Lichmassacre (talk | contribs) m (Removed redundant links at the top. TOClimit added.) |
|||
| Line 29: | Line 29: | ||
*Poor reversal options: | *Poor reversal options: | ||
**He cannot perform a super on the reversal frame | **He cannot perform a super on the reversal frame | ||
**His teleport, even if successful, has quite a lot of recovery, and many characters can punish it on reaction | |||
**His teleport | *Low priority on his long range pokes, allowing the opponent to use invincible or high priority moves to snuff them | ||
*Low priority on his long range pokes | |||
*Floaty jump speeds and a short jump arc | *Floaty jump speeds and a short jump arc | ||
*Limited blockstring sequences | *Limited blockstring sequences | ||
Revision as of 12:04, 14 April 2022
Introduction
Competitive Overview
Dhalsim cannot be played at a competitive level if you don't know all of his anti-air options in every match. He requires really strenuous training that you have to do in order to net consistent wins. If you don't do it, you'll get crushed without a doubt.
Sim is not a common top tier character. You can't just learn two or three cheap tricks and go for cheesy wins. Of course, Sim can be very cheesy, but you won't win consistently relying on it.
You have to learn, you have to meditate, and then destroy. If you want to main Sim in order to do well in tournaments, you'll need to be analytical in your overall strategy, how you handle specific matchups, and having multiple plans to deal with both good and bad situations. He is such a deep character that you'll never be fully satisfied of your level with him. There is a lot of ways you can play with him, but even when you got your style, you have to have ultra-solid fundamentals, which is knowing everything about countering the moves in every matches.
That said, Dhalsim is a great character to compete with. Claw is his only really unfavorable match, and if you have good reactions and fundamentals, then you'll do great without a doubt.
All in all, what you need is: Discipline, learning, humility, reactions, reflection, and dedication. Being good with Sim doesn't usually happen quickly. Theoretically, Dhalsim is the best character of the game, because he can counter everything if done at the right time and the right spacing. But this skill demands incredibly great concentration and knowledge. If you make one mistake against any character, even a minor mistake, that can reasonably lend to a round loss.
Strengths & Weaknesses
Strengths
- Very good throw range and tick throw setups
- Awesome super. Has high damage, juggles airborne opponents, and is invulnerability for almost half it's animation
- His limbs reach very far which give him a very good zoning game
- Fantastic frame trap setups
- Great air mobility with his drills
- Has a lot of reliable anti-air options
Weaknesses
- Poor reversal options:
- He cannot perform a super on the reversal frame
- His teleport, even if successful, has quite a lot of recovery, and many characters can punish it on reaction
- Low priority on his long range pokes, allowing the opponent to use invincible or high priority moves to snuff them
- Floaty jump speeds and a short jump arc
- Limited blockstring sequences
New & Old Versions Comparison
To select O.Dhalsim, choose Dhalsim and then press ↓ ↑ ↑ ↑ Jab or Fierce. Pressing Short simultaneously with the punch button will give you the alternate color.
Here is the list of differences:
- Obvious stuff: O.Dhalsim can not tech throws, does not have the Yoga Blast and Super;
- O.Dhalsim Close Normals behave normally, while for N.Dhalsim they are activated by blocking while pressing the button. N.Dhalsim also received 3 new close crouching normals (that were missing for O.Dhalsim and/or to keep things consistent): Fierce, Short, and Roundhouse;
- O.Dhalsim has some differences in some of his normals:
- Far Standing Jab can be special canceled;
- Close Standing Fierce first hit can be special canceled;
- Far Standing Short can be special canceled;
- Far Standing Forward can be special canceled (!);
- Neutral Jumping Jab has new animation and properties;
- Diagonal Jumping Strong has new animation and properties;
- O.Dhalsim only have the Forward Drill Kick, which is actually activated with Roundhouse;
- O.Dhalsim's teleport has a 1 frame longer startup, a different animation and it does not have a pushbox during the small period of time where Dhalsim's sprites are invisible and he is actually teleporting (i.e. shifting his position);
N.Dhalsim is often regarded as the best character in the game (excluding Akuma who is plain broken). O.Dhalsim isn't as good as his new counterpart, but he is very competitive and can be used against most characters without many problems.
Color Options
| Jab | Strong | Fierce | Start | Old |
 |
 |
 |
 |

|
 |
 |
 |
 |

|
| Short | Forward | Roundhouse | Hold | Old Alternative |
--Born2SPD
Moves Analysis
Disclaimer: To better understand the diagrams, read this.
Normal Moves
Ground Normals
- Close Standing Jab: (←/↖ + Jab)
| Damage | 14[0] |  |
 |
 |

|
| Stun | 0~5 | ||||
| Stun Timer | 40 | ||||
| Chain Cancel | No | ||||
| Special Cancel | Yes / No | ||||
| Super Cancel | Yes / Yes | ||||
| Frame Advantage | -1 / +2 | ||||
| Frame Count | 2 | 3 | 6 | 5 | |
| Simplified | 1 + 2 | 9 | 5 | ||
One of your best standing anti-airs due to the low start-up frames.
- Far Standing Jab:
| Damage | 12[0] |  |
 |
 |

|
| Stun | 0~5 | ||||
| Stun Timer | 40 | ||||
| Chain Cancel | No | ||||
| Special Cancel | No | ||||
| Super Cancel | Yes | ||||
| Frame Advantage | +2 | ||||
| Frame Count | 2 | 3 | 6 | 5 | |
| Simplified | 1 + 5 | 6 | 5 | ||
Not rapid fireable, but still has ok priority. Can beat a decent amount of moves, but the lack of rapid fire makes this harder to utilize.
- Close Crouching Jab: (↙ + Jab)
| Damage | 14[1] |  |
 |

|
| Stun | 0~5 | |||
| Stun Timer | 40 | |||
| Chain Cancel | No | |||
| Special Cancel | Yes | |||
| Super Cancel | Yes | |||
| Frame Advantage | +4 | |||
| Frame Count | 2 | 4 | 5 | |
| Simplified | 1 + 2 | 4 | 5 | |
Great for knocking Honda out of his headbutt or disrupting his HHS due to the low startup frames and very robust hitbox.
- Far Crouching Jab:
| Damage | 12[0] |  |
 |
 |
 |
 |

|
| Stun | 0~5 | ||||||
| Stun Timer | 40 | ||||||
| Chain Cancel | No | ||||||
| Special Cancel | No | ||||||
| Super Cancel | No | ||||||
| Frame Advantage | -2 | ||||||
| Frame Count | 2 | 3 | 3 | 6 | 4 | 5 | |
| Simplified | 1 + 8 | 6 | 9 | ||||
Mostly outclassed by far crouch mp, but this does less pushback, so can be ok if you need them at a specific range.
- Close Standing Strong: (←/↖ + Strong)
| Damage | 18[1] |  |
 |
 |
 |

|
| Stun | 5~11 | |||||
| Stun Timer | 60 | |||||
| Chain Cancel | No | |||||
| Special Cancel | Yes / No | |||||
| Super Cancel | Yes / Yes | |||||
| Frame Advantage | +4 / +7 | |||||
| Frame Count | 2 | 3 | 6 | 4 | 1 | |
| Simplified | 1 + 2 | 9 | 5 | |||
Works as an anti air, and pretty fast to come out. Often better to do mp throw with back+mp since this can catch them jumping or mashing. Where as forward+ mp usually whiffs up close.
- Far Standing Strong:
| Damage | 16[1] |  |
 |
 |

|
| Stun | 5~11 | ||||
| Stun Timer | 60 | ||||
| Chain Cancel | No | ||||
| Special Cancel | No | ||||
| Super Cancel | No | ||||
| Frame Advantage | -1 / +3 | ||||
| Frame Count | 3 | 4 | 4 | 6 | |
| Simplified | 1 + 7 | 10 | |||
 |
 |

| |
| Frame Count | 4 | 4 | 1 |
| Simplified | 9 | ||
Ok as a poke, can beat some attacks that are low on the ground.
- Close Crouching Strong: (↙ + Strong)
| Damage | 18[1] |  |
 |

|
| Stun | 5~11 | |||
| Stun Timer | 60 | |||
| Chain Cancel | No | |||
| Special Cancel | Yes | |||
| Super Cancel | Yes | |||
| Frame Advantage | +6 | |||
| Frame Count | 3 | 5 | 7 | |
| Simplified | 1 + 3 | 5 | 7 | |
Less priority than close crouch lp, but more reach, can still be good to keep them out, as it has fast startup.
- Far Crouching Strong:
| Damage | 16[0] |  |
 |
 |
 |
 |

|
| Stun | 5~11 | ||||||
| Stun Timer | 60 | ||||||
| Chain Cancel | No | ||||||
| Special Cancel | No | ||||||
| Super Cancel | No | ||||||
| Frame Advantage | +3 | ||||||
| Frame Count | 2 | 3 | 3 | 6 | 4 | 5 | |
| Simplified | 1 + 8 | 6 | 9 | ||||
This is a good low poke to pressure and punish with. It gives good frames upon landing, and forces them to block low. Gives Guile and DJ a lot of problems as it can safely punish their fireballs, you can even block them if you get up as the move ends.
- Close Standing Fierce: (←/↖ + Fierce)
| Damage | 22[1] + 22[1] |  |
 |
 |
 |
 |

|
| Stun | 10~16 + 10~16 | ||||||
| Stun Timer | 80 + 80 | ||||||
| Chain Cancel | No | ||||||
| Special Cancel | No | ||||||
| Super Cancel | Yes / No | ||||||
| Frame Advantage | -6 / -3(-4) | ||||||
| Frame Count | 2 | 3 | 3 | 8 | 10 | 7 | |
| Simplified | 1 + 5 | 3 | 8 | 17 | |||
Does a huge amount of dizzy in the case that both hits land, and they do combo properly most of the time. Best to set this up after crossup drill, or meaty crossup slides.
- Far Standing Fierce:
| Damage | 20[1] |  |
 |
 |

|
| Stun | 10~16 | ||||
| Stun Timer | 80 | ||||
| Chain Cancel | No | ||||
| Special Cancel | No | ||||
| Super Cancel | No | ||||
| Frame Advantage | -7 / -3 | ||||
| Frame Count | 3 | 4 | 4 | 6 | |
| Simplified | 1 + 7 | 10 | |||
 |
 |

| |
| Frame Count | 10 | 8 | 1 |
| Simplified | 19 | ||
Good range, but is a little unsafe to whiff. Useful to punish moves like blanka ball, or to push the opponent back to a more ideal range.
- Close Crouching Fierce: (↙ + Fierce)
| Damage | 18[1] |  |
 |

|
| Stun | 5~11 | |||
| Stun Timer | 60 | |||
| Chain Cancel | No | |||
| Special Cancel | No | |||
| Super Cancel | Yes | |||
| Frame Advantage | +0 | |||
| Frame Count | 5 | 8 | 10 | |
| Simplified | 1 + 5 | 8 | 10 | |
This move does Strong/Forward hit/blockstun.
- Far Crouching Fierce:
| Damage | 20[2] |  |
 |
 |
 |
 |

|
| Stun | 10~16 | ||||||
| Stun Timer | 80 | ||||||
| Chain Cancel | No | ||||||
| Special Cancel | No | ||||||
| Super Cancel | No | ||||||
| Frame Advantage | -3 | ||||||
| Frame Count | 3 | 4 | 4 | 6 | 10 | 9 | |
| Simplified | 1 + 11 | 6 | 19 | ||||
Can still low profile under a lot of moves like the weaker variants, but has a much longer recovery. It has great reach, and good priority for a stretching normal, use carefully.
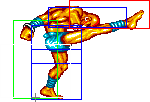
- Close Standing Short:
| Damage | 14[0] |  |
 |

|
| Stun | 0~5 | |||
| Stun Timer | 40 | |||
| Chain Cancel | No | |||
| Special Cancel | Yes | |||
| Super Cancel | Yes | |||
| Frame Advantage | +0 | |||
| Frame Count | 3 | 8 | 5 | |
| Simplified | 1 + 3 | 8 | 5 | |
Ok as an anti air.
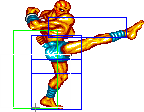
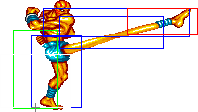
- Far Standing Short: (→/↗ + Short)
| Damage | 12[1] |  |
 |
 |
 |
 |

|
| Stun | 0~5 | ||||||
| Stun Timer | 40 | ||||||
| Chain Cancel | No | ||||||
| Special Cancel | No | ||||||
| Super Cancel | Yes | ||||||
| Frame Advantage | -4 | ||||||
| Frame Count | 2 | 3 | 8 | 4 | 4 | 1 | |
| Simplified | 1 + 5 | 8 | 9 | ||||
Can be ok for checking some moves like chicken wing and scissor kicks, but usually far mk is a better move to use.
- Close Crouching Short: (↙ + Short)
| Damage | 14[2] |  |
 |

|
| Stun | 0~5 | |||
| Stun Timer | 40 | |||
| Chain Cancel | No | |||
| Special Cancel | Yes | |||
| Super Cancel | Yes | |||
| Frame Advantage | +0 | |||
| Frame Count | 2 | 8 | 5 | |
| Simplified | 1 + 2 | 8 | 5 | |
Decent priority, and can be good to use as a tick vs characters who can't deal with your throws.
- Far Crouching Short:
| Damage | 12[1] |  |
 |
 |

|
| Stun | 0~5 | ||||
| Stun Timer | 40 | ||||
| Chain Cancel | No | ||||
| Special Cancel | Yes | ||||
| Super Cancel | Yes | ||||
| Frame Advantage | -6 | ||||
| Frame Count | 1 | 1 | 14 | 5 | |
| Simplified | 1 + 2 | 14 | 5 | ||
This slide is not much use for anti fireball tactics, but can combo into most other normals if done meaty enough. Also useful for ticks into throw, and as an anti air.
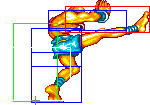
- Close Standing Forward: (←/↖ + Forward)
| Damage | 18[0] |  |
 |

|
| Stun | 5~11 | |||
| Stun Timer | 60 | |||
| Chain Cancel | No | |||
| Special Cancel | Yes | |||
| Super Cancel | Yes | |||
| Frame Advantage | +5 | |||
| Frame Count | 3 | 8 | 5 | |
| Simplified | 1 + 3 | 8 | 5 | |
Ok as a trade anti air, comes out pretty fast.
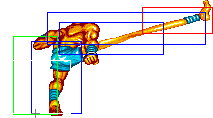
- Far Standing Forward:
| Damage | 16[1] |  |
 |
 |
 |

|
| Stun | 5~11 | |||||
| Stun Timer | 60 | |||||
| Chain Cancel | No | |||||
| Special Cancel | No | |||||
| Super Cancel | Yes | |||||
| Frame Advantage | +1 | |||||
| Frame Count | 2 | 3 | 8 | 4 | 5 | |
| Simplified | 1 + 5 | 8 | 9 | |||
Good poke, and a great move in general. Doesn't take too long to recover if it whiffs, and is fast enough to punish some specials from far, on reaction.
- Close Crouching Forward: (↙ + Forward)
| Damage | 18[2] |  |
 |

|
| Stun | 5~11 | |||
| Stun Timer | 60 | |||
| Chain Cancel | No | |||
| Special Cancel | Yes | |||
| Super Cancel | Yes | |||
| Frame Advantage | +5 | |||
| Frame Count | 1 | 8 | 5 | |
| Simplified | 1 + 1 | 8 | 5 | |
Probably the best anti-ticking normal in the game due to the 1-frame startup. Mash on this to deter tick or walk-up throws.
- Far Crouching Forward:
| Damage | 16[1] |  |
 |
 |

|
| Stun | 5~11 | ||||
| Stun Timer | 60 | ||||
| Chain Cancel | No | ||||
| Special Cancel | No | ||||
| Super Cancel | No | ||||
| Frame Advantage | -1 | ||||
| Frame Count | 3 | 4 | 16 | 5 | |
| Simplified | 1 + 7 | 16 | 5 | ||
Not used as much as his other slides, but can still set up mixups.
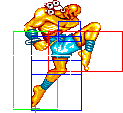
- Close Standing Roundhouse: (←/↖ + Roundhouse)
| Damage | 22[1] |  |
 |
 |
 |
 |
 |

|
| Stun | 10~16 | |||||||
| Stun Timer | 80 | |||||||
| Chain Cancel | No | |||||||
| Special Cancel | No | |||||||
| Super Cancel | No | |||||||
| Frame Advantage | +6 | |||||||
| Frame Count | 3 | 3 | 2 | 8 | 3 | 4 | 1 | |
| Simplified | 1 + 8 | 8 | 8 | |||||
Underrated move, has great priority, it will beat a lot of attacks clean. You can do it as a meaty from far, and a lot of characters reversals will whiff or lose.
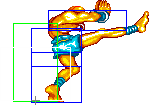
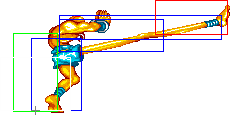
- Far Standing Roundhouse:
| Damage | 20[1] |  |
 |
 |
 |
|
| Stun | 10~16 | |||||
| Stun Timer | 80 | |||||
| Chain Cancel | No | |||||
| Special Cancel | No | |||||
| Super Cancel | No | |||||
| Frame Advantage | -3 | |||||
| Frame Count | 1 | 2 | 3 | 4 | 6 | |
| Simplified | 1 + 10 | 6 | ||||
 |
 |

| |
| Frame Count | 10 | 8 | 1 |
| Simplified | 19 | ||
A little slow, but has great range. Very effective at punishing fireballs, and for an anti air if they jump from far away.
- Close Crouching Roundhouse: (↙ + Roundhouse)
| Damage | 20[2] |  |
 |

|
| Stun | 10~16 | |||
| Stun Timer | 80 | |||
| Chain Cancel | No | |||
| Special Cancel | Yes | |||
| Super Cancel | Yes | |||
| Frame Advantage | +5 | |||
| Frame Count | 3 | 10 | 7 | |
| Simplified | 1 + 3 | 10 | 7 | |
A lot like close crouch mk, but slower. This is the only crouch heavy kick that does not knock down. Can work as an anti air in some matchups if done from far away.
- Far Crouching Roundhouse:
| Damage | 20[2] |  |
 |
 |
 |

|
| Stun | 5~11 | |||||
| Stun Timer | 130 | |||||
| Chain Cancel | No | |||||
| Special Cancel | No | |||||
| Super Cancel | No | |||||
| Frame Advantage | -17 | |||||
| Frame Count | 3 | 4 | 18 | 20 | 1 | |
| Simplified | 1 + 7 | 18 | 21 | |||
Great for punishing fireballs thanks to the long range, and the fact that it knocks down on hit.
Aerial Normals
- Neutral Jumping Jab:
| Damage | 14[1] |  |
 |
 |
 |
 |

|
| Stun | 1~7(-2) | ||||||
| Stun Timer | 40 | ||||||
| Frame Count | 2 | 3 | 3 | 4 | 16 | ∞ | |
| Simplified | 12 | 16 | ∞ | ||||
Not much use, poor range and pretty slow.
- Diagonal Jumping Jab:
| Damage | 14[1] |  |
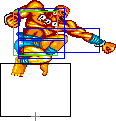 |
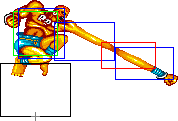 |
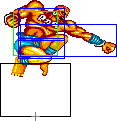 |

|
| Stun | 1~7(-2) | |||||
| Stun Timer | 40 | |||||
| Frame Count | 3 | 4 | 16 | 4 | ∞ | |
| Simplified | 7 | 16 | ∞ | |||
Jump hp is much better to use, however this can hit in spaces where j hp could whiff.
- Neutral Jumping Strong:
| Damage | 18[1] |  |
 |
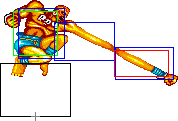 |
 |

|
| Stun | 5~11 | |||||
| Stun Timer | 50(+10) | |||||
| Frame Count | 3 | 4 | 10 | 4 | ∞ | |
| Simplified | 7 | 10 | ∞ | |||
Jump hp is flat out better, though this might hit in spaces where j hp would whiff.
- Diagonal Jumping Strong:
| Damage | 18[1] | 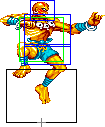 |
 |
 |
 |
 |
 |

|
| Stun | 5~11 | |||||||
| Stun Timer | 50(+10) | |||||||
| Frame Count | 2 | 3 | 3 | 4 | 10 | 4 | ∞ | |
| Simplified | 12 | 10 | ∞ | |||||
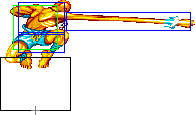
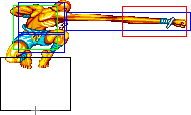
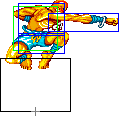
Ok range and angle, but the projected startup vulnerability is awful. Probably best to stick to j hk for controlling this space.
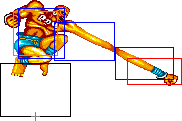
- Neutral/Diagonal Jumping Fierce:
| Damage | 24[2] |  |
 |
 |
 |

|
| Stun | 11~17(-1) | |||||
| Stun Timer | 60(+20) | |||||
| Frame Count | 3 | 4 | 4 | 4 | ∞ | |
| Simplified | 7 | 4 | ∞ | |||
Ok range, but poor priority, can defend you from air to airs if you hit them early enough.
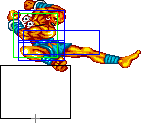
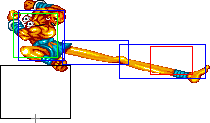
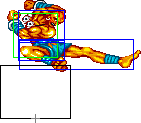
- Neutral/Diagonal Jumping Short:
| Damage | 14[1] |  |
 |
 |
 |

|
| Stun | 1~7(-2) | |||||
| Stun Timer | 40 | |||||
| Frame Count | 4 | 6 | 18 | 4 | ∞ | |
| Simplified | 10 | 18 | ∞ | |||
Jump mk is just flat out better, though this has a little more active frames.
- Neutral/Diagonal Jumping Forward:
| Damage | 18[1] |  |
 |
 |
 |

|
| Stun | 5~11 | |||||
| Stun Timer | 50(+10) | |||||
| Frame Count | 4 | 6 | 12 | 4 | ∞ | |
| Simplified | 10 | 12 | ∞ | |||
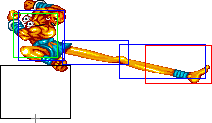
Beats a handful of moves if used at specific ranges, but still has poor priority.
- Neutral/Diagonal Jumping Roundhouse:
| Damage | 24[2] |  |
 |
 |
 |
 |
 |
 |

|
| Stun | 11~17(-1) | ||||||||
| Stun Timer | 60(+20) | ||||||||
| Frame Count | 1 | 2 | 3 | 4 | 6 | 4 | 3 | ∞ | |
| Simplified | 10 | 6 | ∞ | ||||||
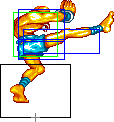
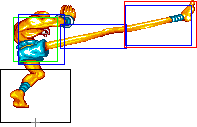
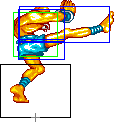
Good reach. This is useful for air to airs, and for beating walldive attempts vs Claw.
Command Normals
It should be noted that all of his drills can hit low, and in some cases must be blocked low. They don't hit overhead like air normals, so it's usually best to crouch block drills.
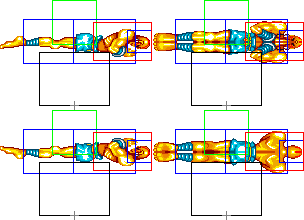
- Drill Zutsuki a.k.a. Mummy Drill: (On air, ↙/↓/↘ + Fierce)
| Damage | 18[4] |  |
|
| Stun | 10~16 | ||
| Stun Timer | 80 | ||
| Frame Count | 6 | ∞ | |
Has the worst priority, but hits earlier.
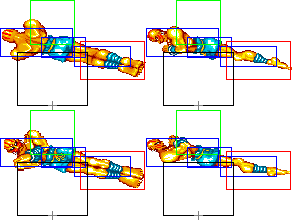
- Drill Kicks: (On air, ↙/↓/↘ + K)
- Short Version:
| Damage | 18[4] |  |
|
| Stun | 10~16 | ||
| Stun Timer | 80 | ||
| Frame Count | 6 | ∞ | |
Good for punish fireballs, especially useful vs Sagat to punish low tigers.
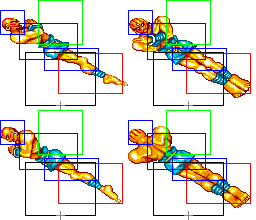
- Forward Version:
| Damage | 18[4] |  |
|
| Stun | 10~16 | ||
| Stun Timer | 80 | ||
| Frame Count | 6 | ∞ | |
Also great as a punish, this has good priority, some characters struggle to deal with it.
- Roundhouse Version:
| Damage | 18[4] |  |

|
| Stun | 10~16 | ||
| Stun Timer | 80 | ||
| Frame Count | 6 | ∞ | |
Nice for fireball avoidance, do it quickly and land in time to anti air if they jump. It hits deep, so will often beat sweeps and other low attacks.
Throws
Dhalsim can throw using Strong and Fierce. The direction of the joystick determines the direction the enemy gets thrown at.
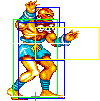
- Grabs Throwboxes:
| Hold | Throw | 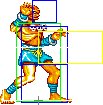 |
 |

| |||
| Damage | 26 + 4*n | Damage | 34 | ||||
| Set amount of hits | 6 | Stun | 7~13 | ||||
| Holds do no stun | Stun Timer | 100 | |||||
| Range | (from axis) | 64 | (from throwable box) | 29 | |||
- Yoga Smash a.k.a. Noogie: (←/↖/↗/→ + Strong)
Dhalsim's Hold. This is his most damaging grab. It may be a good idea to try cheap out and loop this, depending on the opponent's reversal options and grab range. Against Dictator for example, it's possible to make it safe by spacing it out of his throw range, unless he has his super meter full, of course. Against Honda, you can followup with a Yoga Flame which he is pretty much forced to block.
- Yoga Throw: (←/↖/↗/→ + Fierce)
Dhalsim's Throw. It actually does a little more damage than most normal throws, a lot less than Chun's Strong throw though. Go for this throw when you want to keep a confortable distance from your oppponent or when you want to finish a round (the extra damage helps on this).
Special Moves
- Yoga Fire: (↓↘→ P)
Detailed Input: (↓ [7~14f] ↘ [7~14f] → [10/9/7f] Jab/Strong/Fierce)
- Startup:
 |
 |
 |

| |
| Frame Count | 2 | 2 | 7 | 1 |
| Simplified | 12 | |||
- Active:
- Jab Version:
| Damage | 17[2] | 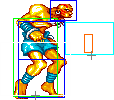 |
 |
 |
 |

|
| Stun | 9~15 | |||||
| Stun Timer | 100 | |||||
| Super Meter | 3 | |||||
| Frame Count | 1 | 1 | 3 | 6 | 9... | |
| Simplified | 40 | |||||
- Strong Version:
| Damage | 18[2] |  |
 |
 |
 |

|
| Stun | 9~15 | |||||
| Stun Timer | 100 | |||||
| Super Meter | 3 | |||||
| Frame Count | 1 | 1 | 3 | 6 | 9... | |
| Simplified | 40 | |||||
- Fierce Version:
| Damage | 20[3] |  |
 |
 |
 |

|
| Stun | 9~15 | |||||
| Stun Timer | 100 | |||||
| Super Meter | 3 | |||||
| Frame Count | 1 | 1 | 3 | 6 | 9... | |
| Simplified | 40 | |||||
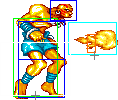
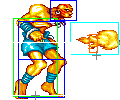
Average frames in terms of startup and recovery, and has a small hitbox. However it has some great qualities, medium and heavy versions cause a hard knockdown, unlike Ryu's red fireballs, this can happen a any time, not just during the first few active frames. Jab version keeps them standing. Like Guile, you can throw one, and stay behind it, and try punish anything they do to avoid it. Dhalsim doesn't make himself nearly as vulnerable as most characters during startup, so it's not too hard to get this out sometimes.
- Yoga Flame: (←↙↓↘→ P)
Detailed Input: (← [7~14f] ↙ [7~14f] ↓ [7~14f] ↘ [7~14f] → [10/9/7f] Jab/Strong/Fierce)
- Startup:
 |
 |
 |
 |
 |
 |
| |
| Frame Count (Jab) | 2 | 2 | 3 | 2 | 2 | 1 | 1 |
| Simplified (Jab) | 13... (21) | ||||||
| Frame Count (Strong) | 2 | 2 | 3 | 2 | 3 | 1 | 1 |
| Simplified (Strong) | 14... (22) | ||||||
| Frame Count (Fierce) | 2 | 2 | 4 | 2 | 4 | 1 | 1 |
| Simplified (Fierce) | 16... (24) | ||||||
 |
 |
 |
 |

| |
| Frame Count | 1 | 2 | 1 | 3 | 1 |
| Simplified (Jab) | ...8 (21) | ||||
| Simplified (Strong) | ...8 (22) | ||||
| Simplified (Fierce) | ...8 (24) | ||||
- Active:
- Jab Version:
| Damage | 28[7] |  |
 |
 |

|
| Stun | 9~15 | ||||
| Stun Timer | 100 | ||||
| Frame Advantage | +16 | ||||
| Super Meter | 8 | ||||
| Frame Count | 3 | 1 | 3 | 1 | |
| Simplified | 8 (32) | ||||
 |
 |
 |

| |
| Frame Count | 3 | 1 | 3 | 1 |
| Simplified | 8... (32) | |||
 |
 |
 |

| |
| Frame Count | 3 | 1 | 3 | 1 |
| Simplified | ...8... (32) | |||
 |
 |
 |

| |
| Frame Count | 3 | 1 | 3 | 1 |
| Simplified | ...8 (32) | |||
- Strong Version:
| Damage | 28[5] / 32[5] |  |
 |
 |

|
| Stun | 9~15 | ||||
| Stun Timer | 100 | ||||
| Frame Advantage | +16 | ||||
| Super Meter | 8 | ||||
| Frame Count | 3 | 1 | 3 | 1 | |
| Simplified | 8 (48) | ||||
 |
 |
 |

| |
| Frame Count | 3 | 1 | 3 | 1 |
| Simplified | 8... (48) | |||
 |
 |
 |

| |
| Frame Count | 3 | 1 | 3 | 1 |
| Simplified | ...8... (48) | |||
 |
 |
 |

| |
| Frame Count | 3 | 1 | 3 | 1 |
| Simplified | ...8... (48) | |||
 |
 |
 |

| |
| Frame Count | 3 | 1 | 3 | 1 |
| Simplified | ...8... (48) | |||
 |
 |
 |

| |
| Frame Count | 3 | 1 | 3 | 1 |
| Simplified | ...4 (48) | 4 (48) | ||
NOTE: The higher damage value is for the last 4 active frames where the hitbox is bigger.
- Fierce Version:
| Damage | 32[5] |  |
 |
 |

|
| Stun | 9~15 | ||||
| Stun Timer | 100 | ||||
| Frame Advantage | +16 | ||||
| Super Meter | 8 | ||||
| Frame Count | 3 | 1 | 3 | 1 | |
| Simplified | 8 (63) | ||||
 |
 |
 |

| |
| Frame Count | 3 | 1 | 3 | 1 |
| Simplified | 8... (63) | |||
 |
 |
 |

| |
| Frame Count | 3 | 1 | 3 | 1 |
| Simplified | ...8... (63) | |||
 |
 |
 |

| |
| Frame Count | 3 | 1 | 3 | 1 |
| Simplified | ...8... (63) | |||
 |
 |
 |

| |
| Frame Count | 3 | 1 | 3 | 1 |
| Simplified | ...8... (63) | |||
 |
 |
 |

| |
| Frame Count | 3 | 1 | 3 | 1 |
| Simplified | ...8... (63) | |||
 |
 |
 |

| |
| Frame Count | 3 | 1 | 3 | 1 |
| Simplified | ...4 (63) | 4... (63) | ||
 |
 |

| |
| Frame Count | 3 | 1 | 3 |
| Simplified | ...7 (63) | ||
- Recovery:
 |
 |
 |
 |
 |

| |
| Frame Count (Jab) | 3 | 1 | 3 | 1 | 3 | |
| Simplified (Jab) | 11... (19) | |||||
| Frame Count (Strong) | 3 | 1 | 3 | 1 | 3 | |
| Simplified (Strong) | 11... (19) | |||||
| Frame Count (Fierce) | 1 | 3 | 1 | 3 | 1 | 3 |
| Simplified (Fierce) | 12... (20) | |||||
 |
 |
 |
 |

| |
| Frame Count | 1 | 3 | 1 | 1 | 2 |
| Simplified (Jab) | ...8 (19) | ||||
| Simplified (Strong) | ...8 (19) | ||||
| Simplified (Fierce) | ...8 (20) | ||||
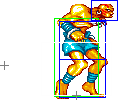
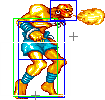
A great pressure tool, as it recovers almost instantly when it connects. If spaced from afar, most characters have no choice but to block, so in the corner you can use it to set up mixups into throw or low attacks. Useful in fireball wars to get the advantage.
- Yoga Blast: (←↙↓↘→ K)
Detailed Input: (← [7~14f] ↙ [7~14f] ↓ [7~14f] ↘ [7~14f] → [10/9/7f] Short/Forward/Roundhouse)
- Startup:
 |
 |
 |

| |
| Frame Count (Short) | 6 | 4 | 3 | 1 |
| Simplified (Short) | 14 | |||
| Frame Count (Forward) | 8 | 4 | 3 | 1 |
| Simplified (Forward) | 16 | |||
| Frame Count (Rh) | 10 | 4 | 4 | 1 |
| Simplified (Rh) | 19 | |||
- Active:
- Short Version:
| Damage | 18[7] | 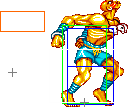 |
 |
 |
 |
 |
 |

|
| Stun | 9~15 | |||||||
| Stun Timer | 100 | |||||||
| Super Meter | 8 | |||||||
| Frame Count | 1 | 1 | 1 | 1 | 1 | 1 | 1 | |
| Simplified | 7 (17) | |||||||
 |
 |
 |
 |
| |
| Frame Count | 1 | 1 | 1 | 1 | 1 |
| Simplified | 5... (17) | ||||
 |
 |
 |
 |

| |
| Frame Count | 1 | 1 | 1 | 1 | 1 |
| Simplified | ...5 (17) | ||||
- Forward Version:
| Damage | 20[7] / 20[5] |  |
 |
 |
 |
 |
 |

|
| Stun | 9~15 | |||||||
| Stun Timer | 100 | |||||||
| Super Meter | 8 | |||||||
| Frame Count | 1 | 1 | 1 | 1 | 1 | 1 | 1 | |
| Simplified | 7 (22) | |||||||
 |
 |
 |
 |

| |
| Frame Count | 1 | 1 | 1 | 1 | 1 |
| Simplified | 5... (22) | ||||
 |
 |
 |
 |

| |
| Frame Count | 1 | 1 | 1 | 1 | 1 |
| Simplified | ...5... (22) | ||||
 |
 |
 |
 |
| |
| Frame Count | 1 | 1 | 1 | 1 | 1 |
| Simplified | ...3 (22) | 2 (22) | |||
- Roundhouse Version:
| Damage | 22[7] / 22[5] |  |
 |
 |
 |
 |
 |
 |
|
| Stun | 9~15 | ||||||||
| Stun Timer | 100 | ||||||||
| Super Meter | 8 | ||||||||
| Frame Count | 1 | 1 | 1 | 1 | 1 | 1 | 1 | 1 | |
| Simplified | 8 (27) | ||||||||
 |
 |
 |

| |
| Frame Count | 1 | 1 | 1 | 1 |
| Simplified | 4... (27) | |||
 |
 |
 |
 |

| |
| Frame Count | 1 | 1 | 1 | 1 | 1 |
| Simplified | ...5... (27) | ||||
 |
 |
 |
 |

| |
| Frame Count | 1 | 1 | 1 | 1 | 1 |
| Simplified | ...5... (27) | ||||
 |
 |
 |
 |

| |
| Frame Count | 1 | 1 | 1 | 1 | 1 |
| Simplified | ...2 (27) | 3 (27) | |||
NOTE: The second damage value for the Forward and Roundhouse versions are for the last active 2/3 frames where the hitbox is fatter.
- Recovery:
- Short Version:
 |
 |
 |
 |
 |
 |
 |

| |
| Frame Count | 1 | 1 | 1 | 1 | 1 | 1 | 1 | 2 |
| Simplified | 9 | |||||||
- Forward Version:
 |
 |
 |
 |
 |
 |
 |

| |
| Frame Count | 1 | 1 | 1 | 1 | 1 | 1 | 1 | 2 |
| Simplified | 9 | |||||||
- Roundhouse Version:
 |
 |
 |
 |
 |
 |
 |
 |

| |
| Frame Count | 1 | 1 | 1 | 1 | 1 | 1 | 1 | 1 | 2 |
| Simplified | 10 | ||||||||
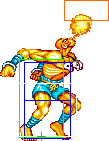
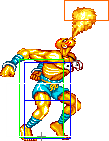
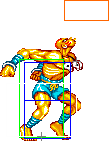
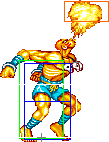
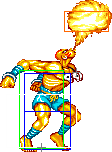
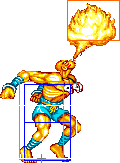
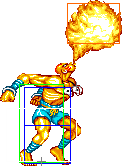
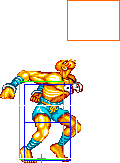
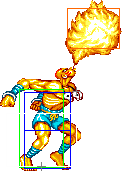
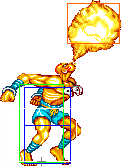
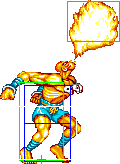
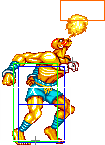
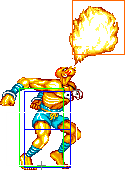
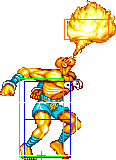
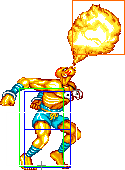
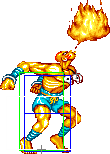
This move was probably intended to be used as an anti air, but it's often too slow, and has a long motion, making it not viable for this usually. It is however, good for building meter, as the light version is pretty fast.
- Yoga Teleport: (→↓↘/←↓↙ 3P/3K)
Detailed Input: (→/← [7~14f] ↓ [7~14f] ↘/↙ [7~14f] 3P/3K)
- Before Teleporting:
| Super Meter | 8 |  |
 |
 |
 |
 |
 |
 |
||
| Frame Count | 2 | 3 | 3 | 2 | 2 | 4 | 4 | 4 | 13 | |
| Simplified | 37 | |||||||||
- After Teleporting:
 |
 |
 |
 |
 |

| |||
| Frame Count | 8 | 3 | 4 | 4 | 2 | 2 | 3 | 3 |
| Simplified | 26 | 3 | ||||||
Dhalsim's only true invincible reversal. Though it often still gets you punished. Vs chip kill attempts, or command grab ticks, this is your only option. In the corner, reversal teleport usually appears in the same spot, which does no good for you.
Super move
- Yoga Inferno: (←↙↓↘←↙↓↘→ P)
Detailed Input: (← [15~22f] ↙ [15~22f] ↓ [15~22f] ↘ [15~22f] ← [15~22f] ↙ [15~22f] ↓ [15~22f] ↘ [15~22f] → [3f] P)
| Damage | 18[1] * 5 |  |
 |
 |
 |
 |
 |

|
| Stun | 0~4 * 5 | |||||||
| Stun Timer | 20 * 5 | |||||||
| Frame Advantage | +10 | |||||||
| Frame Count | 1 + [1...] | [...2...] | [...4...] | [...2...] | [...19 (28)] + 3 | 1 | 1 | |
| Simplified | 6 | |||||||
 |
 |
 |
 |

| |
| Frame Count | 1 | 2 | 1 | 3 | 1 |
| Simplified | 8... (28) | ||||
 |
 |
 |

| |
| Frame Count | 3 | 1 | 3 | 1 |
| Simplified | ...8... (28) | |||
 |
 |
 |

| |
| Frame Count | 3 | 1 | 3 | 1 |
| Simplified | ...8... (28) | |||
 |
 |
 |

| |
| Frame Count | 3 | 1 | 3 | 1 |
| Simplified | ...4 (28) | 4... (32) | ||
 |
 |
 |

| |
| Frame Count | 3 | 1 | 3 | 1 |
| Simplified | ...8... (32) | |||
 |
 |
 |

| |
| Frame Count | 3 | 1 | 3 | 1 |
| Simplified | ...8... (32) | |||
 |
 |
 |

| |
| Frame Count | 3 | 1 | 3 | 1 |
| Simplified | ...8... (32) | |||
 |
 |
 |

| |
| Frame Count | 3 | 1 | 3 | 1 |
| Simplified | ...4 (32) | 4... (11) | ||
 |
 |

| |
| Frame Count | 3 | 1 | 3 |
| Simplified | ...7 (11) | ||
 |
 |
 |
 |
 |

| |
| Frame Count | 1 | 3 | 1 | 3 | 1 | 3 |
| Simplified | 12... (20) | |||||
 |
 |
 |
 |

| |
| Frame Count | 1 | 3 | 1 | 1 | 2 |
| Simplified | ...8 (20) | ||||
Good for chipping. Can juggle too. Hard for someone to jump kick you because his entire body is invulnerable, even the top of his head. A few interesting facts regarding this super, you can't do it as a reversal, so meaties will beat it clean, and a well timed tick throw makes it useless. Another is that the super freeze lasts about twice as long as every other super. If Dhalsim is hit during the active period, the second frame of hisstun he gains a hitbox behind him, protecting him. If the opponent punishes with an invincible hitting move, a throw/command grab/grab super, or by cancelling a normal into an invincible hitting move instantly, they will be fine.
Misc Animations
Jump Animations
- Neutral Jump:
 |
 |
 |
 |
 |
 |
 |
 |

| |
| Frame Count | 1 | 1 | 15 | 8 | 8 | 15 | 17 | 1 | 7* |
| Simplified | 1 | 1 | 63 | 1 | 7* | ||||
- Back Jump:
 |
 |
 |
 |
 |
 |
 |
 |

| |
| Frame Count | 1 | 1 | 15 | 8 | 8 | 8 | 25 | 1 | 7* |
| Simplified | 1 | 1 | 64 | 1 | 7* | ||||
- Forward Jump:
 |
 |
 |
 |
 |
 |
 |
 |

| |
| Frame Count | 1 | 1 | 15 | 8 | 8 | 8 | 24 | 1 | 7* |
| Simplified | 1 | 1 | 63 | 1 | 7* | ||||
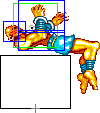
Even though it may not look like, Dhalsim actually has the fastest prejump speed on the game (tied with Dictator and O.Sagat). On the other hand he has the overall longest jump duration on the game.
The landing recovery has a special property which allows it to be canceled into certain actions. At the first landing frame, you can perform throws (including command throws), and on the second landing frame, you can start another jump, attack with a normal or special move, or block. Blocking not being until the second landing frame, as well as hitbox-hurtbox interactions having priority over throwbox-throw hurtbox is why sweeps work as anti airs in this game.
Things are different when jumping over your opponent, however. In that situation it's possible to walk back/forward, to jump again or to even block on the first landing frame! Strangely, if a throw is timed on the first landing frame of a jump that crosses over, a throwbox will never come out, even though that input will result in a normal coming out 2 frames later (like it normally would). Anyway, being able to block on the first landing frame can help a little bit on some safe jump crossup setups, or maybe in other situations as well if your character has a huge jump arc.
The Basics
Repeated LP Yoga Flame
If you corner your opponent and get a knockdown, there is a very potent trick you can use. Move into mid-range and do LP Yoga Flames, many characters have a difficult time with this... M Bison especially. If he doesn't have a super, and Dhalsim player doesn't make an execution mistake, there's no escape. Against shotos or somebody with an uppercut style move, do a couple of reps, bait an uppercut, and then do a HP Yoga Flame on their way down.
--
There's a variant of the Yoga Flame trap that can be used against intermediate Honda players. If you have Honda in the corner, and he's knocked down, you'll want to stand a little bit past the far side of the clock timer This is your marker for positioning. You can repeatedly do LP Yoga Flame over and over again for some healthy chip damage and meter building.
Honda's primary method of getting out of this is either a neutral jump MK, or performing a LP Hundred-Hand Slap (HHS) to hit Sim between repetitions. If they favor the neutral jump, you can use the MP Yoga Flame instead, as it lasts longer, and can catch them as they land. If they're aware of using LP HHS to escape it, you can either attempt the trap in order to gain some meter and do chip, or resort to basic zoning practices to keep him locked down in the corner. If properly spaced, Honda cannot use headbutt, buttslam, or super to escape this trap.
-- eltrouble, 2013
Advanced Strategy
Yoga Teleport Shenaningans
Spaming LP Yoga Fire can be too obvious, but if you use Yoga Teleport after a LP Fire you can confuse your opponent in which you place you will appear, also a good crossup with Back+Fierce its a high stun possible one.
48 Killing Arts of Yoga
A wonderful old school Dhalsim shenaningans strategies videos
https://www.youtube.com/watch?v=XBbuqMvSMEI
The 48 Killing Arts of Yoga
Notes on Proper Usage - When you land one of these techniques, you must suavely say its name. - When you land one of these techniques, you must thank the YSB members. - Even if you use one by accident, you must be nonchalant about it. - If you try a technique and lose, you must have no regrets. - Work diligently on using each technique, day after day.
1. Yoga Strike Back
This one goes without saying: Strike Back. That's right, the origin for the name of the "Yoga Strike Backers." When your opponent is crouching, attack from the air with jump fierce -> far standing fierce for a beautiful combination. It's quite splendid. Initially, Foosuke, who developed this killing art said, "They have to stand to block Dhalsim's jumping fierce. Still, depending on where it connects, they'll eat it if they don't crouch block.[TL?]" But it took Hamah about two months to believe this.
2. Yoga Sniper Custom
AKA Sniper. The moment your opponent is about to throw an FB, jump forward (or up or back) and hit them with jumping fierce. Unless you hit them on the ground (air-to-air = no good) you can't claim a true Sniper hit. Landing this when they're at "eat a Sniper and die" health is extremely thrilling. If you're at a health deficit on top of that, land this for big EXP UP. We'll leave with the aphorism, "The Sniper loses with with no regret." (<- We're just left with regret!)
3. Yoga Bonjour
This fabulous technique is where you hit your opponent on the top of the head with a jump roundhouse as you're falling from a jump. When you land it, you're obliged to look at your watch and say, "Yoga Bonjour. The time is exactly 9 PM, it's morning in France. I'll have a cup of coffee... (etc.)" By the way, Hamah once ate a Guile low forward while he was looking at his watch and saying all this. If you land this technique, you may want to have someone nearby say the line. If they won't, just say it yourself. But, why is called "Bonjour?" You see, the Killing Arts of Yoga were originally going to be written in french (or so Idagoro had hoped,) and so we have the Bonjour. Idagoro, however, didn't know any other french words and thus this was the only french killing art.
4. Yoga Grand Strike
As your opponent is landing from a jump, hit them with a deep forward (or short) cross-up slide kick and combo into a close fierce (head butt.) In SF2CE it became more difficult to use the forward slide kick and this technique fell out of fashion. Note that the forward slide cross-up -> close standing strong -> throw sequence is called the "Grand Strike Variant." This Grand Strike (Variant) is particularly useful against Chun-Li's jumping short. By the way, there was a time when the variant was called the "Yoga Sexy Throw," but we like both names.
5. ?Nospey
This is Dhalsim's close crouching forward (the thrust kick.) Why is it called, "Nospey," you ask...? In the days of SF2 classic, when Guile player Nosuke was playing with Dhalsim against Chun-Li, he discovered that a deep thrust kick could beat wake-up throws. So he said "hey, Hama, this thrust kick is like Chun-Li's crouching forward in that it can't be countered with a throw. Ok, this is the Nosuke Special; call it Nospey!!" and thus it became known as the Nospey. During SF2 classic days, it was said that there weren't any [Yoga] Killing Arts, so we're grateful for the finding of this one. Since Nosuke said, "Hama, since SF2CE came out people often use the Nospey, but nobody actually says, 'Nospey.' I'm so sad!" let's all call the thrust kick Nospey! Of course, all Yoga Strike Backers members call it Nospey.
Thank you, Nosuke
6. Yogaku
This term describes Dhalsim's close standing roundhouse kick (the knee.) It's not Yogaku- (inhalation) because he's straining his yoga to do the kick.
Frank Crowther: "By the way... I was wondering... what's the deal with that finishing blow?" Tsukumo: "The 'Yogaku?' Gaku refers to the mountain..." (etc.) (C) Gate of Shura [info]
When Blanka uses this it's Bugaku. When Guile uses it, it's Gagaku. When Ryu and Ken use it, it's Fugaku, seemingly.
7. Nagata Shougatsu Happy New Year Special
As your opponent is getting up, hit them with a deep Yogaku and then jump away and combo into a Sniper. A great technique to use if you expect your opponent to miss a reversal, land this to inflict unimaginable damage to their spirit. By the way, Nagata Shougatsu is the nickname of the developer of this technique. It's broken down like this: the initial Yogagu is "Happy" and then the Sniper is "New Year."
Thank you, Nagata
8. Yoga Blast
The decals that came with SF2 classic didn't have Yoga Blast on them, so we appropriated the name for this Killing Art. When SF2CE came out and the Yoga Spiral Break (see below) was created, Yoga Blast became the term for a drill kick attack that goes past Dhalsim's opponent without hitting them. When you think you've pulled off a Yoga Blast and you start to say "Yoga B-," but you actually failed to do it, just fudge and say "Yoga Brassiere."
9. Yoga Spiral Break
As your opponent is getting up, hit them with a cross-up drill kick, then combo into Nospey x2. That's the Yoga Spiral Break. This works well against Ryu, Ken, Blanka and Zangief but if you mess it up against Zangief you're in deep trouble. Studies show that this is easy to set up after you've burned your opponent with a Yoga Fire (or Flame.) Research the timing on your own.
10. Yoga Rolling Crystal Flash
This beautiful technique was developed by taking a cue from Claw's Rolling Crystal Flash (partly true.) It consists of this four-hit combo: cross-up drill kick -> close crouching jab x2 -> Nospey. Getting two close crouching jabs to combo is extremely difficult. When you use this technique it goes like this: "goro-goro" (drill kick,) "doka!" (low jab,) "baki!" (low jab,) "gusa!" (Nospey.)
source: http://curryallergy.blogspot.com/2007/03/48-killing-arts-of-yoga-1-10.html
Combos
Dhalsim has very limited combo options, but here's a few of his most practical ones
BNB
- cr.MK ~ cr. MK
- cr.MP ~ cr. MP
- Yoga Fire ~ st.HP
- LK slide x Yoga Inferno Super
Post-Stun
- Late j.FP ~ st.FP
- Late j.RH ~ st.forward
Meaty
- Yoga Fire ~ Yoga Flame
- Yoga Fire ~ Yoga Inferno Super
- b.MK ~ cr.MK
- b.HK ~ cr.MK
- b.HK ~ MK slide
- MK slide ~ Yoga Inferno Super
- MK slide ~ LK slide x Yoga Inferno Super
- HP Mummy Drill ~ LK slide x Yoga Inferno Super (Only works on opponents with wide hurt boxes, or as a deep meaty drill)
- Crossup HK drill ~ LK slide x Yoga Inferno Super
- Cross Under MK slide ~ b.MP
- Cross Under MK slide ~ b.HP
- Cross Under MK slide ~ LK slide x Yoga Inferno Super
Match-ups
Matchups classified with this diagram in mind. For the old characters I guessed the positions.
--Born2SPD
Serious Advantage Match-ups
Vs. Blanka:
- 8 - 2
Space yourself. The second he lands hit standing strong, then either standing fierce immediately. Most of the time he will he will try to jump right away but won't be able to get it off if you time the fierce right. If you can't just through out st. RH. Do this until he starts hesitating to jump and then you are free to throw fireballs every so often to push him back even more. Once he backs you into the corner teleport your ass out and rinse repeat. You will annoy the shit out of every Blanka online. This strat will even rush down Hyper Blanka for free =D
--Jcole
Vs. Dee Jay:
- 8 - 2
As long as Deejay can't go for a crossup, this should be very favourable for Sim. None of his jump ins hit deep, so slides, and low punches all cover you for anti air. You can slide and cr punch under his fireballs just like vs Guile. When you get in, you can set up a tick into fierce throw for a good OS, usually either lk slide, or safejump drill, into forward+fierce. If he does upkicks you will go under with forward hp, and can punish him, lk sobat is risky and often loses, and Sim has much more throw range than Deejay. His only way out that's reliable is super.
Vs. Guile:
- 8.5 - 1.5
Guile lacks of far distance options and also its a charger, but that doesn't mean that you can win easily, try to Teleport at far distance if he Sonic Booms you and keep him away from medium combat
Vs. Ken:
- 7.5 - 2.5
Vs. O. Ken:
Vs. Ryu:
- 7 - 3
Vs. O. Ryu:
Vs. Sagat:
- 9 - 1
Vs. O. Sagat:
- 7 - 3
Vs. Zangief:
- 7.5 - 2.5
Advantage Match-ups
Vs. Cammy:
- 6.5 - 3.5
Vs. E. Honda:
- 6 - 4
Well obviously your first objective is to just keep him away. Use your fireballs wisely, mixing up slow, medium and fast fireballs, and try to make him land on them. If Honda does his flash kick move over the fireball, I like hitting him on the way down with standing roundhouse or you can use standing fierce, but that can be trickier because if you mistime it he will hit your arms clean. Timings a little easier with roundhouse. If he jumps over the fireball, it kind of depends on which attack he uses. If he uses the forward kick splash or short kick butt, it hits down, so you can either use standing kicks or jump back and fierce in the air. Jump back fierce in the air should hit it clean, but standing kicks might trade. If you don't want to trade, just wait till he lands then hit him with low strong, standing fierce to push him back into the corner for more fireballs. Any other jump attack, try to him hit him low with low strong or low fierce followed up by a standing fierce or a fierce fireball to push him away.
Sliding against Honda as an anti air is highly unadvisable unless you see him jumping with Fierce or Jab, I think roundhouse too, but Honda's jump forward splash will hit the slide clean and then he can combo off of that so, the slide as anti-air is a high risk maneuver against Honda.
If timed correctly, Dhalsim's drill can cleanly beat Honda's headbutt. If you're drilling from full screen away make sure to use the short drill. However, for the most part, you should not be drilling from full screen because you want to keep him away.
Also Dhalsim has a really good cornertrap against Honda. If you knock him down in the corner, with the proper spacing you can keep doing jab yoga flames on him, over and over. I saw Gian do this in that 3 on 3 video and it works quite well.
I think Dhalsim's biggest problem with Honda is if Honda gets in a range where he can continue to do his flash kick maneuver. If you see it coming way ahead of time you can do the upwards yoga flame. But if you don't have time for that your best bet is to teleport out. Once again creating a good amount of distance between you two. Another tactic you might try is to short or forward slide out, but this gets tricky. Honda's flash kick maneuver has some weird cross up properties which can get you walking, sliding or blocking the wrong way.
Honda is so goddam annoying for Sim. It's a match you have to struggle until second 40 to win it, and Honda can just blow your face up in 10 secs.
St. MK can beat most honda's far jumps, but change your strategy when he gets closer.
Best anti-airs are st. back jab, which beats nearly every jump MK/HK (Hondas do them a lot), cr. back jab, for same moves, plus it works against belly flop and ass smash (you know, jump+down lk for honda). These two normals are such a pain for sim : you can slide EVERY jump ins BUT these two. Same stuff for sim's cr.mp/hp (limbs) : it gets hit by these two normals, but beats every other jump ins.
Something else you have to consider :jump (straight or back) + HK/HP : these will punish cleanly every jump ins, even belly flop, BUT you have to time it well for two reasons : 1/ it may trade (not in your favor) depending on the distance you are 2/ It is difficult to do on reaction, you have to have very good reflexes and cold blood. If you manage to get really above honda while you two are jumping, in general, sim will beat cleanly honda's jumps (use then HP version ; HK is somewhat more for a far jump). Trade happens more it seems when you are at his same level or lower.
You can punish far buttslam (when he avoids yoga fire) with st. hk, but again, time it well, at the end, the landing of the buttslam. You can also, as stated just above, punish with a jumping HP/HK (when honda is in air, top of his jump). Harder though. A good thing to do is waiting the HK Buttslam to land and doing instantly a Back Standing Fierce, for a double fierce hit, which gets honda near of a dizzy. It will make hondas thinking twice before spamming buttslams also.
Against Buttslams that will hit just on top of your head, there is a great tool which is Standing MP, at the apex of the buttslam. It hits it clean, and you have to follow with a yoga flame when honda gets back on the ground.
If honda manage to get just on top of your head, well, your basically dead. You can try trading with st. MP, it is the best option.
cr. back HK is a nice anti air also. It beats every jump-ins, but you have to space it well.
--wolmar
Vs. Fei Long:
- 6.5 - 3.5
Dhalsim objective will be keep away Fei Long with normals and Fire spamming, more of the specials are easily punishable , but main weakness will be in Teleport and Jump in combat, Jab and Fierce Fire trade spam its the far combat option along with Far standing Forward against the Chicken Wing, Yoga Blast its useful for this match but Short one can be a good Super meter builder, Yoga Infner its your main and best counter for Rekka Kens that are the main approach and trade hit Fei's tool.
Anyway Far Normals are the main tools of the trade for win this match up, specials are more like the entry of the Yoga's plate.
Vs. T. Hawk:
- 6.5 - 3.5
Vs. O. T. Hawk:
Fair Match-ups
Vs. Balrog (boxer):
- 5.5 - 4.5
Here is a bit to add for the match vs Boxer.
To start the match you have to set the tone right away. I would recomend you dont even pick your character but let time run out on the character select screen so that your opponent knows what is in store for him. Ahh nothing like prematch strats.
Starting off the round it is wise to cr.strong. If boxer blocks you can put him at the right range right away. If he head butts you will recover and be able to st.mk him before he lands and then a fierce FB will force him to block again. At this point he is in your range. It should be just outside your st.mp rage.
When you have boxer in your range DO NOT wiff to many moves. Most medium/hard wiffed moves will let boxer rushsweep you and then even if you block it he is in on you. At this range it is best to use FB's and st/cr.mp's that are blocked.
Be careful not to toss too many fireballs as a good boxer will strait jump one and then get in on you. after you get him at this range mix up your FB speeds. Toss a Jab and if he straight jumps its you can hit him with a few limbs. If he does the < or > fp/mp you can st.fp him. If he does a RH on the way down you can wait and hit him with rh/mk just before he hits the ground. Again be carefull not to get reckless with FB's at this point keep your calm and hold him down with mk/mp.
When boxer does get in, and he will, you need to watch a few things. If he should jump from far to hit you do a back.mk/lk then you can cancel into jab/strong FB to force him to block and get him back in your range. Back+Jab is an excelent move when boxer is in close on you. Some boxers love to just jump on your head when you are in the corner. If you are not comfortable teleporting you can b.jab him out of the air if you do it early. In this sittuation it is better to do a teleport, the 623KKK will take you the furthest away.
You will now need to know how to deal with close blocked/whiffed buffalos. After boxer buffalos you can do a few things. If it is whiffed and he is close I recommend you cr.jab x Jab FB. This will force him to block and then anticipate your next move. You can cr.strong and push him out but if you anticipate another buffalo just mk him and get him back to your range again. If you block the buffalo cr.mp/cr.mk will hit him but it may not be wise to xx FB. If the boxer is smart they will buffalo again and hit you and then he is in. you should cr.mkx2 to push him out and then set the pace of the match again.
Oh and remember the Fierce FB is your friend. From full screen there isn't any thing he can do to punish you for throwing them. If you play an opponent that likes to use the 1,2,3,4's you will hit him out of them and knock him down. Even if he does a normal rush and trades with you he will be knocked back to the far side of the screen and you are back in controll with more pokes.
When boxer gets super BLOCK!! I can not stress this enough. It will and has turned the whole game because of one bad slide or FB. If you are keeping him at your max range your game will not change to much. He can not super through FB's at full scree. But from 3/4 screed stop tossing them and do not cr.mk xx FB when he has super he will go through the FB with it every time if they are good. Keep it simple and wait for him to burn his super.
Thanks to Gian for showing me the light and making me want to play sim.
It is my opinion that this match is in favor of sim 60/40 and maybe even 70/30 if boxer doesn't have super.
--CigarBoB
Vs. Chun-Li:
- 5 - 5
If she's rushing you down with st.Strong from the right distance, there's nothing that I know of that Sim can do to beat it cleanly except super. You need patience (keep in mind that blocking her st.Strong is not hurting you), and if she comes within your throw range, throw her. Don't try any normals, because they will all get beaten cleanly if she's rushing correctly (leaving just enough room for you to do a move, but not enough room for that move to hit). If she's not doing it correctly (leaving a big gap between Strongs), you can use close cr.Forward or close cr.RH canceled into Yoga Fire.
--NKI
This only works on Vega and Chun li: after performing a Yoga Noogie, you take one step forward and do a forward slide... the slide crosses them up and then you just hit b + fierce for headbutt (instant Dizzy always). After that just rinse repeat ;-)
One good trick that most Dhalsim players have forgotten is this: If she jumps at you with forward and isn't over your head, you can jump back. Wait until last second and clean counter her with foward drill. Doesn't matter what she jumps up with, it will hit everytime cause you are completely over her head. I forget to use it at times to, cause most the time Chun-Li is just turtling like a whore until she gets Super.
--Jcole
Vs. Dhalsim (self):
Disadvantage Match-ups
Vs. Vega (claw):
- 3.5 - 6.5
Vega on sim can be annoying, but honestly his only aresnal is after he knocks you down and goes for wall dive cross up (which can be teleported out of or a very 50/50 block). He will most likely be jumping away from u so just slowly follow him into the corner. Any wall dive attempt can be countered with jump back rh or u can teleport if your timing is a little slow. If he jumps at you, trade hits with back short then you are in. Start the slide/drill noogie throw game and Vega is done. Its insanely hard for him to get out of. His only option is to wake up with flip kick but the slide goes under it so u end up throwing him again.
Takes a bit to get used to the match, but sim has a pretty big advantage on him --- It all depends on the situation and position dhalsim is compared to when vega goes off the wall. Sim has all kinds of ways to counter vega clean, it's just all about recognizing your position and executing the right move. If you have Vega traped in corner and he happens to go off wall, best thing is upward flame. I use to do back strong at last second if i was right under him, or karate chop st. jab, but do to this past evo and Tokido having the luck of the gods to BARELY get over my strong...iv changed my tactic. If you are about mid screen and he goes off the wall, jump back rh or jump straight up and close strong work excellent. The slide technique is mainly saved for when dirty vega's try to cross you up with the claw but its always risky...cause sometimes you will get hit. All in all, if you truely wanna be safe and not risk anything...just teleport and reset the situation...vega cant do anything and you are free to reposition yourself and get back to locking that claw fag down =P
--Jcole
Serious Disadvantage Match-ups
None!


