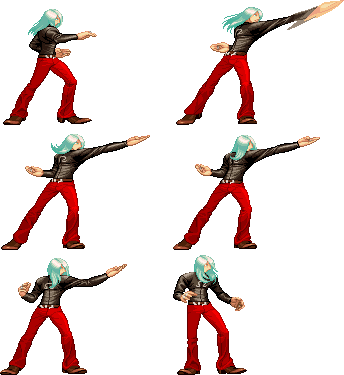
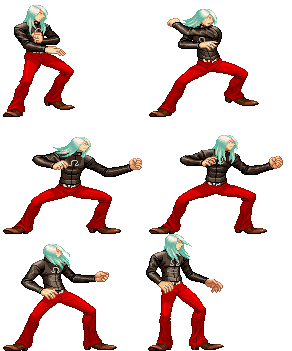
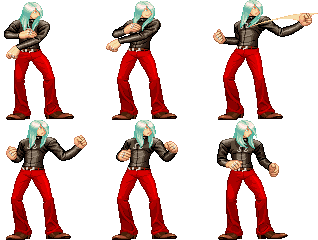
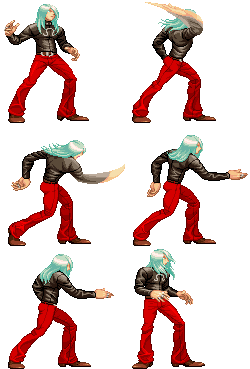
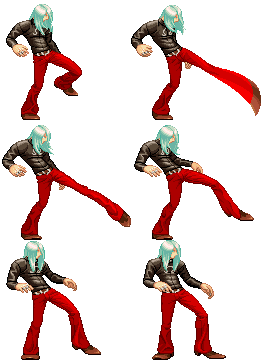
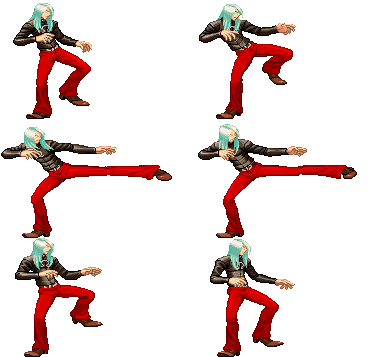
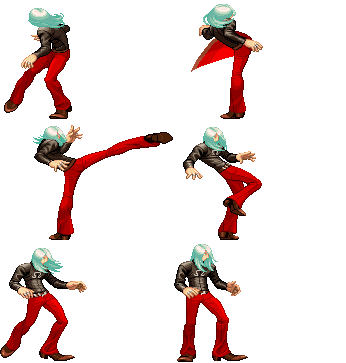
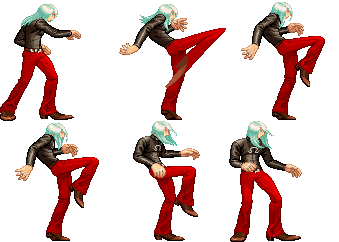
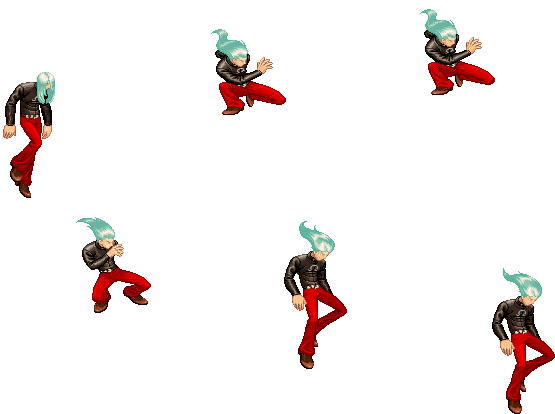
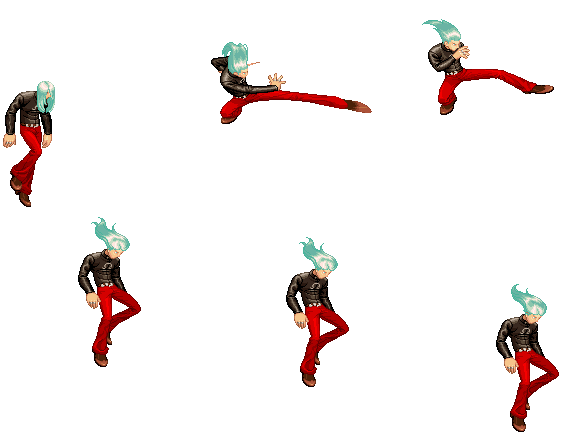
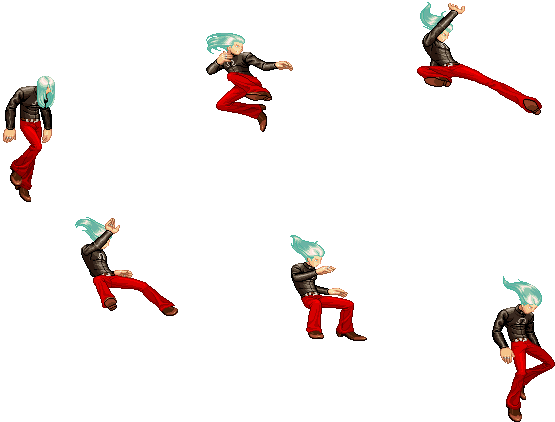
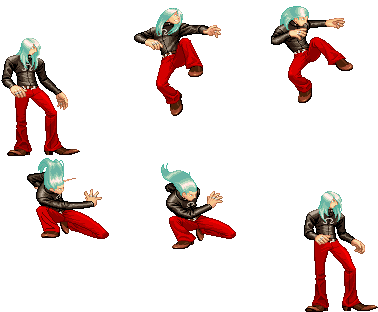
OOF MAXIMA (talk | contribs) No edit summary |
OOF MAXIMA (talk | contribs) (Added Juggle Values for all moves and some comments for a few of them. Who knew cr.LK juggled?) |
||
| Line 1: | Line 1: | ||
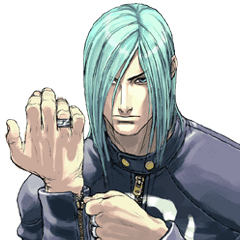
[[Image:Remy3sport.gif|frame| | [[Image:Remy3sport.gif|frame|center|Remy's Character Select Portrait]] | ||
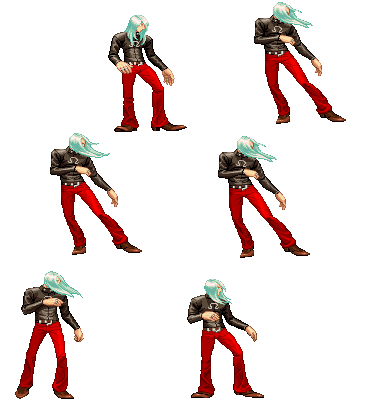
[[Image:Remy3s-stance-short.gif|frame| | [[Image:Remy3s-stance-short.gif|frame|center|Remy's Neutral Stance]] | ||
= Introduction = | = Introduction = | ||
{{ ProConTable | {{ ProConTable | ||
| Line 60: | Line 60: | ||
|- | |- | ||
| III || Blue Nocturne || [[File:Qcf.png]][[File:Qcf.png]]+[[File:K.png]] || 80 Gauge Dots || 1 Stock || 2.0 EX Uses | | III || Blue Nocturne || [[File:Qcf.png]][[File:Qcf.png]]+[[File:K.png]] || 80 Gauge Dots || 1 Stock || 2.0 EX Uses | ||
|} | |} | ||
==Target | ==Target Combos== | ||
{| border="1em" cellspacing="0" width="45%" style="border: 1px solid #999; background: none;" | {| border="1em" cellspacing="0" width="45%" style="border: 1px solid #999; background: none;" | ||
|- | |- | ||
| [[File:Mk.png]] | |close [[File:Mk.png]] -> [[File:Hk.png]] | ||
|- | |||
|close [[File:Lp.png]] -> close [[File:Lk.png]] | |||
|} | |} | ||
| Line 83: | Line 83: | ||
*'''Special Cancel''': If you can cancel the move into a Special Move | *'''Special Cancel''': If you can cancel the move into a Special Move | ||
*'''Super Cancel''': If you can cancel the move into a Super Art | *'''Super Cancel''': If you can cancel the move into a Super Art | ||
*'''Juggle Value''': Amount of JP the move adds in aerial juggles | |||
*0: JP is reset | |||
*'''Juggle or Reset''': If the move knocks down on air connect or air resets | |||
*'''Throw Range''': Range of the throw (in pixels) | *'''Throw Range''': Range of the throw (in pixels) | ||
*'''Num.''': Super Art number | *'''Num.''': Super Art number | ||
| Line 284: | Line 287: | ||
| align="center" | 0 || align="center" | 1 || align="center" | 2 || align="center" | 4 | | align="center" | 0 || align="center" | 1 || align="center" | 2 || align="center" | 4 | ||
|} | |} | ||
' | A standard quick punch with decent range and no combo applications. Useful as a low-commitment anti-air at ranges where close Jab doesn't activate as it is safe on air parry. | ||
| Line 308: | Line 311: | ||
| align="center" | 2 || align="center" | 6 || align="center" | 11 || align="center" | 4 | | align="center" | 2 || align="center" | 6 || align="center" | 11 || align="center" | 4 | ||
|} | |} | ||
Nice, high-angled strike with decent startup and good range, but poor damage. Good for anti-airs and as a poke against taller characters, but prone to being crouched. | |||
| Line 332: | Line 335: | ||
| align="center" | 3 || align="center" | 10 || align="center" | 19 || align="center" | 4 | | align="center" | 3 || align="center" | 10 || align="center" | 19 || align="center" | 4 | ||
|} | |} | ||
Big punch with good damage, range, and priority. Pretty good as a poke and to build space with its large pushback. | |||
| Line 356: | Line 359: | ||
| align="center" | 0 || align="center" | 1 || align="center" | 2 || align="center" | 4 | | align="center" | 0 || align="center" | 1 || align="center" | 2 || align="center" | 4 | ||
|} | |} | ||
Fast, low commitment anti-air that chains into itself, meaning you can keep mashing it if the opponent parries in the air. His close LP -> close LK TC will combo even when the opponent is airborne, which is a nice damage bonus to a very effective anti-air. | |||
| Line 380: | Line 383: | ||
| align="center" | 2 || align="center" | 6 || align="center" | 11 || align="center" | 4 | | align="center" | 2 || align="center" | 6 || align="center" | 11 || align="center" | 4 | ||
|} | |} | ||
'' | Remy proceeds to roast the opponent with a ''BOI'' motion. Allows for links into cr. Short afterwards. Generally outclassed by close MK, but can be used in certain blockstrings due to its good frame advantage and low pushback. | ||
| Line 404: | Line 407: | ||
| align="center" | 3 || align="center" | 6 || align="center" | 14 || align="center" | 4 | | align="center" | 3 || align="center" | 6 || align="center" | 14 || align="center" | 4 | ||
|} | |} | ||
'' | Remy's highest damage cancel by a good margin. However, it whiffs on crouching opponents and has disapointing range, making its applications in neutral somewhat limited. Its hitbox is very tall, potentially catching cross-up attempts if you didn't have time to charge a flash kick. | ||
| Line 428: | Line 431: | ||
| align="center" | 0 || align="center" | 1 || align="center" | 2 || align="center" | 4 | | align="center" | 0 || align="center" | 1 || align="center" | 2 || align="center" | 4 | ||
|} | |} | ||
The almighty foot. Tied for one of the fastest normals in the game, strangely enough, but that fact is hardly relevant. This move is pretty much useless, though it is a 1f link into SA2. | |||
| Line 452: | Line 455: | ||
| align="center" | 2 || align="center" | 6 || align="center" | 11 || align="center" | 4 | | align="center" | 2 || align="center" | 6 || align="center" | 11 || align="center" | 4 | ||
|} | |} | ||
A decent poke and OK counter-poke with good range, but little else. | |||
| Line 476: | Line 479: | ||
| align="center" | 3 || align="center" | 10 || align="center" | 19 || align="center" | 4 | | align="center" | 3 || align="center" | 10 || align="center" | 19 || align="center" | 4 | ||
|} | |} | ||
Functions as a slower, beefier version of standing Strong. Good in anti-air scenarios with a high angled hitbox, but prone to air parries. Also OK as a poke against some taller characters like Hugo, but can be crouched. | |||
[[Image:(remycloselk).gif|none]] | [[Image:(remycloselk).gif|none]] | ||
| Line 499: | Line 503: | ||
| align="center" | 0 || align="center" | 1 || align="center" | 2 || align="center" | 4 | | align="center" | 0 || align="center" | 1 || align="center" | 2 || align="center" | 4 | ||
|} | |} | ||
' | Also tied for the fastest move in the game, this quick knee strike has very little utility outside of Remy's TC. | ||
| Line 523: | Line 527: | ||
| align="center" | 2 || align="center" | 6 || align="center" | 11 || align="center" | 4 | | align="center" | 2 || align="center" | 6 || align="center" | 11 || align="center" | 4 | ||
|} | |} | ||
'' | Now we finally reach a good normal! This is Remy's main damage hitconfirm a la SA2 (st.Forward -> SA2), which is important because Remy has very few safe confirms. Without it, Remy doesn't really have good damage options outside of his cr. Fierce. | ||
| Line 547: | Line 551: | ||
| align="center" | 3 || align="center" | 12 || align="center" | 25 || align="center" | 8(4+4) | | align="center" | 3 || align="center" | 12 || align="center" | 25 || align="center" | 8(4+4) | ||
|} | |} | ||
A 2-hit tall kick that allows links to SA2 afterwards. Sounds nice, until you remember that the first hit only comes out point blank, which is a shame because it also special cancels. | |||
Still, it can act as a decent anti-air for opponents only expecting one parry. | |||
==== Jumping Normals ==== | ==== Jumping Normals ==== | ||
| Line 572: | Line 578: | ||
| align="center" | 0 || align="center" | 1 || align="center" | 2 || align="center" | 4 | | align="center" | 0 || align="center" | 1 || align="center" | 2 || align="center" | 4 | ||
|} | |} | ||
A rather meh move. Completely outclassed by jumping Strong. | |||
| Line 596: | Line 602: | ||
| align="center" | 2 || align="center" | 6 || align="center" | 11 || align="center" | 4 | | align="center" | 2 || align="center" | 6 || align="center" | 11 || align="center" | 4 | ||
|} | |} | ||
Remy smacks you with his clown fingers with a good amount of active frames. Can be used in air-to-airs or to tick throw, but is generally outclassed by jumping Fierce. | |||
| Line 620: | Line 626: | ||
| align="center" | 3 || align="center" | 10 || align="center" | 19 || align="center" | 4 | | align="center" | 3 || align="center" | 10 || align="center" | 19 || align="center" | 4 | ||
|} | |} | ||
'' | In 3S, meeting the opponent air-to-air is normally a safer option than grounded anti-airs since most air normals don't allow combos on airborne opponents. This blunt elbow strike is an exception to this and makes Remy's opponents want to parry way earlier in their jump arc than most other characters, which can open them up for Remy's myriad of other options. Generally you only have time for a flash kick once you land, but if you smack the opponent particularly high in their jump near the corner you can do a short or forward Cold Blue Kick first. | ||
| Line 645: | Line 650: | ||
| align="center" | 0 || align="center" | 1 || align="center" | 2 || align="center" | 4 | | align="center" | 0 || align="center" | 1 || align="center" | 2 || align="center" | 4 | ||
|} | |} | ||
'' | Almost useless except for the fact that it is Remy's only cross-up. The cross-up box is so small that it doesn't really matter anyways. | ||
| Line 669: | Line 674: | ||
| align="center" | 2 || align="center" | 6 || align="center" | 11 || align="center" | 4 | | align="center" | 2 || align="center" | 6 || align="center" | 11 || align="center" | 4 | ||
|} | |} | ||
Good as a long range air-to-air. | |||
[[Image:(remyjhk).gif|none]] | [[Image:(remyjhk).gif|none]] | ||
| Line 692: | Line 697: | ||
| align="center" | 3 || align="center" | 10 || align="center" | 19 || align="center" | 4 | | align="center" | 3 || align="center" | 10 || align="center" | 19 || align="center" | 4 | ||
|} | |} | ||
' | The hitbox goes very low to the ground, making it hit characters looking to anti-air parry earlier than usual. It also hits most characters after an immediate neutral jump, making neutral jumps yet another potential anti-air in Remy's kit. This is your main jump-in normal alongside jumping Fierce. | ||
[[Image:(remyoh).gif|none]] | [[Image:(remyoh).gif|none]] | ||
| Line 715: | Line 720: | ||
| align="center" | 0 || align="center" | 1 || align="center" | 2 || align="center" | 4 | | align="center" | 0 || align="center" | 1 || align="center" | 2 || align="center" | 4 | ||
|} | |} | ||
'' | As far as UOHs go, Remy gets a good amount of use out of spaced/meaty UOH -> SA2, especially with a standing HK kara giving it a massive range boost. However, Remy suffers from a severe lack of reasons for the opponent to block or parry low, so it's not entirely in Remy's favor. | ||
==== Throws ==== | ==== Throws ==== | ||
| Line 740: | Line 745: | ||
| align="center" | 0 || align="center" | 7 (for the player who blocked) || align="center" | 7 | | align="center" | 0 || align="center" | 7 (for the player who blocked) || align="center" | 7 | ||
|} | |} | ||
Because Remy has few ways of dissuading parries, this throw is a godsend. It smacks the opponent fullscreen, and in the corner it allows you to juggle an HK flash kick (requires a st.MP kara on Twins, Ibuki, Dudley, and Oro) or even partial connects of SA1/SA2. His kara throw range is pretty nice as well. | |||
| Line 764: | Line 769: | ||
| align="center" | 0 || align="center" | 7 (for the player who blocked) || align="center" | 8 | | align="center" | 0 || align="center" | 7 (for the player who blocked) || align="center" | 8 | ||
|} | |} | ||
' | Basic damage throw. Good in the corner against characters that need a kara flash kick, if you haven't mastered it. | ||
==== Crouching Normals ==== | ==== Crouching Normals ==== | ||
| Line 789: | Line 795: | ||
| align="center" | 0 || align="center" | 1 || align="center" | 2 || align="center" | 4 | | align="center" | 0 || align="center" | 1 || align="center" | 2 || align="center" | 4 | ||
|} | |} | ||
'' | cr.LP -> cr.LP -> flash kick is another one of Remy's confirms, but it's held back somewhat by the fact that cr.LP can be parried in any direction. Still, it IS a confirm. 3 cr.LPs -> flash kick is also a combo that requires no prior charge, but also requires you to be point blank. | ||
[[Image:(remycmp).gif|none]] | [[Image:(remycmp).gif|none]] | ||
| Line 813: | Line 818: | ||
| align="center" | 2 || align="center" | 6 || align="center" | 11 || align="center" | 4 | | align="center" | 2 || align="center" | 6 || align="center" | 11 || align="center" | 4 | ||
|} | |} | ||
'' | Good range, but low damage. It's usually cancelled into LoV for pressure, but can also be parried in either direction. Not only does Remy have a hard time making them block low, but making them parry low is also difficult. Given that this is Remy's main cancel for extending combos and blockstrings, it's a rather nifty tool. It also has a very good anti-air hitbox, as if Remy didn't have enough of those. | ||
| Line 837: | Line 842: | ||
| align="center" | 3 || align="center" | 10 || align="center" | 19 || align="center" | 4 | | align="center" | 3 || align="center" | 10 || align="center" | 19 || align="center" | 4 | ||
|} | |} | ||
'' | This move is the most basic and scary of all of Remy's anti-airs, since it allows juggles on hit. On grounded connects and when midscreen it gives you time to charge up a HK flash kick, which is Remy's max damage for close range parries. In the corner you can combo an short Cold Blue Kick before this for more damage. Be careful to switch up between anti-airs, as if this move is air parried you're eating a fat combo. | ||
Revision as of 17:18, 28 June 2021
Introduction
| Strengths | Weaknesses |
|---|---|
|
|
Specific Character Information
- Stamina: 1120
- Stun Bar Length (in pixels): 52 (Short)
- Stun Bar Recovery (frames it takes to recover 1 pixel): 21
- Taunt: Increases stun damage for the next hit/combo by 18.8% per taunt. Maximum 4 taunts, 75% bonus.
- Best Kara-Throw: Far S.HK / Far S.MP / F.MK / Close S.MP / Close S.LK / Close S.MK / Far S.HP / C.MK / C.HK / C.HP / Far S.LP
- Standard Throw Range (pixels): 24
- Kara Throw Range (pixels): 51 / 45 / 40 / 38 / 36 / 36 / 33 / 32 / 31 / 30 / 25
- Dash Forward (frames) / Moving Distance: 17 / 2
- Dash Backward (frames) / Moving Distance: 17 / 2
- Normal Wake up (frames): 67
- Quick Stand (frames): 47
Moves List
Throws
| Valse no you ni Kuruoshiku | |
| Nemuri wo Midasu Contour |
Command Moves
| Amari ni Muku na Aiguille |
Special Moves
| Vertu no Zankou~Haute | EX | SC | ||
| Vertu no Zankou~Basse | EX | SC | ||
| Ma Cherie no Hiai | EX | SC | SC on EX version on 1st hit | |
| Tsumetaku Aoi Regret | EX |
Super Arts
| I | Light of Justice | 104 Gauge Dots | 2 Stocks | 5.2 EX Uses | |
| II | Supreme Rising Rage Flash | 120 Gauge Dots | 2 Stocks | 6.0 EX Uses | |
| III | Blue Nocturne | 80 Gauge Dots | 1 Stock | 2.0 EX Uses |
Target Combos
| close |
| close |
Move Analysis
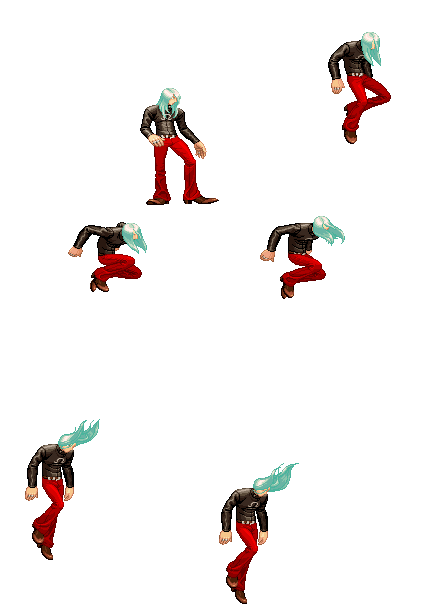
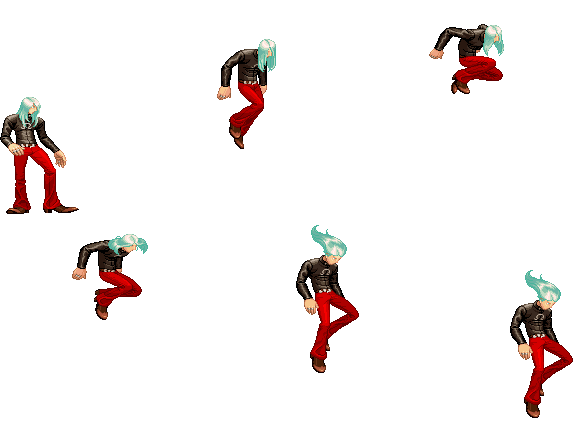
- All those sprites are taken from the site http://www.zweifuss.ca/
- All Framedatas in "Move Analisys" section are taken from Game Restaurant , this means the Framedata isn't from the Dreamcast version like Karathrow site, it's from Arcade version.
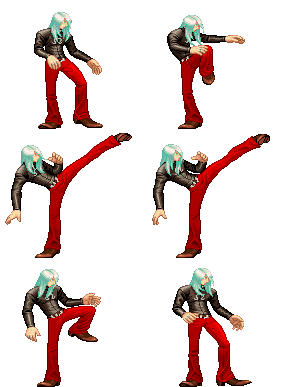
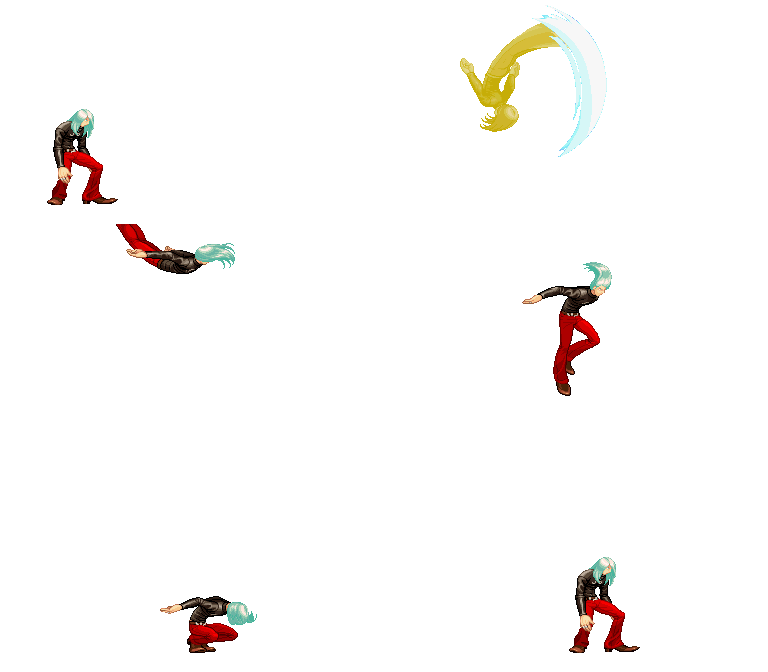
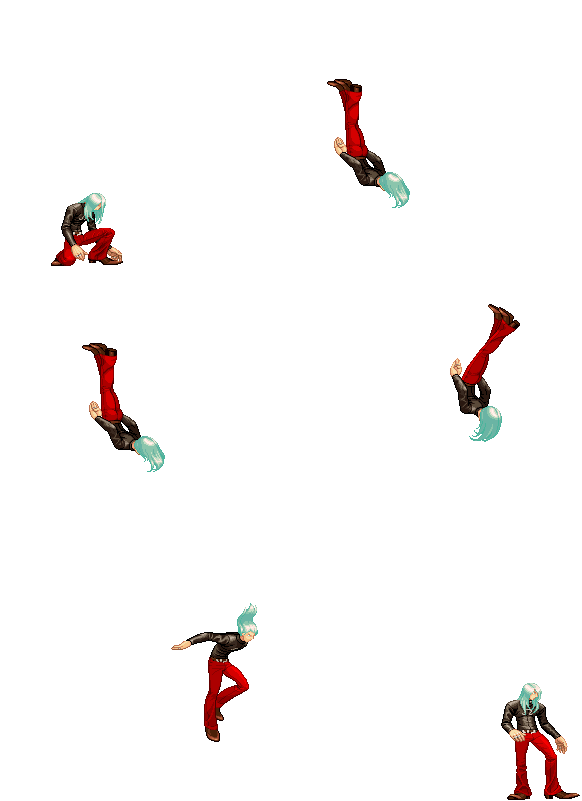
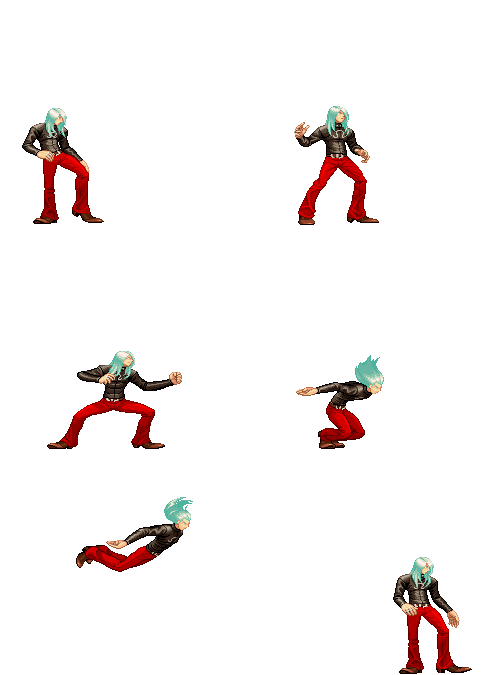
Please note that the images show in this section are for the 1st frame it hits, so this means the opponent is taking the hit in the image shown on the move. I use the 1st frame of every move (except taunt, dash, jump, wakeup and 2nd throw image sprites) because you will see the maximum range of every attack (mostly of the attacks). Note also that those images are ACCURATE, they are exactly the first frame it hits, so enemy takes damage but they still dont make the "pain" frame.
General
- Move: Move name
- Motion: What you must do to execute the move
- Damage: Damage it does (in pixels)
- Stun Damage: Stun Damage it does (in pixels)
- Chains into itself: If you can combo into the same movement
- Special Cancel: If you can cancel the move into a Special Move
- Super Cancel: If you can cancel the move into a Super Art
- Juggle Value: Amount of JP the move adds in aerial juggles
- 0: JP is reset
- Juggle or Reset: If the move knocks down on air connect or air resets
- Throw Range: Range of the throw (in pixels)
- Num.: Super Art number
- Super Art: Super Art name
- Super Art Stock: Number of Gauge Bars the Super Art have, also the lenght of each bar (in pixels)
Frame Data
- Startup: Number of frames it takes to start the move
- Hit: Number of frames that can hit the opponent
- Recovery: Number of frames it takes to recover from the move
- Blocked Advantage: Number of frames you are in advantage/disvantage after opponent have been blocked the hit
- Hit Advantage: Number of frames you are in advantage/disvantage after opponent have been take the hit
- Crouching Hit Advantage: Number of frames you are in advantage/disvantage after opponent have been take the hit while he's crouching
- + # : You have # frames of advantage
- - # : You have # frames of disvantage
- # ~ # : Advantage/disvantage can vary from # to #
- Down: Enemy gets knocked down
- Guard: How opponent must guard the move, High (H), Low (L) or both (HL)
- Parry: How opponent must parry the move, High (H), Low (L) or both (HL)
Gauge Increase
- Miss: Gauge you gain if you miss the move (in pixels)
- Blocked: Gauge you gain if the move gets blocked (in pixels)
- Hit: Gauge you gain if you hit the opponent with the move (in pixels)
- Parry: Gauge opponent gains when he parry the move (in pixels)
Basic Moves
| Move | Start-up frames | In ground frames | In air frames | Recovery frames | Total frames |
|---|---|---|---|---|---|
| Dash Forward | 2 | 8? | - | 6? | 17 |
Comments here
| Move | Start-up frames | In ground frames | In air frames | Recovery frames | Total frames |
|---|---|---|---|---|---|
| Dash Backwards | 2 | 4? | - | 6? | 17 |
Comments here
| Move | Motion | Startup Frames |
| Jump | BU or U or FU | 3 |
Comments here
| Move | Motion | Startup Frames |
| Super Jump | DBU or DU or DFU | 5 |
Comments here
| Move | Motion | Frames |
| Normal Wakeup | - | 67 |
Comments here
| Move | Motion | Frames |
| Quick Stand | Tap D when hitting the ground | 47 |
Comments here
| Move | Motion | Damage | Stun Damage | Chains into itself | Special Cancel | Super Cancel | Juggle Value |
| Taunt | HP+HK | - | - | No | No | No |
Frame Data
| Startup | Hit | Recovery | Blocked Advantage | Hit Advantage | Crouching Hit Advantage | Guard | Parry |
| - | 131 | - | ? | ? | ? | HL | HL |
Gauge Increase
| Miss | Blocked | Hit | Parry (Gauge for opponent) |
| 4(6) | ? | ? | 8(4+4) |
Comments here
| Move | Motion |
| Parry (High) | Tap F when about taking a hit |
| Parry (Low) | Tap D when about taking a hit |
| Parry (Air) | Tap F in air when about taking a hit |
Frame Data
| Move | Frames you're frozen | Frames opponent is frozen | Frame Advantage when parry is successful | Frames before you can try another parry |
| Parry (High) | 16 | 16 | +4(LP/LK) +3(MP/MK) +2(HP/HK) 0(Special/Super) -16(Fireball) | 24(19 when attack comes from the air)*,** |
| Parry (Low) | 16 | 16 | +4(LP/LK) +3(MP/MK) +2(HP/HK) 0(Special/Super) -16(Fireball) | 24(19 when attack comes from the air)*,** |
| Parry (Air) | 16 | 16 | +4(LP/LK) +3(MP/MK) +2(HP/HK) 0(Special/Super) -16(Fireball) | 21(19 when attack comes from the air)*,** |
| * (If a parry attempt is successful, the 19/21/24 frame restriction is taken away and you can attempt another parry immediately) |
| ** (If another attack connects within 2 frames of your parry, it will automatically be parried) |
Gauge Increase
| Move | Gauge Increase |
| Parry (High) | 4*** |
| Parry (Low) | 4*** |
| Parry (Air) | 4*** |
| *** (You gain 4 of gauge for whatever attack parried, and for whatever hit you parry during multihit attack) |
You can buffer any motion during High or Low parry, but NOT during Air parry, also parry resets the juggle count (and thus resets all scaling).
- Parry information is taken from Shoryuken Forums, more exactly, from user JinraiPVC. Thanks for this information dude
Normal Moves
Standing Normals
| Move | Motion | Damage | Stun Damage | Chains into itself | Special Cancel | Super Cancel | Juggle Value | Reset or Juggle |
| Far Jab | LP | 30(3 life points) | 3 | Yes | Yes | Yes | 15 | Reset |
Frame Data
| Startup | Hit | Recovery | Blocked Advantage | Hit Advantage | Crouching Hit Advantage | Guard | Parry |
| 4 | 4 | 4 | +3 | +3 | +3 | HL | HL |
Gauge Increase
| Miss | Blocked | Hit | Parry (Gauge for opponent) |
| 0 | 1 | 2 | 4 |
A standard quick punch with decent range and no combo applications. Useful as a low-commitment anti-air at ranges where close Jab doesn't activate as it is safe on air parry.
| Move | Motion | Damage | Stun Damage | Chains into itself | Special Cancel | Super Cancel | Juggle Value | Reset or Juggle |
| Far Strong | MP | 60(10 life points) | 9 | No | No | No | 15 | Reset |
Frame Data
| Startup | Hit | Recovery | Blocked Advantage | Hit Advantage | Crouching Hit Advantage | Guard | Parry |
| 7 | 3 | 12 | +1 | +2 | +3 | HL | H |
Gauge Increase
| Miss | Blocked | Hit | Parry (Gauge for opponent) |
| 2 | 6 | 11 | 4 |
Nice, high-angled strike with decent startup and good range, but poor damage. Good for anti-airs and as a poke against taller characters, but prone to being crouched.
| Move | Motion | Damage | Stun Damage | Chains into itself | Special Cancel | Super Cancel | Juggle Value | Reset or Juggle |
| Far Fierce | HP | 110(19 life points) | 7 | No | No | No | 15 | Reset |
Frame Data
| Startup | Hit | Recovery | Blocked Advantage | Hit Advantage | Crouching Hit Advantage | Guard | Parry |
| 10 | 5 | 18 | -2 | 0 | +2 | HL | H |
Gauge Increase
| Miss | Blocked | Hit | Parry (Gauge for opponent) |
| 3 | 10 | 19 | 4 |
Big punch with good damage, range, and priority. Pretty good as a poke and to build space with its large pushback.
| Move | Motion | Damage | Stun Damage | Chains into itself | Special Cancel | Super Cancel | Juggle Value | Reset or Juggle |
| Close Jab | (Close to opponent) LP | 30(5 life points) | 3 | No | Yes | Yes | 1 | Reset |
Frame Data
| Startup | Hit | Recovery | Blocked Advantage | Hit Advantage | Crouching Hit Advantage | Guard | Parry |
| 4 | 4 | 3 | +3 | +3 | +3 | HL | HL |
Gauge Increase
| Miss | Blocked | Hit | Parry (Gauge for opponent) |
| 0 | 1 | 2 | 4 |
Fast, low commitment anti-air that chains into itself, meaning you can keep mashing it if the opponent parries in the air. His close LP -> close LK TC will combo even when the opponent is airborne, which is a nice damage bonus to a very effective anti-air.
| Move | Motion | Damage | Stun Damage | Chains into itself | Special Cancel | Super Cancel | Juggle Value | Reset or Juggle |
| Close Strong | (Close to opponent) MP | 70(12 life points) | 7 | No | Yes | Yes | 15 | Reset |
Frame Data
| Startup | Hit | Recovery | Blocked Advantage | Hit Advantage | Crouching Hit Advantage | Guard | Parry |
| 5 | 5 | 8 | +5 | +6 | +7 | HL | H |
Gauge Increase
| Miss | Blocked | Hit | Parry (Gauge for opponent) |
| 2 | 6 | 11 | 4 |
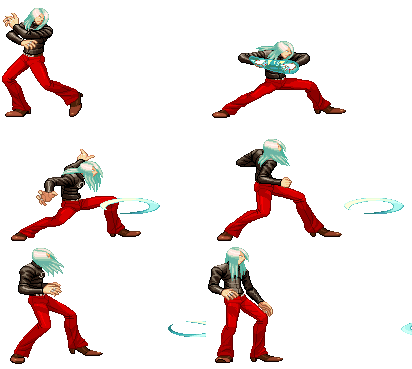
Remy proceeds to roast the opponent with a BOI motion. Allows for links into cr. Short afterwards. Generally outclassed by close MK, but can be used in certain blockstrings due to its good frame advantage and low pushback.
| Move | Motion | Damage | Stun Damage | Chains into itself | Special Cancel | Super Cancel | Juggle Value | Reset or Juggle |
| Close Fierce | (Close to opponent) HP | 130(21 life points) | 15 | No | Yes | Yes | 15 | Reset (Juggle at fist) |
Frame Data
| Startup | Hit | Recovery | Blocked Advantage | Hit Advantage | Crouching Hit Advantage | Guard | Parry |
| 6 | 3 | 15 | -2 | 0 | +2 | HL | H |
Gauge Increase
| Miss | Blocked | Hit | Parry (Gauge for opponent) |
| 3 | 6 | 14 | 4 |
Remy's highest damage cancel by a good margin. However, it whiffs on crouching opponents and has disapointing range, making its applications in neutral somewhat limited. Its hitbox is very tall, potentially catching cross-up attempts if you didn't have time to charge a flash kick.
| Move | Motion | Damage | Stun Damage | Chains into itself | Special Cancel | Super Cancel | Juggle Value | Reset or Juggle |
| Short | LK | 35(5 life points) | 5 | No | No | No | 15 | Reset |
Frame Data
| Startup | Hit | Recovery | Blocked Advantage | Hit Advantage | Crouching Hit Advantage | Guard | Parry |
| 2 | 5 | 4 | +2 | +2 | +2 | HL | HL |
Gauge Increase
| Miss | Blocked | Hit | Parry (Gauge for opponent) |
| 0 | 1 | 2 | 4 |
The almighty foot. Tied for one of the fastest normals in the game, strangely enough, but that fact is hardly relevant. This move is pretty much useless, though it is a 1f link into SA2.
| Move | Motion | Damage | Stun Damage | Chains into itself | Special Cancel | Super Cancel | Juggle Value | Reset or Juggle |
| Forward | MK | 80(14 life points) | 7 | No | No | No | 15 | Reset |
Frame Data
| Startup | Hit | Recovery | Blocked Advantage | Hit Advantage | Crouching Hit Advantage | Guard | Parry |
| 8 | 5 | 14 | -3 | -2 | -1 | HL | H |
Gauge Increase
| Miss | Blocked | Hit | Parry (Gauge for opponent) |
| 2 | 6 | 11 | 4 |
A decent poke and OK counter-poke with good range, but little else.
| Move | Motion | Damage | Stun Damage | Chains into itself | Special Cancel | Super Cancel | Juggle Value | Reset or Juggle |
| Roundhouse | HK | 130(23 life points) | 11 | No | No | No | 15 | Reset |
Frame Data
| Startup | Hit | Recovery | Blocked Advantage | Hit Advantage | Crouching Hit Advantage | Guard | Parry |
| 10 | 3 | 23 | -9 | -7 | -5 | HL | H |
Gauge Increase
| Miss | Blocked | Hit | Parry (Gauge for opponent) |
| 3 | 10 | 19 | 4 |
Functions as a slower, beefier version of standing Strong. Good in anti-air scenarios with a high angled hitbox, but prone to air parries. Also OK as a poke against some taller characters like Hugo, but can be crouched.
| Move | Motion | Damage | Stun Damage | Chains into itself | Special Cancel | Super Cancel | Juggle Value | Reset or Juggle |
| Close Short | (Close to opponent) LK | 35(6 life points) | 5 | No | Yes | Yes | 15 | Reset |
Frame Data
| Startup | Hit | Recovery | Blocked Advantage | Hit Advantage | Crouching Hit Advantage | Guard | Parry |
| 2 | 5 | 7 | 0 | 0 | 0 | HL | HL |
Gauge Increase
| Miss | Blocked | Hit | Parry (Gauge for opponent) |
| 0 | 1 | 2 | 4 |
Also tied for the fastest move in the game, this quick knee strike has very little utility outside of Remy's TC.
| Move | Motion | Damage | Stun Damage | Chains into itself | Special Cancel | Super Cancel | Juggle Value | Reset or Juggle |
| Close Forward | (Close to opponent) MK | 80(16 life points) | 7 | No | Yes | Yes | 15 | Reset |
Frame Data
| Startup | Hit | Recovery | Blocked Advantage | Hit Advantage | Crouching Hit Advantage | Guard | Parry |
| 4 | 6 | 11 | +1 | +3 | +5 | HL | H |
Gauge Increase
| Miss | Blocked | Hit | Parry (Gauge for opponent) |
| 2 | 6 | 11 | 4 |
Now we finally reach a good normal! This is Remy's main damage hitconfirm a la SA2 (st.Forward -> SA2), which is important because Remy has very few safe confirms. Without it, Remy doesn't really have good damage options outside of his cr. Fierce.
| Move | Motion | Damage | Stun Damage | Chains into itself | Special Cancel | Super Cancel | Juggle Value | Reset or Juggle |
| Close Roundhouse | (Close to opponent) HK | 140(80+60)(23 life points) | 16(7+9) | No | Yes/No | Yes/No | 3/3 | Reset/Reset |
Frame Data
| Startup | Hit | Recovery | Blocked Advantage | Hit Advantage | Crouching Hit Advantage | Guard | Parry |
| 6 | 3 | 15 | +3 | p5 | +7 | HL | H |
Gauge Increase
| Miss | Blocked | Hit | Parry (Gauge for opponent) |
| 3 | 12 | 25 | 8(4+4) |
A 2-hit tall kick that allows links to SA2 afterwards. Sounds nice, until you remember that the first hit only comes out point blank, which is a shame because it also special cancels. Still, it can act as a decent anti-air for opponents only expecting one parry.
Jumping Normals
| Move | Motion | Damage | Stun Damage | Chains into itself | Special Cancel | Super Cancel | Juggle Value | Reset or Juggle |
| Jump Jab | (Air) LP | 40(7 life points) | 7 | No | No | No | 3 | Reset |
Frame Data
| Startup | Hit | Recovery | Blocked Advantage | Hit Advantage | Crouching Hit Advantage | Guard | Parry |
| 4 | 20 | - | -3~+7 | -3~+7 | +3~+7 | H | H |
Gauge Increase
| Miss | Blocked | Hit | Parry (Gauge for opponent) |
| 0 | 1 | 2 | 4 |
A rather meh move. Completely outclassed by jumping Strong.
| Move | Motion | Damage | Stun Damage | Chains into itself | Special Cancel | Super Cancel | Juggle Value | Reset or Juggle |
| Jump Strong | (Air) MP | 70(12 life points) | 11 | No | No | No | 3 | Reset |
Frame Data
| Startup | Hit | Recovery | Blocked Advantage | Hit Advantage | Crouching Hit Advantage | Guard | Parry |
| 5 | 14 | - | -3~+10 | -3~+10 | +7~+10 | H | H |
Gauge Increase
| Miss | Blocked | Hit | Parry (Gauge for opponent) |
| 2 | 6 | 11 | 4 |
Remy smacks you with his clown fingers with a good amount of active frames. Can be used in air-to-airs or to tick throw, but is generally outclassed by jumping Fierce.
| Move | Motion | Damage | Stun Damage | Chains into itself | Special Cancel | Super Cancel | Juggle Value | Reset or Juggle |
| Jump Fierce | (Air) HP | 125(22 life points) | 15 | No | No | No | 3 | Juggle |
Frame Data
| Startup | Hit | Recovery | Blocked Advantage | Hit Advantage | Crouching Hit Advantage | Guard | Parry |
| 9 | 5 | - | -2~+13 | -2~+13 | +8~+13 | H | H |
Gauge Increase
| Miss | Blocked | Hit | Parry (Gauge for opponent) |
| 3 | 10 | 19 | 4 |
In 3S, meeting the opponent air-to-air is normally a safer option than grounded anti-airs since most air normals don't allow combos on airborne opponents. This blunt elbow strike is an exception to this and makes Remy's opponents want to parry way earlier in their jump arc than most other characters, which can open them up for Remy's myriad of other options. Generally you only have time for a flash kick once you land, but if you smack the opponent particularly high in their jump near the corner you can do a short or forward Cold Blue Kick first.
| Move | Motion | Damage | Stun Damage | Chains into itself | Special Cancel | Super Cancel | Juggle Value | Reset or Juggle |
| Jump Short | (Air) LK | 50(8 life points) | 5 | No | No | No | 3 | Reset |
Frame Data
| Startup | Hit | Recovery | Blocked Advantage | Hit Advantage | Crouching Hit Advantage | Guard | Parry |
| 4 | 14 | - | -4~+7 | -4~+7 | +1~+7 | H | H |
Gauge Increase
| Miss | Blocked | Hit | Parry (Gauge for opponent) |
| 0 | 1 | 2 | 4 |
Almost useless except for the fact that it is Remy's only cross-up. The cross-up box is so small that it doesn't really matter anyways.
| Move | Motion | Damage | Stun Damage | Chains into itself | Special Cancel | Super Cancel | Juggle Value | Reset or Juggle |
| Jump Forward | (Air) MK | 90(16 life points) | 9 | No | No | No | 3 | Reset |
Frame Data
| Startup | Hit | Recovery | Blocked Advantage | Hit Advantage | Crouching Hit Advantage | Guard | Parry |
| 6 | 4 | - | -2~+10 | -2~+10 | +7~+10 | H | H |
Gauge Increase
| Miss | Blocked | Hit | Parry (Gauge for opponent) |
| 2 | 6 | 11 | 4 |
Good as a long range air-to-air.
| Move | Motion | Damage | Stun Damage | Chains into itself | Special Cancel | Super Cancel | Juggle Value | Reset or Juggle |
| Jump Roundhouse | (Air) HK | 120(21 life points) | 13 | No | No | No | 3 | Reset |
Frame Data
| Startup | Hit | Recovery | Blocked Advantage | Hit Advantage | Crouching Hit Advantage | Guard | Parry |
| 10 | 4 | - | -1~+13 | -1~+13 | +7~+13 | H | H |
Gauge Increase
| Miss | Blocked | Hit | Parry (Gauge for opponent) |
| 3 | 10 | 19 | 4 |
The hitbox goes very low to the ground, making it hit characters looking to anti-air parry earlier than usual. It also hits most characters after an immediate neutral jump, making neutral jumps yet another potential anti-air in Remy's kit. This is your main jump-in normal alongside jumping Fierce.
| Move | Motion | Damage | Stun Damage | Chains into itself | Special Cancel | Super Cancel | Juggle Value | Reset or Juggle |
| Universal Overhead | MP+MK | 40(7 life points) | 3 | No | No | No | 1 | Reset |
Frame Data
| Startup | Hit | Recovery | Blocked Advantage | Hit Advantage | Crouching Hit Advantage | Guard | Parry |
| 15 | 10 | 5 | -5~+7 | 0~+8 | +1~+9 | H | H |
Gauge Increase
| Miss | Blocked | Hit | Parry (Gauge for opponent) |
| 0 | 1 | 2 | 4 |
As far as UOHs go, Remy gets a good amount of use out of spaced/meaty UOH -> SA2, especially with a standing HK kara giving it a massive range boost. However, Remy suffers from a severe lack of reasons for the opponent to block or parry low, so it's not entirely in Remy's favor.
Throws
| Move | Motion | Damage | Stun Damage | Throw Range | Kara-Throw | Kara-Throw Range | Juggle Value | Reset or Juggle |
| Valse no you ni Kuruoshiku | LP+LK | 120(17 life points) | 15 | 24 | Far S.HK / Far S.MP / F.MK / Close S.MP / Close S.LK / Close S.MK / Far S.HP / C.MK / C.HK / C.HP / Far S.LP | 51 / 45 / 40 / 38 / 36 / 36 / 33 / 32 / 31 / 30 / 25 | 1 | Juggle |
Frame Data
| Startup | Hit | Recovery | Blocked Advantage | Hit Advantage | Crouching Hit Advantage | Guard | Parry |
| 2 | 1 | 21 | - | - | - | LP+LK | - |
Gauge Increase
| Miss | Blocked | Hit |
| 0 | 7 (for the player who blocked) | 7 |
Because Remy has few ways of dissuading parries, this throw is a godsend. It smacks the opponent fullscreen, and in the corner it allows you to juggle an HK flash kick (requires a st.MP kara on Twins, Ibuki, Dudley, and Oro) or even partial connects of SA1/SA2. His kara throw range is pretty nice as well.
| Move | Motion | Damage | Stun Damage | Throw Range | Kara-Throw | Kara-Throw Range |
| Nemuri wo Midasu Contour | B/F+LP+LK | 130(23 life points) | 5 | 24 | Far S.HK / Far S.MP / F.MK / Close S.MP / Close S.LK / Close S.MK / Far S.HP / C.MK / C.HK / C.HP / Far S.LP | 51 / 45 / 40 / 38 / 36 / 36 / 33 / 32 / 31 / 30 / 25 |
Frame Data
| Startup | Hit | Recovery | Blocked Advantage | Hit Advantage | Crouching Hit Advantage | Guard | Parry |
| 2 | 1 | 21 | - | - | - | B/F+LP+LK | - |
Gauge Increase
| Miss | Blocked | Hit |
| 0 | 7 (for the player who blocked) | 8 |
Basic damage throw. Good in the corner against characters that need a kara flash kick, if you haven't mastered it.
Crouching Normals
| Move | Motion | Damage | Stun Damage | Chains into itself | Special Cancel | Super Cancel | Juggle Value | Reset or Juggle |
| Crouch Jab | D+LP | 30(3 life points) | 3 | Yes | Yes | Yes | 15 | Reset |
Frame Data
| Startup | Hit | Recovery | Blocked Advantage | Hit Advantage | Crouching Hit Advantage | Guard | Parry |
| 5 | 2 | 7 | +2 | +2 | +2 | HL | HL |
Gauge Increase
| Miss | Blocked | Hit | Parry (Gauge for opponent) |
| 0 | 1 | 2 | 4 |
cr.LP -> cr.LP -> flash kick is another one of Remy's confirms, but it's held back somewhat by the fact that cr.LP can be parried in any direction. Still, it IS a confirm. 3 cr.LPs -> flash kick is also a combo that requires no prior charge, but also requires you to be point blank.
| Move | Motion | Damage | Stun Damage | Chains into itself | Special Cancel | Super Cancel | Juggle Value | Reset or Juggle |
| Crouch Strong | D+MP | 55(9 life points) | 5 | No | Yes | Yes | 15 | Reset |
Frame Data
| Startup | Hit | Recovery | Blocked Advantage | Hit Advantage | Crouching Hit Advantage | Guard | Parry |
| 5 | 5 | 11 | -2 | -1 | 0 | HL | HL |
Gauge Increase
| Miss | Blocked | Hit | Parry (Gauge for opponent) |
| 2 | 6 | 11 | 4 |
Good range, but low damage. It's usually cancelled into LoV for pressure, but can also be parried in either direction. Not only does Remy have a hard time making them block low, but making them parry low is also difficult. Given that this is Remy's main cancel for extending combos and blockstrings, it's a rather nifty tool. It also has a very good anti-air hitbox, as if Remy didn't have enough of those.
| Move | Motion | Damage | Stun Damage | Chains into itself | Special Cancel | Super Cancel | Juggle Value | Reset or Juggle |
| Crouch Fierce | D+HP | 100(17 life points) | 9 | No | No | No | 3 | Juggle |
Frame Data
| Startup | Hit | Recovery | Blocked Advantage | Hit Advantage | Crouching Hit Advantage | Guard | Parry |
| 9 | 5 | 18 | -5 | Down | Down | HL | HL |
Gauge Increase
| Miss | Blocked | Hit | Parry (Gauge for opponent) |
| 3 | 10 | 19 | 4 |
This move is the most basic and scary of all of Remy's anti-airs, since it allows juggles on hit. On grounded connects and when midscreen it gives you time to charge up a HK flash kick, which is Remy's max damage for close range parries. In the corner you can combo an short Cold Blue Kick before this for more damage. Be careful to switch up between anti-airs, as if this move is air parried you're eating a fat combo.
| Move | Motion | Damage | Stun Damage | Chains into itself | Special Cancel | Super Cancel | Juggle Value | Reset or Juggle |
| Crouch Short | D+LK | 30(5 life points) | 3 | No | Yes | Yes | 15 | Reset |
Frame Data
| Startup | Hit | Recovery | Blocked Advantage | Hit Advantage | Crouching Hit Advantage | Guard | Parry |
| 3 | 4 | 7 | 0 | 0 | 0 | L | L |
Gauge Increase
| Miss | Blocked | Hit | Parry (Gauge for opponent) |
| 0 | 1 | 2 | 4 |
Comments here
| Move | Motion | Damage | Stun Damage | Chains into itself | Special Cancel | Super Cancel | Juggle Value | Reset or Juggle |
| Crouch Forward | D+MK | 60(10 life points) | 3 | No | No | No | 15 | Reset |
Frame Data
| Startup | Hit | Recovery | Blocked Advantage | Hit Advantage | Crouching Hit Advantage | Guard | Parry |
| 8 | 5 | 18 | -9 | -8 | -7 | L | L |
Gauge Increase
| Miss | Blocked | Hit | Parry (Gauge for opponent) |
| 2 | 6 | 11 | 4 |
Comments here
| Move | Motion | Damage | Stun Damage | Chains into itself | Special Cancel | Super Cancel | Juggle Value | Reset or Juggle |
| Crouch Roundhouse | D+HK | 100+110(17 life points) | 3+3 | No | No | No | 15 | Juggle |
Frame Data
| Startup | Hit | Recovery | Blocked Advantage | Hit Advantage | Crouching Hit Advantage | Guard | Parry |
| 9 | 2/5 | 21 | -11 | Down | Down | L | L |
Gauge Increase
| Miss | Blocked | Hit | Parry (Gauge for opponent) |
| 3 | 20 | 22 | 4 |
Comments here
Command Normals
| Move | Motion | Damage | Stun Damage | Chains into itself | Special Cancel | Super Cancel | Juggle Value | Reset or Juggle |
| Amari ni Muku na Aiguille | F+MK | 80 | 3 | No | No | No | 15 | Reset |
Frame Data
| Startup | Hit | Recovery | Blocked Advantage | Hit Advantage | Crouching Hit Advantage | Guard | Parry |
| 18 | 3 | 20 | -7 | -6 | -5 | H | H |
Gauge Increase
| Miss | Blocked | Hit | Parry (Gauge for opponent) |
| 2 | 6 | 11 | 4 |
Comments here
Target Combo
| Move | Motion | Damage | Stun Damage | Chains into itself | Special Cancel | Super Cancel | Juggle Value | Reset or Juggle |
| Target Combo | Close MK -> Close HK | 90+60 | 9+5 | No | Yes/No | Yes/No | 15/15 | Reset/Reset |
Frame Data
| Startup | Hit | Recovery | Blocked Advantage | Hit Advantage | Crouching Hit Advantage | Guard | Parry |
| 4 | - | - | -9 | -7 | -5 | HL/HL | H/H |
Gauge Increase
| Miss | Blocked | Hit | Parry (Gauge for opponent) |
| 2+? | 6+1 | 11+1 | 8(4+4) |
Comments here
Special Moves
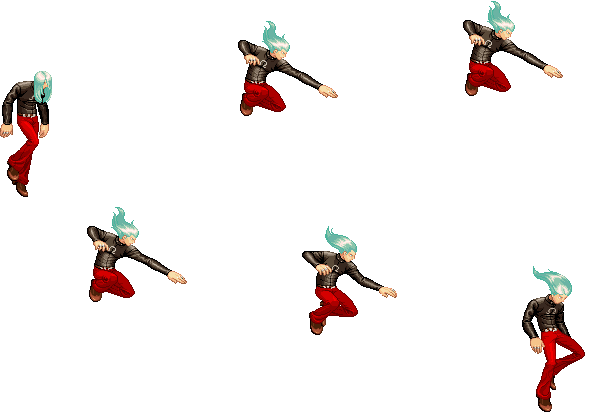
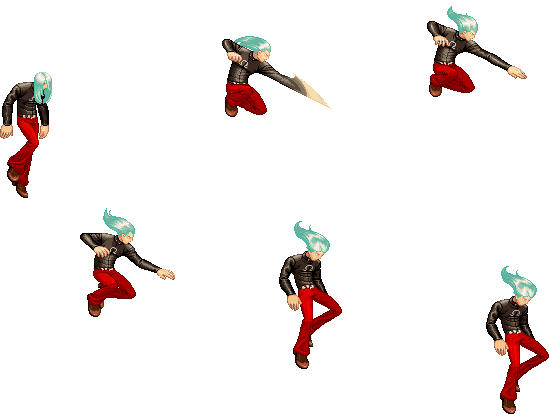
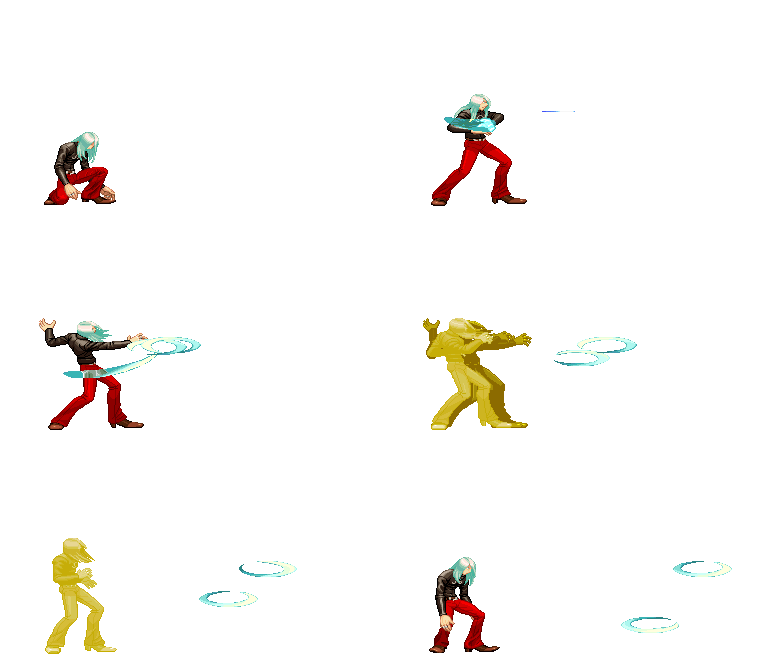
Please note that in this section you will see mainly 3 images for the special moves, this means the image on the left its done with LP (or LK), the image on the center its done with MP (or MK), and the image on the right its done with HP (or HK). Also its the same "rule" as the sections above, its the 1rst frame it hits for every of the moves.
| Move | Motion | Damage | Blocked Damage | Stun Damage | Super Cancel | Juggle Value | Reset or Juggle |
| Light of Virtue (Jab) | Charge B,F+LP | 60(10 life points) | 4 | 3 | Yes | 7 | Reset |
| Light of Virtue (Strong) | Charge B,F+MP | 60(10 life points) | 4 | 3 | Yes | 7 | Reset |
| Light of Virtue (Fierce) | Charge B,F+HP | 60(10 life points) | 4 | 3 | Yes | 7 | Reset |
Frame Data
| Move | Startup | Hit | Recovery | Blocked Advantage | Hit Advantage | Crouching Hit Advantage | Guard | Parry |
| Light of Virtue (Jab) | 8 | 1 | 22 | +5 | +6 | +7 | HL | H |
| Light of Virtue (Strong) | 9 | 1 | 22 | +5 | +6 | +7 | HL | H |
| Light of Virtue (Fierce) | 10 | 1 | 22 | +5 | +6 | +7 | HL | H |
Gauge Increase
| Move | Miss | Blocked | Hit | Parry (Gauge for opponent) |
| Light of Virtue (Jab) | 0 | 1 | 1 | 4 |
| Light of Virtue (Strong) | 0 | 1 | 1 | 4 |
| Light of Virtue (Fierce) | 0 | 1 | 1 | 4 |
Comments here
| Move | Motion | Damage | Blocked Damage | Stun Damage | Super Cancel | Juggle Value | Reset or Juggle |
| Light of Virtue (Short) | Charge B,F+LK | 60(10 life points) | 4 | 3 | Yes | 7 | Reset |
| Light of Virtue (Forward) | Charge B,F+MK | 60(10 life points) | 4 | 3 | Yes | 7 | Reset |
| Light of Virtue (Roundhouse) | Charge B,F+HK | 60(10 life points) | 4 | 3 | Yes | 7 | Reset |
Frame Data
| Move | Startup | Hit | Recovery | Blocked Advantage | Hit Advantage | Crouching Hit Advantage | Guard | Parry |
| Light of Virtue (Short) | 10 | 1 | 22 | +1 | +2 | +3 | L | L |
| Light of Virtue (Forward) | 11 | 1 | 22 | +1 | +2 | +3 | L | L |
| Light of Virtue (Roundhouse) | 12 | 1 | 22 | +1 | +2 | +3 | L | L |
Gauge Increase
| Move | Miss | Blocked | Hit | Parry (Gauge for opponent) |
| Light of Virtue (Short) | 0 | 1 | 1 | 4 |
| Light of Virtue (Forward) | 0 | 1 | 1 | 4 |
| Light of Virtue (Roundhouse) | 0 | 1 | 1 | 4 |
Comments here
| Move | Motion | Damage | Blocked Damage | Stun Damage | Super Cancel | Juggle Value | Reset or Juggle |
| Cold Blue Kick (Short) | QCB+LK | 120(21 life points) | 15 | 7 | No | 2 | Juggle |
| Cold Blue Kick (Forward) | QCB+MK | 120(21 life points) | 15 | 7 | No | 2 | Juggle |
| Cold Blue Kick (Roundhouse) | QCB+HK | 120(21 life points) | 15 | 7 | No | 2 | Juggle |
Frame Data
| Move | Startup | Hit | Recovery | Blocked Advantage | Hit Advantage | Crouching Hit Advantage | Guard | Parry |
| Cold Blue Kick (Short) | 17 | 12 | 10 | -4/+5 Low | -4/+5 Low | -4/+5 Low | HL | H |
| Cold Blue Kick (Forward) | 18 | 12 | 10 | -4/+5 Low | -4/+5 Low | -4/+5 Low | HL | H |
| Cold Blue Kick (Roundhouse) | 19 | 10 | 10 | -6/+5 Low | Down | down | HL | H |
Gauge Increase
| Move | Miss | Blocked | Hit | Parry (Gauge for opponent) |
| Cold Blue Kick (Short) | 3 | 12 | 18 | 4 |
| Cold Blue Kick (Forward) | 3 | 12 | 18 | 4 |
| Cold Blue Kick (Roundhouse) | 3 | 12 | 18 | 4 |
Comments here
| Move | Motion | Damage | Blocked Damage | Stun Damage | Super Cancel | Juggle Value | Reset or Juggle |
| Rising Rage Flash (Short) | Charge D,U+LK | 120(21 life points) | 15 | 9 | No | 15 | Juggle |
| Rising Rage Flash (Forward) | Charge D,U+MK | 130(23 life points) | 8 | 7 | No | 15 | Juggle |
| Rising Rage Flash (Roundhouse) | Charge D,U+HK | 140(24 life points) | 9 | 7 | No | 15 | Juggle |
Frame Data
| Move | Startup | Hit | Recovery | Blocked Advantage | Hit Advantage | Crouching Hit Advantage | Guard | Parry |
| Rising Rage Flash (Short) | 3 | 3 | 32 | -17 | Down | Down | HL | HL |
| Rising Rage Flash (Forward) | 4 | 3 | 39 | -23 | Down | Down | HL | HL |
| Rising Rage Flash (Roundhouse) | 5 | 4 | 44 | -26 | Down | Down | HL | HL |
Gauge Increase
| Move | Miss | Blocked | Hit | Parry (Gauge for opponent) |
| Rising Rage Flash (Short) | 3 | 12 | 17 | 4 |
| Rising Rage Flash (Forward) | 3 | 12 | 17 | 4 |
| Rising Rage Flash (Roundhouse) | 3 | 12 | 17 | 4 |
Comments here
EX Moves
| Move | Motion | Gauge Needed | Damage | Blocked Damage | Stun Damage | Super Cancel | Juggle Value | Reset or Juggle |
| Light of Virtue (EX) | Charge B,F+PP | 40 | 120(60+60)(20 life points) | 8(4+4) | 6(3+3) | Yes | 14 (7+7) | Juggle |
Frame Data
| Move | Startup | Hit | Recovery | Blocked Advantage | Hit Advantage | Crouching Hit Advantage | Guard | Parry |
| Light of Virtue (EX) | 7/8* | 1 | 23 | +4 | +5 | +6 | HL | H |
Gauge Increase
| Move | Miss | Blocked | Hit | Parry (Gauge for opponent) |
| Light of Virtue (EX) | - | - | - | 8(4+4) |
- Means High/Low
| Move | Motion | Gauge Needed | Damage | Blocked Damage | Stun Damage | Super Cancel | Juggle Value | Reset or Juggle |
| Light of Virtue (EX) | Charge B,F+KK | 40 | 120(60+60)(20 life points) | 8(4+4) | 6(3+3) | Yes | 14(7+7) | Juggle |
Frame Data
| Move | Startup | Hit | Recovery | Blocked Advantage | Hit Advantage | Crouching Hit Advantage | Guard | Parry |
| Light of Virtue (EX) | 8/7* | 1 | 27 | 0 | +1 | +2 | HL | H |
Gauge Increase
| Move | Miss | Blocked | Hit | Parry (Gauge for opponent) |
| Light of Virtue (EX) | - | - | - | 8(4+4) |
- Means High/Low
| Move | Motion | Gauge Needed | Damage | Blocked Damage | Stun Damage | Super Cancel | Juggle Value | Reset or Juggle |
| Rising Rage Flash (EX) | Charge D,U+KK | 40 | 190(120+70)(32 life points) | 28(24+4) | 14(7+7) | Yes/No | 7/15 | Juggle/Juggle |
Frame Data
| Move | Startup | Hit | Recovery | Blocked Advantage | Hit Advantage | Crouching Hit Advantage | Guard | Parry |
| Rising Rage Flash (EX) | 6 | 5 | 41 | -21 | Down | Down | HLx2 | HLx2 |
Gauge Increase
| Move | Miss | Blocked | Hit | Parry (Gauge for opponent) |
| Rising Rage Flash (EX) | - | - | - | 8(4+4) |
Comments here
| Move | Motion | Gauge Needed | Damage | Blocked Damage | Stun Damage | Super Cancel | Juggle Value | Reset or Juggle |
| Cold Blue Kick (EX) | QCB+KK | 40 | 160(90+70)(27 life points) | 20(11+9) | 12(7+5) | No | 2(1+1) | Juggle |
Frame Data
| Move | Startup | Hit | Recovery | Blocked Advantage | Hit Advantage | Crouching Hit Advantage | Guard | Parry |
| Cold Blue Kick (EX) | 18 | 9 | 10 | -2/+5 Low | Down | Down | HLx2 | Hx2 |
Gauge Increase
| Move | Miss | Blocked | Hit | Parry (Gauge for opponent) |
| Cold Blue Kick (EX) | - | - | - | 8(4+4) |
Comments here
Super Arts
| Super Art | Super Art Name | Super Art Stock | Motion | Damage | Blocked Damage | Stun Damage | Damage/Gauge | Juggle Value | Reset or Juggle |
| I | Light of Justice | 2 bars (104 each bar) | QCF QCF+P | 320*(52 life points) | 56** | 21 | 3,07(x2) | 7(1 per hit) | Juggle |
| * 55x7 Damage is when all hits connect. |
| ** 8x7 Damage is when all hits connect. |
Frame Data
| Startup | Hit | Recovery | Blocked Advantage | Hit Advantage | Crouching Hit Advantage | Guard | Parry |
| 1 | 1x7 | 24 | +3 | +4 | +5 | HLx7 | HLx7 |
Comments here
| Super Art | Super Art Name | Super Art Stock | Motion | Damage | Blocked Damage | Stun Damage | Damage/Gauge | Juggle Value | Reset or Juggle |
| II | Supreme Rising Rage Flash | 2 bars (120 each bar) | QCF QCF+K | 390*(61 life points) | 77** | 0 | 3,25 | 0, 15 on last hit | Juggle |
| * 100+40+40+60+30+30+40+40+40+80 Damage is when all hits connect. |
| ** 13+10+10+8+4+4+6+6+6+10 Damage is when all hits connect. |
Frame Data
| Startup | Hit | Recovery | Blocked Advantage | Hit Advantage | Crouching Hit Advantage | Guard | Parry |
| (1,2,3,20,21,22,43,45,47,49)49 | 1×6+2×3+5 | 53(20) | -80 | Down | Down | HLx10 | HLx10 |
Comments here
| Super Art | Super Art Name | Super Art Stock | Motion | Damage | Blocked Damage | Stun Damage | Damage/Gauge | Juggle Value | Reset or Juggle |
| III | Blue Nocturne | 1 bar (80) | QCF QCF+K | 465*(75 life points) | - | 21 | 5,81 | 1 per hit, 3 on last hit | Reset, Juggle on last hit |
| * 80+60×5+190/140 Damage is when all hits connect. |
Frame Data
| Startup | Hit | Recovery | Blocked Advantage | Hit Advantage | Crouching Hit Advantage | Guard | Parry |
| 1 | 21 | 39(27) | -21 | Down | Down | HLx7 | Hx6 |
Comments here
Combos
Basic Ground Combos
| 1st Move | 2nd Move | 3rd Move | 4th Move | Damage | Stun Damage |
| Crouching LP | Crouching LP | HK Rising Rage Flash | - | 345 (30%) | 27 |
| Crouching LP | Crouching LP | Rising Rage Flash | - | 403 (35%) | 18 |
| Crouching LP | Crouching LP | Light of Justice | - | 380 (33%) | 28 |
| Close standing MK | Supreme Rising Rage Flash | - | - | 380 (33%) | 28 |
| Close standing HP | HK Rising Rage Flash | - | - | 380 (33%) | 28 |
| Close standing HP | Supreme Rising Rage Flash | - | - | 380 (33%) | 28 |
| Close standing HP | Light of Justice | - | - | 380 (33%) | 28 |
Neutral Throw Specific Combos
| 1st Move | 2nd Move | 3rd Move | 4th Move | Damage | Stun Damage |
| Neutral Throw | HK Rising Rage Flash | - | - | 196 (17%) | 15 |
| Neutral Throw | Light of Justice (3 hits only | HK Rising Rage Flash | - | 253 (22%) | 20 |
Those combos are in the Corner
Anti-Air Combos
#1) Anti-air crouching HP, when you recover, juggle with an early HK Rising Rage Flash.
#2) When near a corner, land an anti-Air crouching HP, when you recover, juggle with an early LK Cold Blue Kick, then juggle with a final HK
Rising Rage Flash or a crouching MP canceled into a Supreme Rising Rage Flash.
#3) Land a air to air jumping HP, when you land, juggle with an early HK
Rising Rage Flash.
#4) When near a corner, land an air to air jumping HP, when you recover, juggle with an early LK Cold Blue Kick, then juggle with a final HK
Rising Rage Flash or a crouching MP canceled into a Supreme Rising Rage Flash.
#5) Anti-air crouching MP canceled into a Supreme Rising Rage Flash.
Advanced Combos
#1) Close standing MP linked into a crouching MP canceled into a LK Light of Virtue. Note that this is 1 frame easier to perform on a crouching character.
#2) Against a cornered opponent who's standing, jump in HP,when you land link close standing MK canceled into a HP Light of Virtue, then link crouching LK canceled into a HK Rising Rage Flash, Supreme Rising Rage Flash, or Light of Justice.
The Basics
Remy's Objective
Remy's goal is to force his opponent to jump towards him. Although difficult to implement because of the parry, his focus completely revolves around controlling space with his large array of projectiles and attacks that make it difficult for his opponent to be mobile. By applying the right kind of pressure, your opponent will be pressured into committing risky actions in order to avoid Remy's mid-range offense, like the jump, or other evasive special moves. When properly anticipated, Remy can score big damage off of a poorly timed jump with his wide variety of damaging anti-air options.
Outside of this objective, it's also important to focus on cornering your opponent as soon as possible. Once cornered, Remy's ability to control his opponent's movements is heightened, making it that much easier to apply pressure and bait a jump. In addition to this, many of his anti air options, his neutral throw, and a variety of Light of Virtue based combos, all lead to extra damage when near a corner.
Weaknesses
Remy's low-hitting attacks are severely lacking. Outside of crouching LK, none of his low attacks are safe, nor do they lead to a substantial amount of damage. His only answer to this problem is crouching LK--> Light of Justice, which is safe, but not confirmable. This severely limits his close ranged options to a handful of attacks that are highly vulnerable to standing parries.
Additionally, Remy is heavily reliant on his low EX Light of Virtue to exert a threatening mid-range presence. Without it, his ability to punish whiffed attacks and control the movements of mid-range oriented characters is limited to a handful of lackluster attacks. The result is rarely having access to Remy's much needed Super Arts because of the meter usage. Without a Light of Justice or Supreme Rising Rage Flash stocked, Remy must rely on weak and highly risky tactics in order to score damage at close range.
If the above wasn't enough, Remy also happens to have the lowest stun damage rating in the game. This is a huge disadvantage to shoulder when dealing with characters that are focused on dizzying you, such as Ryu (Denjin Hadouken), Necro (Electric Snake) or Makoto (Abare Tosanami Kudaki).
Offensive Notes
Remy's neutral throw is extremely important to his overall game. Mid-screen this attack sends your enemy flying across the screen, making it very useful for quickly pushing your enemy towards the nearest corner. Remy recovers well before his enemy even hits the ground, enabling you to throw a LP or LK Light of Virtue afterwards that will meet your enemy as they stand up if they perform a Quick recovery. Dash behind the LoV in order to safely approach your enemy. Near corners, Remy's neutral throw can also be juggled after with a HK Rising Rage Flash for additional damage. In comparison to the damage output of most normal throws, the addition of the juggle makes this throw one of the more threatening grappling attacks in 3rd Strike. This is especially helpful considering Remy's overall attack options against the Parry system are so weak.
Moreover, standing MP can be kara-canceled into Remy's throw for a massive range increase. This is done by pressing MP then LP + LK very quickly in succession. Like any kara-throw, this is an invaluable option to Remy because of his weakness towards Parries. Always stand just outside of your enemy's throw range when performing a kara-throw on wake up in order to avoid being thrown yourself.
Remy's most commonly used attack openings are close standing MK and crouching LP x 2. In the case of close standing MK, it's possible to link a Supreme Rising Rage Flash directly after it hits. The second hit of crouching LP x 2 can simply be canceled into a HK Rising Rage Flash or a Supreme Rising Rage Flash. Both options are verifiable (Hit Confirm-able) . Commonly used follow up attack options to go for when these options don't connect consist of either crouching MP--> LK Light of Virtue, walk up kara throw, an immediate universal overhead, or a late walk up close standing MK.
- Personal Action: Stun Damage up.
Defensive Notes
The Parry System makes it extremely risky to always place faith in the recovery-heavy crouching HP. In order to consistently land this attack, your enemy must be willing to either perform a jump attack (Which will either trade or lose to crouching HP), or attempt a Parry much earlier during a jump then normal. This requires you to bolster your defense with several different types of anti-air maneuvers; all of which are designed to attack your jumping enemy at different points during their jump in order to throw off their Parry timing.
Your first option is to attack your enemy very early during their jump. This effectively throws off their Parry timing, forcing them to attempt one earlier during their jump (Leaving them vulnerable to crouching HP). A quick forward jumping MP is your best choice in this situation. Standing MP can also be used in the same manner if you're close enough, although it cannot catch your airborne enemy quite as early as jumping MP can.
Your second option is to give your enemy more than they can effectively parry. For example, far standing LP (Wait a quarter of a second)--> close standing LP--> standing LK, is an extremely worthy Parry deterrent against later Parry attempts. Your enemy has no choice but to parry all 3 hits of this chain, which is very difficult to do with any sort of consistency. In cases where only the first hit is Parried, the second standing LP will always beat any jump attack your enemy attempts to perform after the Parry. The final standing LK will actually juggle your enemy just after the close standing LP connects, resulting in a strange looking 2 hit juggle combo.
Crouching MP canceled into a Supreme Rising Rage Flash is also very effective against late Parry attempts. The damage is terrible, but it's worth going for on occasion when you're close to ending a round.
Both of the above Parry deterrents can be beaten if your enemy simply decides to perform a jump attack. Knowing this, anticipate your enemy's attempts to counter these options and beat their jump attack with crouching HP.
Super Art Selection
The Supreme Rising Rage Flash is generally the preferred super of choice. It's possible to link into this attack off of the majority Remy's strongest attack openings, including crouching LP x 2, close standing MK, close standing MP, and close standing HK. It even has a long super meter, allowing Remy to store massive amounts of EX moves for opportune moments. It's also worth noting that the Supreme Rising Rage Flash is a 2 frame Super Art, enabling you to juggle with it if canceled into from ANY normal attack that hits a jumping enemy. This also allows you to punish a hand full of close-range attacks that are normally safe when blocked, like Ken's crouching MK or close standing HP, or the third hit of Yun's standing LP-->standing LK-->standing MP Target Combo.
Despite the SRRF's dominance, Remy's Light of Justice has some use in specific match ups against characters who rely heavily on the Parry in wake up situations. Having a safe, high damage option off of crouching LK (crouching LK--> LoJ) gives you your only real deterrent against random parry attempts outside of throws. It's also very effective as an anti-air option against close-range oriented characters with low jump arcs, like Dudley and Hugo. Specifically, a LP Light of Virtue canceled into the Light of Justice is a solid anti-air option.
Advanced Strategy
Jump Straight Up HK
As mentioned, the risk versus reward on Remy's close range options is lacking when he isn't sitting on super meter. To compensate for this, you may have no choice but to commit to risky actions in order to open up the window to score big damage in wake up situations.
One of these such options is utilizing Remy's jumping HK as a means to punish throw whiffs. In wake up situations, anticipate when your opponent may attempt to tech a throw, then jump straight up just before they initiate the command. If timed correctly, your opponent's throw will whiff directly under you. Since jumping HK has such a steep downward angle, you can initiate the attack very early in the air to punish the throw whiff. After it connects, it's still possible to link a crouching LK canceled into a Raging Rage Flash for sizable damage.
It's possible to use jump straight up HK in a variety of attack patterns to punish tech throw whiffs. For example:
Options after blocked crouching LK
- Kara throw directly where you're standing.
- Jump straight up HK
Options after blocked close standing MP
- Walk up a step, kara throw.
- Walk up a step, jump straight up HK
- Early crouching MP canceled into a LK Light of Virtue
Unfortunately, there are several ways for many characters to avoid this tactic altogether. Chun-li for instance can simply use crouching LP to avoid throws instead of teching, which is far too fast to be punished by jumping HK if it whiffs.
In other cases, players may use a throw teching technique that involves pressing LP + LK while crouching. Although throws cannot be initiated while crouching, your opponent can still tech throws using this command. That bieng the case, if you don't go for a throw, your opponent's character will simply do a stand alone crouching LP, avoiding the recovery heavy throw whiff.
In either of these cases, it's advised to option select crouching MP with a low parry if you anticipate these options (Let the joystick return to neutral, tap down, then press MP). Doing so will scare your opponent into teching throws while standing, allowing you to utilize jump straight up HK once again.
More on Jump Straight Up HK
It's possible to tap forward just as you leave the ground for the jump to cover reversal attempts with a parry. Although this may seem impossible if you want to keep a charge for the crouching LK-->RRF follow up, simply tapping down for a second before you jump will allow you to partition and keep a charge for the follow up combo (Press down for a slightly longer period of time then normal to make sure you don't get a super jump). This is, however, only applicable after crouching LK or a standalone jump.
Additionally, against characters that utilize recovery heavy command throws, such as Makoto, Hugo, or Alex, jumping HK can be done slightly later then normal to punish the throw whiff. Because of the extended hit stun from the later jump attack, it's possible to go for extended combos when near a corner.
Example Combo: Jump straight up, charge down-back, press HK when you start to fall, land, let the joystick return to the neutral position, link close standing MK canceled into a HP LoV (use the motion db, f, db + HP, then continue to hold db), then link crouching LK canceled into a HK Rising Rage Flash once you recover from the projectile.
Although risky, this combo leads to massive damage and a large amount of super meter gain.
Meaty LP Light of Virtue
In wake up situations, Remy's LP Light of Virtue can be thrown on top of your opponent to meet them as they initiate a quick recovery. Although the LP LoV whiffs on most crouching characters, the quick recovery's final recovery frame is much taller then normal, allowing the LoV to hit. Strategically, not only does Remy have frame advantage after an LoV that connects this late, but the projectile itself acts as an effective reversal deterrent.
The better situations to set up a meaty LoV are after any Rising Rage Flash that connects near a corner. In regards to commonly used set ups, land a neutral throw near a corner and juggle with a HK Rising Rage Flash afterwards. Once you recover from the Rising Rage Flash, whiff a crouching MP, then throw a LP LoV when you recover. Assuming your opponent does a quick recovery, the LoV will meet your opponent just as they stand up. Remy recovers well before the LoV is blocked, leaving you with a heavy amount of frame advantage to work with for staging an attack.
Basic options after the blocked LoV
- Walk up kara throw
- Walk up close standing MK. If it hits, link into a Supreme Rising Rage Flash.
- If your opponent parries the LoV, immediately do crouching MP canceled into a LK LoV to beat anything the try afterwards that doesn't have invulnerability.
Moreover, it's possible to increase the options available to you after the blocked LoV by initiating the projectile with this command: charge db, f, db, + LP. This throws the LoV while gathering a small portion of the charge needed for a Rising Rage Flash, allowing you to have the attack available for specific tactics and combos. For example:
After your opponent blocks a meaty LoV
- Walk up, press down, chain crouching LP x 2. If Crouching LP x 2 hits, press up + HK just as the second LP connects to cancel it into a HK Rising Rage Flash.
- After you recover from the LoV, let your joystick return to the neutral position. Initiate a Universal Overhead, then immediately start to charge down. If the overhead connects, immediately press up + LK when you recover to link a LK Rising Rage Flash afterwards.
LoV Machinegun
Using charge partitioning, it's possible to loop high and low Light of Virtues back to back without any gaps between each projectile. Although 3rd Strike's projectile rules generally only allow you to have 1 of the same projectile on screen at a time, Remy's High and Low Light of Virtue are considered to be two different projectiles. This simply means that you cannot throw only one type of LoV - you must alternate between Low and High projectiles in order for the technique to work.
Command to initiate the LoV Machinegun:
- Charge back and obtain a full charge for a LoV. Once you have a charge, tap forward, then immediately press back then Punch. Continue to hold back after the projectile's release.
- Once the first projectile travels about a quarter of its maximum distance, tap forward, then immediately press back + kick to throw a second LoV.
- Using the same command (back, forward, back + punch), immediately throw another high LoV as soon as you after you recover from the last. Continue to alternate between high and low LoVs.
Using the LoV Machinegun Effectively
The LoV Machinegun must be initiated at specific distances in order to be effective. The ideal distance is against a cornered opponent at mid-range, just outside of your opponent's maximum attack distance. Moreover, it's best to utilize the trap when your opponent is the most eager to be mobile. This causes them to run into projectiles trying to parry or jump when they should simply be blocking.
However, this technique is not nearly as difficult to counter as some tend to believe. Your opponent needs only to crouch under the high LoV then jump forward to score a free combo on you.
In order for this trap to be air-tight and safe to the parry, LK LoVs must be followed with high EX LoVs. If your opponent attempts to parry the low LoV and jump forward, the EX High LoV will hit them as they leave the ground. If they instead parry the EX High LoV and then attempt to jump forward, react to the parry and simply don't throw the following kick LoV. When you recover, counter their jump accordingly.
Even this technique, however, has a glaring weakness. There's nothing to stop the opposing player from simply blocking your volley of projectiles. They can simply wait you out, watching as you relentlessly blow super meter on something that doesn't lead to guaranteed damage.
For this technique to be effective, you must think of it as a series of pokes. Your opponent can jump during any of the gaps, so anticipate their jump attempts then stop the trap accordingly to counter them. In cases where your opponent is simply blocking, toss in the occasional dash up throw after a blocked or parried LoV to keep your opponent from thinking it's safe to sit. Replace the dash up throw with a EX High LoV when you know your opponent is looking to counter it. The idea is to make them willing to jump or attack, which is exactly the kind of mistakes Remy feeds off of.
LoV Machinegun out of a Dash.
Since the LoV Machinegun trap is only effective in certain positions, it's useful to be able to move around a bit before initiating it. That being the case, it's possible to perform the LoV trap after coming out of a dash. Keep in mind that the example below illustrates how to do this after dashing behind a LK or LP LoV, which is the safest way to move around.
Command to initiate dashing LoV Machinegun:
- Charge back and obtain a full charge for a LoV. Once you have a charge, tap forward, then immediately press back then LK. Continue to hold back during the projectile's release.
- Once you recover from the LoV, dash forward behind it. Immediately start to charge back again once you initiate the dash.
- When you recover from the dash, tap forward, then press back + LP to come out of the dash with a high LoV. Using the same motion, throw alternating LoVs as soon as you recover from the projectile.
Light of Virtue --> Rising Rage Flash
Using the right command, it's possible to immediately initiate a Rising Rage Flash directly after recovering from a Light of Virtue.
Command to store a RRF behind a LoV
- Charge down-back and obtain 90% of a charge for a LoV.
- Tap forward, then immediately press down-back again. Press any punch button a quarter of a second after hitting down-back to throw the LoV.
- When you recover from the projectile, immediately press up + HK to initiate the Rising Rage Flash.
