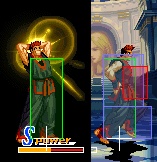
No edit summary |
|||
| (4 intermediate revisions by 3 users not shown) | |||
| Line 37: | Line 37: | ||
{{MOTW Legend}} | {{MOTW Legend}} | ||
Notes: | |||
* Special/Super moves with <span style="color:#ff0000;">"Guard" data in red text</span> are impossible to just defend at 0-pixel health bar. | |||
* For P-Power Raimei Dan 236(x2)D, the last hit, for every level, is impossible to just defend at 0-pixel health bar. | |||
| Line 56: | Line 64: | ||
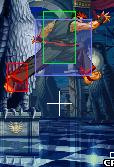
===Close Standing Normals=== | ===Close Standing Normals=== | ||
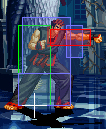
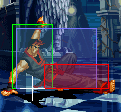
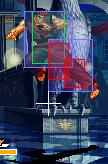
===== <span class="invisible-header"></span> ===== | ===== <span class="invisible-header">Close 5A</span> ===== | ||
<font style="visibility:hidden" size="0"></font> | <font style="visibility:hidden" size="0"></font> | ||
{{MoveData | {{MoveData | ||
|image=DongCloseA.jpg | |image=DongCloseA.jpg | ||
|name= | |name=c.5A | ||
|subtitle= | |subtitle= | ||
|caption= | |caption= | ||
| Line 73: | Line 81: | ||
|Hit Adv=+6 | |Hit Adv=+6 | ||
|Block Adv=+6 | |Block Adv=+6 | ||
|Feint Cancel= | |Feint Cancel=◯ | ||
|Cancel on Hit= | |Cancel on Hit=◯ / ∞ | ||
|Cancel on Block= | |Cancel on Block=◯ / ∞ | ||
|Guard Crush Value=4 | |Guard Crush Value=4 | ||
|description=Standing jab. | |description=Standing jab. | ||
| Line 83: | Line 91: | ||
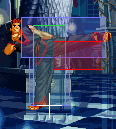
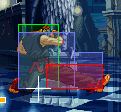
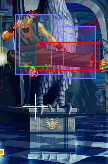
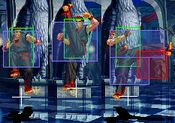
===== <span class="invisible-header"></span> ===== | ===== <span class="invisible-header">Close 5B</span> ===== | ||
<font style="visibility:hidden" size="0"></font> | <font style="visibility:hidden" size="0"></font> | ||
{{MoveData | {{MoveData | ||
|image=DongCloseB.jpg | |image=DongCloseB.jpg | ||
|name= | |name=c.5B | ||
|subtitle= | |subtitle= | ||
|caption= | |caption= | ||
| Line 100: | Line 108: | ||
|Hit Adv=+4 | |Hit Adv=+4 | ||
|Block Adv=+4 | |Block Adv=+4 | ||
|Feint Cancel= | |Feint Cancel=◯ | ||
|Cancel on Hit= | |Cancel on Hit=◯ | ||
|Cancel on Block= | |Cancel on Block=◯ | ||
|Guard Crush Value=4 | |Guard Crush Value=4 | ||
|description= | |description= | ||
| Line 110: | Line 118: | ||
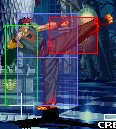
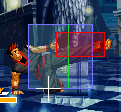
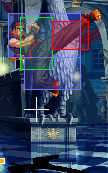
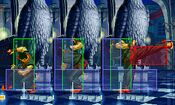
===== <span class="invisible-header"></span> ===== | ===== <span class="invisible-header">Close 5C</span> ===== | ||
<font style="visibility:hidden" size="0"></font> | <font style="visibility:hidden" size="0"></font> | ||
{{MoveData | {{MoveData | ||
|image=DongCloseC.jpg | |image=DongCloseC.jpg | ||
|name= | |name=c.5C | ||
|subtitle= | |subtitle= | ||
|caption= | |caption= | ||
| Line 127: | Line 135: | ||
|Hit Adv=-5 | |Hit Adv=-5 | ||
|Block Adv=-5 | |Block Adv=-5 | ||
|Feint Cancel= | |Feint Cancel=※ | ||
|Cancel on Hit= | |Cancel on Hit=※ | ||
|Cancel on Block= | |Cancel on Block=※ | ||
|Guard Crush Value=3, 3 | |Guard Crush Value=3, 3 | ||
|description=It can anti-air jump startups when trying to throw, is double hit and you can feint cancel it to get a combo. | |description=It can anti-air jump startups when trying to throw, is double hit and you can feint cancel it to get a combo. | ||
| Line 137: | Line 145: | ||
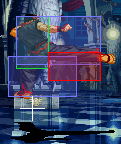
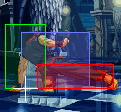
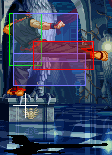
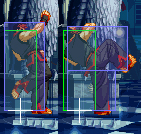
===== <span class="invisible-header"></span> ===== | ===== <span class="invisible-header">Close 5D</span> ===== | ||
<font style="visibility:hidden" size="0"></font> | <font style="visibility:hidden" size="0"></font> | ||
{{MoveData | {{MoveData | ||
|image=DongCloseD.jpg | |image=DongCloseD.jpg | ||
|name= | |name=c.5D | ||
|subtitle= | |subtitle= | ||
|caption= | |caption= | ||
| Line 154: | Line 162: | ||
|Hit Adv=-6 | |Hit Adv=-6 | ||
|Block Adv=-6 | |Block Adv=-6 | ||
|Feint Cancel= | |Feint Cancel=※ | ||
|Cancel on Hit= | |Cancel on Hit=※ | ||
|Cancel on Block= | |Cancel on Block=※ | ||
|Guard Crush Value=3, 3 | |Guard Crush Value=3, 3 | ||
|description= | |description= | ||
| Line 166: | Line 174: | ||
===Far Standing Normals=== | ===Far Standing Normals=== | ||
===== <span class="invisible-header"></span> ===== | ===== <span class="invisible-header">Far 5A</span> ===== | ||
<font style="visibility:hidden" size="0"></font> | <font style="visibility:hidden" size="0"></font> | ||
{{MoveData | {{MoveData | ||
|image=DongStandA.jpg | |image=DongStandA.jpg | ||
|name= | |name=f.5A | ||
|subtitle= | |subtitle= | ||
|caption= | |caption= | ||
| Line 183: | Line 191: | ||
|Hit Adv=+6 | |Hit Adv=+6 | ||
|Block Adv=+6 | |Block Adv=+6 | ||
|Feint Cancel= | |Feint Cancel=◯ | ||
|Cancel on Hit= | |Cancel on Hit=◯ / ∞ | ||
|Cancel on Block= | |Cancel on Block=◯ / ∞ | ||
|Guard Crush Value=4 | |Guard Crush Value=4 | ||
|description= | |description= | ||
| Line 193: | Line 201: | ||
===== <span class="invisible-header"></span> ===== | ===== <span class="invisible-header">Far 5B</span> ===== | ||
<font style="visibility:hidden" size="0"></font> | <font style="visibility:hidden" size="0"></font> | ||
{{MoveData | {{MoveData | ||
|image=DongStandB.jpg | |image=DongStandB.jpg | ||
|name= | |name=f.5B | ||
|subtitle= | |subtitle= | ||
|caption= | |caption= | ||
| Line 210: | Line 218: | ||
|Hit Adv=0 | |Hit Adv=0 | ||
|Block Adv=0 | |Block Adv=0 | ||
|Feint Cancel= | |Feint Cancel=◯ | ||
|Cancel on Hit= | |Cancel on Hit=◯ | ||
|Cancel on Block= | |Cancel on Block=◯ | ||
|Guard Crush Value=4 | |Guard Crush Value=4 | ||
|description= | |description= | ||
| Line 220: | Line 228: | ||
===== <span class="invisible-header"></span> ===== | ===== <span class="invisible-header">Far 5C</span> ===== | ||
<font style="visibility:hidden" size="0"></font> | <font style="visibility:hidden" size="0"></font> | ||
{{MoveData | {{MoveData | ||
|image=DongStandC.jpg | |image=DongStandC.jpg | ||
|name= | |name=f.5C | ||
|subtitle= | |subtitle= | ||
|caption= | |caption= | ||
| Line 237: | Line 245: | ||
|Hit Adv=-10 | |Hit Adv=-10 | ||
|Block Adv=-10 | |Block Adv=-10 | ||
|Feint Cancel= | |Feint Cancel=△ | ||
|Cancel on Hit= | |Cancel on Hit=X | ||
|Cancel on Block= | |Cancel on Block=◯ | ||
|Guard Crush Value=5 | |Guard Crush Value=5 | ||
|description= | |description= | ||
| Line 247: | Line 255: | ||
===== <span class="invisible-header"></span> ===== | ===== <span class="invisible-header">Far 5D</span> ===== | ||
<font style="visibility:hidden" size="0"></font> | <font style="visibility:hidden" size="0"></font> | ||
{{MoveData | {{MoveData | ||
|image=DongStandD.jpg | |image=DongStandD.jpg | ||
|name= | |name=f.5D | ||
|subtitle= | |subtitle= | ||
|caption= | |caption= | ||
| Line 264: | Line 272: | ||
|Hit Adv=-1 | |Hit Adv=-1 | ||
|Block Adv=-1 | |Block Adv=-1 | ||
|Feint Cancel= | |Feint Cancel=X | ||
|Cancel on Hit= | |Cancel on Hit=X | ||
|Cancel on Block= | |Cancel on Block=X | ||
|Guard Crush Value=5 | |Guard Crush Value=5 | ||
|description= | |description= | ||
| Line 278: | Line 286: | ||
===Crouching Normals=== | ===Crouching Normals=== | ||
===== <span class="invisible-header"></span> ===== | ===== <span class="invisible-header">2A</span> ===== | ||
<font style="visibility:hidden" size="0"></font> | <font style="visibility:hidden" size="0"></font> | ||
{{MoveData | {{MoveData | ||
|image=DongDownA.jpg | |image=DongDownA.jpg | ||
|name= | |name=2A | ||
|subtitle= | |subtitle= | ||
|caption= | |caption= | ||
| Line 295: | Line 303: | ||
|Hit Adv=+2 | |Hit Adv=+2 | ||
|Block Adv=+2 | |Block Adv=+2 | ||
|Feint Cancel= | |Feint Cancel=X | ||
|Cancel on Hit= | |Cancel on Hit=X / ∞ | ||
|Cancel on Block= | |Cancel on Block=X / ∞ | ||
|Guard Crush Value=4 | |Guard Crush Value=4 | ||
|description= | |description= | ||
| Line 305: | Line 313: | ||
===== <span class="invisible-header"></span> ===== | ===== <span class="invisible-header">2B</span> ===== | ||
<font style="visibility:hidden" size="0"></font> | <font style="visibility:hidden" size="0"></font> | ||
{{MoveData | {{MoveData | ||
|image=DongDownB.jpg | |image=DongDownB.jpg | ||
|name= | |name=2B | ||
|subtitle= | |subtitle= | ||
|caption= | |caption= | ||
| Line 322: | Line 330: | ||
|Hit Adv=+6 | |Hit Adv=+6 | ||
|Block Adv=+6 | |Block Adv=+6 | ||
|Feint Cancel= | |Feint Cancel=◯ | ||
|Cancel on Hit= | |Cancel on Hit=◯ / ∞ | ||
|Cancel on Block= | |Cancel on Block=◯ / ∞ | ||
|Guard Crush Value=4 | |Guard Crush Value=4 | ||
|description= | |description= | ||
| Line 332: | Line 340: | ||
===== <span class="invisible-header"></span> ===== | ===== <span class="invisible-header">2C</span> ===== | ||
<font style="visibility:hidden" size="0"></font> | <font style="visibility:hidden" size="0"></font> | ||
{{MoveData | {{MoveData | ||
|image=DongDownC.jpg | |image=DongDownC.jpg | ||
|name= | |name=2C | ||
|subtitle= | |subtitle= | ||
|caption= | |caption= | ||
| Line 349: | Line 357: | ||
|Hit Adv=+4 | |Hit Adv=+4 | ||
|Block Adv=+4 | |Block Adv=+4 | ||
|Feint Cancel= | |Feint Cancel=◯ | ||
|Cancel on Hit= | |Cancel on Hit=◯ | ||
|Cancel on Block= | |Cancel on Block=◯ | ||
|Guard Crush Value=5 | |Guard Crush Value=5 | ||
|description= | |description= | ||
| Line 359: | Line 367: | ||
===== <span class="invisible-header"></span> ===== | ===== <span class="invisible-header">2D</span> ===== | ||
<font style="visibility:hidden" size="0"></font> | <font style="visibility:hidden" size="0"></font> | ||
{{MoveData | {{MoveData | ||
|image=DongDownD.jpg | |image=DongDownD.jpg | ||
|name= | |name=2D | ||
|subtitle= | |subtitle= | ||
|caption= | |caption= | ||
| Line 376: | Line 384: | ||
|Hit Adv=KD | |Hit Adv=KD | ||
|Block Adv=-8 | |Block Adv=-8 | ||
|Feint Cancel= | |Feint Cancel=X | ||
|Cancel on Hit= | |Cancel on Hit=X | ||
|Cancel on Block= | |Cancel on Block=X | ||
|Guard Crush Value=5 | |Guard Crush Value=5 | ||
|description=One of the best sweep in the game. Can be punished with supers or when not spaced properly. | |description=One of the best sweep in the game. Can be punished with supers or when not spaced properly. | ||
| Line 388: | Line 396: | ||
===Jumping Normals=== | ===Jumping Normals=== | ||
===== <span class="invisible-header"></span> ===== | ===== <span class="invisible-header">jA</span> ===== | ||
<font style="visibility:hidden" size="0"></font> | <font style="visibility:hidden" size="0"></font> | ||
{{MoveData | {{MoveData | ||
|image=DongJumpA.jpg | |image=DongJumpA.jpg | ||
|name= | |name=j.A | ||
|subtitle= | |subtitle= | ||
|caption= | |caption= | ||
| Line 406: | Line 414: | ||
|Block Adv= | |Block Adv= | ||
|Feint Cancel= | |Feint Cancel= | ||
|Cancel on Hit= | |Cancel on Hit=◯ | ||
|Cancel on Block= | |Cancel on Block=◯ | ||
|Guard Crush Value=4 | |Guard Crush Value=4 | ||
|description= Can beat out upper-body evasion attacks, and can crossup | |description= Can beat out upper-body evasion attacks, and can crossup | ||
| Line 413: | Line 421: | ||
}} | }} | ||
===== <span class="invisible-header"></span> ===== | ===== <span class="invisible-header">jB</span> ===== | ||
<font style="visibility:hidden" size="0"></font> | <font style="visibility:hidden" size="0"></font> | ||
{{MoveData | {{MoveData | ||
|image=DongJumpB.jpg | |image=DongJumpB.jpg | ||
|name= | |name=j.B | ||
|subtitle= | |subtitle= | ||
|caption= | |caption= | ||
| Line 431: | Line 439: | ||
|Block Adv= | |Block Adv= | ||
|Feint Cancel= | |Feint Cancel= | ||
|Cancel on Hit= | |Cancel on Hit=◯ | ||
|Cancel on Block= | |Cancel on Block=◯ | ||
|Guard Crush Value=4 | |Guard Crush Value=4 | ||
|description= | |description= | ||
| Line 440: | Line 448: | ||
===== <span class="invisible-header"></span> ===== | ===== <span class="invisible-header">jC</span> ===== | ||
<font style="visibility:hidden" size="0"></font> | <font style="visibility:hidden" size="0"></font> | ||
{{MoveData | {{MoveData | ||
|image=DongJumpC.jpg | |image=DongJumpC.jpg | ||
|name= | |name=j.C | ||
|subtitle= | |subtitle= | ||
|caption= | |caption= | ||
| Line 458: | Line 466: | ||
|Block Adv= | |Block Adv= | ||
|Feint Cancel= | |Feint Cancel= | ||
|Cancel on Hit= | |Cancel on Hit=◯ | ||
|Cancel on Block= | |Cancel on Block=◯ | ||
|Guard Crush Value=5 | |Guard Crush Value=5 | ||
|description= | |description= | ||
| Line 467: | Line 475: | ||
===== <span class="invisible-header"></span> ===== | ===== <span class="invisible-header">jD</span> ===== | ||
<font style="visibility:hidden" size="0"></font> | <font style="visibility:hidden" size="0"></font> | ||
{{MoveData | {{MoveData | ||
|image=DongJumpD.jpg | |image=DongJumpD.jpg | ||
|name= | |name=j.D | ||
|subtitle= | |subtitle= | ||
|caption= | |caption= | ||
| Line 485: | Line 493: | ||
|Block Adv= | |Block Adv= | ||
|Feint Cancel= | |Feint Cancel= | ||
|Cancel on Hit= | |Cancel on Hit=◯ | ||
|Cancel on Block= | |Cancel on Block=◯ | ||
|Guard Crush Value=5 | |Guard Crush Value=5 | ||
|description= | |description= | ||
| Line 496: | Line 504: | ||
===Command Normals=== | ===Command Normals=== | ||
===== <span class="invisible-header"></span> ===== | ===== <span class="invisible-header">j4C</span> ===== | ||
<font style="visibility:hidden" size="0"></font> | <font style="visibility:hidden" size="0"></font> | ||
{{MoveData | {{MoveData | ||
|image=DongBackC.jpg | |image=DongBackC.jpg | ||
|name=Ushiro-geri (Back Kick) | |name=Ushiro-geri (Back Kick) | ||
|input= | |input=j.4C | ||
|subtitle= | |subtitle= | ||
|caption= | |caption= | ||
| Line 515: | Line 523: | ||
|Block Adv= | |Block Adv= | ||
|Feint Cancel= | |Feint Cancel= | ||
|Cancel on Hit= | |Cancel on Hit=◯ | ||
|Cancel on Block= | |Cancel on Block=◯ | ||
|Guard Crush Value=9 | |Guard Crush Value=9 | ||
|description= Can beat out upper-body evasion attacks. | |description= Can beat out upper-body evasion attacks. | ||
| Line 526: | Line 534: | ||
===Universal Moves=== | ===Universal Moves=== | ||
===== <span class="invisible-header"></span> ===== | ===== <span class="invisible-header">Lower-body Evasion Attack (5AB)</span> ===== | ||
<font style="visibility:hidden" size="0"></font> | <font style="visibility:hidden" size="0"></font> | ||
{{MoveData | {{MoveData | ||
|image=DongAB.jpg | |image=DongAB.jpg | ||
|name= | |name=5A+B | ||
|subtitle=Lower-body evasion attack | |subtitle=Lower-body evasion attack | ||
|caption= | |caption= | ||
| Line 543: | Line 551: | ||
|Hit Adv=-1 | |Hit Adv=-1 | ||
|Block Adv=+5 | |Block Adv=+5 | ||
|Feint Cancel= | |Feint Cancel=X | ||
|Cancel on Hit= | |Cancel on Hit=X | ||
|Cancel on Block= | |Cancel on Block=X | ||
|Guard Crush Value=6 | |Guard Crush Value=6 | ||
|description= | |description= | ||
| Line 555: | Line 563: | ||
===== <span class="invisible-header"></span> ===== | ===== <span class="invisible-header">Upper-body Evasion Attack (2AB)</span> ===== | ||
<font style="visibility:hidden" size="0"></font> | <font style="visibility:hidden" size="0"></font> | ||
{{MoveData | {{MoveData | ||
|image=DongDwnAB.jpg | |image=DongDwnAB.jpg | ||
|name= | |name=2A+B | ||
|subtitle=Upper-body evasion attack | |subtitle=Upper-body evasion attack | ||
|caption= | |caption= | ||
| Line 572: | Line 580: | ||
|Hit Adv=-2 | |Hit Adv=-2 | ||
|Block Adv=+4 | |Block Adv=+4 | ||
|Feint Cancel= | |Feint Cancel=▽ | ||
|Cancel on Hit= | |Cancel on Hit=◯ | ||
|Cancel on Block= | |Cancel on Block=X | ||
|Guard Crush Value=6 | |Guard Crush Value=6 | ||
|description=1~5F upper-body invincibility. | |description=1~5F upper-body invincibility. | ||
| Line 582: | Line 590: | ||
===== <span class="invisible-header"></span> ===== | ===== <span class="invisible-header">T.O.P. Attack (CD)</span> ===== | ||
<font style="visibility:hidden" size="0"></font> | <font style="visibility:hidden" size="0"></font> | ||
{{MoveData | {{MoveData | ||
|image=DongTOP.jpg | |image=DongTOP.jpg | ||
|name=Kaiten Dong Hwan (T.O.P. Attack) | |name=Kaiten Dong Hwan (T.O.P. Attack) | ||
|input= | |input=C+D (T.O.P. Only) | ||
|subtitle=Rotating Don Juan | |subtitle=Rotating Don Juan | ||
|caption= | |caption= | ||
| Line 607: | Line 615: | ||
}} | }} | ||
}} | }} | ||
===Throws=== | ===Throws=== | ||
===== <span class="invisible-header"></span> ===== | ===== <span class="invisible-header">Ground Throw</span> ===== | ||
<font style="visibility:hidden" size="0"></font> | <font style="visibility:hidden" size="0"></font> | ||
{{MoveData | {{MoveData | ||
|image=DongThrow.jpg | |image=DongThrow.jpg | ||
|name=Tai Otoshi | |name=Tai Otoshi | ||
|input='''Close''' | |input='''Close''' 4/6C | ||
|subtitle=Body Throw | |subtitle=Body Throw | ||
|caption= | |caption= | ||
| Line 640: | Line 646: | ||
===== <span class="invisible-header"></span> ===== | ===== <span class="invisible-header">Air Throw</span> ===== | ||
<font style="visibility:hidden" size="0"></font> | <font style="visibility:hidden" size="0"></font> | ||
{{MoveData | {{MoveData | ||
|image= | |image= | ||
|name=Tai Hineri | |name=Tai Hineri | ||
|input='''Air Close''' | |input='''Air Close''' 2C | ||
|subtitle=Body Twisting Throw | |subtitle=Body Twisting Throw | ||
|caption= | |caption= | ||
| Line 670: | Line 676: | ||
===Feints=== | ===Feints=== | ||
===== <span class="invisible-header"></span> ===== | ===== <span class="invisible-header">Forward Feint (6AC)</span> ===== | ||
<font style="visibility:hidden" size="0"></font> | <font style="visibility:hidden" size="0"></font> | ||
{{MoveData | {{MoveData | ||
|image=DongFwdFeint.jpg | |image=DongFwdFeint.jpg | ||
|name= | |name=6A+C | ||
|subtitle=Forward Feint | |subtitle=Forward Feint | ||
|caption= | |caption= | ||
| Line 697: | Line 703: | ||
< | ===== <span class="invisible-header">Down Feint (2AC)</span> ===== | ||
{{MoveData | {{MoveData | ||
|image=DongDwnFeint.jpg | |image=DongDwnFeint.jpg | ||
|name= | |name=2A+C | ||
|subtitle=Down Feint | |subtitle=Down Feint | ||
|caption= | |caption= | ||
| Line 725: | Line 731: | ||
===Special Moves=== | ===Special Moves=== | ||
===== <span class="invisible-header"></span> ===== | ===== <span class="invisible-header">Raimei Zan (214K)</span> ===== | ||
<font style="visibility:hidden" size="0"></font> | <font style="visibility:hidden" size="0"></font> | ||
{{MoveData | {{MoveData | ||
|image=Dong214B.jpg | |image=Dong214B.jpg | ||
|name=Raimei Zan | |name=Raimei Zan | ||
|input= | |input= 214B/D | ||
|subtitle= | |subtitle= | ||
|caption= | |caption= | ||
|data= | |data= | ||
First hit whiffs on crouching opponents | First hit whiffs on crouching opponents. <br><br> | ||
{{AttackData-Garou | {{AttackData-Garou | ||
|version= | |version=B | ||
|Damage=10, 10 | |Damage=10, 10 | ||
|Guard=Overhead | |Guard=<span style="color:#ff0000;">Overhead</span> | ||
|Startup=19 | |Startup=19 | ||
|Active= | |Active= | ||
| Line 754: | Line 758: | ||
}} | }} | ||
{{AttackData-Garou | {{AttackData-Garou | ||
|version= | |version=D | ||
|Damage=12, 12 | |Damage=12, 12 | ||
|Guard=Overhead | |Guard=<span style="color:#ff0000;">Overhead</span> | ||
|Startup=25 | |Startup=25 | ||
|Active= | |Active= | ||
| Line 773: | Line 777: | ||
===== <span class="invisible-header"></span> ===== | ===== <span class="invisible-header">Hishou Kyaku (j2K)</span> ===== | ||
<font style="visibility:hidden" size="0"></font> | <font style="visibility:hidden" size="0"></font> | ||
{{MoveData | {{MoveData | ||
|image=DongDwnBandD.jpg | |image=DongDwnBandD.jpg | ||
|name=Hishou Kyaku | |name=Hishou Kyaku | ||
|input= | |input=j.2B/D | ||
|subtitle= | |subtitle= | ||
|caption= | |caption= | ||
|data= | |data= | ||
Can beat out upper-body evasion attacks | Can beat out upper-body evasion attacks. <br><br> | ||
{{AttackData-Garou | {{AttackData-Garou | ||
|version= | |version=B | ||
|Damage=10, 5×3 | |Damage=10, 5×3 | ||
|Guard=Mid | |Guard=<span style="color:#ff0000;">Mid</span> | ||
|Startup=7 | |Startup=7 | ||
|Active= | |Active= | ||
| Line 802: | Line 804: | ||
}} | }} | ||
{{AttackData-Garou | {{AttackData-Garou | ||
|version= | |version=D | ||
|Damage=10, 5×3 | |Damage=10, 5×3 | ||
|Guard=Mid | |Guard=<span style="color:#ff0000;">Mid</span> | ||
|Startup=9 | |Startup=9 | ||
|Active= | |Active= | ||
| Line 821: | Line 823: | ||
===== <span class="invisible-header"></span> ===== | ===== <span class="invisible-header">Shiden Kyaku (236K)</span> ===== | ||
<font style="visibility:hidden" size="0"></font> | <font style="visibility:hidden" size="0"></font> | ||
{{MoveData | {{MoveData | ||
|image=Dong236B.jpg | |image=Dong236B.jpg | ||
|name=Shiden Kyaku | |name=Shiden Kyaku | ||
|input= | |input=236B/D | ||
|subtitle= | |subtitle= | ||
|caption= | |caption= | ||
|data= | |data= | ||
{{AttackData-Garou | {{AttackData-Garou | ||
|version= | |version=B | ||
|Damage=10 | |Damage=10 | ||
|Guard=Low | |Guard=Low | ||
| Line 847: | Line 849: | ||
}} | }} | ||
{{AttackData-Garou | {{AttackData-Garou | ||
|version= | |version=D | ||
|Damage=12 | |Damage=12 | ||
|Guard=Low | |Guard=Low | ||
| Line 866: | Line 868: | ||
===== <span class="invisible-header"></span> ===== | ===== <span class="invisible-header">Ashi Binta (63214C)</span> ===== | ||
<font style="visibility:hidden" size="0"></font> | <font style="visibility:hidden" size="0"></font> | ||
{{MoveData | {{MoveData | ||
|image=Dong63214C.jpg | |image=Dong63214C.jpg | ||
|name=Ashi Binta | |name=Ashi Binta | ||
|input= | |input=63214C | ||
|subtitle= | |subtitle= | ||
|caption= | |caption= | ||
|data= | |data= | ||
{{AttackData-Garou | {{AttackData-Garou | ||
|version= | |version=C | ||
|Damage=5×6, 8 | |Damage=5×6, 8 | ||
|Guard=Mid | |Guard=Mid | ||
| Line 895: | Line 897: | ||
===== <span class="invisible-header"></span> ===== | ===== <span class="invisible-header">Kuu Sa Jin (623P)</span> ===== | ||
<font style="visibility:hidden" size="0"></font> | <font style="visibility:hidden" size="0"></font> | ||
{{MoveData | {{MoveData | ||
|image=DongDPAandC.jpg | |image=DongDPAandC.jpg | ||
|name=Kuu Sa Jin | |name=Kuu Sa Jin | ||
|input= | |input= 623A/C (Break OK) | ||
|subtitle= | |subtitle= | ||
|caption= | |caption= | ||
|data= | |data= | ||
{{AttackData-Garou | {{AttackData-Garou | ||
|version= | |version=A | ||
|Damage=5, 6×3 | |Damage=5, 6×3 | ||
|Guard=Mid | |Guard=<span style="color:#ff0000;">Mid</span> | ||
|Startup=4 | |Startup=4 | ||
|Active= | |Active= | ||
| Line 921: | Line 920: | ||
|Cancel on Block= | |Cancel on Block= | ||
|Guard Crush Value=3, 2×3 | |Guard Crush Value=3, 2×3 | ||
|description= | |description=1~5F full-body invincibility <br><br> | ||
}} | }} | ||
{{AttackData-Garou | {{AttackData-Garou | ||
|version= | |version=A Break | ||
|Damage=5 | |Damage=5 | ||
|Guard=Mid | |Guard=<span style="color:#ff0000;">Mid</span> | ||
|Startup=4 | |Startup=4 | ||
|Active= | |Active= | ||
| Line 939: | Line 938: | ||
|description= | |description= | ||
}} | }} | ||
{{AttackData-Garou | {{AttackData-Garou | ||
|version= | |version=C | ||
|Damage=8, 4×4, 8 | |Damage=8, 4×4, 8 | ||
|Guard=Mid | |Guard=<span style="color:#ff0000;">Mid</span> | ||
|Startup=4 | |Startup=4 | ||
|Active= | |Active= | ||
| Line 969: | Line 952: | ||
|Cancel on Block= | |Cancel on Block= | ||
|Guard Crush Value=3, 2×4, 5 | |Guard Crush Value=3, 2×4, 5 | ||
|description= | |description=1~5F full-body invincibility <br><br> | ||
}} | }} | ||
{{AttackData-Garou | {{AttackData-Garou | ||
|version= | |version=C Break | ||
|Damage=8 | |Damage=8 | ||
|Guard=Mid | |Guard=<span style="color:#ff0000;">Mid</span> | ||
|Startup=4 | |Startup=4 | ||
|Active= | |Active= | ||
| Line 988: | Line 971: | ||
}} | }} | ||
}} | }} | ||
===Super Moves=== | ===Super Moves=== | ||
===== <span class="invisible-header"></span> ===== | ===== <span class="invisible-header">Super Dong Hwan Kyaku (j236236P)</span> ===== | ||
<font style="visibility:hidden" size="0"></font> | <font style="visibility:hidden" size="0"></font> | ||
{{MoveData | {{MoveData | ||
|image =DongjCsuper.jpg | |image =DongjCsuper.jpg | ||
|name =Super Dong Hwan Kyaku | |name =Super Dong Hwan Kyaku | ||
|input = | |input =j.236236A/C | ||
|caption= | |caption= | ||
|data= | |data= | ||
| Line 1,005: | Line 986: | ||
{{AttackData-Garou | {{AttackData-Garou | ||
|version = | |version =A | ||
|Damage=15, 5×5 | |Damage=15, 5×5 | ||
|Guard=Mid | |Guard=Mid | ||
| Line 1,022: | Line 1,003: | ||
{{AttackData-Garou | {{AttackData-Garou | ||
| header = | | header = | ||
|version = | |version =C | ||
|Damage=18, 6×6, 18 | |Damage=18, 6×6, 18 | ||
|Guard=Mid | |Guard=Mid | ||
| Line 1,041: | Line 1,022: | ||
===== <span class="invisible-header"></span> ===== | ===== <span class="invisible-header">Raimei Dan (236236K)</span> ===== | ||
<font style="visibility:hidden" size="0"></font> | <font style="visibility:hidden" size="0"></font> | ||
{{MoveData | {{MoveData | ||
|image = DongDsuper.jpg | |image = DongDsuper.jpg | ||
|name =Raimei Dan | |name =Raimei Dan | ||
|input = | |input =236236B/D | ||
|caption= | |caption= | ||
|data= | |data= | ||
{{AttackData-Garou | {{AttackData-Garou | ||
|version = | |version =B | ||
|Damage=35 | |Damage=35 | ||
|Guard=Mid | |Guard=<span style="color:#ff0000;">Mid</span> | ||
|Startup=19 | |Startup=19 | ||
|Active= | |Active= | ||
| Line 1,065: | Line 1,046: | ||
|description= | |description= | ||
1~13F full-body invincibility. Has a projectile hitbox/hurtbox. | 1~13F full-body invincibility. Has a projectile hitbox/hurtbox. | ||
}} | }} | ||
{{AttackData-Garou | {{AttackData-Garou | ||
| header = | | header = | ||
|version = | |version =D Lvl.1 | ||
|Damage=6, 35 | |Damage=6, 35 | ||
|Guard=Overhead, Mid | |Guard=Overhead, <span style="color:#ff0000;">Mid</span> | ||
|Startup=17 | |Startup=17 | ||
|Active= | |Active= | ||
| Line 1,100: | Line 1,062: | ||
|Cancel on Block= | |Cancel on Block= | ||
|Guard Crush Value=10, 30 | |Guard Crush Value=10, 30 | ||
|description= Lv 1 done without holding D, or D let go within 1~13F after exiting blackout. | |description= The level (the number of hits) of Raimei Dan D increases according to the charging time (holding D). <br> | ||
1~15F full-body invincibility. The last hit, for every level, has a projectile hitbox/hurtbox. <br><br> | |||
Lv 1 done without holding D, or D let go within 1~13F after exiting blackout. | |||
}} | }} | ||
{{AttackData-Garou | {{AttackData-Garou | ||
| header = | | header = | ||
|version = | |version =D Lvl.2 | ||
|Damage=6, 8, 35 | |Damage=6, 8, 35 | ||
|Guard=Overhead, Overhead, Mid | |Guard=Overhead, Overhead, <span style="color:#ff0000;">Mid</span> | ||
|Startup= | |Startup= | ||
|Active= | |Active= | ||
| Line 1,121: | Line 1,085: | ||
{{AttackData-Garou | {{AttackData-Garou | ||
| header = | | header = | ||
|version = | |version =D Lvl.3 | ||
|Damage=6, 8, 9, 35 | |Damage=6, 8, 9, 35 | ||
|Guard=Overhead, Overhead, Overhead, Mid | |Guard=Overhead, Overhead, Overhead, <span style="color:#ff0000;">Mid</span> | ||
|Startup= | |Startup= | ||
|Active= | |Active= | ||
| Line 1,138: | Line 1,102: | ||
}} | }} | ||
===== <span class="invisible-header">Ore-sama Houou Kyaku (236236236C)</span> ===== | |||
===== <span class="invisible-header"></span> ===== | |||
<font style="visibility:hidden" size="0"></font> | <font style="visibility:hidden" size="0"></font> | ||
{{MoveData | {{MoveData | ||
|image =DongHiddenSuper.jpg | |image =DongHiddenSuper.jpg | ||
|name =Ore-sama Houou Kyaku | |name =Ore-sama Houou Kyaku | ||
|input = | |input =236236236C | ||
|caption= | |caption= | ||
|data= | |data= | ||
{{AttackData-Garou | {{AttackData-Garou | ||
|version = | |version =C | ||
|Damage= 9, 4×7, 3×3, 9×5 | |Damage= 9, 4×7, 3×3, 9×5 | ||
|Guard=Mid | |Guard=Mid | ||
| Line 1,165: | Line 1,127: | ||
}} | }} | ||
}} | }} | ||
{{Navbox-MOTW}} | {{Navbox-MOTW}} | ||
[[Category:Garou: Mark of the Wolves]] | [[Category:Garou: Mark of the Wolves]] | ||
Latest revision as of 11:50, 17 June 2024
Introduction
To come.
Gameplay
To come.
| Strengths | Weaknesses |
|---|---|
|
|
Character Colors
Move List
Frame Data Source : http://www13.atwiki.jp/garoumow/pages/21.html and https://w.atwiki.jp/garoumow/pages/72.html
| Data Help | |
|---|---|
| Disclaimer: This is meant to teach basic terminology used when describing moves. | |
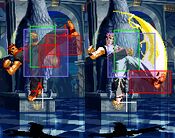
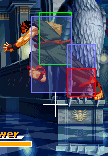
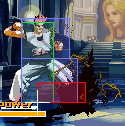
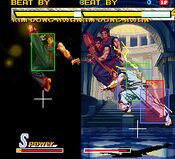
| HitBox: | A predefined area (usually a group of rectangles or circles) that tell the game how any given attack can come in contact with a character. Hitboxes are invisible to the player when normally playing. |
| HurtBox: | A predefined area (usually a group of rectangles or circles) that tell the game how your character is allowed to get hit by any incoming attack. Specifically, you'll get hit by (or block) an attack if that attack's hitbox ever overlaps your hurtbox. |
| Throw Box/Range: | Active throw frames and range. Your opponent will be thrown in this field if not in block or hit stun. |
| Projectile Box: | Hit box on a projectile attack. |
| Guard/Counter Box: | The Guard Box or Counter Box. This appears when blocking or using a counter move. |
| Push Box: | Has no bearing on hurt/hit boxes. Just allows characters to not pass through each other. (Also known as "Collision Box".) |
| Command | the input for the attack. |
| Start Up | The number of frames that initiate at the beginning of an attack after the input.
And when the first hitbox is present.
The first active frame is after the last startup frame. |
| Guard | The way this move must be blocked.
High or H or Overhead (especially when from the ground) -- must be blocked standing. |
| Damage | "basic" damage -- unmodified damage values
"correct" damage -- damage values modified for damage scaling, TOP multiplier, and defense rate |
| Guard Crush Value | Decrease your guard durability gauge/meter by that value/s |
| + | signifies how many advantage frames the attacker has. |
| - | signifies how many disadvantage frames the attacker has. |
| KD | means the attack will knock the opponent down. |
| ◯ | circle means cancelable on both hit/block. |
| ∞ | infinity means chain cancelable with the same button (renda cancel). |
| ※ | means cancelable on the first hit/part only. |
| 《 》OR « » OR << >> OR ( ) | The numbers in the brackets are the startup frames until the next stage (the gap until the next hit's first active frame). |
| △ | up triangle means only cancelable on block. |
| ▽ | down triangle means only cancelable on hit. |
| × OR X | means not cancelable. |
Notes:
- Special/Super moves with "Guard" data in red text are impossible to just defend at 0-pixel health bar.
- For P-Power Raimei Dan 236(x2)D, the last hit, for every level, is impossible to just defend at 0-pixel health bar.
| Standing, Crouching and Running | Taunt | Jumping (35 total frames) |
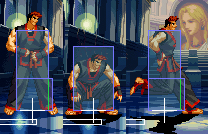 |
 |

|
Super Jump: Press ![]() , then
, then ![]() /
/![]() /
/![]() Dong cannot JD during a superjump, allowing opponents to anti air
Dong cannot JD during a superjump, allowing opponents to anti air
Wall Jump: Jump towards a wall and then press the opposite direction to it. Dong retains his air JD ability after wall jump. It is a good tool to escape the corner.
Close Standing Normals
Close 5A
| Damage | Guard | Startup | Active | Recovery | Total |
|---|---|---|---|---|---|
| 4 | Mid | 3 | 4 | 5 | 12 |
| Hit Adv | Block Adv | Feint Cancel | Cancel on Hit | Cancel on Block | Guard Crush Value |
| +6 | +6 | ◯ | ◯ / ∞ | ◯ / ∞ | 4 |
|
Standing jab. | |||||
Close 5B
| Damage | Guard | Startup | Active | Recovery | Total |
|---|---|---|---|---|---|
| 6 | Mid | 4 | 4 | 7 | 15 |
| Hit Adv | Block Adv | Feint Cancel | Cancel on Hit | Cancel on Block | Guard Crush Value |
| +4 | +4 | ◯ | ◯ | ◯ | 4 |
Close 5C
| Damage | Guard | Startup | Active | Recovery | Total |
|---|---|---|---|---|---|
| 6, 6 | Mid | 5 | 1, 4 | 22 | 32 |
| Hit Adv | Block Adv | Feint Cancel | Cancel on Hit | Cancel on Block | Guard Crush Value |
| -5 | -5 | ※ | ※ | ※ | 3, 3 |
|
It can anti-air jump startups when trying to throw, is double hit and you can feint cancel it to get a combo. | |||||
Close 5D
| Damage | Guard | Startup | Active | Recovery | Total |
|---|---|---|---|---|---|
| 6, 6 | Mid | 4 | 1, 《5》, 3 | 24 | 37 |
| Hit Adv | Block Adv | Feint Cancel | Cancel on Hit | Cancel on Block | Guard Crush Value |
| -6 | -6 | ※ | ※ | ※ | 3, 3 |
Far Standing Normals
Far 5A
| Damage | Guard | Startup | Active | Recovery | Total |
|---|---|---|---|---|---|
| 5 | Mid | 3 | 4 | 5 | 12 |
| Hit Adv | Block Adv | Feint Cancel | Cancel on Hit | Cancel on Block | Guard Crush Value |
| +6 | +6 | ◯ | ◯ / ∞ | ◯ / ∞ | 4 |
Far 5B
| Damage | Guard | Startup | Active | Recovery | Total |
|---|---|---|---|---|---|
| 7 | Mid | 4 | 3 | 12 | 19 |
| Hit Adv | Block Adv | Feint Cancel | Cancel on Hit | Cancel on Block | Guard Crush Value |
| 0 | 0 | ◯ | ◯ | ◯ | 4 |
Far 5C
| Damage | Guard | Startup | Active | Recovery | Total |
|---|---|---|---|---|---|
| 14 | Mid | 12 | 3 | 28 | 43 |
| Hit Adv | Block Adv | Feint Cancel | Cancel on Hit | Cancel on Block | Guard Crush Value |
| -10 | -10 | △ | X | ◯ | 5 |
Far 5D
| Damage | Guard | Startup | Active | Recovery | Total |
|---|---|---|---|---|---|
| 14 | Mid | 13 | 2 | 20 | 35 |
| Hit Adv | Block Adv | Feint Cancel | Cancel on Hit | Cancel on Block | Guard Crush Value |
| -1 | -1 | X | X | X | 5 |
|
Note: It's possible to reduce the move's overall recovery by canceling its landing recovery. | |||||
Crouching Normals
2A
| Damage | Guard | Startup | Active | Recovery | Total |
|---|---|---|---|---|---|
| 4 | Low | 5 | 4 | 9 | 18 |
| Hit Adv | Block Adv | Feint Cancel | Cancel on Hit | Cancel on Block | Guard Crush Value |
| +2 | +2 | X | X / ∞ | X / ∞ | 4 |
2B
| Damage | Guard | Startup | Active | Recovery | Total |
|---|---|---|---|---|---|
| 6 | Low | 4 | 4 | 5 | 13 |
| Hit Adv | Block Adv | Feint Cancel | Cancel on Hit | Cancel on Block | Guard Crush Value |
| +6 | +6 | ◯ | ◯ / ∞ | ◯ / ∞ | 4 |
2C
| Damage | Guard | Startup | Active | Recovery | Total |
|---|---|---|---|---|---|
| 10 | Mid | 5 | 3 | 14 | 22 |
| Hit Adv | Block Adv | Feint Cancel | Cancel on Hit | Cancel on Block | Guard Crush Value |
| +4 | +4 | ◯ | ◯ | ◯ | 5 |
2D
| Damage | Guard | Startup | Active | Recovery | Total |
|---|---|---|---|---|---|
| 10 | Low | 7 | 4 | 25 | 36 |
| Hit Adv | Block Adv | Feint Cancel | Cancel on Hit | Cancel on Block | Guard Crush Value |
| KD | -8 | X | X | X | 5 |
|
One of the best sweep in the game. Can be punished with supers or when not spaced properly. | |||||
Jumping Normals
jA
| Damage | Guard | Startup | Active | Recovery | Total |
|---|---|---|---|---|---|
| 5 | High | 5 | 7 | - | - |
| Hit Adv | Block Adv | Feint Cancel | Cancel on Hit | Cancel on Block | Guard Crush Value |
| - | - | - | ◯ | ◯ | 4 |
|
Can beat out upper-body evasion attacks, and can crossup | |||||
jB
| Damage | Guard | Startup | Active | Recovery | Total |
|---|---|---|---|---|---|
| 6 | High | 6 | 10 | - | - |
| Hit Adv | Block Adv | Feint Cancel | Cancel on Hit | Cancel on Block | Guard Crush Value |
| - | - | - | ◯ | ◯ | 4 |
jC
| Damage | Guard | Startup | Active | Recovery | Total |
|---|---|---|---|---|---|
| 9 | High | 6 | 5 | - | - |
| Hit Adv | Block Adv | Feint Cancel | Cancel on Hit | Cancel on Block | Guard Crush Value |
| - | - | - | ◯ | ◯ | 5 |
jD
| Damage | Guard | Startup | Active | Recovery | Total |
|---|---|---|---|---|---|
| 9 | High | 8 | 6 | - | - |
| Hit Adv | Block Adv | Feint Cancel | Cancel on Hit | Cancel on Block | Guard Crush Value |
| - | - | - | ◯ | ◯ | 5 |
Command Normals
j4C
| Damage | Guard | Startup | Active | Recovery | Total |
|---|---|---|---|---|---|
| 10 | High | 4 | 6 | - | - |
| Hit Adv | Block Adv | Feint Cancel | Cancel on Hit | Cancel on Block | Guard Crush Value |
| - | - | - | ◯ | ◯ | 9 |
|
Can beat out upper-body evasion attacks. | |||||
Universal Moves
Lower-body Evasion Attack (5AB)
| Damage | Guard | Startup | Active | Recovery | Total |
|---|---|---|---|---|---|
| 10 | Overhead | 25 | 1 | 19 | 45 |
| Hit Adv | Block Adv | Feint Cancel | Cancel on Hit | Cancel on Block | Guard Crush Value |
| -1 | +5 | X | X | X | 6 |
| |||||
Upper-body Evasion Attack (2AB)
| Damage | Guard | Startup | Active | Recovery | Total |
|---|---|---|---|---|---|
| 10 | Mid | 10 | 2 | 19 | 31 |
| Hit Adv | Block Adv | Feint Cancel | Cancel on Hit | Cancel on Block | Guard Crush Value |
| -2 | +4 | ▽ | ◯ | X | 6 |
|
1~5F upper-body invincibility. | |||||
T.O.P. Attack (CD)
| Damage | Guard | Startup | Active | Recovery | Total |
|---|---|---|---|---|---|
| 10, 3×4 (base damage) | Mid | 8 | - | - | - |
| Hit Adv | Block Adv | Feint Cancel | Cancel on Hit | Cancel on Block | Guard Crush Value |
| KD | -9 | - | - | - | 2, 3×4 |
Throws
Ground Throw
| Damage | Guard | Startup | Active | Recovery | Total |
|---|---|---|---|---|---|
| 14 | - | 1 | - | - | - |
| Hit Adv | Block Adv | Feint Cancel | Cancel on Hit | Cancel on Block | Guard Crush Value |
| +34 | - | - | - | - | - |
|
Normal throw. | |||||
Air Throw
| Damage | Guard | Startup | Active | Recovery | Total |
|---|---|---|---|---|---|
| 16 | - | 1 | - | - | - |
| Hit Adv | Block Adv | Feint Cancel | Cancel on Hit | Cancel on Block | Guard Crush Value |
| +40 | - | - | - | - | - |
|
Air throw. | |||||
Feints
Forward Feint (6AC)
| Damage | Guard | Startup | Active | Recovery | Total |
|---|---|---|---|---|---|
| - | - | - | - | - | 10 |
| Hit Adv | Block Adv | Feint Cancel | Cancel on Hit | Cancel on Block | Guard Crush Value |
| - | - | - | - | - | - |
|
Mimics the start of Shiden-kyaku B (front stomp). | |||||
Down Feint (2AC)
| Damage | Guard | Startup | Active | Recovery | Total |
|---|---|---|---|---|---|
| - | - | - | - | - | 10 |
| Hit Adv | Block Adv | Feint Cancel | Cancel on Hit | Cancel on Block | Guard Crush Value |
| - | - | - | - | - | - |
|
Mimics the start of Shiden-kyaku D (back stomp). Try to use this feint for Dong, it has less pushback. | |||||
Special Moves
Raimei Zan (214K)
| B | Damage | Guard | Startup | Active | Recovery | Total |
|---|---|---|---|---|---|---|
| 10, 10 | Overhead | 19 | - | - | - | |
| Hit Adv | Block Adv | Feint Cancel | Cancel on Hit | Cancel on Block | Guard Crush Value | |
| -1 | -1 | - | - | - | 3, 3 | |
| D | Damage | Guard | Startup | Active | Recovery | Total |
| 12, 12 | Overhead | 25 | - | - | - | |
| Hit Adv | Block Adv | Feint Cancel | Cancel on Hit | Cancel on Block | Guard Crush Value | |
| -2 | -2 | - | - | - | 4, 4 |
Hishou Kyaku (j2K)
| B | Damage | Guard | Startup | Active | Recovery | Total |
|---|---|---|---|---|---|---|
| 10, 5×3 | Mid | 7 | - | - | - | |
| Hit Adv | Block Adv | Feint Cancel | Cancel on Hit | Cancel on Block | Guard Crush Value | |
| 0 or more (up to -4) | 0 or more (up to -4) | - | - | - | 2×4 | |
|
B version travels slower. | ||||||
| D | Damage | Guard | Startup | Active | Recovery | Total |
| 10, 5×3 | Mid | 9 | - | - | - | |
| Hit Adv | Block Adv | Feint Cancel | Cancel on Hit | Cancel on Block | Guard Crush Value | |
| 0 or more (up to -4) | 0 or more (up to -4) | - | - | - | 2×4 | |
|
D version travels faster, such that there are usually 3 hits, rather than 4 hits. | ||||||
Shiden Kyaku (236K)
| B | Damage | Guard | Startup | Active | Recovery | Total |
|---|---|---|---|---|---|---|
| 10 | Low | 22 | - | - | - | |
| Hit Adv | Block Adv | Feint Cancel | Cancel on Hit | Cancel on Block | Guard Crush Value | |
| +13 | +13 | - | - | - | 7 | |
| D | Damage | Guard | Startup | Active | Recovery | Total |
| 12 | Low | 25 | - | - | - | |
| Hit Adv | Block Adv | Feint Cancel | Cancel on Hit | Cancel on Block | Guard Crush Value | |
| KD | +9 | - | - | - | 8 |
Ashi Binta (63214C)
| C | Damage | Guard | Startup | Active | Recovery | Total |
|---|---|---|---|---|---|---|
| 5×6, 8 | Mid | 7 | - | - | - | |
| Hit Adv | Block Adv | Feint Cancel | Cancel on Hit | Cancel on Block | Guard Crush Value | |
| KD | -9 | - | - | - | 1×7 |
Kuu Sa Jin (623P)
| A | Damage | Guard | Startup | Active | Recovery | Total |
|---|---|---|---|---|---|---|
| 5, 6×3 | Mid | 4 | - | - | - | |
| Hit Adv | Block Adv | Feint Cancel | Cancel on Hit | Cancel on Block | Guard Crush Value | |
| KD | -30 | - | - | - | 3, 2×3 | |
|
1~5F full-body invincibility | ||||||
| A Break | Damage | Guard | Startup | Active | Recovery | Total |
| 5 | Mid | 4 | - | - | - | |
| Hit Adv | Block Adv | Feint Cancel | Cancel on Hit | Cancel on Block | Guard Crush Value | |
| KD | -6 | - | - | - | 3 | |
| C | Damage | Guard | Startup | Active | Recovery | Total |
| 8, 4×4, 8 | Mid | 4 | - | - | - | |
| Hit Adv | Block Adv | Feint Cancel | Cancel on Hit | Cancel on Block | Guard Crush Value | |
| KD | -29 | - | - | - | 3, 2×4, 5 | |
|
1~5F full-body invincibility | ||||||
| C Break | Damage | Guard | Startup | Active | Recovery | Total |
| 8 | Mid | 4 | - | - | - | |
| Hit Adv | Block Adv | Feint Cancel | Cancel on Hit | Cancel on Block | Guard Crush Value | |
| KD | -6 | - | - | - | 3 | |
Super Moves
Super Dong Hwan Kyaku (j236236P)
| A | Damage | Guard | Startup | Active | Recovery | Total |
|---|---|---|---|---|---|---|
| 15, 5×5 | Mid | 0 | - | - | - | |
| Hit Adv | Block Adv | Feint Cancel | Cancel on Hit | Cancel on Block | Guard Crush Value | |
| KD | -39 | - | - | - | 5×6 | |
| C | Damage | Guard | Startup | Active | Recovery | Total |
| 18, 6×6, 18 | Mid | 0 | - | - | - | |
| Hit Adv | Block Adv | Feint Cancel | Cancel on Hit | Cancel on Block | Guard Crush Value | |
| KD | -69 | - | - | - | 10, 7×7 |
Raimei Dan (236236K)
| B | Damage | Guard | Startup | Active | Recovery | Total |
|---|---|---|---|---|---|---|
| 35 | Mid | 19 | - | - | - | |
| Hit Adv | Block Adv | Feint Cancel | Cancel on Hit | Cancel on Block | Guard Crush Value | |
| KD | -5 | - | - | - | 20 | |
|
1~13F full-body invincibility. Has a projectile hitbox/hurtbox. | ||||||
| D Lvl.1 | Damage | Guard | Startup | Active | Recovery | Total |
| 6, 35 | Overhead, Mid | 17 | - | - | - | |
| Hit Adv | Block Adv | Feint Cancel | Cancel on Hit | Cancel on Block | Guard Crush Value | |
| KD | +5 | - | - | - | 10, 30 | |
|
The level (the number of hits) of Raimei Dan D increases according to the charging time (holding D). Lv 1 done without holding D, or D let go within 1~13F after exiting blackout. | ||||||
| D Lvl.2 | Damage | Guard | Startup | Active | Recovery | Total |
| 6, 8, 35 | Overhead, Overhead, Mid | - | - | - | - | |
| Hit Adv | Block Adv | Feint Cancel | Cancel on Hit | Cancel on Block | Guard Crush Value | |
| KD | +5 | - | - | - | 10, 10, 30 | |
|
Lv 2 done holding D for a moment, within 14~18F after exiting blackout. | ||||||
| D Lvl.3 | Damage | Guard | Startup | Active | Recovery | Total |
| 6, 8, 9, 35 | Overhead, Overhead, Overhead, Mid | - | - | - | - | |
| Hit Adv | Block Adv | Feint Cancel | Cancel on Hit | Cancel on Block | Guard Crush Value | |
| KD | +5 | - | - | - | 10, 10, 20, 30 | |
|
Max Lv 3 done holding D even longer, from 19~23F after exiting blackout. | ||||||
Ore-sama Houou Kyaku (236236236C)
| C | Damage | Guard | Startup | Active | Recovery | Total |
|---|---|---|---|---|---|---|
| 9, 4×7, 3×3, 9×5 | Mid | 0 | - | - | - | |
| Hit Adv | Block Adv | Feint Cancel | Cancel on Hit | Cancel on Block | Guard Crush Value | |
| KD | -10 | - | - | - | 20 | |
|
1F full-body invincibility. | ||||||
