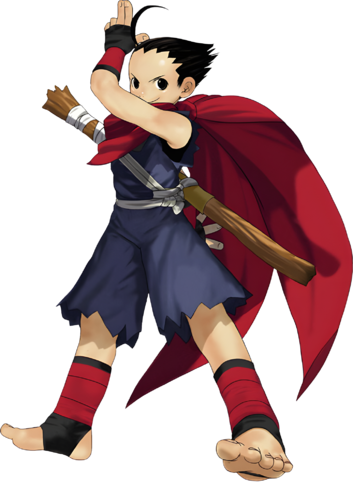
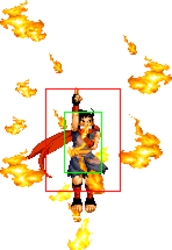
Garou: Mark of the Wolves/Hokutomaru

From SuperCombo Wiki

Introduction

Hokutomaru


Gameplay

TBD


Strengths Weaknesses
  • Many target combos for hit confirming and pressuring
  • Good air-to-air capabilities
  • The only character with a double jump
  • Has an air throw
  • Normals are fairly stubby and have mediocre range
  • Somewhat poor damage and conversions off of lows
  • Struggles to build meter
  • Lower defense and guard crush gauge than average
MOTW Hokutomaru Art.png


Character Colors

Hokucolors.JPG

Move List

Frame Data Source: https://w.atwiki.jp/garoumow/pages/27.html and https://w.atwiki.jp/garoumow/pages/80.html

Data Help
Disclaimer: This is meant to teach basic terminology used when describing moves.
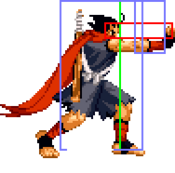
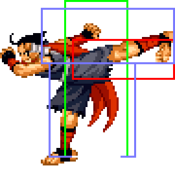
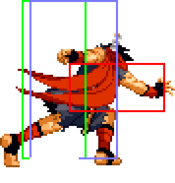
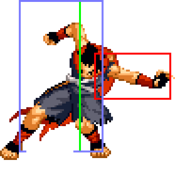
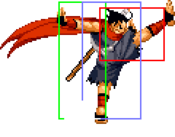
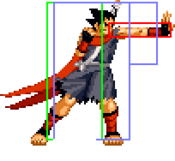
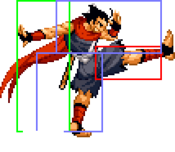
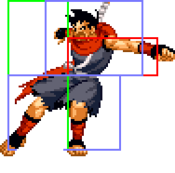
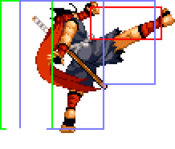
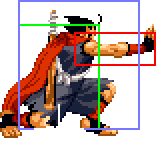
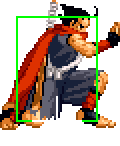
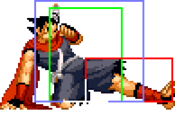
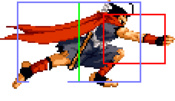
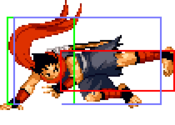
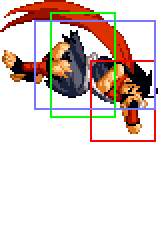
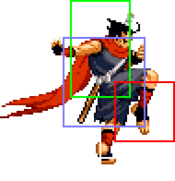
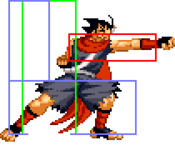
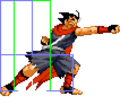
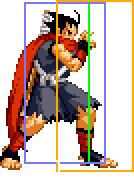
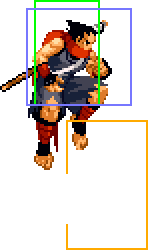
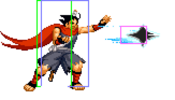
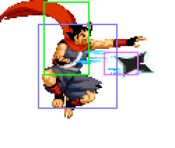
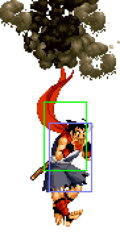
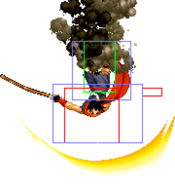
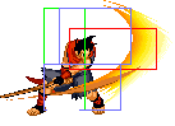
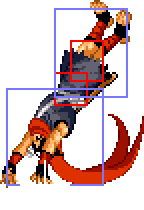
HitBox: A predefined area (usually a group of rectangles or circles) that tell the game how any given attack can come in contact with a character. Hitboxes are invisible to the player when normally playing.
HurtBox: A predefined area (usually a group of rectangles or circles) that tell the game how your character is allowed to get hit by any incoming attack. Specifically, you'll get hit by (or block) an attack if that attack's hitbox ever overlaps your hurtbox.
Throw Box/Range: Active throw frames and range. Your opponent will be thrown in this field if not in block or hit stun.
Projectile Box: Hit box on a projectile attack.
Guard/Counter Box: The Guard Box or Counter Box. This appears when blocking or using a counter move.
Push Box: Has no bearing on hurt/hit boxes. Just allows characters to not pass through each other. (Also known as "Collision Box".)
Command the input for the attack.
Start Up The number of frames that initiate at the beginning of an attack after the input. And when the first hitbox is present.

The first active frame is after the last startup frame.

Guard The way this move must be blocked.

High or H or Overhead (especially when from the ground) -- must be blocked standing.
High-Low or HL or Mid -- can be blocked either standing or crouching.
Low or L -- must be blocked crouching.

Damage "basic" damage -- unmodified damage values

"correct" damage -- damage values modified for damage scaling, TOP multiplier, and defense rate

Guard Crush Value Decrease your guard durability gauge/meter by that value/s
+ signifies how many advantage frames the attacker has.
- signifies how many disadvantage frames the attacker has.
KD means the attack will knock the opponent down.
circle means cancelable on both hit/block.
infinity means chain cancelable with the same button (renda cancel).
means cancelable on the first hit/part only.
《 》OR « » OR << >> OR ( ) The numbers in the brackets are the startup frames until the next stage (the gap until the next hit's first active frame).
up triangle means only cancelable on block.
down triangle means only cancelable on hit.
× OR X means not cancelable.


Notes:

  • Guard crush values within ( ) are when the move is used as the next hit of a target combo.
  • From the 2nd hit and after of the target combo, the active frames and recovery frames will be the same as far moves and crouching moves
  • Jump D, Jump A, and Jump B (Jump A and Jump B are usually diagonal jumps only) can beat out upper-body evasive attacks.
  • Special/Super moves with "Guard" data in red text are impossible to just defend at 0-pixel health bar.


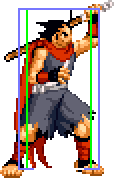
Close Standing Normals

Cl. Kof.lp.png
Garou Hokutomaru c5A.png
Cl. Kof.lp.png Damage Guard Startup Active Recovery Total
4 Mid 4 4 5 13
Hit Adv Block Adv Feint Cancel Cancel on Hit Cancel on Block Guard Crush Value
+6 +6 ◯ / ∞ ◯ / ∞ 4

Standing jab.

Cl. Kof.lp.png>Kof.lk.png Damage Guard Startup Active Recovery Total
- Mid - - - -
Hit Adv Block Adv Feint Cancel Cancel on Hit Cancel on Block Guard Crush Value
+1 +1 4, 3

Target combo from cl.5A.

Cl. Kof.lp.png>Kof.sp.png Damage Guard Startup Active Recovery Total
- Mid - - - -
Hit Adv Block Adv Feint Cancel Cancel on Hit Cancel on Block Guard Crush Value
-10 -10 4, 3

Target combo from cl.5A.

Cl. Kof.lp.png>Kof.sp.png>Kof.sp.png Damage Guard Startup Active Recovery Total
- - - - - -
Hit Adv Block Adv Feint Cancel Cancel on Hit Cancel on Block Guard Crush Value
-2 -2 - - - 4, 3, 0

Target combo from cl.5A. Ends in a cancel.


Cl. Kof.lk.png
Garou Hokutomaru c5B.png
Cl. Kof.lk.png Damage Guard Startup Active Recovery Total
6 Mid 4 3 9 16
Hit Adv Block Adv Feint Cancel Cancel on Hit Cancel on Block Guard Crush Value
+3 +3 4
Cl. Kof.lk.png>Kof.sk.png Damage Guard Startup Active Recovery Total
- Mid - - - -
Hit Adv Block Adv Feint Cancel Cancel on Hit Cancel on Block Guard Crush Value
-3 -3 4, 3

Target combo from cl.5B.

Cl. Kof.lk.png>Kof.sk.png>Kof.sp.png Damage Guard Startup Active Recovery Total
- - - - - -
Hit Adv Block Adv Feint Cancel Cancel on Hit Cancel on Block Guard Crush Value
-1 -1 - - - 4, 3, 0

Target combo from cl.5B. Ends in a cancel.


Cl. Kof.sp.png
Garou Hokutomaru c5C.png
Garou Hokutomaru c5C 1.png
Damage Guard Startup Active Recovery Total
6, 6 Mid 5 2, 《5》, 3 16 31
Hit Adv Block Adv Feint Cancel Cancel on Hit Cancel on Block Guard Crush Value
+2 +2 3, 3


Cl. Kof.sk.png
Garou Hokutomaru c5D.png
Damage Guard Startup Active Recovery Total
9 Mid 3 3 19 25
Hit Adv Block Adv Feint Cancel Cancel on Hit Cancel on Block Guard Crush Value
-1 -1 5

Tied with jB as Hokutomaru's fastest normal, easily combos into specials, has incredible frame advantage when feint cancelled letting it link into itself and can't be JD'd low despite being a mid. An incredible normal.

Far Standing Normals

Far Kof.lp.png
Garou Hokutomaru f5A.png
Far Kof.lp.png Damage Guard Startup Active Recovery Total
5 Mid 4 3 7 14
Hit Adv Block Adv Feint Cancel Cancel on Hit Cancel on Block Guard Crush Value
+5 +5 ◯ / ∞ ◯ / ∞ 4
Far Kof.lp.png>Kof.lk.png Damage Guard Startup Active Recovery Total
- Mid - - - -
Hit Adv Block Adv Feint Cancel Cancel on Hit Cancel on Block Guard Crush Value
+1 +1 4, 3

Target combo from f.5A.

Far Kof.lp.png>Kof.sp.png Damage Guard Startup Active Recovery Total
- Mid - - - -
Hit Adv Block Adv Feint Cancel Cancel on Hit Cancel on Block Guard Crush Value
-10 -10 4, 3

Target combo from f.5A.

Far Kof.lp.png>Kof.sp.png>Kof.sp.png Damage Guard Startup Active Recovery Total
- - - - - -
Hit Adv Block Adv Feint Cancel Cancel on Hit Cancel on Block Guard Crush Value
-2 -2 - - - 4, 3, 0

Target combo from f.5A. Ends in a cancel.

Far Kof.lk.png
Garou Hokutomaru f5B.png
Far Kof.lk.png Damage Guard Startup Active Recovery Total
7 Mid 6 3 11 20
Hit Adv Block Adv Feint Cancel Cancel on Hit Cancel on Block Guard Crush Value
+1 +1 4(3)
Far Kof.lk.png>Kof.sk.png Damage Guard Startup Active Recovery Total
- Mid - - - -
Hit Adv Block Adv Feint Cancel Cancel on Hit Cancel on Block Guard Crush Value
-3 -3 4, 3

Target combo from f.5B.

Far Kof.lk.png>Kof.sk.png>Kof.sp.png Damage Guard Startup Active Recovery Total
- - - - - -
Hit Adv Block Adv Feint Cancel Cancel on Hit Cancel on Block Guard Crush Value
-1 -1 - - - 4, 3, 0

Target combo from f.5B. Ends in a cancel.


Far Kof.sp.png
Garou Hokutomaru f5C.png
Damage Guard Startup Active Recovery Total
12 Mid 11 1 30 42
Hit Adv Block Adv Feint Cancel Cancel on Hit Cancel on Block Guard Crush Value
-10 -10 X X X 5(3)

Slow, can't be cancelled and is punishable on hit... not great traits to have.

Far Kof.sk.png
Garou Hokutomaru f5D.png
Damage Guard Startup Active Recovery Total
12 Mid 11 3 21 35
Hit Adv Block Adv Feint Cancel Cancel on Hit Cancel on Block Guard Crush Value
-3 -3 X X X 5(3)


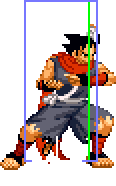
Crouching Normals

Cr. Kof.lp.png
Garou Hokutomaru 2A.png
Garou Hokutomaru 2A 1.png
Invincible Recovery Frames
Cr. Kof.lp.png Damage Guard Startup Active Recovery Total
4 Mid 4 4 5 13
Hit Adv Block Adv Feint Cancel Cancel on Hit Cancel on Block Guard Crush Value
+6 +6 ◯ / ∞ ◯ / ∞ 4

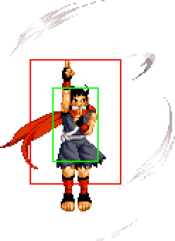
Crouching A's (2A) last 3F of recovery has full-body invincibility.

  • Typical crouching Kof.lp.png. Chains into Kof.lp.png,Kof.lk.png and Kof.sp.png
  • You can confirm Kof.lp.png/Kof.sp.png super by doing 2Kof.lp.png362Kof.lk.pngKof.sp.png36 then confirming if it hit or not.
Cr. Kof.lp.png> Cr. Kof.lk.png Damage Guard Startup Active Recovery Total
- Mid, Low - - - -
Hit Adv Block Adv Feint Cancel Cancel on Hit Cancel on Block Guard Crush Value
+4 +4 4, 3

Target combo from 2A.

Cr. Kof.lp.png> Cr. Kof.sp.png>Kof.sp.png Damage Guard Startup Active Recovery Total
- Mid, Mid - - - -
Hit Adv Block Adv Feint Cancel Cancel on Hit Cancel on Block Guard Crush Value
-1 -1 - - - 4, 3, 0

Target combo from 2A. Ends in a cancel.


Cr. Kof.lk.png
Garou Hokutomaru 2B.png
Cr. Kof.lk.png Damage Guard Startup Active Recovery Total
5 Low 5 4 7 16
Hit Adv Block Adv Feint Cancel Cancel on Hit Cancel on Block Guard Crush Value
+4 +4 ◯ / ∞ ◯ / ∞ 4(3)
  • Your go-to low poke and confirm. You can confirm Kof.lp.png/Kof.sp.png super by doing 2Kof.lk.png362Kof.lk.pngKof.sp.png36 then confirming if it hit or not.
  • Without meter, chain into 2Kof.sk.png then do the Kof.sp.png feint to recover faster.
Cr. Kof.lk.png> Cr. Kof.sp.png>Kof.sp.png Damage Guard Startup Active Recovery Total
- Low, Mid - - - -
Hit Adv Block Adv Feint Cancel Cancel on Hit Cancel on Block Guard Crush Value
-1 -1 - - - 4, 3, 0

Target combo from 2B. Ends in a cancel.

Cr. Kof.lk.png> Cr. Kof.sk.png>Kof.sp.png Damage Guard Startup Active Recovery Total
- Low, Low - - - -
Hit Adv Block Adv Feint Cancel Cancel on Hit Cancel on Block Guard Crush Value
-1 -1 - - - 4, 5, 0

Target combo from f.5B. Ends in the same cancel.

You can kara cancel the 2D with the follow-up C cancel.


Cr. Kof.sp.png
Garou Hokutomaru 2C.png
Damage Guard Startup Active Recovery Total
9 Mid 6 4 16 26
Hit Adv Block Adv Feint Cancel Cancel on Hit Cancel on Block Guard Crush Value
+1 +1 X X X 5(3)
  • A somewhat quick poke that reaches far away and recovers quickly. It's +1 too so , making it very useful to just throw out in neutral since you aren't risking much.


Cr. Kof.sk.png
Garou Hokutomaru 2D.png
Damage Guard Startup Active Recovery Total
9 Low 10 5 19 34
Hit Adv Block Adv Feint Cancel Cancel on Hit Cancel on Block Guard Crush Value
KD -3 X X X 5(5)
  • Sweep. Can be used as an anti-air by low profiling some moves and hitting the landing frames.


Jumping Normals

Jump Kof.lp.png
Garou Hokutomaru jA.png
Damage Guard Startup Active Recovery Total
6 High 6 12 - -
Hit Adv Block Adv Feint Cancel Cancel on Hit Cancel on Block Guard Crush Value
- - - 4

Jump A (usually diagonal jump only) can beat out upper-body evasion attacks.


Jump Kof.lk.png
Garou Hokutomaru jB.png
Damage Guard Startup Active Recovery Total
6 High 3 10 - -
Hit Adv Block Adv Feint Cancel Cancel on Hit Cancel on Block Guard Crush Value
- - - 4

Jump B (usually diagonal jump only) can beat out upper-body evasion attacks.


Jump Kof.sp.png
Garou Hokutomaru jC.png
Damage Guard Startup Active Recovery Total
8 High 6 5 - -
Hit Adv Block Adv Feint Cancel Cancel on Hit Cancel on Block Guard Crush Value
- - - 5


Jump Kof.sk.png
Garou Hokutomaru jD.png
Damage Guard Startup Active Recovery Total
8 High 7 7 - -
Hit Adv Block Adv Feint Cancel Cancel on Hit Cancel on Block Guard Crush Value
- - - 5

Jump D can beat out upper-body evasion attacks.


Command Normals

Sliding
Df.png+Kof.lk.png
Garou Hokutomaru 3B.png
Damage Guard Startup Active Recovery Total
10 Low 7 13 22 42
Hit Adv Block Adv Feint Cancel Cancel on Hit Cancel on Block Guard Crush Value
KD -13 X X X 9

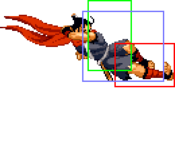
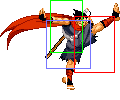
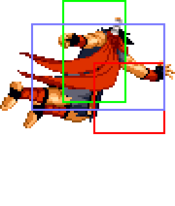
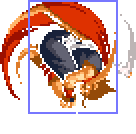
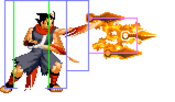
A sliding sweep that is excellent at catching landing frames, making this one of Hokutomaru's better anti-airs. Some characters are completely incapable of hitting Hokutomaru during the low profile.
On hit/block, unless hit on the last active frame, 1 active frame of recovery is removed. (e.g., hitting on the first frame has 20F blockstun - (11 remaining active frames + 22F recovery) = -13 adv. Max advantage is -2.

Kuuten Kyaku
Df.png+Kof.sk.png
Garou Hokutomaru 3D.png
Garou Hokutomaru 3D 1.png
Damage Guard Startup Active Recovery Total
6, 6 Mid 8 4, 4 30 46
Hit Adv Block Adv Feint Cancel Cancel on Hit Cancel on Block Guard Crush Value
KD -13 - X , ◯ X , ◯ 9, 9

Block adv on 1st hit only = -17

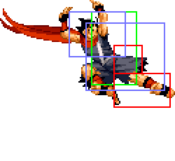
Apart from kara canceling during the attack's startup, after the 2nd hit it's possible to special cancel anytime in the air, on hit or on whiff.


Universal Moves

St. Kof.lp.png+Kof.lk.png
Lower-body evasion attack
Garou Hokutomaru 5AB.png
Damage Guard Startup Active Recovery Total
6, 6 Overhead 18 3, 《4》, 3 17 45
Hit Adv Block Adv Feint Cancel Cancel on Hit Cancel on Block Guard Crush Value
-1 +5 - X X 3, 3

18F hitstun and 24F blockstun. 1st hit only, -8 on hit, -2 on block.


Cr. Kof.lp.png+Kof.lk.png
Upper-body evasion attack
Garou Hokutomaru 2AB.png
Damage Guard Startup Active Recovery Total
10 Mid 10 2 16 28
Hit Adv Block Adv Feint Cancel Cancel on Hit Cancel on Block Guard Crush Value
+1 +7 X 6

1~5F upper-body invincibility.

18F hitstun and 24F blockstun.


Cr. Kof.lp.png+Kof.lk.png>Kof.lk.png+Kof.sp.png
Garou Hokutomaru 2AB BC.png
Damage Guard Startup Active Recovery Total
- - - - - 30
Hit Adv Block Adv Feint Cancel Cancel on Hit Cancel on Block Guard Crush Value
-12 -6 - - - 6, 0

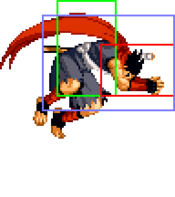
Follow-up to 2AB where Hokutomaru jumps forward with no collision, meaning he can pass through the opponent. Can be used to reposition after a knockdown.

Lower-body invincibility for 12F while in the air. Although he disappears briefly, Hokutomaru is NOT invincible at any point in this move.

Ninpou Bakuho (T.O.P. Attack)
Kof.sp.pngKof.sk.png
Garou Hokutomaru CD.png
Damage Guard Startup Active Recovery Total
17 (base damage) Mid 14 - - -
Hit Adv Block Adv Feint Cancel Cancel on Hit Cancel on Block Guard Crush Value
KD -31 - - - 25

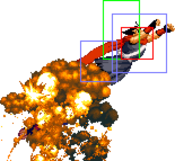
This is a rising attack that is good for one hit and travels at a 45 degree angle. It has a slow start and can be used as an anti-air. Don't ever get this attack blocked!

12~14F full-body invincibility.


Throws

Hikkakimanesu
Scratch
Close B.png/F.png+Kof.sp.png
Garou Hokutomaru Grab.png
Damage Guard Startup Active Recovery Total
4, 4, 4, 4 - 1 - - -
Hit Adv Block Adv Feint Cancel Cancel on Hit Cancel on Block Guard Crush Value
+59 - - - - -

Hokutomaru climbs onto the opponent and scratches their face. Frame advantage varies depending on the height of the opponent as Hokutomaru needs to jump off of them and land before he can act.

Noumen Tsukuri
Noh mask making
Air Close D.png+Kof.sp.png
Garou Hokutomaru Air Grab.png
Damage Guard Startup Active Recovery Total
- - 1 - - -
Hit Adv Block Adv Feint Cancel Cancel on Hit Cancel on Block Guard Crush Value
- - - - - -


Feints

F.png+Kof.lp.png+Kof.sp.png
Forward Feint
Garou Hokutomaru 6AC.png
Damage Guard Startup Active Recovery Total
- - - - - 10
Hit Adv Block Adv Feint Cancel Cancel on Hit Cancel on Block Guard Crush Value
- - - - - -

Mimics the end recovery animation of Karakusa Giri.

D.png+Kof.lp.png+Kof.sp.png
Down Feint
Garou Hokutomaru 2AC.png
Damage Guard Startup Active Recovery Total
- - - - - 8
Hit Adv Block Adv Feint Cancel Cancel on Hit Cancel on Block Guard Crush Value
- - - - - -

Mimics the start of Shuriken.


Special Moves

Shuriken
Qcf.png+Kof.lp.png/Kof.sp.png
Garou Hokutomaru 236A.png
236A
Garou Hokutomaru 236C.png
236C
Qcf.png+Kof.lp.png Damage Guard Startup Active Recovery Total
10 Mid 12 / 35 47
Hit Adv Block Adv Feint Cancel Cancel on Hit Cancel on Block Guard Crush Value
-2 ~ +32 -2 ~ +32 X X X 7

Single shuriken. Unlike all other projectiles, the shurikens can be destroyed by the opponent's melee attacks (without absorbing it, the same attack can still hit Hokutomaru) which makes them not as effective for deterring divekicks or... most things actually. This particular version is unlikely to be used as the air version is faster when TK'd or done from a backdash.

Qcf.png+Kof.sp.png Damage Guard Startup Active Recovery Total
6, 6, 6 Mid 18 / 40 58
Hit Adv Block Adv Feint Cancel Cancel on Hit Cancel on Block Guard Crush Value
-2 -2 X X X 5, 5, 5

Triple shuriken.

Shuriken (Air)
Air Qcf.png+Kof.lp.png/Kof.sp.png
Garou Hokutomaru j236P.png
Air Qcf.png+Kof.lp.png/Kof.sp.png Damage Guard Startup Active Recovery Total
12 Mid 18 / Until landing + 10 Can be as low as 38
Hit Adv Block Adv Feint Cancel Cancel on Hit Cancel on Block Guard Crush Value
Up to +32 Up to +32 X X X /

Slows your descent as opposed to a normal empty hop or air normal. Decent option to try and stuff someone who's gonna jump.


Rakkazan
Qcb.png+Kof.lk.png/Kof.sk.png (Air Ok)
Garou Hokutomaru 214B.png
214B
Garou Hokutomaru 214D.png
214D
Qcb.png+Kof.lk.png (Air Ok)
Kyo (Void)
Damage Guard Startup Active Recovery Total
/ / / / 45 45
Hit Adv Block Adv Feint Cancel Cancel on Hit Cancel on Block Guard Crush Value
/ / X X X /

Fake-out. Hokutomaru is counterhit punishable.
7~12F full-body invincibility.

Qcb.png+Kof.sk.png (Air Ok)
Jitsu (Real)
Damage Guard Startup Active Recovery Total
20 High 28 2 32(hit/whiff) / 47(block) 62(hit/whiff) / 77(block)
Hit Adv Block Adv Feint Cancel Cancel on Hit Cancel on Block Guard Crush Value
KD -22 X X X 8

Cheesy homing teleport overhead that carries enormous risk in exchange for just decent reward.
Hokutomaru appears at a fixed height every time so if the opponent is in the air you will teleport directly into a jump normal, and the hitbox is a lot smaller than it seems (the inverse can be said about the hurtbox).
When counterhitting a grounded opponent they will get spun instead of knocked down, leaving Hokutomaru only +1.
If the opponent blocks this move, you have thrown away the round, good luck on the next one.
On the bright side, this move is a good combo tool, can be used after a double jump or air target combo (slowest triple overhead ever), and is okay at punishing fireballs. Still gimmicky though.
7~8F full-body invincibility.

Karakusa Giri
Qcb.png+Kof.lp.png/Kof.sp.png
Garou Hokutomaru 214A.png
Hitbox is the same for 214C's second hit
Qcb.png+Kof.lp.png Damage Guard Startup Active Recovery Total
20 Mid 19 - - -
Hit Adv Block Adv Feint Cancel Cancel on Hit Cancel on Block Guard Crush Value
KD -10 - - - 7

Used in meterless combos. Can GC into this to punish a fireball at footsies range.

Qcb.png + Hold Kof.lp.png
(Empty Follow-up)
Damage Guard Startup Active Recovery Total
/ / / / 35 35
Hit Adv Block Adv Feint Cancel Cancel on Hit Cancel on Block Guard Crush Value
/ / X / / /

Hold the button input to stop/cancel the attack. Trying to make use of this after a blocked normal still leaves Hokutomaru very minus, but it can be useful to approach a downed opponent while building a bit of meter.

Qcb.png+Kof.sp.png Damage Guard Startup Active Recovery Total
14, 16 Mid 30 - - -
Hit Adv Block Adv Feint Cancel Cancel on Hit Cancel on Block Guard Crush Value
KD -18 - - - 4, 4

Far too slow to be comboed into practically and is extremely unsafe.

Qcb.png + Hold Kof.sp.png
(Empty Follow-up)
Damage Guard Startup Active Recovery Total
- - - - - -
Hit Adv Block Adv Feint Cancel Cancel on Hit Cancel on Block Guard Crush Value
- - - - - -

Hold the button input to stop/cancel the attack.

Kuuha Dan
Qcf.png+Kof.lk.png
Garou Hokutomaru 236B.png
Qcf.png+Kof.lk.png Damage Guard Startup Active Recovery Total
6, 6, 6 Mid 11 - - -
Hit Adv Block Adv Feint Cancel Cancel on Hit Cancel on Block Guard Crush Value
KD -12 - - - 3, 3, 3

Andy Bogard's signature multihit arcing kick that is very unsafe and unrewarding.

Qcf.png+Kof.lk.png Break Damage Guard Startup Active Recovery Total
6 Mid 11 - - 33
Hit Adv Block Adv Feint Cancel Cancel on Hit Cancel on Block Guard Crush Value
KD +5 X - - 3

When braked, this move becomes a plus on block launcher which is very nice, although this version has little range which restricts its use in combos/pressure.
Hokutomaru's fastest meterless guard cancel and this brake is his fastest way to build meter.

Kuuha Dan
Qcf.png+Kof.sk.png
Garou Hokutomaru 236B.png
Qcf.png+Kof.sk.png Damage Guard Startup Active Recovery Total
7, 7, 7, 7 Mid 16 - - -
Hit Adv Block Adv Feint Cancel Cancel on Hit Cancel on Block Guard Crush Value
KD -9 - - - 3, 3, 3, 3

Travels in a larger arc than the B version and hits an additional time. Each individual hit also does slightly more damage.

Qcf.png+Kof.sk.png Break Damage Guard Startup Active Recovery Total
7 Mid 16 - - -
Hit Adv Block Adv Feint Cancel Cancel on Hit Cancel on Block Guard Crush Value
KD +5 - - - 3

While slower than the B version, this brake has more damage and range, so it's better for combos in most situations.

Super Moves

Chou Hissatsu Shuriken
Qcf.png,Qcf.png + Kof.lp.png
Garou Hokutomaru 236236A.png
Garou Hokutomaru 236236A 1.png
Qcf.png,Qcf.png + Kof.lp.png Damage Guard Startup Active Recovery Total
7, 7, 7, 7, 15 Mid 9 - - -
Hit Adv Block Adv Feint Cancel Cancel on Hit Cancel on Block Guard Crush Value
KD -34 - - - 2×4, 5

Midscreen combo ender. 1~6F full-body invincibility. When far away from the opponent, this move will only hit 4 times.

--- Kof.lp.pngKof.lk.png Damage Guard Startup Active Recovery Total
- - - - - -
Hit Adv Block Adv Feint Cancel Cancel on Hit Cancel on Block Guard Crush Value
- - - - - -

Can be force-finished early with A+B.


Chou Bakuen Kunai
Qcf.png,Qcf.png + Kof.sp.png
Garou Hokutomaru 236236C.png
Garou Hokutomaru 236236C 1.png
Qcf.png,Qcf.png + Kof.sp.png Damage Guard Startup Active Recovery Total
7, 7, 7, 7, 32 Mid 9 - - -
Hit Adv Block Adv Feint Cancel Cancel on Hit Cancel on Block Guard Crush Value
KD -34 - - - 3×5

1~9F full-body invincibility.

--- Kof.lp.pngKof.lk.png Damage Guard Startup Active Recovery Total
- - - - - -
Hit Adv Block Adv Feint Cancel Cancel on Hit Cancel on Block Guard Crush Value
- - - - - -

Can be force-finished early with A+B.


Ougi • Chou Hissatsu Tatsumaki
Qcf.png,Qcf.png + Kof.lk.png
Garou Hokutomaru 236236B.png
Qcf.png,Qcf.png + Kof.lk.png Damage Guard Startup Active Recovery Total
5×9 Mid 1 - - -
Hit Adv Block Adv Feint Cancel Cancel on Hit Cancel on Block Guard Crush Value
KD -60 - - - 2×9

Corner combo ender and Hokutomaru's only invincible reversal. Due to the hitbox being modest, the short length of the invincibility and the damage being spread between many weak hits, when used outside of combos it will often miss many hits and even trade/lose to attacks, limiting its use as a raw reversal or anti-air. It is pretty reliable after a GC, though you may still lose damage if the opponent is in the air.
As it is 1F startup, Hokutomaru can juggle into this super when the opponent is meant to be invincible (air reset). This is difficult to time and does not apply to the P-Power version which is 0F startup.
1~2F full-body invincibility.

  • Causes Hard Knockdown.

Kyuukyoku Ougi • Chou Bakuen Tatsumaki
Qcf.png,Qcf.png + Kof.sk.png
Garou Hokutomaru 236236D.png
Qcf.png,Qcf.png + Kof.sk.png Damage Guard Startup Active Recovery Total
7×10 Mid 0 - - -
Hit Adv Block Adv Feint Cancel Cancel on Hit Cancel on Block Guard Crush Value
KD -54 - - - 3×10
  • Causes Soft Knockdown, unlike 236236B.


Game Navigation

General
Controls
HUD
System
Movement
Offense
Defense
Calculation
Advanced_Techniques
Miscellaneous
Wakeup
Meta_Strategy
FAQ
Characters
Rock
Kim Dong Hwan
Hotaru
Khushnood Butt
Hokutomaru
Kevin Rian
Freeman
Tizoc
B. Jenet
Gato
Kim Jae Hoon
Terry
Kain
Grant