Scatteraxis (talk | contribs) m (Scatteraxis moved page Street Fighter 3: 3rd Strike/Twelve to Street Fighter 3: 3rd Strike/Twelve/Archive without leaving a redirect) |
|||
| (16 intermediate revisions by 6 users not shown) | |||
| Line 1: | Line 1: | ||
[[Image:Twelve3sport.gif|frame|right|Twelve's Character Select Portrait]] | [[Image:Twelve3sport.gif|frame|right|Twelve's Character Select Portrait]] | ||
[[Image:Twelve3s-stance.gif|frame|right|Twelve's Neutral Stance]] | [[Image:Twelve3s-stance.gif|frame|right|Twelve's Neutral Stance]] | ||
==Updated version available!== | |||
You're reading the old version of this page. [https://srk.shib.live/w/Street_Fighter_3:_3rd_Strike/Twelve/2021 Click here] to read the (in-progress) updated version! | |||
==Introduction== | ==Introduction== | ||
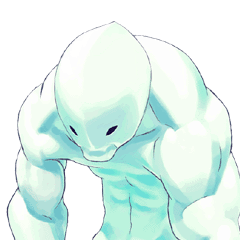
With Necro being his prototype, Twelve is genetically engineered to regenerate, form other shapes (usually weapons) out of his body, copy a person's appearance and skill, and is meant to be incapable of being damaged. The "G-Project", the secret project that resulted in Twelve's birth, was executed by Dr. Kure, and overseen by Gill's brother, [[Urien (3S)|Urien]]. Twelve is ordered to retrieve Necro and Effie after the latter freed and helped Necro escape from Gill's organization. Twelve is also being mass produced by the organization to create an army of Twelve-like creatures. Twelve considers Urien to be his father because of his involvement with his creation. | With Necro being his prototype, Twelve is genetically engineered to regenerate, form other shapes (usually weapons) out of his body, copy a person's appearance and skill, and is meant to be incapable of being damaged. The "G-Project", the secret project that resulted in Twelve's birth, was executed by Dr. Kure, and overseen by Gill's brother, [[Urien (3S)|Urien]]. Twelve is ordered to retrieve Necro and Effie after the latter freed and helped Necro escape from Gill's organization. Twelve is also being mass produced by the organization to create an army of Twelve-like creatures. Twelve considers Urien to be his father because of his involvement with his creation. | ||
It's not worth it to deny the fact that twelve is awful - he's easily on the bottom 2 characters in the game. He lacks in a lot of important fields, and shifts his gameplan from what was probably meant to be mixup-heavy rushdown to hit and run, heavy on getting a lifelead safely and stalling away. However, contrary to belief, twelve isn't actually useless or unviable - his airdash is a great tool for approaching, mixups and stalling. his walk low profiles projectiles and allows him to go for anti airs more safely. his ex needles can tthreaten with a knockdown and oki opportunity from far away, and he actually has a few decent normals for poking, anti airing and blockstrings. If you pick twelve, prepare to play one of the most difficult characters to play, but if you like hit and run chars, twelve's design, or playing a difficult character, he can be a lot of fun. | |||
{{ ProConTable | |||
| pros= | |||
* Great mobility with his airdash, used for approaching or stalling | |||
* Walk can low profile projectiles, only boosting his stalling ability | |||
* Great high/low or left/right mixups thanks to his airdash and funky j.hk | |||
* fireballs can be annoying for certain characters, ex needles can threaten with a knockdown from anywhere on the screen. | |||
* some all-around decent normals, especially in close range | |||
| cons= | |||
* the worst damage output in the game | |||
* No conversions unless standing close to opponent | |||
* some of the lower health and stun in the game | |||
* struggles to get knockdown once he does get a conversion, especially without a super | |||
* very poor frame data meaning he has a hard time being safe or getting + frames | |||
* While his supers are not awful, he doesnt gain much utility from them, except actually decent damage in some situations | |||
}} | |||
==Specific Character Information== | ==Specific Character Information== | ||
| Line 13: | Line 31: | ||
*Stun Bar Recovery (frames it takes to recover 1 dot): 23 | *Stun Bar Recovery (frames it takes to recover 1 dot): 23 | ||
*Taunt: It turns you invisible for a while. | *Taunt: It turns you invisible for a while. | ||
*Best Kara-Throw: | *Best Kara-Throw: None. Technically s.MP is best but it becomes cl.MP at ranges where the kara throw would be relevant, which gives very little bonus range. | ||
*Standard Throw Range (pixels): 22 | *Standard Throw Range (pixels): 22 | ||
*Kara-Throw Range (pixels): 40 | *Kara-Throw Range (pixels): 40 | ||
| Line 22: | Line 40: | ||
= Moves List = | = Moves List = | ||
==Standing Normals== | |||
'''s.LP''' - Quick, cancellable jab. Frequently used as an anti-air and cancelled into LP A.X.E. Can be crouched under by most characters. | |||
'''s.MP''' - Really good button. Longish startup for a medium normal but amazing range and fast recovery. Used pretty much just as a long range poke since it's not cancellable, can be crouched like LP. | |||
'''cl.MP''' - Good speed, good recovery, cancellable, scaling isn't bad. The only thing holding this move back is that it's situational since raw SA1 does more damage than cl.MP xx SA1. Whiffs on short crouching opponents like Chun and Elena. | |||
'''s.HP''' - Slow, single hit """anti-air""". It's more like an anti-jump move because it's so slow, you almost have to predict the jump instead of reacting to it. Covers a good angle though and isn't a bad move. A good "shut the hell up" button. | |||
'''s.LK''' - Fast, cancellable poke. Good button, almost never used because cr.LK is just better. | |||
'''s.MK''' - Funky button. Kinda slow but it's super cancellable and superjump cancellable. This is Twelve's only SJC-able button and you can occasionally throw it into your pressure game for some fun loops. Just don't get carried away. This move is also his only true confirm into SA2. | |||
'''s.HK''' - The Dhalsim button. One of the biggest normals in the game. Very good at low level but is parryable on reaction at high level and is also -2 on hit, meaning you're eating a super if you use this against the wrong characters. | |||
==Crouching Normals== | |||
==Jumping Normals== | |||
==Command Normals== | |||
{| border="1em" cellspacing="0" width="45%" style="border: 1px solid #999; background: none;"|- | |||
| b.MK || [[File:B.png]]+[[File:Mk.png]] | |||
|- | |||
| Kokkou || Air [[File:F.png]]/[[File:B.png]] | |||
|- | |||
| Kabe Haritsuki || Air [[File:F.png]]/[[File:B.png]] into wall | |||
|} | |||
'''b.MK''' - ''Funkier'' button. Used for pretty much the same things as cl.MP except it's also sort of an anti-air and hits short chrouching characters. Highest damage confirm to SA1, harder execution. Weird, unexplored move. | |||
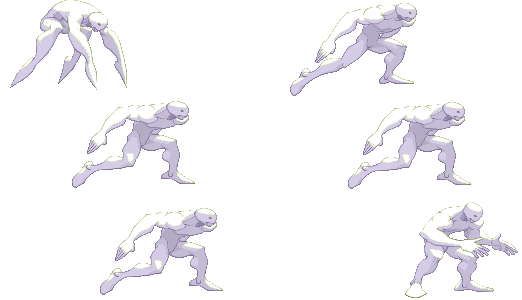
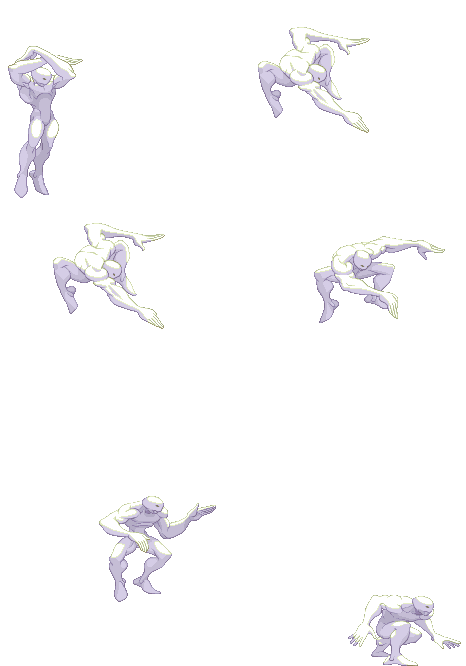
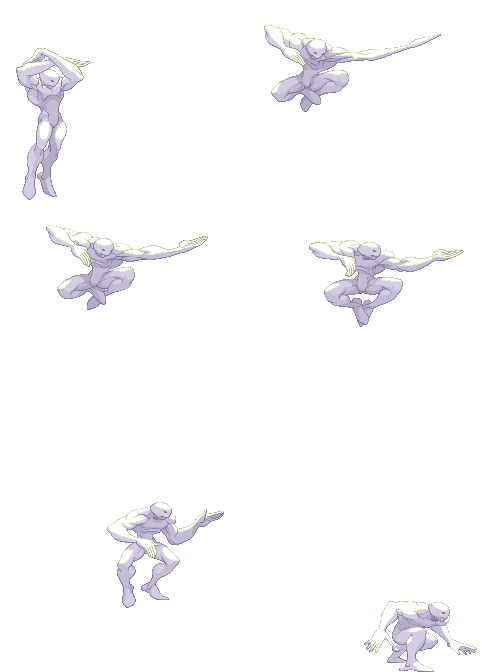
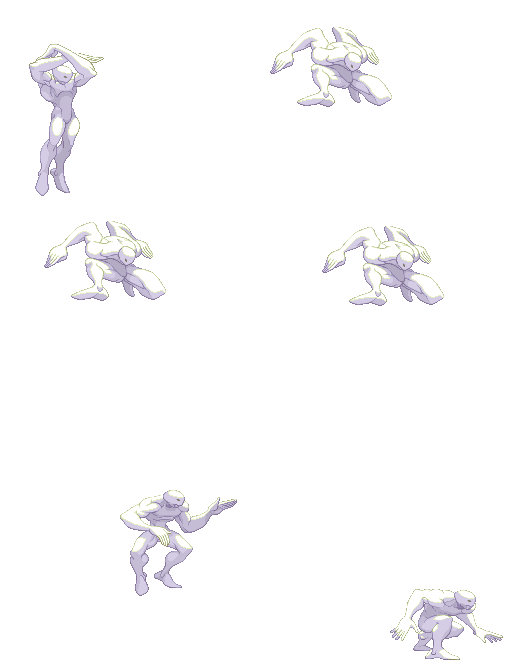
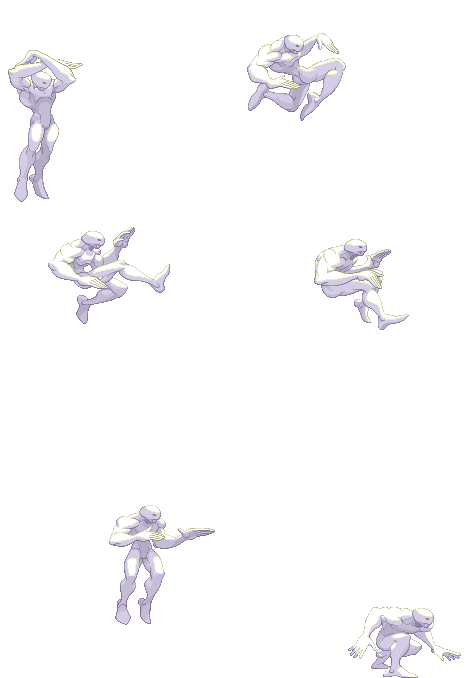
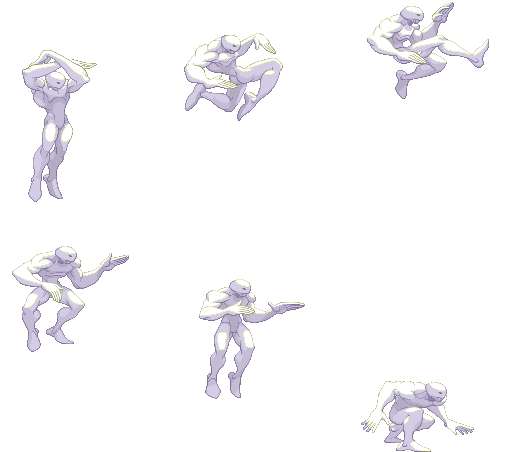
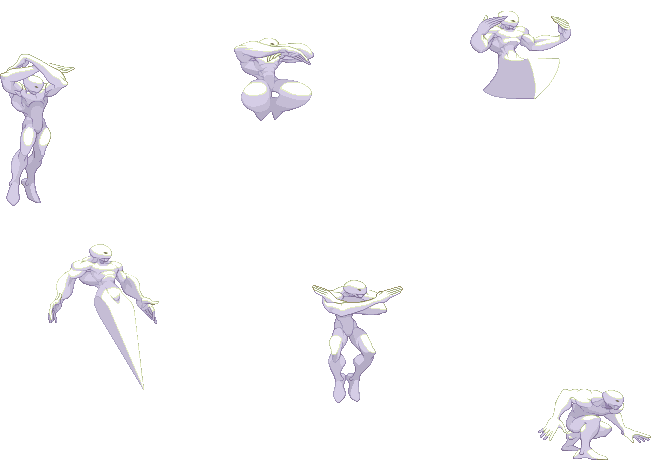
'''Kokkou (aka Airdash)''' - One of the main reasons to play Twelve. Performed with two forward inputs while airborne, airdash opens up so many of the options Twelve has and enables his mixups and pressure game. | |||
Twelve cannot parry while airdashing. An instant airdash can be performed by pressing up-forward to jump and forward to begin the airdash. | |||
Twelve's airdash is a key part of their kit and it is essential to understand not only the benefits of airdash but the drawbacks as well. | |||
More advanced airdash options will be discussed in the "Advanced Strategy" section (when I eventually get around to adding to it) | |||
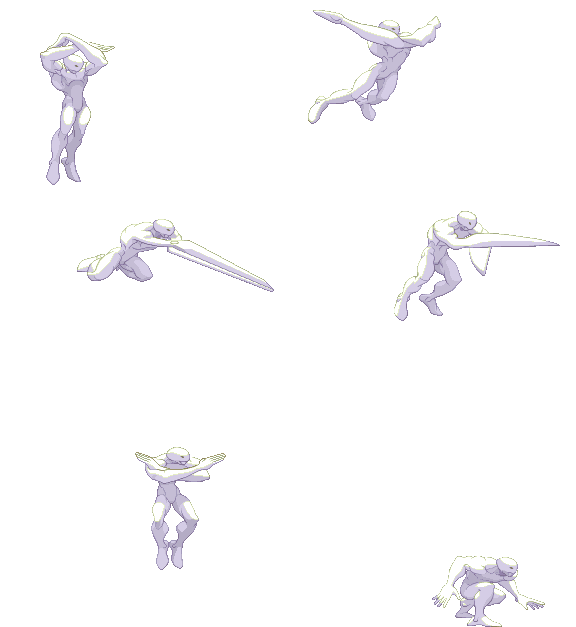
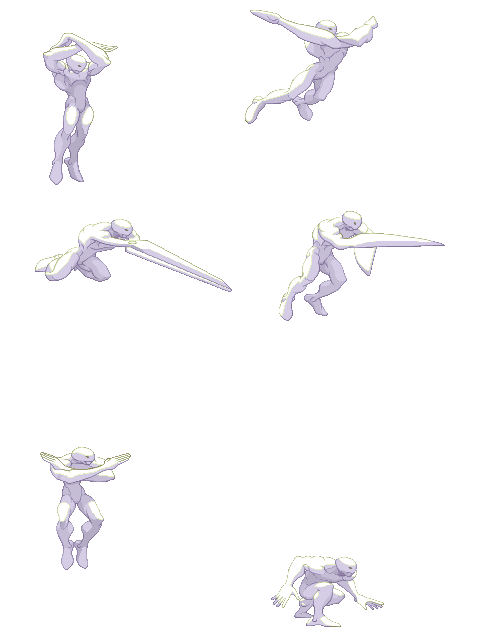
'''Kabe Haritsuki (aka Walljump)''' - Almost completely irrelevant. Can be used to mix up stalling in very situational occasions but is overall fairly useless. | |||
==Specials== | |||
==Supers== | |||
==Throws== | ==Throws== | ||
{| border="1em" cellspacing="0" width="45%" style="border: 1px solid #999; background: | {| border="1em" cellspacing="0" width="45%" style="border: 1px solid #999; background: none;"|- | ||
| H.U.G. || [[File:Lp.png]]+[[File:Lk.png]] | | H.U.G. || [[File:Lp.png]]+[[File:Lk.png]] | ||
|- | |- | ||
| F.L.G. || [[File:F.png]]+[[File:Lp.png]]+[[File:Lk.png]] | | F.L.G. || [[File:F.png]]+[[File:Lp.png]]+[[File:Lk.png]] | ||
|- | |- | ||
| | | T.R.W. || [[File:B.png]]+[[File:Lp.png]]+[[File:Lk.png]] | ||
|} | |} | ||
'''Neutral Throw''' - not good. Does slightly more stun that his other throws and is harder to mash oit of than other mash throws, but overall is rarely worth giving up the positioning and setup potential of his other throws. Also, you can OTG Hugo with Super if he doesn't quickrise this. | |||
'''Forward Throw''' - Sends fullscreen and gives you enough time to airdash over and start oki. You can also forego oki to set up funny taunt but be aware that many characters can punish you since forward throw does not give you as many + frames as back throw. | |||
'''Back Throw''' - Unless you have your opponent cornered or something this is usually Twelve's best throw. You basically get everything you would normally get off forward throw except back throw is safer on hit, allowing for more time to set up oki or the t a u n t. | |||
==Special Moves== | ==Special Moves== | ||
{| border="1em" cellspacing="0" width="45%" style="border: 1px solid #999; background: | {| border="1em" cellspacing="0" width="45%" style="border: 1px solid #999; background: none;"|- | ||
| N.D.L. || [[File:Qcf.png]]+[[File:P.png]] || EX | | N.D.L. || [[File:Qcf.png]]+[[File:P.png]] || EX | ||
|- | |- | ||
| Line 52: | Line 109: | ||
|} | |} | ||
==Super Arts== | ==Super Arts== | ||
{| border="1em" cellspacing="0" width="45%" style="border: 1px solid #999; background: | {| border="1em" cellspacing="0" width="45%" style="border: 1px solid #999; background: none;"|- | ||
| I || X.N.D.L. || [[File:Qcf.png]][[File:Qcf.png]]+[[File:P.png]] || 96 Gauge Dots || 2 Stocks || 4.7 EX Uses | | SA Number || SA Name || SA Motion || Bar Length || # of Stocks || # of EX uses || Notes | ||
|- | |||
| I || X.N.D.L. || [[File:Qcf.png]][[File:Qcf.png]]+[[File:P.png]] || 96 Gauge Dots || 2 Stocks || 4.7 EX Uses || recovers crouching | |||
|- | |- | ||
| II || X.F.L.A.T. || Air [[File:Qcf.png]][[File:Qcf.png]]+[[File:K.png]] || 112 Gauge Dots || 1 Stock || 2.7 EX Uses | | II || X.F.L.A.T. || Air [[File:Qcf.png]][[File:Qcf.png]]+[[File:K.png]] || 112 Gauge Dots || 1 Stock || 2.7 EX Uses | ||
|- | |- | ||
| III || X.C.O.P.Y. || [[File:Qcf.png]][[File:Qcf.png]]+[[File:P.png]] || 128 Gauge Dots || 1 Stock || 3.2 EX Uses | | III || X.C.O.P.Y. || [[File:Qcf.png]][[File:Qcf.png]]+[[File:P.png]] || 128 Gauge Dots || 1 Stock || 3.2 EX Uses || transform into a foe | ||
| | |||
| | |||
|} | |} | ||
= Move Analysis = | = Move Analysis = | ||
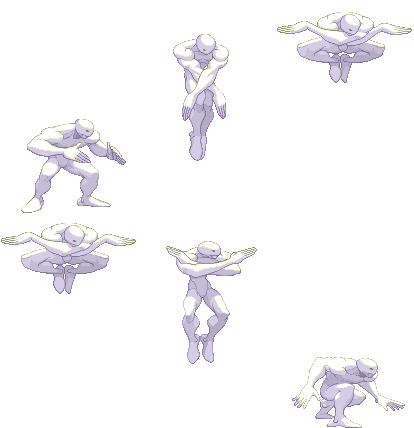
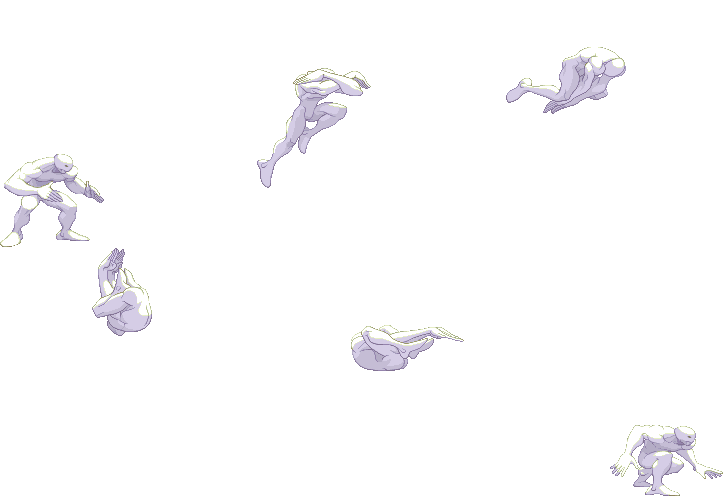
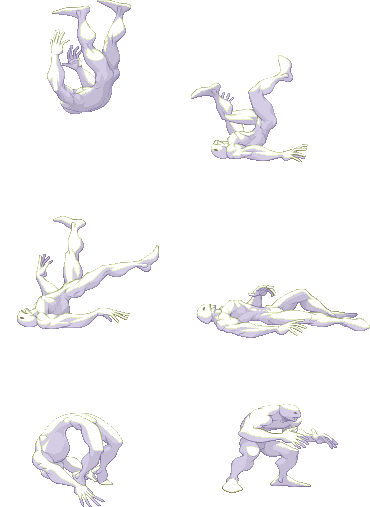
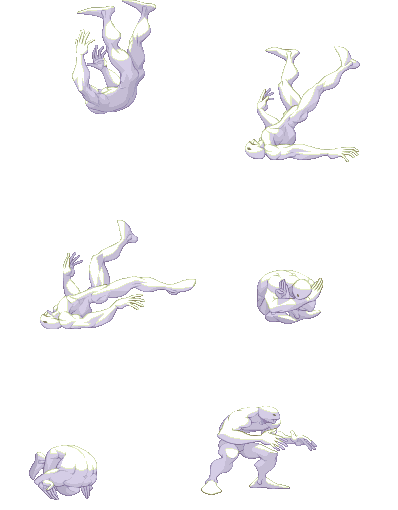
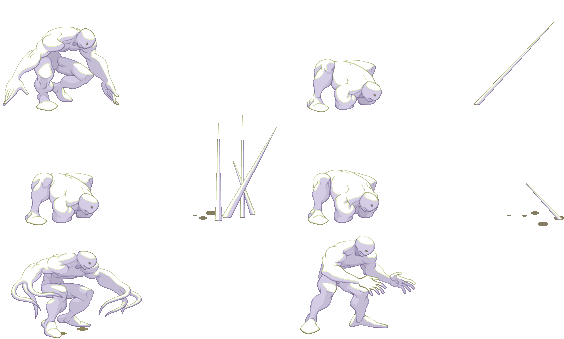
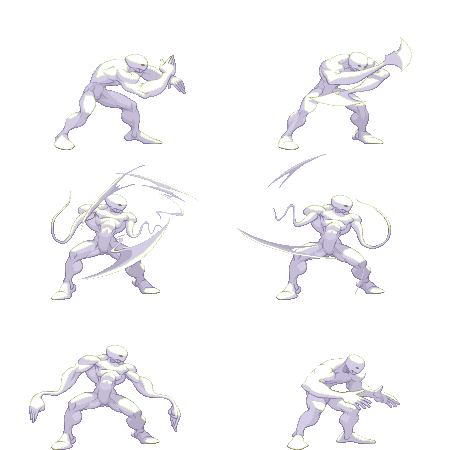
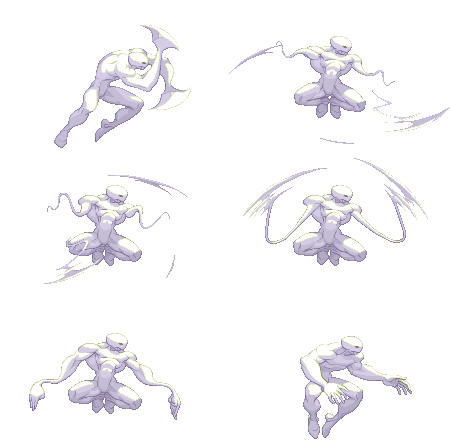
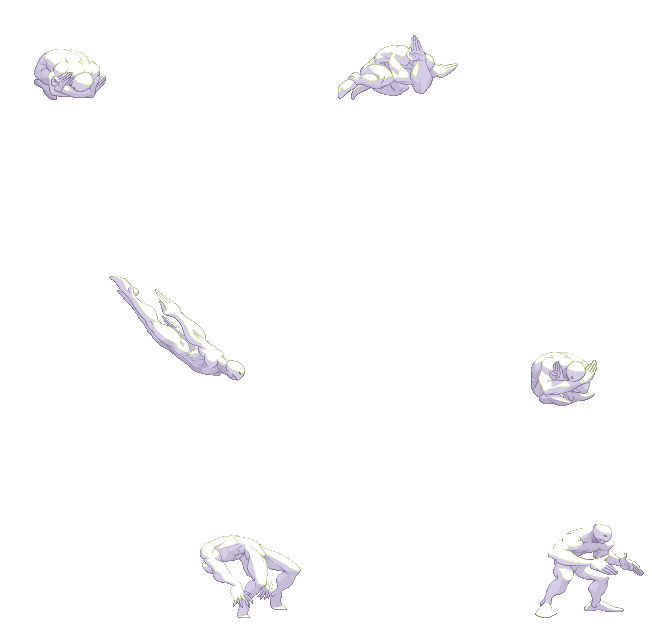
*All those sprites are taken from the site | *All those sprites are taken from the site https://www.justnopoint.com/zweifuss/ | ||
*All Framedatas in "Move Analisys" section are taken from [http:// | *All Framedatas in "Move Analisys" section are taken from [http://gr.qee.jp/01_3rd/index.html Game Restaurant] , this means the Framedata isn't from the Dreamcast version like Karathrow site, it's from Arcade version. | ||
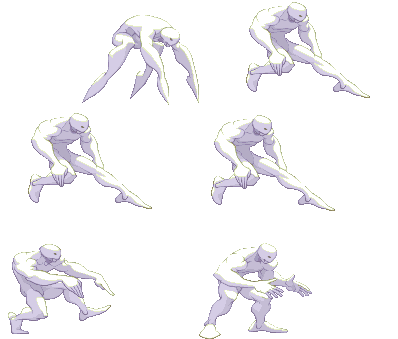
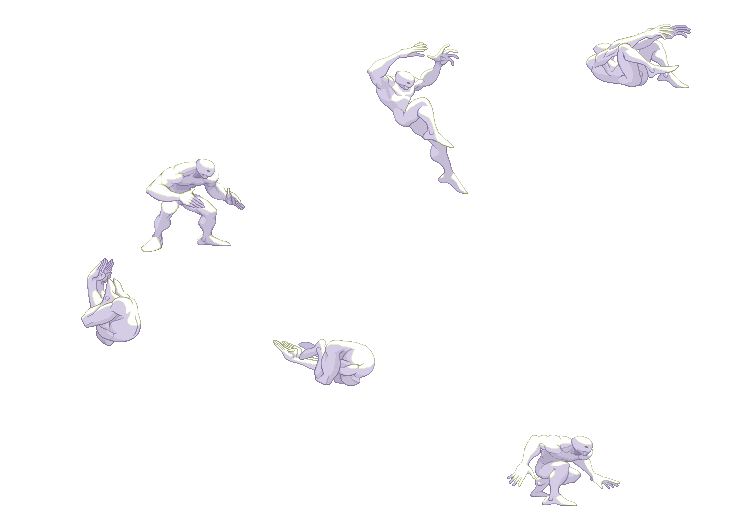
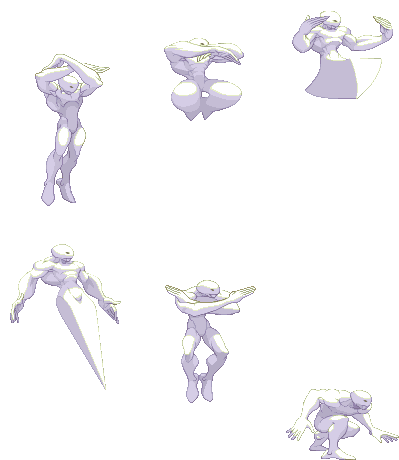
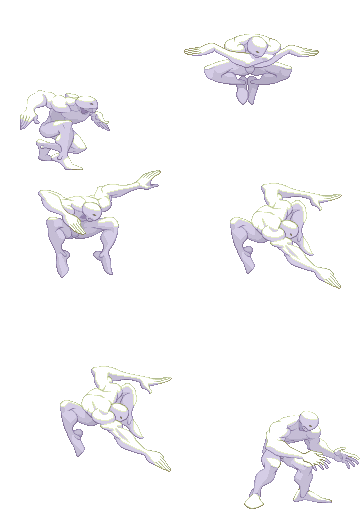
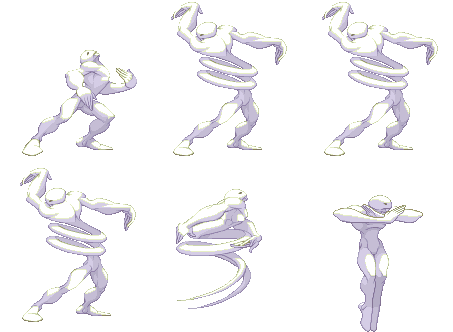
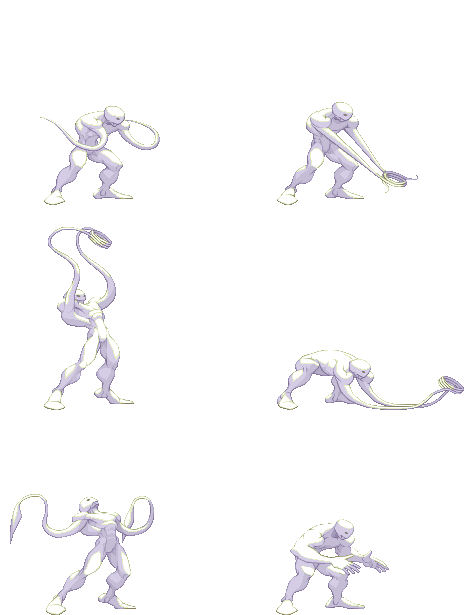
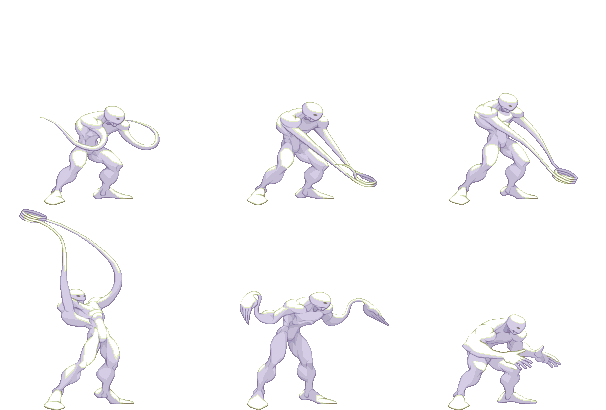
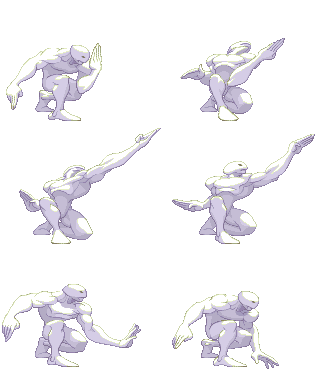
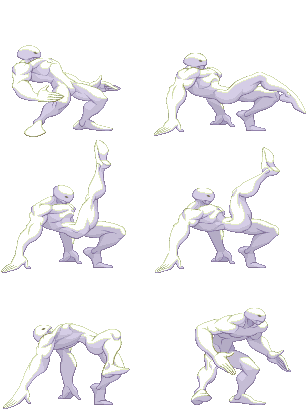
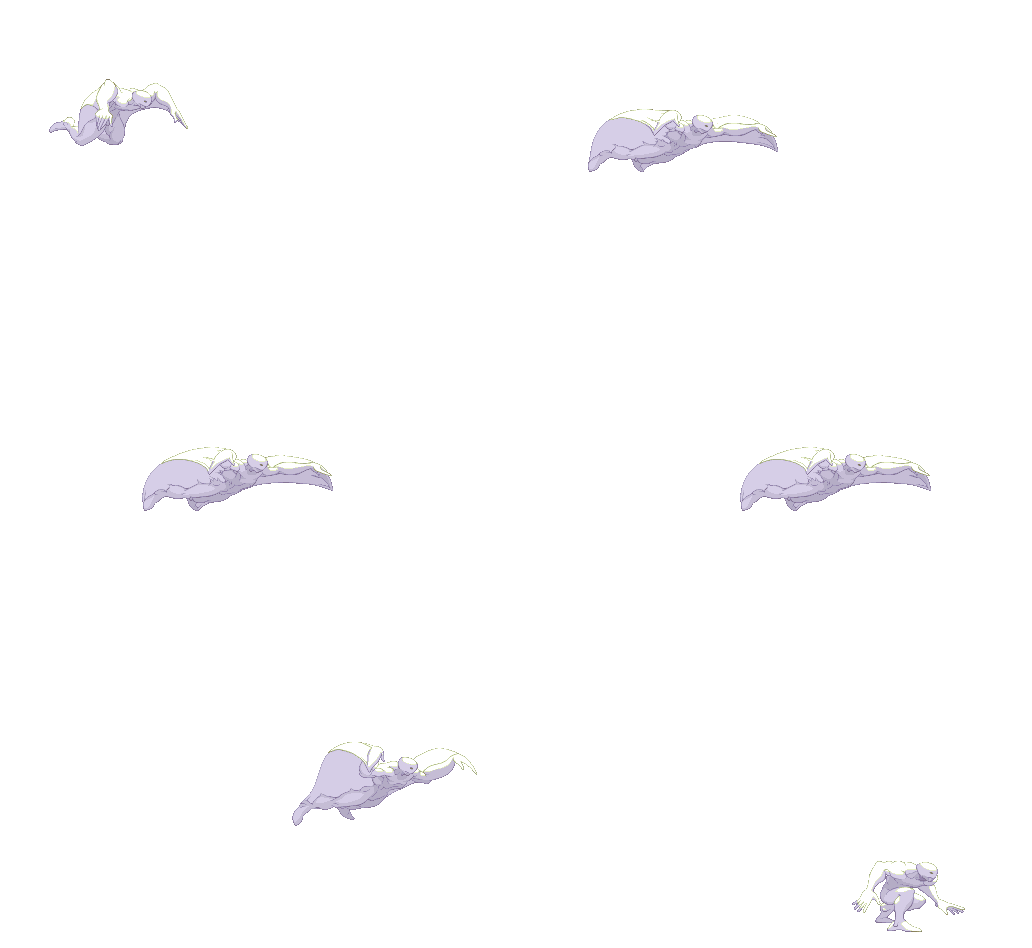
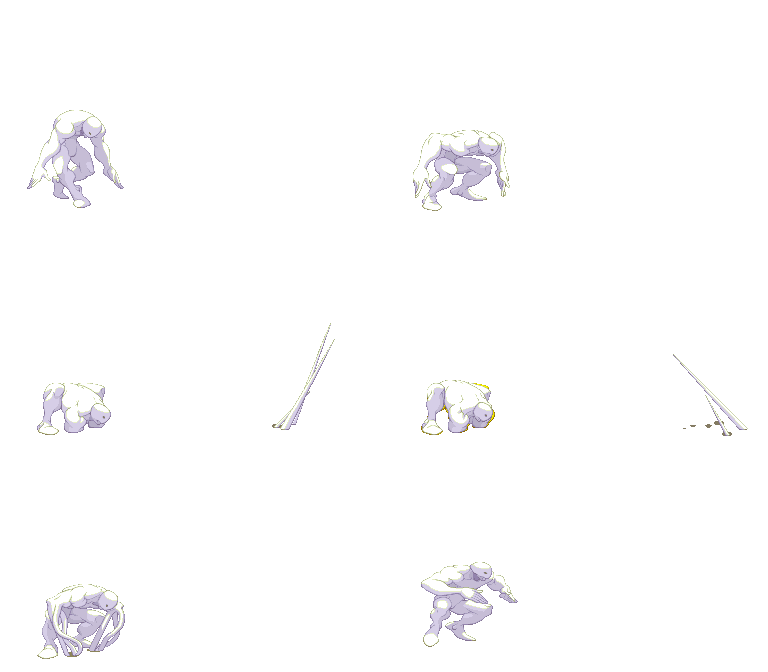
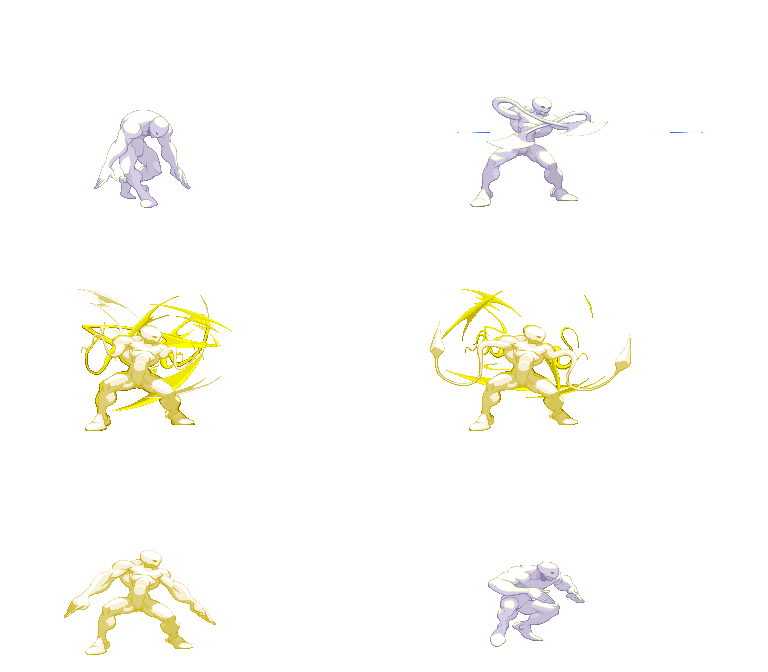
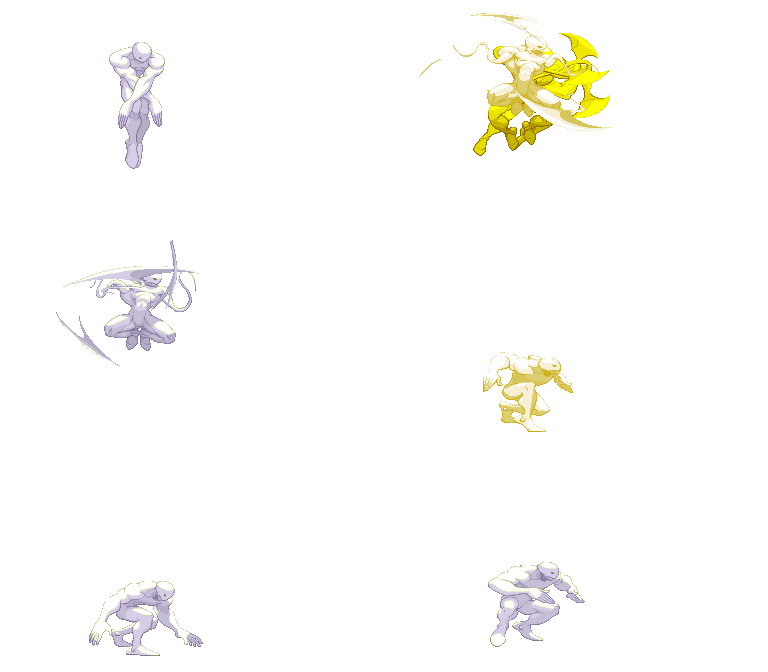
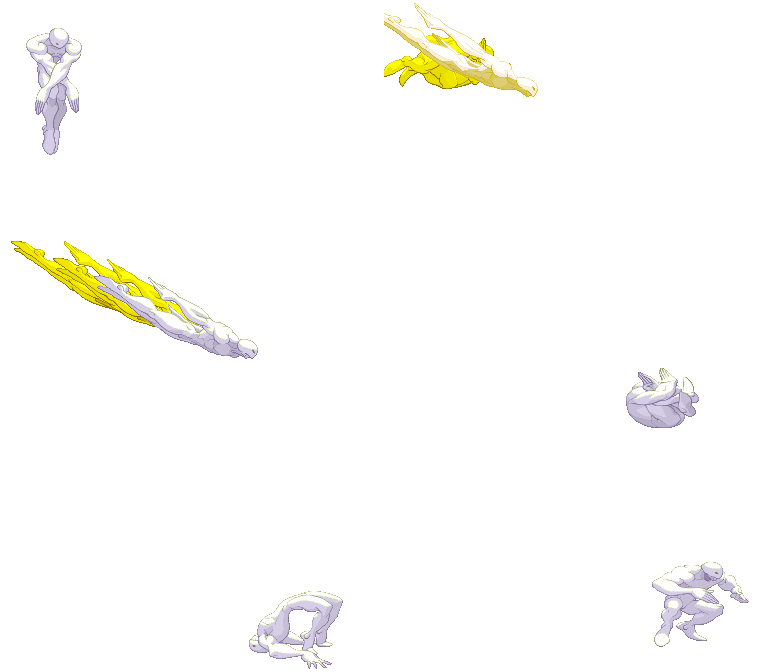
Please note that the images show in this section are for the 1st frame it hits, so this means the opponent is taking the hit in the image shown on the move. I use the 1st frame of every move (except taunt, dash, jump, wakeup and 2nd throw image sprites) because you will see the maximum range of every attack (mostly of the attacks). Note also that those images are ACCURATE, they are exactly the first frame it hits, so enemy takes damage but they still dont make the "pain" frame. | Please note that the images show in this section are for the 1st frame it hits, so this means the opponent is taking the hit in the image shown on the move. I use the 1st frame of every move (except taunt, dash, jump, wakeup and 2nd throw image sprites) because you will see the maximum range of every attack (mostly of the attacks). Note also that those images are ACCURATE, they are exactly the first frame it hits, so enemy takes damage but they still dont make the "pain" frame. | ||
| Line 84: | Line 141: | ||
*'''Hit''': Number of frames that can hit the opponent | *'''Hit''': Number of frames that can hit the opponent | ||
*'''Recovery''': Number of frames it takes to recover from the move | *'''Recovery''': Number of frames it takes to recover from the move | ||
*'''Blocked Advantage''': Number of frames you are in advantage/ | *'''Blocked Advantage''': Number of frames you are in advantage/disadvantage after opponent have been blocked the hit | ||
*'''Hit Advantage''': Number of frames you are in advantage/ | *'''Hit Advantage''': Number of frames you are in advantage/disadvantage after opponent have been take the hit | ||
*'''Crouching Hit Advantage''': Number of frames you are in advantage/ | *'''Crouching Hit Advantage''': Number of frames you are in advantage/disadvantage after opponent have been take the hit while he's crouching | ||
* + # : You have # frames of advantage | * + # : You have # frames of advantage | ||
* - # : You have # frames of | * - # : You have # frames of disadvantage | ||
* # ~ # : Advantage/ | * # ~ # : Advantage/disadvantage can vary from # to # | ||
*Down: Enemy gets knocked down | *Down: Enemy gets knocked down | ||
*'''Guard''': How opponent must guard the move, High (H), Low (L) or both (HL) | *'''Guard''': How opponent must guard the move, High (H), Low (L) or both (HL) | ||
| Line 102: | Line 159: | ||
[[Image:(twelvedf).gif|none]] | [[Image:(twelvedf).gif|none]] | ||
{| border="1em" cellspacing="0" width="60%" style="border: 1px solid #999; background: | {| border="1em" cellspacing="0" width="60%" style="border: 1px solid #999; background: none;" | ||
|- | |- | ||
! align="center" | Move | ! align="center" | Move | ||
| Line 122: | Line 179: | ||
[[Image:(twelvedb).gif|none]] | [[Image:(twelvedb).gif|none]] | ||
{| border="1em" cellspacing="0" width="60%" style="border: 1px solid #999; background: | {| border="1em" cellspacing="0" width="60%" style="border: 1px solid #999; background: none;" | ||
|- | |- | ||
! align="center" | Move | ! align="center" | Move | ||
| Line 144: | Line 201: | ||
[[Image:(twelvejump).gif|none]] | [[Image:(twelvejump).gif|none]] | ||
[[Image:(twelvefjump).gif|none]] | [[Image:(twelvefjump).gif|none]] | ||
{| border="1em" cellspacing="0" width="30%" style="border: 1px solid #999; background: | {| border="1em" cellspacing="0" width="30%" style="border: 1px solid #999; background: none;" | ||
|- | |- | ||
| align="center" | '''Move''' || align="center" | '''Motion''' || align="center" | '''Startup Frames''' | | align="center" | '''Move''' || align="center" | '''Motion''' || align="center" | '''Startup Frames''' | ||
| Line 153: | Line 210: | ||
{| border="1em" cellspacing="0" width="30%" style="border: 1px solid #999; background: | {| border="1em" cellspacing="0" width="30%" style="border: 1px solid #999; background: none;" | ||
|- | |- | ||
| align="center" | '''Move''' || align="center" | '''Motion''' || align="center" | '''Startup Frames''' | | align="center" | '''Move''' || align="center" | '''Motion''' || align="center" | '''Startup Frames''' | ||
| Line 163: | Line 220: | ||
[[Image:(twelvew).gif|none]] | [[Image:(twelvew).gif|none]] | ||
{| border="1em" cellspacing="0" width="30%" style="border: 1px solid #999; background: | {| border="1em" cellspacing="0" width="30%" style="border: 1px solid #999; background: none;" | ||
|- | |- | ||
| align="center" | '''Move''' || align="center" | '''Motion''' || align="center" | '''Frames''' | | align="center" | '''Move''' || align="center" | '''Motion''' || align="center" | '''Frames''' | ||
| Line 173: | Line 230: | ||
[[Image:(twelvetw).gif|none]] | [[Image:(twelvetw).gif|none]] | ||
{| border="1em" cellspacing="0" width="30%" style="border: 1px solid #999; background: | {| border="1em" cellspacing="0" width="30%" style="border: 1px solid #999; background: none;" | ||
|- | |- | ||
| align="center" | '''Move''' || align="center" | '''Motion''' || align="center" | '''Frames''' | | align="center" | '''Move''' || align="center" | '''Motion''' || align="center" | '''Frames''' | ||
| Line 183: | Line 240: | ||
[[Image:(twelvet).gif|none]] | [[Image:(twelvet).gif|none]] | ||
{| border="1em" cellspacing="0" width="60%" style="border: 1px solid #999; background: | {| border="1em" cellspacing="0" width="60%" style="border: 1px solid #999; background: none;" | ||
|- | |- | ||
| align="center" | '''Move''' || align="center" | '''Motion''' || align="center" | '''Damage''' || align="center" | '''Stun Damage''' || align="center" | '''Chains into itself''' || align="center" | '''Special Cancel''' || align="center" | '''Super Cancel''' || align="center" | '''Juggle Value''' | | align="center" | '''Move''' || align="center" | '''Motion''' || align="center" | '''Damage''' || align="center" | '''Stun Damage''' || align="center" | '''Chains into itself''' || align="center" | '''Special Cancel''' || align="center" | '''Super Cancel''' || align="center" | '''Juggle Value''' | ||
| Line 190: | Line 247: | ||
|} | |} | ||
'''Frame Data''' | '''Frame Data''' | ||
{| border="1em" cellspacing="0" width="60%" style="border: 1px solid #999; background: | {| border="1em" cellspacing="0" width="60%" style="border: 1px solid #999; background: none;" | ||
|- | |- | ||
| align="center" | '''Startup''' || align="center" | '''Hit''' || align="center" | '''Recovery''' || align="center" | '''Blocked Advantage''' || align="center" | '''Hit Advantage''' || align="center" | '''Crouching Hit Advantage''' || align="center" | '''Guard''' || align="center" | '''Parry''' | | align="center" | '''Startup''' || align="center" | '''Hit''' || align="center" | '''Recovery''' || align="center" | '''Blocked Advantage''' || align="center" | '''Hit Advantage''' || align="center" | '''Crouching Hit Advantage''' || align="center" | '''Guard''' || align="center" | '''Parry''' | ||
| Line 197: | Line 254: | ||
|} | |} | ||
'''Gauge Increase''' | '''Gauge Increase''' | ||
{| border="1em" cellspacing="0" width="30%" style="border: 1px solid #999; background: | {| border="1em" cellspacing="0" width="30%" style="border: 1px solid #999; background: none;" | ||
|- | |- | ||
| align="center" | '''Miss''' || align="center" | '''Blocked''' || align="center" | '''Hit''' || align="center" | '''Parry (Gauge for opponent)''' | | align="center" | '''Miss''' || align="center" | '''Blocked''' || align="center" | '''Hit''' || align="center" | '''Parry (Gauge for opponent)''' | ||
| Line 209: | Line 266: | ||
[[Image:(twelvelparry).gif|none]] | [[Image:(twelvelparry).gif|none]] | ||
{| border="1em" cellspacing="0" width="35%" style="border: 1px solid #999; background: | {| border="1em" cellspacing="0" width="35%" style="border: 1px solid #999; background: none;" | ||
|- | |- | ||
| align="center" | '''Move''' || align="center" | '''Motion''' | | align="center" | '''Move''' || align="center" | '''Motion''' | ||
| Line 220: | Line 277: | ||
|} | |} | ||
'''Frame Data''' | '''Frame Data''' | ||
{| border="1em" cellspacing="0" width="95%" style="border: 1px solid #999; background: | {| border="1em" cellspacing="0" width="95%" style="border: 1px solid #999; background: none;" | ||
|- | |- | ||
| align="center" | '''Move''' || align="center" | '''Frames you're frozen''' || align="center" | '''Frames opponent is frozen''' || align="center" | '''Frame Advantage when parry is successful''' || align="center" | '''Frames before you can try another parry''' | | align="center" | '''Move''' || align="center" | '''Frames you're frozen''' || align="center" | '''Frames opponent is frozen''' || align="center" | '''Frame Advantage when parry is successful''' || align="center" | '''Frames before you can try another parry''' | ||
| Line 230: | Line 287: | ||
| align="center" | Parry (Air) || align="center" | 16 || align="center" | 16 || align="center" | +4(LP/LK) +3(MP/MK) +2(HP/HK) 0(Special/Super) -16(Fireball) || align="center" | 21(19 when attack comes from the air)*,** | | align="center" | Parry (Air) || align="center" | 16 || align="center" | 16 || align="center" | +4(LP/LK) +3(MP/MK) +2(HP/HK) 0(Special/Super) -16(Fireball) || align="center" | 21(19 when attack comes from the air)*,** | ||
|} | |} | ||
{| border="1em" cellspacing="0" width="70%" style="border: 1px solid #999; background: | {| border="1em" cellspacing="0" width="70%" style="border: 1px solid #999; background: none;" | ||
|- | |- | ||
|* (If a parry attempt is successful, the 19/21/24 frame restriction is taken away and you can attempt another parry immediately) | |* (If a parry attempt is successful, the 19/21/24 frame restriction is taken away and you can attempt another parry immediately) | ||
| Line 237: | Line 294: | ||
|} | |} | ||
'''Gauge Increase''' | '''Gauge Increase''' | ||
{| border="1em" cellspacing="0" width="30%" style="border: 1px solid #999; background: | {| border="1em" cellspacing="0" width="30%" style="border: 1px solid #999; background: none;" | ||
|- | |- | ||
| align="center" | '''Move''' || align="center" | '''Gauge Increase''' | | align="center" | '''Move''' || align="center" | '''Gauge Increase''' | ||
| Line 247: | Line 304: | ||
| align="center" | Parry (Air) || align="center" | 4*** | | align="center" | Parry (Air) || align="center" | 4*** | ||
|} | |} | ||
{| border="1em" cellspacing="0" width="57%" style="border: 1px solid #999; background: | {| border="1em" cellspacing="0" width="57%" style="border: 1px solid #999; background: none;" | ||
|- | |- | ||
|*** (You gain 4 of gauge for whatever attack parried, and for whatever hit you parry during multihit attack) | |*** (You gain 4 of gauge for whatever attack parried, and for whatever hit you parry during multihit attack) | ||
| Line 258: | Line 315: | ||
[[Image:(twelvelp).gif|none]] | [[Image:(twelvelp).gif|none]] | ||
{| border="1em" cellspacing="0" width="60%" style="border: 1px solid #999; background: | {| border="1em" cellspacing="0" width="60%" style="border: 1px solid #999; background: none;" | ||
|- | |- | ||
| align="center" | '''Move''' || align="center" | '''Motion''' || align="center" | '''Damage''' || align="center" | '''Stun Damage''' || align="center" | '''Chains into itself''' || align="center" | '''Special Cancel''' || align="center" | '''Super Cancel''' || align="center" | '''Juggle Value''' | | align="center" | '''Move''' || align="center" | '''Motion''' || align="center" | '''Damage''' || align="center" | '''Stun Damage''' || align="center" | '''Chains into itself''' || align="center" | '''Special Cancel''' || align="center" | '''Super Cancel''' || align="center" | '''Juggle Value''' | ||
| Line 265: | Line 322: | ||
|} | |} | ||
'''Frame Data''' | '''Frame Data''' | ||
{| border="1em" cellspacing="0" width="60%" style="border: 1px solid #999; background: | {| border="1em" cellspacing="0" width="60%" style="border: 1px solid #999; background: none;" | ||
|- | |- | ||
| align="center" | '''Startup''' || align="center" | '''Hit''' || align="center" | '''Recovery''' || align="center" | '''Blocked Advantage''' || align="center" | '''Hit Advantage''' || align="center" | '''Crouching Hit Advantage''' || align="center" | '''Guard''' || align="center" | '''Parry''' | | align="center" | '''Startup''' || align="center" | '''Hit''' || align="center" | '''Recovery''' || align="center" | '''Blocked Advantage''' || align="center" | '''Hit Advantage''' || align="center" | '''Crouching Hit Advantage''' || align="center" | '''Guard''' || align="center" | '''Parry''' | ||
| Line 272: | Line 329: | ||
|} | |} | ||
'''Gauge Increase''' | '''Gauge Increase''' | ||
{| border="1em" cellspacing="0" width="30%" style="border: 1px solid #999; background: | {| border="1em" cellspacing="0" width="30%" style="border: 1px solid #999; background: none;" | ||
|- | |- | ||
| align="center" | '''Miss''' || align="center" | '''Blocked''' || align="center" | '''Hit''' || align="center" | '''Parry (Gauge for opponent)''' | | align="center" | '''Miss''' || align="center" | '''Blocked''' || align="center" | '''Hit''' || align="center" | '''Parry (Gauge for opponent)''' | ||
| Line 282: | Line 339: | ||
[[Image:(twelvemp).gif|none]] | [[Image:(twelvemp).gif|none]] | ||
{| border="1em" cellspacing="0" width="60%" style="border: 1px solid #999; background: | {| border="1em" cellspacing="0" width="60%" style="border: 1px solid #999; background: none;" | ||
|- | |- | ||
| align="center" | '''Move''' || align="center" | '''Motion''' || align="center" | '''Damage''' || align="center" | '''Stun Damage''' || align="center" | '''Chains into itself''' || align="center" | '''Special Cancel''' || align="center" | '''Super Cancel''' || align="center" | '''Juggle Value''' | | align="center" | '''Move''' || align="center" | '''Motion''' || align="center" | '''Damage''' || align="center" | '''Stun Damage''' || align="center" | '''Chains into itself''' || align="center" | '''Special Cancel''' || align="center" | '''Super Cancel''' || align="center" | '''Juggle Value''' | ||
| Line 289: | Line 346: | ||
|} | |} | ||
'''Frame Data''' | '''Frame Data''' | ||
{| border="1em" cellspacing="0" width="60%" style="border: 1px solid #999; background: | {| border="1em" cellspacing="0" width="60%" style="border: 1px solid #999; background: none;" | ||
|- | |- | ||
| align="center" | '''Startup''' || align="center" | '''Hit''' || align="center" | '''Recovery''' || align="center" | '''Blocked Advantage''' || align="center" | '''Hit Advantage''' || align="center" | '''Crouching Hit Advantage''' || align="center" | '''Guard''' || align="center" | '''Parry''' | | align="center" | '''Startup''' || align="center" | '''Hit''' || align="center" | '''Recovery''' || align="center" | '''Blocked Advantage''' || align="center" | '''Hit Advantage''' || align="center" | '''Crouching Hit Advantage''' || align="center" | '''Guard''' || align="center" | '''Parry''' | ||
| Line 296: | Line 353: | ||
|} | |} | ||
'''Gauge Increase''' | '''Gauge Increase''' | ||
{| border="1em" cellspacing="0" width="30%" style="border: 1px solid #999; background: | {| border="1em" cellspacing="0" width="30%" style="border: 1px solid #999; background: none;" | ||
|- | |- | ||
| align="center" | '''Miss''' || align="center" | '''Blocked''' || align="center" | '''Hit''' || align="center" | '''Parry (Gauge for opponent)''' | | align="center" | '''Miss''' || align="center" | '''Blocked''' || align="center" | '''Hit''' || align="center" | '''Parry (Gauge for opponent)''' | ||
| Line 306: | Line 363: | ||
[[Image:(twelvehp).gif|none]] | [[Image:(twelvehp).gif|none]] | ||
{| border="1em" cellspacing="0" width="60%" style="border: 1px solid #999; background: | {| border="1em" cellspacing="0" width="60%" style="border: 1px solid #999; background: none;" | ||
|- | |- | ||
| align="center" | '''Move''' || align="center" | '''Motion''' || align="center" | '''Damage''' || align="center" | '''Stun Damage''' || align="center" | '''Chains into itself''' || align="center" | '''Special Cancel''' || align="center" | '''Super Cancel''' || align="center" | '''Juggle Value''' | | align="center" | '''Move''' || align="center" | '''Motion''' || align="center" | '''Damage''' || align="center" | '''Stun Damage''' || align="center" | '''Chains into itself''' || align="center" | '''Special Cancel''' || align="center" | '''Super Cancel''' || align="center" | '''Juggle Value''' | ||
| Line 313: | Line 370: | ||
|} | |} | ||
'''Frame Data''' | '''Frame Data''' | ||
{| border="1em" cellspacing="0" width="60%" style="border: 1px solid #999; background: | {| border="1em" cellspacing="0" width="60%" style="border: 1px solid #999; background: none;" | ||
|- | |- | ||
| align="center" | '''Startup''' || align="center" | '''Hit''' || align="center" | '''Recovery''' || align="center" | '''Blocked Advantage''' || align="center" | '''Hit Advantage''' || align="center" | '''Crouching Hit Advantage''' || align="center" | '''Guard''' || align="center" | '''Parry''' | | align="center" | '''Startup''' || align="center" | '''Hit''' || align="center" | '''Recovery''' || align="center" | '''Blocked Advantage''' || align="center" | '''Hit Advantage''' || align="center" | '''Crouching Hit Advantage''' || align="center" | '''Guard''' || align="center" | '''Parry''' | ||
| Line 320: | Line 377: | ||
|} | |} | ||
'''Gauge Increase''' | '''Gauge Increase''' | ||
{| border="1em" cellspacing="0" width="30%" style="border: 1px solid #999; background: | {| border="1em" cellspacing="0" width="30%" style="border: 1px solid #999; background: none;" | ||
|- | |- | ||
| align="center" | '''Miss''' || align="center" | '''Blocked''' || align="center" | '''Hit''' || align="center" | '''Parry (Gauge for opponent)''' | | align="center" | '''Miss''' || align="center" | '''Blocked''' || align="center" | '''Hit''' || align="center" | '''Parry (Gauge for opponent)''' | ||
| Line 329: | Line 386: | ||
[[Image:(twelveclosemp).gif|none]] | [[Image:(twelveclosemp).gif|none]] | ||
{| border="1em" cellspacing="0" width="65%" style="border: 1px solid #999; background: | {| border="1em" cellspacing="0" width="65%" style="border: 1px solid #999; background: none;" | ||
|- | |- | ||
| align="center" | '''Move''' || align="center" | '''Motion''' || align="center" | '''Damage''' || align="center" | '''Stun Damage''' || align="center" | '''Chains into itself''' || align="center" | '''Special Cancel''' || align="center" | '''Super Cancel''' || align="center" | '''Juggle Value''' | | align="center" | '''Move''' || align="center" | '''Motion''' || align="center" | '''Damage''' || align="center" | '''Stun Damage''' || align="center" | '''Chains into itself''' || align="center" | '''Special Cancel''' || align="center" | '''Super Cancel''' || align="center" | '''Juggle Value''' | ||
| Line 336: | Line 393: | ||
|} | |} | ||
'''Frame Data''' | '''Frame Data''' | ||
{| border="1em" cellspacing="0" width="60%" style="border: 1px solid #999; background: | {| border="1em" cellspacing="0" width="60%" style="border: 1px solid #999; background: none;" | ||
|- | |- | ||
| align="center" | '''Startup''' || align="center" | '''Hit''' || align="center" | '''Recovery''' || align="center" | '''Blocked Advantage''' || align="center" | '''Hit Advantage''' || align="center" | '''Crouching Hit Advantage''' || align="center" | '''Guard''' || align="center" | '''Parry''' | | align="center" | '''Startup''' || align="center" | '''Hit''' || align="center" | '''Recovery''' || align="center" | '''Blocked Advantage''' || align="center" | '''Hit Advantage''' || align="center" | '''Crouching Hit Advantage''' || align="center" | '''Guard''' || align="center" | '''Parry''' | ||
| Line 343: | Line 400: | ||
|} | |} | ||
'''Gauge Increase''' | '''Gauge Increase''' | ||
{| border="1em" cellspacing="0" width="30%" style="border: 1px solid #999; background: | {| border="1em" cellspacing="0" width="30%" style="border: 1px solid #999; background: none;" | ||
|- | |- | ||
| align="center" | '''Miss''' || align="center" | '''Blocked''' || align="center" | '''Hit''' || align="center" | '''Parry (Gauge for opponent)''' | | align="center" | '''Miss''' || align="center" | '''Blocked''' || align="center" | '''Hit''' || align="center" | '''Parry (Gauge for opponent)''' | ||
| Line 353: | Line 410: | ||
[[Image:(twelvelk).gif|none]] | [[Image:(twelvelk).gif|none]] | ||
{| border="1em" cellspacing="0" width="65%" style="border: 1px solid #999; background: | {| border="1em" cellspacing="0" width="65%" style="border: 1px solid #999; background: none;" | ||
|- | |- | ||
| align="center" | '''Move''' || align="center" | '''Motion''' || align="center" | '''Damage''' || align="center" | '''Stun Damage''' || align="center" | '''Chains into itself''' || align="center" | '''Special Cancel''' || align="center" | '''Super Cancel''' || align="center" | '''Juggle Value''' | | align="center" | '''Move''' || align="center" | '''Motion''' || align="center" | '''Damage''' || align="center" | '''Stun Damage''' || align="center" | '''Chains into itself''' || align="center" | '''Special Cancel''' || align="center" | '''Super Cancel''' || align="center" | '''Juggle Value''' | ||
| Line 360: | Line 417: | ||
|} | |} | ||
'''Frame Data''' | '''Frame Data''' | ||
{| border="1em" cellspacing="0" width="60%" style="border: 1px solid #999; background: | {| border="1em" cellspacing="0" width="60%" style="border: 1px solid #999; background: none;" | ||
|- | |- | ||
| align="center" | '''Startup''' || align="center" | '''Hit''' || align="center" | '''Recovery''' || align="center" | '''Blocked Advantage''' || align="center" | '''Hit Advantage''' || align="center" | '''Crouching Hit Advantage''' || align="center" | '''Guard''' || align="center" | '''Parry''' | | align="center" | '''Startup''' || align="center" | '''Hit''' || align="center" | '''Recovery''' || align="center" | '''Blocked Advantage''' || align="center" | '''Hit Advantage''' || align="center" | '''Crouching Hit Advantage''' || align="center" | '''Guard''' || align="center" | '''Parry''' | ||
| Line 367: | Line 424: | ||
|} | |} | ||
'''Gauge Increase''' | '''Gauge Increase''' | ||
{| border="1em" cellspacing="0" width="30%" style="border: 1px solid #999; background: | {| border="1em" cellspacing="0" width="30%" style="border: 1px solid #999; background: none;" | ||
|- | |- | ||
| align="center" | '''Miss''' || align="center" | '''Blocked''' || align="center" | '''Hit''' || align="center" | '''Parry (Gauge for opponent)''' | | align="center" | '''Miss''' || align="center" | '''Blocked''' || align="center" | '''Hit''' || align="center" | '''Parry (Gauge for opponent)''' | ||
| Line 377: | Line 434: | ||
[[Image:(twelvemk).gif|none]] | [[Image:(twelvemk).gif|none]] | ||
{| border="1em" cellspacing="0" width="65%" style="border: 1px solid #999; background: | {| border="1em" cellspacing="0" width="65%" style="border: 1px solid #999; background: none;" | ||
|- | |- | ||
| align="center" | '''Move''' || align="center" | '''Motion''' || align="center" | '''Damage''' || align="center" | '''Stun Damage''' || align="center" | '''Chains into itself''' || align="center" | '''Special Cancel''' || align="center" | '''Super Cancel''' || align="center" | '''Juggle Value''' | | align="center" | '''Move''' || align="center" | '''Motion''' || align="center" | '''Damage''' || align="center" | '''Stun Damage''' || align="center" | '''Chains into itself''' || align="center" | '''Special Cancel''' || align="center" | '''Super Cancel''' || align="center" | '''Juggle Value''' | ||
| Line 384: | Line 441: | ||
|} | |} | ||
'''Frame Data''' | '''Frame Data''' | ||
{| border="1em" cellspacing="0" width="60%" style="border: 1px solid #999; background: | {| border="1em" cellspacing="0" width="60%" style="border: 1px solid #999; background: none;" | ||
|- | |- | ||
| align="center" | '''Startup''' || align="center" | '''Hit''' || align="center" | '''Recovery''' || align="center" | '''Blocked Advantage''' || align="center" | '''Hit Advantage''' || align="center" | '''Crouching Hit Advantage''' || align="center" | '''Guard''' || align="center" | '''Parry''' | | align="center" | '''Startup''' || align="center" | '''Hit''' || align="center" | '''Recovery''' || align="center" | '''Blocked Advantage''' || align="center" | '''Hit Advantage''' || align="center" | '''Crouching Hit Advantage''' || align="center" | '''Guard''' || align="center" | '''Parry''' | ||
| Line 391: | Line 448: | ||
|} | |} | ||
'''Gauge Increase''' | '''Gauge Increase''' | ||
{| border="1em" cellspacing="0" width="30%" style="border: 1px solid #999; background: | {| border="1em" cellspacing="0" width="30%" style="border: 1px solid #999; background: none;" | ||
|- | |- | ||
| align="center" | '''Miss''' || align="center" | '''Blocked''' || align="center" | '''Hit''' || align="center" | '''Parry (Gauge for opponent)''' | | align="center" | '''Miss''' || align="center" | '''Blocked''' || align="center" | '''Hit''' || align="center" | '''Parry (Gauge for opponent)''' | ||
| Line 401: | Line 458: | ||
[[Image:(twelvehk).gif|none]] | [[Image:(twelvehk).gif|none]] | ||
{| border="1em" cellspacing="0" width="65%" style="border: 1px solid #999; background: | {| border="1em" cellspacing="0" width="65%" style="border: 1px solid #999; background: none;" | ||
|- | |- | ||
| align="center" | '''Move''' || align="center" | '''Motion''' || align="center" | '''Damage''' || align="center" | '''Stun Damage''' || align="center" | '''Chains into itself''' || align="center" | '''Special Cancel''' || align="center" | '''Super Cancel''' || align="center" | '''Juggle Value''' | | align="center" | '''Move''' || align="center" | '''Motion''' || align="center" | '''Damage''' || align="center" | '''Stun Damage''' || align="center" | '''Chains into itself''' || align="center" | '''Special Cancel''' || align="center" | '''Super Cancel''' || align="center" | '''Juggle Value''' | ||
| Line 408: | Line 465: | ||
|} | |} | ||
'''Frame Data''' | '''Frame Data''' | ||
{| border="1em" cellspacing="0" width="60%" style="border: 1px solid #999; background: | {| border="1em" cellspacing="0" width="60%" style="border: 1px solid #999; background: none;" | ||
|- | |- | ||
| align="center" | '''Startup''' || align="center" | '''Hit''' || align="center" | '''Recovery''' || align="center" | '''Blocked Advantage''' || align="center" | '''Hit Advantage''' || align="center" | '''Crouching Hit Advantage''' || align="center" | '''Guard''' || align="center" | '''Parry''' | | align="center" | '''Startup''' || align="center" | '''Hit''' || align="center" | '''Recovery''' || align="center" | '''Blocked Advantage''' || align="center" | '''Hit Advantage''' || align="center" | '''Crouching Hit Advantage''' || align="center" | '''Guard''' || align="center" | '''Parry''' | ||
| Line 415: | Line 472: | ||
|} | |} | ||
'''Gauge Increase''' | '''Gauge Increase''' | ||
{| border="1em" cellspacing="0" width="30%" style="border: 1px solid #999; background: | {| border="1em" cellspacing="0" width="30%" style="border: 1px solid #999; background: none;" | ||
|- | |- | ||
| align="center" | '''Miss''' || align="center" | '''Blocked''' || align="center" | '''Hit''' || align="center" | '''Parry (Gauge for opponent)''' | | align="center" | '''Miss''' || align="center" | '''Blocked''' || align="center" | '''Hit''' || align="center" | '''Parry (Gauge for opponent)''' | ||
| Line 427: | Line 484: | ||
[[Image:(twelvejlp).gif|none]] | [[Image:(twelvejlp).gif|none]] | ||
{| border="1em" cellspacing="0" width="65%" style="border: 1px solid #999; background: | {| border="1em" cellspacing="0" width="65%" style="border: 1px solid #999; background: none;" | ||
|- | |- | ||
| align="center" | '''Move''' || align="center" | '''Motion''' || align="center" | '''Damage''' || align="center" | '''Stun Damage''' || align="center" | '''Chains into itself''' || align="center" | '''Special Cancel''' || align="center" | '''Super Cancel''' || align="center" | '''Juggle Value''' | | align="center" | '''Move''' || align="center" | '''Motion''' || align="center" | '''Damage''' || align="center" | '''Stun Damage''' || align="center" | '''Chains into itself''' || align="center" | '''Special Cancel''' || align="center" | '''Super Cancel''' || align="center" | '''Juggle Value''' | ||
| Line 434: | Line 491: | ||
|} | |} | ||
'''Frame Data''' | '''Frame Data''' | ||
{| border="1em" cellspacing="0" width="70%" style="border: 1px solid #999; background: | {| border="1em" cellspacing="0" width="70%" style="border: 1px solid #999; background: none;" | ||
|- | |- | ||
| align="center" | '''Startup''' || align="center" | '''Hit''' || align="center" | '''Recovery''' || align="center" | '''Blocked Advantage''' || align="center" | '''Hit Advantage''' || align="center" | '''Crouching Hit Advantage''' || align="center" | '''Guard''' || align="center" | '''Parry''' | | align="center" | '''Startup''' || align="center" | '''Hit''' || align="center" | '''Recovery''' || align="center" | '''Blocked Advantage''' || align="center" | '''Hit Advantage''' || align="center" | '''Crouching Hit Advantage''' || align="center" | '''Guard''' || align="center" | '''Parry''' | ||
| Line 441: | Line 498: | ||
|} | |} | ||
'''Gauge Increase''' | '''Gauge Increase''' | ||
{| border="1em" cellspacing="0" width="30%" style="border: 1px solid #999; background: | {| border="1em" cellspacing="0" width="30%" style="border: 1px solid #999; background: none;" | ||
|- | |- | ||
| align="center" | '''Miss''' || align="center" | '''Blocked''' || align="center" | '''Hit''' || align="center" | '''Parry (Gauge for opponent)''' | | align="center" | '''Miss''' || align="center" | '''Blocked''' || align="center" | '''Hit''' || align="center" | '''Parry (Gauge for opponent)''' | ||
| Line 451: | Line 508: | ||
[[Image:(twelvejmp).gif|none]] | [[Image:(twelvejmp).gif|none]] | ||
{| border="1em" cellspacing="0" width="60%" style="border: 1px solid #999; background: | {| border="1em" cellspacing="0" width="60%" style="border: 1px solid #999; background: none;" | ||
|- | |- | ||
| align="center" | '''Move''' || align="center" | '''Motion''' || align="center" | '''Damage''' || align="center" | '''Stun Damage''' || align="center" | '''Chains into itself''' || align="center" | '''Special Cancel''' || align="center" | '''Super Cancel''' || align="center" | '''Juggle Value''' | | align="center" | '''Move''' || align="center" | '''Motion''' || align="center" | '''Damage''' || align="center" | '''Stun Damage''' || align="center" | '''Chains into itself''' || align="center" | '''Special Cancel''' || align="center" | '''Super Cancel''' || align="center" | '''Juggle Value''' | ||
| Line 458: | Line 515: | ||
|} | |} | ||
'''Frame Data''' | '''Frame Data''' | ||
{| border="1em" cellspacing="0" width="65%" style="border: 1px solid #999; background: | {| border="1em" cellspacing="0" width="65%" style="border: 1px solid #999; background: none;" | ||
|- | |- | ||
| align="center" | '''Startup''' || align="center" | '''Hit''' || align="center" | '''Recovery''' || align="center" | '''Blocked Advantage''' || align="center" | '''Hit Advantage''' || align="center" | '''Crouching Hit Advantage''' || align="center" | '''Guard''' || align="center" | '''Parry''' | | align="center" | '''Startup''' || align="center" | '''Hit''' || align="center" | '''Recovery''' || align="center" | '''Blocked Advantage''' || align="center" | '''Hit Advantage''' || align="center" | '''Crouching Hit Advantage''' || align="center" | '''Guard''' || align="center" | '''Parry''' | ||
| Line 465: | Line 522: | ||
|} | |} | ||
'''Gauge Increase''' | '''Gauge Increase''' | ||
{| border="1em" cellspacing="0" width="30%" style="border: 1px solid #999; background: | {| border="1em" cellspacing="0" width="30%" style="border: 1px solid #999; background: none;" | ||
|- | |- | ||
| align="center" | '''Miss''' || align="center" | '''Blocked''' || align="center" | '''Hit''' || align="center" | '''Parry (Gauge for opponent)''' | | align="center" | '''Miss''' || align="center" | '''Blocked''' || align="center" | '''Hit''' || align="center" | '''Parry (Gauge for opponent)''' | ||
| Line 475: | Line 532: | ||
[[Image:(twelvejhp).gif|none]] | [[Image:(twelvejhp).gif|none]] | ||
{| border="1em" cellspacing="0" width="60%" style="border: 1px solid #999; background: | {| border="1em" cellspacing="0" width="60%" style="border: 1px solid #999; background: none;" | ||
|- | |- | ||
| align="center" | '''Move''' || align="center" | '''Motion''' || align="center" | '''Damage''' || align="center" | '''Stun Damage''' || align="center" | '''Chains into itself''' || align="center" | '''Special Cancel''' || align="center" | '''Super Cancel''' || align="center" | '''Juggle Value''' | | align="center" | '''Move''' || align="center" | '''Motion''' || align="center" | '''Damage''' || align="center" | '''Stun Damage''' || align="center" | '''Chains into itself''' || align="center" | '''Special Cancel''' || align="center" | '''Super Cancel''' || align="center" | '''Juggle Value''' | ||
| Line 482: | Line 539: | ||
|} | |} | ||
'''Frame Data''' | '''Frame Data''' | ||
{| border="1em" cellspacing="0" width="65%" style="border: 1px solid #999; background: | {| border="1em" cellspacing="0" width="65%" style="border: 1px solid #999; background: none;" | ||
|- | |- | ||
| align="center" | '''Startup''' || align="center" | '''Hit''' || align="center" | '''Recovery''' || align="center" | '''Blocked Advantage''' || align="center" | '''Hit Advantage''' || align="center" | '''Crouching Hit Advantage''' || align="center" | '''Guard''' || align="center" | '''Parry''' | | align="center" | '''Startup''' || align="center" | '''Hit''' || align="center" | '''Recovery''' || align="center" | '''Blocked Advantage''' || align="center" | '''Hit Advantage''' || align="center" | '''Crouching Hit Advantage''' || align="center" | '''Guard''' || align="center" | '''Parry''' | ||
| Line 489: | Line 546: | ||
|} | |} | ||
'''Gauge Increase''' | '''Gauge Increase''' | ||
{| border="1em" cellspacing="0" width="30%" style="border: 1px solid #999; background: | {| border="1em" cellspacing="0" width="30%" style="border: 1px solid #999; background: none;" | ||
|- | |- | ||
| align="center" | '''Miss''' || align="center" | '''Blocked''' || align="center" | '''Hit''' || align="center" | '''Parry (Gauge for opponent)''' | | align="center" | '''Miss''' || align="center" | '''Blocked''' || align="center" | '''Hit''' || align="center" | '''Parry (Gauge for opponent)''' | ||
| Line 499: | Line 556: | ||
[[Image:(twelvenjhp).gif|none]] | [[Image:(twelvenjhp).gif|none]] | ||
{| border="1em" cellspacing="0" width="60%" style="border: 1px solid #999; background: | {| border="1em" cellspacing="0" width="60%" style="border: 1px solid #999; background: none;" | ||
|- | |- | ||
| align="center" | '''Move''' || align="center" | '''Motion''' || align="center" | '''Damage''' || align="center" | '''Stun Damage''' || align="center" | '''Chains into itself''' || align="center" | '''Special Cancel''' || align="center" | '''Super Cancel''' || align="center" | '''Juggle Value''' | | align="center" | '''Move''' || align="center" | '''Motion''' || align="center" | '''Damage''' || align="center" | '''Stun Damage''' || align="center" | '''Chains into itself''' || align="center" | '''Special Cancel''' || align="center" | '''Super Cancel''' || align="center" | '''Juggle Value''' | ||
| Line 506: | Line 563: | ||
|} | |} | ||
'''Frame Data''' | '''Frame Data''' | ||
{| border="1em" cellspacing="0" width="65%" style="border: 1px solid #999; background: | {| border="1em" cellspacing="0" width="65%" style="border: 1px solid #999; background: none;" | ||
|- | |- | ||
| align="center" | '''Startup''' || align="center" | '''Hit''' || align="center" | '''Recovery''' || align="center" | '''Blocked Advantage''' || align="center" | '''Hit Advantage''' || align="center" | '''Crouching Hit Advantage''' || align="center" | '''Guard''' || align="center" | '''Parry''' | | align="center" | '''Startup''' || align="center" | '''Hit''' || align="center" | '''Recovery''' || align="center" | '''Blocked Advantage''' || align="center" | '''Hit Advantage''' || align="center" | '''Crouching Hit Advantage''' || align="center" | '''Guard''' || align="center" | '''Parry''' | ||
| Line 513: | Line 570: | ||
|} | |} | ||
'''Gauge Increase''' | '''Gauge Increase''' | ||
{| border="1em" cellspacing="0" width="30%" style="border: 1px solid #999; background: | {| border="1em" cellspacing="0" width="30%" style="border: 1px solid #999; background: none;" | ||
|- | |- | ||
| align="center" | '''Miss''' || align="center" | '''Blocked''' || align="center" | '''Hit''' || align="center" | '''Parry (Gauge for opponent)''' | | align="center" | '''Miss''' || align="center" | '''Blocked''' || align="center" | '''Hit''' || align="center" | '''Parry (Gauge for opponent)''' | ||
| Line 523: | Line 580: | ||
[[Image:(twelvejlk).gif|none]] | [[Image:(twelvejlk).gif|none]] | ||
{| border="1em" cellspacing="0" width="60%" style="border: 1px solid #999; background: | {| border="1em" cellspacing="0" width="60%" style="border: 1px solid #999; background: none;" | ||
|- | |- | ||
| align="center" | '''Move''' || align="center" | '''Motion''' || align="center" | '''Damage''' || align="center" | '''Stun Damage''' || align="center" | '''Chains into itself''' || align="center" | '''Special Cancel''' || align="center" | '''Super Cancel''' || align="center" | '''Juggle Value''' | | align="center" | '''Move''' || align="center" | '''Motion''' || align="center" | '''Damage''' || align="center" | '''Stun Damage''' || align="center" | '''Chains into itself''' || align="center" | '''Special Cancel''' || align="center" | '''Super Cancel''' || align="center" | '''Juggle Value''' | ||
| Line 530: | Line 587: | ||
|} | |} | ||
'''Frame Data''' | '''Frame Data''' | ||
{| border="1em" cellspacing="0" width="75%" style="border: 1px solid #999; background: | {| border="1em" cellspacing="0" width="75%" style="border: 1px solid #999; background: none;" | ||
|- | |- | ||
| align="center" | '''Startup''' || align="center" | '''Hit''' || align="center" | '''Recovery''' || align="center" | '''Blocked Advantage''' || align="center" | '''Hit Advantage''' || align="center" | '''Crouching Hit Advantage''' || align="center" | '''Guard''' || align="center" | '''Parry''' | | align="center" | '''Startup''' || align="center" | '''Hit''' || align="center" | '''Recovery''' || align="center" | '''Blocked Advantage''' || align="center" | '''Hit Advantage''' || align="center" | '''Crouching Hit Advantage''' || align="center" | '''Guard''' || align="center" | '''Parry''' | ||
| Line 537: | Line 594: | ||
|} | |} | ||
'''Gauge Increase''' | '''Gauge Increase''' | ||
{| border="1em" cellspacing="0" width="30%" style="border: 1px solid #999; background: | {| border="1em" cellspacing="0" width="30%" style="border: 1px solid #999; background: none;" | ||
|- | |- | ||
| align="center" | '''Miss''' || align="center" | '''Blocked''' || align="center" | '''Hit''' || align="center" | '''Parry (Gauge for opponent)''' | | align="center" | '''Miss''' || align="center" | '''Blocked''' || align="center" | '''Hit''' || align="center" | '''Parry (Gauge for opponent)''' | ||
| Line 547: | Line 604: | ||
[[Image:(twelvejmk).gif|none]] | [[Image:(twelvejmk).gif|none]] | ||
{| border="1em" cellspacing="0" width="60%" style="border: 1px solid #999; background: | {| border="1em" cellspacing="0" width="60%" style="border: 1px solid #999; background: none;" | ||
|- | |- | ||
| align="center" | '''Move''' || align="center" | '''Motion''' || align="center" | '''Damage''' || align="center" | '''Stun Damage''' || align="center" | '''Chains into itself''' || align="center" | '''Special Cancel''' || align="center" | '''Super Cancel''' || align="center" | '''Juggle Value''' | | align="center" | '''Move''' || align="center" | '''Motion''' || align="center" | '''Damage''' || align="center" | '''Stun Damage''' || align="center" | '''Chains into itself''' || align="center" | '''Special Cancel''' || align="center" | '''Super Cancel''' || align="center" | '''Juggle Value''' | ||
| Line 554: | Line 611: | ||
|} | |} | ||
'''Frame Data''' | '''Frame Data''' | ||
{| border="1em" cellspacing="0" width="65%" style="border: 1px solid #999; background: | {| border="1em" cellspacing="0" width="65%" style="border: 1px solid #999; background: none;" | ||
|- | |- | ||
| align="center" | '''Startup''' || align="center" | '''Hit''' || align="center" | '''Recovery''' || align="center" | '''Blocked Advantage''' || align="center" | '''Hit Advantage''' || align="center" | '''Crouching Hit Advantage''' || align="center" | '''Guard''' || align="center" | '''Parry''' | | align="center" | '''Startup''' || align="center" | '''Hit''' || align="center" | '''Recovery''' || align="center" | '''Blocked Advantage''' || align="center" | '''Hit Advantage''' || align="center" | '''Crouching Hit Advantage''' || align="center" | '''Guard''' || align="center" | '''Parry''' | ||
| Line 561: | Line 618: | ||
|} | |} | ||
'''Gauge Increase''' | '''Gauge Increase''' | ||
{| border="1em" cellspacing="0" width="30%" style="border: 1px solid #999; background: | {| border="1em" cellspacing="0" width="30%" style="border: 1px solid #999; background: none;" | ||
|- | |- | ||
| align="center" | '''Miss''' || align="center" | '''Blocked''' || align="center" | '''Hit''' || align="center" | '''Parry (Gauge for opponent)''' | | align="center" | '''Miss''' || align="center" | '''Blocked''' || align="center" | '''Hit''' || align="center" | '''Parry (Gauge for opponent)''' | ||
| Line 571: | Line 628: | ||
[[Image:(twelvenjmk).gif|none]] | [[Image:(twelvenjmk).gif|none]] | ||
{| border="1em" cellspacing="0" width="60%" style="border: 1px solid #999; background: | {| border="1em" cellspacing="0" width="60%" style="border: 1px solid #999; background: none;" | ||
|- | |- | ||
| align="center" | '''Move''' || align="center" | '''Motion''' || align="center" | '''Damage''' || align="center" | '''Stun Damage''' || align="center" | '''Chains into itself''' || align="center" | '''Special Cancel''' || align="center" | '''Super Cancel''' || align="center" | '''Juggle Value''' | | align="center" | '''Move''' || align="center" | '''Motion''' || align="center" | '''Damage''' || align="center" | '''Stun Damage''' || align="center" | '''Chains into itself''' || align="center" | '''Special Cancel''' || align="center" | '''Super Cancel''' || align="center" | '''Juggle Value''' | ||
| Line 578: | Line 635: | ||
|} | |} | ||
'''Frame Data''' | '''Frame Data''' | ||
{| border="1em" cellspacing="0" width="65%" style="border: 1px solid #999; background: | {| border="1em" cellspacing="0" width="65%" style="border: 1px solid #999; background: none;" | ||
|- | |- | ||
| align="center" | '''Startup''' || align="center" | '''Hit''' || align="center" | '''Recovery''' || align="center" | '''Blocked Advantage''' || align="center" | '''Hit Advantage''' || align="center" | '''Crouching Hit Advantage''' || align="center" | '''Guard''' || align="center" | '''Parry''' | | align="center" | '''Startup''' || align="center" | '''Hit''' || align="center" | '''Recovery''' || align="center" | '''Blocked Advantage''' || align="center" | '''Hit Advantage''' || align="center" | '''Crouching Hit Advantage''' || align="center" | '''Guard''' || align="center" | '''Parry''' | ||
| Line 585: | Line 642: | ||
|} | |} | ||
'''Gauge Increase''' | '''Gauge Increase''' | ||
{| border="1em" cellspacing="0" width="30%" style="border: 1px solid #999; background: | {| border="1em" cellspacing="0" width="30%" style="border: 1px solid #999; background: none;" | ||
|- | |- | ||
| align="center" | '''Miss''' || align="center" | '''Blocked''' || align="center" | '''Hit''' || align="center" | '''Parry (Gauge for opponent)''' | | align="center" | '''Miss''' || align="center" | '''Blocked''' || align="center" | '''Hit''' || align="center" | '''Parry (Gauge for opponent)''' | ||
| Line 595: | Line 652: | ||
[[Image:(twelvejhk).gif|none]] | [[Image:(twelvejhk).gif|none]] | ||
{| border="1em" cellspacing="0" width="60%" style="border: 1px solid #999; background: | {| border="1em" cellspacing="0" width="60%" style="border: 1px solid #999; background: none;" | ||
|- | |- | ||
| align="center" | '''Move''' || align="center" | '''Motion''' || align="center" | '''Damage''' || align="center" | '''Stun Damage''' || align="center" | '''Chains into itself''' || align="center" | '''Special Cancel''' || align="center" | '''Super Cancel''' || align="center" | '''Juggle Value''' | | align="center" | '''Move''' || align="center" | '''Motion''' || align="center" | '''Damage''' || align="center" | '''Stun Damage''' || align="center" | '''Chains into itself''' || align="center" | '''Special Cancel''' || align="center" | '''Super Cancel''' || align="center" | '''Juggle Value''' | ||
| Line 602: | Line 659: | ||
|} | |} | ||
'''Frame Data''' | '''Frame Data''' | ||
{| border="1em" cellspacing="0" width="65%" style="border: 1px solid #999; background: | {| border="1em" cellspacing="0" width="65%" style="border: 1px solid #999; background: none;" | ||
|- | |- | ||
| align="center" | '''Startup''' || align="center" | '''Hit''' || align="center" | '''Recovery''' || align="center" | '''Blocked Advantage''' || align="center" | '''Hit Advantage''' || align="center" | '''Crouching Hit Advantage''' || align="center" | '''Guard''' || align="center" | '''Parry''' | | align="center" | '''Startup''' || align="center" | '''Hit''' || align="center" | '''Recovery''' || align="center" | '''Blocked Advantage''' || align="center" | '''Hit Advantage''' || align="center" | '''Crouching Hit Advantage''' || align="center" | '''Guard''' || align="center" | '''Parry''' | ||
| Line 609: | Line 666: | ||
|} | |} | ||
'''Gauge Increase''' | '''Gauge Increase''' | ||
{| border="1em" cellspacing="0" width="30%" style="border: 1px solid #999; background: | {| border="1em" cellspacing="0" width="30%" style="border: 1px solid #999; background: none;" | ||
|- | |- | ||
| align="center" | '''Miss''' || align="center" | '''Blocked''' || align="center" | '''Hit''' || align="center" | '''Parry (Gauge for opponent)''' | | align="center" | '''Miss''' || align="center" | '''Blocked''' || align="center" | '''Hit''' || align="center" | '''Parry (Gauge for opponent)''' | ||
| Line 619: | Line 676: | ||
[[Image:(twelvenjhk).gif|none]] | [[Image:(twelvenjhk).gif|none]] | ||
{| border="1em" cellspacing="0" width="65%" style="border: 1px solid #999; background: | {| border="1em" cellspacing="0" width="65%" style="border: 1px solid #999; background: none;" | ||
|- | |- | ||
| align="center" | '''Move''' || align="center" | '''Motion''' || align="center" | '''Damage''' || align="center" | '''Stun Damage''' || align="center" | '''Chains into itself''' || align="center" | '''Special Cancel''' || align="center" | '''Super Cancel''' || align="center" | '''Juggle Value''' | | align="center" | '''Move''' || align="center" | '''Motion''' || align="center" | '''Damage''' || align="center" | '''Stun Damage''' || align="center" | '''Chains into itself''' || align="center" | '''Special Cancel''' || align="center" | '''Super Cancel''' || align="center" | '''Juggle Value''' | ||
| Line 626: | Line 683: | ||
|} | |} | ||
'''Frame Data''' | '''Frame Data''' | ||
{| border="1em" cellspacing="0" width="65%" style="border: 1px solid #999; background: | {| border="1em" cellspacing="0" width="65%" style="border: 1px solid #999; background: none;" | ||
|- | |- | ||
| align="center" | '''Startup''' || align="center" | '''Hit''' || align="center" | '''Recovery''' || align="center" | '''Blocked Advantage''' || align="center" | '''Hit Advantage''' || align="center" | '''Crouching Hit Advantage''' || align="center" | '''Guard''' || align="center" | '''Parry''' | | align="center" | '''Startup''' || align="center" | '''Hit''' || align="center" | '''Recovery''' || align="center" | '''Blocked Advantage''' || align="center" | '''Hit Advantage''' || align="center" | '''Crouching Hit Advantage''' || align="center" | '''Guard''' || align="center" | '''Parry''' | ||
| Line 633: | Line 690: | ||
|} | |} | ||
'''Gauge Increase''' | '''Gauge Increase''' | ||
{| border="1em" cellspacing="0" width="30%" style="border: 1px solid #999; background: | {| border="1em" cellspacing="0" width="30%" style="border: 1px solid #999; background: none;" | ||
|- | |- | ||
| align="center" | '''Miss''' || align="center" | '''Blocked''' || align="center" | '''Hit''' || align="center" | '''Parry (Gauge for opponent)''' | | align="center" | '''Miss''' || align="center" | '''Blocked''' || align="center" | '''Hit''' || align="center" | '''Parry (Gauge for opponent)''' | ||
| Line 643: | Line 700: | ||
[[Image:(twelveoh).gif|none]] | [[Image:(twelveoh).gif|none]] | ||
{| border="1em" cellspacing="0" width="60%" style="border: 1px solid #999; background: | {| border="1em" cellspacing="0" width="60%" style="border: 1px solid #999; background: none;" | ||
|- | |- | ||
| align="center" | '''Move''' || align="center" | '''Motion''' || align="center" | '''Damage''' || align="center" | '''Stun Damage''' || align="center" | '''Chains into itself''' || align="center" | '''Special Cancel''' || align="center" | '''Super Cancel''' || align="center" | '''Juggle Value''' | | align="center" | '''Move''' || align="center" | '''Motion''' || align="center" | '''Damage''' || align="center" | '''Stun Damage''' || align="center" | '''Chains into itself''' || align="center" | '''Special Cancel''' || align="center" | '''Super Cancel''' || align="center" | '''Juggle Value''' | ||
| Line 650: | Line 707: | ||
|} | |} | ||
'''Frame Data''' | '''Frame Data''' | ||
{| border="1em" cellspacing="0" width="65%" style="border: 1px solid #999; background: | {| border="1em" cellspacing="0" width="65%" style="border: 1px solid #999; background: none;" | ||
|- | |- | ||
| align="center" | '''Startup''' || align="center" | '''Hit''' || align="center" | '''Recovery''' || align="center" | '''Blocked Advantage''' || align="center" | '''Hit Advantage''' || align="center" | '''Crouching Hit Advantage''' || align="center" | '''Guard''' || align="center" | '''Parry''' | | align="center" | '''Startup''' || align="center" | '''Hit''' || align="center" | '''Recovery''' || align="center" | '''Blocked Advantage''' || align="center" | '''Hit Advantage''' || align="center" | '''Crouching Hit Advantage''' || align="center" | '''Guard''' || align="center" | '''Parry''' | ||
| Line 657: | Line 714: | ||
|} | |} | ||
'''Gauge Increase''' | '''Gauge Increase''' | ||
{| border="1em" cellspacing="0" width="30%" style="border: 1px solid #999; background: | {| border="1em" cellspacing="0" width="30%" style="border: 1px solid #999; background: none;" | ||
|- | |- | ||
| align="center" | '''Miss''' || align="center" | '''Blocked''' || align="center" | '''Hit''' || align="center" | '''Parry (Gauge for opponent)''' | | align="center" | '''Miss''' || align="center" | '''Blocked''' || align="center" | '''Hit''' || align="center" | '''Parry (Gauge for opponent)''' | ||
| Line 668: | Line 725: | ||
[[Image:(twelventr).gif|none]] | [[Image:(twelventr).gif|none]] | ||
{| border="1em" cellspacing="0" width="70%" style="border: 1px solid #999; background: | {| border="1em" cellspacing="0" width="70%" style="border: 1px solid #999; background: none;" | ||
|- | |- | ||
| align="center" | '''Move''' || align="center" | '''Motion''' || align="center" | '''Damage''' || align="center" | '''Stun Damage''' || align="center" | '''Throw Range''' || align="center" | '''Kara-Throw''' || align="center" | '''Kara-Throw Range''' | | align="center" | '''Move''' || align="center" | '''Motion''' || align="center" | '''Damage''' || align="center" | '''Stun Damage''' || align="center" | '''Throw Range''' || align="center" | '''Kara-Throw''' || align="center" | '''Kara-Throw Range''' | ||
| Line 675: | Line 732: | ||
|} | |} | ||
'''Frame Data''' | '''Frame Data''' | ||
{| border="1em" cellspacing="0" width="65%" style="border: 1px solid #999; background: | {| border="1em" cellspacing="0" width="65%" style="border: 1px solid #999; background: none;" | ||
|- | |- | ||
| align="center" | '''Startup''' || align="center" | '''Hit''' || align="center" | '''Recovery''' || align="center" | '''Blocked Advantage''' || align="center" | '''Hit Advantage''' || align="center" | '''Crouching Hit Advantage''' || align="center" | '''Guard''' || align="center" | '''Parry''' | | align="center" | '''Startup''' || align="center" | '''Hit''' || align="center" | '''Recovery''' || align="center" | '''Blocked Advantage''' || align="center" | '''Hit Advantage''' || align="center" | '''Crouching Hit Advantage''' || align="center" | '''Guard''' || align="center" | '''Parry''' | ||
| Line 682: | Line 739: | ||
|} | |} | ||
'''Gauge Increase''' | '''Gauge Increase''' | ||
{| border="1em" cellspacing="0" width="25%" style="border: 1px solid #999; background: | {| border="1em" cellspacing="0" width="25%" style="border: 1px solid #999; background: none;" | ||
|- | |- | ||
| align="center" | '''Miss''' || align="center" | '''Blocked''' || align="center" | '''Hit''' | | align="center" | '''Miss''' || align="center" | '''Blocked''' || align="center" | '''Hit''' | ||
| Line 692: | Line 749: | ||
[[Image:(twelveftr).gif|none]] | [[Image:(twelveftr).gif|none]] | ||
{| border="1em" cellspacing="0" width="70%" style="border: 1px solid #999; background: | {| border="1em" cellspacing="0" width="70%" style="border: 1px solid #999; background: none;" | ||
|- | |- | ||
| align="center" | '''Move''' || align="center" | '''Motion''' || align="center" | '''Damage''' || align="center" | '''Stun Damage''' || align="center" | '''Throw Range''' || align="center" | '''Kara-Throw''' || align="center" | '''Kara-Throw Range''' | | align="center" | '''Move''' || align="center" | '''Motion''' || align="center" | '''Damage''' || align="center" | '''Stun Damage''' || align="center" | '''Throw Range''' || align="center" | '''Kara-Throw''' || align="center" | '''Kara-Throw Range''' | ||
| Line 699: | Line 756: | ||
|} | |} | ||
'''Frame Data''' | '''Frame Data''' | ||
{| border="1em" cellspacing="0" width="65%" style="border: 1px solid #999; background: | {| border="1em" cellspacing="0" width="65%" style="border: 1px solid #999; background: none;" | ||
|- | |- | ||
| align="center" | '''Startup''' || align="center" | '''Hit''' || align="center" | '''Recovery''' || align="center" | '''Blocked Advantage''' || align="center" | '''Hit Advantage''' || align="center" | '''Crouching Hit Advantage''' || align="center" | '''Guard''' || align="center" | '''Parry''' | | align="center" | '''Startup''' || align="center" | '''Hit''' || align="center" | '''Recovery''' || align="center" | '''Blocked Advantage''' || align="center" | '''Hit Advantage''' || align="center" | '''Crouching Hit Advantage''' || align="center" | '''Guard''' || align="center" | '''Parry''' | ||
| Line 706: | Line 763: | ||
|} | |} | ||
'''Gauge Increase''' | '''Gauge Increase''' | ||
{| border="1em" cellspacing="0" width="25%" style="border: 1px solid #999; background: | {| border="1em" cellspacing="0" width="25%" style="border: 1px solid #999; background: none;" | ||
|- | |- | ||
| align="center" | '''Miss''' || align="center" | '''Blocked''' || align="center" | '''Hit''' | | align="center" | '''Miss''' || align="center" | '''Blocked''' || align="center" | '''Hit''' | ||
| Line 716: | Line 773: | ||
[[Image:(twelvebtr).gif|none]] | [[Image:(twelvebtr).gif|none]] | ||
{| border="1em" cellspacing="0" width="70%" style="border: 1px solid #999; background: | {| border="1em" cellspacing="0" width="70%" style="border: 1px solid #999; background: none;" | ||
|- | |- | ||
| align="center" | '''Move''' || align="center" | '''Motion''' || align="center" | '''Damage''' || align="center" | '''Stun Damage''' || align="center" | '''Throw Range''' || align="center" | '''Kara-Throw''' || align="center" | '''Kara-Throw Range''' | | align="center" | '''Move''' || align="center" | '''Motion''' || align="center" | '''Damage''' || align="center" | '''Stun Damage''' || align="center" | '''Throw Range''' || align="center" | '''Kara-Throw''' || align="center" | '''Kara-Throw Range''' | ||
| Line 723: | Line 780: | ||
|} | |} | ||
'''Frame Data''' | '''Frame Data''' | ||
{| border="1em" cellspacing="0" width="65%" style="border: 1px solid #999; background: | {| border="1em" cellspacing="0" width="65%" style="border: 1px solid #999; background: none;" | ||
|- | |- | ||
| align="center" | '''Startup''' || align="center" | '''Hit''' || align="center" | '''Recovery''' || align="center" | '''Blocked Advantage''' || align="center" | '''Hit Advantage''' || align="center" | '''Crouching Hit Advantage''' || align="center" | '''Guard''' || align="center" | '''Parry''' | | align="center" | '''Startup''' || align="center" | '''Hit''' || align="center" | '''Recovery''' || align="center" | '''Blocked Advantage''' || align="center" | '''Hit Advantage''' || align="center" | '''Crouching Hit Advantage''' || align="center" | '''Guard''' || align="center" | '''Parry''' | ||
| Line 730: | Line 787: | ||
|} | |} | ||
'''Gauge Increase''' | '''Gauge Increase''' | ||
{| border="1em" cellspacing="0" width="25%" style="border: 1px solid #999; background: | {| border="1em" cellspacing="0" width="25%" style="border: 1px solid #999; background: none;" | ||
|- | |- | ||
| align="center" | '''Miss''' || align="center" | '''Blocked''' || align="center" | '''Hit''' | | align="center" | '''Miss''' || align="center" | '''Blocked''' || align="center" | '''Hit''' | ||
| Line 741: | Line 798: | ||
[[Image:(twelveclp).gif|none]] | [[Image:(twelveclp).gif|none]] | ||
{| border="1em" cellspacing="0" width="60%" style="border: 1px solid #999; background: | {| border="1em" cellspacing="0" width="60%" style="border: 1px solid #999; background: none;" | ||
|- | |- | ||
| align="center" | '''Move''' || align="center" | '''Motion''' || align="center" | '''Damage''' || align="center" | '''Stun Damage''' || align="center" | '''Chains into itself''' || align="center" | '''Special Cancel''' || align="center" | '''Super Cancel''' || align="center" | '''Juggle Value''' | | align="center" | '''Move''' || align="center" | '''Motion''' || align="center" | '''Damage''' || align="center" | '''Stun Damage''' || align="center" | '''Chains into itself''' || align="center" | '''Special Cancel''' || align="center" | '''Super Cancel''' || align="center" | '''Juggle Value''' | ||
| Line 748: | Line 805: | ||
|} | |} | ||
'''Frame Data''' | '''Frame Data''' | ||
{| border="1em" cellspacing="0" width="65%" style="border: 1px solid #999; background: | {| border="1em" cellspacing="0" width="65%" style="border: 1px solid #999; background: none;" | ||
|- | |- | ||
| align="center" | '''Startup''' || align="center" | '''Hit''' || align="center" | '''Recovery''' || align="center" | '''Blocked Advantage''' || align="center" | '''Hit Advantage''' || align="center" | '''Crouching Hit Advantage''' || align="center" | '''Guard''' || align="center" | '''Parry''' | | align="center" | '''Startup''' || align="center" | '''Hit''' || align="center" | '''Recovery''' || align="center" | '''Blocked Advantage''' || align="center" | '''Hit Advantage''' || align="center" | '''Crouching Hit Advantage''' || align="center" | '''Guard''' || align="center" | '''Parry''' | ||
| Line 755: | Line 812: | ||
|} | |} | ||
'''Gauge Increase''' | '''Gauge Increase''' | ||
{| border="1em" cellspacing="0" width="30%" style="border: 1px solid #999; background: | {| border="1em" cellspacing="0" width="30%" style="border: 1px solid #999; background: none;" | ||
|- | |- | ||
| align="center" | '''Miss''' || align="center" | '''Blocked''' || align="center" | '''Hit''' || align="center" | '''Parry (Gauge for opponent)''' | | align="center" | '''Miss''' || align="center" | '''Blocked''' || align="center" | '''Hit''' || align="center" | '''Parry (Gauge for opponent)''' | ||
| Line 765: | Line 822: | ||
[[Image:(twelvecmp).gif|none]] | [[Image:(twelvecmp).gif|none]] | ||
{| border="1em" cellspacing="0" width="60%" style="border: 1px solid #999; background: | {| border="1em" cellspacing="0" width="60%" style="border: 1px solid #999; background: none;" | ||
|- | |- | ||
| align="center" | '''Move''' || align="center" | '''Motion''' || align="center" | '''Damage''' || align="center" | '''Stun Damage''' || align="center" | '''Chains into itself''' || align="center" | '''Special Cancel''' || align="center" | '''Super Cancel''' || align="center" | '''Juggle Value''' | | align="center" | '''Move''' || align="center" | '''Motion''' || align="center" | '''Damage''' || align="center" | '''Stun Damage''' || align="center" | '''Chains into itself''' || align="center" | '''Special Cancel''' || align="center" | '''Super Cancel''' || align="center" | '''Juggle Value''' | ||
| Line 772: | Line 829: | ||
|} | |} | ||
'''Frame Data''' | '''Frame Data''' | ||
{| border="1em" cellspacing="0" width="65%" style="border: 1px solid #999; background: | {| border="1em" cellspacing="0" width="65%" style="border: 1px solid #999; background: none;" | ||
|- | |- | ||
| align="center" | '''Startup''' || align="center" | '''Hit''' || align="center" | '''Recovery''' || align="center" | '''Blocked Advantage''' || align="center" | '''Hit Advantage''' || align="center" | '''Crouching Hit Advantage''' || align="center" | '''Guard''' || align="center" | '''Parry''' | | align="center" | '''Startup''' || align="center" | '''Hit''' || align="center" | '''Recovery''' || align="center" | '''Blocked Advantage''' || align="center" | '''Hit Advantage''' || align="center" | '''Crouching Hit Advantage''' || align="center" | '''Guard''' || align="center" | '''Parry''' | ||
| Line 779: | Line 836: | ||
|} | |} | ||
'''Gauge Increase''' | '''Gauge Increase''' | ||
{| border="1em" cellspacing="0" width="30%" style="border: 1px solid #999; background: | {| border="1em" cellspacing="0" width="30%" style="border: 1px solid #999; background: none;" | ||
|- | |- | ||
| align="center" | '''Miss''' || align="center" | '''Blocked''' || align="center" | '''Hit''' || align="center" | '''Parry (Gauge for opponent)''' | | align="center" | '''Miss''' || align="center" | '''Blocked''' || align="center" | '''Hit''' || align="center" | '''Parry (Gauge for opponent)''' | ||
| Line 789: | Line 846: | ||
[[Image:(twelvechp).gif|none]] | [[Image:(twelvechp).gif|none]] | ||
{| border="1em" cellspacing="0" width="60%" style="border: 1px solid #999; background: | {| border="1em" cellspacing="0" width="60%" style="border: 1px solid #999; background: none;" | ||
|- | |- | ||
| align="center" | '''Move''' || align="center" | '''Motion''' || align="center" | '''Damage''' || align="center" | '''Stun Damage''' || align="center" | '''Chains into itself''' || align="center" | '''Special Cancel''' || align="center" | '''Super Cancel''' || align="center" | '''Juggle Value''' | | align="center" | '''Move''' || align="center" | '''Motion''' || align="center" | '''Damage''' || align="center" | '''Stun Damage''' || align="center" | '''Chains into itself''' || align="center" | '''Special Cancel''' || align="center" | '''Super Cancel''' || align="center" | '''Juggle Value''' | ||
| Line 796: | Line 853: | ||
|} | |} | ||
'''Frame Data''' | '''Frame Data''' | ||
{| border="1em" cellspacing="0" width="65%" style="border: 1px solid #999; background: | {| border="1em" cellspacing="0" width="65%" style="border: 1px solid #999; background: none;" | ||
|- | |- | ||
| align="center" | '''Startup''' || align="center" | '''Hit''' || align="center" | '''Recovery''' || align="center" | '''Blocked Advantage''' || align="center" | '''Hit Advantage''' || align="center" | '''Crouching Hit Advantage''' || align="center" | '''Guard''' || align="center" | '''Parry''' | | align="center" | '''Startup''' || align="center" | '''Hit''' || align="center" | '''Recovery''' || align="center" | '''Blocked Advantage''' || align="center" | '''Hit Advantage''' || align="center" | '''Crouching Hit Advantage''' || align="center" | '''Guard''' || align="center" | '''Parry''' | ||
| Line 803: | Line 860: | ||
|} | |} | ||
'''Gauge Increase''' | '''Gauge Increase''' | ||
{| border="1em" cellspacing="0" width="30%" style="border: 1px solid #999; background: | {| border="1em" cellspacing="0" width="30%" style="border: 1px solid #999; background: none;" | ||
|- | |- | ||
| align="center" | '''Miss''' || align="center" | '''Blocked''' || align="center" | '''Hit''' || align="center" | '''Parry (Gauge for opponent)''' | | align="center" | '''Miss''' || align="center" | '''Blocked''' || align="center" | '''Hit''' || align="center" | '''Parry (Gauge for opponent)''' | ||
| Line 813: | Line 870: | ||
[[Image:(twelveclk).gif|none]] | [[Image:(twelveclk).gif|none]] | ||
{| border="1em" cellspacing="0" width="60%" style="border: 1px solid #999; background: | {| border="1em" cellspacing="0" width="60%" style="border: 1px solid #999; background: none;" | ||
|- | |- | ||
| align="center" | '''Move''' || align="center" | '''Motion''' || align="center" | '''Damage''' || align="center" | '''Stun Damage''' || align="center" | '''Chains into itself''' || align="center" | '''Special Cancel''' || align="center" | '''Super Cancel''' || align="center" | '''Juggle Value''' | | align="center" | '''Move''' || align="center" | '''Motion''' || align="center" | '''Damage''' || align="center" | '''Stun Damage''' || align="center" | '''Chains into itself''' || align="center" | '''Special Cancel''' || align="center" | '''Super Cancel''' || align="center" | '''Juggle Value''' | ||
| Line 820: | Line 877: | ||
|} | |} | ||
'''Frame Data''' | '''Frame Data''' | ||
{| border="1em" cellspacing="0" width="65%" style="border: 1px solid #999; background: | {| border="1em" cellspacing="0" width="65%" style="border: 1px solid #999; background: none;" | ||
|- | |- | ||
| align="center" | '''Startup''' || align="center" | '''Hit''' || align="center" | '''Recovery''' || align="center" | '''Blocked Advantage''' || align="center" | '''Hit Advantage''' || align="center" | '''Crouching Hit Advantage''' || align="center" | '''Guard''' || align="center" | '''Parry''' | | align="center" | '''Startup''' || align="center" | '''Hit''' || align="center" | '''Recovery''' || align="center" | '''Blocked Advantage''' || align="center" | '''Hit Advantage''' || align="center" | '''Crouching Hit Advantage''' || align="center" | '''Guard''' || align="center" | '''Parry''' | ||
| Line 827: | Line 884: | ||
|} | |} | ||
'''Gauge Increase''' | '''Gauge Increase''' | ||
{| border="1em" cellspacing="0" width="30%" style="border: 1px solid #999; background: | {| border="1em" cellspacing="0" width="30%" style="border: 1px solid #999; background: none;" | ||
|- | |- | ||
| align="center" | '''Miss''' || align="center" | '''Blocked''' || align="center" | '''Hit''' || align="center" | '''Parry (Gauge for opponent)''' | | align="center" | '''Miss''' || align="center" | '''Blocked''' || align="center" | '''Hit''' || align="center" | '''Parry (Gauge for opponent)''' | ||
| Line 837: | Line 894: | ||
[[Image:(twelvecmk).gif|none]] | [[Image:(twelvecmk).gif|none]] | ||
{| border="1em" cellspacing="0" width="60%" style="border: 1px solid #999; background: | {| border="1em" cellspacing="0" width="60%" style="border: 1px solid #999; background: none;" | ||
|- | |- | ||
| align="center" | '''Move''' || align="center" | '''Motion''' || align="center" | '''Damage''' || align="center" | '''Stun Damage''' || align="center" | '''Chains into itself''' || align="center" | '''Special Cancel''' || align="center" | '''Super Cancel''' || align="center" | '''Juggle Value''' | | align="center" | '''Move''' || align="center" | '''Motion''' || align="center" | '''Damage''' || align="center" | '''Stun Damage''' || align="center" | '''Chains into itself''' || align="center" | '''Special Cancel''' || align="center" | '''Super Cancel''' || align="center" | '''Juggle Value''' | ||
| Line 844: | Line 901: | ||
|} | |} | ||
'''Frame Data''' | '''Frame Data''' | ||
{| border="1em" cellspacing="0" width="65%" style="border: 1px solid #999; background: | {| border="1em" cellspacing="0" width="65%" style="border: 1px solid #999; background: none;" | ||
|- | |- | ||
| align="center" | '''Startup''' || align="center" | '''Hit''' || align="center" | '''Recovery''' || align="center" | '''Blocked Advantage''' || align="center" | '''Hit Advantage''' || align="center" | '''Crouching Hit Advantage''' || align="center" | '''Guard''' || align="center" | '''Parry''' | | align="center" | '''Startup''' || align="center" | '''Hit''' || align="center" | '''Recovery''' || align="center" | '''Blocked Advantage''' || align="center" | '''Hit Advantage''' || align="center" | '''Crouching Hit Advantage''' || align="center" | '''Guard''' || align="center" | '''Parry''' | ||
| Line 851: | Line 908: | ||
|} | |} | ||
'''Gauge Increase''' | '''Gauge Increase''' | ||
{| border="1em" cellspacing="0" width="30%" style="border: 1px solid #999; background: | {| border="1em" cellspacing="0" width="30%" style="border: 1px solid #999; background: none;" | ||
|- | |- | ||
| align="center" | '''Miss''' || align="center" | '''Blocked''' || align="center" | '''Hit''' || align="center" | '''Parry (Gauge for opponent)''' | | align="center" | '''Miss''' || align="center" | '''Blocked''' || align="center" | '''Hit''' || align="center" | '''Parry (Gauge for opponent)''' | ||
| Line 861: | Line 918: | ||
[[Image:(twelvechk).gif|none]] | [[Image:(twelvechk).gif|none]] | ||
{| border="1em" cellspacing="0" width="60%" style="border: 1px solid #999; background: | {| border="1em" cellspacing="0" width="60%" style="border: 1px solid #999; background: none;" | ||
|- | |- | ||
| align="center" | '''Move''' || align="center" | '''Motion''' || align="center" | '''Damage''' || align="center" | '''Stun Damage''' || align="center" | '''Chains into itself''' || align="center" | '''Special Cancel''' || align="center" | '''Super Cancel''' || align="center" | '''Juggle Value''' | | align="center" | '''Move''' || align="center" | '''Motion''' || align="center" | '''Damage''' || align="center" | '''Stun Damage''' || align="center" | '''Chains into itself''' || align="center" | '''Special Cancel''' || align="center" | '''Super Cancel''' || align="center" | '''Juggle Value''' | ||
| Line 868: | Line 925: | ||
|} | |} | ||
'''Frame Data''' | '''Frame Data''' | ||
{| border="1em" cellspacing="0" width="65%" style="border: 1px solid #999; background: | {| border="1em" cellspacing="0" width="65%" style="border: 1px solid #999; background: none;" | ||
|- | |- | ||
| align="center" | '''Startup''' || align="center" | '''Hit''' || align="center" | '''Recovery''' || align="center" | '''Blocked Advantage''' || align="center" | '''Hit Advantage''' || align="center" | '''Crouching Hit Advantage''' || align="center" | '''Guard''' || align="center" | '''Parry''' | | align="center" | '''Startup''' || align="center" | '''Hit''' || align="center" | '''Recovery''' || align="center" | '''Blocked Advantage''' || align="center" | '''Hit Advantage''' || align="center" | '''Crouching Hit Advantage''' || align="center" | '''Guard''' || align="center" | '''Parry''' | ||
| Line 875: | Line 932: | ||
|} | |} | ||
'''Gauge Increase''' | '''Gauge Increase''' | ||
{| border="1em" cellspacing="0" width="30%" style="border: 1px solid #999; background: | {| border="1em" cellspacing="0" width="30%" style="border: 1px solid #999; background: none;" | ||
|- | |- | ||
| align="center" | '''Miss''' || align="center" | '''Blocked''' || align="center" | '''Hit''' || align="center" | '''Parry (Gauge for opponent)''' | | align="center" | '''Miss''' || align="center" | '''Blocked''' || align="center" | '''Hit''' || align="center" | '''Parry (Gauge for opponent)''' | ||
| Line 886: | Line 943: | ||
[[Image:(twelvebmk).gif|none]] | [[Image:(twelvebmk).gif|none]] | ||
{| border="1em" cellspacing="0" width="60%" style="border: 1px solid #999; background: | {| border="1em" cellspacing="0" width="60%" style="border: 1px solid #999; background: none;" | ||
|- | |- | ||
| align="center" | '''Move''' || align="center" | '''Motion''' || align="center" | '''Damage''' || align="center" | '''Stun Damage''' || align="center" | '''Chains into itself''' || align="center" | '''Special Cancel''' || align="center" | '''Super Cancel''' || align="center" | '''Juggle Value''' | | align="center" | '''Move''' || align="center" | '''Motion''' || align="center" | '''Damage''' || align="center" | '''Stun Damage''' || align="center" | '''Chains into itself''' || align="center" | '''Special Cancel''' || align="center" | '''Super Cancel''' || align="center" | '''Juggle Value''' | ||
| Line 893: | Line 950: | ||
|} | |} | ||
'''Frame Data''' | '''Frame Data''' | ||
{| border="1em" cellspacing="0" width="65%" style="border: 1px solid #999; background: | {| border="1em" cellspacing="0" width="65%" style="border: 1px solid #999; background: none;" | ||
|- | |- | ||
| align="center" | '''Startup''' || align="center" | '''Hit''' || align="center" | '''Recovery''' || align="center" | '''Blocked Advantage''' || align="center" | '''Hit Advantage''' || align="center" | '''Crouching Hit Advantage''' || align="center" | '''Guard''' || align="center" | '''Parry''' | | align="center" | '''Startup''' || align="center" | '''Hit''' || align="center" | '''Recovery''' || align="center" | '''Blocked Advantage''' || align="center" | '''Hit Advantage''' || align="center" | '''Crouching Hit Advantage''' || align="center" | '''Guard''' || align="center" | '''Parry''' | ||
| Line 900: | Line 957: | ||
|} | |} | ||
'''Gauge Increase''' | '''Gauge Increase''' | ||
{| border="1em" cellspacing="0" width="30%" style="border: 1px solid #999; background: | {| border="1em" cellspacing="0" width="30%" style="border: 1px solid #999; background: none;" | ||
|- | |- | ||
| align="center" | '''Miss''' || align="center" | '''Blocked''' || align="center" | '''Hit''' || align="center" | '''Parry (Gauge for opponent)''' | | align="center" | '''Miss''' || align="center" | '''Blocked''' || align="center" | '''Hit''' || align="center" | '''Parry (Gauge for opponent)''' | ||
| Line 910: | Line 967: | ||
[[Image:(twelvejffbb).gif|none]] | [[Image:(twelvejffbb).gif|none]] | ||
{| border="1em" cellspacing="0" width="60%" style="border: 1px solid #999; background: | {| border="1em" cellspacing="0" width="60%" style="border: 1px solid #999; background: none;" | ||
|- | |- | ||
| align="center" | '''Move''' || align="center" | '''Motion''' || align="center" | '''Damage''' || align="center" | '''Stun Damage''' || align="center" | '''Chains into itself''' || align="center" | '''Special Cancel''' || align="center" | '''Super Cancel''' || align="center" | '''Juggle Value''' | | align="center" | '''Move''' || align="center" | '''Motion''' || align="center" | '''Damage''' || align="center" | '''Stun Damage''' || align="center" | '''Chains into itself''' || align="center" | '''Special Cancel''' || align="center" | '''Super Cancel''' || align="center" | '''Juggle Value''' | ||
| Line 917: | Line 974: | ||
|} | |} | ||
'''Frame Data''' | '''Frame Data''' | ||
{| border="1em" cellspacing="0" width="65%" style="border: 1px solid #999; background: | {| border="1em" cellspacing="0" width="65%" style="border: 1px solid #999; background: none;" | ||
|- | |- | ||
| align="center" | '''Startup''' || align="center" | '''Hit''' || align="center" | '''Recovery''' || align="center" | '''Blocked Advantage''' || align="center" | '''Hit Advantage''' || align="center" | '''Crouching Hit Advantage''' || align="center" | '''Guard''' || align="center" | '''Parry''' | | align="center" | '''Startup''' || align="center" | '''Hit''' || align="center" | '''Recovery''' || align="center" | '''Blocked Advantage''' || align="center" | '''Hit Advantage''' || align="center" | '''Crouching Hit Advantage''' || align="center" | '''Guard''' || align="center" | '''Parry''' | ||
| Line 924: | Line 981: | ||
|} | |} | ||
'''Gauge Increase''' | '''Gauge Increase''' | ||
{| border="1em" cellspacing="0" width="30%" style="border: 1px solid #999; background: | {| border="1em" cellspacing="0" width="30%" style="border: 1px solid #999; background: none;" | ||
|- | |- | ||
| align="center" | '''Miss''' || align="center" | '''Blocked''' || align="center" | '''Hit''' || align="center" | '''Parry (Gauge for opponent)''' | | align="center" | '''Miss''' || align="center" | '''Blocked''' || align="center" | '''Hit''' || align="center" | '''Parry (Gauge for opponent)''' | ||
| Line 937: | Line 994: | ||
[[Image:(twelvendl).gif|none]] | [[Image:(twelvendl).gif|none]] | ||
{| border="1em" cellspacing="0" width="65%" style="border: 1px solid #999; background: | {| border="1em" cellspacing="0" width="65%" style="border: 1px solid #999; background: none;" | ||
|- | |- | ||
| align="center" | '''Move''' || align="center" | '''Motion''' || align="center" | '''Damage''' || align="center" | '''Blocked Damage''' || align="center" | '''Stun Damage''' || align="center" | '''Super Cancel''' || align="center" | '''Juggle Value''' | | align="center" | '''Move''' || align="center" | '''Motion''' || align="center" | '''Damage''' || align="center" | '''Blocked Damage''' || align="center" | '''Stun Damage''' || align="center" | '''Super Cancel''' || align="center" | '''Juggle Value''' | ||
| Line 948: | Line 1,005: | ||
|} | |} | ||
'''Frame Data''' | '''Frame Data''' | ||
{| border="1em" cellspacing="0" width="85%" style="border: 1px solid #999; background: | {| border="1em" cellspacing="0" width="85%" style="border: 1px solid #999; background: none;" | ||
|- | |- | ||
| align="center" | '''Move''' || align="center" | '''Startup''' || align="center" | '''Hit''' || align="center" | '''Recovery''' || align="center" | '''Blocked Advantage''' || align="center" | '''Hit Advantage''' || align="center" | '''Crouching Hit Advantage''' || align="center" | '''Guard''' || align="center" | '''Parry''' | | align="center" | '''Move''' || align="center" | '''Startup''' || align="center" | '''Hit''' || align="center" | '''Recovery''' || align="center" | '''Blocked Advantage''' || align="center" | '''Hit Advantage''' || align="center" | '''Crouching Hit Advantage''' || align="center" | '''Guard''' || align="center" | '''Parry''' | ||
| Line 959: | Line 1,016: | ||
|} | |} | ||
'''Gauge Increase''' | '''Gauge Increase''' | ||
{| border="1em" cellspacing="0" width="50%" style="border: 1px solid #999; background: | {| border="1em" cellspacing="0" width="50%" style="border: 1px solid #999; background: none;" | ||
|- | |- | ||
| align="center" | '''Move''' || align="center" | '''Miss''' || align="center" | '''Blocked''' || align="center" | '''Hit''' || align="center" | '''Parry (Gauge for opponent)''' | | align="center" | '''Move''' || align="center" | '''Miss''' || align="center" | '''Blocked''' || align="center" | '''Hit''' || align="center" | '''Parry (Gauge for opponent)''' | ||
| Line 972: | Line 1,029: | ||
[[Image:(twelveaxe).gif|none]] | [[Image:(twelveaxe).gif|none]] | ||
{| border="1em" cellspacing="0" width="65%" style="border: 1px solid #999; background: | {| border="1em" cellspacing="0" width="65%" style="border: 1px solid #999; background: none;" | ||
|- | |- | ||
| align="center" | '''Move''' || align="center" | '''Motion''' || align="center" | '''Damage''' || align="center" | '''Blocked Damage''' || align="center" | '''Stun Damage''' || align="center" | '''Super Cancel''' || align="center" | '''Juggle Value''' | | align="center" | '''Move''' || align="center" | '''Motion''' || align="center" | '''Damage''' || align="center" | '''Blocked Damage''' || align="center" | '''Stun Damage''' || align="center" | '''Super Cancel''' || align="center" | '''Juggle Value''' | ||
| Line 983: | Line 1,040: | ||
|} | |} | ||
'''Frame Data''' | '''Frame Data''' | ||
{| border="1em" cellspacing="0" width="85%" style="border: 1px solid #999; background: | {| border="1em" cellspacing="0" width="85%" style="border: 1px solid #999; background: none;" | ||
|- | |- | ||
| align="center" | '''Move''' || align="center" | '''Startup''' || align="center" | '''Hit''' || align="center" | '''Recovery''' || align="center" | '''Blocked Advantage''' || align="center" | '''Hit Advantage''' || align="center" | '''Crouching Hit Advantage''' || align="center" | '''Guard''' || align="center" | '''Parry''' | | align="center" | '''Move''' || align="center" | '''Startup''' || align="center" | '''Hit''' || align="center" | '''Recovery''' || align="center" | '''Blocked Advantage''' || align="center" | '''Hit Advantage''' || align="center" | '''Crouching Hit Advantage''' || align="center" | '''Guard''' || align="center" | '''Parry''' | ||
| Line 994: | Line 1,051: | ||
|} | |} | ||
'''Gauge Increase''' | '''Gauge Increase''' | ||
{| border="1em" cellspacing="0" width="50%" style="border: 1px solid #999; background: | {| border="1em" cellspacing="0" width="50%" style="border: 1px solid #999; background: none;" | ||
|- | |- | ||
| align="center" | '''Move''' || align="center" | '''Miss''' || align="center" | '''Blocked''' || align="center" | '''Hit''' || align="center" | '''Parry (Gauge for opponent)''' | | align="center" | '''Move''' || align="center" | '''Miss''' || align="center" | '''Blocked''' || align="center" | '''Hit''' || align="center" | '''Parry (Gauge for opponent)''' | ||
| Line 1,007: | Line 1,064: | ||
[[Image:(twelveaaxe).gif|none]] | [[Image:(twelveaaxe).gif|none]] | ||
{| border="1em" cellspacing="0" width="65%" style="border: 1px solid #999; background: | {| border="1em" cellspacing="0" width="65%" style="border: 1px solid #999; background: none;" | ||
|- | |- | ||
| align="center" | '''Move''' || align="center" | '''Motion''' || align="center" | '''Damage''' || align="center" | '''Blocked Damage''' || align="center" | '''Stun Damage''' || align="center" | '''Super Cancel''' || align="center" | '''Juggle Value''' | | align="center" | '''Move''' || align="center" | '''Motion''' || align="center" | '''Damage''' || align="center" | '''Blocked Damage''' || align="center" | '''Stun Damage''' || align="center" | '''Super Cancel''' || align="center" | '''Juggle Value''' | ||
| Line 1,018: | Line 1,075: | ||
|} | |} | ||
'''Frame Data''' | '''Frame Data''' | ||
{| border="1em" cellspacing="0" width="85%" style="border: 1px solid #999; background: | {| border="1em" cellspacing="0" width="85%" style="border: 1px solid #999; background: none;" | ||
|- | |- | ||
| align="center" | '''Move''' || align="center" | '''Startup''' || align="center" | '''Hit''' || align="center" | '''Recovery''' || align="center" | '''Blocked Advantage''' || align="center" | '''Hit Advantage''' || align="center" | '''Crouching Hit Advantage''' || align="center" | '''Guard''' || align="center" | '''Parry''' | | align="center" | '''Move''' || align="center" | '''Startup''' || align="center" | '''Hit''' || align="center" | '''Recovery''' || align="center" | '''Blocked Advantage''' || align="center" | '''Hit Advantage''' || align="center" | '''Crouching Hit Advantage''' || align="center" | '''Guard''' || align="center" | '''Parry''' | ||
| Line 1,029: | Line 1,086: | ||
|} | |} | ||
'''Gauge Increase''' | '''Gauge Increase''' | ||
{| border="1em" cellspacing="0" width="60%" style="border: 1px solid #999; background: | {| border="1em" cellspacing="0" width="60%" style="border: 1px solid #999; background: none;" | ||
|- | |- | ||
| align="center" | '''Move''' || align="center" | '''Miss''' || align="center" | '''Blocked''' || align="center" | '''Hit''' || align="center" | '''Parry (Gauge for opponent)''' | | align="center" | '''Move''' || align="center" | '''Miss''' || align="center" | '''Blocked''' || align="center" | '''Hit''' || align="center" | '''Parry (Gauge for opponent)''' | ||
| Line 1,043: | Line 1,100: | ||
[[Image:(twelvedra).gif|none]] | [[Image:(twelvedra).gif|none]] | ||
{| border="1em" cellspacing="0" width="70%" style="border: 1px solid #999; background: | {| border="1em" cellspacing="0" width="70%" style="border: 1px solid #999; background: none;" | ||
|- | |- | ||
| align="center" | '''Move''' || align="center" | '''Motion''' || align="center" | '''Damage''' || align="center" | '''Blocked Damage''' || align="center" | '''Stun Damage''' || align="center" | '''Super Cancel''' || align="center" | '''Juggle Value''' | | align="center" | '''Move''' || align="center" | '''Motion''' || align="center" | '''Damage''' || align="center" | '''Blocked Damage''' || align="center" | '''Stun Damage''' || align="center" | '''Super Cancel''' || align="center" | '''Juggle Value''' | ||
| Line 1,054: | Line 1,111: | ||
|} | |} | ||
'''Frame Data''' | '''Frame Data''' | ||
{| border="1em" cellspacing="0" width="85%" style="border: 1px solid #999; background: | {| border="1em" cellspacing="0" width="85%" style="border: 1px solid #999; background: none;" | ||
|- | |- | ||
| align="center" | '''Move''' || align="center" | '''Startup''' || align="center" | '''Hit''' || align="center" | '''Recovery''' || align="center" | '''Blocked Advantage''' || align="center" | '''Hit Advantage''' || align="center" | '''Crouching Hit Advantage''' || align="center" | '''Guard''' || align="center" | '''Parry''' | | align="center" | '''Move''' || align="center" | '''Startup''' || align="center" | '''Hit''' || align="center" | '''Recovery''' || align="center" | '''Blocked Advantage''' || align="center" | '''Hit Advantage''' || align="center" | '''Crouching Hit Advantage''' || align="center" | '''Guard''' || align="center" | '''Parry''' | ||
| Line 1,065: | Line 1,122: | ||
|} | |} | ||
'''Gauge Increase''' | '''Gauge Increase''' | ||
{| border="1em" cellspacing="0" width="60%" style="border: 1px solid #999; background: | {| border="1em" cellspacing="0" width="60%" style="border: 1px solid #999; background: none;" | ||
|- | |- | ||
| align="center" | '''Move''' || align="center" | '''Miss''' || align="center" | '''Blocked''' || align="center" | '''Hit''' || align="center" | '''Parry (Gauge for opponent)''' | | align="center" | '''Move''' || align="center" | '''Miss''' || align="center" | '''Blocked''' || align="center" | '''Hit''' || align="center" | '''Parry (Gauge for opponent)''' | ||
| Line 1,080: | Line 1,137: | ||
[[Image:(twelvendlex).gif|none]] | [[Image:(twelvendlex).gif|none]] | ||
{| border="1em" cellspacing="0" width="65%" style="border: 1px solid #999; background: | {| border="1em" cellspacing="0" width="65%" style="border: 1px solid #999; background: none;" | ||
|- | |- | ||
| align="center" | '''Move''' || align="center" | '''Motion''' || align="center" | '''Gauge Needed''' || align="center" | '''Damage''' || align="center" | '''Blocked Damage''' || align="center" | '''Stun Damage''' || align="center" | '''Super Cancel''' || align="center" | '''Juggle Value''' | | align="center" | '''Move''' || align="center" | '''Motion''' || align="center" | '''Gauge Needed''' || align="center" | '''Damage''' || align="center" | '''Blocked Damage''' || align="center" | '''Stun Damage''' || align="center" | '''Super Cancel''' || align="center" | '''Juggle Value''' | ||
| Line 1,087: | Line 1,144: | ||
|} | |} | ||
'''Frame Data''' | '''Frame Data''' | ||
{| border="1em" cellspacing="0" width="80%" style="border: 1px solid #999; background: | {| border="1em" cellspacing="0" width="80%" style="border: 1px solid #999; background: none;" | ||
|- | |- | ||
| align="center" | '''Move''' || align="center" | '''Startup''' || align="center" | '''Hit''' || align="center" | '''Recovery''' || align="center" | '''Blocked Advantage''' || align="center" | '''Hit Advantage''' || align="center" | '''Crouching Hit Advantage''' || align="center" | '''Guard''' || align="center" | '''Parry''' | | align="center" | '''Move''' || align="center" | '''Startup''' || align="center" | '''Hit''' || align="center" | '''Recovery''' || align="center" | '''Blocked Advantage''' || align="center" | '''Hit Advantage''' || align="center" | '''Crouching Hit Advantage''' || align="center" | '''Guard''' || align="center" | '''Parry''' | ||
| Line 1,094: | Line 1,151: | ||
|} | |} | ||
'''Gauge Increase''' | '''Gauge Increase''' | ||
{| border="1em" cellspacing="0" width="50%" style="border: 1px solid #999; background: | {| border="1em" cellspacing="0" width="50%" style="border: 1px solid #999; background: none;" | ||
|- | |- | ||
| align="center" | '''Move''' || align="center" | '''Miss''' || align="center" | '''Blocked''' || align="center" | '''Hit''' || align="center" | '''Parry (Gauge for opponent)''' | | align="center" | '''Move''' || align="center" | '''Miss''' || align="center" | '''Blocked''' || align="center" | '''Hit''' || align="center" | '''Parry (Gauge for opponent)''' | ||
| Line 1,104: | Line 1,161: | ||
[[Image:(twelveaxeex).gif|none]] | [[Image:(twelveaxeex).gif|none]] | ||
{| border="1em" cellspacing="0" width="65%" style="border: 1px solid #999; background: | {| border="1em" cellspacing="0" width="65%" style="border: 1px solid #999; background: none;" | ||
|- | |- | ||
| align="center" | '''Move''' || align="center" | '''Motion''' || align="center" | '''Gauge Needed''' || align="center" | '''Damage''' || align="center" | '''Blocked Damage''' || align="center" | '''Stun Damage''' || align="center" | '''Super Cancel''' || align="center" | '''Juggle Value''' | | align="center" | '''Move''' || align="center" | '''Motion''' || align="center" | '''Gauge Needed''' || align="center" | '''Damage''' || align="center" | '''Blocked Damage''' || align="center" | '''Stun Damage''' || align="center" | '''Super Cancel''' || align="center" | '''Juggle Value''' | ||
| Line 1,111: | Line 1,168: | ||
|} | |} | ||
'''Frame Data''' | '''Frame Data''' | ||
{| border="1em" cellspacing="0" width="80%" style="border: 1px solid #999; background: | {| border="1em" cellspacing="0" width="80%" style="border: 1px solid #999; background: none;" | ||
|- | |- | ||
| align="center" | '''Move''' || align="center" | '''Startup''' || align="center" | '''Hit''' || align="center" | '''Recovery''' || align="center" | '''Blocked Advantage''' || align="center" | '''Hit Advantage''' || align="center" | '''Crouching Hit Advantage''' || align="center" | '''Guard''' || align="center" | '''Parry''' | | align="center" | '''Move''' || align="center" | '''Startup''' || align="center" | '''Hit''' || align="center" | '''Recovery''' || align="center" | '''Blocked Advantage''' || align="center" | '''Hit Advantage''' || align="center" | '''Crouching Hit Advantage''' || align="center" | '''Guard''' || align="center" | '''Parry''' | ||
| Line 1,118: | Line 1,175: | ||
|} | |} | ||
'''Gauge Increase''' | '''Gauge Increase''' | ||
{| border="1em" cellspacing="0" width="50%" style="border: 1px solid #999; background: | {| border="1em" cellspacing="0" width="50%" style="border: 1px solid #999; background: none;" | ||
|- | |- | ||
| align="center" | '''Move''' || align="center" | '''Miss''' || align="center" | '''Blocked''' || align="center" | '''Hit''' || align="center" | '''Parry (Gauge for opponent)''' | | align="center" | '''Move''' || align="center" | '''Miss''' || align="center" | '''Blocked''' || align="center" | '''Hit''' || align="center" | '''Parry (Gauge for opponent)''' | ||
| Line 1,128: | Line 1,185: | ||
[[Image:(twelveaaxeex).gif|none]] | [[Image:(twelveaaxeex).gif|none]] | ||
{| border="1em" cellspacing="0" width="70%" style="border: 1px solid #999; background: | {| border="1em" cellspacing="0" width="70%" style="border: 1px solid #999; background: none;" | ||
|- | |- | ||
| align="center" | '''Move''' || align="center" | '''Motion''' || align="center" | '''Gauge Needed''' || align="center" | '''Damage''' || align="center" | '''Blocked Damage''' || align="center" | '''Stun Damage''' || align="center" | '''Super Cancel''' || align="center" | '''Juggle Value''' | | align="center" | '''Move''' || align="center" | '''Motion''' || align="center" | '''Gauge Needed''' || align="center" | '''Damage''' || align="center" | '''Blocked Damage''' || align="center" | '''Stun Damage''' || align="center" | '''Super Cancel''' || align="center" | '''Juggle Value''' | ||
| Line 1,135: | Line 1,192: | ||
|} | |} | ||
'''Frame Data''' | '''Frame Data''' | ||
{| border="1em" cellspacing="0" width="80%" style="border: 1px solid #999; background: | {| border="1em" cellspacing="0" width="80%" style="border: 1px solid #999; background: none;" | ||
|- | |- | ||
| align="center" | '''Move''' || align="center" | '''Startup''' || align="center" | '''Hit''' || align="center" | '''Recovery''' || align="center" | '''Blocked Advantage''' || align="center" | '''Hit Advantage''' || align="center" | '''Crouching Hit Advantage''' || align="center" | '''Guard''' || align="center" | '''Parry''' | | align="center" | '''Move''' || align="center" | '''Startup''' || align="center" | '''Hit''' || align="center" | '''Recovery''' || align="center" | '''Blocked Advantage''' || align="center" | '''Hit Advantage''' || align="center" | '''Crouching Hit Advantage''' || align="center" | '''Guard''' || align="center" | '''Parry''' | ||
| Line 1,142: | Line 1,199: | ||
|} | |} | ||
'''Gauge Increase''' | '''Gauge Increase''' | ||
{| border="1em" cellspacing="0" width="50%" style="border: 1px solid #999; background: | {| border="1em" cellspacing="0" width="50%" style="border: 1px solid #999; background: none;" | ||
|- | |- | ||
| align="center" | '''Move''' || align="center" | '''Miss''' || align="center" | '''Blocked''' || align="center" | '''Hit''' || align="center" | '''Parry (Gauge for opponent)''' | | align="center" | '''Move''' || align="center" | '''Miss''' || align="center" | '''Blocked''' || align="center" | '''Hit''' || align="center" | '''Parry (Gauge for opponent)''' | ||
| Line 1,152: | Line 1,209: | ||
[[Image:(twelvedraex).gif|none]] | [[Image:(twelvedraex).gif|none]] | ||
{| border="1em" cellspacing="0" width="70%" style="border: 1px solid #999; background: | {| border="1em" cellspacing="0" width="70%" style="border: 1px solid #999; background: none;" | ||
|- | |- | ||
| align="center" | '''Move''' || align="center" | '''Motion''' || align="center" | '''Gauge Needed''' || align="center" | '''Damage''' || align="center" | '''Blocked Damage''' || align="center" | '''Stun Damage''' || align="center" | '''Super Cancel''' || align="center" | '''Juggle Value''' | | align="center" | '''Move''' || align="center" | '''Motion''' || align="center" | '''Gauge Needed''' || align="center" | '''Damage''' || align="center" | '''Blocked Damage''' || align="center" | '''Stun Damage''' || align="center" | '''Super Cancel''' || align="center" | '''Juggle Value''' | ||
| Line 1,159: | Line 1,216: | ||
|} | |} | ||
'''Frame Data''' | '''Frame Data''' | ||
{| border="1em" cellspacing="0" width="80%" style="border: 1px solid #999; background: | {| border="1em" cellspacing="0" width="80%" style="border: 1px solid #999; background: none;" | ||
|- | |- | ||
| align="center" | '''Move''' || align="center" | '''Startup''' || align="center" | '''Hit''' || align="center" | '''Recovery''' || align="center" | '''Blocked Advantage''' || align="center" | '''Hit Advantage''' || align="center" | '''Crouching Hit Advantage''' || align="center" | '''Guard''' || align="center" | '''Parry''' | | align="center" | '''Move''' || align="center" | '''Startup''' || align="center" | '''Hit''' || align="center" | '''Recovery''' || align="center" | '''Blocked Advantage''' || align="center" | '''Hit Advantage''' || align="center" | '''Crouching Hit Advantage''' || align="center" | '''Guard''' || align="center" | '''Parry''' | ||
| Line 1,166: | Line 1,223: | ||
|} | |} | ||
'''Gauge Increase''' | '''Gauge Increase''' | ||
{| border="1em" cellspacing="0" width="50%" style="border: 1px solid #999; background: | {| border="1em" cellspacing="0" width="50%" style="border: 1px solid #999; background: none;" | ||
|- | |- | ||
| align="center" | '''Move''' || align="center" | '''Miss''' || align="center" | '''Blocked''' || align="center" | '''Hit''' || align="center" | '''Parry (Gauge for opponent)''' | | align="center" | '''Move''' || align="center" | '''Miss''' || align="center" | '''Blocked''' || align="center" | '''Hit''' || align="center" | '''Parry (Gauge for opponent)''' | ||
| Line 1,177: | Line 1,234: | ||
[[Image:(twelvesa1).gif|none]] | [[Image:(twelvesa1).gif|none]] | ||
{| border="1em" cellspacing="0" width="70%" style="border: 1px solid #999; background: | {| border="1em" cellspacing="0" width="70%" style="border: 1px solid #999; background: none;" | ||
|- | |- | ||
| align="center" | '''Super Art''' || align="center" | '''Super Art Name''' || align="center" | '''Super Art Stock''' || align="center" | '''Motion''' || align="center" | '''Damage''' || align="center" | '''Blocked Damage''' || align="center" | '''Stun Damage''' || align="center" | '''Damage/Gauge''' | | align="center" | '''Super Art''' || align="center" | '''Super Art Name''' || align="center" | '''Super Art Stock''' || align="center" | '''Motion''' || align="center" | '''Damage''' || align="center" | '''Blocked Damage''' || align="center" | '''Stun Damage''' || align="center" | '''Damage/Gauge''' | ||
| Line 1,183: | Line 1,240: | ||
| align="center" | I || align="center" | X.N.D.L. || align="center" | 2 bars (112 each bar) || align="center" | QCF QCF+P || align="center" | 370*(57 life points) || align="center" | 48** || align="center" | 15*** || align="center" | 3,30 (x2) | | align="center" | I || align="center" | X.N.D.L. || align="center" | 2 bars (112 each bar) || align="center" | QCF QCF+P || align="center" | 370*(57 life points) || align="center" | 48** || align="center" | 15*** || align="center" | 3,30 (x2) | ||
|} | |} | ||
{| border="1em" cellspacing="0" width="40%" style="border: 1px solid #999; background: | {| border="1em" cellspacing="0" width="40%" style="border: 1px solid #999; background: none;" | ||
|- | |- | ||
|* (60×3~8) Damage is when all hits connect. | |* (60×3~8) Damage is when all hits connect. | ||
| Line 1,193: | Line 1,250: | ||
|} | |} | ||
'''Frame Data''' | '''Frame Data''' | ||
{| border="1em" cellspacing="0" width="65%" style="border: 1px solid #999; background: | {| border="1em" cellspacing="0" width="65%" style="border: 1px solid #999; background: none;" | ||
|- | |- | ||
| align="center" | '''Startup''' || align="center" | '''Hit''' || align="center" | '''Recovery''' || align="center" | '''Blocked Advantage''' || align="center" | '''Hit Advantage''' || align="center" | '''Crouching Hit Advantage''' || align="center" | '''Guard''' || align="center" | '''Parry''' | | align="center" | '''Startup''' || align="center" | '''Hit''' || align="center" | '''Recovery''' || align="center" | '''Blocked Advantage''' || align="center" | '''Hit Advantage''' || align="center" | '''Crouching Hit Advantage''' || align="center" | '''Guard''' || align="center" | '''Parry''' | ||
| Line 1,203: | Line 1,260: | ||
[[Image:(twelvesa2).gif|none]] | [[Image:(twelvesa2).gif|none]] | ||
{| border="1em" cellspacing="0" width="80%" style="border: 1px solid #999; background: | {| border="1em" cellspacing="0" width="80%" style="border: 1px solid #999; background: none;" | ||
|- | |- | ||
| align="center" | '''Super Art''' || align="center" | '''Super Art Name''' || align="center" | '''Super Art Stock''' || align="center" | '''Motion''' || align="center" | '''Damage''' || align="center" | '''Blocked Damage''' || align="center" | '''Stun Damage''' || align="center" | '''Damage/Gauge''' | | align="center" | '''Super Art''' || align="center" | '''Super Art Name''' || align="center" | '''Super Art Stock''' || align="center" | '''Motion''' || align="center" | '''Damage''' || align="center" | '''Blocked Damage''' || align="center" | '''Stun Damage''' || align="center" | '''Damage/Gauge''' | ||
| Line 1,209: | Line 1,266: | ||
| align="center" | II || align="center" | X.F.L.A.T. || align="center" | 1 bar (104) || align="center" | Jump In, QCF QCF+K || align="center" | 430(74 life points)/230(40 life points)* || align="center" | 4/off** || align="center" | 25/18* || align="center" | 4,13 | | align="center" | II || align="center" | X.F.L.A.T. || align="center" | 1 bar (104) || align="center" | Jump In, QCF QCF+K || align="center" | 430(74 life points)/230(40 life points)* || align="center" | 4/off** || align="center" | 25/18* || align="center" | 4,13 | ||
|} | |} | ||
{| border="1em" cellspacing="0" width="40%" style="border: 1px solid #999; background: | {| border="1em" cellspacing="0" width="40%" style="border: 1px solid #999; background: none;" | ||
|- | |- | ||
|* Ground/Air Damage is when all hits connect. | |* Ground/Air Damage is when all hits connect. | ||
|} | |} | ||
'''Frame Data''' | '''Frame Data''' | ||
{| border="1em" cellspacing="0" width="65%" style="border: 1px solid #999; background: | {| border="1em" cellspacing="0" width="65%" style="border: 1px solid #999; background: none;" | ||
|- | |- | ||
| align="center" | '''Startup''' || align="center" | '''Hit''' || align="center" | '''Recovery''' || align="center" | '''Blocked Advantage''' || align="center" | '''Hit Advantage''' || align="center" | '''Crouching Hit Advantage''' || align="center" | '''Guard''' || align="center" | '''Parry''' | | align="center" | '''Startup''' || align="center" | '''Hit''' || align="center" | '''Recovery''' || align="center" | '''Blocked Advantage''' || align="center" | '''Hit Advantage''' || align="center" | '''Crouching Hit Advantage''' || align="center" | '''Guard''' || align="center" | '''Parry''' | ||
| Line 1,224: | Line 1,281: | ||
[[Image:(twelvesa3).gif|none]] | [[Image:(twelvesa3).gif|none]] | ||
{| border="1em" cellspacing="0" width="70%" style="border: 1px solid #999; background: | {| border="1em" cellspacing="0" width="70%" style="border: 1px solid #999; background: none;" | ||
|- | |- | ||
| align="center" | '''Super Art''' || align="center" | '''Super Art Name''' || align="center" | '''Super Art Stock''' || align="center" | '''Motion''' || align="center" | '''Damage''' || align="center" | '''Blocked Damage''' || align="center" | '''Stun Damage''' || align="center" | '''Damage/Gauge''' | | align="center" | '''Super Art''' || align="center" | '''Super Art Name''' || align="center" | '''Super Art Stock''' || align="center" | '''Motion''' || align="center" | '''Damage''' || align="center" | '''Blocked Damage''' || align="center" | '''Stun Damage''' || align="center" | '''Damage/Gauge''' | ||
| Line 1,232: | Line 1,289: | ||
'''Frame Data''' | '''Frame Data''' | ||
{| border="1em" cellspacing="0" width="65%" style="border: 1px solid #999; background: | {| border="1em" cellspacing="0" width="65%" style="border: 1px solid #999; background: none;" | ||
|- | |- | ||
| align="center" | '''Startup''' || align="center" | '''Hit''' || align="center" | '''Recovery''' || align="center" | '''Blocked Advantage''' || align="center" | '''Hit Advantage''' || align="center" | '''Crouching Hit Advantage''' || align="center" | '''Guard''' || align="center" | '''Parry''' | | align="center" | '''Startup''' || align="center" | '''Hit''' || align="center" | '''Recovery''' || align="center" | '''Blocked Advantage''' || align="center" | '''Hit Advantage''' || align="center" | '''Crouching Hit Advantage''' || align="center" | '''Guard''' || align="center" | '''Parry''' | ||
Latest revision as of 19:57, 23 June 2024
Updated version available!
You're reading the old version of this page. Click here to read the (in-progress) updated version!
Introduction
With Necro being his prototype, Twelve is genetically engineered to regenerate, form other shapes (usually weapons) out of his body, copy a person's appearance and skill, and is meant to be incapable of being damaged. The "G-Project", the secret project that resulted in Twelve's birth, was executed by Dr. Kure, and overseen by Gill's brother, Urien. Twelve is ordered to retrieve Necro and Effie after the latter freed and helped Necro escape from Gill's organization. Twelve is also being mass produced by the organization to create an army of Twelve-like creatures. Twelve considers Urien to be his father because of his involvement with his creation.
It's not worth it to deny the fact that twelve is awful - he's easily on the bottom 2 characters in the game. He lacks in a lot of important fields, and shifts his gameplan from what was probably meant to be mixup-heavy rushdown to hit and run, heavy on getting a lifelead safely and stalling away. However, contrary to belief, twelve isn't actually useless or unviable - his airdash is a great tool for approaching, mixups and stalling. his walk low profiles projectiles and allows him to go for anti airs more safely. his ex needles can tthreaten with a knockdown and oki opportunity from far away, and he actually has a few decent normals for poking, anti airing and blockstrings. If you pick twelve, prepare to play one of the most difficult characters to play, but if you like hit and run chars, twelve's design, or playing a difficult character, he can be a lot of fun.
| Strengths | Weaknesses |
|---|---|
|
|
Specific Character Information
- Stamina: 1080
- Stun Bar Length (dots): 64 (Normal)
- Stun Bar Recovery (frames it takes to recover 1 dot): 23
- Taunt: It turns you invisible for a while.
- Best Kara-Throw: None. Technically s.MP is best but it becomes cl.MP at ranges where the kara throw would be relevant, which gives very little bonus range.
- Standard Throw Range (pixels): 22
- Kara-Throw Range (pixels): 40
- Dash Forward (frames) / Moving Distance: 20 / 1,5
- Dash Backward (frames) / Moving Distance: 16 / 1,5
- Normal Wake up (frames): 59
- Quick Stand (frames): 49
Moves List
Standing Normals
s.LP - Quick, cancellable jab. Frequently used as an anti-air and cancelled into LP A.X.E. Can be crouched under by most characters.
s.MP - Really good button. Longish startup for a medium normal but amazing range and fast recovery. Used pretty much just as a long range poke since it's not cancellable, can be crouched like LP.
cl.MP - Good speed, good recovery, cancellable, scaling isn't bad. The only thing holding this move back is that it's situational since raw SA1 does more damage than cl.MP xx SA1. Whiffs on short crouching opponents like Chun and Elena.
s.HP - Slow, single hit """anti-air""". It's more like an anti-jump move because it's so slow, you almost have to predict the jump instead of reacting to it. Covers a good angle though and isn't a bad move. A good "shut the hell up" button.
s.LK - Fast, cancellable poke. Good button, almost never used because cr.LK is just better.
s.MK - Funky button. Kinda slow but it's super cancellable and superjump cancellable. This is Twelve's only SJC-able button and you can occasionally throw it into your pressure game for some fun loops. Just don't get carried away. This move is also his only true confirm into SA2.
s.HK - The Dhalsim button. One of the biggest normals in the game. Very good at low level but is parryable on reaction at high level and is also -2 on hit, meaning you're eating a super if you use this against the wrong characters.
Crouching Normals
Jumping Normals
Command Normals
| b.MK | |
| Kokkou | Air |
| Kabe Haritsuki | Air |
b.MK - Funkier button. Used for pretty much the same things as cl.MP except it's also sort of an anti-air and hits short chrouching characters. Highest damage confirm to SA1, harder execution. Weird, unexplored move.
Kokkou (aka Airdash) - One of the main reasons to play Twelve. Performed with two forward inputs while airborne, airdash opens up so many of the options Twelve has and enables his mixups and pressure game.
Twelve cannot parry while airdashing. An instant airdash can be performed by pressing up-forward to jump and forward to begin the airdash.
Twelve's airdash is a key part of their kit and it is essential to understand not only the benefits of airdash but the drawbacks as well.
More advanced airdash options will be discussed in the "Advanced Strategy" section (when I eventually get around to adding to it)
Kabe Haritsuki (aka Walljump) - Almost completely irrelevant. Can be used to mix up stalling in very situational occasions but is overall fairly useless.
Specials
Supers
Throws
| H.U.G. | |
| F.L.G. | |
| T.R.W. |
Neutral Throw - not good. Does slightly more stun that his other throws and is harder to mash oit of than other mash throws, but overall is rarely worth giving up the positioning and setup potential of his other throws. Also, you can OTG Hugo with Super if he doesn't quickrise this.
Forward Throw - Sends fullscreen and gives you enough time to airdash over and start oki. You can also forego oki to set up funny taunt but be aware that many characters can punish you since forward throw does not give you as many + frames as back throw.
Back Throw - Unless you have your opponent cornered or something this is usually Twelve's best throw. You basically get everything you would normally get off forward throw except back throw is safer on hit, allowing for more time to set up oki or the t a u n t.
Special Moves
| N.D.L. | EX | |
| A.X.E. | (Air) |
EX |
| D.R.A. | Air |
EX |
Super Arts
Move Analysis
- All those sprites are taken from the site https://www.justnopoint.com/zweifuss/
- All Framedatas in "Move Analisys" section are taken from Game Restaurant , this means the Framedata isn't from the Dreamcast version like Karathrow site, it's from Arcade version.
Please note that the images show in this section are for the 1st frame it hits, so this means the opponent is taking the hit in the image shown on the move. I use the 1st frame of every move (except taunt, dash, jump, wakeup and 2nd throw image sprites) because you will see the maximum range of every attack (mostly of the attacks). Note also that those images are ACCURATE, they are exactly the first frame it hits, so enemy takes damage but they still dont make the "pain" frame.
General
- Move: Move name
- Motion: What you must do to execute the move
- Damage: Damage it does (in pixels)
- Stun Damage: Stun Damage it does (in pixels)
- Chains into itself: If you can combo into the same movement
- Special Cancel: If you can cancel the move into a Special Move
- Super Cancel: If you can cancel the move into a Super Art
- Throw Range: Range of the throw (in pixels)
- Num.: Super Art number
- Super Art: Super Art name
- Super Art Stock: Number of Gauge Bars the Super Art have, also the lenght of each bar (in pixels)
Frame Data
- Startup: Number of frames it takes to start the move
- Hit: Number of frames that can hit the opponent
- Recovery: Number of frames it takes to recover from the move
- Blocked Advantage: Number of frames you are in advantage/disadvantage after opponent have been blocked the hit
- Hit Advantage: Number of frames you are in advantage/disadvantage after opponent have been take the hit
- Crouching Hit Advantage: Number of frames you are in advantage/disadvantage after opponent have been take the hit while he's crouching
- + # : You have # frames of advantage
- - # : You have # frames of disadvantage
- # ~ # : Advantage/disadvantage can vary from # to #
- Down: Enemy gets knocked down
- Guard: How opponent must guard the move, High (H), Low (L) or both (HL)
- Parry: How opponent must parry the move, High (H), Low (L) or both (HL)
Gauge Increase
- Miss: Gauge you gain if you miss the move (in pixels)
- Blocked: Gauge you gain if the move gets blocked (in pixels)
- Hit: Gauge you gain if you hit the opponent with the move (in pixels)
- Parry: Gauge opponent gains when he parry the move (in pixels)
Basic Moves
| Move | Start-up frames | In ground frames | In air frames | Recovery frames | Total frames |
|---|---|---|---|---|---|
| Dash Forward | 1,5 | 8? | - | 6? | 20 |
Comments here
| Move | Start-up frames | In ground frames | In air frames | Recovery frames | Total frames |
|---|---|---|---|---|---|
| Dash Backwards | 1,5 | 4? | - | 6? | 16 |
Comments here
| Move | Motion | Startup Frames |
| Jump | BU or U or FU | 3 |
Comments here
| Move | Motion | Startup Frames |
| Super Jump | DBU or DU or DFU | 5 |
Comments here
| Move | Motion | Frames |
| Normal Wakeup | - | 59 |
Comments here
| Move | Motion | Frames |
| Quick Stand | Tap D when hitting the ground | 49 |
Comments here
| Move | Motion | Damage | Stun Damage | Chains into itself | Special Cancel | Super Cancel | Juggle Value |
| Taunt | HP+HK | - | - | No | No | No |
Frame Data
| Startup | Hit | Recovery | Blocked Advantage | Hit Advantage | Crouching Hit Advantage | Guard | Parry |
| 79 | 150 | 71 | ? | ? | ? | HL | HL |
Gauge Increase
| Miss | Blocked | Hit | Parry (Gauge for opponent) |
| 2(3) | ? | ? | 4 |
Comments here
| Move | Motion |
| Parry (High) | Tap F when about taking a hit |
| Parry (Low) | Tap D when about taking a hit |
| Parry (Air) | Tap F in air when about taking a hit |
Frame Data
| Move | Frames you're frozen | Frames opponent is frozen | Frame Advantage when parry is successful | Frames before you can try another parry |
| Parry (High) | 16 | 16 | +4(LP/LK) +3(MP/MK) +2(HP/HK) 0(Special/Super) -16(Fireball) | 24(19 when attack comes from the air)*,** |
| Parry (Low) | 16 | 16 | +4(LP/LK) +3(MP/MK) +2(HP/HK) 0(Special/Super) -16(Fireball) | 24(19 when attack comes from the air)*,** |
| Parry (Air) | 16 | 16 | +4(LP/LK) +3(MP/MK) +2(HP/HK) 0(Special/Super) -16(Fireball) | 21(19 when attack comes from the air)*,** |
| * (If a parry attempt is successful, the 19/21/24 frame restriction is taken away and you can attempt another parry immediately) |
| ** (If another attack connects within 2 frames of your parry, it will automatically be parried) |
Gauge Increase
| Move | Gauge Increase |
| Parry (High) | 4*** |
| Parry (Low) | 4*** |
| Parry (Air) | 4*** |
| *** (You gain 4 of gauge for whatever attack parried, and for whatever hit you parry during multihit attack) |
You can buffer any motion during High or Low parry, but NOT during Air parry, also parry resets the juggle count (and thus resets all scaling).
- Parry information is taken from A.X.E. Forums, more exactly, from user JinraiPVC. Thanks for this information dude
Normal Moves
Standing Normals
| Move | Motion | Damage | Stun Damage | Chains into itself | Special Cancel | Super Cancel | Juggle Value |
| Far Jab | LP | 30(5 life points) | 3 | Yes | Yes | Yes |
Frame Data
| Startup | Hit | Recovery | Blocked Advantage | Hit Advantage | Crouching Hit Advantage | Guard | Parry |
| 3 | 3 | 7 | +1 | +1 | +1 | HL | HL |
Gauge Increase
| Miss | Blocked | Hit | Parry (Gauge for opponent) |
| 0 | 1 | 2 | 4 |
Comments here
| Move | Motion | Damage | Stun Damage | Chains into itself | Special Cancel | Super Cancel | Juggle Value |
| Far Strong | MP | 70(11 life points) | 11 | No | Yes | Yes |
Frame Data
| Startup | Hit | Recovery | Blocked Advantage | Hit Advantage | Crouching Hit Advantage | Guard | Parry |
| 9 | 4 | 12 | -2 | -1 | 0 | HL | H |
Gauge Increase
| Miss | Blocked | Hit | Parry (Gauge for opponent) |
| 2 | 6 | 11 | 4 |
Comments here
| Move | Motion | Damage | Stun Damage | Chains into itself | Special Cancel | Super Cancel | Juggle Value |
| Far Fierce | HP | 110(19 life points) | 15 | No | No | No |
Frame Data
| Startup | Hit | Recovery | Blocked Advantage | Hit Advantage | Crouching Hit Advantage | Guard | Parry |
| 12 | 4 | 17 | -3 | -1 | +1 | HL | H |
Gauge Increase
| Miss | Blocked | Hit | Parry (Gauge for opponent) |
| 3 | 10 | 19 | 4 |
Comments here
| Move | Motion | Damage | Stun Damage | Chains into itself | Special Cancel | Super Cancel | Juggle Value |
| Close Strong | (Close to opponent) MP | 65(12 life points) | 9 | No | Yes | Yes |
Frame Data
| Startup | Hit | Recovery | Blocked Advantage | Hit Advantage | Crouching Hit Advantage | Guard | Parry |
| 6 | 4 | 12 | -2 | +4 | +5 | HL | H |
Gauge Increase
| Miss | Blocked | Hit | Parry (Gauge for opponent) |
| 2 | 6 | 11 | 4 |
Comments here
| Move | Motion | Damage | Stun Damage | Chains into itself | Special Cancel | Super Cancel | Juggle Value |
| Short | LK | 35(7 life points) | 3 | No | No | No |
Frame Data
| Startup | Hit | Recovery | Blocked Advantage | Hit Advantage | Crouching Hit Advantage | Guard | Parry |
| 3 | 2 | 10 | -1 | -1 | -1 | HL | HL |
Gauge Increase
| Miss | Blocked | Hit | Parry (Gauge for opponent) |
| 0 | 1 | 2 | 4 |
Comments here
| Move | Motion | Damage | Stun Damage | Chains into itself | Special Cancel | Super Cancel | Juggle Value |
| Forward | MK | 70(12 life points) | 11 | No | No | No |
Frame Data
| Startup | Hit | Recovery | Blocked Advantage | Hit Advantage | Crouching Hit Advantage | Guard | Parry |
| 6 | 6 | 13 | -6 | -2 | 0 | HL | H |
Gauge Increase
| Miss | Blocked | Hit | Parry (Gauge for opponent) |
| 2 | 4 | 8 | 4 |
Comments here
| Move | Motion | Damage | Stun Damage | Chains into itself | Special Cancel | Super Cancel | Juggle Value |
| Roundhouse | HK | 100(17 life points) | 13 | No | No | No |
Frame Data
| Startup | Hit | Recovery | Blocked Advantage | Hit Advantage | Crouching Hit Advantage | Guard | Parry |
| 17 | 3 | 25 | -11 | -1 | +1 | HL | H |
Gauge Increase
| Miss | Blocked | Hit | Parry (Gauge for opponent) |
| 3 | 10 | 19 | 4 |
Comments here
Jumping Normals
| Move | Motion | Damage | Stun Damage | Chains into itself | Special Cancel | Super Cancel | Juggle Value |
| Jump Jab | (Air) LP | 50(60 if neutral jump)(5/7 life points) | 7 | No | No | No |
Frame Data
| Startup | Hit | Recovery | Blocked Advantage | Hit Advantage | Crouching Hit Advantage | Guard | Parry |
| 4(5 if neutral jump) | Until landing | - | - | - | - | H | H |
Gauge Increase
| Miss | Blocked | Hit | Parry (Gauge for opponent) |
| 0 | 1 | 2 | 4 |
Comments here
| Move | Motion | Damage | Stun Damage | Chains into itself | Special Cancel | Super Cancel | Juggle Value |
| Jump Strong | (Air) MP | 100(14 life points) | 11 | No | No | No |
Frame Data
| Startup | Hit | Recovery | Blocked Advantage | Hit Advantage | Crouching Hit Advantage | Guard | Parry |
| 5(6 if neutral jump) | 5 | - | - | - | - | H | H |
Gauge Increase
| Miss | Blocked | Hit | Parry (Gauge for opponent) |
| 2 | 4 | 8 | 4 |
Comments here
| Move | Motion | Damage | Stun Damage | Chains into itself | Special Cancel | Super Cancel | Juggle Value |
| Jump Fierce | (Air) HP | 130(17 life points) | 15 | No | No | No |
Frame Data
| Startup | Hit | Recovery | Blocked Advantage | Hit Advantage | Crouching Hit Advantage | Guard | Parry |
| 6 | 4 | - | - | - | - | H | H |
Gauge Increase
| Miss | Blocked | Hit | Parry (Gauge for opponent) |
| 3 | 6 | 14 | 4 |
Comments here
| Move | Motion | Damage | Stun Damage | Chains into itself | Special Cancel | Super Cancel | Juggle Value |
| Neutral Jump Fierce | (Air) HP | 130(17 life points) | 15 | No | No | No |
Frame Data
| Startup | Hit | Recovery | Blocked Advantage | Hit Advantage | Crouching Hit Advantage | Guard | Parry |
| 7 | 3 | - | - | - | - | H | H |
Gauge Increase
| Miss | Blocked | Hit | Parry (Gauge for opponent) |
| 3 | 6 | 14 | 4 |
Comments here
| Move | Motion | Damage | Stun Damage | Chains into itself | Special Cancel | Super Cancel | Juggle Value |
| Jump Short | (Air) LK | 50(7 life points) | 5(7 if neutral jump) | No | No | No |
Frame Data
| Startup | Hit | Recovery | Blocked Advantage | Hit Advantage | Crouching Hit Advantage | Guard | Parry |
| 4(5 if neutral jump) | 10(19 if neutral jump) | - | - | - | - | H | H |
Gauge Increase
| Miss | Blocked | Hit | Parry (Gauge for opponent) |
| 0 | 1 | 2 | 4 |
Comments here
| Move | Motion | Damage | Stun Damage | Chains into itself | Special Cancel | Super Cancel | Juggle Value |
| Jump Forward | (Air) MK | 90(12 life points) | 9 | No | No | No |
Frame Data
| Startup | Hit | Recovery | Blocked Advantage | Hit Advantage | Crouching Hit Advantage | Guard | Parry |
| 5 | 6 | - | - | - | - | H | H |
Gauge Increase
| Miss | Blocked | Hit | Parry (Gauge for opponent) |
| 2 | 4 | 8 | 4 |
Comments here
| Move | Motion | Damage | Stun Damage | Chains into itself | Special Cancel | Super Cancel | Juggle Value |
| Neutral Jump Forward | (Air) MK | 90(12 life points) | 9 | No | No | No |
Frame Data
| Startup | Hit | Recovery | Blocked Advantage | Hit Advantage | Crouching Hit Advantage | Guard | Parry |
| 5 | 6 | - | - | - | - | H | H |
Gauge Increase
| Miss | Blocked | Hit | Parry (Gauge for opponent) |
| 2 | 4 | 8 | 4 |
Comments here
| Move | Motion | Damage | Stun Damage | Chains into itself | Special Cancel | Super Cancel | Juggle Value |
| Jump Roundhouse | (Air) HK | 125(21 life points) | 13 | No | No | No |
Frame Data
| Startup | Hit | Recovery | Blocked Advantage | Hit Advantage | Crouching Hit Advantage | Guard | Parry |
| 6 | 4 | - | - | - | - | H | H |
Gauge Increase
| Miss | Blocked | Hit | Parry (Gauge for opponent) |
| 3 | 6 | 14 | 4 |
Comments here
| Move | Motion | Damage | Stun Damage | Chains into itself | Special Cancel | Super Cancel | Juggle Value |
| Neutral Jump Roundhouse | (Air) HK | 130(21 life points) | 13 | No | No | No |
Frame Data
| Startup | Hit | Recovery | Blocked Advantage | Hit Advantage | Crouching Hit Advantage | Guard | Parry |
| 7 | 5 | - | - | - | - | H | H |
Gauge Increase
| Miss | Blocked | Hit | Parry (Gauge for opponent) |
| 3 | 6 | 14 | 4 |
Comments here
| Move | Motion | Damage | Stun Damage | Chains into itself | Special Cancel | Super Cancel | Juggle Value |
| Universal Overhead | MP+MK | 40(7 life points) | 3 | No | No | No |
Frame Data
| Startup | Hit | Recovery | Blocked Advantage | Hit Advantage | Crouching Hit Advantage | Guard | Parry |
| 15 | 8 | 7 | -5~+7 | 0~+8 | +1~+9 | H | H |
Gauge Increase
| Miss | Blocked | Hit | Parry (Gauge for opponent) |
| 0 | 1 | 2 | 4 |
Comments here
Throws
| Move | Motion | Damage | Stun Damage | Throw Range | Kara-Throw | Kara-Throw Range |
| H.U.G. | LP+LK | 100(20x6)(21 life points) | 18(3x6) | 22 | Far S.MP / Close S.MP / S.HP | 40 / 29 / 28 |
Frame Data
| Startup | Hit | Recovery | Blocked Advantage | Hit Advantage | Crouching Hit Advantage | Guard | Parry |
| 2 | 1 | 21 | - | - | - | LP+LK | - |
Gauge Increase
| Miss | Blocked | Hit |
| 0 | 7 (for the player who blocked) | 6 |
Comments here
| Move | Motion | Damage | Stun Damage | Throw Range | Kara-Throw | Kara-Throw Range |
| F.L.G. | F+LP+LK | 120(15 life points) | 11 | 22 | Far S.MP / Close S.MP / S.HP | 40 / 29 / 28 |
Frame Data
| Startup | Hit | Recovery | Blocked Advantage | Hit Advantage | Crouching Hit Advantage | Guard | Parry |
| 2 | 1 | 21 | - | - | - | F+LP+LK | - |
Gauge Increase
| Miss | Blocked | Hit |
| 0 | 7 (for the player who blocked) | 7 |
Comments here
| Move | Motion | Damage | Stun Damage | Throw Range | Kara-Throw | Kara-Throw Range |
| T.R.W. | B+LP+LK | 120(14 life points) | 11 | 22 | Far S.MP / Close S.MP / S.HP | 40 / 29 / 28 |
Frame Data
| Startup | Hit | Recovery | Blocked Advantage | Hit Advantage | Crouching Hit Advantage | Guard | Parry |
| 2 | 1 | 21 | - | - | - | B+LP+LK | - |
Gauge Increase
| Miss | Blocked | Hit |
| 0 | 7 (for the player who blocked) | 7 |
Comments here
Crouching Normals
| Move | Motion | Damage | Stun Damage | Chains into itself | Special Cancel | Super Cancel | Juggle Value |
| Crouch Jab | D+LP | 30(5 life points) | 3 | No | Yes | Yes |
Frame Data
| Startup | Hit | Recovery | Blocked Advantage | Hit Advantage | Crouching Hit Advantage | Guard | Parry |
| 3 | 2 | 5 | +4 | +4 | +4 | HL | HL |
Gauge Increase
| Miss | Blocked | Hit | Parry (Gauge for opponent) |
| 0 | 1 | 2 | 4 |
Comments here
| Move | Motion | Damage | Stun Damage | Chains into itself | Special Cancel | Super Cancel | Juggle Value |
| Crouch Strong | D+MP | 55(9 life points) | 7 | No | No | No |
Frame Data
| Startup | Hit | Recovery | Blocked Advantage | Hit Advantage | Crouching Hit Advantage | Guard | Parry |
| 5 | 2 | 10 | -2 | +4 | +5 | HL | HL |
Gauge Increase
| Miss | Blocked | Hit | Parry (Gauge for opponent) |
| 2 | 6 | 11 | 4 |
Comments here
| Move | Motion | Damage | Stun Damage | Chains into itself | Special Cancel | Super Cancel | Juggle Value |
| Crouch Fierce | D+HP | 100(40x3)(18 life points) | 9(5+3+3) | No | No | No |
Frame Data
| Startup | Hit | Recovery | Blocked Advantage | Hit Advantage | Crouching Hit Advantage | Guard | Parry |
| 10 | 7 | 13 | -8 | -1 | +1 | HL | HL |
Gauge Increase
| Miss | Blocked | Hit | Parry (Gauge for opponent) |
| 2 | 4 | 10 | 4 |
Comments here
| Move | Motion | Damage | Stun Damage | Chains into itself | Special Cancel | Super Cancel | Juggle Value |
| Crouch Short | D+LK | 35(7 life points) | 3 | No | Yes | Yes |
Frame Data
| Startup | Hit | Recovery | Blocked Advantage | Hit Advantage | Crouching Hit Advantage | Guard | Parry |
| 3 | 4 | 8 | +1 | +1 | +1 | L | L |
Gauge Increase
| Miss | Blocked | Hit | Parry (Gauge for opponent) |
| 0 | 1 | 2 | 4 |
Comments here
| Move | Motion | Damage | Stun Damage | Chains into itself | Special Cancel | Super Cancel | Juggle Value |
| Crouch Forward | D+MK | 60(10 life points) | 3 | No | No | No |
Frame Data
| Startup | Hit | Recovery | Blocked Advantage | Hit Advantage | Crouching Hit Advantage | Guard | Parry |
| 8 | 2 | 14 | -2 | -1 | 0 | L | L |
Gauge Increase
| Miss | Blocked | Hit | Parry (Gauge for opponent) |
| 2 | 6 | 11 | 4 |
Comments here
| Move | Motion | Damage | Stun Damage | Chains into itself | Special Cancel | Super Cancel | Juggle Value |
| Crouch Roundhouse | D+HK | 90(16 life points) | 3 | No | No | No |
Frame Data
| Startup | Hit | Recovery | Blocked Advantage | Hit Advantage | Crouching Hit Advantage | Guard | Parry |
| 13 | 2 | 25 | -11 | Down | Down | L | L |
Gauge Increase
| Miss | Blocked | Hit | Parry (Gauge for opponent) |
| 2 | 8 | 11 | 4 |
Comments here
Command Normals
| Move | Motion | Damage | Stun Damage | Chains into itself | Special Cancel | Super Cancel | Juggle Value |
| B.M.K. | B+MK | 80(14 life points) | 11 | No | Yes | Yes |
Frame Data
| Startup | Hit | Recovery | Blocked Advantage | Hit Advantage | Crouching Hit Advantage | Guard | Parry |
| 5 | 5 | 14 | -2 | -1 | 0 | HL | HL |
Gauge Increase
| Miss | Blocked | Hit | Parry (Gauge for opponent) |
| 2¿ | 6 | 11 | 4 |
Comments here
| Move | Motion | Damage | Stun Damage | Chains into itself | Special Cancel | Super Cancel | Juggle Value |
| Kokuu | (Air) F,F or B,B | - | - | No | Yes | No |
Frame Data
| Startup | Hit | Recovery | Blocked Advantage | Hit Advantage | Crouching Hit Advantage | Guard | Parry |
| - | - | - | - | - | - | - | - |
Gauge Increase
| Miss | Blocked | Hit | Parry (Gauge for opponent) |
| - | - | - | - |
Comments here
Special Moves
Please note that in this section you will see mainly 3 images for the special moves, this means the image on the left its done with LP (or LK), the image on the center its done with MP (or MK), and the image on the right its done with HP (or HK). Also its the same "rule" as the sections above, its the 1rst frame it hits for every of the moves.
| Move | Motion | Damage | Blocked Damage | Stun Damage | Super Cancel | Juggle Value |
| N.D.L. (Jab) | QCF+LP | 60(10 life points) | 4 | 3 | No | |
| N.D.L. (Strong) | QCF+MP | 60(10 life points) | 4 | 3 | No | |
| N.D.L. (Fierce) | QCF+HP | 80(10 life points) | 5 | 6 | No |
Frame Data
| Move | Startup | Hit | Recovery | Blocked Advantage | Hit Advantage | Crouching Hit Advantage | Guard | Parry |
| N.D.L. (Jab) | 13 | 11 | 14 | -5 | -4 | -3 | HL | HL |
| N.D.L. (Strong) | 13 | 13 | 16 | -9 | -8 | -7 | HL/HL | HL |
| N.D.L. (Fierce) | 14 | 13 | 20 | -13 | -12 | -11 | HL | HHL |
Gauge Increase
| Move | Miss | Blocked | Hit | Parry (Gauge for opponent) |
| N.D.L. (Jab) | 1 | 3 | 5 | 4 |
| N.D.L. (Strong) | 1 | 3 | 5 | 4 |
| N.D.L. (Fierce) | 1 | 3 | 5 | 4 |
Recovers crouching
| Move | Motion | Damage | Blocked Damage | Stun Damage | Super Cancel | Juggle Value |
| A.X.E. (Jab) | QCB+LP | 60 (2 hits)(10 life points) | 11 | 8 | Yes | |
| A.X.E. (Strong) | QCB+MP | 140 (4 hits)(17 life points) | 22 | 12 | Yes | |
| A.X.E. (Fierce) | QCB+HP | 200 (5 hits)(20 life points) | 33 | 15 | Yes |
Frame Data
| Move | Startup | Hit | Recovery | Blocked Advantage | Hit Advantage | Crouching Hit Advantage | Guard | Parry |
| A.X.E. (Jab) | 6 | 3 | 16 | -5 | -1 | 0 | HL | HL |
| A.X.E. (Strong) | 10 | 3 | 17 | -6 | -1 | 0 | HL/HL | HL |
| A.X.E. (Fierce) | 14 | 3 | 18 | -7 | -1 | 0 | HL/HL/HL | HL |
Gauge Increase
| Move | Miss | Blocked | Hit | Parry (Gauge for opponent) |
| A.X.E. (Jab) | 2 | 5 | 11 | 8(4+4) |
| A.X.E. (Strong) | 2 | 7 | 13 | 16(4+4+4+4) |
| A.X.E. (Fierce) | 3 | 11 | 21 | 20(4+4+4+4+4) |
Comments here
| Move | Motion | Damage | Blocked Damage | Stun Damage | Super Cancel | Juggle Value |
| Air A.X.E. (Jab) | (Air) QCB+LP | 90(13 life points) | 14 | 9 | No | |
| Air A.X.E. (Strong) | (Air) QCB+MP | 120(16 life points) | 22 | 11 | No | |
| Air A.X.E. (Fierce) | (Air) QCB+HP | 180(18 life points) | 29 | 13 | No |
Frame Data
| Move | Startup | Hit | Recovery | Blocked Advantage | Hit Advantage | Crouching Hit Advantage | Guard | Parry |
| Air A.X.E. (Jab) | 9 | 3 | 15 | - | - | - | HL | H |
| Air A.X.E. (Strong) | 11 | 3 | 15 | - | - | - | HL | H |
| Air A.X.E. (Fierce) | 13 | 3 | 15 | - | - | - | HL | H |
Gauge Increase
| Move | Miss | Blocked | Hit | Parry (Gauge for opponent) |
| Air A.X.E. (Jab) | 2 | 6 | 12 | 12(4+4+4) |
| Air A.X.E. (Strong) | 2 | 7 | 13 | 16(4+4+4+4) |
| Air A.X.E. (Fierce) | 3 | 11 | 21 | 20(4+4+4+4+4) |
Comments here
| Move | Motion | Damage | Blocked Damage | Stun Damage | Super Cancel | Juggle Value |
| D.R.A. (Short) | (Air) QCB+LK | 110(19 life points) | 14 | 5 | No | |
| D.R.A. (Forward) | (Air) QCB+MK | 110(19 life points) | 14 | 5 | No | |
| D.R.A. (Roundhouse) | (Air) QCB+HK | 110(19 life points) | 14 | 5 | No |
Frame Data
| Move | Startup | Hit | Recovery | Blocked Advantage | Hit Advantage | Crouching Hit Advantage | Guard | Parry |
| D.R.A. (Short) | 14 | Until Landing | 10~11/20 Whiff/12~13 Guard/Parry | -11 | 0 | +2 | HL | H |
| D.R.A. (Forward) | 14 | Until Landing | 10~11/20 Whiff/12~13 Guard/Parry | -11 | 0 | +2 | HL | H |
| D.R.A. (Roundhouse) | 14 | Until Landing | 10~11/20 Whiff/12~13 Guard/Parry | -11 | 0 | +2 | HL | H |
Gauge Increase
| Move | Miss | Blocked | Hit | Parry (Gauge for opponent) |
| D.R.A. (Short) | 3 | 12 | 18 | 4 |
| D.R.A. (Forward) | 3 | 12 | 18 | 4 |
| D.R.A. (Roundhouse) | 3 | 12 | 18 | 4 |
Comments here
EX Moves
| Move | Motion | Gauge Needed | Damage | Blocked Damage | Stun Damage | Super Cancel | Juggle Value |
| N.D.L. (EX) | QCF+PP | 40 | 80(50+30)(13 life points) | 5(3+2) | 6(3+3) | No |
Frame Data
| Move | Startup | Hit | Recovery | Blocked Advantage | Hit Advantage | Crouching Hit Advantage | Guard | Parry |
| N.D.L. (EX) | 12・18 | 6・7 | 15 | 0 | Down | Down | HL | H |
Gauge Increase
| Move | Miss | Blocked | Hit | Parry (Gauge for opponent) |
| N.D.L. (EX) | - | - | - | 8(4+4) |
Comments here
| Move | Motion | Gauge Needed | Damage | Blocked Damage | Stun Damage | Super Cancel | Juggle Value |
| A.X.E. (EX) | QCB+PP | 40 | 240(60+[40x5])(22 life points) | 40(15+[5x5]) | 18(5+[3x5]) | Yes/No~ |
Frame Data
| Move | Startup | Hit | Recovery | Blocked Advantage | Hit Advantage | Crouching Hit Advantage | Guard | Parry |
| A.X.E. (EX) | 8 | 3・3・5・3・3・4 | 15(13) | -4 | -1 | 0 | HL | H |
Gauge Increase
| Move | Miss | Blocked | Hit | Parry (Gauge for opponent) |
| A.X.E. (EX) | - | - | - | 24(4x6) |
Comments here
| Move | Motion | Gauge Needed | Damage | Blocked Damage | Stun Damage | Super Cancel | Juggle Value |
| Air A.X.E. (EX) | (Air) QCB+PP | 40 | 210(60+[35X5])(20 life points) | 35(15+[4X5]) | 15(5+[3X5]) | Yes |
Frame Data
| Move | Startup | Hit | Recovery | Blocked Advantage | Hit Advantage | Crouching Hit Advantage | Guard | Parry |
| Air A.X.E. (EX) | 6 | 3・3・4・3・3・4 | 15 | - | - | - | HL | H |
Gauge Increase
| Move | Miss | Blocked | Hit | Parry (Gauge for opponent) |
| Air A.X.E. (EX) | - | - | - | 24(4X6) |
Comments here
| Move | Motion | Gauge Needed | Damage | Blocked Damage | Stun Damage | Super Cancel | Juggle Value |
| D.R.A. (EX) | (Air) QCB+KK | 40 | 240(80(x10))(20 life points) | 5(5(x10)) | 15(5(x10)) | No |
Frame Data
| Move | Startup | Hit | Recovery | Blocked Advantage | Hit Advantage | Crouching Hit Advantage | Guard | Parry |
| D.R.A. (EX) | 6・8 | Until Landing | 20 | -8~0 | -1~0・Down | -2~0・Down | HL | H |
Gauge Increase
| Move | Miss | Blocked | Hit | Parry (Gauge for opponent) |
| D.R.A. (EX) | - | - | - | 8(4+4) |
Comments here
Super Arts
| Super Art | Super Art Name | Super Art Stock | Motion | Damage | Blocked Damage | Stun Damage | Damage/Gauge |
| I | X.N.D.L. | 2 bars (112 each bar) | QCF QCF+P | 370*(57 life points) | 48** | 15*** | 3,30 (x2) |
| * (60×3~8) Damage is when all hits connect. |
| ** (4×3~8) Damage is when all hits connect. |
| *** (3×3~8) Damage is when all hits connect. |
Frame Data
| Startup | Hit | Recovery | Blocked Advantage | Hit Advantage | Crouching Hit Advantage | Guard | Parry |
| 3 | 34 | 33 | -31 | Down | Down | HLx8 | HLx8 |
Comments here
| Super Art | Super Art Name | Super Art Stock | Motion | Damage | Blocked Damage | Stun Damage | Damage/Gauge |
| II | X.F.L.A.T. | 1 bar (104) | Jump In, QCF QCF+K | 430(74 life points)/230(40 life points)* | 4/off** | 25/18* | 4,13 |
| * Ground/Air Damage is when all hits connect. |
Frame Data
| Startup | Hit | Recovery | Blocked Advantage | Hit Advantage | Crouching Hit Advantage | Guard | Parry |
| 2 | Until Landing | 49 | -26 | Down | Down | HL | HL |
Comments here
| Super Art | Super Art Name | Super Art Stock | Motion | Damage | Blocked Damage | Stun Damage | Damage/Gauge |
| III | X.C.O.P.Y. | 1 bar (120) | QCF QCF+P | - | - | - | - |
Frame Data
| Startup | Hit | Recovery | Blocked Advantage | Hit Advantage | Crouching Hit Advantage | Guard | Parry |
| 12 | * | 73 | - | - | - | - | - |
*1440 frames lenght (like 24 seconds)
More
Standing
LP -Twelve stretches his arm forward with a open hand.
A quick and well-ranged poke. However, it will whiff on most crouching characters
LK -Twelve barely lifts his leg and he goes to give a low kick.
Very short range kick. No pratical use.
MP -Twelve leans forward and swipes his arm across with an open hand.
Similiar poke to standing LP, but better range and damage. Unfortunately, this normal will whiff on all crouching characters. Very good for zoning and occasional footsies.
MK -Twelve steps forward and thrusts his knee upward.
This attack gives Twelve a good option to verify a super off of a mid-level hit. Short range, decent damage. In addition, Twelve can super jump cancel this move giving him a great mix-up (see below under Mix-Ups)
HP -Twelve morphs his hand into an axe and flings it at an upward angle.
Twelve's most powerful normal. The priority is great and works as an excellent anti-air.
HK -Twelve stands on both hands as he morphs his legs together into a huge sickle and swipes the opponent.
Good range, good damage, ok priority but horrible recovery making it vulnerable to recovery supers. This serves as a decent poke once in a blue moon from max range. Plus unlike MP it can hit all crouching opponents. Best used to juggle an opponent after a EX N.D.L.
Standing close
MP
Crouching
LP
LK
MP
MK
HP
HK
Jumping
LP
LK
MP
MK
HP
HK
Combos
| Meterless | EX Moves | S.A. I | S.A. II |
|---|---|---|---|
| Crouching LK, A.X.E. (LP) | Mid-screen, EX N.D.L., standing HK | Kokkuu deep HK, X.N.D.L. | Standing close MK, super jump cancel, X.F.L.A.T. |
| Kokkuu deep HK, A.X.E. (LP) | EX N.D.L. x 4 (Air Elena Only) | Standing close MP, X.N.D.L. | Neutral Throw ,X.F.L.A.T (Hugo Only) |
| Crouching LP, A.X.E. (LP) | Crouching LK, A.X.E. (LP), xx, X.N.D.L. | ||
| Standing close MK, X.N.D.L. | |||
| B.M.K., X.N.D.L. | |||
| UOH, link X.N.D.L. |
Strategies
Overview
Twelve is one of the weakest characters in the game. His defense and stamina are low, adding to this is his lack of options to land damage without meter. Twelve does make up for this with his high mobility and his arsenal of decent pokes.
Basics
Super Art Selection
X.N.D.L. offers Twelve the most options. Resets, EX moves, simple combos and an anti-air. The gauge is composed of two average sized gauges. So upon executing a super, Twelve still has one gauge for EX moves. You may find yourself using EX D.R.A.'s and EX N.D.L.s over X.N.D.L. however. But unlike X.F.L.A.T., Twelve can verify a super from a low hit (crouching LK, A.X.E. (LP) and a high hit (standing close MP).
X.F.L.A.T. is a second possibility but landing a successful hit is hard in high-level play. There is some speculation with X.C.O.P.Y. since every other character can offer more damage than Twelve, plus the damage and defense bonus Twelve gets during X.C.O.P.Y. At the same time many characters rely on their super or EX moves to land big damage ala Chun-Li, Urien, etc. X.C.O.P.Y. does not offer Twelve the ability to execute his opponent's EX and super moves. Yet, both super arts only offer one gauge meaning no room for EX moves.
Kara-Techniques
Kara-Throw - standing MP
Twelve's kara-throw has nothing to offer to his game, including that the range on his throw is already good.
Kara-UOH - Standing MP
Resets
Anti-air LP, X.N.D.L.
Anti-Air IAD MP, X.N.D.L.
Anti-air A.X.E. (LP) (1-hit) walk-up standing MK, X.N.D.L.
Anti-Air IAD MP, Instant X.F.L.A.T.
Anti-air A.X.E. (LP) (1-hit), walk-up standing MK, super jump cancel, X.F.L.A.T.
Zoning
Standing MP
crouching MK
standing HK
Jump-back HP
N.D.L.
Mixups
Kokkuu HK
- hit from front
- hit behind
- whiff in front
- whiff behind
- fake cross-up
>Kokkuu HK (hit), X.N.D.L.
>Kokkuu HK (whiff), walk-up, throw or walk-up crouching LK, A.X.E. (LP), xx, X.N.D.L.
>Kokkuu HK (block), walk-up, throw or walk-up crouching LK, A.X.E. (LP), xx, X.N.D.L.
Standing close MK (blocked), Super Jump Cancel
- IAD, D.R.A. (LK)
- IAD, EX D.R.A.
- IAD MK (whiff), throw
- IAD MK (whiff) crouching LK, A.X.E. (LP), xx, X.N.D.L.
- IAD MK, X.N.D.L.
When the opponent is in the corner, sweep range, EX N.D.L., standing LP (reset)
- UOH, X.N.D.L.
- Walk-up, crouching LK, X.N.D.L.
Additional Notes
Personal Action: Invisibility.
After landing a H.U.G. on Hugo at mid-screen, Twelve can OTG Hugo with SA1 or an instant SA2. However, this does not combo and Hugo can avoid both supers by quick recovering from the H.U.G.
Cross-Ups:
- Twelve can cross-up a cornered Hugo
- Twelve can ground cross-up a cornered Hugo
IAD (Instant Air-Dash) - Twelve can execute a IAD by simply inputting http://www.shoryuken.com/wiki/images/5/57/Upleft.gif, http://www.shoryuken.com/wiki/images/8/8e/Left.gif or http://www.shoryuken.com/wiki/images/9/9a/Upright.gif, http://www.shoryuken.com/wiki/images/2/29/Right.gif quickly. The game will register this as if you jumped and immediately pressed http://www.shoryuken.com/wiki/images/8/8e/Left.gif, http://www.shoryuken.com/wiki/images/8/8e/Left.gif or http://www.shoryuken.com/wiki/images/2/29/Right.gif, http://www.shoryuken.com/wiki/images/2/29/Right.gif. The IAD keeps Twelve close to ground. Due to the low altitude his normals will hit deeper, while his HP and HK will whiff every time. For there is not enough time for both attacks to fully animate. IAD allows you to create high/low/faint/throw mix-ups while keeping the pressure on. Upon executing a normal or not, Twelve cant act immediately upon landing from a IAD. Aside from quick reversals and supers, a blocked IAD normal is usually safe since Twelve will be grounded upon recovery. This allows Twelve to easily land tick-throws.
Match-ups
Serious Advantage Match-ups
Advantage Match-ups
Sean
Fair Match-ups
Q
Hugo
Disadvantage Match-ups
Chun-Li - Now your Street Fighter Anniversary Edition Strategy Guide may title this as a favorable match-up for Twelve. The guide will include that Chun-Li has no anti-airs nor a decent air game. If anything this is an overstatement. Chun-Li's B HP serves as a great anti-air and will stuff any air dash attack. Her crouching HK has a wide enough hit box to counter Twelve before he lands from an air-dash. While her standing HP can stuff Twelve from afar if he tries to IAD. Another viable option is standing MK. In addition, Chun-Li can meet him in the air with an air-to-air vertical jumping LP, MP or HK. She can also jump forward and hit Twelve out of anything with LK.
What do I do you ask? Luckily, most Chun-Li players will not be looking for attacks to anti-air. They will be too busy blocking to throw to gain some ground, whiffing B HP or crouching MK to get some bar. Try to rush Chun-Li the first round before she gets any bar. But play accordingly and counter-act any possible normal that will thwart your air game. If she is spamming B HP, land short with a HK and walk-up to throw or crouching MK as she recovers. If you anticipate a crouching HK, interrupt your air dash with a quick D.R.A. this should catch her off guard and hit her while recovering. Mix-up your game between normal air dashing and IAD. Mix-up your normals to, attack from a far with HP, whiff MK or HK to put you in mix-up range. Do not try hard to play a ground game with her by using MP, N.D.L. or HK. With that said, never ever attack a full stocked Chun-Li with standing HK. Hit or not she can easily reversal super you for big damage into the corner. Once Chun has bar be prepared to start flying around like crazy. Fly back and forth, high and low. Mix-up your normals more than before. Do anything to keep Chun-Li fishing for an opening on the ground to land a super. A Chun-Li player will not risk their bar to reset to super off of an air-to-air or anti-air.
Urien
Don’t carlessly AD vs Uiren or get fireballed>tackled to death into the corner. Use random NDL to get him from far away. Cr.MK and St.Strong are good safe ways to keep Urien off you and get some free damage. With Uiren I only AD maybe twice when they don’t expect you to, after you’ve stayed grounded for a while.
XNDL’s the only super to use on Urien as it can go through Aeigs corner-traps and allow you to possibly SJ> AD your way outta there.
Elena
She has great pokes, over-headS not over-head and just about outprioritizes anything from 12.
Try using the same bait tricks on her, like IAD HK to walk-up throw if she whiffs her DP + K
Don’t Cross her up
Don’t know the name or motion, she turns around and jumps kicks you lol corny I know, I think it’s a HC motion. But if blocked, you can throw or super her for free. If you anticipate it, it’s quite easy to parry. But if u block/parry and stand there like a fuckin moron, then she will DP + K yo ass
She can also do the DP + LK (whiff) game like Ken, slightly.
Don’t always assume your safe when in not point-blank range, cause she will KARA that shit down and throw your goo ass! dont have much else on her, no one really plays her lol
Serious Disadvantage Match-ups
Yun'
Akuma
Ken
