mNo edit summary |
Scatteraxis (talk | contribs) m (Scatteraxis moved page Street Fighter 3: 3rd Strike/Makoto to Street Fighter 3: 3rd Strike/Makoto/Archive without leaving a redirect) |
||
| (230 intermediate revisions by 47 users not shown) | |||
| Line 1: | Line 1: | ||
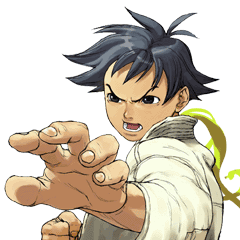
[ | [[Image:makoto.gif|frame|right|Makoto's Character Select Portrait]] | ||
[[Image:Makoto3s-stance.gif |frame|right|Makoto's Neutral Stance]] | |||
==Updated version available!== | |||
You're reading the old version of this page. [https://srk.shib.live/w/Street_Fighter_3:_3rd_Strike/Makoto/2021 Click here] to read the (in-progress) updated version! | |||
{| border="0" | ==Introduction== | ||
Makoto is very unique, and still is to this day, as the first female fighting game character to be fairly slow and hard-hitting with just as much stamina as the average males (like Ryu and Ken), whereas all other female fighters before her had always focused on speed and always had notably less stamina. Although her normal walk speed is incredibly sluggish, she has the best forward dash in the game, as well as high priority and oppressive offense. Her best tool however is the Karakusa, a very unique command grab which can be comboed off of, making way for devastating damage and, overall, a highly dangerous and frustrating offensive fighting style. | |||
{{ ProConTable | |||
|pros= | |||
* '''Burst Damage''': Makoto hurts incredibly hard, whether meterless or fully stocked. Makoto is even capable of dealing a true '''ToD''' to some of the cast thanks to her high damage supers. | |||
* '''Fast Strike/Throw''': With the best foward dash in the game, Makoto can enforce a powerful strike/throw mixup game that leads into great reward regardless of what she picks. Makoto also has a fast and damaging overhead that knocks down in Ex Orochi and can combo into her supers from her command grab starters. | |||
* '''Great Pokes''': Makoto has comparatively long ranged normals that often give a lot of advantage frames on hit or block, with only few being punishable. Combined with her fast dash, and she can control a lot of the screen. | |||
|cons= | |||
* '''Sluggish''': Makoto has the slowest walk speed in the game, meaning she has to commit to her movement options and consider them carefully. She also has slow startup on many of her moves compared to the majority of the cast, meaning she can have a hard time escaping pressure or punishing certain moves. | |||
* '''Execution Required''': While Makoto's basic gameplan requires very little in the means of execution, her most powerful meterdumps and punishes require fast reaction speed and good execution. | |||
}} | |||
==Specific Character Information== | |||
*Stamina: 1200 | |||
*Stun Bar Length (dots): 64 (Normal) | |||
*Stun Bar Recovery (frames it takes to recover 1 dot): 20 | |||
*Taunt: | |||
Part 1 - Increases damage for the next hit/combo by 31.3% per taunt. Maximum 2 taunts, 62.5% damage. | |||
Part 2 - Replaces a second Part 1 taunt. One two-part taunt is the maximum. | |||
Part 3 - Increases stun recovery rate by 10% for the first full taunt and an additional 21% for the second full taunt. Lasts the whole round. Maximum 2 full taunt, 33% bonus. | |||
Hayate taunt - No bonus. | |||
*Best Kara-Throw: S.LK / S.HK | |||
*Standard Throw Range (pixels): 20 | |||
*Dash Forward (frames) / Moving Distance: 11 / 2 | |||
*Dash Backward (frames) / Moving Distance: 12 / 1 | |||
*Normal Wake up (frames): 71 | |||
*Quick Stand (frames): 43 | |||
=Moves List= | |||
==Throws== | |||
{| border="1em" cellspacing="0" width="45%" style="border: 1px solid #999; background: none;"|- | |||
|- | |||
| Hikiyose Zutsuki~Tacchuu || [[File:Lp.png]]+[[File:Lk.png]] | |||
|- | |||
| Hiji Otoshi Sanren Tsuki~Araiso || [[File:F.png]]/[[File:B.png]]+[[File:Lp.png]]+[[File:Lk.png]] | |||
|} | |||
==Command Moves== | |||
{| border="1em" cellspacing="0" width="45%" style="border: 1px solid #999; background: none;"|- | |||
| Kote Tsuki~Kazami || [[File:F.png]]+[[File:Lp.png]] | |||
|- | |||
| Gezuki~Kaoruna || [[File:F.png]]+[[File:Mp.png]] | |||
|- | |||
| Fumikomi Seiken-zuki~Shimaki || [[File:F.png]]+[[File:Hp.png]] | |||
|- | |||
| └Fumikomi Seiken Sanren Tsuki~Yamase || Press rapidly [[File:Hp.png]] | |||
|- | |||
| Mae Geri~Shibuki || [[File:F.png]]+[[File:Lk.png]] | |||
|- | |||
| Fumikomi Joudan Mawashi Geri~Naruto || [[File:F.png]]+[[File:Mk.png]] | |||
|- | |||
| Fumikomi Soku Barai~Kuroshio || [[File:F.png]]+[[File:Hk.png]] | |||
|- | |||
| └Fake || Hold [[File:Hk.png]] | |||
|} | |||
==Special Moves== | |||
{| border="1em" cellspacing="0" width="45%" style="border: 1px solid #999; background: none;"|- | |||
| Tosshin Seiken-zuki~Hayate || [[File:Qcf.png]]+Hold [[File:P.png]] || EX || | |||
|- | |||
| └Cancel || [[File:K.png]] || || | |||
|- | |||
| └Makoto Secret Taunt || [[File:Hp.png]]+[[File:Hk.png]] || || | |||
|- | |||
| Chokujou Seiken-zuki~Fukiage || [[File:Dp.png]]+[[File:P.png]] || EX || SC | |||
|- | |||
| Uchi Oroshi Shutou~Oroshi || [[File:Qcb.png]]+[[File:P.png]] || EX || SC | |||
|- | |||
| Tsurushi Nodowa~Karakusa || [[File:Hcb.png]]+[[File:K.png]] || || | |||
|- | |||
| Senkou Kakato Otoshi~Tsurugi || Neutral/Foward Air [[File:Qcb.png]]+[[File:K.png]] || EX || | |||
|} | |||
==Super Arts== | |||
{| border="1em" cellspacing="0" width="45%" style="border: 1px solid #999; background: none;"|- | |||
| I || Seichu Sen Godan-zuki || [[File:Qcf.png]][[File:Qcf.png]]+[[File:P.png]] || 120 Gauge Dots || 1 Stock || 3.0 EX Uses | |||
|- | |||
| II ||Abare To Sanami Kudaki || [[File:Qcf.png]][[File:Qcf.png]]+[[File:K.png]] || 88 Gauge Dots || 2 Stocks || 4.3 EX Uses | |||
|- | |||
| III ||Tanden Renki-Seme no Kata || [[File:Qcf.png]][[File:Qcf.png]]+[[File:P.png]] || 96 Gauge Dots || 1 Stock || 2.3 EX Uses | |||
|} | |||
==Target Combo== | |||
{| border="1em" cellspacing="0" width="45%" style="border: 1px solid #999; background: none;"|- | |||
|- | |||
| [[File:Lk.png]]c[[File:Mk.png]] | |||
|- | |||
| [[File:F.png]]+[[File:Mk.png]][[File:Hk.png]] | |||
|} | |||
= Move Analysis = | |||
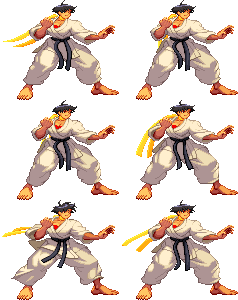
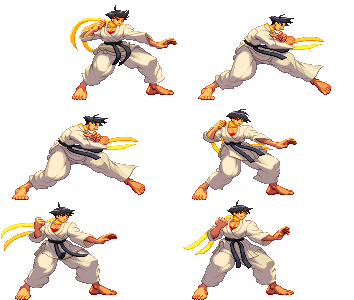
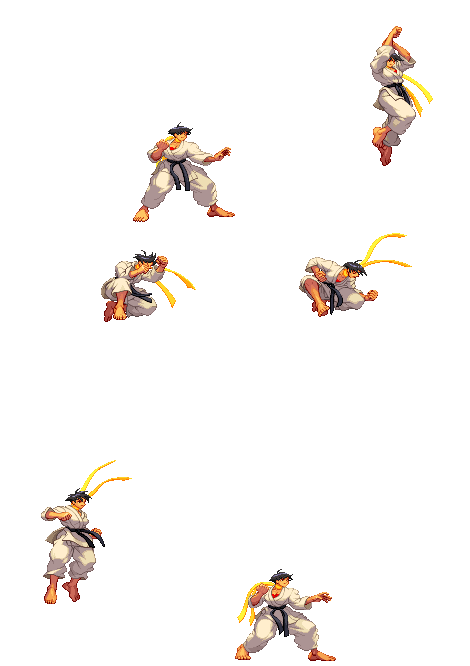
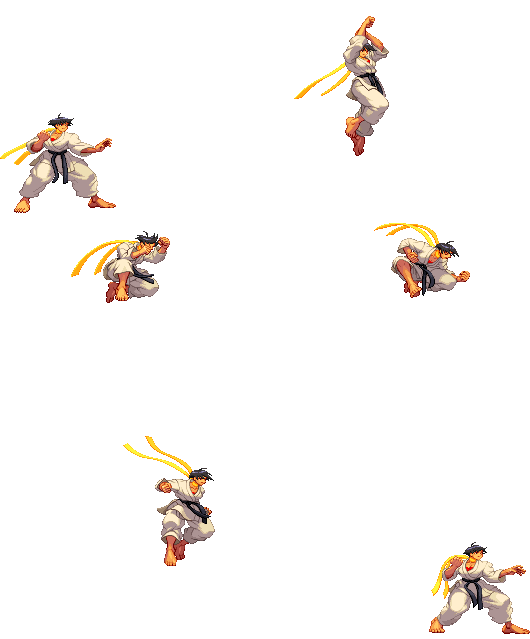
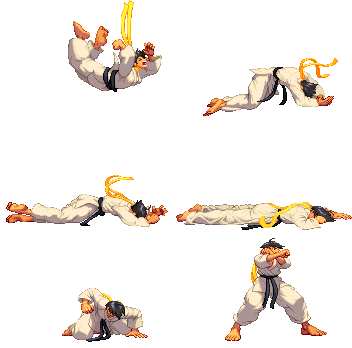
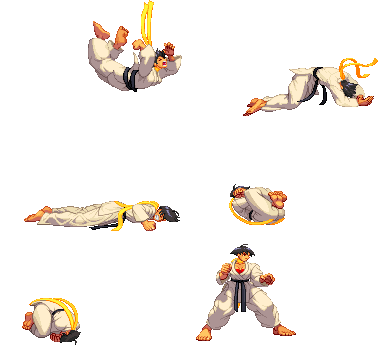
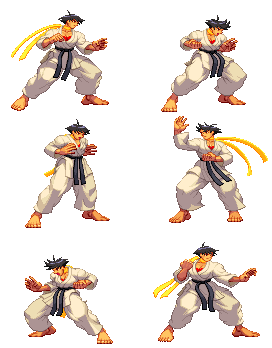
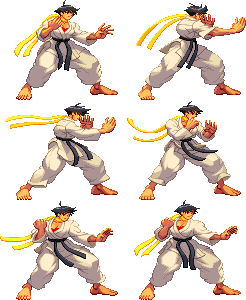
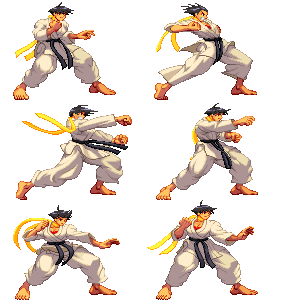
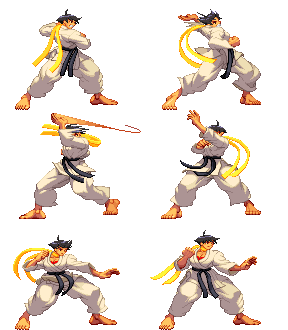
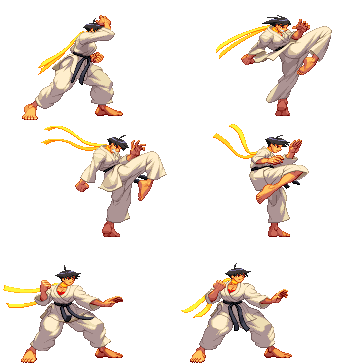
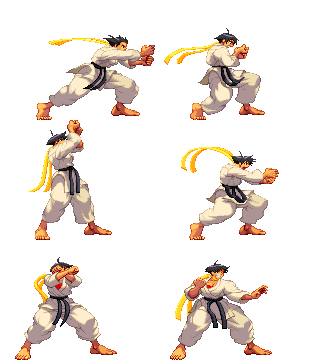
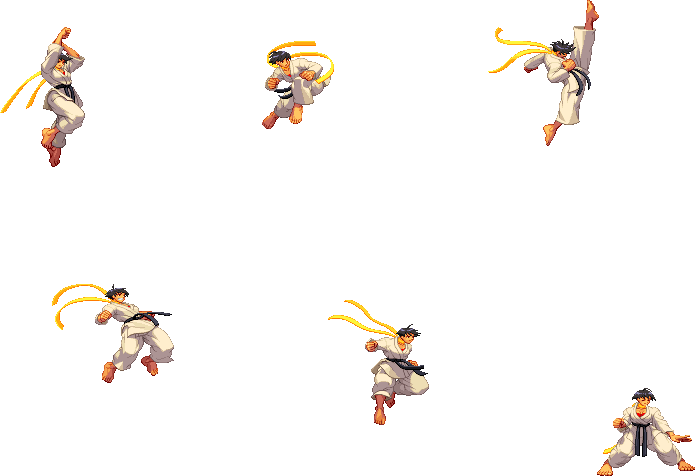
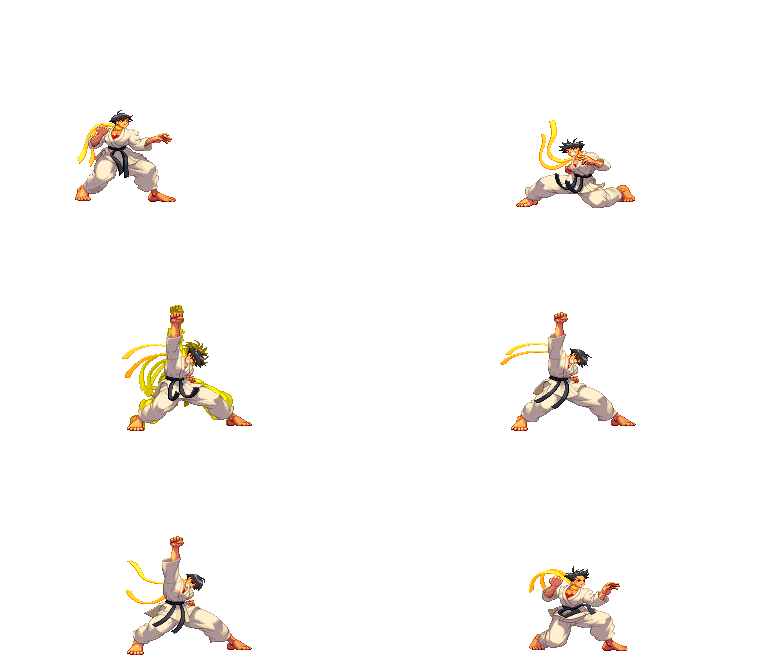
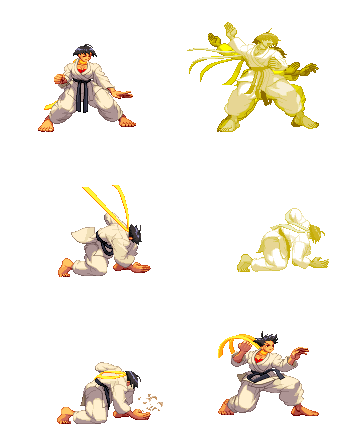
*All those sprites are taken from the site https://www.justnopoint.com/zweifuss/ | |||
*All Framedatas in "Move Analysis" section are taken from [http://gr.qee.jp/01_3rd/index.html Game Restaurant] , this means the Framedata isn't from the Dreamcast version like Karathrow site, it's from Arcade version. | |||
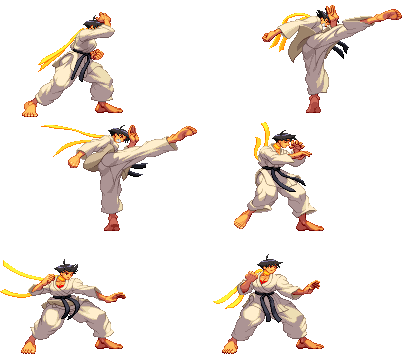
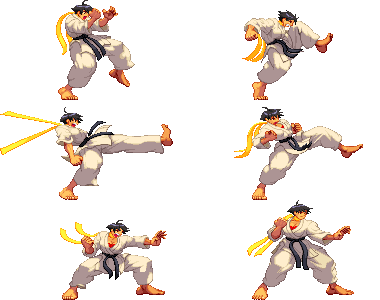
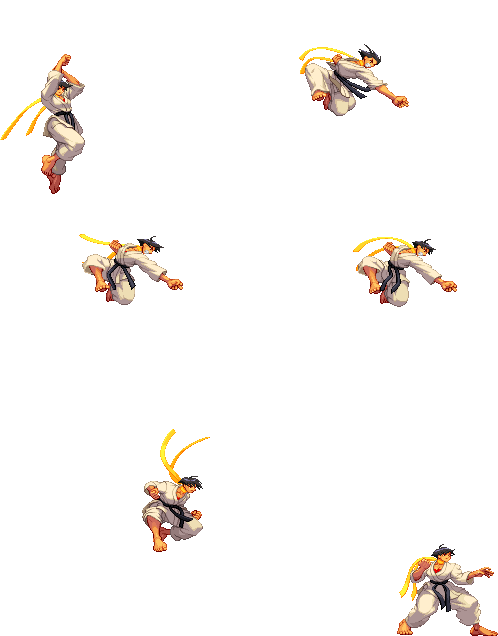
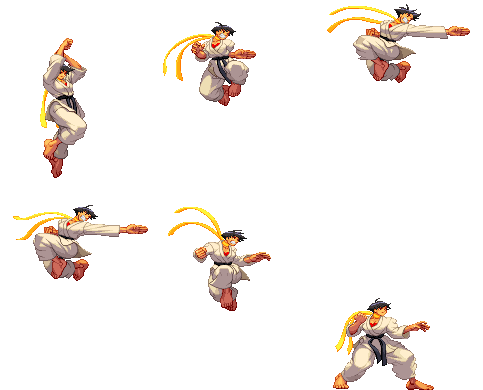
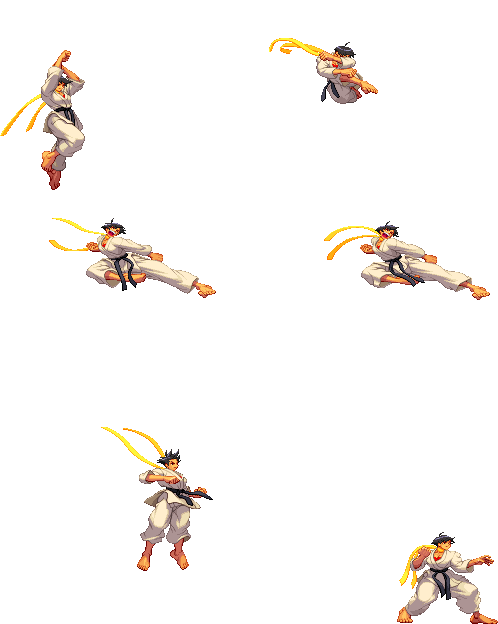
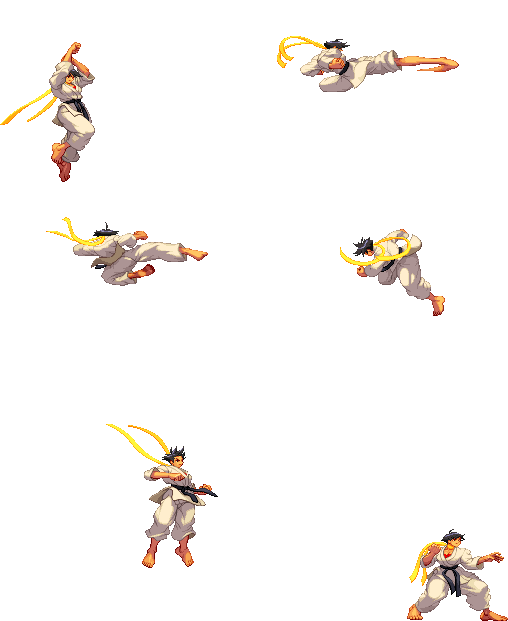
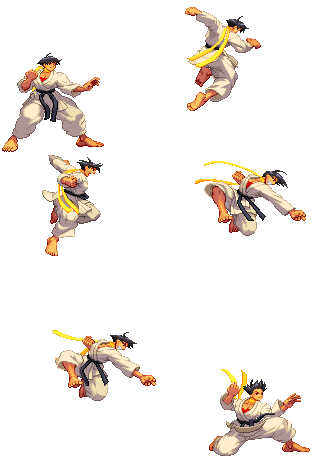
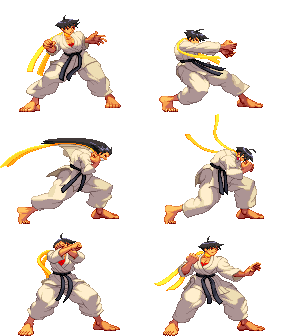
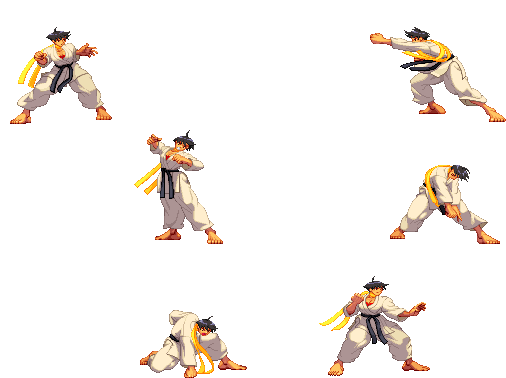
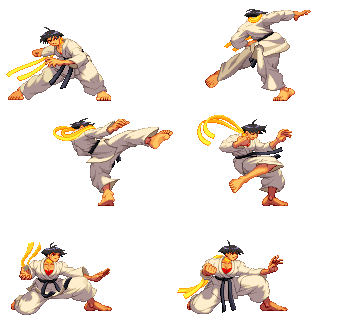
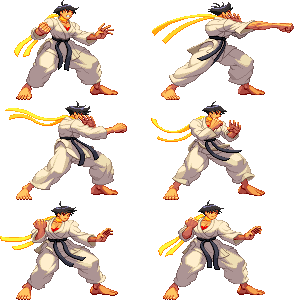
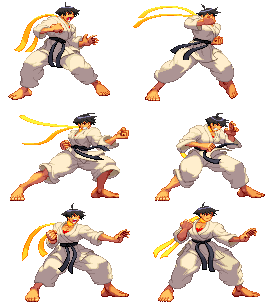
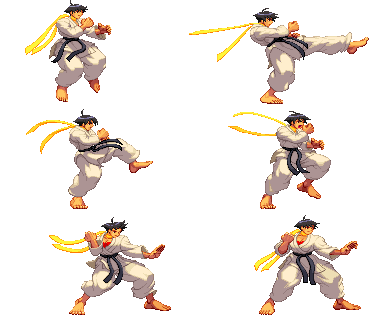
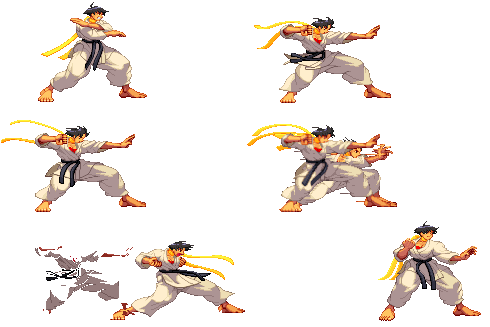
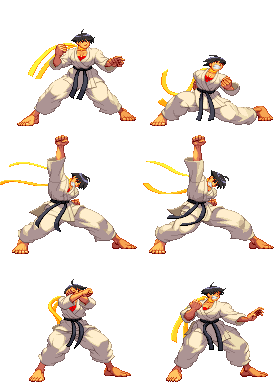
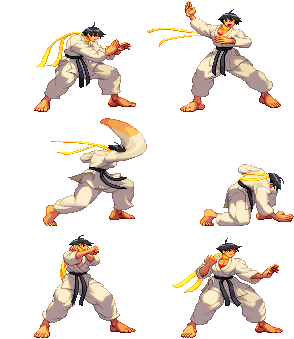
Please note that the images show in this section are for the 1st frame it hits, so this means the opponent is taking the hit in the image shown on the move. I use the 1st frame of every move (except taunt, dash, jump, wakeup and 2nd throw image sprites) because you will see the maximum range of every attack (mostly of the attacks). Note also that those images are ACCURATE, they are exactly the first frame it hits, so enemy takes damage but they still dont make the "pain" frame. | |||
General | |||
*'''Move''': Move name | |||
*'''Motion''': What you must do to execute the move | |||
*'''Damage''': Damage it does (in pixels) | |||
*'''Stun Damage''': Stun Damage it does (in pixels) | |||
*'''Chains into itself''': If you can combo into the same movement | |||
*'''Special Cancel''': If you can cancel the move into a Special Move | |||
*'''Super Cancel''': If you can cancel the move into a Super Art | |||
*'''Throw Range''': Range of the throw (in pixels) | |||
*'''Num.''': Super Art number | |||
*'''Super Art''': Super Art name | |||
*'''Super Art Stock''': Number of Gauge Bars the Super Art have, also the lenght of each bar (in pixels) | |||
Frame Data | |||
*'''Startup''': Number of frames it takes to start the move | |||
*'''Hit''': Number of frames that can hit the opponent | |||
*'''Recovery''': Number of frames it takes to recover from the move | |||
*'''Blocked Advantage''': Number of frames you are in advantage/disadvantage after opponent have been blocked the hit | |||
*'''Hit Advantage''': Number of frames you are in advantage/disadvantage after opponent have been take the hit | |||
*'''Crouching Hit Advantage''': Number of frames you are in advantage/disadvantage after opponent have been take the hit while he's crouching | |||
* + # : You have # frames of advantage | |||
* - # : You have # frames of disadvantage | |||
* # ~ # : Advantage/disadvantage can vary from # to # | |||
*Down: Enemy gets knocked down | |||
*'''Guard''': How opponent must guard the move, High (H), Low (L) or both (HL) | |||
*'''Parry''': How opponent must parry the move, High (H), Low (L) or both (HL) | |||
Gauge Increase | |||
*'''Miss''': Gauge you gain if you miss the move (in pixels) | |||
*'''Blocked''': Gauge you gain if the move gets blocked (in pixels) | |||
*'''Hit''': Gauge you gain if you hit the opponent with the move (in pixels) | |||
*'''Parry''': Gauge opponent gains when he parry the move (in pixels) | |||
=== Basic Moves === | |||
[[Image:(makotodf).gif|none]] | |||
{| border="1em" cellspacing="0" width="60%" style="border: 1px solid #999; background: none;" | |||
|- | |||
! align="center" | Move | |||
! align="center" | Start-up frames | |||
! align="center" | In ground frames | |||
! align="center" | In air frames | |||
! align="center" | Recovery frames | |||
! align="center" | Total frames | |||
|- | |||
| align="center" | Dash Forward | |||
| align="center" | 2 | |||
| align="center" | 8? | |||
| align="center" | - | |||
| align="center" | 6? | |||
| align="center" | 11 | |||
|} | |||
''Comments here'' | |||
[[Image:(makotodb).gif|none]] | |||
{| border="1em" cellspacing="0" width="60%" style="border: 1px solid #999; background: none;" | |||
|- | |||
! align="center" | Move | |||
! align="center" | Start-up frames | |||
! align="center" | In ground frames | |||
! align="center" | In air frames | |||
! align="center" | Recovery frames | |||
! align="center" | Total frames | |||
|- | |||
| align="center" | Dash Backwards | |||
| align="center" | 1 | |||
| align="center" | 4? | |||
| align="center" | - | |||
| align="center" | 6? | |||
| align="center" | 12 | |||
|} | |||
''Comments here'' | |||
[[Image:(makotobjump).gif|none]] | |||
[[Image:(makotojump).gif|none]] | |||
[[Image:(makotofjump).gif|none]] | |||
{| border="1em" cellspacing="0" width="30%" style="border: 1px solid #999; background: none;" | |||
|- | |||
| align="center" | '''Move''' || align="center" | '''Motion''' || align="center" | '''Startup Frames''' | |||
|- | |||
| align="center" | Jump || align="center" | BU or U or FU || align="center" | 3 | |||
|} | |||
''Comments here'' | |||
{| border="1em" cellspacing="0" width="30%" style="border: 1px solid #999; background: none;" | |||
|- | |||
| align="center" | '''Move''' || align="center" | '''Motion''' || align="center" | '''Startup Frames''' | |||
|- | |||
| align="center" | Super Jump || align="center" | DBU or DU or DFU || align="center" | 5 | |||
|} | |||
''Comments here'' | |||
[[Image:(makotow).gif|none]] | |||
{| border="1em" cellspacing="0" width="30%" style="border: 1px solid #999; background: none;" | |||
|- | |||
| align="center" | '''Move''' || align="center" | '''Motion''' || align="center" | '''Frames''' | |||
|- | |||
| align="center" | Normal Wakeup || align="center" | - || align="center" | 71 | |||
|} | |||
''Comments here'' | |||
[[Image:(makototw).gif|none]] | |||
{| border="1em" cellspacing="0" width="30%" style="border: 1px solid #999; background: none;" | |||
|- | |||
| align="center" | '''Move''' || align="center" | '''Motion''' || align="center" | '''Frames''' | |||
|- | |||
| align="center" | Quick Stand || align="center" | Tap D when hitting the ground || align="center" | 43 | |||
|} | |||
''Comments here'' | |||
[[Image:(makotot).gif|none]] | |||
{| border="1em" cellspacing="0" width="60%" style="border: 1px solid #999; background: none;" | |||
|- | |||
| align="center" | '''Move''' || align="center" | '''Motion''' || align="center" | '''Damage''' || align="center" | '''Stun Damage''' || align="center" | '''Chains into itself''' || align="center" | '''Special Cancel''' || align="center" | '''Super Cancel''' || align="center" | '''Juggle Value''' | |||
|- | |||
| align="center" | Taunt || align="center" | HP+HK || align="center" | 10 || align="center" | 3 || align="center" | No || align="center" | No || align="center" | No | |||
|} | |||
'''Frame Data''' | |||
{| border="1em" cellspacing="0" width="60%" style="border: 1px solid #999; background: none;" | |||
|- | |||
| align="center" | '''Startup''' || align="center" | '''Hit''' || align="center" | '''Recovery''' || align="center" | '''Blocked Advantage''' || align="center" | '''Hit Advantage''' || align="center" | '''Crouching Hit Advantage''' || align="center" | '''Guard''' || align="center" | '''Parry''' | |||
|- | |||
| align="center" | 79 || align="center" | 3 || align="center" | - || align="center" | ? || align="center" | ? || align="center" | ? || align="center" | HL || align="center" | HL | |||
|} | |||
'''Gauge Increase''' | |||
{| border="1em" cellspacing="0" width="30%" style="border: 1px solid #999; background: none;" | |||
|- | |||
| align="center" | '''Miss''' || align="center" | '''Blocked''' || align="center" | '''Hit''' || align="center" | '''Parry (Gauge for opponent)''' | |||
|- | |||
| align="center" | 6(7) || align="center" | ? || align="center" | ? || align="center" | 8(4+4) | |||
|} | |||
''Comments here'' | |||
[[Image:(makotohparry).gif|none]] | |||
[[Image:(makotolparry).gif|none]] | |||
{| border="1em" cellspacing="0" width="35%" style="border: 1px solid #999; background: none;" | |||
|- | |||
| align="center" | '''Move''' || align="center" | '''Motion''' | |||
|- | |||
| align="center" | Parry (High) || align="center" | Tap F when about taking a hit | |||
|- | |||
| align="center" | Parry (Low) || align="center" | Tap D when about taking a hit | |||
|- | |||
| align="center" | Parry (Air) || align="center" | Tap F in air when about taking a hit | |||
|} | |||
'''Frame Data''' | |||
{| border="1em" cellspacing="0" width="95%" style="border: 1px solid #999; background: none;" | |||
|- | |||
| align="center" | '''Move''' || align="center" | '''Frames you're frozen''' || align="center" | '''Frames opponent is frozen''' || align="center" | '''Frame Advantage when parry is successful''' || align="center" | '''Frames before you can try another parry''' | |||
|- | |||
| align="center" | Parry (High) || align="center" | 16 || align="center" | 16 || align="center" | +4(LP/LK) +3(MP/MK) +2(HP/HK) 0(Special/Super) -16(Fireball) || align="center" | 24(19 when attack comes from the air)*,** | |||
|- | |||
| align="center" | Parry (Low) || align="center" | 16 || align="center" | 16 || align="center" | +4(LP/LK) +3(MP/MK) +2(HP/HK) 0(Special/Super) -16(Fireball) || align="center" | 24(19 when attack comes from the air)*,** | |||
|- | |||
| align="center" | Parry (Air) || align="center" | 16 || align="center" | 16 || align="center" | +4(LP/LK) +3(MP/MK) +2(HP/HK) 0(Special/Super) -16(Fireball) || align="center" | 21(19 when attack comes from the air)*,** | |||
|} | |||
{| border="1em" cellspacing="0" width="70%" style="border: 1px solid #999; background: none;" | |||
|- | |||
|* (If a parry attempt is successful, the 19/21/24 frame restriction is taken away and you can attempt another parry immediately) | |||
|- | |||
|** (If another attack connects within 2 frames of your parry, it will automatically be parried) | |||
|} | |||
'''Gauge Increase''' | |||
{| border="1em" cellspacing="0" width="30%" style="border: 1px solid #999; background: none;" | |||
|- | |||
| align="center" | '''Move''' || align="center" | '''Gauge Increase''' | |||
|- | |||
| align="center" | Parry (High) || align="center" | 4*** | |||
|- | |||
| align="center" | Parry (Low) || align="center" | 4*** | |||
|- | |||
| align="center" | Parry (Air) || align="center" | 4*** | |||
|} | |||
{| border="1em" cellspacing="0" width="57%" style="border: 1px solid #999; background: none;" | |||
|- | |||
|*** (You gain 4 of gauge for whatever attack parried, and for whatever hit you parry during multihit attack) | |||
|} | |||
You can buffer any motion during High or Low parry, but NOT during Air parry, also parry resets the juggle count (and thus resets all scaling). | |||
*'''Parry information is taken from Fukiage Forums, more exactly, from user JinraiPVC. Thanks for this information dude''' | |||
=== Normal Moves === | |||
==== Standing Normals ==== | |||
[[Image:(makotolp).gif|none]] | |||
{| border="1em" cellspacing="0" width="60%" style="border: 1px solid #999; background: none;" | |||
|- | |||
| align="center" | '''Move''' || align="center" | '''Motion''' || align="center" | '''Damage''' || align="center" | '''Stun Damage''' || align="center" | '''Chains into itself''' || align="center" | '''Special Cancel''' || align="center" | '''Super Cancel''' || align="center" | '''Juggle Value''' | |||
|- | |||
| align="center" | Far Jab || align="center" | LP || align="center" | 30(5 life points) || align="center" | 3 || align="center" | Yes || align="center" | Yes || align="center" | Yes | |||
|} | |||
'''Frame Data''' | |||
{| border="1em" cellspacing="0" width="60%" style="border: 1px solid #999; background: none;" | |||
|- | |||
| align="center" | '''Startup''' || align="center" | '''Hit''' || align="center" | '''Recovery''' || align="center" | '''Blocked Advantage''' || align="center" | '''Hit Advantage''' || align="center" | '''Crouching Hit Advantage''' || align="center" | '''Guard''' || align="center" | '''Parry''' | |||
|- | |||
| align="center" | 4 || align="center" | 6 || align="center" | 6 || align="center" | +2 || align="center" | +2 || align="center" | +2 || align="center" | HL || align="center" | HL | |||
|} | |||
'''Gauge Increase''' | |||
{| border="1em" cellspacing="0" width="30%" style="border: 1px solid #999; background: none;" | |||
|- | |||
| align="center" | '''Miss''' || align="center" | '''Blocked''' || align="center" | '''Hit''' || align="center" | '''Parry (Gauge for opponent)''' | |||
|- | |||
| align="center" | 0 || align="center" | 1 || align="center" | 2 || align="center" | 4 | |||
|} | |||
''Comments here'' | |||
[[Image:(makotomp).gif|none]] | |||
{| border="1em" cellspacing="0" width="60%" style="border: 1px solid #999; background: none;" | |||
|- | |||
| align="center" | '''Move''' || align="center" | '''Motion''' || align="center" | '''Damage''' || align="center" | '''Stun Damage''' || align="center" | '''Chains into itself''' || align="center" | '''Special Cancel''' || align="center" | '''Super Cancel''' || align="center" | '''Juggle Value''' | |||
|- | |||
| align="center" | Far Strong || align="center" | MP || align="center" | 80(14 life points) || align="center" | 9 || align="center" | No || align="center" | Yes || align="center" | Yes | |||
|} | |||
'''Frame Data''' | |||
{| border="1em" cellspacing="0" width="60%" style="border: 1px solid #999; background: none;" | |||
|- | |||
| align="center" | '''Startup''' || align="center" | '''Hit''' || align="center" | '''Recovery''' || align="center" | '''Blocked Advantage''' || align="center" | '''Hit Advantage''' || align="center" | '''Crouching Hit Advantage''' || align="center" | '''Guard''' || align="center" | '''Parry''' | |||
|- | |||
| align="center" | 8 || align="center" | 11 || align="center" | 4 || align="center" | +6 || align="center" | +7 || align="center" | +8 || align="center" | HL || align="center" | H | |||
|} | |||
'''Gauge Increase''' | |||
{| border="1em" cellspacing="0" width="30%" style="border: 1px solid #999; background: none;" | |||
|- | |||
| align="center" | '''Miss''' || align="center" | '''Blocked''' || align="center" | '''Hit''' || align="center" | '''Parry (Gauge for opponent)''' | |||
|- | |||
| align="center" | 2 || align="center" | 6 || align="center" | 11 || align="center" | 4 | |||
|} | |||
''Because this move is extremely plus on hit, it's visually confirmable into SA1. Generally regarded as one of the better Strong attacks in the game.'' | |||
[[Image:(makotohp).gif|none]] | |||
{| border="1em" cellspacing="0" width="60%" style="border: 1px solid #999; background: none;" | |||
|- | |||
| align="center" | '''Move''' || align="center" | '''Motion''' || align="center" | '''Damage''' || align="center" | '''Stun Damage''' || align="center" | '''Chains into itself''' || align="center" | '''Special Cancel''' || align="center" | '''Super Cancel''' || align="center" | '''Juggle Value''' | |||
|- | |||
| align="center" | Far Fierce || align="center" | HP || align="center" | 120(21 life points) || align="center" | 15 || align="center" | No || align="center" | Yes || align="center" | Yes | |||
|} | |||
'''Frame Data''' | |||
{| border="1em" cellspacing="0" width="60%" style="border: 1px solid #999; background: none;" | |||
|- | |||
| align="center" | '''Startup''' || align="center" | '''Hit''' || align="center" | '''Recovery''' || align="center" | '''Blocked Advantage''' || align="center" | '''Hit Advantage''' || align="center" | '''Crouching Hit Advantage''' || align="center" | '''Guard''' || align="center" | '''Parry''' | |||
|- | |||
| align="center" | 8 || align="center" | 2 || align="center" | 22 || align="center" | -5 || align="center" | -3 || align="center" | -1 || align="center" | HL || align="center" | H | |||
|} | |||
'''Gauge Increase''' | |||
{| border="1em" cellspacing="0" width="30%" style="border: 1px solid #999; background: none;" | |||
|- | |||
| align="center" | '''Miss''' || align="center" | '''Blocked''' || align="center" | '''Hit''' || align="center" | '''Parry (Gauge for opponent)''' | |||
|- | |||
| align="center" | 3 || align="center" | 10 || align="center" | 19 || align="center" | 4 | |||
|} | |||
''Comments here'' | |||
[[Image:(makotolk).gif|none]] | |||
{| border="1em" cellspacing="0" width="65%" style="border: 1px solid #999; background: none;" | |||
|- | |||
| align="center" | '''Move''' || align="center" | '''Motion''' || align="center" | '''Damage''' || align="center" | '''Stun Damage''' || align="center" | '''Chains into itself''' || align="center" | '''Special Cancel''' || align="center" | '''Super Cancel''' || align="center" | '''Juggle Value''' | |||
|- | |||
| align="center" | Short || align="center" | LK || align="center" | 40(7 life points) || align="center" | 3 || align="center" | No || align="center" | Yes || align="center" | Yes | |||
|} | |||
'''Frame Data''' | |||
{| border="1em" cellspacing="0" width="60%" style="border: 1px solid #999; background: none;" | |||
|- | |||
| align="center" | '''Startup''' || align="center" | '''Hit''' || align="center" | '''Recovery''' || align="center" | '''Blocked Advantage''' || align="center" | '''Hit Advantage''' || align="center" | '''Crouching Hit Advantage''' || align="center" | '''Guard''' || align="center" | '''Parry''' | |||
|- | |||
| align="center" | 4 || align="center" | 5 || align="center" | 12 || align="center" | -2 || align="center" | -2 || align="center" | -2 || align="center" | HL || align="center" | HL | |||
|} | |||
'''Gauge Increase''' | |||
{| border="1em" cellspacing="0" width="30%" style="border: 1px solid #999; background: none;" | |||
|- | |||
| align="center" | '''Miss''' || align="center" | '''Blocked''' || align="center" | '''Hit''' || align="center" | '''Parry (Gauge for opponent)''' | |||
|- | |||
| align="center" | 0 || align="center" | 1 || align="center" | 2 || align="center" | 4 | |||
|} | |||
''Comments here'' | |||
[[Image:(makotomk).gif|none]] | |||
{| border="1em" cellspacing="0" width="65%" style="border: 1px solid #999; background: none;" | |||
|- | |||
| align="center" | '''Move''' || align="center" | '''Motion''' || align="center" | '''Damage''' || align="center" | '''Stun Damage''' || align="center" | '''Chains into itself''' || align="center" | '''Special Cancel''' || align="center" | '''Super Cancel''' || align="center" | '''Juggle Value''' | |||
|- | |||
| align="center" | Forward || align="center" | MK || align="center" | 90(16 life points) || align="center" | 7 || align="center" | No || align="center" | No || align="center" | No | |||
|} | |||
'''Frame Data''' | |||
{| border="1em" cellspacing="0" width="60%" style="border: 1px solid #999; background: none;" | |||
|- | |||
| align="center" | '''Startup''' || align="center" | '''Hit''' || align="center" | '''Recovery''' || align="center" | '''Blocked Advantage''' || align="center" | '''Hit Advantage''' || align="center" | '''Crouching Hit Advantage''' || align="center" | '''Guard''' || align="center" | '''Parry''' | |||
|- | |||
| align="center" | 7 || align="center" | 5 || align="center" | 13 || align="center" | -2 || align="center" | -1 || align="center" | 0 || align="center" | HL || align="center" | H | |||
|} | |||
'''Gauge Increase''' | |||
{| border="1em" cellspacing="0" width="30%" style="border: 1px solid #999; background: none;" | |||
|- | |||
| align="center" | '''Miss''' || align="center" | '''Blocked''' || align="center" | '''Hit''' || align="center" | '''Parry (Gauge for opponent)''' | |||
|- | |||
| align="center" | 2 || align="center" | 6 || align="center" |11 || align="center" | 4 | |||
|} | |||
''Comments here'' | |||
[[Image:(makotohk).gif|none]] | |||
{| border="1em" cellspacing="0" width="65%" style="border: 1px solid #999; background: none;" | |||
|- | |||
| align="center" | '''Move''' || align="center" | '''Motion''' || align="center" | '''Damage''' || align="center" | '''Stun Damage''' || align="center" | '''Chains into itself''' || align="center" | '''Special Cancel''' || align="center" | '''Super Cancel''' || align="center" | '''Juggle Value''' | |||
|- | |||
| align="center" | Roundhouse || align="center" | HK || align="center" | 130(21 life points) || align="center" | 7 || align="center" | No || align="center" | No || align="center" | No | |||
|} | |||
'''Frame Data''' | |||
{| border="1em" cellspacing="0" width="60%" style="border: 1px solid #999; background: none;" | |||
|- | |||
| align="center" | '''Startup''' || align="center" | '''Hit''' || align="center" | '''Recovery''' || align="center" | '''Blocked Advantage''' || align="center" | '''Hit Advantage''' || align="center" | '''Crouching Hit Advantage''' || align="center" | '''Guard''' || align="center" | '''Parry''' | |||
|- | |||
| align="center" | 11 || align="center" | 9 || align="center" | 13 || align="center" | 0 || align="center" | +2 || align="center" | +4 || align="center" | HL || align="center" | H | |||
|} | |||
'''Gauge Increase''' | |||
{| border="1em" cellspacing="0" width="30%" style="border: 1px solid #999; background: none;" | |||
|- | |||
| align="center" | '''Miss''' || align="center" | '''Blocked''' || align="center" | '''Hit''' || align="center" | '''Parry (Gauge for opponent)''' | |||
|- | |||
| align="center" | 3 || align="center" | 10 || align="center" | 19 || align="center" | 4 | |||
|} | |||
''Comments here'' | |||
==== Jumping Normals ==== | |||
[[Image:(makotojlp).gif|none]] | |||
{| border="1em" cellspacing="0" width="65%" style="border: 1px solid #999; background: none;" | |||
|- | |||
| align="center" | '''Move''' || align="center" | '''Motion''' || align="center" | '''Damage''' || align="center" | '''Stun Damage''' || align="center" | '''Chains into itself''' || align="center" | '''Special Cancel''' || align="center" | '''Super Cancel''' || align="center" | '''Juggle Value''' | |||
|- | |||
| align="center" | Jump Jab || align="center" | (Air) LP || align="center" | 50(8 life points) || align="center" | 7 || align="center" | No || align="center" | No || align="center" | No | |||
|} | |||
'''Frame Data''' | |||
{| border="1em" cellspacing="0" width="70%" style="border: 1px solid #999; background: none;" | |||
|- | |||
| align="center" | '''Startup''' || align="center" | '''Hit''' || align="center" | '''Recovery''' || align="center" | '''Blocked Advantage''' || align="center" | '''Hit Advantage''' || align="center" | '''Crouching Hit Advantage''' || align="center" | '''Guard''' || align="center" | '''Parry''' | |||
|- | |||
| align="center" | 4 || align="center" | 21 || align="center" | - || align="center" | -9~+7 || align="center" | -9~+7 || align="center" | +2~+7 || align="center" | H || align="center" | H | |||
|} | |||
'''Gauge Increase''' | |||
{| border="1em" cellspacing="0" width="30%" style="border: 1px solid #999; background: none;" | |||
|- | |||
| align="center" | '''Miss''' || align="center" | '''Blocked''' || align="center" | '''Hit''' || align="center" | '''Parry (Gauge for opponent)''' | |||
|- | |||
| align="center" | 0 || align="center" | 1 || align="center" | 2 || align="center" | 4 | |||
|} | |||
''Comments here'' | |||
[[Image:(makotonjlp).gif|none]] | |||
{| border="1em" cellspacing="0" width="60%" style="border: 1px solid #999; background: none;" | |||
|- | |||
| align="center" | '''Move''' || align="center" | '''Motion''' || align="center" | '''Damage''' || align="center" | '''Stun Damage''' || align="center" | '''Chains into itself''' || align="center" | '''Special Cancel''' || align="center" | '''Super Cancel''' || align="center" | '''Juggle Value''' | |||
|- | |||
| align="center" | Neutral Jump Jab || align="center" | (Air) LP || align="center" | 50(8 life points) || align="center" | 7 || align="center" | No || align="center" | No || align="center" | No | |||
|} | |||
'''Frame Data''' | |||
{| border="1em" cellspacing="0" width="70%" style="border: 1px solid #999; background: none;" | |||
|- | |||
| align="center" | '''Startup''' || align="center" | '''Hit''' || align="center" | '''Recovery''' || align="center" | '''Blocked Advantage''' || align="center" | '''Hit Advantage''' || align="center" | '''Crouching Hit Advantage''' || align="center" | '''Guard''' || align="center" | '''Parry''' | |||
|- | |||
| align="center" | 9 || align="center" | 17|| align="center" | - || align="center" | -2~+7 || align="center" | -2~+7 || align="center" | +5~+7 || align="center" | H || align="center" | H | |||
|} | |||
'''Gauge Increase''' | |||
{| border="1em" cellspacing="0" width="30%" style="border: 1px solid #999; background: none;" | |||
|- | |||
| align="center" | '''Miss''' || align="center" | '''Blocked''' || align="center" | '''Hit''' || align="center" | '''Parry (Gauge for opponent)''' | |||
|- | |||
| align="center" | 0 || align="center" | 1 || align="center" | 2 || align="center" | 4 | |||
|} | |||
''Comments here'' | |||
[[Image:(makotojmp).gif|none]] | |||
{| border="1em" cellspacing="0" width="60%" style="border: 1px solid #999; background: none;" | |||
|- | |||
| align="center" | '''Move''' || align="center" | '''Motion''' || align="center" | '''Damage''' || align="center" | '''Stun Damage''' || align="center" | '''Chains into itself''' || align="center" | '''Special Cancel''' || align="center" | '''Super Cancel''' || align="center" | '''Juggle Value''' | |||
|- | |||
| align="center" | Jump Strong || align="center" | (Air) MP || align="center" | 80(12 life points) || align="center" | 11 || align="center" | No || align="center" | No || align="center" | No | |||
|} | |||
'''Frame Data''' | |||
{| border="1em" cellspacing="0" width="65%" style="border: 1px solid #999; background: none;" | |||
|- | |||
| align="center" | '''Startup''' || align="center" | '''Hit''' || align="center" | '''Recovery''' || align="center" | '''Blocked Advantage''' || align="center" | '''Hit Advantage''' || align="center" | '''Crouching Hit Advantage''' || align="center" | '''Guard''' || align="center" | '''Parry''' | |||
|- | |||
| align="center" | 11 || align="center" | 24 || align="center" | - || align="center" | -3~+10 || align="center" | -3~+10 || align="center" | +4~+10 || align="center" | H || align="center" | H | |||
|} | |||
'''Gauge Increase''' | |||
{| border="1em" cellspacing="0" width="30%" style="border: 1px solid #999; background: none;" | |||
|- | |||
| align="center" | '''Miss''' || align="center" | '''Blocked''' || align="center" | '''Hit''' || align="center" | '''Parry (Gauge for opponent)''' | |||
|- | |||
| align="center" | 2 || align="center" | 6 || align="center" | 11 || align="center" | 4 | |||
|} | |||
''Comments here'' | |||
[[Image:(makotojnmp).gif|none]] | |||
{| border="1em" cellspacing="0" width="60%" style="border: 1px solid #999; background: none;" | |||
|- | |||
| align="center" | '''Move''' || align="center" | '''Motion''' || align="center" | '''Damage''' || align="center" | '''Stun Damage''' || align="center" | '''Chains into itself''' || align="center" | '''Special Cancel''' || align="center" | '''Super Cancel''' || align="center" | '''Juggle Value''' | |||
|- | |||
| align="center" | Neutral Jump Strong || align="center" | (Air) MP || align="center" | 80(14 life points) || align="center" | 11 || align="center" | No || align="center" | No || align="center" | No | |||
|} | |||
'''Frame Data''' | |||
{| border="1em" cellspacing="0" width="65%" style="border: 1px solid #999; background: none;" | |||
|- | |||
| align="center" | '''Startup''' || align="center" | '''Hit''' || align="center" | '''Recovery''' || align="center" | '''Blocked Advantage''' || align="center" | '''Hit Advantage''' || align="center" | '''Crouching Hit Advantage''' || align="center" | '''Guard''' || align="center" | '''Parry''' | |||
|- | |||
| align="center" | 11 || align="center" | 10 || align="center" | - || align="center" | +2~+10 || align="center" | +2~+10 || align="center" | +8~+10 || align="center" | H || align="center" | H | |||
|} | |||
'''Gauge Increase''' | |||
{| border="1em" cellspacing="0" width="30%" style="border: 1px solid #999; background: none;" | |||
|- | |||
| align="center" | '''Miss''' || align="center" | '''Blocked''' || align="center" | '''Hit''' || align="center" | '''Parry (Gauge for opponent)''' | |||
|- | |||
| align="center" | 2 || align="center" | 6 || align="center" | 11 || align="center" | 4 | |||
|} | |||
''Comments here'' | |||
[[Image:(makotojhp).gif|none]] | |||
{| border="1em" cellspacing="0" width="60%" style="border: 1px solid #999; background: none;" | |||
|- | |||
| align="center" | '''Move''' || align="center" | '''Motion''' || align="center" | '''Damage''' || align="center" | '''Stun Damage''' || align="center" | '''Chains into itself''' || align="center" | '''Special Cancel''' || align="center" | '''Super Cancel''' || align="center" | '''Juggle Value''' | |||
|- | |||
| align="center" | Jump Fierce || align="center" | (Air) HP || align="center" | 130(150)(26 life points) || align="center" | 15 || align="center" | No || align="center" | No || align="center" | No | |||
|} | |||
'''Frame Data''' | |||
{| border="1em" cellspacing="0" width="65%" style="border: 1px solid #999; background: none;" | |||
|- | |||
| align="center" | '''Startup''' || align="center" | '''Hit''' || align="center" | '''Recovery''' || align="center" | '''Blocked Advantage''' || align="center" | '''Hit Advantage''' || align="center" | '''Crouching Hit Advantage''' || align="center" | '''Guard''' || align="center" | '''Parry''' | |||
|- | |||
| align="center" | 10 || align="center" | 2 || align="center" | - || align="center" | +1~+13 || align="center" | +1~+13 || align="center" | +7~+13 || align="center" | H || align="center" | H | |||
|} | |||
'''Gauge Increase''' | |||
{| border="1em" cellspacing="0" width="30%" style="border: 1px solid #999; background: none;" | |||
|- | |||
| align="center" | '''Miss''' || align="center" | '''Blocked''' || align="center" | '''Hit''' || align="center" | '''Parry (Gauge for opponent)''' | |||
|- | |||
| align="center" | 3 || align="center" | 10 || align="center" | 19 || align="center" | 4 | |||
|} | |||
''Comments here'' | |||
[[Image:(makotonjhp).gif|none]] | |||
{| border="1em" cellspacing="0" width="60%" style="border: 1px solid #999; background: none;" | |||
|- | |||
| align="center" | '''Move''' || align="center" | '''Motion''' || align="center" | '''Damage''' || align="center" | '''Stun Damage''' || align="center" | '''Chains into itself''' || align="center" | '''Special Cancel''' || align="center" | '''Super Cancel''' || align="center" | '''Juggle Value''' | |||
|- | |||
| align="center" | Neutral Jump Fierce || align="center" | (Air) HP || align="center" | 130(23 life points) || align="center" | 15 || align="center" | No || align="center" | No || align="center" | No | |||
|} | |||
'''Frame Data''' | |||
{| border="1em" cellspacing="0" width="65%" style="border: 1px solid #999; background: none;" | |||
|- | |||
| align="center" | '''Startup''' || align="center" | '''Hit''' || align="center" | '''Recovery''' || align="center" | '''Blocked Advantage''' || align="center" | '''Hit Advantage''' || align="center" | '''Crouching Hit Advantage''' || align="center" | '''Guard''' || align="center" | '''Parry''' | |||
|- | |||
| align="center" | 13 || align="center" | 2 || align="center" | - || align="center" | +7~+13 || align="center" | +7~+13 || align="center" | +12~+13 || align="center" | H || align="center" | H | |||
|} | |||
'''Gauge Increase''' | |||
{| border="1em" cellspacing="0" width="30%" style="border: 1px solid #999; background: none;" | |||
|- | |||
| align="center" | '''Miss''' || align="center" | '''Blocked''' || align="center" | '''Hit''' || align="center" | '''Parry (Gauge for opponent)''' | |||
|- | |||
| align="center" | 3 || align="center" | 10 || align="center" | 19 || align="center" | 4 | |||
|} | |||
''Comments here'' | |||
[[Image:(makotojlk).gif|none]] | |||
{| border="1em" cellspacing="0" width="60%" style="border: 1px solid #999; background: none;" | |||
|- | |||
| align="center" | '''Move''' || align="center" | '''Motion''' || align="center" | '''Damage''' || align="center" | '''Stun Damage''' || align="center" | '''Chains into itself''' || align="center" | '''Special Cancel''' || align="center" | '''Super Cancel''' || align="center" | '''Juggle Value''' | |||
|- | |||
| align="center" | Jump Short || align="center" | (Air) LK || align="center" | 60(10 life points) || align="center" | 7 || align="center" | No || align="center" | No || align="center" | No | |||
|} | |||
'''Frame Data''' | |||
{| border="1em" cellspacing="0" width="75%" style="border: 1px solid #999; background: none;" | |||
|- | |||
| align="center" | '''Startup''' || align="center" | '''Hit''' || align="center" | '''Recovery''' || align="center" | '''Blocked Advantage''' || align="center" | '''Hit Advantage''' || align="center" | '''Crouching Hit Advantage''' || align="center" | '''Guard''' || align="center" | '''Parry''' | |||
|- | |||
| align="center" | 2 || align="center" | 14 || align="center" | - || align="center" | -4~+7/-5~+7 || align="center" | -4~+7/-5~+7 || align="center" |+3~+7/+4~+7 || align="center" | H || align="center" | H | |||
|} | |||
'''Gauge Increase''' | |||
{| border="1em" cellspacing="0" width="30%" style="border: 1px solid #999; background: none;" | |||
|- | |||
| align="center" | '''Miss''' || align="center" | '''Blocked''' || align="center" | '''Hit''' || align="center" | '''Parry (Gauge for opponent)''' | |||
|- | |||
| align="center" | 0 || align="center" | 1 || align="center" | 2 || align="center" | 4 | |||
|} | |||
''Comments here'' | |||
[[Image:(makotojmk).gif|none]] | |||
{| border="1em" cellspacing="0" width="60%" style="border: 1px solid #999; background: none;" | |||
|- | |||
| align="center" | '''Move''' || align="center" | '''Motion''' || align="center" | '''Damage''' || align="center" | '''Stun Damage''' || align="center" | '''Chains into itself''' || align="center" | '''Special Cancel''' || align="center" | '''Super Cancel''' || align="center" | '''Juggle Value''' | |||
|- | |||
| align="center" | Jump Forward || align="center" | (Air) MK || align="center" | 90(16 life points) || align="center" | 9 || align="center" | No || align="center" | No || align="center" | No | |||
|} | |||
'''Frame Data''' | |||
{| border="1em" cellspacing="0" width="65%" style="border: 1px solid #999; background: none;" | |||
|- | |||
| align="center" | '''Startup''' || align="center" | '''Hit''' || align="center" | '''Recovery''' || align="center" | '''Blocked Advantage''' || align="center" | '''Hit Advantage''' || align="center" | '''Crouching Hit Advantage''' || align="center" | '''Guard''' || align="center" | '''Parry''' | |||
|- | |||
| align="center" | 7 || align="center" | 13 || align="center" | - || align="center" | -4~+10/-5~+10 || align="center" | -4~+10/-5~+10 || align="center" | +3~+10/+5~+10 || align="center" | H || align="center" | H | |||
|} | |||
'''Gauge Increase''' | |||
{| border="1em" cellspacing="0" width="30%" style="border: 1px solid #999; background: none;" | |||
|- | |||
| align="center" | '''Miss''' || align="center" | '''Blocked''' || align="center" | '''Hit''' || align="center" | '''Parry (Gauge for opponent)''' | |||
|- | |||
| align="center" | 2 || align="center" | 6 || align="center" | 11 || align="center" | 4 | |||
|} | |||
''Comments here'' | |||
[[Image:(makotojhk).gif|none]] | |||
{| border="1em" cellspacing="0" width="60%" style="border: 1px solid #999; background: none;" | |||
|- | |||
| align="center" | '''Move''' || align="center" | '''Motion''' || align="center" | '''Damage''' || align="center" | '''Stun Damage''' || align="center" | '''Chains into itself''' || align="center" | '''Special Cancel''' || align="center" | '''Super Cancel''' || align="center" | '''Juggle Value''' | |||
|- | |||
| align="center" | Jump Roundhouse || align="center" | (Air) HK || align="center" | 130(23 life points) || align="center" | 11 || align="center" | No || align="center" | No || align="center" | No | |||
|} | |||
'''Frame Data''' | |||
{| border="1em" cellspacing="0" width="65%" style="border: 1px solid #999; background: none;" | |||
|- | |||
| align="center" | '''Startup''' || align="center" | '''Hit''' || align="center" | '''Recovery''' || align="center" | '''Blocked Advantage''' || align="center" | '''Hit Advantage''' || align="center" | '''Crouching Hit Advantage''' || align="center" | '''Guard''' || align="center" | '''Parry''' | |||
|- | |||
| align="center" | 6 || align="center" | 6 || align="center" | - || align="center" | +4~+13 || align="center" | +4~+13 || align="center" | +11~+13 || align="center" | H || align="center" | H | |||
|} | |||
'''Gauge Increase''' | |||
{| border="1em" cellspacing="0" width="30%" style="border: 1px solid #999; background: none;" | |||
|- | |||
| align="center" | '''Miss''' || align="center" | '''Blocked''' || align="center" | '''Hit''' || align="center" | '''Parry (Gauge for opponent)''' | |||
|- | |||
| align="center" | 3 || align="center" | 10 || align="center" | 19 || align="center" | 4 | |||
|} | |||
''Comments here'' | |||
[[Image:(makotooh).gif|none]] | |||
{| border="1em" cellspacing="0" width="60%" style="border: 1px solid #999; background: none;" | |||
|- | |||
| align="center" | '''Move''' || align="center" | '''Motion''' || align="center" | '''Damage''' || align="center" | '''Stun Damage''' || align="center" | '''Chains into itself''' || align="center" | '''Special Cancel''' || align="center" | '''Super Cancel''' || align="center" | '''Juggle Value''' | |||
|- | |||
| align="center" | Universal Overhead || align="center" | MP+MK || align="center" | 40(7 life points) || align="center" | 3 || align="center" | No || align="center" | No || align="center" | No | |||
|} | |||
'''Frame Data''' | |||
{| border="1em" cellspacing="0" width="65%" style="border: 1px solid #999; background: none;" | |||
|- | |||
| align="center" | '''Startup''' || align="center" | '''Hit''' || align="center" | '''Recovery''' || align="center" | '''Blocked Advantage''' || align="center" | '''Hit Advantage''' || align="center" | '''Crouching Hit Advantage''' || align="center" | '''Guard''' || align="center" | '''Parry''' | |||
|- | |||
| align="center" | 15 || align="center" | 10 || align="center" | 5 || align="center" | -5~+7 || align="center" | 0~+8 || align="center" | +1~+9 || align="center" | H || align="center" | H | |||
|} | |||
'''Gauge Increase''' | |||
{| border="1em" cellspacing="0" width="30%" style="border: 1px solid #999; background: none;" | |||
|- | |||
| align="center" | '''Miss''' || align="center" | '''Blocked''' || align="center" | '''Hit''' || align="center" | '''Parry (Gauge for opponent)''' | |||
|- | |||
| align="center" | 0 || align="center" | 1 || align="center" | 2 || align="center" | 4 | |||
|} | |||
''Comments here'' | |||
==== Throws ==== | |||
[[Image:(makotothr).gif|none]] | |||
{| border="1em" cellspacing="0" width="70%" style="border: 1px solid #999; background: none;" | |||
|- | |||
| align="center" | '''Move''' || align="center" | '''Motion''' || align="center" | '''Damage''' || align="center" | '''Stun Damage''' || align="center" | '''Throw Range''' || align="center" | '''Kara-Throw''' || align="center" | '''Kara-Throw Range''' | |||
|- | |||
| align="center" | Hikiyose Zutsuki "Tacchuu" || align="center" | LP+LK || align="center" | 90(16 life points) || align="center" | 17 || align="center" | 20 || align="center" | C.HK / S.LK / S.MK / F.LK / F.MP / C.MP / F.MK || align="center" | 33 / 27 / 27 / 24 / 24 / 23 / 22 | |||
|} | |||
'''Frame Data''' | |||
{| border="1em" cellspacing="0" width="65%" style="border: 1px solid #999; background: none;" | |||
|- | |||
| align="center" | '''Startup''' || align="center" | '''Hit''' || align="center" | '''Recovery''' || align="center" | '''Blocked Advantage''' || align="center" | '''Hit Advantage''' || align="center" | '''Crouching Hit Advantage''' || align="center" | '''Guard''' || align="center" | '''Parry''' | |||
|- | |||
| align="center" | 2 || align="center" | 1 || align="center" | 21 || align="center" | - || align="center" | - || align="center" | - || align="center" | LP+LK || align="center" | - | |||
|} | |||
'''Gauge Increase''' | |||
{| border="1em" cellspacing="0" width="25%" style="border: 1px solid #999; background: none;" | |||
|- | |||
| align="center" | '''Miss''' || align="center" | '''Blocked''' || align="center" | '''Hit''' | |||
|- | |||
| align="center" | 0 || align="center" | 7 (for the player who blocked) || align="center" | 8 | |||
|} | |||
''Comments here'' | |||
[[Image:(makotobftr).gif|none]] | |||
{| border="1em" cellspacing="0" width="70%" style="border: 1px solid #999; background: none;" | |||
|- | |||
| align="center" | '''Move''' || align="center" | '''Motion''' || align="center" | '''Damage''' || align="center" | '''Stun Damage''' || align="center" | '''Throw Range''' || align="center" | '''Kara-Throw''' || align="center" | '''Kara-Throw Range''' | |||
|- | |||
| align="center" | Hiji Otoshi Sanren Tsuki "Araiso" || align="center" | B/F+LP+LK || align="center" | 150(21 life points) || align="center" | 13 || align="center" | 20 || align="center" | C.HK / S.LK / S.MK / F.LK / F.MP / C.MP / F.MK || align="center" | 33 / 27 / 27 / 24 / 24 / 23 / 22 | |||
|} | |||
'''Frame Data''' | |||
{| border="1em" cellspacing="0" width="65%" style="border: 1px solid #999; background: none;" | |||
|- | |||
| align="center" | '''Startup''' || align="center" | '''Hit''' || align="center" | '''Recovery''' || align="center" | '''Blocked Advantage''' || align="center" | '''Hit Advantage''' || align="center" | '''Crouching Hit Advantage''' || align="center" | '''Guard''' || align="center" | '''Parry''' | |||
|- | |||
| align="center" | 2 || align="center" | 1 || align="center" | 21 || align="center" | - || align="center" | - || align="center" | - || align="center" | B/F+LP+LK || align="center" | - | |||
|} | |||
'''Gauge Increase''' | |||
{| border="1em" cellspacing="0" width="25%" style="border: 1px solid #999; background: none;" | |||
|- | |||
| align="center" | '''Miss''' || align="center" | '''Blocked''' || align="center" | '''Hit''' | |||
|- | |||
| align="center" | 0 || align="center" | 7 (for the player who blocked) || align="center" | 7 | |||
|} | |||
''Comments here'' | |||
==== Crouching Normals ==== | |||
[[Image:(makotoclp).gif|none]] | |||
{| border="1em" cellspacing="0" width="60%" style="border: 1px solid #999; background: none;" | |||
|- | |||
| align="center" | '''Move''' || align="center" | '''Motion''' || align="center" | '''Damage''' || align="center" | '''Stun Damage''' || align="center" | '''Chains into itself''' || align="center" | '''Special Cancel''' || align="center" | '''Super Cancel''' || align="center" | '''Juggle Value''' | |||
|- | |||
| align="center" | Crouch Jab || align="center" | D+LP || align="center" | 20(3 life points) || align="center" | 3 || align="center" | Yes || align="center" | Yes || align="center" | Yes | |||
|} | |||
'''Frame Data''' | |||
{| border="1em" cellspacing="0" width="65%" style="border: 1px solid #999; background: none;" | |||
|- | |||
| align="center" | '''Startup''' || align="center" | '''Hit''' || align="center" | '''Recovery''' || align="center" | '''Blocked Advantage''' || align="center" | '''Hit Advantage''' || align="center" | '''Crouching Hit Advantage''' || align="center" | '''Guard''' || align="center" | '''Parry''' | |||
|- | |||
| align="center" | 5 || align="center" | 4 || align="center" | 5 || align="center" | +3 || align="center" | +3 || align="center" | +3 || align="center" | HL || align="center" | HL | |||
|} | |||
'''Gauge Increase''' | |||
{| border="1em" cellspacing="0" width="30%" style="border: 1px solid #999; background: none;" | |||
|- | |- | ||
| | | align="center" | '''Miss''' || align="center" | '''Blocked''' || align="center" | '''Hit''' || align="center" | '''Parry (Gauge for opponent)''' | ||
|- | |- | ||
| | | align="center" | 0 || align="center" | 1 || align="center" | 2 || align="center" | 4 | ||
|} | |} | ||
''Comments here'' | |||
{| border="0" | [[Image:(makotocmp).gif|none]] | ||
{| border="1em" cellspacing="0" width="60%" style="border: 1px solid #999; background: none;" | |||
|- | |||
| align="center" | '''Move''' || align="center" | '''Motion''' || align="center" | '''Damage''' || align="center" | '''Stun Damage''' || align="center" | '''Chains into itself''' || align="center" | '''Special Cancel''' || align="center" | '''Super Cancel''' || align="center" | '''Juggle Value''' | |||
|- | |||
| align="center" | Crouch Strong || align="center" | D+MP || align="center" | 70(12 life points) || align="center" | 5 || align="center" | No || align="center" | Yes || align="center" | Yes | |||
|} | |||
'''Frame Data''' | |||
{| border="1em" cellspacing="0" width="65%" style="border: 1px solid #999; background: none;" | |||
|- | |||
| align="center" | '''Startup''' || align="center" | '''Hit''' || align="center" | '''Recovery''' || align="center" | '''Blocked Advantage''' || align="center" | '''Hit Advantage''' || align="center" | '''Crouching Hit Advantage''' || align="center" | '''Guard''' || align="center" | '''Parry''' | |||
|- | |||
| align="center" | 7 || align="center" | 7 || align="center" | 11 || align="center" | -1 || align="center" | 0 || align="center" | +1 || align="center" | HL || align="center" | HL | |||
|} | |||
'''Gauge Increase''' | |||
{| border="1em" cellspacing="0" width="30%" style="border: 1px solid #999; background: none;" | |||
|- | |- | ||
| | | align="center" | '''Miss''' || align="center" | '''Blocked''' || align="center" | '''Hit''' || align="center" | '''Parry (Gauge for opponent)''' | ||
|- | |||
| align="center" | 2 || align="center" | 6 || align="center" | 11 || align="center" | 4 | |||
|} | |||
''Comments here'' | |||
[[Image:(makotochp).gif|none]] | |||
{| border="1em" cellspacing="0" width="60%" style="border: 1px solid #999; background: none;" | |||
|- | |- | ||
| | | align="center" | '''Move''' || align="center" | '''Motion''' || align="center" | '''Damage''' || align="center" | '''Stun Damage''' || align="center" | '''Chains into itself''' || align="center" | '''Special Cancel''' || align="center" | '''Super Cancel''' || align="center" | '''Juggle Value''' | ||
|- | |- | ||
| | | align="center" | Crouch Fierce || align="center" | D+HP || align="center" | 130(17 life points) || align="center" | 13 || align="center" | No || align="center" | Yes || align="center" | Yes | ||
|} | |||
'''Frame Data''' | |||
{| border="1em" cellspacing="0" width="65%" style="border: 1px solid #999; background: none;" | |||
|- | |- | ||
| || | | align="center" | '''Startup''' || align="center" | '''Hit''' || align="center" | '''Recovery''' || align="center" | '''Blocked Advantage''' || align="center" | '''Hit Advantage''' || align="center" | '''Crouching Hit Advantage''' || align="center" | '''Guard''' || align="center" | '''Parry''' | ||
|- | |- | ||
| | | align="center" | 10 || align="center" | 2 || align="center" | 21 || align="center" | -6 || align="center" | Down || align="center" | Down || align="center" | L || align="center" | L | ||
|} | |||
'''Gauge Increase''' | |||
{| border="1em" cellspacing="0" width="30%" style="border: 1px solid #999; background: none;" | |||
|- | |- | ||
| | | align="center" | '''Miss''' || align="center" | '''Blocked''' || align="center" | '''Hit''' || align="center" | '''Parry (Gauge for opponent)''' | ||
|- | |- | ||
| | | align="center" | 3 || align="center" | 10 || align="center" | 19 || align="center" | 4 | ||
|} | |} | ||
''Comments here'' | |||
[[Image:(makotoclk).gif|none]] | |||
{| border="1em" cellspacing="0" width="60%" style="border: 1px solid #999; background: none;" | |||
|- | |||
| align="center" | '''Move''' || align="center" | '''Motion''' || align="center" | '''Damage''' || align="center" | '''Stun Damage''' || align="center" | '''Chains into itself''' || align="center" | '''Special Cancel''' || align="center" | '''Super Cancel''' || align="center" | '''Juggle Value''' | |||
|- | |||
| align="center" | Crouch Short || align="center" | D+LK || align="center" | 40(5 life points) || align="center" | 3 || align="center" | No || align="center" | Yes || align="center" | Yes | |||
|} | |||
'''Frame Data''' | |||
{| border="1em" cellspacing="0" width="65%" style="border: 1px solid #999; background: none;" | |||
|- | |||
| align="center" | '''Startup''' || align="center" | '''Hit''' || align="center" | '''Recovery''' || align="center" | '''Blocked Advantage''' || align="center" | '''Hit Advantage''' || align="center" | '''Crouching Hit Advantage''' || align="center" | '''Guard''' || align="center" | '''Parry''' | |||
|- | |||
| align="center" | 4 || align="center" | 6 || align="center" | 10 || align="center" | -3 || align="center" | -3 || align="center" | -3 || align="center" | L || align="center" | L | |||
|} | |||
'''Gauge Increase''' | |||
{| border="1em" cellspacing="0" width="30%" style="border: 1px solid #999; background: none;" | |||
|- | |||
| align="center" | '''Miss''' || align="center" | '''Blocked''' || align="center" | '''Hit''' || align="center" | '''Parry (Gauge for opponent)''' | |||
|- | |||
| align="center" | 0 || align="center" | 1 || align="center" | 2 || align="center" | 4 | |||
|} | |||
''Comments here'' | |||
===Special | [[Image:(makotocmk).gif|none]] | ||
{| border="1em" cellspacing="0" width="60%" style="border: 1px solid #999; background: none;" | |||
|- | |||
| align="center" | '''Move''' || align="center" | '''Motion''' || align="center" | '''Damage''' || align="center" | '''Stun Damage''' || align="center" | '''Chains into itself''' || align="center" | '''Special Cancel''' || align="center" | '''Super Cancel''' || align="center" | '''Juggle Value''' | |||
|- | |||
| align="center" | Crouch Forward || align="center" | D+MK || align="center" | 90(16 life points) || align="center" | 5 || align="center" | No || align="center" | No || align="center" | No | |||
|} | |||
'''Frame Data''' | |||
{| border="1em" cellspacing="0" width="65%" style="border: 1px solid #999; background: none;" | |||
|- | |||
| align="center" | '''Startup''' || align="center" | '''Hit''' || align="center" | '''Recovery''' || align="center" | '''Blocked Advantage''' || align="center" | '''Hit Advantage''' || align="center" | '''Crouching Hit Advantage''' || align="center" | '''Guard''' || align="center" | '''Parry''' | |||
|- | |||
| align="center" | 7 || align="center" | 8 || align="center" | 7 || align="center" | +3 || align="center" | +4 || align="center" | +5 || align="center" | HL || align="center" | HL | |||
|} | |||
'''Gauge Increase''' | |||
{| border="1em" cellspacing="0" width="30%" style="border: 1px solid #999; background: none;" | |||
|- | |||
| align="center" | '''Miss''' || align="center" | '''Blocked''' || align="center" | '''Hit''' || align="center" | '''Parry (Gauge for opponent)''' | |||
|- | |||
| align="center" | 2 || align="center" | 4 || align="center" | 8 || align="center" | 4 | |||
|} | |||
''Comments here'' | |||
{| border=" | |||
[[Image:(makotochk).gif|none]] | |||
{| border="1em" cellspacing="0" width="60%" style="border: 1px solid #999; background: none;" | |||
|- | |- | ||
| | | align="center" | '''Move''' || align="center" | '''Motion''' || align="center" | '''Damage''' || align="center" | '''Stun Damage''' || align="center" | '''Chains into itself''' || align="center" | '''Special Cancel''' || align="center" | '''Super Cancel''' || align="center" | '''Juggle Value''' | ||
|- | |- | ||
| | | align="center" | Crouch Roundhouse || align="center" | D+HK || align="center" | 130(23 life points) || align="center" | 15 || align="center" | No || align="center" | No || align="center" | No | ||
|} | |||
'''Frame Data''' | |||
{| border="1em" cellspacing="0" width="65%" style="border: 1px solid #999; background: none;" | |||
|- | |- | ||
| | | align="center" | '''Startup''' || align="center" | '''Hit''' || align="center" | '''Recovery''' || align="center" | '''Blocked Advantage''' || align="center" | '''Hit Advantage''' || align="center" | '''Crouching Hit Advantage''' || align="center" | '''Guard''' || align="center" | '''Parry''' | ||
|- | |- | ||
| | | align="center" | 10 || align="center" | 4 || align="center" | 12 || align="center" | +2 || align="center" | +4 || align="center" | +6 || align="center" | HL || align="center" | H | ||
|} | |||
'''Gauge Increase''' | |||
{| border="1em" cellspacing="0" width="30%" style="border: 1px solid #999; background: none;" | |||
|- | |- | ||
| | | align="center" | '''Miss''' || align="center" | '''Blocked''' || align="center" | '''Hit''' || align="center" | '''Parry (Gauge for opponent)''' | ||
|- | |||
| align="center" | 3 || align="center" | 10 || align="center" | 19 || align="center" | 4 | |||
|} | |} | ||
''Comments here'' | |||
=== | ==== Command Normals ==== | ||
{| border=" | |||
[[Image:(makotoflp).gif|none]] | |||
{| border="1em" cellspacing="0" width="60%" style="border: 1px solid #999; background: none;" | |||
|- | |- | ||
| | | align="center" | '''Move''' || align="center" | '''Motion''' || align="center" | '''Damage''' || align="center" | '''Stun Damage''' || align="center" | '''Chains into itself''' || align="center" | '''Special Cancel''' || align="center" | '''Super Cancel''' || align="center" | '''Juggle Value''' | ||
|- | |- | ||
| | | align="center" | Kazami || align="center" | F+LP || align="center" | 25(4 life points) || align="center" | 3 || align="center" | No || align="center" | No || align="center" | No | ||
|} | |||
'''Frame Data''' | |||
{| border="1em" cellspacing="0" width="65%" style="border: 1px solid #999; background: none;" | |||
|- | |||
| align="center" | '''Startup''' || align="center" | '''Hit''' || align="center" | '''Recovery''' || align="center" | '''Blocked Advantage''' || align="center" | '''Hit Advantage''' || align="center" | '''Crouching Hit Advantage''' || align="center" | '''Guard''' || align="center" | '''Parry''' | |||
|- | |- | ||
| | | align="center" | 4 || align="center" | 4 || align="center" | 8 || align="center" | 0 || align="center" | 0 || align="center" | 0 || align="center" | HL || align="center" | HL | ||
|} | |} | ||
'''Gauge Increase''' | |||
{| border="1em" cellspacing="0" width="30%" style="border: 1px solid #999; background: none;" | |||
|- | |||
| align="center" | '''Miss''' || align="center" | '''Blocked''' || align="center" | '''Hit''' || align="center" | '''Parry (Gauge for opponent)''' | |||
|- | |||
| align="center" | 0 || align="center" | 1 || align="center" | 2 || align="center" | 4 | |||
|} | |||
''Comments here'' | |||
---- | [[Image:(makotofmp).gif|none]] | ||
{| border="1em" cellspacing="0" width="60%" style="border: 1px solid #999; background: none;" | |||
|- | |||
| align="center" | '''Move''' || align="center" | '''Motion''' || align="center" | '''Damage''' || align="center" | '''Stun Damage''' || align="center" | '''Chains into itself''' || align="center" | '''Special Cancel''' || align="center" | '''Super Cancel''' || align="center" | '''Juggle Value''' | |||
|- | |||
| align="center" | Kaoruna || align="center" | F+MP || align="center" | 85(15 life points) || align="center" | 5 || align="center" | No || align="center" | No || align="center" | No | |||
|} | |||
'''Frame Data''' | |||
{| border="1em" cellspacing="0" width="65%" style="border: 1px solid #999; background: none;" | |||
|- | |||
| align="center" | '''Startup''' || align="center" | '''Hit''' || align="center" | '''Recovery''' || align="center" | '''Blocked Advantage''' || align="center" | '''Hit Advantage''' || align="center" | '''Crouching Hit Advantage''' || align="center" | '''Guard''' || align="center" | '''Parry''' | |||
|- | |||
| align="center" | 9 || align="center" | 6 || align="center" | 9 || align="center" | +2 || align="center" | +3 || align="center" | +4 || align="center" | HL || align="center" | H | |||
|} | |||
'''Gauge Increase''' | |||
{| border="1em" cellspacing="0" width="30%" style="border: 1px solid #999; background: none;" | |||
|- | |||
| align="center" | '''Miss''' || align="center" | '''Blocked''' || align="center" | '''Hit''' || align="center" | '''Parry (Gauge for opponent)''' | |||
|- | |||
| align="center" | 2 || align="center" | 6 || align="center" | 11 || align="center" | 4 | |||
|} | |||
''Comments here'' | |||
[[Image:(makotofhp).gif|none]] | |||
{| border="1em" cellspacing="0" width="60%" style="border: 1px solid #999; background: none;" | |||
|- | |||
| align="center" | '''Move''' || align="center" | '''Motion''' || align="center" | '''Damage''' || align="center" | '''Stun Damage''' || align="center" | '''Chains into itself''' || align="center" | '''Special Cancel''' || align="center" | '''Super Cancel''' || align="center" | '''Juggle Value''' | |||
|- | |||
| align="center" | Shimaki || align="center" | F+HP || align="center" | 150(16 life points) || align="center" | 13 || align="center" | No || align="center" | No || align="center" | No | |||
|} | |||
'''Frame Data''' | |||
{| border="1em" cellspacing="0" width="65%" style="border: 1px solid #999; background: none;" | |||
|- | |||
| align="center" | '''Startup''' || align="center" | '''Hit''' || align="center" | '''Recovery''' || align="center" | '''Blocked Advantage''' || align="center" | '''Hit Advantage''' || align="center" | '''Crouching Hit Advantage''' || align="center" | '''Guard''' || align="center" | '''Parry''' | |||
|- | |||
| align="center" | 16 || align="center" | 12 || align="center" | 16 || align="center" | -4 || align="center" | -2 || align="center" | 0 || align="center" | HL || align="center" | H | |||
|} | |||
'''Gauge Increase''' | |||
{| border="1em" cellspacing="0" width="30%" style="border: 1px solid #999; background: none;" | |||
|- | |||
| align="center" | '''Miss''' || align="center" | '''Blocked''' || align="center" | '''Hit''' || align="center" | '''Parry (Gauge for opponent)''' | |||
|- | |||
| align="center" | 3 || align="center" | 7 || align="center" | 17 || align="center" | 4 | |||
|} | |||
''Comments here'' | |||
===Move | [[Image:(makotofhp).gif|none]] | ||
{| border="1em" cellspacing="0" width="60%" style="border: 1px solid #999; background: none;" | |||
|- | |||
| align="center" | '''Move''' || align="center" | '''Motion''' || align="center" | '''Damage''' || align="center" | '''Stun Damage''' || align="center" | '''Chains into itself''' || align="center" | '''Special Cancel''' || align="center" | '''Super Cancel''' || align="center" | '''Juggle Value''' | |||
|- | |||
| align="center" | Shimaki || align="center" | F+HP || align="center" | 150,20+20(31 life points) || align="center" | 13,3+3 || align="center" | No || align="center" | No || align="center" | No | |||
|} | |||
'''Frame Data''' | |||
{| border="1em" cellspacing="0" width="65%" style="border: 1px solid #999; background: none;" | |||
|- | |||
| align="center" | '''Startup''' || align="center" | '''Hit''' || align="center" | '''Recovery''' || align="center" | '''Blocked Advantage''' || align="center" | '''Hit Advantage''' || align="center" | '''Crouching Hit Advantage''' || align="center" | '''Guard''' || align="center" | '''Parry''' | |||
|- | |||
| align="center" | 16 || align="center" | 4,15 || align="center" | 13 || align="center" | -4 || align="center" | -3 || align="center" | -2 || align="center" | HL || align="center" | H | |||
|} | |||
'''Gauge Increase''' | |||
{| border="1em" cellspacing="0" width="30%" style="border: 1px solid #999; background: none;" | |||
|- | |||
| align="center" | '''Miss''' || align="center" | '''Blocked''' || align="center" | '''Hit''' || align="center" | '''Parry (Gauge for opponent)''' | |||
|- | |||
| align="center" | 3 || align="center" | 11 || align="center" | 29 || align="center" | 4 | |||
|} | |||
''Comments here'' | |||
== | [[Image:(makotoflk).gif|none]] | ||
{| border="1em" cellspacing="0" width="60%" style="border: 1px solid #999; background: none;" | |||
|- | |||
| align="center" | '''Move''' || align="center" | '''Motion''' || align="center" | '''Damage''' || align="center" | '''Stun Damage''' || align="center" | '''Chains into itself''' || align="center" | '''Special Cancel''' || align="center" | '''Super Cancel''' || align="center" | '''Juggle Value''' | |||
|- | |||
| align="center" | Shinbuki || align="center" | F+LK || align="center" | 35(6 life points) || align="center" | 5 || align="center" | No || align="center" | No || align="center" | No | |||
|} | |||
'''Frame Data''' | |||
{| border="1em" cellspacing="0" width="65%" style="border: 1px solid #999; background: none;" | |||
|- | |||
| align="center" | '''Startup''' || align="center" | '''Hit''' || align="center" | '''Recovery''' || align="center" | '''Blocked Advantage''' || align="center" | '''Hit Advantage''' || align="center" | '''Crouching Hit Advantage''' || align="center" | '''Guard''' || align="center" | '''Parry''' | |||
|- | |||
| align="center" | 6 || align="center" | 6 || align="center" | 13 || align="center" | -5 || align="center" | -5 || align="center" | -5 || align="center" | HL || align="center" | HL | |||
|} | |||
'''Gauge Increase''' | |||
{| border="1em" cellspacing="0" width="30%" style="border: 1px solid #999; background: none;" | |||
|- | |||
| align="center" | '''Miss''' || align="center" | '''Blocked''' || align="center" | '''Hit''' || align="center" | '''Parry (Gauge for opponent)''' | |||
|- | |||
| align="center" | 0 || align="center" | 1 || align="center" | 2 || align="center" | 4 | |||
|} | |||
''Comments here'' | |||
SAI (Seichusen-Godanzuki) | [[Image:(makotofmk).gif|none]] | ||
{| border="1em" cellspacing="0" width="60%" style="border: 1px solid #999; background: none;" | |||
|- | |||
| align="center" | '''Move''' || align="center" | '''Motion''' || align="center" | '''Damage''' || align="center" | '''Stun Damage''' || align="center" | '''Chains into itself''' || align="center" | '''Special Cancel''' || align="center" | '''Super Cancel''' || align="center" | '''Juggle Value''' | |||
|- | |||
| align="center" | Naruto || align="center" | F+MK || align="center" | 100(17 life points) || align="center" | 9 || align="center" | No || align="center" | No || align="center" | No | |||
|} | |||
'''Frame Data''' | |||
{| border="1em" cellspacing="0" width="65%" style="border: 1px solid #999; background: none;" | |||
|- | |||
| align="center" | '''Startup''' || align="center" | '''Hit''' || align="center" | '''Recovery''' || align="center" | '''Blocked Advantage''' || align="center" | '''Hit Advantage''' || align="center" | '''Crouching Hit Advantage''' || align="center" | '''Guard''' || align="center" | '''Parry''' | |||
|- | |||
| align="center" | 17 || align="center" | 5 || align="center" | 18 || align="center" | -5 || align="center" | -3 || align="center" | -1 || align="center" | HL || align="center" | H | |||
|} | |||
'''Gauge Increase''' | |||
{| border="1em" cellspacing="0" width="30%" style="border: 1px solid #999; background: none;" | |||
|- | |||
| align="center" | '''Miss''' || align="center" | '''Blocked''' || align="center" | '''Hit''' || align="center" | '''Parry (Gauge for opponent)''' | |||
|- | |||
| align="center" | 2 || align="center" | 6 || align="center" | 11 || align="center" | 4 | |||
|} | |||
''Comments here'' | |||
[[Image:(makotofhk).gif|none]] | |||
{| border="1em" cellspacing="0" width="60%" style="border: 1px solid #999; background: none;" | |||
|- | |||
| align="center" | '''Move''' || align="center" | '''Motion''' || align="center" | '''Damage''' || align="center" | '''Stun Damage''' || align="center" | '''Chains into itself''' || align="center" | '''Special Cancel''' || align="center" | '''Super Cancel''' || align="center" | '''Juggle Value''' | |||
|- | |||
| align="center" | Kurushio || align="center" | F+HK || align="center" | 120(21 life points) || align="center" | 5 || align="center" | No || align="center" | No || align="center" | No | |||
|} | |||
'''Frame Data''' | |||
{| border="1em" cellspacing="0" width="65%" style="border: 1px solid #999; background: none;" | |||
|- | |||
| align="center" | '''Startup''' || align="center" | '''Hit''' || align="center" | '''Recovery''' || align="center" | '''Blocked Advantage''' || align="center" | '''Hit Advantage''' || align="center" | '''Crouching Hit Advantage''' || align="center" | '''Guard''' || align="center" | '''Parry''' | |||
|- | |||
| align="center" | 22 || align="center" | 3 || align="center" | 25 || align="center" | -11 || align="center" | Down || align="center" | Down || align="center" | L || align="center" | L | |||
|} | |||
'''Gauge Increase''' | |||
{| border="1em" cellspacing="0" width="30%" style="border: 1px solid #999; background: none;" | |||
|- | |||
| align="center" | '''Miss''' || align="center" | '''Blocked''' || align="center" | '''Hit''' || align="center" | '''Parry (Gauge for opponent)''' | |||
|- | |||
| align="center" | 3 || align="center" | 10 || align="center" | 19 || align="center" | 4 | |||
|} | |||
''Comments here'' | |||
=== Target Combo === | |||
{| border="1em" cellspacing="0" width="65%" style="border: 1px solid #999; background: none;" | |||
|- | |||
| align="center" | '''Move''' || align="center" | '''Motion''' || align="center" | '''Damage''' || align="center" | '''Stun Damage''' || align="center" | '''Chains into itself''' || align="center" | '''Special Cancel''' || align="center" | '''Super Cancel''' || align="center" | '''Juggle Value''' | |||
|- | |||
| align="center" | Target Combo || align="center" | LK -> MK || align="center" | 40+70 || align="center" | 3+7 || align="center" | No || align="center" | Yes/No || align="center" | Yes/No | |||
|} | |||
'''Frame Data''' | |||
{| border="1em" cellspacing="0" width="65%" style="border: 1px solid #999; background: none;" | |||
|- | |||
| align="center" | '''Startup''' || align="center" | '''Hit''' || align="center" | '''Recovery''' || align="center" | '''Blocked Advantage''' || align="center" | '''Hit Advantage''' || align="center" | '''Crouching Hit Advantage''' || align="center" | '''Guard''' || align="center" | '''Parry''' | |||
|- | |||
| align="center" | 4 || align="center" | - || align="center" | - || align="center" | -3 || align="center" | -2 || align="center" | -1 || align="center" | HL/HL || align="center" | H/H | |||
|} | |||
'''Gauge Increase''' | |||
{| border="1em" cellspacing="0" width="30%" style="border: 1px solid #999; background: none;" | |||
|- | |||
| align="center" | '''Miss''' || align="center" | '''Blocked''' || align="center" | '''Hit''' || align="center" | '''Parry (Gauge for opponent)''' | |||
|- | |||
| align="center" | 0+? || align="center" | 1+1 || align="center" | 2+1 || align="center" | 8(4+4) | |||
|} | |||
''Comments here'' | |||
{| border="1em" cellspacing="0" width="65%" style="border: 1px solid #999; background: none;" | |||
|- | |||
| align="center" | '''Move''' || align="center" | '''Motion''' || align="center" | '''Damage''' || align="center" | '''Stun Damage''' || align="center" | '''Chains into itself''' || align="center" | '''Special Cancel''' || align="center" | '''Super Cancel''' || align="center" | '''Juggle Value''' | |||
|- | |||
| align="center" | Target Combo || align="center" | F+MK -> Far HK || align="center" | 100+80 || align="center" | 9+7 || align="center" | No/No || align="center" | No/No || align="center" | No/No | |||
|} | |||
'''Frame Data''' | |||
{| border="1em" cellspacing="0" width="65%" style="border: 1px solid #999; background: none;" | |||
|- | |||
| align="center" | '''Startup''' || align="center" | '''Hit''' || align="center" | '''Recovery''' || align="center" | '''Blocked Advantage''' || align="center" | '''Hit Advantage''' || align="center" | '''Crouching Hit Advantage''' || align="center" | '''Guard''' || align="center" | '''Parry''' | |||
|- | |||
| align="center" | 17 || align="center" | - || align="center" | - || align="center" | -1 || align="center" | -1 || align="center" | +1 || align="center" | HL/HL || align="center" | HL/H | |||
|} | |||
'''Gauge Increase''' | |||
{| border="1em" cellspacing="0" width="30%" style="border: 1px solid #999; background: none;" | |||
|- | |||
| align="center" | '''Miss''' || align="center" | '''Blocked''' || align="center" | '''Hit''' || align="center" | '''Parry (Gauge for opponent)''' | |||
|- | |||
| align="center" | 2+? || align="center" | 6+1 || align="center" | 11+1 || align="center" | 8(4+4) | |||
|} | |||
''Comments here'' | |||
=== Special Moves === | |||
Please note that in this section you will see mainly 3 images for the special moves, this means the image on the left its done with LP (or LK), the image on the center its done with MP (or MK), and the image on the right its done with HP (or HK). Also its the same "rule" as the sections above, its the 1rst frame it hits for every of the moves. | |||
[[Image:(makotohayate).gif|none]] | |||
{| border="1em" cellspacing="0" width="65%" style="border: 1px solid #999; background: none;" | |||
|- | |||
| align="center" | '''Move''' || align="center" | '''Motion''' || align="center" | '''Damage''' || align="center" | '''Blocked Damage''' || align="center" | '''Stun Damage''' || align="center" | '''Super Cancel''' || align="center" | '''Juggle Value''' | |||
|- | |||
| align="center" | Hayate (Jab) || align="center" | QCF +LP || align="center" | 100(17 life points) || align="center" | 13 || align="center" | 9 || align="center" | No | |||
|- | |||
| align="center" | Hayate (Strong) || align="center" | QCF +MP || align="center" | 100(17 life points) || align="center" | 13 || align="center" | 9 || align="center" | No | |||
|- | |||
| align="center" | Hayate (Fierce) || align="center" | QCF +HP || align="center" | 100(17 life points) || align="center" | 13 || align="center" | 9 || align="center" | No | |||
|- | |||
| align="center" | Hayate (Level 1) || align="center" | QCF +P Hold || align="center" | 110(19 life points) || align="center" | 14 || align="center" | 11 || align="center" | No | |||
|- | |||
| align="center" | Hayate (Level 2) || align="center" | QCF +P Hold || align="center" | 120(21 life points) || align="center" | 15 || align="center" | 13 || align="center" | No | |||
|- | |||
| align="center" | Hayate (Level 3) || align="center" | QCF +P Hold || align="center" | 130(22 life points) || align="center" | 33 || align="center" | 15 || align="center" | No | |||
|- | |||
| align="center" | Hayate (Level 4) || align="center" | QCF +P Hold || align="center" | 140(24 life points) || align="center" | 35 || align="center" | 17 || align="center" | No | |||
|} | |||
'''Frame Data''' | |||
{| border="1em" cellspacing="0" width="85%" style="border: 1px solid #999; background: none;" | |||
|- | |||
| align="center" | '''Move''' || align="center" | '''Startup''' || align="center" | '''Hit''' || align="center" | '''Recovery''' || align="center" | '''Blocked Advantage''' || align="center" | '''Hit Advantage''' || align="center" | '''Crouching Hit Advantage''' || align="center" | '''Guard''' || align="center" | '''Parry''' | |||
|- | |||
| align="center" | Hayate (Jab) || align="center" | 6 || align="center" | 6 || align="center" | 12 || align="center" | -12 || align="center" | +2 || align="center" | +4 || align="center" | HL || align="center" | H | |||
|- | |||
| align="center" | Hayate (Strong) || align="center" | 9 || align="center" | 6 || align="center" | 12 || align="center" | -12 || align="center" | +2 || align="center" | +4 || align="center" | HL || align="center" | H | |||
|- | |||
| align="center" | Hayate (Fierce) || align="center" | 11 || align="center" | 6 || align="center" | 12 || align="center" | -12 || align="center" | +2 || align="center" | +4 || align="center" | HL || align="center" | H | |||
|- | |||
| align="center" | Hayate (Level 1) || align="center" | 7~26 || align="center" | 6 || align="center" | 11 || align="center" | -9 || align="center" | +2 || align="center" | +4 || align="center" | HL || align="center" | H | |||
|- | |||
| align="center" | Hayate (Level 2) || align="center" | 27~46 || align="center" | 6 || align="center" | 10 || align="center" | -6 || align="center" | +2 || align="center" | +4 || align="center" | HL || align="center" | H | |||
|- | |||
| align="center" | Hayate (Level 3) || align="center" | 47~66 || align="center" | 6 || align="center" | 10 || align="center" | -2 || align="center" | Down || align="center" | Down || align="center" | HL || align="center" | H | |||
|- | |||
| align="center" | Hayate (Level 4) || align="center" | 67~126 || align="center" | 6 || align="center" | 8 || align="center" | +2 || align="center" | Down || align="center" | Down || align="center" | HL || align="center" | H | |||
|} | |||
'''Gauge Increase''' | |||
{| border="1em" cellspacing="0" width="30%" style="border: 1px solid #999; background: none;" | |||
|- | |||
| align="center" | '''Miss''' || align="center" | '''Blocked''' || align="center" | '''Hit''' || align="center" | '''Parry (Gauge for opponent)''' | |||
|- | |||
| align="center" | 3 || align="center" | 7 || align="center" | 5 || align="center" | 4 | |||
|} | |||
''Comments here'' | |||
[[Image:(makotofkage).gif|none]] | |||
{| border="1em" cellspacing="0" width="65%" style="border: 1px solid #999; background: none;" | |||
|- | |||
| align="center" | '''Move''' || align="center" | '''Motion''' || align="center" | '''Damage''' || align="center" | '''Blocked Damage''' || align="center" | '''Stun Damage''' || align="center" | '''Super Cancel''' || align="center" | '''Juggle Value''' | |||
|- | |||
| align="center" | Fukiage (Jab) || align="center" | F, D, DF+LP || align="center" | 120(21 life points) || align="center" | 15 || align="center" | 29 || align="center" | Yes | |||
|- | |||
| align="center" | Fukiage (Strong) || align="center" | F, D, DF+MP || align="center" | 140(24 life points) || align="center" | 18 || align="center" | 31 || align="center" | Yes | |||
|- | |||
| align="center" | Fukiage (Fierce) || align="center" | F, D, DF+HP || align="center" | 160(28 life points) || align="center" | 20 || align="center" | 31 || align="center" | Yes | |||
|} | |||
'''Frame Data''' | |||
{| border="1em" cellspacing="0" width="85%" style="border: 1px solid #999; background: none;" | |||
|- | |||
| align="center" | '''Move''' || align="center" | '''Startup''' || align="center" | '''Hit''' || align="center" | '''Recovery''' || align="center" | '''Blocked Advantage''' || align="center" | '''Hit Advantage''' || align="center" | '''Crouching Hit Advantage''' || align="center" | '''Guard''' || align="center" | '''Parry''' | |||
|- | |||
| align="center" | Fukiage (Jab) || align="center" | 7 || align="center" | 8 || align="center" | 26 || align="center" | - || align="center" | Down || align="center" | Down || align="center" | HL || align="center" | HL | |||
|- | |||
| align="center" | Fukiage (Strong) || align="center" | 10 || align="center" | 8 || align="center" | 26 || align="center" | - || align="center" | Down || align="center" | Down || align="center" | HL || align="center" | HL | |||
|- | |||
| align="center" | Fukiage (Fierce) || align="center" | 14 || align="center" | 7 || align="center" | 26 || align="center" | - || align="center" | Down || align="center" | Down || align="center" | HL || align="center" | HL | |||
|} | |||
'''Gauge Increase''' | |||
{| border="1em" cellspacing="0" width="50%" style="border: 1px solid #999; background: none;" | |||
|- | |||
| align="center" | '''Move''' || align="center" | '''Miss''' || align="center" | '''Blocked''' || align="center" | '''Hit''' || align="center" | '''Parry (Gauge for opponent)''' | |||
|- | |||
| align="center" | Fukiage (Jab) || align="center" | 3 || align="center" | 10 || align="center" | 21 || align="center" | 4 | |||
|- | |||
| align="center" | Fukiage (Strong) || align="center" | 3 || align="center" | 10 || align="center" | 21 || align="center" | 4 | |||
|- | |||
| align="center" | Fukiage (Fierce) || align="center" | 3 || align="center" | 10 || align="center" | 21 || align="center" | 4 | |||
|} | |||
''Comments here'' | |||
[[Image:(makotooroshi).gif|none]] | |||
{| border="1em" cellspacing="0" width="65%" style="border: 1px solid #999; background: none;" | |||
|- | |||
| align="center" | '''Move''' || align="center" | '''Motion''' || align="center" | '''Damage''' || align="center" | '''Blocked Damage''' || align="center" | '''Stun Damage''' || align="center" | '''Super Cancel''' || align="center" | '''Juggle Value''' | |||
|- | |||
| align="center" | Oroshi (Jab) || align="center" | QCB+LP || align="center" | 100(17 life points) || align="center" | 25 || align="center" | 7 || align="center" | Yes | |||
|- | |||
| align="center" | Oroshi (Strong) || align="center" | QCB+MP || align="center" | 110(19 life points) || align="center" | 28 || align="center" | 11 || align="center" | Yes | |||
|- | |||
| align="center" | Oroshi (Fierce) || align="center" | QCB+HP || align="center" | 140(24 life points) || align="center" | 35 || align="center" | 13 || align="center" | Yes | |||
|} | |||
'''Frame Data''' | |||
{| border="1em" cellspacing="0" width="85%" style="border: 1px solid #999; background: none;" | |||
|- | |||
| align="center" | '''Move''' || align="center" | '''Startup''' || align="center" | '''Hit''' || align="center" | '''Recovery''' || align="center" | '''Blocked Advantage''' || align="center" | '''Hit Advantage''' || align="center" | '''Crouching Hit Advantage''' || align="center" | '''Guard''' || align="center" | '''Parry''' | |||
|- | |||
| align="center" | Oroshi (Jab) || align="center" | 19 || align="center" | 7 || align="center" | 17 || align="center" | -4 || align="center" | -2 || align="center" | 0 || align="center" | HL || align="center" | H | |||
|- | |||
| align="center" | Oroshi (Strong) || align="center" | 23 || align="center" | 7 || align="center" | 17 || align="center" | -4 || align="center" | -2 || align="center" | 0 || align="center" | HL || align="center" | H | |||
|- | |||
| align="center" | Oroshi (Fierce) || align="center" | 28 || align="center" | 7 || align="center" | 17 || align="center" | 0 || align="center" | Down || align="center" | Down || align="center" | HL || align="center" | H | |||
|} | |||
'''Gauge Increase''' | |||
{| border="1em" cellspacing="0" width="60%" style="border: 1px solid #999; background: none;" | |||
|- | |||
| align="center" | '''Move''' || align="center" | '''Miss''' || align="center" | '''Blocked''' || align="center" | '''Hit''' || align="center" | '''Parry (Gauge for opponent)''' | |||
|- | |||
| align="center" | Oroshi (Ja) || align="center" | 3 || align="center" | 12 || align="center" | 18 || align="center" | 4 | |||
|- | |||
| align="center" | Oroshi (Strong) || align="center" | 3 || align="center" | 12 || align="center" | 18 || align="center" | 4 | |||
|- | |||
| align="center" | Oroshi (Fiercee) || align="center" | 3 || align="center" | 12 || align="center" | 18 || align="center" | 4 | |||
|} | |||
''Comments here'' | |||
[[Image:(makotokarakusa).gif|none]] | |||
{| border="1em" cellspacing="0" width="65%" style="border: 1px solid #999; background: none;" | |||
|- | |||
| align="center" | '''Move''' || align="center" | '''Motion''' || align="center" | '''Damage''' || align="center" | '''Blocked Damage''' || align="center" | '''Stun Damage''' || align="center" | '''Throw Range''' || align="center" | '''Super Cancel''' || align="center" | '''Juggle Value''' | |||
|- | |||
| align="center" | Karakusa (Short) || align="center" | HCB +LK || align="center" | 30(8 life points) || align="center" | - || align="center" | 9 || align="center" | 39 || align="center" | No | |||
|- | |||
| align="center" | Karakusa (Forward) || align="center" | HCB +MK || align="center" | 30(8 life points) || align="center" | - || align="center" | 9 || align="center" | 43 || align="center" | No | |||
|- | |||
| align="center" | Karakusa (Roundhouse) || align="center" | HCB +HK || align="center" | 30(8 life points) || align="center" | - || align="center" | 9 || align="center" | 47 || align="center" | No | |||
|} | |||
'''Frame Data''' | |||
{| border="1em" cellspacing="0" width="85%" style="border: 1px solid #999; background: none;" | |||
|- | |||
| align="center" | '''Move''' || align="center" | '''Startup''' || align="center" | '''Hit''' || align="center" | '''Recovery''' || align="center" | '''Blocked Advantage''' || align="center" | '''Hit Advantage''' || align="center" | '''Crouching Hit Advantage''' || align="center" | '''Guard''' || align="center" | '''Parry''' | |||
|- | |||
| align="center" | Karakusa (Short) || align="center" | 7 || align="center" | 3 || align="center" | 28 || align="center" | - || align="center" | +14 || align="center" | +14 || align="center" | - || align="center" | - | |||
|- | |||
| align="center" | Karakusa (Forward) || align="center" | 8 || align="center" | 4 || align="center" | 29 || align="center" | - || align="center" | +14 || align="center" | +14 || align="center" | - || align="center" | - | |||
|- | |||
| align="center" | Karakusa (Roundhouse) || align="center" | 9 || align="center" | 4 || align="center" | 30 || align="center" | - || align="center" | +14 || align="center" | +14 || align="center" | - || align="center" | - | |||
|} | |||
'''Gauge Increase''' | |||
{| border="1em" cellspacing="0" width="60%" style="border: 1px solid #999; background: none;" | |||
|- | |||
| align="center" | '''Move''' || align="center" | '''Miss''' || align="center" | '''Blocked''' || align="center" | '''Hit''' || align="center" | '''Parry (Gauge for opponent)''' | |||
|- | |||
| align="center" | Karakusa (Short) || align="center" | 0 || align="center" | - || align="center" | 8 || align="center" | - | |||
|- | |||
| align="center" | Karakusa (Forward) || align="center" | 0 || align="center" | - || align="center" | 8 || align="center" | - | |||
|- | |||
| align="center" | Karakusa (Roundhouse) || align="center" | 0 || align="center" | - || align="center" | 8 || align="center" | - | |||
|} | |||
''Comments here'' | |||
[[Image:(makotoatsur).gif|none]] | |||
{| border="1em" cellspacing="0" width="70%" style="border: 1px solid #999; background: none;" | |||
|- | |||
| align="center" | '''Move''' || align="center" | '''Motion''' || align="center" | '''Damage''' || align="center" | '''Blocked Damage''' || align="center" | '''Stun Damage''' || align="center" | '''Super Cancel''' || align="center" | '''Juggle Value''' | |||
|- | |||
| align="center" | Tsurugi (Short) || align="center" | (Air Neutral or Diagonal Forward Jump) QCB+LK || align="center" | 140 || align="center" | 18 || align="center" | 13 || align="center" | No | |||
|- | |||
| align="center" | Tsurugi (Forward) || align="center" | (Air Neutral or Diagonal Forward Jump) QCB+MK || align="center" | 150 || align="center" | 19 || align="center" | 13 || align="center" | No | |||
|- | |||
| align="center" | Tsurugi (Roundhouse) || align="center" | (Air Neutral or Diagonal Forward Jump) QCB+HK || align="center" | 160 || align="center" | 20 || align="center" | 13 || align="center" | No | |||
|} | |||
'''Frame Data''' | |||
{| border="1em" cellspacing="0" width="85%" style="border: 1px solid #999; background: none;" | |||
|- | |||
| align="center" | '''Move''' || align="center" | '''Startup''' || align="center" | '''Hit''' || align="center" | '''Recovery''' || align="center" | '''Blocked Advantage''' || align="center" | '''Hit Advantage''' || align="center" | '''Crouching Hit Advantage''' || align="center" | '''Guard''' || align="center" | '''Parry''' | |||
|- | |||
| align="center" | Tsurugi (Short) || align="center" | 7 || align="center" | 1 || align="center" | 12 || align="center" | - || align="center" | - || align="center" | - || align="center" | HL || align="center" | H | |||
|- | |||
| align="center" | Tsurugi (Forward) || align="center" | 7 || align="center" | 1 || align="center" | 12 || align="center" | - || align="center" | - || align="center" | - || align="center" | HL || align="center" | H | |||
|- | |||
| align="center" | Tsurugi (Roundhouse) || align="center" | 7 || align="center" | 1 || align="center" | 12 || align="center" | - || align="center" | - || align="center" | - || align="center" | HL || align="center" | H | |||
|} | |||
'''Gauge Increase''' | |||
{| border="1em" cellspacing="0" width="60%" style="border: 1px solid #999; background: none;" | |||
|- | |||
| align="center" | '''Move''' || align="center" | '''Miss''' || align="center" | '''Blocked''' || align="center" | '''Hit''' || align="center" | '''Parry (Gauge for opponent)''' | |||
|- | |||
| align="center" | Tsurugi (Short) || align="center" | 3 || align="center" | 12 || align="center" | 19 || align="center" | 4 | |||
|- | |||
| align="center" | Tsurugi (Forward) || align="center" | 3 || align="center" | 12 || align="center" | 19 || align="center" | 4 | |||
|- | |||
| align="center" | Tsurugi (Roundhouse) || align="center" | 3 || align="center" | 12 || align="center" | 19 || align="center" | 4 | |||
|} | |||
''Comments here'' | |||
=== EX Moves === | |||
[[Image:(makotohdkex).gif|none]] | |||
{| border="1em" cellspacing="0" width="65%" style="border: 1px solid #999; background: none;" | |||
|- | |||
| align="center" | '''Move''' || align="center" | '''Motion''' || align="center" | '''Gauge Needed''' || align="center" | '''Damage''' || align="center" | '''Blocked Damage''' || align="center" | '''Stun Damage''' || align="center" | '''Super Cancel''' || align="center" | '''Juggle Value''' | |||
|- | |||
| align="center" | Hayate (EX) || align="center" | QCF+PP || align="center" | 40 || align="center" | 160(28 life points) || align="center" | 20 || align="center" | 15 || align="center" | No | |||
|} | |||
'''Frame Data''' | |||
{| border="1em" cellspacing="0" width="80%" style="border: 1px solid #999; background: none;" | |||
|- | |||
| align="center" | '''Move''' || align="center" | '''Startup''' || align="center" | '''Hit''' || align="center" | '''Recovery''' || align="center" | '''Blocked Advantage''' || align="center" | '''Hit Advantage''' || align="center" | '''Crouching Hit Advantage''' || align="center" | '''Guard''' || align="center" | '''Parry''' | |||
|- | |||
| align="center" | Hayate (EX) || align="center" | 17 || align="center" | 1 || align="center" | 8/12 Guard/8 Far || align="center" | +2 || align="center" | Down || align="center" | Down || align="center" | HL || align="center" | H | |||
|} | |||
'''Gauge Increase''' | |||
{| border="1em" cellspacing="0" width="50%" style="border: 1px solid #999; background: none;" | |||
|- | |||
| align="center" | '''Move''' || align="center" | '''Miss''' || align="center" | '''Blocked''' || align="center" | '''Hit''' || align="center" | '''Parry (Gauge for opponent)''' | |||
|- | |||
| align="center" | Hayate (EX) || align="center" | - || align="center" | - || align="center" | - || align="center" | 4 | |||
|} | |||
A superb EX move that crosses much of the screen. The recovery can be cancelled into a safe taunt on hit. Can be followed up on in the corner with juggles and resets. It is slightly plus on block and can leave you with the right spacing to mix up between a poke and a LK kara Karakusa. Cannot be feinted like the other versions can. | |||
[[Image:(makotosrkex).gif|none]] | |||
{| border="1em" cellspacing="0" width="65%" style="border: 1px solid #999; background: none;" | |||
|- | |||
| align="center" | '''Move''' || align="center" | '''Motion''' || align="center" | '''Gauge Needed''' || align="center" | '''Damage''' || align="center" | '''Blocked Damage''' || align="center" | '''Stun Damage''' || align="center" | '''Super Cancel''' || align="center" | '''Juggle Value''' | |||
|- | |||
| align="center" | Fukiage (EX) || align="center" | F, D, DF+PP || align="center" | 40 || align="center" | 140(24 life points) || align="center" | 18 || align="center" | 21 || align="center" | Yes | |||
|} | |||
'''Frame Data''' | |||
{| border="1em" cellspacing="0" width="80%" style="border: 1px solid #999; background: none;" | |||
|- | |||
| align="center" | '''Move''' || align="center" | '''Startup''' || align="center" | '''Hit''' || align="center" | '''Recovery''' || align="center" | '''Blocked Advantage''' || align="center" | '''Hit Advantage''' || align="center" | '''Crouching Hit Advantage''' || align="center" | '''Guard''' || align="center" | '''Parry''' | |||
|- | |||
| align="center" | Fukiage (EX) || align="center" | 11 || align="center" | 8 || align="center" | 17/26 Guard || align="center" | - || align="center" | Down || align="center" | Down || align="center" | HL || align="center" | HL | |||
|} | |||
'''Gauge Increase''' | |||
{| border="1em" cellspacing="0" width="50%" style="border: 1px solid #999; background: none;" | |||
|- | |||
| align="center" | '''Move''' || align="center" | '''Miss''' || align="center" | '''Blocked''' || align="center" | '''Hit''' || align="center" | '''Parry (Gauge for opponent)''' | |||
|- | |||
| align="center" | Fukiage (EX) || align="center" | - || align="center" | - || align="center" | - || align="center" | 4 | |||
|} | |||
Less stun than the other versions, but has a very low profile during its startup. Doesn't see much use but can be cancelled into in the case that your anti air gets parried (such as MP). | |||
[[Image:(makototskex).gif|none]] | |||
{| border="1em" cellspacing="0" width="70%" style="border: 1px solid #999; background: none;" | |||
|- | |||
| align="center" | '''Move''' || align="center" | '''Motion''' || align="center" | '''Gauge Needed''' || align="center" | '''Damage''' || align="center" | '''Blocked Damage''' || align="center" | '''Stun Damage''' || align="center" | '''Super Cancel''' || align="center" | '''Juggle Value''' | |||
|- | |||
| align="center" | Oroshi (EX) || align="center" | QCB+PP || align="center" | 40 || align="center" | 160(28 life points) || align="center" | 40 || align="center" | 9 || align="center" | Yes | |||
|} | |||
'''Frame Data''' | |||
{| border="1em" cellspacing="0" width="80%" style="border: 1px solid #999; background: none;" | |||
|- | |||
| align="center" | '''Move''' || align="center" | '''Startup''' || align="center" | '''Hit''' || align="center" | '''Recovery''' || align="center" | '''Blocked Advantage''' || align="center" | '''Hit Advantage''' || align="center" | '''Crouching Hit Advantage''' || align="center" | '''Guard''' || align="center" | '''Parry''' | |||
|- | |||
| align="center" | Oroshi (EX) || align="center" | 13 || align="center" | 7 || align="center" | 17 || align="center" | +3~+9 || align="center" | Down || align="center" | Down || align="center" | HL || align="center" | H | |||
|} | |||
'''Gauge Increase''' | |||
{| border="1em" cellspacing="0" width="50%" style="border: 1px solid #999; background: none;" | |||
|- | |||
| align="center" | '''Move''' || align="center" | '''Miss''' || align="center" | '''Blocked''' || align="center" | '''Hit''' || align="center" | '''Parry (Gauge for opponent)''' | |||
|- | |||
| align="center" | Oroshi (EX) || align="center" | - || align="center" | - || align="center" | - || align="center" | 4 | |||
|} | |||
One of the fastest overheads in the game, and also one of the most rewarding as it gives a knockdown. Very good for mixups. Sees niche use in some corner combos. | |||
[[Image:(makotoatskex).gif|none]] | |||
{| border="1em" cellspacing="0" width="70%" style="border: 1px solid #999; background: none;" | |||
|- | |||
| align="center" | '''Move''' || align="center" | '''Motion''' || align="center" | '''Gauge Needed''' || align="center" | '''Damage''' || align="center" | '''Blocked Damage''' || align="center" | '''Stun Damage''' || align="center" | '''Super Cancel''' || align="center" | '''Juggle Value''' | |||
|- | |||
| align="center" | Tsurugi (EX) || align="center" | (Air) QCB+KK || align="center" | 40 || align="center" | 180(80+100)(17 life points) || align="center" | 23(10+13) || align="center" | 18(9+9) || align="center" | No | |||
|} | |||
'''Frame Data''' | |||
{| border="1em" cellspacing="0" width="80%" style="border: 1px solid #999; background: none;" | |||
|- | |||
| align="center" | '''Move''' || align="center" | '''Startup''' || align="center" | '''Hit''' || align="center" | '''Recovery''' || align="center" | '''Blocked Advantage''' || align="center" | '''Hit Advantage''' || align="center" | '''Crouching Hit Advantage''' || align="center" | '''Guard''' || align="center" | '''Parry''' | |||
|- | |||
| align="center" | Tsurugi (EX) || align="center" | 15・17 || align="center" | 2・2 || align="center" | 8 || align="center" | +2~+9 || align="center" | Down || align="center" | Down || align="center" | Hx2 || align="center" | Hx2 | |||
|} | |||
'''Gauge Increase''' | |||
{| border="1em" cellspacing="0" width="50%" style="border: 1px solid #999; background: none;" | |||
|- | |||
| align="center" | '''Move''' || align="center" | '''Miss''' || align="center" | '''Blocked''' || align="center" | '''Hit''' || align="center" | '''Parry (Gauge for opponent)''' | |||
|- | |||
| align="center" | Tsurugi (EX) || align="center" | - || align="center" | - || align="center" | - || align="center" | 8(4+4) | |||
|} | |||
Completely stalls Makoto's air momentum. Has an extra hit making it a harder parry. Does not see much use as because the MK version of this special starts juggles, and the HK version also knocks down without costing any meter. | |||
=== Super Arts === | |||
[[Image:(makotosa1).gif|none]] | |||
{| border="1em" cellspacing="0" width="70%" style="border: 1px solid #999; background: none;" | |||
|- | |||
| align="center" | '''Super Art''' || align="center" | '''Super Art Name''' || align="center" | '''Super Art Stock''' || align="center" | '''Motion''' || align="center" | '''Damage''' || align="center" | '''Blocked Damage''' || align="center" | '''Stun Damage''' || align="center" | '''Damage/Gauge''' | |||
|- | |||
| align="center" | I || align="center" | Seichu Sen Godan-zuki || align="center" | 1 bar (120) || align="center" | QCF QCF+P || align="center" | 500*(83 life points) || align="center" | 40 || align="center" | 20** || align="center" | 4,17 | |||
|} | |||
{| border="1em" cellspacing="0" width="40%" style="border: 1px solid #999; background: none;" | |||
|- | |||
|* (150+40×3+300) Damage is when all hits connect. | |||
|- | |||
|** 5x5 is when all hits connect. | |||
|} | |||
'''Frame Data''' | |||
{| border="1em" cellspacing="0" width="65%" style="border: 1px solid #999; background: none;" | |||
|- | |||
| align="center" | '''Startup''' || align="center" | '''Hit''' || align="center" | '''Recovery''' || align="center" | '''Blocked Advantage''' || align="center" | '''Hit Advantage''' || align="center" | '''Crouching Hit Advantage''' || align="center" | '''Guard''' || align="center" | '''Parry''' | |||
|- | |||
| align="center" | 1・42・46・50・80 || align="center" | 3・1・1・1・7 || align="center" | 133/65 Far/71 Parry || align="center" | -17 || align="center" | Down || align="center" | Down || align="center" | HL || align="center" | H | |||
|} | |||
''Comments here'' | |||
[[Image:(makotosa2).gif|none]] | |||
{| border="1em" cellspacing="0" width="80%" style="border: 1px solid #999; background: none;" | |||
|- | |||
| align="center" | '''Super Art''' || align="center" | '''Super Art Name''' || align="center" | '''Super Art Stock''' || align="center" | '''Motion''' || align="center" | '''Damage''' || align="center" | '''Blocked Damage''' || align="center" | '''Stun Damage''' || align="center" | '''Damage/Gauge''' | |||
|- | |||
| align="center" | II || align="center" | Abare Tosanami Kudaki || align="center" | 2 bars (88 each bar) || align="center" | QCF QCF+K (range changes based on the K) || align="center" | 360*(59 life points) || align="center" | 65** || align="center" | 24*** || align="center" | 4,75 | |||
|} | |||
{| border="1em" cellspacing="0" width="40%" style="border: 1px solid #999; background: none;" | |||
|- | |||
|* (100+40+80+170) Damage is when all hits connect. | |||
|- | |||
|** (13+5+10+43) Damage is when all hits connect. | |||
|- | |||
|*** (9+3+5+9) Damage is when all hits connect. | |||
|} | |||
'''Frame Data''' | |||
{| border="1em" cellspacing="0" width="65%" style="border: 1px solid #999; background: none;" | |||
|- | |||
| align="center" | '''Startup''' || align="center" | '''Hit''' || align="center" | '''Recovery''' || align="center" | '''Blocked Advantage''' || align="center" | '''Hit Advantage''' || align="center" | '''Crouching Hit Advantage''' || align="center" | '''Guard''' || align="center" | '''Parry''' | |||
|- | |||
| align="center" | 14~18 || align="center" | 5/6/9 || align="center" | 6/25 Far/32 Parry || align="center" | -20 || align="center" | Down || align="center" | Down || align="center" | HLx3 || align="center" | HLx3 | |||
|} | |||
''Comments here'' | |||
[[Image:(makotosa3).gif|none]] | |||
{| border="1em" cellspacing="0" width="70%" style="border: 1px solid #999; background: none;" | |||
|- | |||
| align="center" | '''Super Art''' || align="center" | '''Super Art Name''' || align="center" | '''Super Art Stock''' || align="center" | '''Motion''' || align="center" | '''Damage''' || align="center" | '''Blocked Damage''' || align="center" | '''Stun Damage''' || align="center" | '''Damage/Gauge''' | |||
|- | |||
| align="center" | III || align="center" | Tanden Renki-Seme no Kata || align="center" | 1 bar (96) || align="center" | QCF QCF+P || align="center" | - || align="center" | - || align="center" | - || align="center" | - | |||
|} | |||
'''Frame Data''' | |||
{| border="1em" cellspacing="0" width="65%" style="border: 1px solid #999; background: none;" | |||
|- | |||
| align="center" | '''Startup''' || align="center" | '''Hit''' || align="center" | '''Recovery''' || align="center" | '''Blocked Advantage''' || align="center" | '''Hit Advantage''' || align="center" | '''Crouching Hit Advantage''' || align="center" | '''Guard''' || align="center" | '''Parry''' | |||
|- | |||
| align="center" | 0 || align="center" | - || align="center" | - || align="center" | - || align="center" | - || align="center" | - || align="center" | - || align="center" | - | |||
|} | |||
600 Frames active (10 seconds) | |||
=Combos= | |||
===Meterless=== | |||
c.LK, LP Hayate | |||
LK, LP Hayate | |||
c.MP, HP Hayate | |||
MP, HP Hayate | |||
Karakusa, close.HP, HP Hayate | |||
===EX Moves=== | |||
Karakusa,HP,EX Hayate,(HP Hayate) | |||
===SAI (Seichusen-Godanzuki)=== | |||
Note: Her dash punch can combo into SAI if you do the super | Note: Her dash punch can combo into SAI if you do the super on the first frame after dash punch recovery; any combo involving dash punch can be comboed into SAI, as a result (i.e. strong -> dash punch -> SAI, or low short -> dash punch -> super, etc.) | ||
| Line 87: | Line 1,475: | ||
Karakusa, SAI | Karakusa, SAI | ||
===SAII (Abare Tosanami)=== | |||
SAII (Abare Tosanami) | |||
Lead-ins: | Lead-ins: | ||
| Line 117: | Line 1,502: | ||
(JCD) Mk Tsurugi, SAII, (JCU) mk Tsurugi, hp hayate, hp hayate (corner only, 2 full stocks, strict timing) | (JCD) Mk Tsurugi, SAII, (JCU) mk Tsurugi, hp hayate, hp hayate (corner only, 2 full stocks, strict timing) | ||
''*''Character-specific, and sometimes the second fukiage is kara'ed, not the first. | ''*''Character-specific, and sometimes the second fukiage is kara'ed, not the first. [https://docs.google.com/document/d/1NAO6oTN6ov5xw4Z8Lxd5mExz_9clRYz0lcyyKXTueXQ/edit?usp=sharing Here] is a comprehensive guide to most of the character specifics of SAII | ||
===SAIII (Tanden-Renki)=== | |||
SAIII (Tanden-Renki) | |||
This isn't a traditional attacking super; Makoto gets a serious attack boost but can't block (until the meter runs out.) Therefore, there's not really any special comboes she can do with it, but there is a lot of damage potential if you can read your opponent well. The only one I've got is: | This isn't a traditional attacking super; Makoto gets a serious attack boost but can't block (until the meter runs out.) Therefore, there's not really any special comboes she can do with it, but there is a lot of damage potential if you can read your opponent well. The only one I've got is: | ||
| Line 126: | Line 1,510: | ||
Karakusa, hp, SAIII, cr. mp, hp Hayate | Karakusa, hp, SAIII, cr. mp, hp Hayate | ||
=Strategies= | |||
===Overview=== | ===Overview=== | ||
Work your entire game around the karakusa/landing the abare tosanami. Use standing jabs to poke jump-ins, dashing under after the hit. This sets up for low LK-hayate, throw/ techs, or karakusas. This will become predictable, so keep it fresh. Jumping MK is the all purpose air and anti air attack. Jumping HK is great for swatting down jump happy combatants. | Work your entire game around the karakusa/landing the abare tosanami. Use standing jabs to poke jump-ins, dashing under after the hit. This sets up for low LK-hayate, throw/ techs, or karakusas. This will become predictable, so keep it fresh. Jumping MK is the all purpose air and anti air attack. Jumping HK is great for swatting down jump happy combatants. | ||
===Basics=== | ===Basics=== | ||
Makoto its a medium weight and hitbox rushdown grappler tomboy character with the objective of being aggressive from a simple crouching 2-in-1 LP Hayate to a Karakusa combo starter, she must charge a Super Art Stock as soon as possible and then land it for a high possible Stun combo. | |||
She had good pokes but zoning with her but due to her slow walk and bad dash animation can be an easy objective for poking focused character like Necro and Twelve, try to approach your opponent with Hayate and jumping on it | |||
===Super Art Selection=== | ===Super Art Selection=== | ||
| Line 185: | Line 1,565: | ||
*Ibuki | *Ibuki | ||
*Elena | *Elena | ||
*Necro | *Necro | ||
*Alex | *Alex | ||
| Line 207: | Line 1,586: | ||
''Makoto has no match-ups where she is at a serious disadvantage'' | ''Makoto has no match-ups where she is at a serious disadvantage'' | ||
{{ | {{Navbox-3S}} | ||
[[Category: Street Fighter 3: 3rd Strike]] | [[Category: Street Fighter 3: 3rd Strike]] | ||
Latest revision as of 19:39, 23 June 2024
Updated version available!
You're reading the old version of this page. Click here to read the (in-progress) updated version!
Introduction
Makoto is very unique, and still is to this day, as the first female fighting game character to be fairly slow and hard-hitting with just as much stamina as the average males (like Ryu and Ken), whereas all other female fighters before her had always focused on speed and always had notably less stamina. Although her normal walk speed is incredibly sluggish, she has the best forward dash in the game, as well as high priority and oppressive offense. Her best tool however is the Karakusa, a very unique command grab which can be comboed off of, making way for devastating damage and, overall, a highly dangerous and frustrating offensive fighting style.
| Strengths | Weaknesses |
|---|---|
|
|
Specific Character Information
- Stamina: 1200
- Stun Bar Length (dots): 64 (Normal)
- Stun Bar Recovery (frames it takes to recover 1 dot): 20
- Taunt:
Part 1 - Increases damage for the next hit/combo by 31.3% per taunt. Maximum 2 taunts, 62.5% damage.
Part 2 - Replaces a second Part 1 taunt. One two-part taunt is the maximum.
Part 3 - Increases stun recovery rate by 10% for the first full taunt and an additional 21% for the second full taunt. Lasts the whole round. Maximum 2 full taunt, 33% bonus.
Hayate taunt - No bonus.
- Best Kara-Throw: S.LK / S.HK
- Standard Throw Range (pixels): 20
- Dash Forward (frames) / Moving Distance: 11 / 2
- Dash Backward (frames) / Moving Distance: 12 / 1
- Normal Wake up (frames): 71
- Quick Stand (frames): 43
Moves List
Throws
| Hikiyose Zutsuki~Tacchuu | |
| Hiji Otoshi Sanren Tsuki~Araiso |
Command Moves
Special Moves
Super Arts
| I | Seichu Sen Godan-zuki | 120 Gauge Dots | 1 Stock | 3.0 EX Uses | |
| II | Abare To Sanami Kudaki | 88 Gauge Dots | 2 Stocks | 4.3 EX Uses | |
| III | Tanden Renki-Seme no Kata | 96 Gauge Dots | 1 Stock | 2.3 EX Uses |
Target Combo
Move Analysis
- All those sprites are taken from the site https://www.justnopoint.com/zweifuss/
- All Framedatas in "Move Analysis" section are taken from Game Restaurant , this means the Framedata isn't from the Dreamcast version like Karathrow site, it's from Arcade version.
Please note that the images show in this section are for the 1st frame it hits, so this means the opponent is taking the hit in the image shown on the move. I use the 1st frame of every move (except taunt, dash, jump, wakeup and 2nd throw image sprites) because you will see the maximum range of every attack (mostly of the attacks). Note also that those images are ACCURATE, they are exactly the first frame it hits, so enemy takes damage but they still dont make the "pain" frame.
General
- Move: Move name
- Motion: What you must do to execute the move
- Damage: Damage it does (in pixels)
- Stun Damage: Stun Damage it does (in pixels)
- Chains into itself: If you can combo into the same movement
- Special Cancel: If you can cancel the move into a Special Move
- Super Cancel: If you can cancel the move into a Super Art
- Throw Range: Range of the throw (in pixels)
- Num.: Super Art number
- Super Art: Super Art name
- Super Art Stock: Number of Gauge Bars the Super Art have, also the lenght of each bar (in pixels)
Frame Data
- Startup: Number of frames it takes to start the move
- Hit: Number of frames that can hit the opponent
- Recovery: Number of frames it takes to recover from the move
- Blocked Advantage: Number of frames you are in advantage/disadvantage after opponent have been blocked the hit
- Hit Advantage: Number of frames you are in advantage/disadvantage after opponent have been take the hit
- Crouching Hit Advantage: Number of frames you are in advantage/disadvantage after opponent have been take the hit while he's crouching
- + # : You have # frames of advantage
- - # : You have # frames of disadvantage
- # ~ # : Advantage/disadvantage can vary from # to #
- Down: Enemy gets knocked down
- Guard: How opponent must guard the move, High (H), Low (L) or both (HL)
- Parry: How opponent must parry the move, High (H), Low (L) or both (HL)
Gauge Increase
- Miss: Gauge you gain if you miss the move (in pixels)
- Blocked: Gauge you gain if the move gets blocked (in pixels)
- Hit: Gauge you gain if you hit the opponent with the move (in pixels)
- Parry: Gauge opponent gains when he parry the move (in pixels)
Basic Moves
| Move | Start-up frames | In ground frames | In air frames | Recovery frames | Total frames |
|---|---|---|---|---|---|
| Dash Forward | 2 | 8? | - | 6? | 11 |
Comments here
| Move | Start-up frames | In ground frames | In air frames | Recovery frames | Total frames |
|---|---|---|---|---|---|
| Dash Backwards | 1 | 4? | - | 6? | 12 |
Comments here
| Move | Motion | Startup Frames |
| Jump | BU or U or FU | 3 |
Comments here
| Move | Motion | Startup Frames |
| Super Jump | DBU or DU or DFU | 5 |
Comments here
| Move | Motion | Frames |
| Normal Wakeup | - | 71 |
Comments here
| Move | Motion | Frames |
| Quick Stand | Tap D when hitting the ground | 43 |
Comments here
| Move | Motion | Damage | Stun Damage | Chains into itself | Special Cancel | Super Cancel | Juggle Value |
| Taunt | HP+HK | 10 | 3 | No | No | No |
Frame Data
| Startup | Hit | Recovery | Blocked Advantage | Hit Advantage | Crouching Hit Advantage | Guard | Parry |
| 79 | 3 | - | ? | ? | ? | HL | HL |
Gauge Increase
| Miss | Blocked | Hit | Parry (Gauge for opponent) |
| 6(7) | ? | ? | 8(4+4) |
Comments here
| Move | Motion |
| Parry (High) | Tap F when about taking a hit |
| Parry (Low) | Tap D when about taking a hit |
| Parry (Air) | Tap F in air when about taking a hit |
Frame Data
| Move | Frames you're frozen | Frames opponent is frozen | Frame Advantage when parry is successful | Frames before you can try another parry |
| Parry (High) | 16 | 16 | +4(LP/LK) +3(MP/MK) +2(HP/HK) 0(Special/Super) -16(Fireball) | 24(19 when attack comes from the air)*,** |
| Parry (Low) | 16 | 16 | +4(LP/LK) +3(MP/MK) +2(HP/HK) 0(Special/Super) -16(Fireball) | 24(19 when attack comes from the air)*,** |
| Parry (Air) | 16 | 16 | +4(LP/LK) +3(MP/MK) +2(HP/HK) 0(Special/Super) -16(Fireball) | 21(19 when attack comes from the air)*,** |
| * (If a parry attempt is successful, the 19/21/24 frame restriction is taken away and you can attempt another parry immediately) |
| ** (If another attack connects within 2 frames of your parry, it will automatically be parried) |
Gauge Increase
| Move | Gauge Increase |
| Parry (High) | 4*** |
| Parry (Low) | 4*** |
| Parry (Air) | 4*** |
| *** (You gain 4 of gauge for whatever attack parried, and for whatever hit you parry during multihit attack) |
You can buffer any motion during High or Low parry, but NOT during Air parry, also parry resets the juggle count (and thus resets all scaling).
- Parry information is taken from Fukiage Forums, more exactly, from user JinraiPVC. Thanks for this information dude
Normal Moves
Standing Normals
| Move | Motion | Damage | Stun Damage | Chains into itself | Special Cancel | Super Cancel | Juggle Value |
| Far Jab | LP | 30(5 life points) | 3 | Yes | Yes | Yes |
Frame Data
| Startup | Hit | Recovery | Blocked Advantage | Hit Advantage | Crouching Hit Advantage | Guard | Parry |
| 4 | 6 | 6 | +2 | +2 | +2 | HL | HL |
Gauge Increase
| Miss | Blocked | Hit | Parry (Gauge for opponent) |
| 0 | 1 | 2 | 4 |
Comments here
| Move | Motion | Damage | Stun Damage | Chains into itself | Special Cancel | Super Cancel | Juggle Value |
| Far Strong | MP | 80(14 life points) | 9 | No | Yes | Yes |
Frame Data
| Startup | Hit | Recovery | Blocked Advantage | Hit Advantage | Crouching Hit Advantage | Guard | Parry |
| 8 | 11 | 4 | +6 | +7 | +8 | HL | H |
Gauge Increase
| Miss | Blocked | Hit | Parry (Gauge for opponent) |
| 2 | 6 | 11 | 4 |
Because this move is extremely plus on hit, it's visually confirmable into SA1. Generally regarded as one of the better Strong attacks in the game.
| Move | Motion | Damage | Stun Damage | Chains into itself | Special Cancel | Super Cancel | Juggle Value |
| Far Fierce | HP | 120(21 life points) | 15 | No | Yes | Yes |
Frame Data
| Startup | Hit | Recovery | Blocked Advantage | Hit Advantage | Crouching Hit Advantage | Guard | Parry |
| 8 | 2 | 22 | -5 | -3 | -1 | HL | H |
Gauge Increase
| Miss | Blocked | Hit | Parry (Gauge for opponent) |
| 3 | 10 | 19 | 4 |
Comments here
| Move | Motion | Damage | Stun Damage | Chains into itself | Special Cancel | Super Cancel | Juggle Value |
| Short | LK | 40(7 life points) | 3 | No | Yes | Yes |
Frame Data
| Startup | Hit | Recovery | Blocked Advantage | Hit Advantage | Crouching Hit Advantage | Guard | Parry |
| 4 | 5 | 12 | -2 | -2 | -2 | HL | HL |
Gauge Increase
| Miss | Blocked | Hit | Parry (Gauge for opponent) |
| 0 | 1 | 2 | 4 |
Comments here
| Move | Motion | Damage | Stun Damage | Chains into itself | Special Cancel | Super Cancel | Juggle Value |
| Forward | MK | 90(16 life points) | 7 | No | No | No |
Frame Data
| Startup | Hit | Recovery | Blocked Advantage | Hit Advantage | Crouching Hit Advantage | Guard | Parry |
| 7 | 5 | 13 | -2 | -1 | 0 | HL | H |
Gauge Increase
| Miss | Blocked | Hit | Parry (Gauge for opponent) |
| 2 | 6 | 11 | 4 |
Comments here
| Move | Motion | Damage | Stun Damage | Chains into itself | Special Cancel | Super Cancel | Juggle Value |
| Roundhouse | HK | 130(21 life points) | 7 | No | No | No |
Frame Data
| Startup | Hit | Recovery | Blocked Advantage | Hit Advantage | Crouching Hit Advantage | Guard | Parry |
| 11 | 9 | 13 | 0 | +2 | +4 | HL | H |
Gauge Increase
| Miss | Blocked | Hit | Parry (Gauge for opponent) |
| 3 | 10 | 19 | 4 |
Comments here
Jumping Normals
| Move | Motion | Damage | Stun Damage | Chains into itself | Special Cancel | Super Cancel | Juggle Value |
| Jump Jab | (Air) LP | 50(8 life points) | 7 | No | No | No |
Frame Data
| Startup | Hit | Recovery | Blocked Advantage | Hit Advantage | Crouching Hit Advantage | Guard | Parry |
| 4 | 21 | - | -9~+7 | -9~+7 | +2~+7 | H | H |
Gauge Increase
| Miss | Blocked | Hit | Parry (Gauge for opponent) |
| 0 | 1 | 2 | 4 |
Comments here
| Move | Motion | Damage | Stun Damage | Chains into itself | Special Cancel | Super Cancel | Juggle Value |
| Neutral Jump Jab | (Air) LP | 50(8 life points) | 7 | No | No | No |
Frame Data
| Startup | Hit | Recovery | Blocked Advantage | Hit Advantage | Crouching Hit Advantage | Guard | Parry |
| 9 | 17 | - | -2~+7 | -2~+7 | +5~+7 | H | H |
Gauge Increase
| Miss | Blocked | Hit | Parry (Gauge for opponent) |
| 0 | 1 | 2 | 4 |
Comments here
| Move | Motion | Damage | Stun Damage | Chains into itself | Special Cancel | Super Cancel | Juggle Value |
| Jump Strong | (Air) MP | 80(12 life points) | 11 | No | No | No |
Frame Data
| Startup | Hit | Recovery | Blocked Advantage | Hit Advantage | Crouching Hit Advantage | Guard | Parry |
| 11 | 24 | - | -3~+10 | -3~+10 | +4~+10 | H | H |
Gauge Increase
| Miss | Blocked | Hit | Parry (Gauge for opponent) |
| 2 | 6 | 11 | 4 |
Comments here
| Move | Motion | Damage | Stun Damage | Chains into itself | Special Cancel | Super Cancel | Juggle Value |
| Neutral Jump Strong | (Air) MP | 80(14 life points) | 11 | No | No | No |
Frame Data
| Startup | Hit | Recovery | Blocked Advantage | Hit Advantage | Crouching Hit Advantage | Guard | Parry |
| 11 | 10 | - | +2~+10 | +2~+10 | +8~+10 | H | H |
Gauge Increase
| Miss | Blocked | Hit | Parry (Gauge for opponent) |
| 2 | 6 | 11 | 4 |
Comments here
| Move | Motion | Damage | Stun Damage | Chains into itself | Special Cancel | Super Cancel | Juggle Value |
| Jump Fierce | (Air) HP | 130(150)(26 life points) | 15 | No | No | No |
Frame Data
| Startup | Hit | Recovery | Blocked Advantage | Hit Advantage | Crouching Hit Advantage | Guard | Parry |
| 10 | 2 | - | +1~+13 | +1~+13 | +7~+13 | H | H |
Gauge Increase
| Miss | Blocked | Hit | Parry (Gauge for opponent) |
| 3 | 10 | 19 | 4 |
Comments here
| Move | Motion | Damage | Stun Damage | Chains into itself | Special Cancel | Super Cancel | Juggle Value |
| Neutral Jump Fierce | (Air) HP | 130(23 life points) | 15 | No | No | No |
Frame Data
| Startup | Hit | Recovery | Blocked Advantage | Hit Advantage | Crouching Hit Advantage | Guard | Parry |
| 13 | 2 | - | +7~+13 | +7~+13 | +12~+13 | H | H |
Gauge Increase
| Miss | Blocked | Hit | Parry (Gauge for opponent) |
| 3 | 10 | 19 | 4 |
Comments here
| Move | Motion | Damage | Stun Damage | Chains into itself | Special Cancel | Super Cancel | Juggle Value |
| Jump Short | (Air) LK | 60(10 life points) | 7 | No | No | No |
Frame Data
| Startup | Hit | Recovery | Blocked Advantage | Hit Advantage | Crouching Hit Advantage | Guard | Parry |
| 2 | 14 | - | -4~+7/-5~+7 | -4~+7/-5~+7 | +3~+7/+4~+7 | H | H |
Gauge Increase
| Miss | Blocked | Hit | Parry (Gauge for opponent) |
| 0 | 1 | 2 | 4 |
Comments here
| Move | Motion | Damage | Stun Damage | Chains into itself | Special Cancel | Super Cancel | Juggle Value |
| Jump Forward | (Air) MK | 90(16 life points) | 9 | No | No | No |
Frame Data
| Startup | Hit | Recovery | Blocked Advantage | Hit Advantage | Crouching Hit Advantage | Guard | Parry |
| 7 | 13 | - | -4~+10/-5~+10 | -4~+10/-5~+10 | +3~+10/+5~+10 | H | H |
Gauge Increase
| Miss | Blocked | Hit | Parry (Gauge for opponent) |
| 2 | 6 | 11 | 4 |
Comments here
| Move | Motion | Damage | Stun Damage | Chains into itself | Special Cancel | Super Cancel | Juggle Value |
| Jump Roundhouse | (Air) HK | 130(23 life points) | 11 | No | No | No |
Frame Data
| Startup | Hit | Recovery | Blocked Advantage | Hit Advantage | Crouching Hit Advantage | Guard | Parry |
| 6 | 6 | - | +4~+13 | +4~+13 | +11~+13 | H | H |
Gauge Increase
| Miss | Blocked | Hit | Parry (Gauge for opponent) |
| 3 | 10 | 19 | 4 |
Comments here
| Move | Motion | Damage | Stun Damage | Chains into itself | Special Cancel | Super Cancel | Juggle Value |
| Universal Overhead | MP+MK | 40(7 life points) | 3 | No | No | No |
Frame Data
| Startup | Hit | Recovery | Blocked Advantage | Hit Advantage | Crouching Hit Advantage | Guard | Parry |
| 15 | 10 | 5 | -5~+7 | 0~+8 | +1~+9 | H | H |
Gauge Increase
| Miss | Blocked | Hit | Parry (Gauge for opponent) |
| 0 | 1 | 2 | 4 |
Comments here
Throws
| Move | Motion | Damage | Stun Damage | Throw Range | Kara-Throw | Kara-Throw Range |
| Hikiyose Zutsuki "Tacchuu" | LP+LK | 90(16 life points) | 17 | 20 | C.HK / S.LK / S.MK / F.LK / F.MP / C.MP / F.MK | 33 / 27 / 27 / 24 / 24 / 23 / 22 |
Frame Data
| Startup | Hit | Recovery | Blocked Advantage | Hit Advantage | Crouching Hit Advantage | Guard | Parry |
| 2 | 1 | 21 | - | - | - | LP+LK | - |
Gauge Increase
| Miss | Blocked | Hit |
| 0 | 7 (for the player who blocked) | 8 |
Comments here
| Move | Motion | Damage | Stun Damage | Throw Range | Kara-Throw | Kara-Throw Range |
| Hiji Otoshi Sanren Tsuki "Araiso" | B/F+LP+LK | 150(21 life points) | 13 | 20 | C.HK / S.LK / S.MK / F.LK / F.MP / C.MP / F.MK | 33 / 27 / 27 / 24 / 24 / 23 / 22 |
Frame Data
| Startup | Hit | Recovery | Blocked Advantage | Hit Advantage | Crouching Hit Advantage | Guard | Parry |
| 2 | 1 | 21 | - | - | - | B/F+LP+LK | - |
Gauge Increase
| Miss | Blocked | Hit |
| 0 | 7 (for the player who blocked) | 7 |
Comments here
Crouching Normals
| Move | Motion | Damage | Stun Damage | Chains into itself | Special Cancel | Super Cancel | Juggle Value |
| Crouch Jab | D+LP | 20(3 life points) | 3 | Yes | Yes | Yes |
Frame Data
| Startup | Hit | Recovery | Blocked Advantage | Hit Advantage | Crouching Hit Advantage | Guard | Parry |
| 5 | 4 | 5 | +3 | +3 | +3 | HL | HL |
Gauge Increase
| Miss | Blocked | Hit | Parry (Gauge for opponent) |
| 0 | 1 | 2 | 4 |
Comments here
| Move | Motion | Damage | Stun Damage | Chains into itself | Special Cancel | Super Cancel | Juggle Value |
| Crouch Strong | D+MP | 70(12 life points) | 5 | No | Yes | Yes |
Frame Data
| Startup | Hit | Recovery | Blocked Advantage | Hit Advantage | Crouching Hit Advantage | Guard | Parry |
| 7 | 7 | 11 | -1 | 0 | +1 | HL | HL |
Gauge Increase
| Miss | Blocked | Hit | Parry (Gauge for opponent) |
| 2 | 6 | 11 | 4 |
Comments here
| Move | Motion | Damage | Stun Damage | Chains into itself | Special Cancel | Super Cancel | Juggle Value |
| Crouch Fierce | D+HP | 130(17 life points) | 13 | No | Yes | Yes |
Frame Data
| Startup | Hit | Recovery | Blocked Advantage | Hit Advantage | Crouching Hit Advantage | Guard | Parry |
| 10 | 2 | 21 | -6 | Down | Down | L | L |
Gauge Increase
| Miss | Blocked | Hit | Parry (Gauge for opponent) |
| 3 | 10 | 19 | 4 |
Comments here
| Move | Motion | Damage | Stun Damage | Chains into itself | Special Cancel | Super Cancel | Juggle Value |
| Crouch Short | D+LK | 40(5 life points) | 3 | No | Yes | Yes |
Frame Data
| Startup | Hit | Recovery | Blocked Advantage | Hit Advantage | Crouching Hit Advantage | Guard | Parry |
| 4 | 6 | 10 | -3 | -3 | -3 | L | L |
Gauge Increase
| Miss | Blocked | Hit | Parry (Gauge for opponent) |
| 0 | 1 | 2 | 4 |
Comments here
| Move | Motion | Damage | Stun Damage | Chains into itself | Special Cancel | Super Cancel | Juggle Value |
| Crouch Forward | D+MK | 90(16 life points) | 5 | No | No | No |
Frame Data
| Startup | Hit | Recovery | Blocked Advantage | Hit Advantage | Crouching Hit Advantage | Guard | Parry |
| 7 | 8 | 7 | +3 | +4 | +5 | HL | HL |
Gauge Increase
| Miss | Blocked | Hit | Parry (Gauge for opponent) |
| 2 | 4 | 8 | 4 |
Comments here
| Move | Motion | Damage | Stun Damage | Chains into itself | Special Cancel | Super Cancel | Juggle Value |
| Crouch Roundhouse | D+HK | 130(23 life points) | 15 | No | No | No |
Frame Data
| Startup | Hit | Recovery | Blocked Advantage | Hit Advantage | Crouching Hit Advantage | Guard | Parry |
| 10 | 4 | 12 | +2 | +4 | +6 | HL | H |
Gauge Increase
| Miss | Blocked | Hit | Parry (Gauge for opponent) |
| 3 | 10 | 19 | 4 |
Comments here
Command Normals
| Move | Motion | Damage | Stun Damage | Chains into itself | Special Cancel | Super Cancel | Juggle Value |
| Kazami | F+LP | 25(4 life points) | 3 | No | No | No |
Frame Data
| Startup | Hit | Recovery | Blocked Advantage | Hit Advantage | Crouching Hit Advantage | Guard | Parry |
| 4 | 4 | 8 | 0 | 0 | 0 | HL | HL |
Gauge Increase
| Miss | Blocked | Hit | Parry (Gauge for opponent) |
| 0 | 1 | 2 | 4 |
Comments here
| Move | Motion | Damage | Stun Damage | Chains into itself | Special Cancel | Super Cancel | Juggle Value |
| Kaoruna | F+MP | 85(15 life points) | 5 | No | No | No |
Frame Data
| Startup | Hit | Recovery | Blocked Advantage | Hit Advantage | Crouching Hit Advantage | Guard | Parry |
| 9 | 6 | 9 | +2 | +3 | +4 | HL | H |
Gauge Increase
| Miss | Blocked | Hit | Parry (Gauge for opponent) |
| 2 | 6 | 11 | 4 |
Comments here
| Move | Motion | Damage | Stun Damage | Chains into itself | Special Cancel | Super Cancel | Juggle Value |
| Shimaki | F+HP | 150(16 life points) | 13 | No | No | No |
Frame Data
| Startup | Hit | Recovery | Blocked Advantage | Hit Advantage | Crouching Hit Advantage | Guard | Parry |
| 16 | 12 | 16 | -4 | -2 | 0 | HL | H |
Gauge Increase
| Miss | Blocked | Hit | Parry (Gauge for opponent) |
| 3 | 7 | 17 | 4 |
Comments here
| Move | Motion | Damage | Stun Damage | Chains into itself | Special Cancel | Super Cancel | Juggle Value |
| Shimaki | F+HP | 150,20+20(31 life points) | 13,3+3 | No | No | No |
Frame Data
| Startup | Hit | Recovery | Blocked Advantage | Hit Advantage | Crouching Hit Advantage | Guard | Parry |
| 16 | 4,15 | 13 | -4 | -3 | -2 | HL | H |
Gauge Increase
| Miss | Blocked | Hit | Parry (Gauge for opponent) |
| 3 | 11 | 29 | 4 |
Comments here
| Move | Motion | Damage | Stun Damage | Chains into itself | Special Cancel | Super Cancel | Juggle Value |
| Shinbuki | F+LK | 35(6 life points) | 5 | No | No | No |
Frame Data
| Startup | Hit | Recovery | Blocked Advantage | Hit Advantage | Crouching Hit Advantage | Guard | Parry |
| 6 | 6 | 13 | -5 | -5 | -5 | HL | HL |
Gauge Increase
| Miss | Blocked | Hit | Parry (Gauge for opponent) |
| 0 | 1 | 2 | 4 |
Comments here
| Move | Motion | Damage | Stun Damage | Chains into itself | Special Cancel | Super Cancel | Juggle Value |
| Naruto | F+MK | 100(17 life points) | 9 | No | No | No |
Frame Data
| Startup | Hit | Recovery | Blocked Advantage | Hit Advantage | Crouching Hit Advantage | Guard | Parry |
| 17 | 5 | 18 | -5 | -3 | -1 | HL | H |
Gauge Increase
| Miss | Blocked | Hit | Parry (Gauge for opponent) |
| 2 | 6 | 11 | 4 |
Comments here
| Move | Motion | Damage | Stun Damage | Chains into itself | Special Cancel | Super Cancel | Juggle Value |
| Kurushio | F+HK | 120(21 life points) | 5 | No | No | No |
Frame Data
| Startup | Hit | Recovery | Blocked Advantage | Hit Advantage | Crouching Hit Advantage | Guard | Parry |
| 22 | 3 | 25 | -11 | Down | Down | L | L |
Gauge Increase
| Miss | Blocked | Hit | Parry (Gauge for opponent) |
| 3 | 10 | 19 | 4 |
Comments here
Target Combo
| Move | Motion | Damage | Stun Damage | Chains into itself | Special Cancel | Super Cancel | Juggle Value |
| Target Combo | LK -> MK | 40+70 | 3+7 | No | Yes/No | Yes/No |
Frame Data
| Startup | Hit | Recovery | Blocked Advantage | Hit Advantage | Crouching Hit Advantage | Guard | Parry |
| 4 | - | - | -3 | -2 | -1 | HL/HL | H/H |
Gauge Increase
| Miss | Blocked | Hit | Parry (Gauge for opponent) |
| 0+? | 1+1 | 2+1 | 8(4+4) |
Comments here
| Move | Motion | Damage | Stun Damage | Chains into itself | Special Cancel | Super Cancel | Juggle Value |
| Target Combo | F+MK -> Far HK | 100+80 | 9+7 | No/No | No/No | No/No |
Frame Data
| Startup | Hit | Recovery | Blocked Advantage | Hit Advantage | Crouching Hit Advantage | Guard | Parry |
| 17 | - | - | -1 | -1 | +1 | HL/HL | HL/H |
Gauge Increase
| Miss | Blocked | Hit | Parry (Gauge for opponent) |
| 2+? | 6+1 | 11+1 | 8(4+4) |
Comments here
Special Moves
Please note that in this section you will see mainly 3 images for the special moves, this means the image on the left its done with LP (or LK), the image on the center its done with MP (or MK), and the image on the right its done with HP (or HK). Also its the same "rule" as the sections above, its the 1rst frame it hits for every of the moves.
| Move | Motion | Damage | Blocked Damage | Stun Damage | Super Cancel | Juggle Value |
| Hayate (Jab) | QCF +LP | 100(17 life points) | 13 | 9 | No | |
| Hayate (Strong) | QCF +MP | 100(17 life points) | 13 | 9 | No | |
| Hayate (Fierce) | QCF +HP | 100(17 life points) | 13 | 9 | No | |
| Hayate (Level 1) | QCF +P Hold | 110(19 life points) | 14 | 11 | No | |
| Hayate (Level 2) | QCF +P Hold | 120(21 life points) | 15 | 13 | No | |
| Hayate (Level 3) | QCF +P Hold | 130(22 life points) | 33 | 15 | No | |
| Hayate (Level 4) | QCF +P Hold | 140(24 life points) | 35 | 17 | No |
Frame Data
| Move | Startup | Hit | Recovery | Blocked Advantage | Hit Advantage | Crouching Hit Advantage | Guard | Parry |
| Hayate (Jab) | 6 | 6 | 12 | -12 | +2 | +4 | HL | H |
| Hayate (Strong) | 9 | 6 | 12 | -12 | +2 | +4 | HL | H |
| Hayate (Fierce) | 11 | 6 | 12 | -12 | +2 | +4 | HL | H |
| Hayate (Level 1) | 7~26 | 6 | 11 | -9 | +2 | +4 | HL | H |
| Hayate (Level 2) | 27~46 | 6 | 10 | -6 | +2 | +4 | HL | H |
| Hayate (Level 3) | 47~66 | 6 | 10 | -2 | Down | Down | HL | H |
| Hayate (Level 4) | 67~126 | 6 | 8 | +2 | Down | Down | HL | H |
Gauge Increase
| Miss | Blocked | Hit | Parry (Gauge for opponent) |
| 3 | 7 | 5 | 4 |
Comments here
| Move | Motion | Damage | Blocked Damage | Stun Damage | Super Cancel | Juggle Value |
| Fukiage (Jab) | F, D, DF+LP | 120(21 life points) | 15 | 29 | Yes | |
| Fukiage (Strong) | F, D, DF+MP | 140(24 life points) | 18 | 31 | Yes | |
| Fukiage (Fierce) | F, D, DF+HP | 160(28 life points) | 20 | 31 | Yes |
Frame Data
| Move | Startup | Hit | Recovery | Blocked Advantage | Hit Advantage | Crouching Hit Advantage | Guard | Parry |
| Fukiage (Jab) | 7 | 8 | 26 | - | Down | Down | HL | HL |
| Fukiage (Strong) | 10 | 8 | 26 | - | Down | Down | HL | HL |
| Fukiage (Fierce) | 14 | 7 | 26 | - | Down | Down | HL | HL |
Gauge Increase
| Move | Miss | Blocked | Hit | Parry (Gauge for opponent) |
| Fukiage (Jab) | 3 | 10 | 21 | 4 |
| Fukiage (Strong) | 3 | 10 | 21 | 4 |
| Fukiage (Fierce) | 3 | 10 | 21 | 4 |
Comments here
| Move | Motion | Damage | Blocked Damage | Stun Damage | Super Cancel | Juggle Value |
| Oroshi (Jab) | QCB+LP | 100(17 life points) | 25 | 7 | Yes | |
| Oroshi (Strong) | QCB+MP | 110(19 life points) | 28 | 11 | Yes | |
| Oroshi (Fierce) | QCB+HP | 140(24 life points) | 35 | 13 | Yes |
Frame Data
| Move | Startup | Hit | Recovery | Blocked Advantage | Hit Advantage | Crouching Hit Advantage | Guard | Parry |
| Oroshi (Jab) | 19 | 7 | 17 | -4 | -2 | 0 | HL | H |
| Oroshi (Strong) | 23 | 7 | 17 | -4 | -2 | 0 | HL | H |
| Oroshi (Fierce) | 28 | 7 | 17 | 0 | Down | Down | HL | H |
Gauge Increase
| Move | Miss | Blocked | Hit | Parry (Gauge for opponent) |
| Oroshi (Ja) | 3 | 12 | 18 | 4 |
| Oroshi (Strong) | 3 | 12 | 18 | 4 |
| Oroshi (Fiercee) | 3 | 12 | 18 | 4 |
Comments here
| Move | Motion | Damage | Blocked Damage | Stun Damage | Throw Range | Super Cancel | Juggle Value |
| Karakusa (Short) | HCB +LK | 30(8 life points) | - | 9 | 39 | No | |
| Karakusa (Forward) | HCB +MK | 30(8 life points) | - | 9 | 43 | No | |
| Karakusa (Roundhouse) | HCB +HK | 30(8 life points) | - | 9 | 47 | No |
Frame Data
| Move | Startup | Hit | Recovery | Blocked Advantage | Hit Advantage | Crouching Hit Advantage | Guard | Parry |
| Karakusa (Short) | 7 | 3 | 28 | - | +14 | +14 | - | - |
| Karakusa (Forward) | 8 | 4 | 29 | - | +14 | +14 | - | - |
| Karakusa (Roundhouse) | 9 | 4 | 30 | - | +14 | +14 | - | - |
Gauge Increase
| Move | Miss | Blocked | Hit | Parry (Gauge for opponent) |
| Karakusa (Short) | 0 | - | 8 | - |
| Karakusa (Forward) | 0 | - | 8 | - |
| Karakusa (Roundhouse) | 0 | - | 8 | - |
Comments here
| Move | Motion | Damage | Blocked Damage | Stun Damage | Super Cancel | Juggle Value |
| Tsurugi (Short) | (Air Neutral or Diagonal Forward Jump) QCB+LK | 140 | 18 | 13 | No | |
| Tsurugi (Forward) | (Air Neutral or Diagonal Forward Jump) QCB+MK | 150 | 19 | 13 | No | |
| Tsurugi (Roundhouse) | (Air Neutral or Diagonal Forward Jump) QCB+HK | 160 | 20 | 13 | No |
Frame Data
| Move | Startup | Hit | Recovery | Blocked Advantage | Hit Advantage | Crouching Hit Advantage | Guard | Parry |
| Tsurugi (Short) | 7 | 1 | 12 | - | - | - | HL | H |
| Tsurugi (Forward) | 7 | 1 | 12 | - | - | - | HL | H |
| Tsurugi (Roundhouse) | 7 | 1 | 12 | - | - | - | HL | H |
Gauge Increase
| Move | Miss | Blocked | Hit | Parry (Gauge for opponent) |
| Tsurugi (Short) | 3 | 12 | 19 | 4 |
| Tsurugi (Forward) | 3 | 12 | 19 | 4 |
| Tsurugi (Roundhouse) | 3 | 12 | 19 | 4 |
Comments here
EX Moves
| Move | Motion | Gauge Needed | Damage | Blocked Damage | Stun Damage | Super Cancel | Juggle Value |
| Hayate (EX) | QCF+PP | 40 | 160(28 life points) | 20 | 15 | No |
Frame Data
| Move | Startup | Hit | Recovery | Blocked Advantage | Hit Advantage | Crouching Hit Advantage | Guard | Parry |
| Hayate (EX) | 17 | 1 | 8/12 Guard/8 Far | +2 | Down | Down | HL | H |
Gauge Increase
| Move | Miss | Blocked | Hit | Parry (Gauge for opponent) |
| Hayate (EX) | - | - | - | 4 |
A superb EX move that crosses much of the screen. The recovery can be cancelled into a safe taunt on hit. Can be followed up on in the corner with juggles and resets. It is slightly plus on block and can leave you with the right spacing to mix up between a poke and a LK kara Karakusa. Cannot be feinted like the other versions can.
| Move | Motion | Gauge Needed | Damage | Blocked Damage | Stun Damage | Super Cancel | Juggle Value |
| Fukiage (EX) | F, D, DF+PP | 40 | 140(24 life points) | 18 | 21 | Yes |
Frame Data
| Move | Startup | Hit | Recovery | Blocked Advantage | Hit Advantage | Crouching Hit Advantage | Guard | Parry |
| Fukiage (EX) | 11 | 8 | 17/26 Guard | - | Down | Down | HL | HL |
Gauge Increase
| Move | Miss | Blocked | Hit | Parry (Gauge for opponent) |
| Fukiage (EX) | - | - | - | 4 |
Less stun than the other versions, but has a very low profile during its startup. Doesn't see much use but can be cancelled into in the case that your anti air gets parried (such as MP).
| Move | Motion | Gauge Needed | Damage | Blocked Damage | Stun Damage | Super Cancel | Juggle Value |
| Oroshi (EX) | QCB+PP | 40 | 160(28 life points) | 40 | 9 | Yes |
Frame Data
| Move | Startup | Hit | Recovery | Blocked Advantage | Hit Advantage | Crouching Hit Advantage | Guard | Parry |
| Oroshi (EX) | 13 | 7 | 17 | +3~+9 | Down | Down | HL | H |
Gauge Increase
| Move | Miss | Blocked | Hit | Parry (Gauge for opponent) |
| Oroshi (EX) | - | - | - | 4 |
One of the fastest overheads in the game, and also one of the most rewarding as it gives a knockdown. Very good for mixups. Sees niche use in some corner combos.
| Move | Motion | Gauge Needed | Damage | Blocked Damage | Stun Damage | Super Cancel | Juggle Value |
| Tsurugi (EX) | (Air) QCB+KK | 40 | 180(80+100)(17 life points) | 23(10+13) | 18(9+9) | No |
Frame Data
| Move | Startup | Hit | Recovery | Blocked Advantage | Hit Advantage | Crouching Hit Advantage | Guard | Parry |
| Tsurugi (EX) | 15・17 | 2・2 | 8 | +2~+9 | Down | Down | Hx2 | Hx2 |
Gauge Increase
| Move | Miss | Blocked | Hit | Parry (Gauge for opponent) |
| Tsurugi (EX) | - | - | - | 8(4+4) |
Completely stalls Makoto's air momentum. Has an extra hit making it a harder parry. Does not see much use as because the MK version of this special starts juggles, and the HK version also knocks down without costing any meter.
Super Arts
| Super Art | Super Art Name | Super Art Stock | Motion | Damage | Blocked Damage | Stun Damage | Damage/Gauge |
| I | Seichu Sen Godan-zuki | 1 bar (120) | QCF QCF+P | 500*(83 life points) | 40 | 20** | 4,17 |
| * (150+40×3+300) Damage is when all hits connect. |
| ** 5x5 is when all hits connect. |
Frame Data
| Startup | Hit | Recovery | Blocked Advantage | Hit Advantage | Crouching Hit Advantage | Guard | Parry |
| 1・42・46・50・80 | 3・1・1・1・7 | 133/65 Far/71 Parry | -17 | Down | Down | HL | H |
Comments here
| Super Art | Super Art Name | Super Art Stock | Motion | Damage | Blocked Damage | Stun Damage | Damage/Gauge |
| II | Abare Tosanami Kudaki | 2 bars (88 each bar) | QCF QCF+K (range changes based on the K) | 360*(59 life points) | 65** | 24*** | 4,75 |
| * (100+40+80+170) Damage is when all hits connect. |
| ** (13+5+10+43) Damage is when all hits connect. |
| *** (9+3+5+9) Damage is when all hits connect. |
Frame Data
| Startup | Hit | Recovery | Blocked Advantage | Hit Advantage | Crouching Hit Advantage | Guard | Parry |
| 14~18 | 5/6/9 | 6/25 Far/32 Parry | -20 | Down | Down | HLx3 | HLx3 |
Comments here
| Super Art | Super Art Name | Super Art Stock | Motion | Damage | Blocked Damage | Stun Damage | Damage/Gauge |
| III | Tanden Renki-Seme no Kata | 1 bar (96) | QCF QCF+P | - | - | - | - |
Frame Data
| Startup | Hit | Recovery | Blocked Advantage | Hit Advantage | Crouching Hit Advantage | Guard | Parry |
| 0 | - | - | - | - | - | - | - |
600 Frames active (10 seconds)
Combos
Meterless
c.LK, LP Hayate
LK, LP Hayate
c.MP, HP Hayate
MP, HP Hayate
Karakusa, close.HP, HP Hayate
EX Moves
Karakusa,HP,EX Hayate,(HP Hayate)
SAI (Seichusen-Godanzuki)
Note: Her dash punch can combo into SAI if you do the super on the first frame after dash punch recovery; any combo involving dash punch can be comboed into SAI, as a result (i.e. strong -> dash punch -> SAI, or low short -> dash punch -> super, etc.)
Cr. lk, SAI
Cl. mp, SAI
Cl. hp, SAI
Cr. mk, SAI
Cl. hk, SAI
Karakusa, SAI
SAII (Abare Tosanami)
Lead-ins:
Note: SAII tracks based on which kick is used. LK travels nearly vertically, MK goes to about half-screen, and HK goes about 3/4 screen. Sometimes there is character specificity involved in which kick to use; taller characters, for example, can be hit anywhere between pinned in the corner and half screen by MK (and sometimes HK, even), but shorter ones require LK if Makoto is pinned in the corner (MK hits once and then flies over the character's head) and MK otherwise.
(Karakusa), Cl. hp, SAII (only if opponent is on your half of the screen after the pushback from the standing fierce.)
Mp Oroshi, SAII (same condition).
Juggles after SAII finishes:
Note: All dash-cancels are in the direction your opponent is hit; therefore, if your SAII activates from the right corner of the screen, dash-cancel left, and vice-versa. Also, all follow-up uppercuts (fukiages) are in the opposite direction of the dash-cancel. Therefore, if you dash-canceled to the right, you have to do a left-directional DP motion. Finally, "JCD" = Jump-cancel directionally (towards opponent); JCU = Jump-cancel up.
(Dash-cancel) Hp Fukiage, (JCU) Hp
(Dash-cancel) Kara-Fukiage*, (Dash-cancel) Fukiage
(JCD) Mk Tsurugi, lp Hayate, hp Hayate
(JCD) Mk Tsurugi, hp Hayate, hp/cr. hk (corner only)
(JCD) Mk Tsurugi, SAII, (JCU) mk Tsurugi, hp hayate, hp hayate (corner only, 2 full stocks, strict timing)
*Character-specific, and sometimes the second fukiage is kara'ed, not the first. Here is a comprehensive guide to most of the character specifics of SAII
SAIII (Tanden-Renki)
This isn't a traditional attacking super; Makoto gets a serious attack boost but can't block (until the meter runs out.) Therefore, there's not really any special comboes she can do with it, but there is a lot of damage potential if you can read your opponent well. The only one I've got is:
Karakusa, hp, SAIII, cr. mp, hp Hayate
Strategies
Overview
Work your entire game around the karakusa/landing the abare tosanami. Use standing jabs to poke jump-ins, dashing under after the hit. This sets up for low LK-hayate, throw/ techs, or karakusas. This will become predictable, so keep it fresh. Jumping MK is the all purpose air and anti air attack. Jumping HK is great for swatting down jump happy combatants.
Basics
Makoto its a medium weight and hitbox rushdown grappler tomboy character with the objective of being aggressive from a simple crouching 2-in-1 LP Hayate to a Karakusa combo starter, she must charge a Super Art Stock as soon as possible and then land it for a high possible Stun combo.
She had good pokes but zoning with her but due to her slow walk and bad dash animation can be an easy objective for poking focused character like Necro and Twelve, try to approach your opponent with Hayate and jumping on it
Super Art Selection
SAI (Seichusen-Godanzuki):
Use this for the weaker stamina characters, including Yun, Yang, Ibuki, etc.* It does excellent damage, and has numerous hit-confirms, in addition to the guaranteed karakusa ones. Especially good if you get good comboing it out of dash punches, which are fairly easy to confirm. Weaknesses include lack of range and bad anti-air, but the first shouldn't be an issue if you combo into it, and the second isn't a big deal, as she has plenty of good anti-air normals.
* Some people use this super exclusively for all characters, which is fine, but not the norm. Even within the norm, there are some borderline characters, such as Chun-Li and Twelve, where it comes down to personal preference and skill. However, unless you really have a hard time landing karakusas, do not choose SAI for Akuma and Remy; always choose SAII.
SAII (Abare-Tosanami):
Typically used for higher stamina characters including the shotos, Urien, Hugo, etc. A lot of its usefulness depends on your ability to land karakusas, especially on your half of the screen, since the overhead link is virtually useless, and fierce -> SAII w/o karakusa is rare except for punishes. If you get good with karakusas, though, this super is excellent, as it has massive damage and stun potential. For the most damage, go the axe-kick, hayate, hayate route; for the most stun, follow it up with fukiage, hp/fukiage.
Akuma and Remy, having the shortest stun bars, have one of the easiest 100% stun combos in the game (the "fukiage, hp" follow-up to the super). Given their weak staminas (and therefore extra damage after the stun), this is why SAII is nearly always recommended for those two. Makoto actually has 100% stuns on everyone except the 5 characters with the longest stun bar (Alex, Q, Hugo, Oro, and Dudley), but they involve either two uppercuts after the super, kara-uppercutting either the first or second one. The timing on the second uppercut is very strict, and those 100%s are much more difficult to execute consistently. There is also character-specificity in which kara-uppercut to do. However, you can still get 80-85% stuns on those characters with the same combo than 100% stuns Akuma and Remy, so it's still an extremely worthwhile super.
The only downside (aside from its usefulness being totally tied to your ability to land stun grabs) is that it has absolutely terrible recovery if you mess it up (i.e. the fierce gets blocked, you land the fierce but the super comes out too late, the opponent is too far on the far half of the screen, etc.) This shouldn't be an issue once you get comfortable with it, but under virtually no circumstances should you use it outside of karakusa or guaranteed punish combos. In other words, terrible wake-up super, terrible super for punishing someone whiffing moves at a distance, etc. Just don't do it.
SAIII (Tanden-Renki):
Obviously the last super of choice, this is more a "fun" super than a practical one. If you can get your opponent on the back foot and guessing wrong once or twice, you can get insane damage by the time the meter runs out. However, if you're on the back foot against an experienced player, you're pretty much screwed.
Kara-Techniques
Zoning
Mixups
Additional Notes
- Personal Action: Attack and Recovers stun meter. Holding HP HK = Up to 2 more Stun Recocery bonuses Attack up.
Match-ups
Serious Advantage Match-ups
- Sean
- Q
Advantage Match-ups
- Yang
- Akuma
- Urien
- Ryu
- Ibuki
- Elena
- Necro
- Alex
- Remy
- Hugo
- Twelve
Fair Match-ups
- Ken
- Makoto
- Dudley
- Oro
Disadvantage Match-ups
- Yun
- Chun-Li
Serious Disadvantage Match-ups
Makoto has no match-ups where she is at a serious disadvantage
