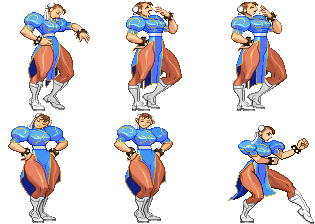
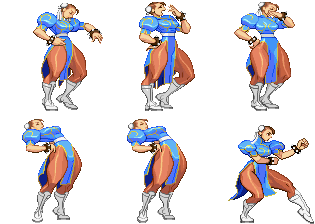
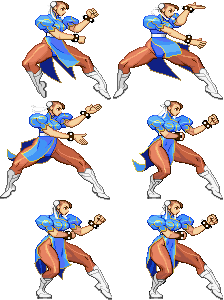
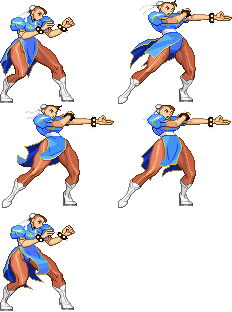
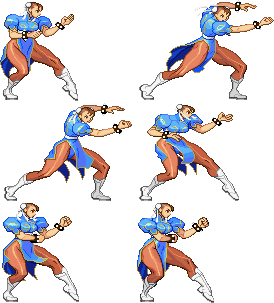
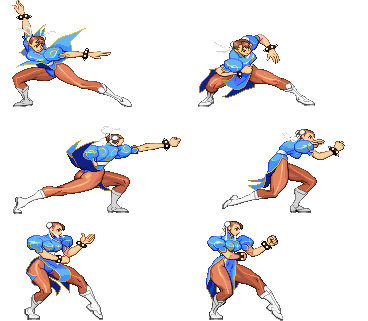
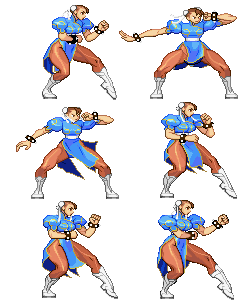
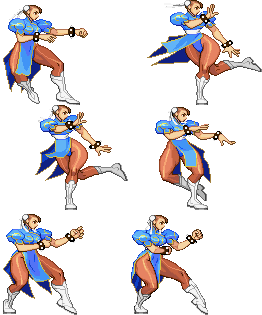
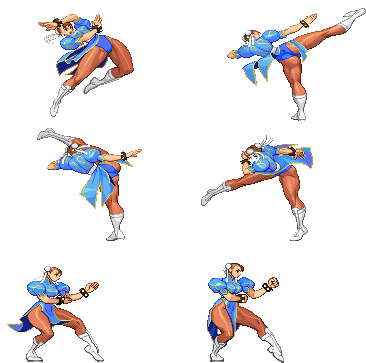
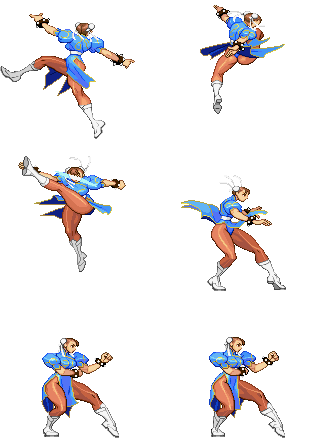
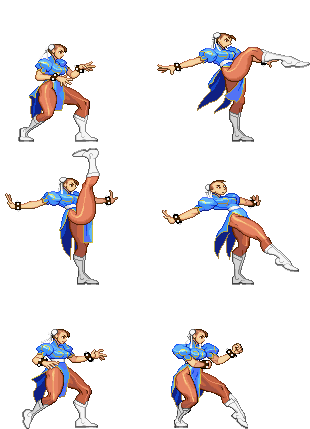
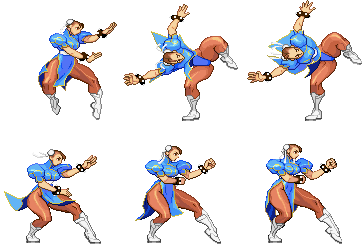
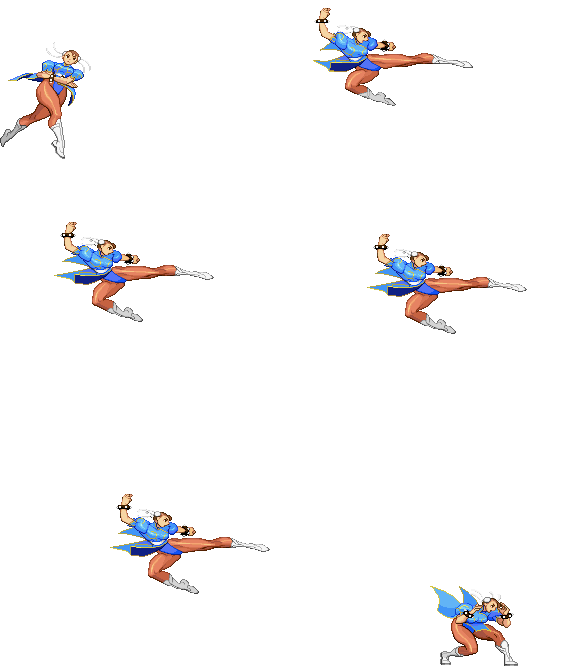
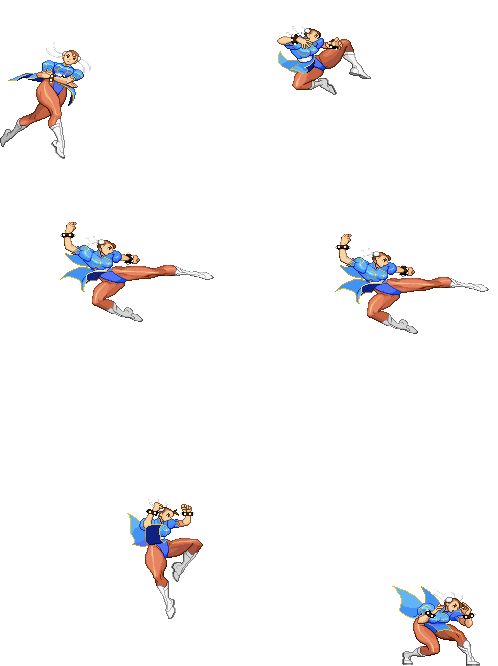
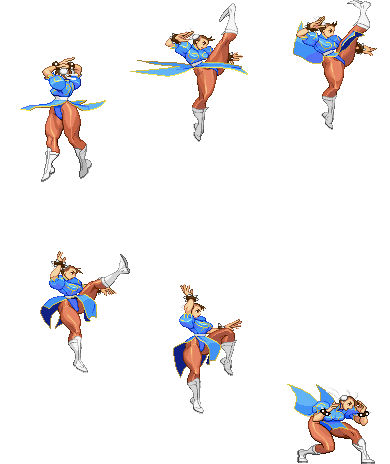
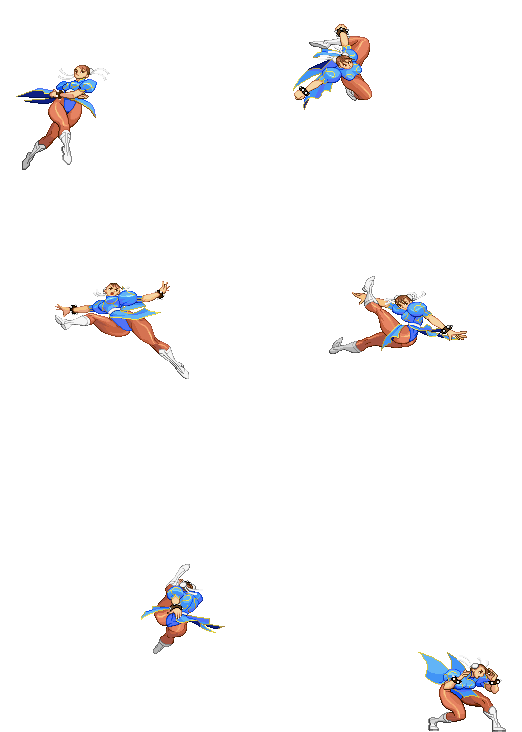
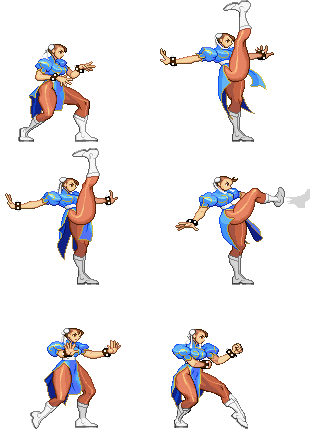
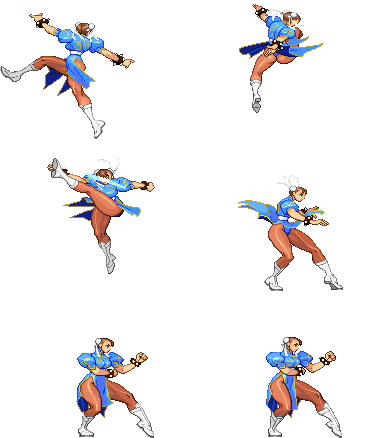
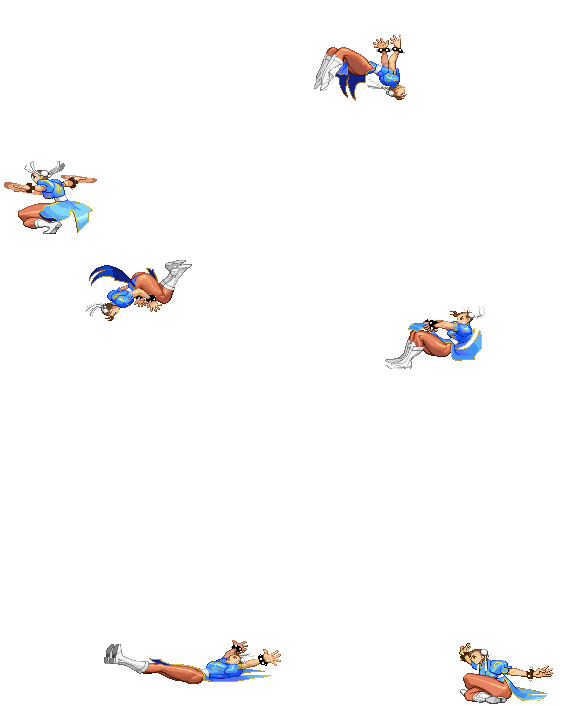
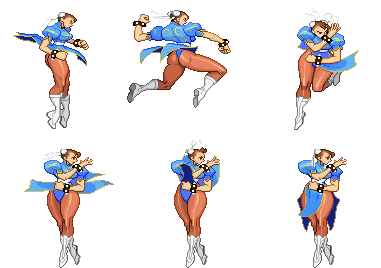
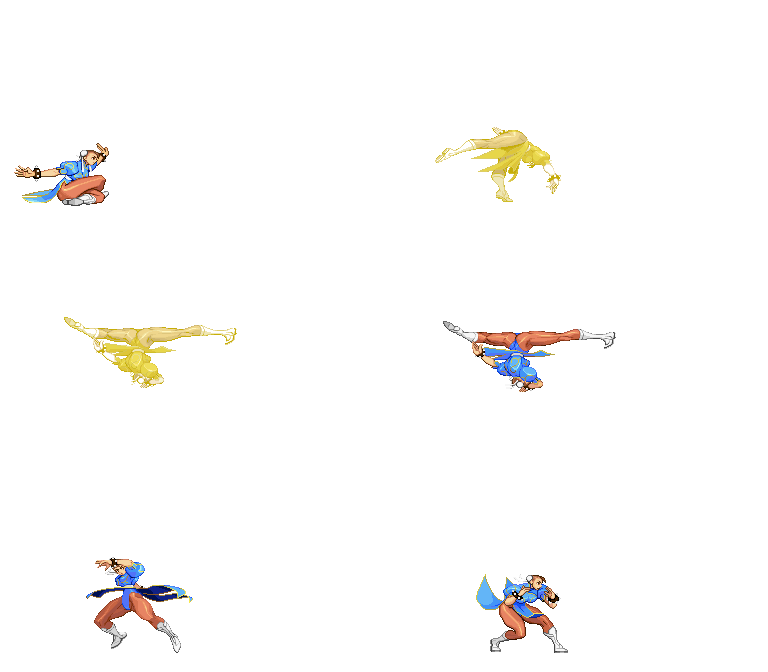
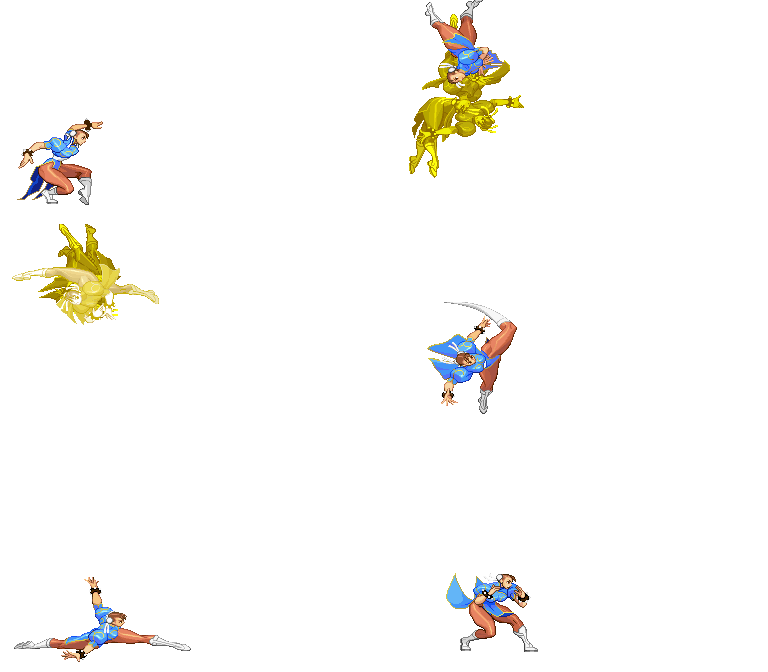
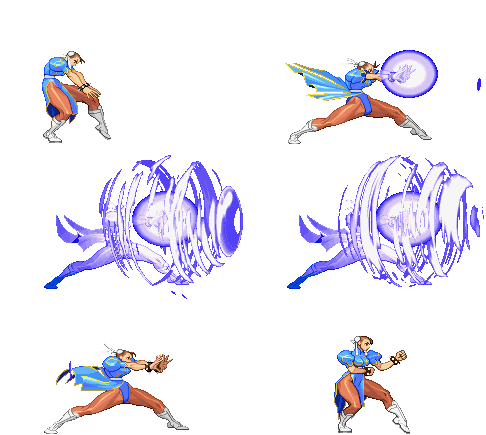
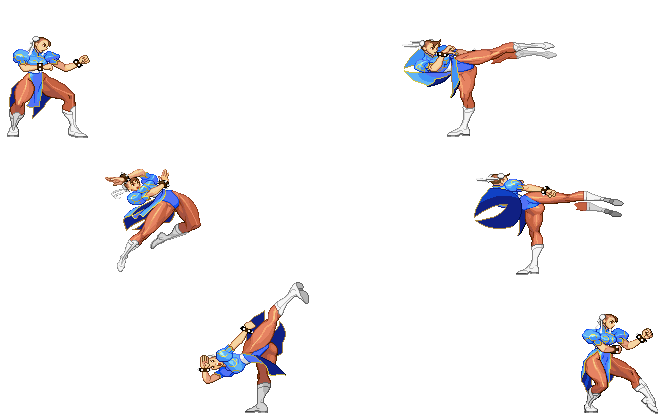
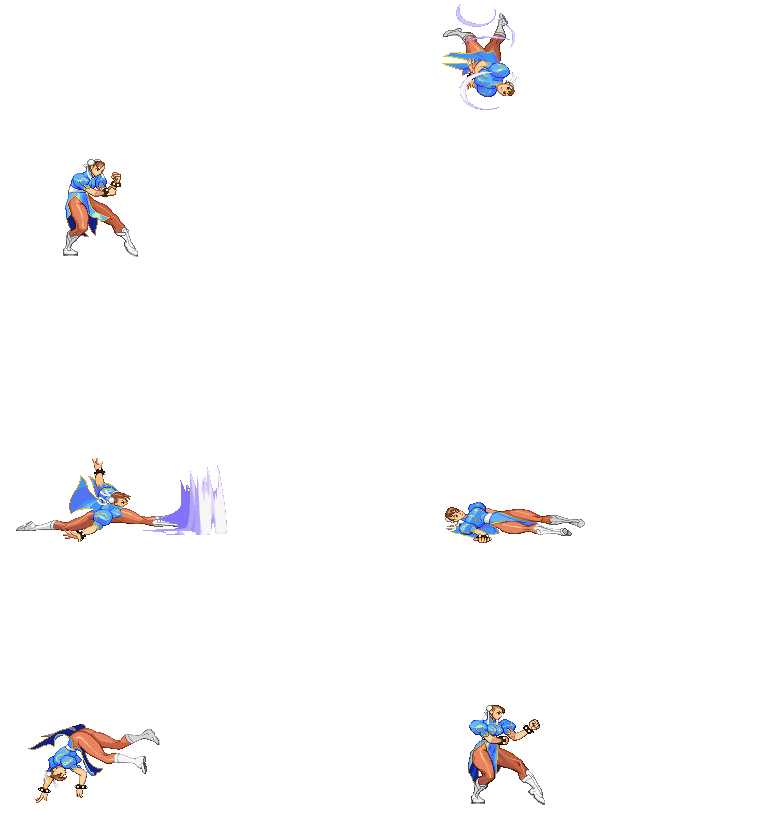
(→Combos) |
Scatteraxis (talk | contribs) m (Scatteraxis moved page Street Fighter 3: 3rd Strike/Chun-Li to Street Fighter 3: 3rd Strike/Chun-Li/Archive without leaving a redirect) |
||
| (31 intermediate revisions by 14 users not shown) | |||
| Line 1: | Line 1: | ||
[[Image:Chunli3sport.gif|frame|right|Chun-Li's Character Select Portrait]] | [[Image:Chunli3sport.gif|frame|right|Chun-Li's Character Select Portrait]] | ||
[[Image:Chun-li-3sstance.gif|frame|right|Chun-Li's Neutral Stance]] | [[Image:Chun-li-3sstance.gif|frame|right|Chun-Li's Neutral Stance]] | ||
==Updated version available!== | |||
You're reading the old version of this page. [https://srk.shib.live/w/Street_Fighter_3:_3rd_Strike/Chun-Li/2021 Click here] to read the (in-progress) updated version! | |||
==Introduction== | ==Introduction== | ||
In her most notorious incarnation, Chun-Li is a defensive beast. She mainly relies on punishing opponents with her high speed and range, solid power and 2nd Super Art which can be combo'd into multiple ways. | In her most notorious incarnation, Chun-Li is a defensive beast. She mainly relies on punishing opponents with her high speed and range, solid power and 2nd Super Art which can be combo'd into multiple ways. | ||
{{ ProConTable | |||
| pros= | |||
* One of the scariest super arts in the game. Huge damage and stun, very accessible, and having two bars leads into setplay that can loop into itself. | |||
* Extremely strong normals. Quick, safe, hard hitting buttons with high priority, as well as many pokes that are hitconfirmable into super. | |||
* Best kara throw in the game, allowing her to punish effectively with throws and annoy with throw loops from ranges where it may seem easy to walk/block away. | |||
* Low profile crouch, making a lot of moves whiff completely on her. Lacks the universal single standing fuzzy frame on wakeup. | |||
* Great walk speed, as well as a solid dash, giving her the mobility to navigate neutral confidently. | |||
| cons= | |||
* Seemingly unconventional anti-air game can be unintuitive at first. | |||
* Meterless damage is underwhelming, allowing characters to play more aggressively with less risk while she does not have a super stocked. | |||
}} | |||
==Specific Character Information== | ==Specific Character Information== | ||
| Line 17: | Line 32: | ||
Back stretch (happens 15% of the time) - Increases defense by 31.3% (more than the shoulder tap) for the whole round. Also increases damage for the next hit/combo by 31.3%. Maximum one back stretch. | Back stretch (happens 15% of the time) - Increases defense by 31.3% (more than the shoulder tap) for the whole round. Also increases damage for the next hit/combo by 31.3%. Maximum one back stretch. | ||
*Best Kara-Throw: Far | *Chun-Li takes 2 additional frames of crouching blockstun | ||
*Best Kara-Throw: Far MK / Close HK | |||
*Standard Throw Range (pixels): 26 | *Standard Throw Range (pixels): 26 | ||
*Kara Throw Range (pixels): | *Kara Throw Range (pixels): 26+32/26+16 | ||
*Dash Forward (frames) / Moving Distance: 16 / 2 | *Dash Forward (frames) / Moving Distance: 16 / 2 | ||
*Dash Backward (frames) / Moving Distance: 23 / 2 | *Dash Backward (frames) / Moving Distance: 23 / 2 | ||
| Line 28: | Line 45: | ||
==Throws== | ==Throws== | ||
{| border="1em" cellspacing="0" width="45%" style="border: 1px solid #999; background: | {| border="1em" cellspacing="0" width="45%" style="border: 1px solid #999; background: none;"|- | ||
| Koshuu Tou || [[File:Lp.png]]+[[File:Lk.png]] | | Koshuu Tou || [[File:Lp.png]]+[[File:Lk.png]] | ||
|} | |} | ||
==Air Throws== | ==Air Throws== | ||
{| border="1em" cellspacing="0" width="45%" style="border: 1px solid #999; background: | {| border="1em" cellspacing="0" width="45%" style="border: 1px solid #999; background: none;"|- | ||
| Ryuusei Raku || Air [[File:Lp.png]]+[[File:Lk.png]] | | Ryuusei Raku || Air [[File:Lp.png]]+[[File:Lk.png]] | ||
|} | |} | ||
==Command Moves== | ==Command Moves== | ||
{| border="1em" cellspacing="0" width="45%" style="border: 1px solid #999; background: | {| border="1em" cellspacing="0" width="45%" style="border: 1px solid #999; background: none;"|- | ||
| Kakushu Raku Kyaku || Close Hold [[File:Mk.png]] SC | | Kakushu Raku Kyaku || Close Hold [[File:Mk.png]] SC | ||
|- | |- | ||
| Line 57: | Line 74: | ||
==Special Moves== | ==Special Moves== | ||
{| border="1em" cellspacing="0" width="45%" style="border: 1px solid #999; background: | {| border="1em" cellspacing="0" width="45%" style="border: 1px solid #999; background: none;"|- | ||
| Hyakuretsu Kyaku || Mash [[File:K.png]] EX | | Hyakuretsu Kyaku || Mash [[File:K.png]] EX | ||
|- | |- | ||
| Line 68: | Line 85: | ||
==Super Arts== | ==Super Arts== | ||
{| border="1em" cellspacing="0" width="45%" style="border: 1px solid #999; background: | {| border="1em" cellspacing="0" width="45%" style="border: 1px solid #999; background: none;"|- | ||
| I || Kikou Shou || [[File:Qcf.png]][[File:Qcf.png]]+[[File:P.png]] || 88 Gauge Dots || 1 Stock || 2.1 EX Uses | | I || Kikou Shou || [[File:Qcf.png]][[File:Qcf.png]]+[[File:P.png]] || 88 Gauge Dots || 1 Stock || 2.1 EX Uses | ||
|- | |- | ||
| Line 76: | Line 93: | ||
|} | |} | ||
==Target Combo== | ==Target Combo== | ||
{| border="1em" cellspacing="0" width="45%" style="border: 1px solid #999; background: | {| border="1em" cellspacing="0" width="45%" style="border: 1px solid #999; background: none;"|- | ||
|- | |- | ||
| Air forward[[File:Hp.png]][[File:Hp.png]] | | Air forward[[File:Hp.png]][[File:Hp.png]] | ||
| Line 83: | Line 100: | ||
= Move Analysis = | = Move Analysis = | ||
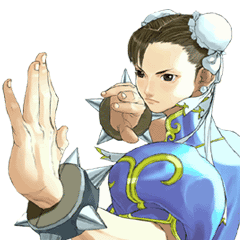
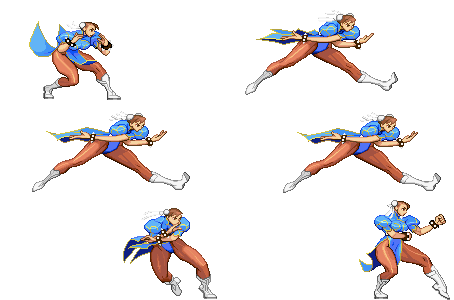
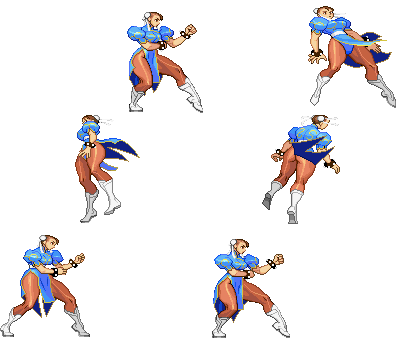
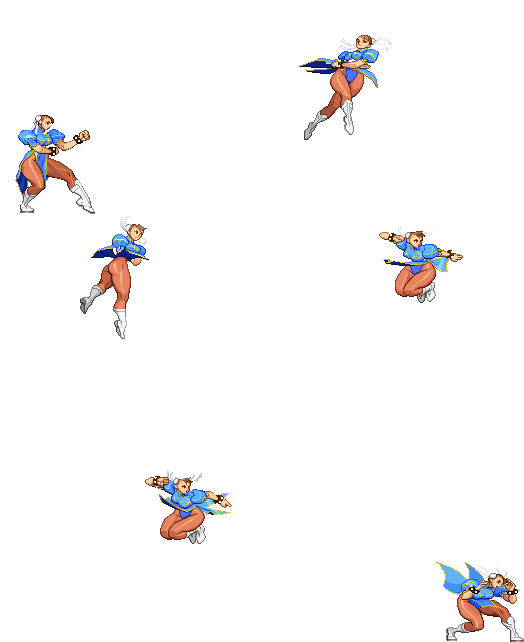
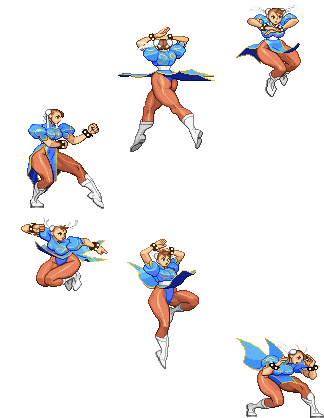
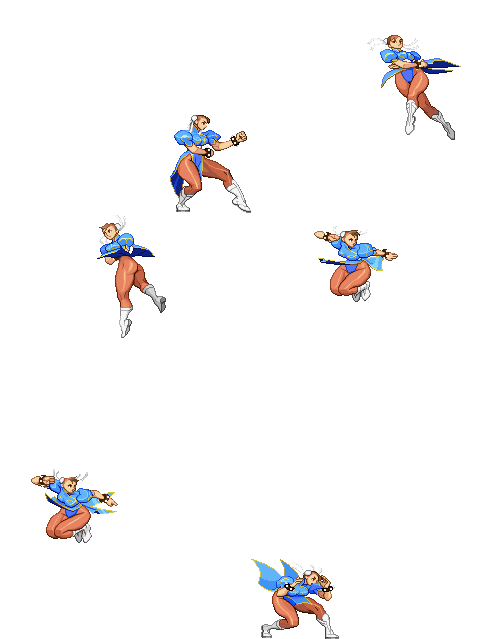
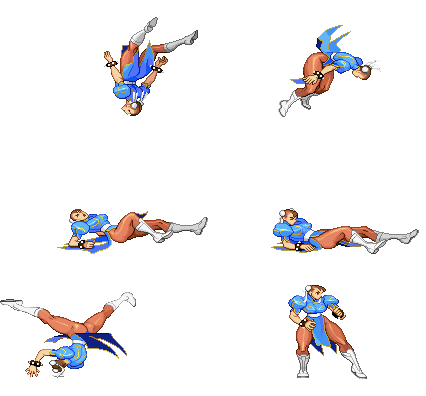
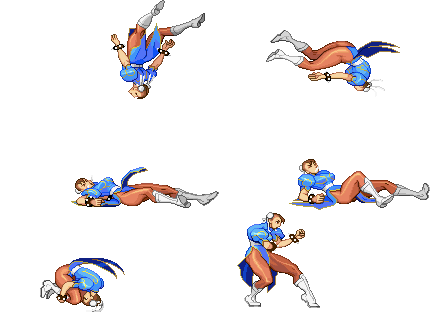
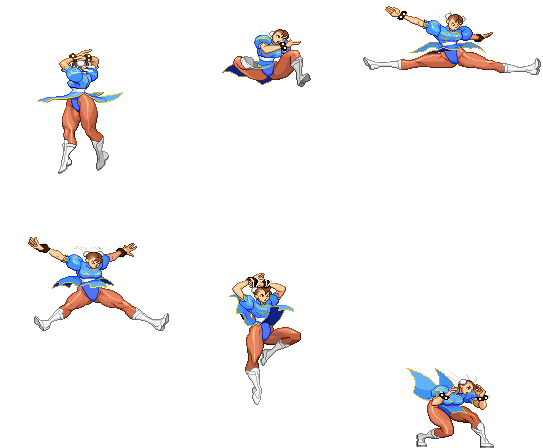
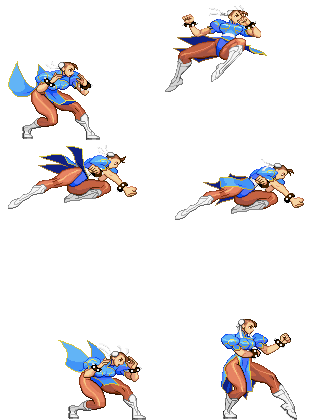
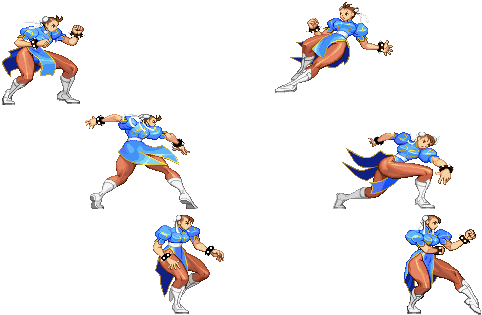
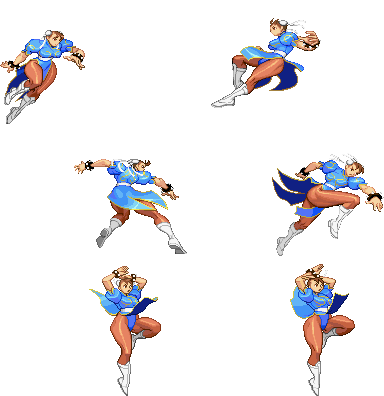
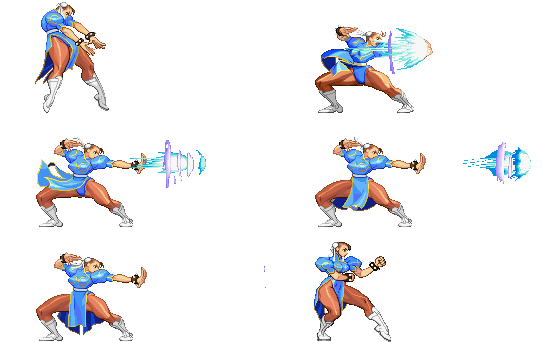
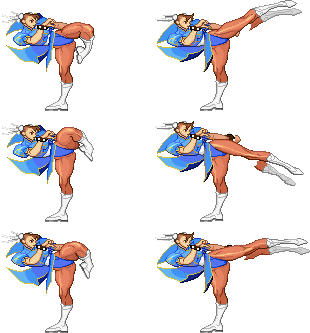
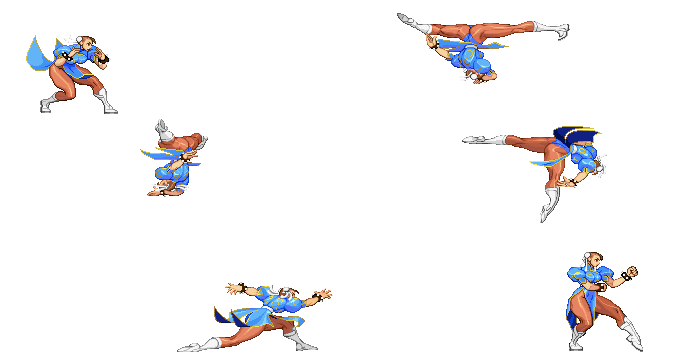
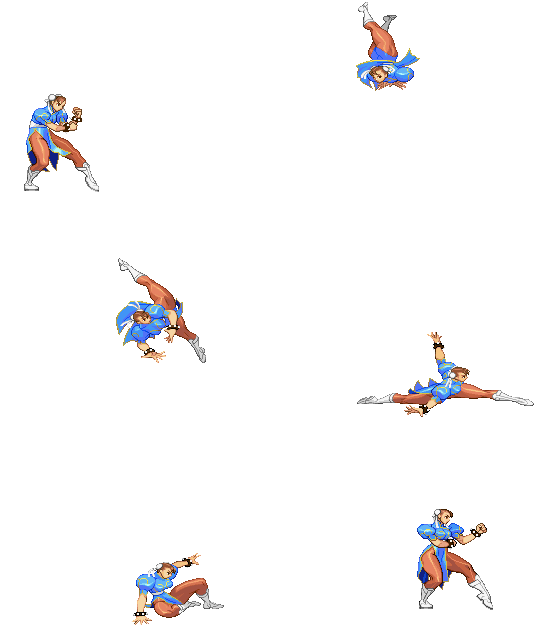
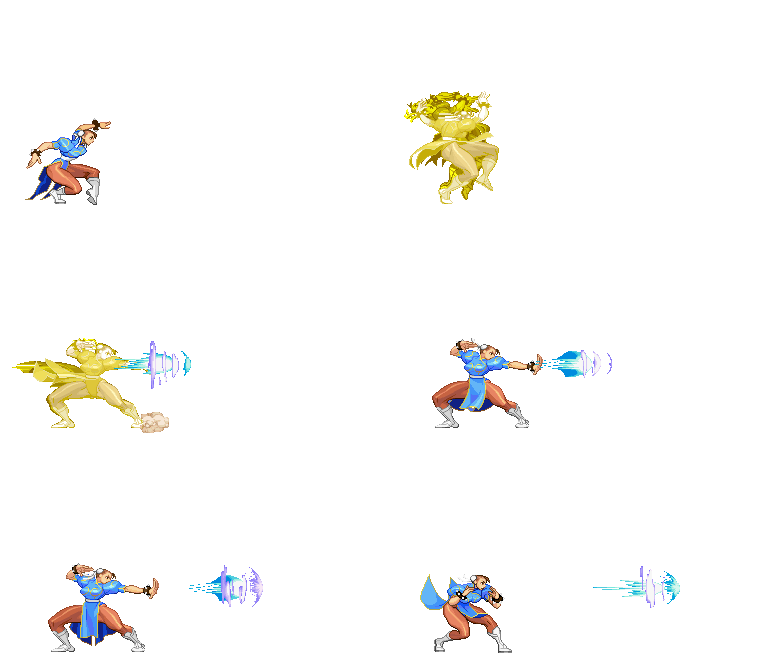
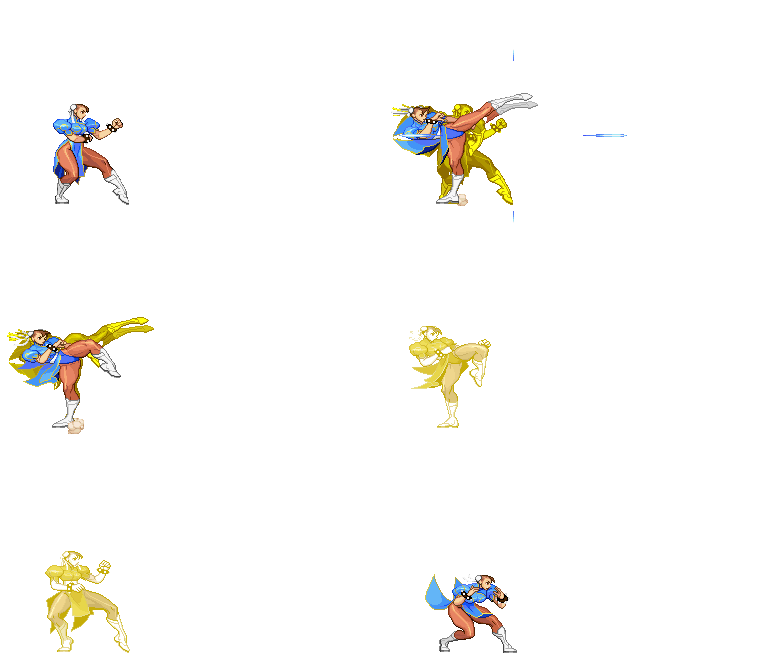
*All those sprites are taken from the site | *All those sprites are taken from the site https://www.justnopoint.com/zweifuss/ | ||
*All Framedatas in "Move Analisys" section are taken from [http:// | *All Framedatas in "Move Analisys" section are taken from [http://gr.qee.jp/01_3rd/index.html Game Restaurant] , this means the Framedata isn't from the Dreamcast version like Karathrow site, it's from Arcade version. | ||
Please note that the images show in this section are for the 1st frame it hits, so this means the opponent is taking the hit in the image shown on the move. I use the 1st frame of every move (except taunt, dash, jump, wakeup and 2nd throw image sprites) because you will see the maximum range of every attack (mostly of the attacks). Note also that those images are ACCURATE, they are exactly the first frame it hits, so enemy takes damage but they still dont make the "pain" frame. | Please note that the images show in this section are for the 1st frame it hits, so this means the opponent is taking the hit in the image shown on the move. I use the 1st frame of every move (except taunt, dash, jump, wakeup and 2nd throw image sprites) because you will see the maximum range of every attack (mostly of the attacks). Note also that those images are ACCURATE, they are exactly the first frame it hits, so enemy takes damage but they still dont make the "pain" frame. | ||
| Line 95: | Line 112: | ||
*'''Special Cancel''': If you can cancel the move into a Special Move | *'''Special Cancel''': If you can cancel the move into a Special Move | ||
*'''Super Cancel''': If you can cancel the move into a Super Art | *'''Super Cancel''': If you can cancel the move into a Super Art | ||
*'''Juggle Value''': Amount of JP the move adds in aerial juggles | |||
*0: JP is reset | |||
*'''Juggle or Reset''': If the move knocks down on air connect or air resets | |||
*'''Throw Range''': Range of the throw (in pixels) | *'''Throw Range''': Range of the throw (in pixels) | ||
*'''Num.''': Super Art number | *'''Num.''': Super Art number | ||
| Line 103: | Line 123: | ||
*'''Hit''': Number of frames that can hit the opponent | *'''Hit''': Number of frames that can hit the opponent | ||
*'''Recovery''': Number of frames it takes to recover from the move | *'''Recovery''': Number of frames it takes to recover from the move | ||
*'''Blocked Advantage''': Number of frames you are in advantage/ | *'''Blocked Advantage''': Number of frames you are in advantage/disadvantage after opponent have been blocked the hit | ||
*'''Hit Advantage''': Number of frames you are in advantage/ | *'''Hit Advantage''': Number of frames you are in advantage/disadvantage after opponent have been take the hit | ||
*'''Crouching Hit Advantage''': Number of frames you are in advantage/ | *'''Crouching Hit Advantage''': Number of frames you are in advantage/disadvantage after opponent have been take the hit while he's crouching | ||
* + # : You have # frames of advantage | * + # : You have # frames of advantage | ||
* - # : You have # frames of | * - # : You have # frames of disadvantage | ||
* # ~ # : Advantage/ | * # ~ # : Advantage/disadvantage can vary from # to # | ||
*Down: Enemy gets knocked down | *Down: Enemy gets knocked down | ||
*'''Guard''': How opponent must guard the move, High (H), Low (L) or both (HL) | *'''Guard''': How opponent must guard the move, High (H), Low (L) or both (HL) | ||
| Line 121: | Line 141: | ||
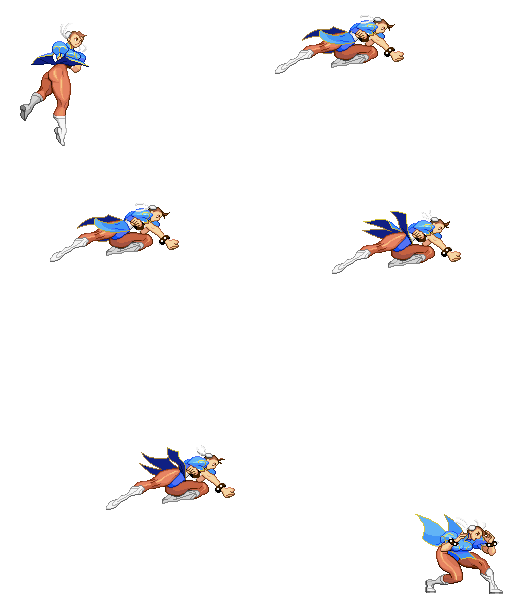
[[Image:(chunlidf).gif|none]] | [[Image:(chunlidf).gif|none]] | ||
{| border="1em" cellspacing="0" width="60%" style="border: 1px solid #999; background: | {| border="1em" cellspacing="0" width="60%" style="border: 1px solid #999; background: none;" | ||
|- | |- | ||
! align="center" | Move | ! align="center" | Move | ||
| Line 131: | Line 151: | ||
|- | |- | ||
| align="center" | Dash Forward | | align="center" | Dash Forward | ||
| align="center" | 2 | | align="center" | 2 | ||
| align="center" | 8? | | align="center" | 8? | ||
| align="center" | - | | align="center" | - | ||
| Line 141: | Line 161: | ||
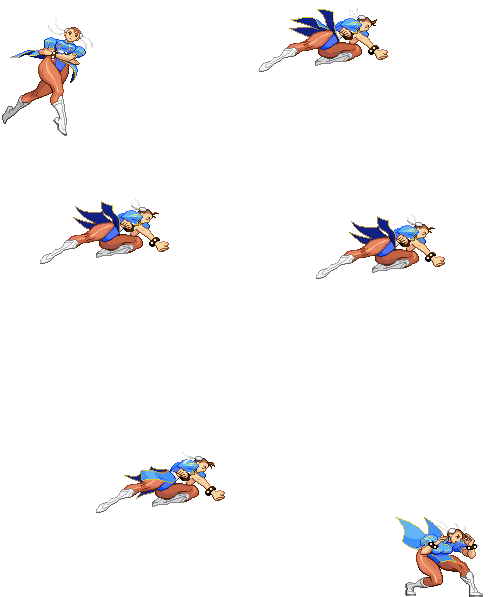
[[Image:(chunlidb).gif|none]] | [[Image:(chunlidb).gif|none]] | ||
{| border="1em" cellspacing="0" width="60%" style="border: 1px solid #999; background: | {| border="1em" cellspacing="0" width="60%" style="border: 1px solid #999; background: none;" | ||
|- | |- | ||
! align="center" | Move | ! align="center" | Move | ||
| Line 151: | Line 171: | ||
|- | |- | ||
| align="center" | Dash Backwards | | align="center" | Dash Backwards | ||
| align="center" | | | align="center" | 2 | ||
| align="center" | 4? | | align="center" | 4? | ||
| align="center" | - | | align="center" | - | ||
| align="center" | 6? | | align="center" | 6? | ||
| align="center" | | | align="center" | 23 | ||
|} | |} | ||
''Comments here'' | ''Comments here'' | ||
| Line 162: | Line 182: | ||
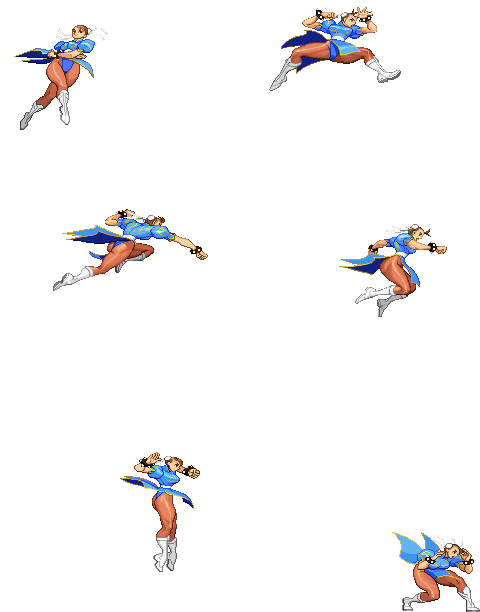
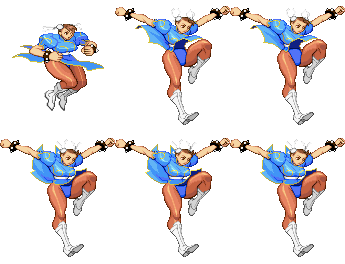
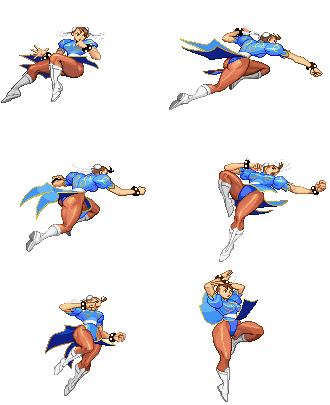
[[Image:(chunlijump).gif|none]] | [[Image:(chunlijump).gif|none]] | ||
[[Image:(chunlibjump).gif|none]] | [[Image:(chunlibjump).gif|none]] | ||
{| border="1em" cellspacing="0" width="30%" style="border: 1px solid #999; background: | {| border="1em" cellspacing="0" width="30%" style="border: 1px solid #999; background: none;" | ||
|- | |- | ||
| align="center" | '''Move''' || align="center" | '''Motion''' || align="center" | '''Startup Frames''' | | align="center" | '''Move''' || align="center" | '''Motion''' || align="center" | '''Startup Frames''' | ||
| Line 170: | Line 190: | ||
''Comments here'' | ''Comments here'' | ||
{| border="1em" cellspacing="0" width="30%" style="border: 1px solid #999; background: | {| border="1em" cellspacing="0" width="30%" style="border: 1px solid #999; background: none;" | ||
|- | |- | ||
| align="center" | '''Move''' || align="center" | '''Motion''' || align="center" | '''Startup Frames''' | | align="center" | '''Move''' || align="center" | '''Motion''' || align="center" | '''Startup Frames''' | ||
| Line 180: | Line 200: | ||
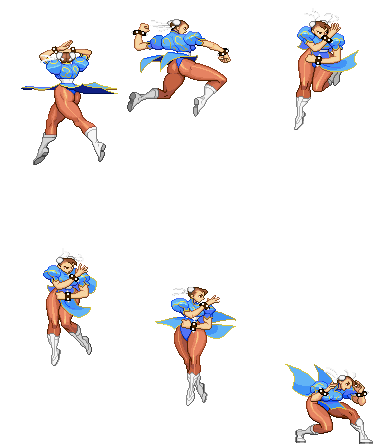
[[Image:(chunliw).gif|none]] | [[Image:(chunliw).gif|none]] | ||
{| border="1em" cellspacing="0" width="30%" style="border: 1px solid #999; background: | {| border="1em" cellspacing="0" width="30%" style="border: 1px solid #999; background: none;" | ||
|- | |- | ||
| align="center" | '''Move''' || align="center" | '''Motion''' || align="center" | '''Frames''' | | align="center" | '''Move''' || align="center" | '''Motion''' || align="center" | '''Frames''' | ||
|- | |- | ||
| align="center" | Normal Wakeup || align="center" | - || align="center" | | | align="center" | Normal Wakeup || align="center" | - || align="center" | 88 | ||
|} | |} | ||
''Comments here'' | ''Comments here'' | ||
| Line 190: | Line 210: | ||
[[Image:(chunlitw).gif|none]] | [[Image:(chunlitw).gif|none]] | ||
{| border="1em" cellspacing="0" width="30%" style="border: 1px solid #999; background: | {| border="1em" cellspacing="0" width="30%" style="border: 1px solid #999; background: none;" | ||
|- | |- | ||
| align="center" | '''Move''' || align="center" | '''Motion''' || align="center" | '''Frames''' | | align="center" | '''Move''' || align="center" | '''Motion''' || align="center" | '''Frames''' | ||
|- | |- | ||
| align="center" | Quick Stand || align="center" | Tap D when hitting the ground || align="center" | | | align="center" | Quick Stand || align="center" | Tap D when hitting the ground || align="center" | 61 | ||
|} | |} | ||
''Comments here'' | ''Comments here'' | ||
| Line 200: | Line 220: | ||
[[Image:(chunlit1).gif|none]] | [[Image:(chunlit1).gif|none]] | ||
{| border="1em" cellspacing="0" width="60%" style="border: 1px solid #999; background: | {| border="1em" cellspacing="0" width="60%" style="border: 1px solid #999; background: none;" | ||
|- | |- | ||
| align="center" | '''Move''' || align="center" | '''Motion''' || align="center" | '''Damage''' || align="center" | '''Stun Damage''' || align="center" | '''Chains into itself''' || align="center" | '''Special Cancel''' || align="center" | '''Super Cancel''' | | align="center" | '''Move''' || align="center" | '''Motion''' || align="center" | '''Damage''' || align="center" | '''Stun Damage''' || align="center" | '''Chains into itself''' || align="center" | '''Special Cancel''' || align="center" | '''Super Cancel''' || align="center" | '''Juggle Value''' || align="center" | '''Reset or Juggle''' | ||
|- | |- | ||
| align="center" | Taunt || align="center" | HP+HK || align="center" | | | align="center" | Taunt || align="center" | HP+HK || align="center" | - || align="center" | - || align="center" | No || align="center" | No || align="center" | No || align="center" | - || align="center" | - | ||
|} | |} | ||
'''Frame Data''' | '''Frame Data''' | ||
{| border="1em" cellspacing="0" width="60%" style="border: 1px solid #999; background: | {| border="1em" cellspacing="0" width="60%" style="border: 1px solid #999; background: none;" | ||
|- | |- | ||
| align="center" | '''Startup''' || align="center" | '''Hit''' || align="center" | '''Recovery''' || align="center" | '''Blocked Advantage''' || align="center" | '''Hit Advantage''' || align="center" | '''Crouching Hit Advantage''' || align="center" | '''Guard''' || align="center" | '''Parry''' | | align="center" | '''Startup''' || align="center" | '''Hit''' || align="center" | '''Recovery''' || align="center" | '''Blocked Advantage''' || align="center" | '''Hit Advantage''' || align="center" | '''Crouching Hit Advantage''' || align="center" | '''Guard''' || align="center" | '''Parry''' | ||
|- | |- | ||
| align="center" | | | align="center" | - || align="center" | 59 || align="center" | - || align="center" | ? || align="center" | ? || align="center" | ? || align="center" | - || align="center" | - | ||
|} | |} | ||
'''Gauge Increase''' | '''Gauge Increase''' | ||
{| border="1em" cellspacing="0" width="30%" style="border: 1px solid #999; background: | {| border="1em" cellspacing="0" width="30%" style="border: 1px solid #999; background: none;" | ||
|- | |- | ||
| align="center" | '''Miss''' || align="center" | '''Blocked''' || align="center" | '''Hit''' || align="center" | '''Parry (Gauge for opponent)''' | | align="center" | '''Miss''' || align="center" | '''Blocked''' || align="center" | '''Hit''' || align="center" | '''Parry (Gauge for opponent)''' | ||
| Line 223: | Line 243: | ||
[[Image:(chunlit2).gif|none]] | [[Image:(chunlit2).gif|none]] | ||
{| border="1em" cellspacing="0" width="60%" style="border: 1px solid #999; background: | {| border="1em" cellspacing="0" width="60%" style="border: 1px solid #999; background: none;" | ||
|- | |- | ||
| align="center" | '''Move''' || align="center" | '''Motion''' || align="center" | '''Damage''' || align="center" | '''Stun Damage''' || align="center" | '''Chains into itself''' || align="center" | '''Special Cancel''' || align="center" | '''Super Cancel''' | | align="center" | '''Move''' || align="center" | '''Motion''' || align="center" | '''Damage''' || align="center" | '''Stun Damage''' || align="center" | '''Chains into itself''' || align="center" | '''Special Cancel''' || align="center" | '''Super Cancel''' || align="center" | '''Juggle Value''' || align="center" | '''Reset or Juggle''' | ||
|- | |- | ||
| align="center" | Taunt || align="center" | HP+HK || align="center" | | | align="center" | Taunt || align="center" | HP+HK || align="center" | - || align="center" | - || align="center" | No || align="center" | No || align="center" | No || align="center" | - || align="center" | - | ||
|} | |} | ||
'''Frame Data''' | '''Frame Data''' | ||
{| border="1em" cellspacing="0" width="60%" style="border: 1px solid #999; background: | {| border="1em" cellspacing="0" width="60%" style="border: 1px solid #999; background: none;" | ||
|- | |- | ||
| align="center" | '''Startup''' || align="center" | '''Hit''' || align="center" | '''Recovery''' || align="center" | '''Blocked Advantage''' || align="center" | '''Hit Advantage''' || align="center" | '''Crouching Hit Advantage''' || align="center" | '''Guard''' || align="center" | '''Parry''' | | align="center" | '''Startup''' || align="center" | '''Hit''' || align="center" | '''Recovery''' || align="center" | '''Blocked Advantage''' || align="center" | '''Hit Advantage''' || align="center" | '''Crouching Hit Advantage''' || align="center" | '''Guard''' || align="center" | '''Parry''' | ||
|- | |- | ||
| align="center" | | | align="center" | - || align="center" | 59 || align="center" | - || align="center" | ? || align="center" | ? || align="center" | ? || align="center" | - || align="center" | - | ||
|} | |} | ||
'''Gauge Increase''' | '''Gauge Increase''' | ||
{| border="1em" cellspacing="0" width="30%" style="border: 1px solid #999; background: | {| border="1em" cellspacing="0" width="30%" style="border: 1px solid #999; background: none;" | ||
|- | |- | ||
| align="center" | '''Miss''' || align="center" | '''Blocked''' || align="center" | '''Hit''' || align="center" | '''Parry (Gauge for opponent)''' | | align="center" | '''Miss''' || align="center" | '''Blocked''' || align="center" | '''Hit''' || align="center" | '''Parry (Gauge for opponent)''' | ||
| Line 244: | Line 264: | ||
|} | |} | ||
''Comments here'' | ''Comments here'' | ||
[[Image:(chunlit3).gif|none]] | [[Image:(chunlit3).gif|none]] | ||
{| border="1em" cellspacing="0" width="60%" style="border: 1px solid #999; background: | {| border="1em" cellspacing="0" width="60%" style="border: 1px solid #999; background: none;" | ||
|- | |- | ||
| align="center" | '''Move''' || align="center" | '''Motion''' || align="center" | '''Damage''' || align="center" | '''Stun Damage''' || align="center" | '''Chains into itself''' || align="center" | '''Special Cancel''' || align="center" | '''Super Cancel''' | | align="center" | '''Move''' || align="center" | '''Motion''' || align="center" | '''Damage''' || align="center" | '''Stun Damage''' || align="center" | '''Chains into itself''' || align="center" | '''Special Cancel''' || align="center" | '''Super Cancel''' || align="center" | '''Juggle Value''' || align="center" | '''Reset or Juggle''' | ||
|- | |- | ||
| align="center" | Taunt || align="center" | HP+HK || align="center" | | | align="center" | Taunt || align="center" | HP+HK || align="center" | - || align="center" | - || align="center" | No || align="center" | No || align="center" | No || align="center" | - || align="center" | - | ||
|} | |} | ||
'''Frame Data''' | '''Frame Data''' | ||
{| border="1em" cellspacing="0" width="60%" style="border: 1px solid #999; background: | {| border="1em" cellspacing="0" width="60%" style="border: 1px solid #999; background: none;" | ||
|- | |- | ||
| align="center" | '''Startup''' || align="center" | '''Hit''' || align="center" | '''Recovery''' || align="center" | '''Blocked Advantage''' || align="center" | '''Hit Advantage''' || align="center" | '''Crouching Hit Advantage''' || align="center" | '''Guard''' || align="center" | '''Parry''' | | align="center" | '''Startup''' || align="center" | '''Hit''' || align="center" | '''Recovery''' || align="center" | '''Blocked Advantage''' || align="center" | '''Hit Advantage''' || align="center" | '''Crouching Hit Advantage''' || align="center" | '''Guard''' || align="center" | '''Parry''' | ||
|- | |- | ||
| align="center" | | | align="center" | - || align="center" | 59 || align="center" | - || align="center" | ? || align="center" | ? || align="center" | ? || align="center" | - || align="center" | - | ||
|} | |} | ||
'''Gauge Increase''' | '''Gauge Increase''' | ||
{| border="1em" cellspacing="0" width="30%" style="border: 1px solid #999; background: | {| border="1em" cellspacing="0" width="30%" style="border: 1px solid #999; background: none;" | ||
|- | |- | ||
| align="center" | '''Miss''' || align="center" | '''Blocked''' || align="center" | '''Hit''' || align="center" | '''Parry (Gauge for opponent)''' | | align="center" | '''Miss''' || align="center" | '''Blocked''' || align="center" | '''Hit''' || align="center" | '''Parry (Gauge for opponent)''' | ||
| Line 267: | Line 288: | ||
|} | |} | ||
''Comments here'' | ''Comments here'' | ||
[[Image:(chunlihparry).gif|none]] | [[Image:(chunlihparry).gif|none]] | ||
[[Image:(chunlilparry).gif|none]] | [[Image:(chunlilparry).gif|none]] | ||
{| border="1em" cellspacing="0" width="35%" style="border: 1px solid #999; background: | {| border="1em" cellspacing="0" width="35%" style="border: 1px solid #999; background: none;" | ||
|- | |- | ||
| align="center" | '''Move''' || align="center" | '''Motion''' | | align="center" | '''Move''' || align="center" | '''Motion''' | ||
| Line 282: | Line 304: | ||
|} | |} | ||
'''Frame Data''' | '''Frame Data''' | ||
{| border="1em" cellspacing="0" width="95%" style="border: 1px solid #999; background: | {| border="1em" cellspacing="0" width="95%" style="border: 1px solid #999; background: none;" | ||
|- | |- | ||
| align="center" | '''Move''' || align="center" | '''Frames you're frozen''' || align="center" | '''Frames opponent is frozen''' || align="center" | '''Frame Advantage when parry is successful''' || align="center" | '''Frames before you can try another parry''' | | align="center" | '''Move''' || align="center" | '''Frames you're frozen''' || align="center" | '''Frames opponent is frozen''' || align="center" | '''Frame Advantage when parry is successful''' || align="center" | '''Frames before you can try another parry''' | ||
| Line 292: | Line 314: | ||
| align="center" | Parry (Air) || align="center" | 16 || align="center" | 16 || align="center" | +4(LP/LK) +3(MP/MK) +2(HP/HK) 0(Special/Super) -16(Fireball) || align="center" | 21(19 when attack comes from the air)*,** | | align="center" | Parry (Air) || align="center" | 16 || align="center" | 16 || align="center" | +4(LP/LK) +3(MP/MK) +2(HP/HK) 0(Special/Super) -16(Fireball) || align="center" | 21(19 when attack comes from the air)*,** | ||
|} | |} | ||
{| border="1em" cellspacing="0" width="70%" style="border: 1px solid #999; background: | {| border="1em" cellspacing="0" width="70%" style="border: 1px solid #999; background: none;" | ||
|- | |- | ||
|* (If a parry attempt is successful, the 19/21/24 frame restriction is taken away and you can attempt another parry immediately) | |* (If a parry attempt is successful, the 19/21/24 frame restriction is taken away and you can attempt another parry immediately) | ||
| Line 299: | Line 321: | ||
|} | |} | ||
'''Gauge Increase''' | '''Gauge Increase''' | ||
{| border="1em" cellspacing="0" width="30%" style="border: 1px solid #999; background: | {| border="1em" cellspacing="0" width="30%" style="border: 1px solid #999; background: none;" | ||
|- | |- | ||
| align="center" | '''Move''' || align="center" | '''Gauge Increase''' | | align="center" | '''Move''' || align="center" | '''Gauge Increase''' | ||
| Line 309: | Line 331: | ||
| align="center" | Parry (Air) || align="center" | 4*** | | align="center" | Parry (Air) || align="center" | 4*** | ||
|} | |} | ||
{| border="1em" cellspacing="0" width="57%" style="border: 1px solid #999; background: | {| border="1em" cellspacing="0" width="57%" style="border: 1px solid #999; background: none;" | ||
|- | |- | ||
|*** (You gain 4 of gauge for whatever attack parried, and for whatever hit you parry during multihit attack) | |*** (You gain 4 of gauge for whatever attack parried, and for whatever hit you parry during multihit attack) | ||
| Line 319: | Line 341: | ||
==== Standing Normals ==== | ==== Standing Normals ==== | ||
[[Image:(chunlilp).gif|none]] | [[Image:(chunlilp).gif|none]] | ||
{| border="1em" cellspacing="0" width=" | {| border="1em" cellspacing="0" width="65%" style="border: 1px solid #999; background: none;" | ||
|- | |- | ||
| align="center" | '''Move''' || align="center" | '''Motion''' || align="center" | '''Damage''' || align="center" | '''Stun Damage''' || align="center" | '''Chains into itself''' || align="center" | '''Special Cancel''' || align="center" | '''Super Cancel''' | | align="center" | '''Move''' || align="center" | '''Motion''' || align="center" | '''Damage''' || align="center" | '''Stun Damage''' || align="center" | '''Chains into itself''' || align="center" | '''Special Cancel''' || align="center" | '''Super Cancel''' || align="center" | '''Juggle Value''' || align="center" | '''Reset or Juggle''' | ||
|- | |- | ||
| align="center" | Far Jab || align="center" | LP || align="center" | 15(3 life points) || align="center" | 3 || align="center" | Yes || align="center" | Yes || align="center" | Yes | | align="center" | Far Jab || align="center" | LP || align="center" | 15(3 life points) || align="center" | 3 || align="center" | Yes || align="center" | Yes || align="center" | Yes || align="center" | 15 || align="center" | Reset | ||
|} | |} | ||
'''Frame Data''' | '''Frame Data''' | ||
{| border="1em" cellspacing="0" width=" | {| border="1em" cellspacing="0" width="65%" style="border: 1px solid #999; background: none;" | ||
|- | |- | ||
| align="center" | '''Startup''' || align="center" | '''Hit''' || align="center" | '''Recovery''' || align="center" | '''Blocked Advantage''' || align="center" | '''Hit Advantage''' || align="center" | '''Crouching Hit Advantage''' || align="center" | '''Guard''' || align="center" | '''Parry''' | | align="center" | '''Startup''' || align="center" | '''Hit''' || align="center" | '''Recovery''' || align="center" | '''Blocked Advantage''' || align="center" | '''Hit Advantage''' || align="center" | '''Crouching Hit Advantage''' || align="center" | '''Guard''' || align="center" | '''Parry''' | ||
| Line 333: | Line 355: | ||
|} | |} | ||
'''Gauge Increase''' | '''Gauge Increase''' | ||
{| border="1em" cellspacing="0" width="30%" style="border: 1px solid #999; background: | {| border="1em" cellspacing="0" width="30%" style="border: 1px solid #999; background: none;" | ||
|- | |- | ||
| align="center" | '''Miss''' || align="center" | '''Blocked''' || align="center" | '''Hit''' || align="center" | '''Parry (Gauge for opponent)''' | | align="center" | '''Miss''' || align="center" | '''Blocked''' || align="center" | '''Hit''' || align="center" | '''Parry (Gauge for opponent)''' | ||
| Line 343: | Line 365: | ||
[[Image:(chunlimp).gif|none]] | [[Image:(chunlimp).gif|none]] | ||
{| border="1em" cellspacing="0" width=" | {| border="1em" cellspacing="0" width="65%" style="border: 1px solid #999; background: none;" | ||
|- | |- | ||
| align="center" | '''Move''' || align="center" | '''Motion''' || align="center" | '''Damage''' || align="center" | '''Stun Damage''' || align="center" | '''Chains into itself''' || align="center" | '''Special Cancel''' || align="center" | '''Super Cancel''' | | align="center" | '''Move''' || align="center" | '''Motion''' || align="center" | '''Damage''' || align="center" | '''Stun Damage''' || align="center" | '''Chains into itself''' || align="center" | '''Special Cancel''' || align="center" | '''Super Cancel''' || align="center" | '''Juggle Value''' || align="center" | '''Reset or Juggle''' | ||
|- | |- | ||
| align="center" | Far Strong || align="center" | MP || align="center" | 100(17 life points) || align="center" | 11 || align="center" | No || align="center" | | | align="center" | Far Strong || align="center" | MP || align="center" | 100(17 life points) || align="center" | 11 || align="center" | No || align="center" | Yes || align="center" | Yes || align="center" | 15 || align="center" | Reset | ||
|} | |} | ||
'''Frame Data''' | '''Frame Data''' | ||
{| border="1em" cellspacing="0" width=" | {| border="1em" cellspacing="0" width="65%" style="border: 1px solid #999; background: none;" | ||
|- | |- | ||
| align="center" | '''Startup''' || align="center" | '''Hit''' || align="center" | '''Recovery''' || align="center" | '''Blocked Advantage''' || align="center" | '''Hit Advantage''' || align="center" | '''Crouching Hit Advantage''' || align="center" | '''Guard''' || align="center" | '''Parry''' | | align="center" | '''Startup''' || align="center" | '''Hit''' || align="center" | '''Recovery''' || align="center" | '''Blocked Advantage''' || align="center" | '''Hit Advantage''' || align="center" | '''Crouching Hit Advantage''' || align="center" | '''Guard''' || align="center" | '''Parry''' | ||
| Line 357: | Line 379: | ||
|} | |} | ||
'''Gauge Increase''' | '''Gauge Increase''' | ||
{| border="1em" cellspacing="0" width="30%" style="border: 1px solid #999; background: | {| border="1em" cellspacing="0" width="30%" style="border: 1px solid #999; background: none;" | ||
|- | |- | ||
| align="center" | '''Miss''' || align="center" | '''Blocked''' || align="center" | '''Hit''' || align="center" | '''Parry (Gauge for opponent)''' | | align="center" | '''Miss''' || align="center" | '''Blocked''' || align="center" | '''Hit''' || align="center" | '''Parry (Gauge for opponent)''' | ||
| Line 367: | Line 389: | ||
[[Image:(chunlihp).gif|none]] | [[Image:(chunlihp).gif|none]] | ||
{| border="1em" cellspacing="0" width=" | {| border="1em" cellspacing="0" width="65%" style="border: 1px solid #999; background: none;" | ||
|- | |- | ||
| align="center" | '''Move''' || align="center" | '''Motion''' || align="center" | '''Damage''' || align="center" | '''Stun Damage''' || align="center" | '''Chains into itself''' || align="center" | '''Special Cancel''' || align="center" | '''Super Cancel''' | | align="center" | '''Move''' || align="center" | '''Motion''' || align="center" | '''Damage''' || align="center" | '''Stun Damage''' || align="center" | '''Chains into itself''' || align="center" | '''Special Cancel''' || align="center" | '''Super Cancel''' || align="center" | '''Juggle Value''' || align="center" | '''Reset or Juggle''' | ||
|- | |- | ||
| align="center" | Far Fierce || align="center" | HP || align="center" | 110(19 life points) || align="center" | 11 || align="center" | No || align="center" | No || align="center" | No | | align="center" | Far Fierce || align="center" | HP || align="center" | 110(19 life points) || align="center" | 11 || align="center" | No || align="center" | No || align="center" | No || align="center" | 15 || align="center" | Reset | ||
|} | |} | ||
'''Frame Data''' | '''Frame Data''' | ||
{| border="1em" cellspacing="0" width=" | {| border="1em" cellspacing="0" width="65%" style="border: 1px solid #999; background: none;" | ||
|- | |- | ||
| align="center" | '''Startup''' || align="center" | '''Hit''' || align="center" | '''Recovery''' || align="center" | '''Blocked Advantage''' || align="center" | '''Hit Advantage''' || align="center" | '''Crouching Hit Advantage''' || align="center" | '''Guard''' || align="center" | '''Parry''' | | align="center" | '''Startup''' || align="center" | '''Hit''' || align="center" | '''Recovery''' || align="center" | '''Blocked Advantage''' || align="center" | '''Hit Advantage''' || align="center" | '''Crouching Hit Advantage''' || align="center" | '''Guard''' || align="center" | '''Parry''' | ||
| Line 381: | Line 403: | ||
|} | |} | ||
'''Gauge Increase''' | '''Gauge Increase''' | ||
{| border="1em" cellspacing="0" width="30%" style="border: 1px solid #999; background: | {| border="1em" cellspacing="0" width="30%" style="border: 1px solid #999; background: none;" | ||
|- | |- | ||
| align="center" | '''Miss''' || align="center" | '''Blocked''' || align="center" | '''Hit''' || align="center" | '''Parry (Gauge for opponent)''' | | align="center" | '''Miss''' || align="center" | '''Blocked''' || align="center" | '''Hit''' || align="center" | '''Parry (Gauge for opponent)''' | ||
| Line 391: | Line 413: | ||
[[Image:(chunlicloselp).gif|none]] | [[Image:(chunlicloselp).gif|none]] | ||
{| border="1em" cellspacing="0" width=" | {| border="1em" cellspacing="0" width="65%" style="border: 1px solid #999; background: none;" | ||
|- | |- | ||
| align="center" | '''Move''' || align="center" | '''Motion''' || align="center" | '''Damage''' || align="center" | '''Stun Damage''' || align="center" | '''Chains into itself''' || align="center" | '''Special Cancel''' || align="center" | '''Super Cancel''' | | align="center" | '''Move''' || align="center" | '''Motion''' || align="center" | '''Damage''' || align="center" | '''Stun Damage''' || align="center" | '''Chains into itself''' || align="center" | '''Special Cancel''' || align="center" | '''Super Cancel''' || align="center" | '''Juggle Value''' || align="center" | '''Reset or Juggle''' | ||
|- | |- | ||
| align="center" | Close Jab || align="center" | (Close to opponent) LP(5 life points) || align="center" | 30 || align="center" | 3 || align="center" | No || align="center" | Yes || align="center" | Yes | | align="center" | Close Jab || align="center" | (Close to opponent) LP(5 life points) || align="center" | 30 || align="center" | 3 || align="center" | No || align="center" | Yes || align="center" | Yes || align="center" | 1 || align="center" | Reset | ||
|} | |} | ||
'''Frame Data''' | '''Frame Data''' | ||
{| border="1em" cellspacing="0" width=" | {| border="1em" cellspacing="0" width="65%" style="border: 1px solid #999; background: none;" | ||
|- | |- | ||
| align="center" | '''Startup''' || align="center" | '''Hit''' || align="center" | '''Recovery''' || align="center" | '''Blocked Advantage''' || align="center" | '''Hit Advantage''' || align="center" | '''Crouching Hit Advantage''' || align="center" | '''Guard''' || align="center" | '''Parry''' | | align="center" | '''Startup''' || align="center" | '''Hit''' || align="center" | '''Recovery''' || align="center" | '''Blocked Advantage''' || align="center" | '''Hit Advantage''' || align="center" | '''Crouching Hit Advantage''' || align="center" | '''Guard''' || align="center" | '''Parry''' | ||
| Line 405: | Line 427: | ||
|} | |} | ||
'''Gauge Increase''' | '''Gauge Increase''' | ||
{| border="1em" cellspacing="0" width="30%" style="border: 1px solid #999; background: | {| border="1em" cellspacing="0" width="30%" style="border: 1px solid #999; background: none;" | ||
|- | |- | ||
| align="center" | '''Miss''' || align="center" | '''Blocked''' || align="center" | '''Hit''' || align="center" | '''Parry (Gauge for opponent)''' | | align="center" | '''Miss''' || align="center" | '''Blocked''' || align="center" | '''Hit''' || align="center" | '''Parry (Gauge for opponent)''' | ||
| Line 418: | Line 440: | ||
[[Image:(chunlilk).gif|none]] | [[Image:(chunlilk).gif|none]] | ||
{| border="1em" cellspacing="0" width="65%" style="border: 1px solid #999; background: | {| border="1em" cellspacing="0" width="65%" style="border: 1px solid #999; background: none;" | ||
|- | |- | ||
| align="center" | '''Move''' || align="center" | '''Motion''' || align="center" | '''Damage''' || align="center" | '''Stun Damage''' || align="center" | '''Chains into itself''' || align="center" | '''Special Cancel''' || align="center" | '''Super Cancel''' | | align="center" | '''Move''' || align="center" | '''Motion''' || align="center" | '''Damage''' || align="center" | '''Stun Damage''' || align="center" | '''Chains into itself''' || align="center" | '''Special Cancel''' || align="center" | '''Super Cancel''' || align="center" | '''Juggle Value''' || align="center" | '''Reset or Juggle''' | ||
|- | |- | ||
| align="center" | Short || align="center" | LK || align="center" | 40(7 life points) || align="center" | 3 || align="center" | No || align="center" | No || align="center" | No | | align="center" | Short || align="center" | LK || align="center" | 40(7 life points) || align="center" | 3 || align="center" | No || align="center" | No || align="center" | No || align="center" | 15 || align="center" | Reset | ||
|} | |} | ||
'''Frame Data''' | '''Frame Data''' | ||
{| border="1em" cellspacing="0" width=" | {| border="1em" cellspacing="0" width="65%" style="border: 1px solid #999; background: none;" | ||
|- | |- | ||
| align="center" | '''Startup''' || align="center" | '''Hit''' || align="center" | '''Recovery''' || align="center" | '''Blocked Advantage''' || align="center" | '''Hit Advantage''' || align="center" | '''Crouching Hit Advantage''' || align="center" | '''Guard''' || align="center" | '''Parry''' | | align="center" | '''Startup''' || align="center" | '''Hit''' || align="center" | '''Recovery''' || align="center" | '''Blocked Advantage''' || align="center" | '''Hit Advantage''' || align="center" | '''Crouching Hit Advantage''' || align="center" | '''Guard''' || align="center" | '''Parry''' | ||
| Line 432: | Line 454: | ||
|} | |} | ||
'''Gauge Increase''' | '''Gauge Increase''' | ||
{| border="1em" cellspacing="0" width="30%" style="border: 1px solid #999; background: | {| border="1em" cellspacing="0" width="30%" style="border: 1px solid #999; background: none;" | ||
|- | |- | ||
| align="center" | '''Miss''' || align="center" | '''Blocked''' || align="center" | '''Hit''' || align="center" | '''Parry (Gauge for opponent)''' | | align="center" | '''Miss''' || align="center" | '''Blocked''' || align="center" | '''Hit''' || align="center" | '''Parry (Gauge for opponent)''' | ||
| Line 441: | Line 463: | ||
[[Image:(chunlimk).gif|none]] | [[Image:(chunlimk).gif|none]] | ||
{| border="1em" cellspacing="0" width="65%" style="border: 1px solid #999; background: | {| border="1em" cellspacing="0" width="65%" style="border: 1px solid #999; background: none;" | ||
|- | |- | ||
| align="center" | '''Move''' || align="center" | '''Motion''' || align="center" | '''Damage''' || align="center" | '''Stun Damage''' || align="center" | '''Chains into itself''' || align="center" | '''Special Cancel''' || align="center" | '''Super Cancel''' | | align="center" | '''Move''' || align="center" | '''Motion''' || align="center" | '''Damage''' || align="center" | '''Stun Damage''' || align="center" | '''Chains into itself''' || align="center" | '''Special Cancel''' || align="center" | '''Super Cancel''' || align="center" | '''Juggle Value''' || align="center" | '''Reset or Juggle''' | ||
|- | |- | ||
| align="center" | Forward || align="center" | MK || align="center" | 90(16 life points) || align="center" | 11 || align="center" | No || align="center" | No || align="center" | No | | align="center" | Forward || align="center" | MK || align="center" | 90(16 life points) || align="center" | 11 || align="center" | No || align="center" | No || align="center" | No || align="center" | 15 || align="center" | Reset | ||
|} | |} | ||
'''Frame Data''' | '''Frame Data''' | ||
{| border="1em" cellspacing="0" width=" | {| border="1em" cellspacing="0" width="65%" style="border: 1px solid #999; background: none;" | ||
|- | |- | ||
| align="center" | '''Startup''' || align="center" | '''Hit''' || align="center" | '''Recovery''' || align="center" | '''Blocked Advantage''' || align="center" | '''Hit Advantage''' || align="center" | '''Crouching Hit Advantage''' || align="center" | '''Guard''' || align="center" | '''Parry''' | | align="center" | '''Startup''' || align="center" | '''Hit''' || align="center" | '''Recovery''' || align="center" | '''Blocked Advantage''' || align="center" | '''Hit Advantage''' || align="center" | '''Crouching Hit Advantage''' || align="center" | '''Guard''' || align="center" | '''Parry''' | ||
| Line 455: | Line 477: | ||
|} | |} | ||
'''Gauge Increase''' | '''Gauge Increase''' | ||
{| border="1em" cellspacing="0" width="30%" style="border: 1px solid #999; background: | {| border="1em" cellspacing="0" width="30%" style="border: 1px solid #999; background: none;" | ||
|- | |- | ||
| align="center" | '''Miss''' || align="center" | '''Blocked''' || align="center" | '''Hit''' || align="center" | '''Parry (Gauge for opponent)''' | | align="center" | '''Miss''' || align="center" | '''Blocked''' || align="center" | '''Hit''' || align="center" | '''Parry (Gauge for opponent)''' | ||
| Line 465: | Line 487: | ||
[[Image:(chunlihk).gif|none]] | [[Image:(chunlihk).gif|none]] | ||
{| border="1em" cellspacing="0" width="65%" style="border: 1px solid #999; background: | {| border="1em" cellspacing="0" width="65%" style="border: 1px solid #999; background: none;" | ||
|- | |- | ||
| align="center" | '''Move''' || align="center" | '''Motion''' || align="center" | '''Damage''' || align="center" | '''Stun Damage''' || align="center" | '''Chains into itself''' || align="center" | '''Special Cancel''' || align="center" | '''Super Cancel''' | | align="center" | '''Move''' || align="center" | '''Motion''' || align="center" | '''Damage''' || align="center" | '''Stun Damage''' || align="center" | '''Chains into itself''' || align="center" | '''Special Cancel''' || align="center" | '''Super Cancel''' || align="center" | '''Juggle Value''' || align="center" | '''Reset or Juggle''' | ||
|- | |- | ||
| align="center" | Roundhouse || align="center" | HK || align="center" | 120(21 life points) || align="center" | 13 || align="center" | No || align="center" | No || align="center" | No | | align="center" | Roundhouse || align="center" | HK || align="center" | 120(21 life points) || align="center" | 13 || align="center" | No || align="center" | No || align="center" | No || align="center" | 15 || align="center" | Reset | ||
|} | |} | ||
'''Frame Data''' | '''Frame Data''' | ||
{| border="1em" cellspacing="0" width=" | {| border="1em" cellspacing="0" width="65%" style="border: 1px solid #999; background: none;" | ||
|- | |- | ||
| align="center" | '''Startup''' || align="center" | '''Hit''' || align="center" | '''Recovery''' || align="center" | '''Blocked Advantage''' || align="center" | '''Hit Advantage''' || align="center" | '''Crouching Hit Advantage''' || align="center" | '''Guard''' || align="center" | '''Parry''' | | align="center" | '''Startup''' || align="center" | '''Hit''' || align="center" | '''Recovery''' || align="center" | '''Blocked Advantage''' || align="center" | '''Hit Advantage''' || align="center" | '''Crouching Hit Advantage''' || align="center" | '''Guard''' || align="center" | '''Parry''' | ||
| Line 479: | Line 501: | ||
|} | |} | ||
'''Gauge Increase''' | '''Gauge Increase''' | ||
{| border="1em" cellspacing="0" width="30%" style="border: 1px solid #999; background: | {| border="1em" cellspacing="0" width="30%" style="border: 1px solid #999; background: none;" | ||
|- | |- | ||
| align="center" | '''Miss''' || align="center" | '''Blocked''' || align="center" | '''Hit''' || align="center" | '''Parry (Gauge for opponent)''' | | align="center" | '''Miss''' || align="center" | '''Blocked''' || align="center" | '''Hit''' || align="center" | '''Parry (Gauge for opponent)''' | ||
| Line 489: | Line 511: | ||
[[Image:(chunliclosemk).gif|none]] | [[Image:(chunliclosemk).gif|none]] | ||
{| border="1em" cellspacing="0" width="65%" style="border: 1px solid #999; background: | {| border="1em" cellspacing="0" width="65%" style="border: 1px solid #999; background: none;" | ||
|- | |- | ||
| align="center" | '''Move''' || align="center" | '''Motion''' || align="center" | '''Damage''' || align="center" | '''Stun Damage''' || align="center" | '''Chains into itself''' || align="center" | '''Special Cancel''' || align="center" | '''Super Cancel''' | | align="center" | '''Move''' || align="center" | '''Motion''' || align="center" | '''Damage''' || align="center" | '''Stun Damage''' || align="center" | '''Chains into itself''' || align="center" | '''Special Cancel''' || align="center" | '''Super Cancel''' || align="center" | '''Juggle Value''' || align="center" | '''Reset or Juggle''' | ||
|- | |- | ||
| align="center" | Close Forward || align="center" | (Close to opponent) MK || align="center" | 80(14 life points) || align="center" | 5 || align="center" | No || align="center" | No || align="center" | No | | align="center" | Close Forward || align="center" | (Close to opponent) MK || align="center" | 80(14 life points) || align="center" | 5 || align="center" | No || align="center" | No || align="center" | No || align="center" | 15 || align="center" | Reset | ||
|} | |} | ||
'''Frame Data''' | '''Frame Data''' | ||
{| border="1em" cellspacing="0" width=" | {| border="1em" cellspacing="0" width="65%" style="border: 1px solid #999; background: none;" | ||
|- | |- | ||
| align="center" | '''Startup''' || align="center" | '''Hit''' || align="center" | '''Recovery''' || align="center" | '''Blocked Advantage''' || align="center" | '''Hit Advantage''' || align="center" | '''Crouching Hit Advantage''' || align="center" | '''Guard''' || align="center" | '''Parry''' | | align="center" | '''Startup''' || align="center" | '''Hit''' || align="center" | '''Recovery''' || align="center" | '''Blocked Advantage''' || align="center" | '''Hit Advantage''' || align="center" | '''Crouching Hit Advantage''' || align="center" | '''Guard''' || align="center" | '''Parry''' | ||
| Line 503: | Line 525: | ||
|} | |} | ||
'''Gauge Increase''' | '''Gauge Increase''' | ||
{| border="1em" cellspacing="0" width="30%" style="border: 1px solid #999; background: | {| border="1em" cellspacing="0" width="30%" style="border: 1px solid #999; background: none;" | ||
|- | |- | ||
| align="center" | '''Miss''' || align="center" | '''Blocked''' || align="center" | '''Hit''' || align="center" | '''Parry (Gauge for opponent)''' | | align="center" | '''Miss''' || align="center" | '''Blocked''' || align="center" | '''Hit''' || align="center" | '''Parry (Gauge for opponent)''' | ||
| Line 512: | Line 534: | ||
[[Image:(chunliclosehk).gif|none]] | [[Image:(chunliclosehk).gif|none]] | ||
{| border="1em" cellspacing="0" width="65%" style="border: 1px solid #999; background: | {| border="1em" cellspacing="0" width="65%" style="border: 1px solid #999; background: none;" | ||
|- | |- | ||
| align="center" | '''Move''' || align="center" | '''Motion''' || align="center" | '''Damage''' || align="center" | '''Stun Damage''' || align="center" | '''Chains into itself''' || align="center" | '''Special Cancel''' || align="center" | '''Super Cancel''' | | align="center" | '''Move''' || align="center" | '''Motion''' || align="center" | '''Damage''' || align="center" | '''Stun Damage''' || align="center" | '''Chains into itself''' || align="center" | '''Special Cancel''' || align="center" | '''Super Cancel''' || align="center" | '''Juggle Value''' || align="center" | '''Reset or Juggle''' | ||
|- | |- | ||
| align="center" | Close Roundhouse || align="center" | (Close to opponent) HK || align="center" | 120(110)(21 life points) || align="center" | 15(13) || align="center" | No || align="center" | Yes || align="center" | Yes | | align="center" | Close Roundhouse || align="center" | (Close to opponent) HK || align="center" | 120(110)(21 life points) || align="center" | 15(13) || align="center" | No || align="center" | Yes || align="center" | Yes || align="center" | 2 || align="center" | Reset | ||
|} | |} | ||
'''Frame Data''' | '''Frame Data''' | ||
{| border="1em" cellspacing="0" width=" | {| border="1em" cellspacing="0" width="65%" style="border: 1px solid #999; background: none;" | ||
|- | |- | ||
| align="center" | '''Startup''' || align="center" | '''Hit''' || align="center" | '''Recovery''' || align="center" | '''Blocked Advantage''' || align="center" | '''Hit Advantage''' || align="center" | '''Crouching Hit Advantage''' || align="center" | '''Guard''' || align="center" | '''Parry''' | | align="center" | '''Startup''' || align="center" | '''Hit''' || align="center" | '''Recovery''' || align="center" | '''Blocked Advantage''' || align="center" | '''Hit Advantage''' || align="center" | '''Crouching Hit Advantage''' || align="center" | '''Guard''' || align="center" | '''Parry''' | ||
| Line 526: | Line 548: | ||
|} | |} | ||
'''Gauge Increase''' | '''Gauge Increase''' | ||
{| border="1em" cellspacing="0" width="30%" style="border: 1px solid #999; background: | {| border="1em" cellspacing="0" width="30%" style="border: 1px solid #999; background: none;" | ||
|- | |- | ||
| align="center" | '''Miss''' || align="center" | '''Blocked''' || align="center" | '''Hit''' || align="center" | '''Parry (Gauge for opponent)''' | | align="center" | '''Miss''' || align="center" | '''Blocked''' || align="center" | '''Hit''' || align="center" | '''Parry (Gauge for opponent)''' | ||
| Line 538: | Line 560: | ||
[[Image:(chunlijlp).gif|none]] | [[Image:(chunlijlp).gif|none]] | ||
{| border="1em" cellspacing="0" width="65%" style="border: 1px solid #999; background: | {| border="1em" cellspacing="0" width="65%" style="border: 1px solid #999; background: none;" | ||
|- | |- | ||
| align="center" | '''Move''' || align="center" | '''Motion''' || align="center" | '''Damage''' || align="center" | '''Stun Damage''' || align="center" | '''Chains into itself''' || align="center" | '''Special Cancel''' || align="center" | '''Super Cancel''' | | align="center" | '''Move''' || align="center" | '''Motion''' || align="center" | '''Damage''' || align="center" | '''Stun Damage''' || align="center" | '''Chains into itself''' || align="center" | '''Special Cancel''' || align="center" | '''Super Cancel''' || align="center" | '''Juggle Value''' || align="center" | '''Reset or Juggle''' | ||
|- | |- | ||
| align="center" | Jump Jab || align="center" | (Air) LP || align="center" | 40(7 life points) || align="center" | 7 || align="center" | No || align="center" | No || align="center" | No | | align="center" | Jump Jab || align="center" | (Air) LP || align="center" | 40(7 life points) || align="center" | 7 || align="center" | No || align="center" | No || align="center" | No || align="center" | 3 || align="center" | Reset | ||
|} | |} | ||
'''Frame Data''' | '''Frame Data''' | ||
{| border="1em" cellspacing="0" width="70%" style="border: 1px solid #999; background: | {| border="1em" cellspacing="0" width="70%" style="border: 1px solid #999; background: none;" | ||
|- | |- | ||
| align="center" | '''Startup''' || align="center" | '''Hit''' || align="center" | '''Recovery''' || align="center" | '''Blocked Advantage''' || align="center" | '''Hit Advantage''' || align="center" | '''Crouching Hit Advantage''' || align="center" | '''Guard''' || align="center" | '''Parry''' | | align="center" | '''Startup''' || align="center" | '''Hit''' || align="center" | '''Recovery''' || align="center" | '''Blocked Advantage''' || align="center" | '''Hit Advantage''' || align="center" | '''Crouching Hit Advantage''' || align="center" | '''Guard''' || align="center" | '''Parry''' | ||
| Line 552: | Line 574: | ||
|} | |} | ||
'''Gauge Increase''' | '''Gauge Increase''' | ||
{| border="1em" cellspacing="0" width="30%" style="border: 1px solid #999; background: | {| border="1em" cellspacing="0" width="30%" style="border: 1px solid #999; background: none;" | ||
|- | |- | ||
| align="center" | '''Miss''' || align="center" | '''Blocked''' || align="center" | '''Hit''' || align="center" | '''Parry (Gauge for opponent)''' | | align="center" | '''Miss''' || align="center" | '''Blocked''' || align="center" | '''Hit''' || align="center" | '''Parry (Gauge for opponent)''' | ||
| Line 562: | Line 584: | ||
[[Image:(chunlijmp).gif|none]] | [[Image:(chunlijmp).gif|none]] | ||
{| border="1em" cellspacing="0" width=" | {| border="1em" cellspacing="0" width="65%" style="border: 1px solid #999; background: none;" | ||
|- | |- | ||
| align="center" | '''Move''' || align="center" | '''Motion''' || align="center" | '''Damage''' || align="center" | '''Stun Damage''' || align="center" | '''Chains into itself''' || align="center" | '''Special Cancel''' || align="center" | '''Super Cancel''' | | align="center" | '''Move''' || align="center" | '''Motion''' || align="center" | '''Damage''' || align="center" | '''Stun Damage''' || align="center" | '''Chains into itself''' || align="center" | '''Special Cancel''' || align="center" | '''Super Cancel''' || align="center" | '''Juggle Value''' || align="center" | '''Reset or Juggle''' | ||
|- | |- | ||
| align="center" | Jump Strong || align="center" | (Air) MP || align="center" | 60(80 if neutral jump)(10/14 life points) || align="center" | 9(11 if neutral jump) || align="center" | No || align="center" | No || align="center" | No | | align="center" | Jump Strong || align="center" | (Air) MP || align="center" | 60(80 if neutral jump)(10/14 life points) || align="center" | 9(11 if neutral jump) || align="center" | No || align="center" | No || align="center" | No || align="center" | 3 || align="center" | Reset | ||
|} | |} | ||
'''Frame Data''' | '''Frame Data''' | ||
{| border="1em" cellspacing="0" width="65%" style="border: 1px solid #999; background: | {| border="1em" cellspacing="0" width="65%" style="border: 1px solid #999; background: none;" | ||
|- | |- | ||
| align="center" | '''Startup''' || align="center" | '''Hit''' || align="center" | '''Recovery''' || align="center" | '''Blocked Advantage''' || align="center" | '''Hit Advantage''' || align="center" | '''Crouching Hit Advantage''' || align="center" | '''Guard''' || align="center" | '''Parry''' | | align="center" | '''Startup''' || align="center" | '''Hit''' || align="center" | '''Recovery''' || align="center" | '''Blocked Advantage''' || align="center" | '''Hit Advantage''' || align="center" | '''Crouching Hit Advantage''' || align="center" | '''Guard''' || align="center" | '''Parry''' | ||
| Line 576: | Line 598: | ||
|} | |} | ||
'''Gauge Increase''' | '''Gauge Increase''' | ||
{| border="1em" cellspacing="0" width="30%" style="border: 1px solid #999; background: | {| border="1em" cellspacing="0" width="30%" style="border: 1px solid #999; background: none;" | ||
|- | |- | ||
| align="center" | '''Miss''' || align="center" | '''Blocked''' || align="center" | '''Hit''' || align="center" | '''Parry (Gauge for opponent)''' | | align="center" | '''Miss''' || align="center" | '''Blocked''' || align="center" | '''Hit''' || align="center" | '''Parry (Gauge for opponent)''' | ||
| Line 586: | Line 608: | ||
[[Image:(chunlijhp).gif|none]] | [[Image:(chunlijhp).gif|none]] | ||
{| border="1em" cellspacing="0" width=" | {| border="1em" cellspacing="0" width="65%" style="border: 1px solid #999; background: none;" | ||
|- | |- | ||
| align="center" | '''Move''' || align="center" | '''Motion''' || align="center" | '''Damage''' || align="center" | '''Stun Damage''' || align="center" | '''Chains into itself''' || align="center" | '''Special Cancel''' || align="center" | '''Super Cancel''' | | align="center" | '''Move''' || align="center" | '''Motion''' || align="center" | '''Damage''' || align="center" | '''Stun Damage''' || align="center" | '''Chains into itself''' || align="center" | '''Special Cancel''' || align="center" | '''Super Cancel''' || align="center" | '''Juggle Value''' || align="center" | '''Reset or Juggle''' | ||
|- | |- | ||
| align="center" | Jump Fierce || align="center" | (Air) HP || align="center" | 80(10 life points) || align="center" | 9 || align="center" | No || align="center" | No || align="center" | No | | align="center" | Jump Fierce || align="center" | (Air) HP || align="center" | 80(10 life points) || align="center" | 9 || align="center" | No || align="center" | No || align="center" | No || align="center" | 3 || align="center" | Reset | ||
|} | |} | ||
'''Frame Data''' | '''Frame Data''' | ||
{| border="1em" cellspacing="0" width="65%" style="border: 1px solid #999; background: | {| border="1em" cellspacing="0" width="65%" style="border: 1px solid #999; background: none;" | ||
|- | |- | ||
| align="center" | '''Startup''' || align="center" | '''Hit''' || align="center" | '''Recovery''' || align="center" | '''Blocked Advantage''' || align="center" | '''Hit Advantage''' || align="center" | '''Crouching Hit Advantage''' || align="center" | '''Guard''' || align="center" | '''Parry''' | | align="center" | '''Startup''' || align="center" | '''Hit''' || align="center" | '''Recovery''' || align="center" | '''Blocked Advantage''' || align="center" | '''Hit Advantage''' || align="center" | '''Crouching Hit Advantage''' || align="center" | '''Guard''' || align="center" | '''Parry''' | ||
| Line 600: | Line 622: | ||
|} | |} | ||
'''Gauge Increase''' | '''Gauge Increase''' | ||
{| border="1em" cellspacing="0" width="30%" style="border: 1px solid #999; background: | {| border="1em" cellspacing="0" width="30%" style="border: 1px solid #999; background: none;" | ||
|- | |- | ||
| align="center" | '''Miss''' || align="center" | '''Blocked''' || align="center" | '''Hit''' || align="center" | '''Parry (Gauge for opponent)''' | | align="center" | '''Miss''' || align="center" | '''Blocked''' || align="center" | '''Hit''' || align="center" | '''Parry (Gauge for opponent)''' | ||
| Line 610: | Line 632: | ||
[[Image:(chunlinjhp).gif|none]] | [[Image:(chunlinjhp).gif|none]] | ||
{| border="1em" cellspacing="0" width=" | {| border="1em" cellspacing="0" width="65%" style="border: 1px solid #999; background: none;" | ||
|- | |- | ||
| align="center" | '''Move''' || align="center" | '''Motion''' || align="center" | '''Damage''' || align="center" | '''Stun Damage''' || align="center" | '''Chains into itself''' || align="center" | '''Special Cancel''' || align="center" | '''Super Cancel''' | | align="center" | '''Move''' || align="center" | '''Motion''' || align="center" | '''Damage''' || align="center" | '''Stun Damage''' || align="center" | '''Chains into itself''' || align="center" | '''Special Cancel''' || align="center" | '''Super Cancel''' || align="center" | '''Juggle Value''' || align="center" | '''Reset or Juggle''' | ||
|- | |- | ||
| align="center" | Neutral Jump Fierce || align="center" | (Air) HP || align="center" | 130(23 life points) || align="center" | 15 || align="center" | No || align="center" | No || align="center" | No | | align="center" | Neutral Jump Fierce || align="center" | (Air) HP || align="center" | 130(23 life points) || align="center" | 15 || align="center" | No || align="center" | No || align="center" | No || align="center" | 3 || align="center" | Juggle | ||
|} | |} | ||
'''Frame Data''' | '''Frame Data''' | ||
{| border="1em" cellspacing="0" width="65%" style="border: 1px solid #999; background: | {| border="1em" cellspacing="0" width="65%" style="border: 1px solid #999; background: none;" | ||
|- | |- | ||
| align="center" | '''Startup''' || align="center" | '''Hit''' || align="center" | '''Recovery''' || align="center" | '''Blocked Advantage''' || align="center" | '''Hit Advantage''' || align="center" | '''Crouching Hit Advantage''' || align="center" | '''Guard''' || align="center" | '''Parry''' | | align="center" | '''Startup''' || align="center" | '''Hit''' || align="center" | '''Recovery''' || align="center" | '''Blocked Advantage''' || align="center" | '''Hit Advantage''' || align="center" | '''Crouching Hit Advantage''' || align="center" | '''Guard''' || align="center" | '''Parry''' | ||
| Line 624: | Line 646: | ||
|} | |} | ||
'''Gauge Increase''' | '''Gauge Increase''' | ||
{| border="1em" cellspacing="0" width="30%" style="border: 1px solid #999; background: | {| border="1em" cellspacing="0" width="30%" style="border: 1px solid #999; background: none;" | ||
|- | |- | ||
| align="center" | '''Miss''' || align="center" | '''Blocked''' || align="center" | '''Hit''' || align="center" | '''Parry (Gauge for opponent)''' | | align="center" | '''Miss''' || align="center" | '''Blocked''' || align="center" | '''Hit''' || align="center" | '''Parry (Gauge for opponent)''' | ||
| Line 634: | Line 656: | ||
[[Image:(chunlijlk).gif|none]] | [[Image:(chunlijlk).gif|none]] | ||
{| border="1em" cellspacing="0" width=" | {| border="1em" cellspacing="0" width="65%" style="border: 1px solid #999; background: none;" | ||
|- | |- | ||
| align="center" | '''Move''' || align="center" | '''Motion''' || align="center" | '''Damage''' || align="center" | '''Stun Damage''' || align="center" | '''Chains into itself''' || align="center" | '''Special Cancel''' || align="center" | '''Super Cancel''' | | align="center" | '''Move''' || align="center" | '''Motion''' || align="center" | '''Damage''' || align="center" | '''Stun Damage''' || align="center" | '''Chains into itself''' || align="center" | '''Special Cancel''' || align="center" | '''Super Cancel''' || align="center" | '''Juggle Value''' || align="center" | '''Reset or Juggle''' | ||
|- | |- | ||
| align="center" | Jump Short || align="center" | (Air) LK || align="center" | 50(40 if neutral jump)(8/7 life points) || align="center" | 5(7 if neutral jump) || align="center" | No || align="center" | No || align="center" | No | | align="center" | Jump Short || align="center" | (Air) LK || align="center" | 50(40 if neutral jump)(8/7 life points) || align="center" | 5(7 if neutral jump) || align="center" | No || align="center" | No || align="center" | No || align="center" | 3 || align="center" | Reset | ||
|} | |} | ||
'''Frame Data''' | '''Frame Data''' | ||
{| border="1em" cellspacing="0" width="75%" style="border: 1px solid #999; background: | {| border="1em" cellspacing="0" width="75%" style="border: 1px solid #999; background: none;" | ||
|- | |- | ||
| align="center" | '''Startup''' || align="center" | '''Hit''' || align="center" | '''Recovery''' || align="center" | '''Blocked Advantage''' || align="center" | '''Hit Advantage''' || align="center" | '''Crouching Hit Advantage''' || align="center" | '''Guard''' || align="center" | '''Parry''' | | align="center" | '''Startup''' || align="center" | '''Hit''' || align="center" | '''Recovery''' || align="center" | '''Blocked Advantage''' || align="center" | '''Hit Advantage''' || align="center" | '''Crouching Hit Advantage''' || align="center" | '''Guard''' || align="center" | '''Parry''' | ||
| Line 648: | Line 670: | ||
|} | |} | ||
'''Gauge Increase''' | '''Gauge Increase''' | ||
{| border="1em" cellspacing="0" width="30%" style="border: 1px solid #999; background: | {| border="1em" cellspacing="0" width="30%" style="border: 1px solid #999; background: none;" | ||
|- | |- | ||
| align="center" | '''Miss''' || align="center" | '''Blocked''' || align="center" | '''Hit''' || align="center" | '''Parry (Gauge for opponent)''' | | align="center" | '''Miss''' || align="center" | '''Blocked''' || align="center" | '''Hit''' || align="center" | '''Parry (Gauge for opponent)''' | ||
| Line 658: | Line 680: | ||
[[Image:(chunlijmk).gif|none]] | [[Image:(chunlijmk).gif|none]] | ||
{| border="1em" cellspacing="0" width=" | {| border="1em" cellspacing="0" width="65%" style="border: 1px solid #999; background: none;" | ||
|- | |- | ||
| align="center" | '''Move''' || align="center" | '''Motion''' || align="center" | '''Damage''' || align="center" | '''Stun Damage''' || align="center" | '''Chains into itself''' || align="center" | '''Special Cancel''' || align="center" | '''Super Cancel''' | | align="center" | '''Move''' || align="center" | '''Motion''' || align="center" | '''Damage''' || align="center" | '''Stun Damage''' || align="center" | '''Chains into itself''' || align="center" | '''Special Cancel''' || align="center" | '''Super Cancel''' || align="center" | '''Juggle Value''' || align="center" | '''Reset or Juggle''' | ||
|- | |- | ||
| align="center" | Jump Forward || align="center" | (Air) MK || align="center" | 90(16 life points) || align="center" | 9 || align="center" | No || align="center" | No || align="center" | No | | align="center" | Jump Forward || align="center" | (Air) MK || align="center" | 90(16 life points) || align="center" | 9 || align="center" | No || align="center" | No || align="center" | No || align="center" | 3 || align="center" | Reset | ||
|} | |} | ||
'''Frame Data''' | '''Frame Data''' | ||
{| border="1em" cellspacing="0" width="65%" style="border: 1px solid #999; background: | {| border="1em" cellspacing="0" width="65%" style="border: 1px solid #999; background: none;" | ||
|- | |- | ||
| align="center" | '''Startup''' || align="center" | '''Hit''' || align="center" | '''Recovery''' || align="center" | '''Blocked Advantage''' || align="center" | '''Hit Advantage''' || align="center" | '''Crouching Hit Advantage''' || align="center" | '''Guard''' || align="center" | '''Parry''' | | align="center" | '''Startup''' || align="center" | '''Hit''' || align="center" | '''Recovery''' || align="center" | '''Blocked Advantage''' || align="center" | '''Hit Advantage''' || align="center" | '''Crouching Hit Advantage''' || align="center" | '''Guard''' || align="center" | '''Parry''' | ||
| Line 672: | Line 694: | ||
|} | |} | ||
'''Gauge Increase''' | '''Gauge Increase''' | ||
{| border="1em" cellspacing="0" width="30%" style="border: 1px solid #999; background: | {| border="1em" cellspacing="0" width="30%" style="border: 1px solid #999; background: none;" | ||
|- | |- | ||
| align="center" | '''Miss''' || align="center" | '''Blocked''' || align="center" | '''Hit''' || align="center" | '''Parry (Gauge for opponent)''' | | align="center" | '''Miss''' || align="center" | '''Blocked''' || align="center" | '''Hit''' || align="center" | '''Parry (Gauge for opponent)''' | ||
| Line 682: | Line 704: | ||
[[Image:(chunlinjmk).gif|none]] | [[Image:(chunlinjmk).gif|none]] | ||
{| border="1em" cellspacing="0" width=" | {| border="1em" cellspacing="0" width="65%" style="border: 1px solid #999; background: none;" | ||
|- | |- | ||
| align="center" | '''Move''' || align="center" | '''Motion''' || align="center" | '''Damage''' || align="center" | '''Stun Damage''' || align="center" | '''Chains into itself''' || align="center" | '''Special Cancel''' || align="center" | '''Super Cancel''' | | align="center" | '''Move''' || align="center" | '''Motion''' || align="center" | '''Damage''' || align="center" | '''Stun Damage''' || align="center" | '''Chains into itself''' || align="center" | '''Special Cancel''' || align="center" | '''Super Cancel''' || align="center" | '''Juggle Value''' || align="center" | '''Reset or Juggle''' | ||
|- | |- | ||
| align="center" | Neutral Jump Forward || align="center" | (Air) MK || align="center" | 80(14 life points) || align="center" | 9 || align="center" | No || align="center" | No || align="center" | No | | align="center" | Neutral Jump Forward || align="center" | (Air) MK || align="center" | 80(14 life points) || align="center" | 9 || align="center" | No || align="center" | No || align="center" | No || align="center" | 3 || align="center" | Reset | ||
|} | |} | ||
'''Frame Data''' | '''Frame Data''' | ||
{| border="1em" cellspacing="0" width="65%" style="border: 1px solid #999; background: | {| border="1em" cellspacing="0" width="65%" style="border: 1px solid #999; background: none;" | ||
|- | |- | ||
| align="center" | '''Startup''' || align="center" | '''Hit''' || align="center" | '''Recovery''' || align="center" | '''Blocked Advantage''' || align="center" | '''Hit Advantage''' || align="center" | '''Crouching Hit Advantage''' || align="center" | '''Guard''' || align="center" | '''Parry''' | | align="center" | '''Startup''' || align="center" | '''Hit''' || align="center" | '''Recovery''' || align="center" | '''Blocked Advantage''' || align="center" | '''Hit Advantage''' || align="center" | '''Crouching Hit Advantage''' || align="center" | '''Guard''' || align="center" | '''Parry''' | ||
| Line 696: | Line 718: | ||
|} | |} | ||
'''Gauge Increase''' | '''Gauge Increase''' | ||
{| border="1em" cellspacing="0" width="30%" style="border: 1px solid #999; background: | {| border="1em" cellspacing="0" width="30%" style="border: 1px solid #999; background: none;" | ||
|- | |- | ||
| align="center" | '''Miss''' || align="center" | '''Blocked''' || align="center" | '''Hit''' || align="center" | '''Parry (Gauge for opponent)''' | | align="center" | '''Miss''' || align="center" | '''Blocked''' || align="center" | '''Hit''' || align="center" | '''Parry (Gauge for opponent)''' | ||
| Line 706: | Line 728: | ||
[[Image:(chunlijhk).gif|none]] | [[Image:(chunlijhk).gif|none]] | ||
{| border="1em" cellspacing="0" width=" | {| border="1em" cellspacing="0" width="65%" style="border: 1px solid #999; background: none;" | ||
|- | |- | ||
| align="center" | '''Move''' || align="center" | '''Motion''' || align="center" | '''Damage''' || align="center" | '''Stun Damage''' || align="center" | '''Chains into itself''' || align="center" | '''Special Cancel''' || align="center" | '''Super Cancel''' | | align="center" | '''Move''' || align="center" | '''Motion''' || align="center" | '''Damage''' || align="center" | '''Stun Damage''' || align="center" | '''Chains into itself''' || align="center" | '''Special Cancel''' || align="center" | '''Super Cancel''' || align="center" | '''Juggle Value''' || align="center" | '''Reset or Juggle''' | ||
|- | |- | ||
| align="center" | Jump Roundhouse || align="center" | (Air) HK || align="center" | 110(19 life points) || align="center" | 13 || align="center" | No || align="center" | No || align="center" | No | | align="center" | Jump Roundhouse || align="center" | (Air) HK || align="center" | 110(19 life points) || align="center" | 13 || align="center" | No || align="center" | No || align="center" | No || align="center" | 3 || align="center" | Juggle | ||
|} | |} | ||
'''Frame Data''' | '''Frame Data''' | ||
{| border="1em" cellspacing="0" width="65%" style="border: 1px solid #999; background: | {| border="1em" cellspacing="0" width="65%" style="border: 1px solid #999; background: none;" | ||
|- | |- | ||
| align="center" | '''Startup''' || align="center" | '''Hit''' || align="center" | '''Recovery''' || align="center" | '''Blocked Advantage''' || align="center" | '''Hit Advantage''' || align="center" | '''Crouching Hit Advantage''' || align="center" | '''Guard''' || align="center" | '''Parry''' | | align="center" | '''Startup''' || align="center" | '''Hit''' || align="center" | '''Recovery''' || align="center" | '''Blocked Advantage''' || align="center" | '''Hit Advantage''' || align="center" | '''Crouching Hit Advantage''' || align="center" | '''Guard''' || align="center" | '''Parry''' | ||
| Line 720: | Line 742: | ||
|} | |} | ||
'''Gauge Increase''' | '''Gauge Increase''' | ||
{| border="1em" cellspacing="0" width="30%" style="border: 1px solid #999; background: | {| border="1em" cellspacing="0" width="30%" style="border: 1px solid #999; background: none;" | ||
|- | |- | ||
| align="center" | '''Miss''' || align="center" | '''Blocked''' || align="center" | '''Hit''' || align="center" | '''Parry (Gauge for opponent)''' | | align="center" | '''Miss''' || align="center" | '''Blocked''' || align="center" | '''Hit''' || align="center" | '''Parry (Gauge for opponent)''' | ||
| Line 730: | Line 752: | ||
[[Image:(chunlinjhk).gif|none]] | [[Image:(chunlinjhk).gif|none]] | ||
{| border="1em" cellspacing="0" width="65%" style="border: 1px solid #999; background: | {| border="1em" cellspacing="0" width="65%" style="border: 1px solid #999; background: none;" | ||
|- | |- | ||
| align="center" | '''Move''' || align="center" | '''Motion''' || align="center" | '''Damage''' || align="center" | '''Stun Damage''' || align="center" | '''Chains into itself''' || align="center" | '''Special Cancel''' || align="center" | '''Super Cancel''' | | align="center" | '''Move''' || align="center" | '''Motion''' || align="center" | '''Damage''' || align="center" | '''Stun Damage''' || align="center" | '''Chains into itself''' || align="center" | '''Special Cancel''' || align="center" | '''Super Cancel''' || align="center" | '''Juggle Value''' || align="center" | '''Reset or Juggle''' | ||
|- | |- | ||
| align="center" | Neutral Jump Roundhouse || align="center" | (Air) HK || align="center" | 130(23 life points) || align="center" | 13 || align="center" | No || align="center" | No || align="center" | No | | align="center" | Neutral Jump Roundhouse || align="center" | (Air) HK || align="center" | 130(23 life points) || align="center" | 13 || align="center" | No || align="center" | No || align="center" | No || align="center" | 3 || align="center" | Reset | ||
|} | |} | ||
'''Frame Data''' | '''Frame Data''' | ||
{| border="1em" cellspacing="0" width="65%" style="border: 1px solid #999; background: | {| border="1em" cellspacing="0" width="65%" style="border: 1px solid #999; background: none;" | ||
|- | |- | ||
| align="center" | '''Startup''' || align="center" | '''Hit''' || align="center" | '''Recovery''' || align="center" | '''Blocked Advantage''' || align="center" | '''Hit Advantage''' || align="center" | '''Crouching Hit Advantage''' || align="center" | '''Guard''' || align="center" | '''Parry''' | | align="center" | '''Startup''' || align="center" | '''Hit''' || align="center" | '''Recovery''' || align="center" | '''Blocked Advantage''' || align="center" | '''Hit Advantage''' || align="center" | '''Crouching Hit Advantage''' || align="center" | '''Guard''' || align="center" | '''Parry''' | ||
| Line 744: | Line 766: | ||
|} | |} | ||
'''Gauge Increase''' | '''Gauge Increase''' | ||
{| border="1em" cellspacing="0" width="30%" style="border: 1px solid #999; background: | {| border="1em" cellspacing="0" width="30%" style="border: 1px solid #999; background: none;" | ||
|- | |- | ||
| align="center" | '''Miss''' || align="center" | '''Blocked''' || align="center" | '''Hit''' || align="center" | '''Parry (Gauge for opponent)''' | | align="center" | '''Miss''' || align="center" | '''Blocked''' || align="center" | '''Hit''' || align="center" | '''Parry (Gauge for opponent)''' | ||
| Line 754: | Line 776: | ||
[[Image:(chunlioh).gif|none]] | [[Image:(chunlioh).gif|none]] | ||
{| border="1em" cellspacing="0" width=" | {| border="1em" cellspacing="0" width="65%" style="border: 1px solid #999; background: none;" | ||
|- | |- | ||
| align="center" | '''Move''' || align="center" | '''Motion''' || align="center" | '''Damage''' || align="center" | '''Stun Damage''' || align="center" | '''Chains into itself''' || align="center" | '''Special Cancel''' || align="center" | '''Super Cancel''' | | align="center" | '''Move''' || align="center" | '''Motion''' || align="center" | '''Damage''' || align="center" | '''Stun Damage''' || align="center" | '''Chains into itself''' || align="center" | '''Special Cancel''' || align="center" | '''Super Cancel''' || align="center" | '''Juggle Value''' || align="center" | '''Reset or Juggle''' | ||
|- | |- | ||
| align="center" | Universal Overhead || align="center" | MP+MK || align="center" | 40(7 life points) || align="center" | 3 || align="center" | No || align="center" | No || align="center" | No | | align="center" | Universal Overhead || align="center" | MP+MK || align="center" | 40(7 life points) || align="center" | 3 || align="center" | No || align="center" | No || align="center" | No || align="center" | 1 || align="center" | Reset | ||
|} | |} | ||
'''Frame Data''' | '''Frame Data''' | ||
{| border="1em" cellspacing="0" width="65%" style="border: 1px solid #999; background: | {| border="1em" cellspacing="0" width="65%" style="border: 1px solid #999; background: none;" | ||
|- | |- | ||
| align="center" | '''Startup''' || align="center" | '''Hit''' || align="center" | '''Recovery''' || align="center" | '''Blocked Advantage''' || align="center" | '''Hit Advantage''' || align="center" | '''Crouching Hit Advantage''' || align="center" | '''Guard''' || align="center" | '''Parry''' | | align="center" | '''Startup''' || align="center" | '''Hit''' || align="center" | '''Recovery''' || align="center" | '''Blocked Advantage''' || align="center" | '''Hit Advantage''' || align="center" | '''Crouching Hit Advantage''' || align="center" | '''Guard''' || align="center" | '''Parry''' | ||
| Line 768: | Line 790: | ||
|} | |} | ||
'''Gauge Increase''' | '''Gauge Increase''' | ||
{| border="1em" cellspacing="0" width="30%" style="border: 1px solid #999; background: | {| border="1em" cellspacing="0" width="30%" style="border: 1px solid #999; background: none;" | ||
|- | |- | ||
| align="center" | '''Miss''' || align="center" | '''Blocked''' || align="center" | '''Hit''' || align="center" | '''Parry (Gauge for opponent)''' | | align="center" | '''Miss''' || align="center" | '''Blocked''' || align="center" | '''Hit''' || align="center" | '''Parry (Gauge for opponent)''' | ||
| Line 779: | Line 801: | ||
[[Image:(chunlitr).gif|none]] | [[Image:(chunlitr).gif|none]] | ||
{| border="1em" cellspacing="0" width="70%" style="border: 1px solid #999; background: | {| border="1em" cellspacing="0" width="70%" style="border: 1px solid #999; background: none;" | ||
|- | |- | ||
| align="center" | '''Move''' || align="center" | '''Motion''' || align="center" | '''Damage''' || align="center" | '''Stun Damage''' || align="center" | '''Throw Range''' || align="center" | '''Kara-Throw''' || align="center" | '''Kara-Throw Range''' | | align="center" | '''Move''' || align="center" | '''Motion''' || align="center" | '''Damage''' || align="center" | '''Stun Damage''' || align="center" | '''Throw Range''' || align="center" | '''Kara-Throw''' || align="center" | '''Kara-Throw Range''' | ||
| Line 786: | Line 808: | ||
|} | |} | ||
'''Frame Data''' | '''Frame Data''' | ||
{| border="1em" cellspacing="0" width="65%" style="border: 1px solid #999; background: | {| border="1em" cellspacing="0" width="65%" style="border: 1px solid #999; background: none;" | ||
|- | |- | ||
| align="center" | '''Startup''' || align="center" | '''Hit''' || align="center" | '''Recovery''' || align="center" | '''Blocked Advantage''' || align="center" | '''Hit Advantage''' || align="center" | '''Crouching Hit Advantage''' || align="center" | '''Guard''' || align="center" | '''Parry''' | | align="center" | '''Startup''' || align="center" | '''Hit''' || align="center" | '''Recovery''' || align="center" | '''Blocked Advantage''' || align="center" | '''Hit Advantage''' || align="center" | '''Crouching Hit Advantage''' || align="center" | '''Guard''' || align="center" | '''Parry''' | ||
| Line 793: | Line 815: | ||
|} | |} | ||
'''Gauge Increase''' | '''Gauge Increase''' | ||
{| border="1em" cellspacing="0" width="25%" style="border: 1px solid #999; background: | {| border="1em" cellspacing="0" width="25%" style="border: 1px solid #999; background: none;" | ||
|- | |- | ||
| align="center" | '''Miss''' || align="center" | '''Blocked''' || align="center" | '''Hit''' | | align="center" | '''Miss''' || align="center" | '''Blocked''' || align="center" | '''Hit''' | ||
| Line 803: | Line 825: | ||
[[Image:(chunliatr).gif|none]] | [[Image:(chunliatr).gif|none]] | ||
{| border="1em" cellspacing="0" width="70%" style="border: 1px solid #999; background: | {| border="1em" cellspacing="0" width="70%" style="border: 1px solid #999; background: none;" | ||
|- | |- | ||
| align="center" | '''Move''' || align="center" | '''Motion''' || align="center" | '''Damage''' || align="center" | '''Stun Damage''' || align="center" | '''Throw Range''' || align="center" | '''Kara-Throw''' || align="center" | '''Kara-Throw Range''' | | align="center" | '''Move''' || align="center" | '''Motion''' || align="center" | '''Damage''' || align="center" | '''Stun Damage''' || align="center" | '''Throw Range''' || align="center" | '''Kara-Throw''' || align="center" | '''Kara-Throw Range''' || align="center" | '''Juggle Value''' || align="center" | '''Reset or Juggle''' | ||
|- | |- | ||
| align="center" | Seoi Nage || align="center" | Close to Oponnent On Air LP+LK || align="center" | 80(14 life points) || align="center" | 9 || align="center" | Width 14,53~89 Height || align="center" | - || align="center" | - | | align="center" | Seoi Nage || align="center" | Close to Oponnent On Air LP+LK || align="center" | 80(14 life points) || align="center" | 9 || align="center" | Width 14,53~89 Height || align="center" | - || align="center" | - || align="center" | 0 || align="center" | Juggle | ||
|} | |} | ||
'''Frame Data''' | '''Frame Data''' | ||
{| border="1em" cellspacing="0" width="65%" style="border: 1px solid #999; background: | {| border="1em" cellspacing="0" width="65%" style="border: 1px solid #999; background: none;" | ||
|- | |- | ||
| align="center" | '''Startup''' || align="center" | '''Hit''' || align="center" | '''Recovery''' || align="center" | '''Blocked Advantage''' || align="center" | '''Hit Advantage''' || align="center" | '''Crouching Hit Advantage''' || align="center" | '''Guard''' || align="center" | '''Parry''' | | align="center" | '''Startup''' || align="center" | '''Hit''' || align="center" | '''Recovery''' || align="center" | '''Blocked Advantage''' || align="center" | '''Hit Advantage''' || align="center" | '''Crouching Hit Advantage''' || align="center" | '''Guard''' || align="center" | '''Parry''' | ||
| Line 817: | Line 839: | ||
|} | |} | ||
'''Gauge Increase''' | '''Gauge Increase''' | ||
{| border="1em" cellspacing="0" width="25%" style="border: 1px solid #999; background: | {| border="1em" cellspacing="0" width="25%" style="border: 1px solid #999; background: none;" | ||
|- | |- | ||
| align="center" | '''Miss''' || align="center" | '''Blocked''' || align="center" | '''Hit''' | | align="center" | '''Miss''' || align="center" | '''Blocked''' || align="center" | '''Hit''' | ||
| Line 828: | Line 850: | ||
[[Image:(chunliclp).gif|none]] | [[Image:(chunliclp).gif|none]] | ||
{| border="1em" cellspacing="0" width=" | {| border="1em" cellspacing="0" width="65%" style="border: 1px solid #999; background: none;" | ||
|- | |- | ||
| align="center" | '''Move''' || align="center" | '''Motion''' || align="center" | '''Damage''' || align="center" | '''Stun Damage''' || align="center" | '''Chains into itself''' || align="center" | '''Special Cancel''' || align="center" | '''Super Cancel''' | | align="center" | '''Move''' || align="center" | '''Motion''' || align="center" | '''Damage''' || align="center" | '''Stun Damage''' || align="center" | '''Chains into itself''' || align="center" | '''Special Cancel''' || align="center" | '''Super Cancel''' || align="center" | '''Juggle Value''' || align="center" | '''Reset or Juggle''' | ||
|- | |- | ||
| align="center" | Crouch Jab || align="center" | D+LP || align="center" | 15(3 life points) || align="center" | 3 || align="center" | Yes || align="center" | Yes || align="center" | Yes | | align="center" | Crouch Jab || align="center" | D+LP || align="center" | 15(3 life points) || align="center" | 3 || align="center" | Yes || align="center" | Yes || align="center" | Yes || align="center" | 15 || align="center" | Reset | ||
|} | |} | ||
'''Frame Data''' | '''Frame Data''' | ||
{| border="1em" cellspacing="0" width="65%" style="border: 1px solid #999; background: | {| border="1em" cellspacing="0" width="65%" style="border: 1px solid #999; background: none;" | ||
|- | |- | ||
| align="center" | '''Startup''' || align="center" | '''Hit''' || align="center" | '''Recovery''' || align="center" | '''Blocked Advantage''' || align="center" | '''Hit Advantage''' || align="center" | '''Crouching Hit Advantage''' || align="center" | '''Guard''' || align="center" | '''Parry''' | | align="center" | '''Startup''' || align="center" | '''Hit''' || align="center" | '''Recovery''' || align="center" | '''Blocked Advantage''' || align="center" | '''Hit Advantage''' || align="center" | '''Crouching Hit Advantage''' || align="center" | '''Guard''' || align="center" | '''Parry''' | ||
| Line 842: | Line 864: | ||
|} | |} | ||
'''Gauge Increase''' | '''Gauge Increase''' | ||
{| border="1em" cellspacing="0" width="30%" style="border: 1px solid #999; background: | {| border="1em" cellspacing="0" width="30%" style="border: 1px solid #999; background: none;" | ||
|- | |- | ||
| align="center" | '''Miss''' || align="center" | '''Blocked''' || align="center" | '''Hit''' || align="center" | '''Parry (Gauge for opponent)''' | | align="center" | '''Miss''' || align="center" | '''Blocked''' || align="center" | '''Hit''' || align="center" | '''Parry (Gauge for opponent)''' | ||
| Line 852: | Line 874: | ||
[[Image:(chunlicmp).gif|none]] | [[Image:(chunlicmp).gif|none]] | ||
{| border="1em" cellspacing="0" width=" | {| border="1em" cellspacing="0" width="65%" style="border: 1px solid #999; background: none;" | ||
|- | |- | ||
| align="center" | '''Move''' || align="center" | '''Motion''' || align="center" | '''Damage''' || align="center" | '''Stun Damage''' || align="center" | '''Chains into itself''' || align="center" | '''Special Cancel''' || align="center" | '''Super Cancel''' | | align="center" | '''Move''' || align="center" | '''Motion''' || align="center" | '''Damage''' || align="center" | '''Stun Damage''' || align="center" | '''Chains into itself''' || align="center" | '''Special Cancel''' || align="center" | '''Super Cancel''' || align="center" | '''Juggle Value''' || align="center" | '''Reset or Juggle''' | ||
|- | |- | ||
| align="center" | Crouch Strong || align="center" | D+MP || align="center" | 90(16 life points) || align="center" | 7 || align="center" | No || align="center" | No || align="center" | No | | align="center" | Crouch Strong || align="center" | D+MP || align="center" | 90(16 life points) || align="center" | 7 || align="center" | No || align="center" | No || align="center" | No || align="center" | 15 || align="center" | Reset | ||
|} | |} | ||
'''Frame Data''' | '''Frame Data''' | ||
{| border="1em" cellspacing="0" width="65%" style="border: 1px solid #999; background: | {| border="1em" cellspacing="0" width="65%" style="border: 1px solid #999; background: none;" | ||
|- | |- | ||
| align="center" | '''Startup''' || align="center" | '''Hit''' || align="center" | '''Recovery''' || align="center" | '''Blocked Advantage''' || align="center" | '''Hit Advantage''' || align="center" | '''Crouching Hit Advantage''' || align="center" | '''Guard''' || align="center" | '''Parry''' | | align="center" | '''Startup''' || align="center" | '''Hit''' || align="center" | '''Recovery''' || align="center" | '''Blocked Advantage''' || align="center" | '''Hit Advantage''' || align="center" | '''Crouching Hit Advantage''' || align="center" | '''Guard''' || align="center" | '''Parry''' | ||
| Line 866: | Line 888: | ||
|} | |} | ||
'''Gauge Increase''' | '''Gauge Increase''' | ||
{| border="1em" cellspacing="0" width="30%" style="border: 1px solid #999; background: | {| border="1em" cellspacing="0" width="30%" style="border: 1px solid #999; background: none;" | ||
|- | |- | ||
| align="center" | '''Miss''' || align="center" | '''Blocked''' || align="center" | '''Hit''' || align="center" | '''Parry (Gauge for opponent)''' | | align="center" | '''Miss''' || align="center" | '''Blocked''' || align="center" | '''Hit''' || align="center" | '''Parry (Gauge for opponent)''' | ||
| Line 876: | Line 898: | ||
[[Image:(chunlichp).gif|none]] | [[Image:(chunlichp).gif|none]] | ||
{| border="1em" cellspacing="0" width=" | {| border="1em" cellspacing="0" width="65%" style="border: 1px solid #999; background: none;" | ||
|- | |- | ||
| align="center" | '''Move''' || align="center" | '''Motion''' || align="center" | '''Damage''' || align="center" | '''Stun Damage''' || align="center" | '''Chains into itself''' || align="center" | '''Special Cancel''' || align="center" | '''Super Cancel''' | | align="center" | '''Move''' || align="center" | '''Motion''' || align="center" | '''Damage''' || align="center" | '''Stun Damage''' || align="center" | '''Chains into itself''' || align="center" | '''Special Cancel''' || align="center" | '''Super Cancel''' || align="center" | '''Juggle Value''' || align="center" | '''Reset or Juggle''' | ||
|- | |- | ||
| align="center" | Crouch Fierce || align="center" | D+HP || align="center" | 130(19 life points) || align="center" | 13 || align="center" | No || align="center" | Yes || align="center" | Yes | | align="center" | Crouch Fierce || align="center" | D+HP || align="center" | 130(19 life points) || align="center" | 13 || align="center" | No || align="center" | Yes || align="center" | Yes || align="center" | 15 || align="center" | Reset | ||
|} | |} | ||
'''Frame Data''' | '''Frame Data''' | ||
{| border="1em" cellspacing="0" width="65%" style="border: 1px solid #999; background: | {| border="1em" cellspacing="0" width="65%" style="border: 1px solid #999; background: none;" | ||
|- | |- | ||
| align="center" | '''Startup''' || align="center" | '''Hit''' || align="center" | '''Recovery''' || align="center" | '''Blocked Advantage''' || align="center" | '''Hit Advantage''' || align="center" | '''Crouching Hit Advantage''' || align="center" | '''Guard''' || align="center" | '''Parry''' | | align="center" | '''Startup''' || align="center" | '''Hit''' || align="center" | '''Recovery''' || align="center" | '''Blocked Advantage''' || align="center" | '''Hit Advantage''' || align="center" | '''Crouching Hit Advantage''' || align="center" | '''Guard''' || align="center" | '''Parry''' | ||
| Line 890: | Line 912: | ||
|} | |} | ||
'''Gauge Increase''' | '''Gauge Increase''' | ||
{| border="1em" cellspacing="0" width="30%" style="border: 1px solid #999; background: | {| border="1em" cellspacing="0" width="30%" style="border: 1px solid #999; background: none;" | ||
|- | |- | ||
| align="center" | '''Miss''' || align="center" | '''Blocked''' || align="center" | '''Hit''' || align="center" | '''Parry (Gauge for opponent)''' | | align="center" | '''Miss''' || align="center" | '''Blocked''' || align="center" | '''Hit''' || align="center" | '''Parry (Gauge for opponent)''' | ||
| Line 900: | Line 922: | ||
[[Image:(chunliclk).gif|none]] | [[Image:(chunliclk).gif|none]] | ||
{| border="1em" cellspacing="0" width=" | {| border="1em" cellspacing="0" width="65%" style="border: 1px solid #999; background: none;" | ||
|- | |- | ||
| align="center" | '''Move''' || align="center" | '''Motion''' || align="center" | '''Damage''' || align="center" | '''Stun Damage''' || align="center" | '''Chains into itself''' || align="center" | '''Special Cancel''' || align="center" | '''Super Cancel''' | | align="center" | '''Move''' || align="center" | '''Motion''' || align="center" | '''Damage''' || align="center" | '''Stun Damage''' || align="center" | '''Chains into itself''' || align="center" | '''Special Cancel''' || align="center" | '''Super Cancel''' || align="center" | '''Juggle Value''' || align="center" | '''Reset or Juggle''' | ||
|- | |- | ||
| align="center" | Crouch Short || align="center" | D+LK || align="center" | 40(3 life points) || align="center" | 3 || align="center" | No || align="center" | Yes || align="center" | No | | align="center" | Crouch Short || align="center" | D+LK || align="center" | 40(3 life points) || align="center" | 3 || align="center" | No || align="center" | Yes || align="center" | No || align="center" | 15 || align="center" | Reset | ||
|} | |} | ||
'''Frame Data''' | '''Frame Data''' | ||
{| border="1em" cellspacing="0" width="65%" style="border: 1px solid #999; background: | {| border="1em" cellspacing="0" width="65%" style="border: 1px solid #999; background: none;" | ||
|- | |- | ||
| align="center" | '''Startup''' || align="center" | '''Hit''' || align="center" | '''Recovery''' || align="center" | '''Blocked Advantage''' || align="center" | '''Hit Advantage''' || align="center" | '''Crouching Hit Advantage''' || align="center" | '''Guard''' || align="center" | '''Parry''' | | align="center" | '''Startup''' || align="center" | '''Hit''' || align="center" | '''Recovery''' || align="center" | '''Blocked Advantage''' || align="center" | '''Hit Advantage''' || align="center" | '''Crouching Hit Advantage''' || align="center" | '''Guard''' || align="center" | '''Parry''' | ||
| Line 914: | Line 936: | ||
|} | |} | ||
'''Gauge Increase''' | '''Gauge Increase''' | ||
{| border="1em" cellspacing="0" width="30%" style="border: 1px solid #999; background: | {| border="1em" cellspacing="0" width="30%" style="border: 1px solid #999; background: none;" | ||
|- | |- | ||
| align="center" | '''Miss''' || align="center" | '''Blocked''' || align="center" | '''Hit''' || align="center" | '''Parry (Gauge for opponent)''' | | align="center" | '''Miss''' || align="center" | '''Blocked''' || align="center" | '''Hit''' || align="center" | '''Parry (Gauge for opponent)''' | ||
| Line 924: | Line 946: | ||
[[Image:(chunlicmk).gif|none]] | [[Image:(chunlicmk).gif|none]] | ||
{| border="1em" cellspacing="0" width=" | {| border="1em" cellspacing="0" width="65%" style="border: 1px solid #999; background: none;" | ||
|- | |- | ||
| align="center" | '''Move''' || align="center" | '''Motion''' || align="center" | '''Damage''' || align="center" | '''Stun Damage''' || align="center" | '''Chains into itself''' || align="center" | '''Special Cancel''' || align="center" | '''Super Cancel''' | | align="center" | '''Move''' || align="center" | '''Motion''' || align="center" | '''Damage''' || align="center" | '''Stun Damage''' || align="center" | '''Chains into itself''' || align="center" | '''Special Cancel''' || align="center" | '''Super Cancel''' || align="center" | '''Juggle Value''' || align="center" | '''Reset or Juggle''' | ||
|- | |- | ||
| align="center" | Crouch Forward || align="center" | D+MK || align="center" | 90(16 life points) || align="center" | 3 || align="center" | No || align="center" | Yes || align="center" | Yes | | align="center" | Crouch Forward || align="center" | D+MK || align="center" | 90(16 life points) || align="center" | 3 || align="center" | No || align="center" | Yes || align="center" | Yes || align="center" | 15 || align="center" | Reset | ||
|} | |} | ||
'''Frame Data''' | '''Frame Data''' | ||
{| border="1em" cellspacing="0" width="65%" style="border: 1px solid #999; background: | {| border="1em" cellspacing="0" width="65%" style="border: 1px solid #999; background: none;" | ||
|- | |- | ||
| align="center" | '''Startup''' || align="center" | '''Hit''' || align="center" | '''Recovery''' || align="center" | '''Blocked Advantage''' || align="center" | '''Hit Advantage''' || align="center" | '''Crouching Hit Advantage''' || align="center" | '''Guard''' || align="center" | '''Parry''' | | align="center" | '''Startup''' || align="center" | '''Hit''' || align="center" | '''Recovery''' || align="center" | '''Blocked Advantage''' || align="center" | '''Hit Advantage''' || align="center" | '''Crouching Hit Advantage''' || align="center" | '''Guard''' || align="center" | '''Parry''' | ||
| Line 938: | Line 960: | ||
|} | |} | ||
'''Gauge Increase''' | '''Gauge Increase''' | ||
{| border="1em" cellspacing="0" width="30%" style="border: 1px solid #999; background: | {| border="1em" cellspacing="0" width="30%" style="border: 1px solid #999; background: none;" | ||
|- | |- | ||
| align="center" | '''Miss''' || align="center" | '''Blocked''' || align="center" | '''Hit''' || align="center" | '''Parry (Gauge for opponent)''' | | align="center" | '''Miss''' || align="center" | '''Blocked''' || align="center" | '''Hit''' || align="center" | '''Parry (Gauge for opponent)''' | ||
| Line 945: | Line 967: | ||
|} | |} | ||
''Comments here'' | ''Comments here'' | ||
Low forward is one of her more notorious buttons along with back+fierce. This move is particularly interesting in that it has a dedicated late cancel window for specials and supers, with a dead zone of uncancellable frames in between the early cancel and late cancel frames, and more uncancellable frames during the recovery. This means that confirming this move into super is functionally similar to a link, but without the added risk of being too late on the link. The two late cancel frames occur 17 and 18 frames after hitspark, making this move rather generously hitconfirmable, especially when the super input is done with a piano. Aim to ALWAYS hit this late cancel window when cancelling into super, as the early cancel frames are not within a reasonable reaction time. | |||
[[Image:(chunlichk).gif|none]] | [[Image:(chunlichk).gif|none]] | ||
{| border="1em" cellspacing="0" width=" | {| border="1em" cellspacing="0" width="65%" style="border: 1px solid #999; background: none;" | ||
|- | |- | ||
| align="center" | '''Move''' || align="center" | '''Motion''' || align="center" | '''Damage''' || align="center" | '''Stun Damage''' || align="center" | '''Chains into itself''' || align="center" | '''Special Cancel''' || align="center" | '''Super Cancel''' | | align="center" | '''Move''' || align="center" | '''Motion''' || align="center" | '''Damage''' || align="center" | '''Stun Damage''' || align="center" | '''Chains into itself''' || align="center" | '''Special Cancel''' || align="center" | '''Super Cancel''' || align="center" | '''Juggle Value''' || align="center" | '''Reset or Juggle''' | ||
|- | |- | ||
| align="center" | Crouch Roundhouse || align="center" | D+HK || align="center" | 110(19 life points) || align="center" | 5 || align="center" | No || align="center" | No || align="center" | No | | align="center" | Crouch Roundhouse || align="center" | D+HK || align="center" | 110(19 life points) || align="center" | 5 || align="center" | No || align="center" | No || align="center" | No || align="center" | 15 || align="center" | Juggle | ||
|} | |} | ||
'''Frame Data''' | '''Frame Data''' | ||
{| border="1em" cellspacing="0" width="65%" style="border: 1px solid #999; background: | {| border="1em" cellspacing="0" width="65%" style="border: 1px solid #999; background: none;" | ||
|- | |- | ||
| align="center" | '''Startup''' || align="center" | '''Hit''' || align="center" | '''Recovery''' || align="center" | '''Blocked Advantage''' || align="center" | '''Hit Advantage''' || align="center" | '''Crouching Hit Advantage''' || align="center" | '''Guard''' || align="center" | '''Parry''' | | align="center" | '''Startup''' || align="center" | '''Hit''' || align="center" | '''Recovery''' || align="center" | '''Blocked Advantage''' || align="center" | '''Hit Advantage''' || align="center" | '''Crouching Hit Advantage''' || align="center" | '''Guard''' || align="center" | '''Parry''' | ||
|- | |- | ||
| align="center" | 7 || align="center" | 3 || align="center" | 21 || align="center" | -7 || align="center" | Down || align="center" | Down || align="center" | | | align="center" | 7 || align="center" | 3 || align="center" | 21 || align="center" | -7 || align="center" | Down || align="center" | Down || align="center" | HL || align="center" | HL | ||
|} | |} | ||
'''Gauge Increase''' | '''Gauge Increase''' | ||
{| border="1em" cellspacing="0" width="30%" style="border: 1px solid #999; background: | {| border="1em" cellspacing="0" width="30%" style="border: 1px solid #999; background: none;" | ||
|- | |- | ||
| align="center" | '''Miss''' || align="center" | '''Blocked''' || align="center" | '''Hit''' || align="center" | '''Parry (Gauge for opponent)''' | | align="center" | '''Miss''' || align="center" | '''Blocked''' || align="center" | '''Hit''' || align="center" | '''Parry (Gauge for opponent)''' | ||
| Line 973: | Line 997: | ||
[[Image:(chunlibmp).gif|none]] | [[Image:(chunlibmp).gif|none]] | ||
{| border="1em" cellspacing="0" width=" | {| border="1em" cellspacing="0" width="65%" style="border: 1px solid #999; background: none;" | ||
|- | |- | ||
| align="center" | '''Move''' || align="center" | '''Motion''' || align="center" | '''Damage''' || align="center" | '''Stun Damage''' || align="center" | '''Chains into itself''' || align="center" | '''Special Cancel''' || align="center" | '''Super Cancel''' | | align="center" | '''Move''' || align="center" | '''Motion''' || align="center" | '''Damage''' || align="center" | '''Stun Damage''' || align="center" | '''Chains into itself''' || align="center" | '''Special Cancel''' || align="center" | '''Super Cancel''' || align="center" | '''Juggle Value''' || align="center" | '''Reset or Juggle''' | ||
|- | |- | ||
| align="center" | Souren Shou || align="center" | B+MP || align="center" | 110(60+50)(17 life points) || align="center" | 16(7+9) || align="center" | No || align="center" | Yes/Yes || align="center" | Yes/Yes | | align="center" | Souren Shou || align="center" | B+MP || align="center" | 110(60+50)(17 life points) || align="center" | 16(7+9) || align="center" | No || align="center" | Yes/Yes || align="center" | Yes/Yes || align="center" | 3/15 || align="center" | Reset/Reset | ||
|} | |} | ||
'''Frame Data''' | '''Frame Data''' | ||
{| border="1em" cellspacing="0" width="65%" style="border: 1px solid #999; background: | {| border="1em" cellspacing="0" width="65%" style="border: 1px solid #999; background: none;" | ||
|- | |- | ||
| align="center" | '''Startup''' || align="center" | '''Hit''' || align="center" | '''Recovery''' || align="center" | '''Blocked Advantage''' || align="center" | '''Hit Advantage''' || align="center" | '''Crouching Hit Advantage''' || align="center" | '''Guard''' || align="center" | '''Parry''' | | align="center" | '''Startup''' || align="center" | '''Hit''' || align="center" | '''Recovery''' || align="center" | '''Blocked Advantage''' || align="center" | '''Hit Advantage''' || align="center" | '''Crouching Hit Advantage''' || align="center" | '''Guard''' || align="center" | '''Parry''' | ||
| Line 987: | Line 1,011: | ||
|} | |} | ||
'''Gauge Increase''' | '''Gauge Increase''' | ||
{| border="1em" cellspacing="0" width="30%" style="border: 1px solid #999; background: | {| border="1em" cellspacing="0" width="30%" style="border: 1px solid #999; background: none;" | ||
|- | |- | ||
| align="center" | '''Miss''' || align="center" | '''Blocked''' || align="center" | '''Hit''' || align="center" | '''Parry (Gauge for opponent)''' | | align="center" | '''Miss''' || align="center" | '''Blocked''' || align="center" | '''Hit''' || align="center" | '''Parry (Gauge for opponent)''' | ||
| Line 996: | Line 1,020: | ||
[[Image:(chunlibhp).gif|none]] | [[Image:(chunlibhp).gif|none]] | ||
{| border="1em" cellspacing="0" width=" | {| border="1em" cellspacing="0" width="65%" style="border: 1px solid #999; background: none;" | ||
|- | |- | ||
| align="center" | '''Move''' || align="center" | '''Motion''' || align="center" | '''Damage''' || align="center" | '''Stun Damage''' || align="center" | '''Chains into itself''' || align="center" | '''Special Cancel''' || align="center" | '''Super Cancel''' | | align="center" | '''Move''' || align="center" | '''Motion''' || align="center" | '''Damage''' || align="center" | '''Stun Damage''' || align="center" | '''Chains into itself''' || align="center" | '''Special Cancel''' || align="center" | '''Super Cancel''' || align="center" | '''Juggle Value''' || align="center" | '''Reset or Juggle''' | ||
|- | |- | ||
| align="center" | Hakkei || align="center" | B+HP || align="center" | 130(23 life points) || align="center" | 15 || align="center" | No || align="center" | Yes || align="center" | Yes | | align="center" | Hakkei || align="center" | B+HP || align="center" | 130(23 life points) || align="center" | 15 || align="center" | No || align="center" | Yes || align="center" | Yes || align="center" | 15 || align="center" | Reset | ||
|} | |} | ||
'''Frame Data''' | '''Frame Data''' | ||
{| border="1em" cellspacing="0" width="65%" style="border: 1px solid #999; background: | {| border="1em" cellspacing="0" width="65%" style="border: 1px solid #999; background: none;" | ||
|- | |- | ||
| align="center" | '''Startup''' || align="center" | '''Hit''' || align="center" | '''Recovery''' || align="center" | '''Blocked Advantage''' || align="center" | '''Hit Advantage''' || align="center" | '''Crouching Hit Advantage''' || align="center" | '''Guard''' || align="center" | '''Parry''' | | align="center" | '''Startup''' || align="center" | '''Hit''' || align="center" | '''Recovery''' || align="center" | '''Blocked Advantage''' || align="center" | '''Hit Advantage''' || align="center" | '''Crouching Hit Advantage''' || align="center" | '''Guard''' || align="center" | '''Parry''' | ||
| Line 1,010: | Line 1,034: | ||
|} | |} | ||
'''Gauge Increase''' | '''Gauge Increase''' | ||
{| border="1em" cellspacing="0" width="30%" style="border: 1px solid #999; background: | {| border="1em" cellspacing="0" width="30%" style="border: 1px solid #999; background: none;" | ||
|- | |- | ||
| align="center" | '''Miss''' || align="center" | '''Blocked''' || align="center" | '''Hit''' || align="center" | '''Parry (Gauge for opponent)''' | | align="center" | '''Miss''' || align="center" | '''Blocked''' || align="center" | '''Hit''' || align="center" | '''Parry (Gauge for opponent)''' | ||
| Line 1,018: | Line 1,042: | ||
''Comments here'' | ''Comments here'' | ||
The move that everyone thinks of first for 3s Chun-li. It has some of the highest priority for a normal in the game, an extremely active far reaching hitbox, is great for meter building, very quick, special and super cancellable, and very hitconfirmable. It is a great button, but do not delude yourself into thinking that it can be simply spammed mindlessly, whether you are playing as Chun or against her, as anyone who is even halfway looking at the screen will be able to whiff punish poorly placed b+HP. Can be cancelled into kikouken to increase the confirmability of the move, but the fireball can be red parried, and depending on spacing, can even be a blue parry, so be wary of using the fireball as a crutch for confirming b+HP. | |||
[[Image:(chunlifmk).gif|none]] | [[Image:(chunlifmk).gif|none]] | ||
{| border="1em" cellspacing="0" width="65%" style="border: 1px solid #999; background: | {| border="1em" cellspacing="0" width="65%" style="border: 1px solid #999; background: none;" | ||
|- | |- | ||
| align="center" | '''Move''' || align="center" | '''Motion''' || align="center" | '''Damage''' || align="center" | '''Stun Damage''' || align="center" | '''Chains into itself''' || align="center" | '''Special Cancel''' || align="center" | '''Super Cancel''' | | align="center" | '''Move''' || align="center" | '''Motion''' || align="center" | '''Damage''' || align="center" | '''Stun Damage''' || align="center" | '''Chains into itself''' || align="center" | '''Special Cancel''' || align="center" | '''Super Cancel''' || align="center" | '''Juggle Value''' || align="center" | '''Reset or Juggle''' | ||
|- | |- | ||
| align="center" | Senjou Shuu || align="center" | F+MK || align="center" | 80(14 life points) || align="center" | 5 || align="center" | No || align="center" | No || align="center" | No | | align="center" | Senjou Shuu || align="center" | F+MK || align="center" | 80(14 life points) || align="center" | 5 || align="center" | No || align="center" | No || align="center" | No || align="center" | 10 || align="center" | Reset | ||
|} | |} | ||
'''Frame Data''' | '''Frame Data''' | ||
{| border="1em" cellspacing="0" width="70%" style="border: 1px solid #999; background: | {| border="1em" cellspacing="0" width="70%" style="border: 1px solid #999; background: none;" | ||
|- | |- | ||
| align="center" | '''Startup''' || align="center" | '''Hit''' || align="center" | '''Recovery''' || align="center" | '''Blocked Advantage''' || align="center" | '''Hit Advantage''' || align="center" | '''Crouching Hit Advantage''' || align="center" | '''Guard''' || align="center" | '''Parry''' | | align="center" | '''Startup''' || align="center" | '''Hit''' || align="center" | '''Recovery''' || align="center" | '''Blocked Advantage''' || align="center" | '''Hit Advantage''' || align="center" | '''Crouching Hit Advantage''' || align="center" | '''Guard''' || align="center" | '''Parry''' | ||
| Line 1,034: | Line 1,059: | ||
|} | |} | ||
'''Gauge Increase''' | '''Gauge Increase''' | ||
{| border="1em" cellspacing="0" width="35%" style="border: 1px solid #999; background: | {| border="1em" cellspacing="0" width="35%" style="border: 1px solid #999; background: none;" | ||
|- | |- | ||
| align="center" | '''Miss''' || align="center" | '''Blocked''' || align="center" | '''Hit''' || align="center" | '''Parry (Gauge for opponent)''' | | align="center" | '''Miss''' || align="center" | '''Blocked''' || align="center" | '''Hit''' || align="center" | '''Parry (Gauge for opponent)''' | ||
| Line 1,044: | Line 1,069: | ||
[[Image:(chunlimkmk).gif|none]] | [[Image:(chunlimkmk).gif|none]] | ||
{| border="1em" cellspacing="0" width="65%" style="border: 1px solid #999; background: | {| border="1em" cellspacing="0" width="65%" style="border: 1px solid #999; background: none;" | ||
|- | |- | ||
| align="center" | '''Move''' || align="center" | '''Motion''' || align="center" | '''Damage''' || align="center" | '''Stun Damage''' || align="center" | '''Chains into itself''' || align="center" | '''Special Cancel''' || align="center" | '''Super Cancel''' | | align="center" | '''Move''' || align="center" | '''Motion''' || align="center" | '''Damage''' || align="center" | '''Stun Damage''' || align="center" | '''Chains into itself''' || align="center" | '''Special Cancel''' || align="center" | '''Super Cancel''' || align="center" | '''Juggle Value''' || align="center" | '''Reset or Juggle''' | ||
|- | |- | ||
| align="center" | Kakushu Raku Kyaku || align="center" | MK,Hold MK || align="center" | 120(80+20+20) || align="center" | 19(5+7+7) || align="center" | No || align="center" | No || align="center" | No | | align="center" | Kakushu Raku Kyaku || align="center" | MK,Hold MK || align="center" | 120(80+20+20) || align="center" | 19(5+7+7) || align="center" | No || align="center" | No || align="center" | No || align="center" | 15 for all hits || align="center" | Reset for all hits | ||
|} | |} | ||
'''Frame Data''' | '''Frame Data''' | ||
{| border="1em" cellspacing="0" width="70%" style="border: 1px solid #999; background: | {| border="1em" cellspacing="0" width="70%" style="border: 1px solid #999; background: none;" | ||
|- | |- | ||
| align="center" | '''Startup''' || align="center" | '''Hit''' || align="center" | '''Recovery''' || align="center" | '''Blocked Advantage''' || align="center" | '''Hit Advantage''' || align="center" | '''Crouching Hit Advantage''' || align="center" | '''Guard''' || align="center" | '''Parry''' | | align="center" | '''Startup''' || align="center" | '''Hit''' || align="center" | '''Recovery''' || align="center" | '''Blocked Advantage''' || align="center" | '''Hit Advantage''' || align="center" | '''Crouching Hit Advantage''' || align="center" | '''Guard''' || align="center" | '''Parry''' | ||
| Line 1,058: | Line 1,083: | ||
|} | |} | ||
'''Gauge Increase''' | '''Gauge Increase''' | ||
{| border="1em" cellspacing="0" width="35%" style="border: 1px solid #999; background: | {| border="1em" cellspacing="0" width="35%" style="border: 1px solid #999; background: none;" | ||
|- | |- | ||
| align="center" | '''Miss''' || align="center" | '''Blocked''' || align="center" | '''Hit''' || align="center" | '''Parry (Gauge for opponent)''' | | align="center" | '''Miss''' || align="center" | '''Blocked''' || align="center" | '''Hit''' || align="center" | '''Parry (Gauge for opponent)''' | ||
| Line 1,068: | Line 1,093: | ||
[[Image:(chunlifhk).gif|none]] | [[Image:(chunlifhk).gif|none]] | ||
{| border="1em" cellspacing="0" width=" | {| border="1em" cellspacing="0" width="65%" style="border: 1px solid #999; background: none;" | ||
|- | |- | ||
| align="center" | '''Move''' || align="center" | '''Motion''' || align="center" | '''Damage''' || align="center" | '''Stun Damage''' || align="center" | '''Chains into itself''' || align="center" | '''Special Cancel''' || align="center" | '''Super Cancel''' | | align="center" | '''Move''' || align="center" | '''Motion''' || align="center" | '''Damage''' || align="center" | '''Stun Damage''' || align="center" | '''Chains into itself''' || align="center" | '''Special Cancel''' || align="center" | '''Super Cancel''' || align="center" | '''Juggle Value''' || align="center" | '''Reset or Juggle''' | ||
|- | |- | ||
| align="center" | Yoku Sen Kyaku || align="center" | F+HK || align="center" | 120(21 life points) || align="center" | 13 || align="center" | No || align="center" | No || align="center" | No | | align="center" | Yoku Sen Kyaku || align="center" | F+HK || align="center" | 120(21 life points) || align="center" | 13 || align="center" | No || align="center" | No || align="center" | No || align="center" | 15 || align="center" | Reset | ||
|} | |} | ||
'''Frame Data''' | '''Frame Data''' | ||
{| border="1em" cellspacing="0" width="65%" style="border: 1px solid #999; background: | {| border="1em" cellspacing="0" width="65%" style="border: 1px solid #999; background: none;" | ||
|- | |- | ||
| align="center" | '''Startup''' || align="center" | '''Hit''' || align="center" | '''Recovery''' || align="center" | '''Blocked Advantage''' || align="center" | '''Hit Advantage''' || align="center" | '''Crouching Hit Advantage''' || align="center" | '''Guard''' || align="center" | '''Parry''' | | align="center" | '''Startup''' || align="center" | '''Hit''' || align="center" | '''Recovery''' || align="center" | '''Blocked Advantage''' || align="center" | '''Hit Advantage''' || align="center" | '''Crouching Hit Advantage''' || align="center" | '''Guard''' || align="center" | '''Parry''' | ||
| Line 1,082: | Line 1,107: | ||
|} | |} | ||
'''Gauge Increase''' | '''Gauge Increase''' | ||
{| border="1em" cellspacing="0" width="30%" style="border: 1px solid #999; background: | {| border="1em" cellspacing="0" width="30%" style="border: 1px solid #999; background: none;" | ||
|- | |- | ||
| align="center" | '''Miss''' || align="center" | '''Blocked''' || align="center" | '''Hit''' || align="center" | '''Parry (Gauge for opponent)''' | | align="center" | '''Miss''' || align="center" | '''Blocked''' || align="center" | '''Hit''' || align="center" | '''Parry (Gauge for opponent)''' | ||
| Line 1,092: | Line 1,117: | ||
[[Image:(chunlidfhk).gif|none]] | [[Image:(chunlidfhk).gif|none]] | ||
{| border="1em" cellspacing="0" width=" | {| border="1em" cellspacing="0" width="65%" style="border: 1px solid #999; background: none;" | ||
|- | |- | ||
| align="center" | '''Move''' || align="center" | '''Motion''' || align="center" | '''Damage''' || align="center" | '''Stun Damage''' || align="center" | '''Chains into itself''' || align="center" | '''Special Cancel''' || align="center" | '''Super Cancel''' | | align="center" | '''Move''' || align="center" | '''Motion''' || align="center" | '''Damage''' || align="center" | '''Stun Damage''' || align="center" | '''Chains into itself''' || align="center" | '''Special Cancel''' || align="center" | '''Super Cancel''' || align="center" | '''Juggle Value''' || align="center" | '''Reset or Juggle''' | ||
|- | |- | ||
| align="center" | Tenshin Shuu Kyaku || align="center" | DF+HK || align="center" | 110(19 life points) || align="center" | 13 || align="center" | No || align="center" | No || align="center" | No | | align="center" | Tenshin Shuu Kyaku || align="center" | DF+HK || align="center" | 110(19 life points) || align="center" | 13 || align="center" | No || align="center" | No || align="center" | No || align="center" | 1 || align="center" | Juggle | ||
|} | |} | ||
'''Frame Data''' | '''Frame Data''' | ||
{| border="1em" cellspacing="0" width="65%" style="border: 1px solid #999; background: | {| border="1em" cellspacing="0" width="65%" style="border: 1px solid #999; background: none;" | ||
|- | |- | ||
| align="center" | '''Startup''' || align="center" | '''Hit''' || align="center" | '''Recovery''' || align="center" | '''Blocked Advantage''' || align="center" | '''Hit Advantage''' || align="center" | '''Crouching Hit Advantage''' || align="center" | '''Guard''' || align="center" | '''Parry''' | | align="center" | '''Startup''' || align="center" | '''Hit''' || align="center" | '''Recovery''' || align="center" | '''Blocked Advantage''' || align="center" | '''Hit Advantage''' || align="center" | '''Crouching Hit Advantage''' || align="center" | '''Guard''' || align="center" | '''Parry''' | ||
| Line 1,106: | Line 1,131: | ||
|} | |} | ||
'''Gauge Increase''' | '''Gauge Increase''' | ||
{| border="1em" cellspacing="0" width="30%" style="border: 1px solid #999; background: | {| border="1em" cellspacing="0" width="30%" style="border: 1px solid #999; background: none;" | ||
|- | |- | ||
| align="center" | '''Miss''' || align="center" | '''Blocked''' || align="center" | '''Hit''' || align="center" | '''Parry (Gauge for opponent)''' | | align="center" | '''Miss''' || align="center" | '''Blocked''' || align="center" | '''Hit''' || align="center" | '''Parry (Gauge for opponent)''' | ||
| Line 1,115: | Line 1,140: | ||
[[Image:(chunlijdhp).gif|none]] | [[Image:(chunlijdhp).gif|none]] | ||
{| border="1em" cellspacing="0" width="70%" style="border: 1px solid #999; background: | {| border="1em" cellspacing="0" width="70%" style="border: 1px solid #999; background: none;" | ||
|- | |- | ||
| align="center" | '''Move''' || align="center" | '''Motion''' || align="center" | '''Damage''' || align="center" | '''Stun Damage''' || align="center" | '''Chains into itself''' || align="center" | '''Special Cancel''' || align="center" | '''Super Cancel''' | | align="center" | '''Move''' || align="center" | '''Motion''' || align="center" | '''Damage''' || align="center" | '''Stun Damage''' || align="center" | '''Chains into itself''' || align="center" | '''Special Cancel''' || align="center" | '''Super Cancel''' || align="center" | '''Juggle Value''' || align="center" | '''Reset or Juggle''' | ||
|- | |- | ||
| align="center" | Yousou Suitotsu Da || align="center" | (Air) D+HP || align="center" | 110(3 life points) || align="center" | 15 || align="center" | No || align="center" | No || align="center" | No | | align="center" | Yousou Suitotsu Da || align="center" | (Air) D+HP || align="center" | 110(3 life points) || align="center" | 15 || align="center" | No || align="center" | No || align="center" | No || align="center" | 3 || align="center" | Juggle | ||
|} | |} | ||
'''Frame Data''' | '''Frame Data''' | ||
{| border="1em" cellspacing="0" width="65%" style="border: 1px solid #999; background: | {| border="1em" cellspacing="0" width="65%" style="border: 1px solid #999; background: none;" | ||
|- | |- | ||
| align="center" | '''Startup''' || align="center" | '''Hit''' || align="center" | '''Recovery''' || align="center" | '''Blocked Advantage''' || align="center" | '''Hit Advantage''' || align="center" | '''Crouching Hit Advantage''' || align="center" | '''Guard''' || align="center" | '''Parry''' | | align="center" | '''Startup''' || align="center" | '''Hit''' || align="center" | '''Recovery''' || align="center" | '''Blocked Advantage''' || align="center" | '''Hit Advantage''' || align="center" | '''Crouching Hit Advantage''' || align="center" | '''Guard''' || align="center" | '''Parry''' | ||
| Line 1,129: | Line 1,154: | ||
|} | |} | ||
'''Gauge Increase''' | '''Gauge Increase''' | ||
{| border="1em" cellspacing="0" width="30%" style="border: 1px solid #999; background: | {| border="1em" cellspacing="0" width="30%" style="border: 1px solid #999; background: none;" | ||
|- | |- | ||
| align="center" | '''Miss''' || align="center" | '''Blocked''' || align="center" | '''Hit''' || align="center" | '''Parry (Gauge for opponent)''' | | align="center" | '''Miss''' || align="center" | '''Blocked''' || align="center" | '''Hit''' || align="center" | '''Parry (Gauge for opponent)''' | ||
| Line 1,139: | Line 1,164: | ||
[[Image:(chunlijdmk).gif|none]] | [[Image:(chunlijdmk).gif|none]] | ||
{| border="1em" cellspacing="0" width="70%" style="border: 1px solid #999; background: | {| border="1em" cellspacing="0" width="70%" style="border: 1px solid #999; background: none;" | ||
|- | |- | ||
| align="center" | '''Move''' || align="center" | '''Motion''' || align="center" | '''Damage''' || align="center" | '''Stun Damage''' || align="center" | '''Chains into itself''' || align="center" | '''Special Cancel''' || align="center" | '''Super Cancel''' | | align="center" | '''Move''' || align="center" | '''Motion''' || align="center" | '''Damage''' || align="center" | '''Stun Damage''' || align="center" | '''Chains into itself''' || align="center" | '''Special Cancel''' || align="center" | '''Super Cancel''' || align="center" | '''Juggle Value''' || align="center" | '''Reset or Juggle''' | ||
|- | |- | ||
| align="center" | Yosou Kyaku || align="center" | (Air) D+MK || align="center" | 50(8 life points) || align="center" | 5 || align="center" | No || align="center" | No || align="center" | No | | align="center" | Yosou Kyaku || align="center" | (Air) D+MK || align="center" | 50(8 life points) || align="center" | 5 || align="center" | No || align="center" | No || align="center" | No || align="center" | 3 || align="center" | Juggle | ||
|} | |} | ||
'''Frame Data''' | '''Frame Data''' | ||
{| border="1em" cellspacing="0" width="65%" style="border: 1px solid #999; background: | {| border="1em" cellspacing="0" width="65%" style="border: 1px solid #999; background: none;" | ||
|- | |- | ||
| align="center" | '''Startup''' || align="center" | '''Hit''' || align="center" | '''Recovery''' || align="center" | '''Blocked Advantage''' || align="center" | '''Hit Advantage''' || align="center" | '''Crouching Hit Advantage''' || align="center" | '''Guard''' || align="center" | '''Parry''' | | align="center" | '''Startup''' || align="center" | '''Hit''' || align="center" | '''Recovery''' || align="center" | '''Blocked Advantage''' || align="center" | '''Hit Advantage''' || align="center" | '''Crouching Hit Advantage''' || align="center" | '''Guard''' || align="center" | '''Parry''' | ||
| Line 1,153: | Line 1,178: | ||
|} | |} | ||
'''Gauge Increase''' | '''Gauge Increase''' | ||
{| border="1em" cellspacing="0" width="30%" style="border: 1px solid #999; background: | {| border="1em" cellspacing="0" width="30%" style="border: 1px solid #999; background: none;" | ||
|- | |- | ||
| align="center" | '''Miss''' || align="center" | '''Blocked''' || align="center" | '''Hit''' || align="center" | '''Parry (Gauge for opponent)''' | | align="center" | '''Miss''' || align="center" | '''Blocked''' || align="center" | '''Hit''' || align="center" | '''Parry (Gauge for opponent)''' | ||
| Line 1,163: | Line 1,188: | ||
=== Target Combo === | === Target Combo === | ||
[[File:(chunlijhphp).gif|none]] | [[File:(chunlijhphp).gif|none]] | ||
{| border="1em" cellspacing="0" width="65%" style="border: 1px solid #999; background: | {| border="1em" cellspacing="0" width="65%" style="border: 1px solid #999; background: none;" | ||
|- | |- | ||
| align="center" | '''Move''' || align="center" | '''Motion''' || align="center" | '''Damage''' || align="center" | '''Stun Damage''' || align="center" | '''Chains into itself''' || align="center" | '''Special Cancel''' || align="center" | '''Super Cancel''' | | align="center" | '''Move''' || align="center" | '''Motion''' || align="center" | '''Damage''' || align="center" | '''Stun Damage''' || align="center" | '''Chains into itself''' || align="center" | '''Special Cancel''' || align="center" | '''Super Cancel''' || align="center" | '''Juggle Value''' || align="center" | '''Reset or Juggle''' | ||
|- | |- | ||
| align="center" | Target Combo || align="center" | Jumping Diagonal HP -> HP || align="center" | 80+60 || align="center" | 9+5 || align="center" | No/No || align="center" | No/No || align="center" | No/No | | align="center" | Target Combo || align="center" | Jumping Diagonal HP -> HP || align="center" | 80+60 || align="center" | 9+5 || align="center" | No/No || align="center" | No/No || align="center" | No/No || align="center" | 3/3 || align="center" | Reset/Reset | ||
|} | |} | ||
'''Frame Data''' | '''Frame Data''' | ||
{| border="1em" cellspacing="0" width="65%" style="border: 1px solid #999; background: | {| border="1em" cellspacing="0" width="65%" style="border: 1px solid #999; background: none;" | ||
|- | |- | ||
| align="center" | '''Startup''' || align="center" | '''Hit''' || align="center" | '''Recovery''' || align="center" | '''Blocked Advantage''' || align="center" | '''Hit Advantage''' || align="center" | '''Crouching Hit Advantage''' || align="center" | '''Guard''' || align="center" | '''Parry''' | | align="center" | '''Startup''' || align="center" | '''Hit''' || align="center" | '''Recovery''' || align="center" | '''Blocked Advantage''' || align="center" | '''Hit Advantage''' || align="center" | '''Crouching Hit Advantage''' || align="center" | '''Guard''' || align="center" | '''Parry''' | ||
| Line 1,177: | Line 1,202: | ||
|} | |} | ||
'''Gauge Increase''' | '''Gauge Increase''' | ||
{| border="1em" cellspacing="0" width="30%" style="border: 1px solid #999; background: | {| border="1em" cellspacing="0" width="30%" style="border: 1px solid #999; background: none;" | ||
|- | |- | ||
| align="center" | '''Miss''' || align="center" | '''Blocked''' || align="center" | '''Hit''' || align="center" | '''Parry (Gauge for opponent)''' | | align="center" | '''Miss''' || align="center" | '''Blocked''' || align="center" | '''Hit''' || align="center" | '''Parry (Gauge for opponent)''' | ||
| Line 1,189: | Line 1,214: | ||
[[Image:(chunlikikoken).gif|none]] | [[Image:(chunlikikoken).gif|none]] | ||
{| border="1em" cellspacing="0" width="65%" style="border: 1px solid #999; background: | {| border="1em" cellspacing="0" width="65%" style="border: 1px solid #999; background: none;" | ||
|- | |- | ||
| align="center" | '''Move''' || align="center" | '''Motion''' || align="center" | '''Damage''' || align="center" | '''Blocked Damage''' || align="center" | '''Stun Damage''' || align="center" | '''Super Cancel''' | | align="center" | '''Move''' || align="center" | '''Motion''' || align="center" | '''Damage''' || align="center" | '''Blocked Damage''' || align="center" | '''Stun Damage''' || align="center" | '''Super Cancel''' || align="center" | '''Juggle Value''' || align="center" | '''Reset or Juggle''' | ||
|- | |- | ||
| align="center" | Kikkoken (Jab) || align="center" | HCF+LP || align="center" | 45(8 life points) || align="center" | 3 || align="center" | 3 || align="center" | Yes | | align="center" | Kikkoken (Jab) || align="center" | HCF+LP || align="center" | 45(8 life points) || align="center" | 3 || align="center" | 3 || align="center" | Yes || align="center" | 7 || align="center" | Reset | ||
|- | |- | ||
| align="center" | Kikkoken (Strong) || align="center" | HCF+MP || align="center" | 50(8 life points) || align="center" | 4 || align="center" | 3 || align="center" | Yes | | align="center" | Kikkoken (Strong) || align="center" | HCF+MP || align="center" | 50(8 life points) || align="center" | 4 || align="center" | 3 || align="center" | Yes || align="center" | 7 || align="center" | Reset | ||
|- | |- | ||
| align="center" | Kikkoken (Fierce) || align="center" | HCF+HP || align="center" | 60(8 life points) || align="center" | 5 || align="center" | 3 || align="center" | Yes | | align="center" | Kikkoken (Fierce) || align="center" | HCF+HP || align="center" | 60(8 life points) || align="center" | 5 || align="center" | 3 || align="center" | Yes || align="center" | 7 || align="center" | Reset | ||
|} | |} | ||
'''Frame Data''' | '''Frame Data''' | ||
{| border="1em" cellspacing="0" width="85%" style="border: 1px solid #999; background: | {| border="1em" cellspacing="0" width="85%" style="border: 1px solid #999; background: none;" | ||
|- | |- | ||
| align="center" | '''Move''' || align="center" | '''Startup''' || align="center" | '''Hit''' || align="center" | '''Recovery''' || align="center" | '''Blocked Advantage''' || align="center" | '''Hit Advantage''' || align="center" | '''Crouching Hit Advantage''' || align="center" | '''Guard''' || align="center" | '''Parry''' | | align="center" | '''Move''' || align="center" | '''Startup''' || align="center" | '''Hit''' || align="center" | '''Recovery''' || align="center" | '''Blocked Advantage''' || align="center" | '''Hit Advantage''' || align="center" | '''Crouching Hit Advantage''' || align="center" | '''Guard''' || align="center" | '''Parry''' | ||
| Line 1,211: | Line 1,236: | ||
|} | |} | ||
'''Gauge Increase''' | '''Gauge Increase''' | ||
{| border="1em" cellspacing="0" width="50%" style="border: 1px solid #999; background: | {| border="1em" cellspacing="0" width="50%" style="border: 1px solid #999; background: none;" | ||
|- | |- | ||
| align="center" | '''Move''' || align="center" | '''Miss''' || align="center" | '''Blocked''' || align="center" | '''Hit''' || align="center" | '''Parry (Gauge for opponent)''' | | align="center" | '''Move''' || align="center" | '''Miss''' || align="center" | '''Blocked''' || align="center" | '''Hit''' || align="center" | '''Parry (Gauge for opponent)''' | ||
| Line 1,224: | Line 1,249: | ||
[[Image:(chunlihkk).gif|none]] | [[Image:(chunlihkk).gif|none]] | ||
{| border="1em" cellspacing="0" width="65%" style="border: 1px solid #999; background: | {| border="1em" cellspacing="0" width="65%" style="border: 1px solid #999; background: none;" | ||
|- | |- | ||
| align="center" | '''Move''' || align="center" | '''Motion''' || align="center" | '''Damage''' || align="center" | '''Blocked Damage''' || align="center" | '''Stun Damage''' || align="center" | '''Super Cancel''' | | align="center" | '''Move''' || align="center" | '''Motion''' || align="center" | '''Damage''' || align="center" | '''Blocked Damage''' || align="center" | '''Stun Damage''' || align="center" | '''Super Cancel''' || align="center" | '''Juggle Value''' || align="center" | '''Reset or Juggle''' | ||
|- | |- | ||
| align="center" | Hyakuretsu Kyaku (Short) || align="center" | Mash LK || align="center" | 150(6 hits)(17 life points) || align="center" | 9 || align="center" | 15 || align="center" | No | | align="center" | Hyakuretsu Kyaku (Short) || align="center" | Mash LK || align="center" | 150(6 hits)(17 life points) || align="center" | 9 || align="center" | 15 || align="center" | No || align="center" | 15 for each hit || align="center" | Juggle for each hit | ||
|- | |- | ||
| align="center" | Hyakuretsu Kyaku (Forward) || align="center" | Mash MK || align="center" | 160(6 hits)(18 life points) || align="center" | 10 || align="center" | 15 || align="center" | No | | align="center" | Hyakuretsu Kyaku (Forward) || align="center" | Mash MK || align="center" | 160(6 hits)(18 life points) || align="center" | 10 || align="center" | 15 || align="center" | No || align="center" | 15 for each hit || align="center" | Juggle for each hit | ||
|- | |- | ||
| align="center" | Hyakuretsu Kyaku (Roundhouse) || align="center" | Mash HK || align="center" | 165(6 hits)(21 life points) || align="center" | 12 || align="center" | 15 || align="center" | No | | align="center" | Hyakuretsu Kyaku (Roundhouse) || align="center" | Mash HK || align="center" | 165(6 hits)(21 life points) || align="center" | 12 || align="center" | 15 || align="center" | No || align="center" | 15 for each hit || align="center" | Juggle for each hit | ||
|} | |} | ||
'''Frame Data''' | '''Frame Data''' | ||
{| border="1em" cellspacing="0" width="85%" style="border: 1px solid #999; background: | {| border="1em" cellspacing="0" width="85%" style="border: 1px solid #999; background: none;" | ||
|- | |- | ||
| align="center" | '''Move''' || align="center" | '''Startup''' || align="center" | '''Hit''' || align="center" | '''Recovery''' || align="center" | '''Blocked Advantage''' || align="center" | '''Hit Advantage''' || align="center" | '''Crouching Hit Advantage''' || align="center" | '''Guard''' || align="center" | '''Parry''' | | align="center" | '''Move''' || align="center" | '''Startup''' || align="center" | '''Hit''' || align="center" | '''Recovery''' || align="center" | '''Blocked Advantage''' || align="center" | '''Hit Advantage''' || align="center" | '''Crouching Hit Advantage''' || align="center" | '''Guard''' || align="center" | '''Parry''' | ||
| Line 1,246: | Line 1,271: | ||
|} | |} | ||
'''Gauge Increase''' | '''Gauge Increase''' | ||
{| border="1em" cellspacing="0" width="60%" style="border: 1px solid #999; background: | {| border="1em" cellspacing="0" width="60%" style="border: 1px solid #999; background: none;" | ||
|- | |- | ||
| align="center" | '''Move''' || align="center" | '''Miss''' || align="center" | '''Blocked''' || align="center" | '''Hit''' || align="center" | '''Parry (Gauge for opponent)''' | | align="center" | '''Move''' || align="center" | '''Miss''' || align="center" | '''Blocked''' || align="center" | '''Hit''' || align="center" | '''Parry (Gauge for opponent)''' | ||
| Line 1,261: | Line 1,286: | ||
[[Image:(chunlisbk).gif|none]] | [[Image:(chunlisbk).gif|none]] | ||
{| border="1em" cellspacing="0" width="65%" style="border: 1px solid #999; background: | {| border="1em" cellspacing="0" width="65%" style="border: 1px solid #999; background: none;" | ||
|- | |- | ||
| align="center" | '''Move''' || align="center" | '''Motion''' || align="center" | '''Damage''' || align="center" | '''Blocked Damage''' || align="center" | '''Stun Damage''' || align="center" | '''Super Cancel''' | | align="center" | '''Move''' || align="center" | '''Motion''' || align="center" | '''Damage''' || align="center" | '''Blocked Damage''' || align="center" | '''Stun Damage''' || align="center" | '''Super Cancel''' || align="center" | '''Juggle Value''' || align="center" | '''Reset or Juggle''' | ||
|- | |- | ||
| align="center" | Spinning Bird Kick (Short) || align="center" | Charge D,U+LK || align="center" | 140(21 life points) || align="center" | 9 || align="center" | 17 || align="center" | No | | align="center" | Spinning Bird Kick (Short) || align="center" | Charge D,U+LK || align="center" | 140(21 life points) || align="center" | 9 || align="center" | 17 || align="center" | No || align="center" | 3 for each hit || align="center" | Juggle for each hit | ||
|- | |- | ||
| align="center" | Spinning Bird Kick (Forward) || align="center" | Charge D,U+MK || align="center" | 175(27 life points) || align="center" | 11 || align="center" | 19 || align="center" | No | | align="center" | Spinning Bird Kick (Forward) || align="center" | Charge D,U+MK || align="center" | 175(27 life points) || align="center" | 11 || align="center" | 19 || align="center" | No || align="center" | 3 for each hit || align="center" | Juggle for each hit | ||
|- | |- | ||
| align="center" | Spinning Bird Kick (Roundhouse) || align="center" | Charge D,U+HK || align="center" | 195(32 life points) || align="center" | 12 || align="center" | 21 || align="center" | No | | align="center" | Spinning Bird Kick (Roundhouse) || align="center" | Charge D,U+HK || align="center" | 195(32 life points) || align="center" | 12 || align="center" | 21 || align="center" | No || align="center" | 3 for each hit || align="center" | Juggle for each hit | ||
|} | |} | ||
'''Frame Data''' | '''Frame Data''' | ||
{| border="1em" cellspacing="0" width="85%" style="border: 1px solid #999; background: | {| border="1em" cellspacing="0" width="85%" style="border: 1px solid #999; background: none;" | ||
|- | |- | ||
| align="center" | '''Move''' || align="center" | '''Startup''' || align="center" | '''Hit''' || align="center" | '''Recovery''' || align="center" | '''Blocked Advantage''' || align="center" | '''Hit Advantage''' || align="center" | '''Crouching Hit Advantage''' || align="center" | '''Guard''' || align="center" | '''Parry''' | | align="center" | '''Move''' || align="center" | '''Startup''' || align="center" | '''Hit''' || align="center" | '''Recovery''' || align="center" | '''Blocked Advantage''' || align="center" | '''Hit Advantage''' || align="center" | '''Crouching Hit Advantage''' || align="center" | '''Guard''' || align="center" | '''Parry''' | ||
|- | |- | ||
| align="center" | Spinning Bird Kick (Short) || align="center" | 12・13・18・23 || align="center" | 1x4 || align="center" | 21 || align="center" | - | | align="center" | Spinning Bird Kick (Short) || align="center" | 12・13・18・23 || align="center" | 1x4 || align="center" | 21 || align="center" | -2 || align="center" | -1 || align="center" | -1 || align="center" | HL/HL || align="center" | H | ||
|- | |- | ||
| align="center" | Spinning Bird Kick (Forward) || align="center" | 14・15・20・25・30・35 || align="center" | 1x6 || align="center" | 22 || align="center" | - | | align="center" | Spinning Bird Kick (Forward) || align="center" | 14・15・20・25・30・35 || align="center" | 1x6 || align="center" | 22 || align="center" | -3 || align="center" | -1 || align="center" | -1 || align="center" | HL || align="center" | H | ||
|- | |- | ||
| align="center" | Spinning Bird Kick (Roundhouse) || align="center" | 17・18・23・28・33・38・43・48 || align="center" | 1x8 || align="center" | 22 || align="center" | - | | align="center" | Spinning Bird Kick (Roundhouse) || align="center" | 17・18・23・28・33・38・43・48 || align="center" | 1x8 || align="center" | 22 || align="center" | -3 || align="center" | -1 || align="center" | -1 || align="center" | HL || align="center" | H | ||
|} | |} | ||
'''Gauge Increase''' | '''Gauge Increase''' | ||
{| border="1em" cellspacing="0" width="60%" style="border: 1px solid #999; background: | {| border="1em" cellspacing="0" width="60%" style="border: 1px solid #999; background: none;" | ||
|- | |- | ||
| align="center" | '''Move''' || align="center" | '''Miss''' || align="center" | '''Blocked''' || align="center" | '''Hit''' || align="center" | '''Parry (Gauge for opponent)''' | | align="center" | '''Move''' || align="center" | '''Miss''' || align="center" | '''Blocked''' || align="center" | '''Hit''' || align="center" | '''Parry (Gauge for opponent)''' | ||
| Line 1,296: | Line 1,321: | ||
[[Image:(chunlihzs).gif|none]] | [[Image:(chunlihzs).gif|none]] | ||
{| border="1em" cellspacing="0" width="70%" style="border: 1px solid #999; background: | {| border="1em" cellspacing="0" width="70%" style="border: 1px solid #999; background: none;" | ||
|- | |- | ||
| align="center" | '''Move''' || align="center" | '''Motion''' || align="center" | '''Damage''' || align="center" | '''Blocked Damage''' || align="center" | '''Stun Damage''' || align="center" | '''Super Cancel''' | | align="center" | '''Move''' || align="center" | '''Motion''' || align="center" | '''Damage''' || align="center" | '''Blocked Damage''' || align="center" | '''Stun Damage''' || align="center" | '''Super Cancel''' || align="center" | '''Juggle Value''' || align="center" | '''Reset or Juggle''' | ||
|- | |- | ||
| align="center" | Hazan Shu (Short) || align="center" | HCB+LK || align="center" | 100(17 life points) || align="center" | 13 || align="center" | 11 || align="center" | No | | align="center" | Hazan Shu (Short) || align="center" | HCB+LK || align="center" | 100(17 life points) || align="center" | 13 || align="center" | 11 || align="center" | No || align="center" | 1 || align="center" | Juggle | ||
|- | |- | ||
| align="center" | Hazan Shu (Forward) || align="center" | HCB+MK || align="center" | 110(19 life points) || align="center" | 14 || align="center" | 13 || align="center" | No | | align="center" | Hazan Shu (Forward) || align="center" | HCB+MK || align="center" | 110(19 life points) || align="center" | 14 || align="center" | 13 || align="center" | No || align="center" | 1 || align="center" | Juggle | ||
|- | |- | ||
| align="center" | Hazan Shu (Roundhouse) || align="center" | HCB+HK || align="center" | 120(21 life points) || align="center" | 15 || align="center" | 15 || align="center" | No | | align="center" | Hazan Shu (Roundhouse) || align="center" | HCB+HK || align="center" | 120(21 life points) || align="center" | 15 || align="center" | 15 || align="center" | No || align="center" | 1 || align="center" | Juggle | ||
|} | |} | ||
'''Frame Data''' | '''Frame Data''' | ||
{| border="1em" cellspacing="0" width="85%" style="border: 1px solid #999; background: | {| border="1em" cellspacing="0" width="85%" style="border: 1px solid #999; background: none;" | ||
|- | |- | ||
| align="center" | '''Move''' || align="center" | '''Startup''' || align="center" | '''Hit''' || align="center" | '''Recovery''' || align="center" | '''Blocked Advantage''' || align="center" | '''Hit Advantage''' || align="center" | '''Crouching Hit Advantage''' || align="center" | '''Guard''' || align="center" | '''Parry''' | | align="center" | '''Move''' || align="center" | '''Startup''' || align="center" | '''Hit''' || align="center" | '''Recovery''' || align="center" | '''Blocked Advantage''' || align="center" | '''Hit Advantage''' || align="center" | '''Crouching Hit Advantage''' || align="center" | '''Guard''' || align="center" | '''Parry''' | ||
| Line 1,318: | Line 1,343: | ||
|} | |} | ||
'''Gauge Increase''' | '''Gauge Increase''' | ||
{| border="1em" cellspacing="0" width="60%" style="border: 1px solid #999; background: | {| border="1em" cellspacing="0" width="60%" style="border: 1px solid #999; background: none;" | ||
|- | |- | ||
| align="center" | '''Move''' || align="center" | '''Miss''' || align="center" | '''Blocked''' || align="center" | '''Hit''' || align="center" | '''Parry (Gauge for opponent)''' | | align="center" | '''Move''' || align="center" | '''Miss''' || align="center" | '''Blocked''' || align="center" | '''Hit''' || align="center" | '''Parry (Gauge for opponent)''' | ||
| Line 1,332: | Line 1,357: | ||
=== EX Moves === | === EX Moves === | ||
[[Image:(chunlikikokenex).gif|none]] | [[Image:(chunlikikokenex).gif|none]] | ||
{| border="1em" cellspacing="0" width="65%" style="border: 1px solid #999; background: | {| border="1em" cellspacing="0" width="65%" style="border: 1px solid #999; background: none;" | ||
|- | |- | ||
| align="center" | '''Move''' || align="center" | '''Motion''' || align="center" | '''Gauge Needed''' || align="center" | '''Damage''' || align="center" | '''Blocked Damage''' || align="center" | '''Stun Damage''' || align="center" | '''Super Cancel''' | | align="center" | '''Move''' || align="center" | '''Motion''' || align="center" | '''Gauge Needed''' || align="center" | '''Damage''' || align="center" | '''Blocked Damage''' || align="center" | '''Stun Damage''' || align="center" | '''Super Cancel''' || align="center" | '''Juggle Value''' || align="center" | '''Reset or Juggle''' | ||
|- | |- | ||
| align="center" | Kikkoken (EX) || align="center" | HCF+PP || align="center" | 40 || align="center" | 80(14 life points) || align="center" | 5 || align="center" | 3 || align="center" | Yes | | align="center" | Kikkoken (EX) || align="center" | HCF+PP || align="center" | 40 || align="center" | 80(14 life points) || align="center" | 5 || align="center" | 3 || align="center" | Yes || align="center" | 2 || align="center" | Reset | ||
|} | |} | ||
'''Frame Data''' | '''Frame Data''' | ||
{| border="1em" cellspacing="0" width="80%" style="border: 1px solid #999; background: | {| border="1em" cellspacing="0" width="80%" style="border: 1px solid #999; background: none;" | ||
|- | |- | ||
| align="center" | '''Move''' || align="center" | '''Startup''' || align="center" | '''Hit''' || align="center" | '''Recovery''' || align="center" | '''Blocked Advantage''' || align="center" | '''Hit Advantage''' || align="center" | '''Crouching Hit Advantage''' || align="center" | '''Guard''' || align="center" | '''Parry''' | | align="center" | '''Move''' || align="center" | '''Startup''' || align="center" | '''Hit''' || align="center" | '''Recovery''' || align="center" | '''Blocked Advantage''' || align="center" | '''Hit Advantage''' || align="center" | '''Crouching Hit Advantage''' || align="center" | '''Guard''' || align="center" | '''Parry''' | ||
| Line 1,346: | Line 1,371: | ||
|} | |} | ||
'''Gauge Increase''' | '''Gauge Increase''' | ||
{| border="1em" cellspacing="0" width="50%" style="border: 1px solid #999; background: | {| border="1em" cellspacing="0" width="50%" style="border: 1px solid #999; background: none;" | ||
|- | |- | ||
| align="center" | '''Move''' || align="center" | '''Miss''' || align="center" | '''Blocked''' || align="center" | '''Hit''' || align="center" | '''Parry (Gauge for opponent)''' | | align="center" | '''Move''' || align="center" | '''Miss''' || align="center" | '''Blocked''' || align="center" | '''Hit''' || align="center" | '''Parry (Gauge for opponent)''' | ||
| Line 1,355: | Line 1,380: | ||
[[Image:(chunlihrkex).gif|none]] | [[Image:(chunlihrkex).gif|none]] | ||
{| border="1em" cellspacing="0" width="65%" style="border: 1px solid #999; background: | {| border="1em" cellspacing="0" width="65%" style="border: 1px solid #999; background: none;" | ||
|- | |- | ||
| align="center" | '''Move''' || align="center" | '''Motion''' || align="center" | '''Gauge Needed''' || align="center" | '''Damage''' || align="center" | '''Blocked Damage''' || align="center" | '''Stun Damage''' || align="center" | '''Super Cancel''' | | align="center" | '''Move''' || align="center" | '''Motion''' || align="center" | '''Gauge Needed''' || align="center" | '''Damage''' || align="center" | '''Blocked Damage''' || align="center" | '''Stun Damage''' || align="center" | '''Super Cancel''' || align="center" | '''Juggle Value''' || align="center" | '''Reset or Juggle''' | ||
|- | |- | ||
| align="center" | Hyakuretsu Kyaku (EX) || align="center" | Mash KK || align="center" | 40 || align="center" | 210(80+50+40+40)(28 life points) || align="center" | 24(10+6+5+3) || align="center" | 20(11+3(x3)) || align="center" | Yes | | align="center" | Hyakuretsu Kyaku (EX) || align="center" | Mash KK || align="center" | 40 || align="center" | 210(80+50+40+40)(28 life points) || align="center" | 24(10+6+5+3) || align="center" | 20(11+3(x3)) || align="center" | Yes || align="center" | 1 for each hit || align="center" | Juggle for each hit | ||
|} | |} | ||
'''Frame Data''' | '''Frame Data''' | ||
{| border="1em" cellspacing="0" width="80%" style="border: 1px solid #999; background: | {| border="1em" cellspacing="0" width="80%" style="border: 1px solid #999; background: none;" | ||
|- | |- | ||
| align="center" | '''Move''' || align="center" | '''Startup''' || align="center" | '''Hit''' || align="center" | '''Recovery''' || align="center" | '''Blocked Advantage''' || align="center" | '''Hit Advantage''' || align="center" | '''Crouching Hit Advantage''' || align="center" | '''Guard''' || align="center" | '''Parry''' | | align="center" | '''Move''' || align="center" | '''Startup''' || align="center" | '''Hit''' || align="center" | '''Recovery''' || align="center" | '''Blocked Advantage''' || align="center" | '''Hit Advantage''' || align="center" | '''Crouching Hit Advantage''' || align="center" | '''Guard''' || align="center" | '''Parry''' | ||
|- | |- | ||
| align="center" | Hyakuretsu Kyaku (EX) || align="center" | 3・5・7・9 || align="center" | 1・1・1・1 || align="center" | 17 || align="center" | - | | align="center" | Hyakuretsu Kyaku (EX) || align="center" | 3・5・7・9 || align="center" | 1・1・1・1 || align="center" | 17 || align="center" | -** || align="center" | Down || align="center" | Down || align="center" | HL || align="center" | H | ||
|} | |} | ||
'''Gauge Increase''' | '''Gauge Increase''' | ||
{| border="1em" cellspacing="0" width="50%" style="border: 1px solid #999; background: | {| border="1em" cellspacing="0" width="50%" style="border: 1px solid #999; background: none;" | ||
|- | |- | ||
| align="center" | '''Move''' || align="center" | '''Miss''' || align="center" | '''Blocked''' || align="center" | '''Hit''' || align="center" | '''Parry (Gauge for opponent)''' | | align="center" | '''Move''' || align="center" | '''Miss''' || align="center" | '''Blocked''' || align="center" | '''Hit''' || align="center" | '''Parry (Gauge for opponent)''' | ||
| Line 1,376: | Line 1,401: | ||
|} | |} | ||
''Comments here'' | ''Comments here'' | ||
THE INFORMATION BELOW IS NOT RELIABLE. Frame advantage on this move varies a ton based on if the move is meaty and how far spaced she is as well. Just know that EX legs is potentially the most minus. | |||
\** This move has varying minus frames based on who blocked it and whether they were crouching or standing | |||
RY: -2 cr, -3 st | |||
KE: -6 cr, -6 st[shippu punish from crouch block, too far on stand block] | |||
GO: -4 cr, -3 st | |||
SE: -6 cr, -6 st | |||
YU: -6 cr, -3 st[sourai rengeki punish from crouch block, too far on stand block] | |||
YA: -6 cr, -6 st | |||
CH: -2 cr, -4 st | |||
MA: -6 cr, -3 st | |||
DU: -3 cr, -3 st[rolling thunder punish from crouch or stand block] | |||
RE: -3 cr, -3 st | |||
OR: -3 cr, -3 st | |||
UR: -3 cr, -2 st | |||
Q: -1 cr, -2 st | |||
NE: -6 cr, -7 st[electric snake punish from stand block, too far on crouch block] | |||
IB: -3 cr, -3 st | |||
EL: -5 cr, -4 st | |||
HU: -3 cr, -3 st | |||
AL: -3 cr, -7 st | |||
TW: -6 cr, -3 st | |||
[[Image:(chunlisbkex).gif|none]] | [[Image:(chunlisbkex).gif|none]] | ||
{| border="1em" cellspacing="0" width="70%" style="border: 1px solid #999; background: | {| border="1em" cellspacing="0" width="70%" style="border: 1px solid #999; background: none;" | ||
|- | |- | ||
| align="center" | '''Move''' || align="center" | '''Motion''' || align="center" | '''Gauge Needed''' || align="center" | '''Damage''' || align="center" | '''Blocked Damage''' || align="center" | '''Stun Damage''' || align="center" | '''Super Cancel''' | | align="center" | '''Move''' || align="center" | '''Motion''' || align="center" | '''Gauge Needed''' || align="center" | '''Damage''' || align="center" | '''Blocked Damage''' || align="center" | '''Stun Damage''' || align="center" | '''Super Cancel''' || align="center" | '''Juggle Value''' || align="center" | '''Reset or Juggle''' | ||
|- | |- | ||
| align="center" | Spinning Bird Kick (EX) || align="center" | Charge D,U+KK || align="center" | 40 || align="center" | 220(5 hits)(35 life points) || align="center" | 15(3x5)) || align="center" | 25 || align="center" | No | | align="center" | Spinning Bird Kick (EX) || align="center" | Charge D,U+KK || align="center" | 40 || align="center" | 220(5 hits)(35 life points) || align="center" | 15(3x5)) || align="center" | 25 || align="center" | No || align="center" | 1 per hit, 3 for final hit (grounded only) || align="center" | Juggle for all hits | ||
|} | |} | ||
'''Frame Data''' | '''Frame Data''' | ||
{| border="1em" cellspacing="0" width="80%" style="border: 1px solid #999; background: | {| border="1em" cellspacing="0" width="80%" style="border: 1px solid #999; background: none;" | ||
|- | |- | ||
| align="center" | '''Move''' || align="center" | '''Startup''' || align="center" | '''Hit''' || align="center" | '''Recovery''' || align="center" | '''Blocked Advantage''' || align="center" | '''Hit Advantage''' || align="center" | '''Crouching Hit Advantage''' || align="center" | '''Guard''' || align="center" | '''Parry''' | | align="center" | '''Move''' || align="center" | '''Startup''' || align="center" | '''Hit''' || align="center" | '''Recovery''' || align="center" | '''Blocked Advantage''' || align="center" | '''Hit Advantage''' || align="center" | '''Crouching Hit Advantage''' || align="center" | '''Guard''' || align="center" | '''Parry''' | ||
| Line 1,392: | Line 1,459: | ||
|} | |} | ||
'''Gauge Increase''' | '''Gauge Increase''' | ||
{| border="1em" cellspacing="0" width="50%" style="border: 1px solid #999; background: | {| border="1em" cellspacing="0" width="50%" style="border: 1px solid #999; background: none;" | ||
|- | |- | ||
| align="center" | '''Move''' || align="center" | '''Miss''' || align="center" | '''Blocked''' || align="center" | '''Hit''' || align="center" | '''Parry (Gauge for opponent)''' | | align="center" | '''Move''' || align="center" | '''Miss''' || align="center" | '''Blocked''' || align="center" | '''Hit''' || align="center" | '''Parry (Gauge for opponent)''' | ||
| Line 1,399: | Line 1,466: | ||
|} | |} | ||
''Comments here'' | ''Comments here'' | ||
This move has full invulnerability on startup, but is completely vulnerable for several frames before the move becomes active, meaning it can be hit with delayed meaties. This move (nor the other versions) is not considered airborne during startup, so she does not flip out on hit. | |||
[[Image:(chunlihzsex).gif|none]] | [[Image:(chunlihzsex).gif|none]] | ||
{| border="1em" cellspacing="0" width="70%" style="border: 1px solid #999; background: | {| border="1em" cellspacing="0" width="70%" style="border: 1px solid #999; background: none;" | ||
|- | |- | ||
| align="center" | '''Move''' || align="center" | '''Motion''' || align="center" | '''Gauge Needed''' || align="center" | '''Damage''' || align="center" | '''Blocked Damage''' || align="center" | '''Stun Damage''' || align="center" | '''Super Cancel''' | | align="center" | '''Move''' || align="center" | '''Motion''' || align="center" | '''Gauge Needed''' || align="center" | '''Damage''' || align="center" | '''Blocked Damage''' || align="center" | '''Stun Damage''' || align="center" | '''Super Cancel''' || align="center" | '''Juggle Value''' || align="center" | '''Reset or Juggle''' | ||
|- | |- | ||
| align="center" | Hazan Shu (EX) || align="center" | HCB+KK || align="center" | 40 || align="center" | 160(28 life points) || align="center" | 20 || align="center" | 17 || align="center" | No | | align="center" | Hazan Shu (EX) || align="center" | HCB+KK || align="center" | 40 || align="center" | 160(28 life points) || align="center" | 20 || align="center" | 17 || align="center" | No || align="center" | 1 || align="center" | Juggle | ||
|} | |} | ||
'''Frame Data''' | '''Frame Data''' | ||
{| border="1em" cellspacing="0" width="80%" style="border: 1px solid #999; background: | {| border="1em" cellspacing="0" width="80%" style="border: 1px solid #999; background: none;" | ||
|- | |- | ||
| align="center" | '''Move''' || align="center" | '''Startup''' || align="center" | '''Hit''' || align="center" | '''Recovery''' || align="center" | '''Blocked Advantage''' || align="center" | '''Hit Advantage''' || align="center" | '''Crouching Hit Advantage''' || align="center" | '''Guard''' || align="center" | '''Parry''' | | align="center" | '''Move''' || align="center" | '''Startup''' || align="center" | '''Hit''' || align="center" | '''Recovery''' || align="center" | '''Blocked Advantage''' || align="center" | '''Hit Advantage''' || align="center" | '''Crouching Hit Advantage''' || align="center" | '''Guard''' || align="center" | '''Parry''' | ||
|- | |- | ||
| align="center" | Hazan Shu (EX) || align="center" | | | align="center" | Hazan Shu (EX) || align="center" | 31 || align="center" | 1 || align="center" | 12 || align="center" | -2 || align="center" | Down || align="center" | Down || align="center" | H || align="center" | H | ||
|} | |} | ||
'''Gauge Increase''' | '''Gauge Increase''' | ||
{| border="1em" cellspacing="0" width="50%" style="border: 1px solid #999; background: | {| border="1em" cellspacing="0" width="50%" style="border: 1px solid #999; background: none;" | ||
|- | |- | ||
| align="center" | '''Move''' || align="center" | '''Miss''' || align="center" | '''Blocked''' || align="center" | '''Hit''' || align="center" | '''Parry (Gauge for opponent)''' | | align="center" | '''Move''' || align="center" | '''Miss''' || align="center" | '''Blocked''' || align="center" | '''Hit''' || align="center" | '''Parry (Gauge for opponent)''' | ||
| Line 1,426: | Line 1,495: | ||
[[Image:(chunlisa1).gif|none]] | [[Image:(chunlisa1).gif|none]] | ||
{| border="1em" cellspacing="0" width=" | {| border="1em" cellspacing="0" width="75%" style="border: 1px solid #999; background: none;" | ||
|- | |- | ||
| align="center" | '''Super Art''' || align="center" | '''Super Art Name''' || align="center" | '''Super Art Stock''' || align="center" | '''Motion''' || align="center" | '''Damage''' || align="center" | '''Blocked Damage''' || align="center" | '''Stun Damage''' || align="center" | '''Damage/Gauge''' | | align="center" | '''Super Art''' || align="center" | '''Super Art Name''' || align="center" | '''Super Art Stock''' || align="center" | '''Motion''' || align="center" | '''Damage''' || align="center" | '''Blocked Damage''' || align="center" | '''Stun Damage''' || align="center" | '''Damage/Gauge''' || align="center" | '''Juggle Value''' || align="center" | '''Reset or Juggle''' | ||
|- | |- | ||
| align="center" | I || align="center" | Kikoshou || align="center" | 1 bar (88) || align="center" | QCF QCF+P || align="center" | 360*(57 life points) || align="center" | 78** || align="center" | 0 || align="center" | 4 | | align="center" | I || align="center" | Kikoshou || align="center" | 1 bar (88) || align="center" | QCF QCF+P || align="center" | 360*(57 life points) || align="center" | 78** || align="center" | 0 || align="center" | 4.09 || align="center" | 0 for all hits || align="center" | Juggle for all hits | ||
|} | |} | ||
{| border="1em" cellspacing="0" width="40%" style="border: 1px solid #999; background: | {| border="1em" cellspacing="0" width="40%" style="border: 1px solid #999; background: none;" | ||
|- | |- | ||
|* (40×3+35×17) Damage is when all hits connect. | |* (40×3+35×17) Damage is when all hits connect. | ||
| Line 1,439: | Line 1,508: | ||
|} | |} | ||
'''Frame Data''' | '''Frame Data''' | ||
{| border="1em" cellspacing="0" width="65%" style="border: 1px solid #999; background: | {| border="1em" cellspacing="0" width="65%" style="border: 1px solid #999; background: none;" | ||
|- | |- | ||
| align="center" | '''Startup''' || align="center" | '''Hit''' || align="center" | '''Recovery''' || align="center" | '''Blocked Advantage''' || align="center" | '''Hit Advantage''' || align="center" | '''Crouching Hit Advantage''' || align="center" | '''Guard''' || align="center" | '''Parry''' | | align="center" | '''Startup''' || align="center" | '''Hit''' || align="center" | '''Recovery''' || align="center" | '''Blocked Advantage''' || align="center" | '''Hit Advantage''' || align="center" | '''Crouching Hit Advantage''' || align="center" | '''Guard''' || align="center" | '''Parry''' | ||
| Line 1,449: | Line 1,518: | ||
[[Image:(chunlisa2).gif|none]] | [[Image:(chunlisa2).gif|none]] | ||
{| border="1em" cellspacing="0" width=" | {| border="1em" cellspacing="0" width="85%" style="border: 1px solid #999; background: none;" | ||
|- | |- | ||
| align="center" | '''Super Art''' || align="center" | '''Super Art Name''' || align="center" | '''Super Art Stock''' || align="center" | '''Motion''' || align="center" | '''Damage''' || align="center" | '''Blocked Damage''' || align="center" | '''Stun Damage''' || align="center" | '''Damage/Gauge''' | | align="center" | '''Super Art''' || align="center" | '''Super Art Name''' || align="center" | '''Super Art Stock''' || align="center" | '''Motion''' || align="center" | '''Damage''' || align="center" | '''Blocked Damage''' || align="center" | '''Stun Damage''' || align="center" | '''Damage/Gauge''' || align="center" | '''Juggle Value''' || align="center" | '''Reset or Juggle''' | ||
|- | |- | ||
| align="center" | II || align="center" | Houyoku Sen || align="center" | 1 bar (104) || align="center" | QCF QCF+K || align="center" | 390*(67 life points) || align="center" | 58** || align="center" | 22 || align="center" | 3 | | align="center" | II || align="center" | Houyoku Sen || align="center" | 1 bar (104) || align="center" | QCF QCF+K || align="center" | 390*(67 life points) || align="center" | 58** || align="center" | 22 || align="center" | 3.75 (x2) || align="center" | 1 per hit, 2 for final hit || align="center" | Reset, Juggle for final hit | ||
|} | |} | ||
{| border="1em" cellspacing="0" width="40%" style="border: 1px solid #999; background: | {| border="1em" cellspacing="0" width="40%" style="border: 1px solid #999; background: none;" | ||
|- | |- | ||
|* 「30+40(×3)」×2+「30+40(×3)」×2+200 Damage is when all hits connect. | |* 「30+40(×3)」×2+「30+40(×3)」×2+200 Damage is when all hits connect. | ||
| Line 1,465: | Line 1,534: | ||
|} | |} | ||
'''Frame Data''' | '''Frame Data''' | ||
{| border="1em" cellspacing="0" width="65%" style="border: 1px solid #999; background: | {| border="1em" cellspacing="0" width="65%" style="border: 1px solid #999; background: none;" | ||
|- | |- | ||
| align="center" | '''Startup''' || align="center" | '''Hit''' || align="center" | '''Recovery''' || align="center" | '''Blocked Advantage''' || align="center" | '''Hit Advantage''' || align="center" | '''Crouching Hit Advantage''' || align="center" | '''Guard''' || align="center" | '''Parry''' | | align="center" | '''Startup''' || align="center" | '''Hit''' || align="center" | '''Recovery''' || align="center" | '''Blocked Advantage''' || align="center" | '''Hit Advantage''' || align="center" | '''Crouching Hit Advantage''' || align="center" | '''Guard''' || align="center" | '''Parry''' | ||
| Line 1,475: | Line 1,544: | ||
[[Image:(chunlisa3).gif|none]] | [[Image:(chunlisa3).gif|none]] | ||
{| border="1em" cellspacing="0" width=" | {| border="1em" cellspacing="0" width="75%" style="border: 1px solid #999; background: none;" | ||
|- | |- | ||
| align="center" | '''Super Art''' || align="center" | '''Super Art Name''' || align="center" | '''Super Art Stock''' || align="center" | '''Motion''' || align="center" | '''Damage''' || align="center" | '''Blocked Damage''' || align="center" | '''Stun Damage''' || align="center" | '''Damage/Gauge''' | | align="center" | '''Super Art''' || align="center" | '''Super Art Name''' || align="center" | '''Super Art Stock''' || align="center" | '''Motion''' || align="center" | '''Damage''' || align="center" | '''Blocked Damage''' || align="center" | '''Stun Damage''' || align="center" | '''Damage/Gauge''' || align="center" | '''Juggle Value''' || align="center" | '''Reset or Juggle''' | ||
|- | |- | ||
| align="center" | III || align="center" | Tensei Ranka || align="center" | 3 bars (72 each bar) || align="center" | QCF QCF+K || align="center" | 280*(49 life points) || align="center" | 45** || align="center" | 18*** || align="center" | 3,89 (x3) | | align="center" | III || align="center" | Tensei Ranka || align="center" | 3 bars (72 each bar) || align="center" | QCF QCF+K || align="center" | 280*(49 life points) || align="center" | 45** || align="center" | 18*** || align="center" | 3,89 (x3) || align="center" | 0 for first hits, 1 for last four hits || align="center" | Juggle for all hits | ||
|} | |} | ||
{| border="1em" cellspacing="0" width="40%" style="border: 1px solid #999; background: | {| border="1em" cellspacing="0" width="40%" style="border: 1px solid #999; background: none;" | ||
|- | |- | ||
|* 80+(25×4)+(30×3)+140 Damage is when all hits connect. | |* 80+(25×4)+(30×3)+140 Damage is when all hits connect. | ||
| Line 1,490: | Line 1,559: | ||
|} | |} | ||
'''Frame Data''' | '''Frame Data''' | ||
{| border="1em" cellspacing="0" width="65%" style="border: 1px solid #999; background: | {| border="1em" cellspacing="0" width="65%" style="border: 1px solid #999; background: none;" | ||
|- | |- | ||
| align="center" | '''Startup''' || align="center" | '''Hit''' || align="center" | '''Recovery''' || align="center" | '''Blocked Advantage''' || align="center" | '''Hit Advantage''' || align="center" | '''Crouching Hit Advantage''' || align="center" | '''Guard''' || align="center" | '''Parry''' | | align="center" | '''Startup''' || align="center" | '''Hit''' || align="center" | '''Recovery''' || align="center" | '''Blocked Advantage''' || align="center" | '''Hit Advantage''' || align="center" | '''Crouching Hit Advantage''' || align="center" | '''Guard''' || align="center" | '''Parry''' | ||
| Line 1,500: | Line 1,569: | ||
= Combos = | = Combos = | ||
==Meterless== | |||
{| border="1em" cellspacing="0" width="80%" style="border: 1px solid #999; background: none;" | |||
|- | |||
| align="center" | '''1st Move''' || align="center" | '''2nd Move''' || align="center" | '''3rd Move''' || align="center" | '''4th Move''' || align="center" | '''Damage''' || align="center" | '''Stun Damage''' | |||
|- | |||
| align="center" | Back HP || align="center" | Kikoken || align="center" | - || align="center" | - || align="center" | 345 (30%) || align="center" | 27 | |||
|- | |||
| align="center" | Jumping HP || align="center" | Crouch MK || align="center" | Spinning Bird Kick || align="center" | - || align="center" | 414 (36%) || align="center" | 33 | |||
|- | |||
| align="center" | Crouch MK || align="center" | Hyakturetsu Kyaku || align="center" | -|| align="center" | - || align="center" | 380 (33%) || align="center" | 28 | |||
|} | |||
==Ex Moves== | |||
{| border="1em" cellspacing="0" width="80%" style="border: 1px solid #999; background: none;" | |||
|- | |||
| align="center" | '''1st Move''' || align="center" | '''2nd Move''' || align="center" | '''3rd Move''' || align="center" | '''4th Move''' || align="center" | '''Damage''' || align="center" | '''Stun Damage''' | |||
|- | |||
| align="center" | Crouch HP || align="center" | EX Spinning Bird Kick || align="center" | - || align="center" | - || align="center" | 345 (30%) || align="center" | 27 | |||
|- | |||
| align="center" | Crouch MK || align="center" | EX Hyakturetsu Kyaku || align="center" | -|| align="center" | - || align="center" | 380 (33%) || align="center" | 28 | |||
|} | |||
====Super Art I==== | |||
Cr. mk, SAI | Cr. mk, SAI | ||
| Line 1,546: | Line 1,625: | ||
Cr. mk, SAIII (only if opponent is crouching, but not too sure. Needs to be confirmed.) | Cr. mk, SAIII (only if opponent is crouching, but not too sure. Needs to be confirmed.) | ||
= Strategies = | |||
==Overview== | |||
Chun-Li is a top-tier character, sharing the top slots with Yun, Ken and (arguably) Makoto. Her greatest assets are her extremely damaging Super Art (Houyoku-Sen), extreme range of her kara-throw, her fast dash, and fast/high-priority normal moves. She has the capabilities to rush other characters down using her quick dash and faster moves such as s.LP, c.LP and close HK, as well as adding her throw to the mix and fear of Houyoku-Sen super which can be cancelled off of plethora of moves. However, she is often played as a reactive character; one that reacts to an enemy rather than trying to pressure them with a rushdown. As such, she makes an excellent turtle. She also has an extremely short hitbox while crouching, allowing her to duck an enormous number of moves that would normally hit. | Chun-Li is a top-tier character, sharing the top slots with Yun, Ken and (arguably) Makoto. Her greatest assets are her extremely damaging Super Art (Houyoku-Sen), extreme range of her kara-throw, her fast dash, and fast/high-priority normal moves. She has the capabilities to rush other characters down using her quick dash and faster moves such as s.LP, c.LP and close HK, as well as adding her throw to the mix and fear of Houyoku-Sen super which can be cancelled off of plethora of moves. However, she is often played as a reactive character; one that reacts to an enemy rather than trying to pressure them with a rushdown. As such, she makes an excellent turtle. She also has an extremely short hitbox while crouching, allowing her to duck an enormous number of moves that would normally hit. | ||
| Line 1,554: | Line 1,633: | ||
Her main weaknesses are that she has no damaging combos that she can perform when she has no meter, and in some cases lacks a definitive anti-air such as a typical DP maneuver. Her assortment of high-priority normals and quick dash, however, can be used as anti-air devices with a great deal of success. Also, she lacks a fast overhead; both the universal overhead and flip kick are fairly slow and easy to block on reaction. She does, however, have an extremely long kara-universal overhead which can compensate for the lack of speed. Finally, she has a large falling/juggling hitbox, which means she's more prone to eating high-damage combos than a lot of characters (for example, Ken can do strong, fierce, jab uppercut x2 in the corner on her fairly easily, without a kara or strict timing at all.) | Her main weaknesses are that she has no damaging combos that she can perform when she has no meter, and in some cases lacks a definitive anti-air such as a typical DP maneuver. Her assortment of high-priority normals and quick dash, however, can be used as anti-air devices with a great deal of success. Also, she lacks a fast overhead; both the universal overhead and flip kick are fairly slow and easy to block on reaction. She does, however, have an extremely long kara-universal overhead which can compensate for the lack of speed. Finally, she has a large falling/juggling hitbox, which means she's more prone to eating high-damage combos than a lot of characters (for example, Ken can do strong, fierce, jab uppercut x2 in the corner on her fairly easily, without a kara or strict timing at all.) | ||
==Basics== | |||
Chun-Li can dominate a match with simply her normals and throws alone, but much of her strategy stems from having at least one stock of the Houyoku-Sen super ready and available. It can easily be hitconfirmed off of a c.MK and b + HP, which are two of her most commonly used moves for poking, punishing, and during mixup. | Chun-Li can dominate a match with simply her normals and throws alone, but much of her strategy stems from having at least one stock of the Houyoku-Sen super ready and available. It can easily be hitconfirmed off of a c.MK and b + HP, which are two of her most commonly used moves for poking, punishing, and during mixup. | ||
| Line 1,583: | Line 1,662: | ||
EX fireball xx SAII is good for chip damage KO<br><br> | EX fireball xx SAII is good for chip damage KO<br><br> | ||
==Super Art Selection== | |||
Chun-Li's most powerful Super Art is the Houyoku-Sen. It has a healthy stock of two supers, is very damaging, and can be super-cancelled or linked into using many of her attacks:<br> | Chun-Li's most powerful Super Art is the Houyoku-Sen. It has a healthy stock of two supers, is very damaging, and can be super-cancelled or linked into using many of her attacks:<br> | ||
| Line 1,619: | Line 1,698: | ||
Tensei-Ranka (SA3) - The Tensei-Ranka comes with a much healthier 3-stock limit as opposed to the Kikou-Shou, but it's much more difficult to use successfully. Unless the opponent is very tall or standing, you will not be able to hit them on the way up using the super, which turns the Tensei-Ranka most of the time into an extremely delayed, readable overhead. It is best used as an anti-air or confirmable damage off of an anti-air. Since a common way to punish jumpins with Chun-Li is to either close s.HK or parry into close s.HK, you can super-jump cancel into the Tensei-Ranka after a confirmed hit in order to do more damage than you normally would, at the expense of a reset. | Tensei-Ranka (SA3) - The Tensei-Ranka comes with a much healthier 3-stock limit as opposed to the Kikou-Shou, but it's much more difficult to use successfully. Unless the opponent is very tall or standing, you will not be able to hit them on the way up using the super, which turns the Tensei-Ranka most of the time into an extremely delayed, readable overhead. It is best used as an anti-air or confirmable damage off of an anti-air. Since a common way to punish jumpins with Chun-Li is to either close s.HK or parry into close s.HK, you can super-jump cancel into the Tensei-Ranka after a confirmed hit in order to do more damage than you normally would, at the expense of a reset. | ||
==Kara-Techniques== | |||
Chun-Li has two useful kara-throws available to her: | Chun-Li has two useful kara-throws available to her: | ||
| Line 1,631: | Line 1,710: | ||
Her best kara-throw is her standing MK. It is tied with Q for the farthest reaching kara-throw. Her close HK kara-throw has a few uses against certain characters such as Dudley, whose hitbox can be deceiving, making the s.MK karathrow fail, and having the close MK technique execute instead. | Her best kara-throw is her standing MK. It is tied with Q for the farthest reaching kara-throw. Her close HK kara-throw has a few uses against certain characters such as Dudley, whose hitbox can be deceiving, making the s.MK karathrow fail, and having the close MK technique execute instead. | ||
==Zoning== | |||
==Mixups== | |||
==Additional Notes== | |||
*Personal Action: Recovers stun meter (when she yawns) and either Attack up (when she cracks her neck), Defense up (when she pats her shoulders), or both (when she arches forward). Note: Her taunt actions are completely random. | *Personal Action: Recovers stun meter (when she yawns) and either Attack up (when she cracks her neck), Defense up (when she pats her shoulders), or both (when she arches forward). Note: Her taunt actions are completely random. | ||
===Buffering/Partitioning Hyakuretsu Kyaku (Lightning Legs)=== | |||
Cancelling normals into Hyakuretsu Kyaku (from now on, referred to as simply 'Lightning Legs') is a great way to make an opponent think twice about punishing certain moves, and is also used to make b + HP a much more powerful anti-air, as the opponent will not only need to parry the b + HP, but also several kicks as they descend. | Cancelling normals into Hyakuretsu Kyaku (from now on, referred to as simply 'Lightning Legs') is a great way to make an opponent think twice about punishing certain moves, and is also used to make b + HP a much more powerful anti-air, as the opponent will not only need to parry the b + HP, but also several kicks as they descend. | ||
| Line 1,651: | Line 1,730: | ||
This is useful in matches when you need to 'hide' the button inputs. If a player sees one or two standing shorts or repeated presses of the same kick button, they may interpret this as preparation for the move and adjust their gameplay accordingly. By masking the inputs in the dashes, you can spring the technique on your opponent more covertly. This is especially useful during air resets, since the lightning legs technique is a very good way of obtaining chip damage. | This is useful in matches when you need to 'hide' the button inputs. If a player sees one or two standing shorts or repeated presses of the same kick button, they may interpret this as preparation for the move and adjust their gameplay accordingly. By masking the inputs in the dashes, you can spring the technique on your opponent more covertly. This is especially useful during air resets, since the lightning legs technique is a very good way of obtaining chip damage. | ||
=Match-ups= | |||
===Serious Advantage Match-ups=== | ===Serious Advantage Match-ups=== | ||
*Oro | *Oro | ||
| Line 1,682: | Line 1,761: | ||
{{ | {{Navbox-3S}} | ||
[[Category:Chun-Li]] | |||
[[Category: Street Fighter 3: 3rd Strike]] | [[Category:Street Fighter 3: 3rd Strike]] | ||
Latest revision as of 18:06, 23 June 2024
Updated version available!
You're reading the old version of this page. Click here to read the (in-progress) updated version!
Introduction
In her most notorious incarnation, Chun-Li is a defensive beast. She mainly relies on punishing opponents with her high speed and range, solid power and 2nd Super Art which can be combo'd into multiple ways.
| Strengths | Weaknesses |
|---|---|
|
|
Specific Character Information
- Stamina: 1120
- Stun Bar Length (dots): 64 (Normal)
- Stun Bar Recovery (frames it takes to recover 1 dot): 22
- Taunt:
Yawn (happens 100% of the time) - Increases stun recovery rate by 10% for the first yawn and an additional 21% for the second yawn. Lasts the whole round. Maximum 2 yawns, 33% bonus.
Shoulder tap (happens 21% of the time) - Increases defense by 18.8%. Lasts for the whole round. Maximum one shoulder tap.
Neck stretch (happens 38% of the time) - Increases damage for the next hit/combo by 31.3%. Maximum one neck stretch.
Back stretch (happens 15% of the time) - Increases defense by 31.3% (more than the shoulder tap) for the whole round. Also increases damage for the next hit/combo by 31.3%. Maximum one back stretch.
- Chun-Li takes 2 additional frames of crouching blockstun
- Best Kara-Throw: Far MK / Close HK
- Standard Throw Range (pixels): 26
- Kara Throw Range (pixels): 26+32/26+16
- Dash Forward (frames) / Moving Distance: 16 / 2
- Dash Backward (frames) / Moving Distance: 23 / 2
- Normal Wake up (frames): 88
- Quick Stand (frames): 61
Moves List
Throws
| Koshuu Tou |
Air Throws
| Ryuusei Raku | Air |
Command Moves
| Kakushu Raku Kyaku | Close Hold |
| Senjou Shuu | |
| Yoku Sen Kyaku | |
| Souren Shou | |
| Hakkei | |
| Kaku Kyaku Raku | |
| Yousou Kyaku | Air |
| Suitotsu Da | Air forward |
| Sankaku Tobi | Air corner |
Special Moves
| Hyakuretsu Kyaku | Mash | |
| Kikou Ken | EX SC | |
| Hazan Shuu | EX | |
| Spinning Bird Kick | EX |
Super Arts
| I | Kikou Shou | 88 Gauge Dots | 1 Stock | 2.1 EX Uses | |
| II | Houyoku Sen | 104 Gauge Dots | 2 Stocks | 5.2 EX Uses | |
| III | Tensei Ranka | 72 Gauge Dots | 3 Stocks | 5.4 EX Uses |
Target Combo
| Air forward |
Move Analysis
- All those sprites are taken from the site https://www.justnopoint.com/zweifuss/
- All Framedatas in "Move Analisys" section are taken from Game Restaurant , this means the Framedata isn't from the Dreamcast version like Karathrow site, it's from Arcade version.
Please note that the images show in this section are for the 1st frame it hits, so this means the opponent is taking the hit in the image shown on the move. I use the 1st frame of every move (except taunt, dash, jump, wakeup and 2nd throw image sprites) because you will see the maximum range of every attack (mostly of the attacks). Note also that those images are ACCURATE, they are exactly the first frame it hits, so enemy takes damage but they still dont make the "pain" frame.
General
- Move: Move name
- Motion: What you must do to execute the move
- Damage: Damage it does (in pixels)
- Stun Damage: Stun Damage it does (in pixels)
- Chains into itself: If you can combo into the same movement
- Special Cancel: If you can cancel the move into a Special Move
- Super Cancel: If you can cancel the move into a Super Art
- Juggle Value: Amount of JP the move adds in aerial juggles
- 0: JP is reset
- Juggle or Reset: If the move knocks down on air connect or air resets
- Throw Range: Range of the throw (in pixels)
- Num.: Super Art number
- Super Art: Super Art name
- Super Art Stock: Number of Gauge Bars the Super Art have, also the lenght of each bar (in pixels)
Frame Data
- Startup: Number of frames it takes to start the move
- Hit: Number of frames that can hit the opponent
- Recovery: Number of frames it takes to recover from the move
- Blocked Advantage: Number of frames you are in advantage/disadvantage after opponent have been blocked the hit
- Hit Advantage: Number of frames you are in advantage/disadvantage after opponent have been take the hit
- Crouching Hit Advantage: Number of frames you are in advantage/disadvantage after opponent have been take the hit while he's crouching
- + # : You have # frames of advantage
- - # : You have # frames of disadvantage
- # ~ # : Advantage/disadvantage can vary from # to #
- Down: Enemy gets knocked down
- Guard: How opponent must guard the move, High (H), Low (L) or both (HL)
- Parry: How opponent must parry the move, High (H), Low (L) or both (HL)
Gauge Increase
- Miss: Gauge you gain if you miss the move (in pixels)
- Blocked: Gauge you gain if the move gets blocked (in pixels)
- Hit: Gauge you gain if you hit the opponent with the move (in pixels)
- Parry: Gauge opponent gains when he parry the move (in pixels)
Basic Moves
| Move | Start-up frames | In ground frames | In air frames | Recovery frames | Total frames |
|---|---|---|---|---|---|
| Dash Forward | 2 | 8? | - | 6? | 16 |
Comments here
| Move | Start-up frames | In ground frames | In air frames | Recovery frames | Total frames |
|---|---|---|---|---|---|
| Dash Backwards | 2 | 4? | - | 6? | 23 |
Comments here
| Move | Motion | Startup Frames |
| Jump | BU or U or FU | 3 |
Comments here
| Move | Motion | Startup Frames |
| Super Jump | DBU or DU or DFU | 5 |
Comments here
| Move | Motion | Frames |
| Normal Wakeup | - | 88 |
Comments here
| Move | Motion | Frames |
| Quick Stand | Tap D when hitting the ground | 61 |
Comments here
| Move | Motion | Damage | Stun Damage | Chains into itself | Special Cancel | Super Cancel | Juggle Value | Reset or Juggle |
| Taunt | HP+HK | - | - | No | No | No | - | - |
Frame Data
| Startup | Hit | Recovery | Blocked Advantage | Hit Advantage | Crouching Hit Advantage | Guard | Parry |
| - | 59 | - | ? | ? | ? | - | - |
Gauge Increase
| Miss | Blocked | Hit | Parry (Gauge for opponent) |
| 4(6) | ? | ? | 8(4+4) |
Comments here
| Move | Motion |
| Parry (High) | Tap F when about taking a hit |
| Parry (Low) | Tap D when about taking a hit |
| Parry (Air) | Tap F in air when about taking a hit |
Frame Data
| Move | Frames you're frozen | Frames opponent is frozen | Frame Advantage when parry is successful | Frames before you can try another parry |
| Parry (High) | 16 | 16 | +4(LP/LK) +3(MP/MK) +2(HP/HK) 0(Special/Super) -16(Fireball) | 24(19 when attack comes from the air)*,** |
| Parry (Low) | 16 | 16 | +4(LP/LK) +3(MP/MK) +2(HP/HK) 0(Special/Super) -16(Fireball) | 24(19 when attack comes from the air)*,** |
| Parry (Air) | 16 | 16 | +4(LP/LK) +3(MP/MK) +2(HP/HK) 0(Special/Super) -16(Fireball) | 21(19 when attack comes from the air)*,** |
| * (If a parry attempt is successful, the 19/21/24 frame restriction is taken away and you can attempt another parry immediately) |
| ** (If another attack connects within 2 frames of your parry, it will automatically be parried) |
Gauge Increase
| Move | Gauge Increase |
| Parry (High) | 4*** |
| Parry (Low) | 4*** |
| Parry (Air) | 4*** |
| *** (You gain 4 of gauge for whatever attack parried, and for whatever hit you parry during multihit attack) |
You can buffer any motion during High or Low parry, but NOT during Air parry, also parry resets the juggle count (and thus resets all scaling).
- Parry information is taken from Hyakuretsu Kyaku Forums, more exactly, from user JinraiPVC. Thanks for this information dude
Normal Moves
Standing Normals
| Move | Motion | Damage | Stun Damage | Chains into itself | Special Cancel | Super Cancel | Juggle Value | Reset or Juggle |
| Far Jab | LP | 15(3 life points) | 3 | Yes | Yes | Yes | 15 | Reset |
Frame Data
| Startup | Hit | Recovery | Blocked Advantage | Hit Advantage | Crouching Hit Advantage | Guard | Parry |
| 3 | 5 | 4 | +2 | +2 | +2 | HL | HL |
Gauge Increase
| Miss | Blocked | Hit | Parry (Gauge for opponent) |
| 0 | 1 | 2 | 4 |
Comments here
| Move | Motion | Damage | Stun Damage | Chains into itself | Special Cancel | Super Cancel | Juggle Value | Reset or Juggle |
| Far Strong | MP | 100(17 life points) | 11 | No | Yes | Yes | 15 | Reset |
Frame Data
| Startup | Hit | Recovery | Blocked Advantage | Hit Advantage | Crouching Hit Advantage | Guard | Parry |
| 6 | 8 | 9 | -2 | -1 | 0 | HL | H |
Gauge Increase
| Miss | Blocked | Hit | Parry (Gauge for opponent) |
| 2 | 3 | 7 | 4 |
Comments here
| Move | Motion | Damage | Stun Damage | Chains into itself | Special Cancel | Super Cancel | Juggle Value | Reset or Juggle |
| Far Fierce | HP | 110(19 life points) | 11 | No | No | No | 15 | Reset |
Frame Data
| Startup | Hit | Recovery | Blocked Advantage | Hit Advantage | Crouching Hit Advantage | Guard | Parry |
| 8 | 6 | 17 | -2 | 0 | +2 | HL | HL |
Gauge Increase
| Miss | Blocked | Hit | Parry (Gauge for opponent) |
| 3 | 5 | 13 | 4 |
Comments here
| Move | Motion | Damage | Stun Damage | Chains into itself | Special Cancel | Super Cancel | Juggle Value | Reset or Juggle |
| Close Jab | (Close to opponent) LP(5 life points) | 30 | 3 | No | Yes | Yes | 1 | Reset |
Frame Data
| Startup | Hit | Recovery | Blocked Advantage | Hit Advantage | Crouching Hit Advantage | Guard | Parry |
| 2 | 2 | 6 | +2 | +2 | +2 | HL | HL |
Gauge Increase
| Miss | Blocked | Hit | Parry (Gauge for opponent) |
| 0 | 1 | 2 | 4 |
Comments here
| Move | Motion | Damage | Stun Damage | Chains into itself | Special Cancel | Super Cancel | Juggle Value | Reset or Juggle |
| Short | LK | 40(7 life points) | 3 | No | No | No | 15 | Reset |
Frame Data
| Startup | Hit | Recovery | Blocked Advantage | Hit Advantage | Crouching Hit Advantage | Guard | Parry |
| 3 | 5 | 9 | +1 | +1 | +1 | HL | HL |
Gauge Increase
| Miss | Blocked | Hit | Parry (Gauge for opponent) |
| 0 | 1 | 2 | 4 |
Comments here
| Move | Motion | Damage | Stun Damage | Chains into itself | Special Cancel | Super Cancel | Juggle Value | Reset or Juggle |
| Forward | MK | 90(16 life points) | 11 | No | No | No | 15 | Reset |
Frame Data
| Startup | Hit | Recovery | Blocked Advantage | Hit Advantage | Crouching Hit Advantage | Guard | Parry |
| 7 | 6 | 19 | -5 | -3 | -1 | HL | H |
Gauge Increase
| Miss | Blocked | Hit | Parry (Gauge for opponent) |
| 2 | 3 | 7 | 4 |
Comments here
| Move | Motion | Damage | Stun Damage | Chains into itself | Special Cancel | Super Cancel | Juggle Value | Reset or Juggle |
| Roundhouse | HK | 120(21 life points) | 13 | No | No | No | 15 | Reset |
Frame Data
| Startup | Hit | Recovery | Blocked Advantage | Hit Advantage | Crouching Hit Advantage | Guard | Parry |
| 12 | 1 | 15 | 0 | +2 | +4 | HL | H |
Gauge Increase
| Miss | Blocked | Hit | Parry (Gauge for opponent) |
| 3 | 5 | 13 | 4 |
Comments here
| Move | Motion | Damage | Stun Damage | Chains into itself | Special Cancel | Super Cancel | Juggle Value | Reset or Juggle |
| Close Forward | (Close to opponent) MK | 80(14 life points) | 5 | No | No | No | 15 | Reset |
Frame Data
| Startup | Hit | Recovery | Blocked Advantage | Hit Advantage | Crouching Hit Advantage | Guard | Parry |
| 6 | 2 | 15 | -2 | 0 | 0 | HL | H |
Gauge Increase
| Miss | Blocked | Hit | Parry (Gauge for opponent) |
| 2 | 4 | 8 | 4 |
Comments here
| Move | Motion | Damage | Stun Damage | Chains into itself | Special Cancel | Super Cancel | Juggle Value | Reset or Juggle |
| Close Roundhouse | (Close to opponent) HK | 120(110)(21 life points) | 15(13) | No | Yes | Yes | 2 | Reset |
Frame Data
| Startup | Hit | Recovery | Blocked Advantage | Hit Advantage | Crouching Hit Advantage | Guard | Parry |
| 4 | 9 | 12 | -3 | -1 | +1 | HL | H |
Gauge Increase
| Miss | Blocked | Hit | Parry (Gauge for opponent) |
| 3 | 5 | 13 | 4 |
Comments here
Jumping Normals
| Move | Motion | Damage | Stun Damage | Chains into itself | Special Cancel | Super Cancel | Juggle Value | Reset or Juggle |
| Jump Jab | (Air) LP | 40(7 life points) | 7 | No | No | No | 3 | Reset |
Frame Data
| Startup | Hit | Recovery | Blocked Advantage | Hit Advantage | Crouching Hit Advantage | Guard | Parry |
| 2(4 if neutral jump) | Until landing | - | -5~+7/+3~+7 | -5~+7/+3~+7 | +3~+7/+7 | H | H |
Gauge Increase
| Miss | Blocked | Hit | Parry (Gauge for opponent) |
| 0 | 1 | 2 | 4 |
Comments here
| Move | Motion | Damage | Stun Damage | Chains into itself | Special Cancel | Super Cancel | Juggle Value | Reset or Juggle |
| Jump Strong | (Air) MP | 60(80 if neutral jump)(10/14 life points) | 9(11 if neutral jump) | No | No | No | 3 | Reset |
Frame Data
| Startup | Hit | Recovery | Blocked Advantage | Hit Advantage | Crouching Hit Advantage | Guard | Parry |
| 4(6 if neutral jump) | Until Landing | - | -6~+10/+5~+10 | -6~+10/+5~+10 | +5~+10/+10 | H | H |
Gauge Increase
| Miss | Blocked | Hit | Parry (Gauge for opponent) |
| 2 | 5 | 10 | 4 |
Comments here
| Move | Motion | Damage | Stun Damage | Chains into itself | Special Cancel | Super Cancel | Juggle Value | Reset or Juggle |
| Jump Fierce | (Air) HP | 80(10 life points) | 9 | No | No | No | 3 | Reset |
Frame Data
| Startup | Hit | Recovery | Blocked Advantage | Hit Advantage | Crouching Hit Advantage | Guard | Parry |
| 9 | 6 | - | -1~+13 | -1~+13 | +9~+13 | H | H |
Gauge Increase
| Miss | Blocked | Hit | Parry (Gauge for opponent) |
| 3 | 9 | 18 | 4 |
Comments here
| Move | Motion | Damage | Stun Damage | Chains into itself | Special Cancel | Super Cancel | Juggle Value | Reset or Juggle |
| Neutral Jump Fierce | (Air) HP | 130(23 life points) | 15 | No | No | No | 3 | Juggle |
Frame Data
| Startup | Hit | Recovery | Blocked Advantage | Hit Advantage | Crouching Hit Advantage | Guard | Parry |
| 10 | 3 | - | +4~+13 | +4~+13 | +10~+13 | H | H |
Gauge Increase
| Miss | Blocked | Hit | Parry (Gauge for opponent) |
| 3 | 9 | 18 | 4 |
Comments here
| Move | Motion | Damage | Stun Damage | Chains into itself | Special Cancel | Super Cancel | Juggle Value | Reset or Juggle |
| Jump Short | (Air) LK | 50(40 if neutral jump)(8/7 life points) | 5(7 if neutral jump) | No | No | No | 3 | Reset |
Frame Data
| Startup | Hit | Recovery | Blocked Advantage | Hit Advantage | Crouching Hit Advantage | Guard | Parry |
| 5 | Until Landing(22 if neutral jump) | - | 0~+7 | 0~+7 | +6~+7/+5~+7 | H | H |
Gauge Increase
| Miss | Blocked | Hit | Parry (Gauge for opponent) |
| 0 | 1 | 2 | 4 |
Comments here
| Move | Motion | Damage | Stun Damage | Chains into itself | Special Cancel | Super Cancel | Juggle Value | Reset or Juggle |
| Jump Forward | (Air) MK | 90(16 life points) | 9 | No | No | No | 3 | Reset |
Frame Data
| Startup | Hit | Recovery | Blocked Advantage | Hit Advantage | Crouching Hit Advantage | Guard | Parry |
| 6 | 13 | - | +2~+10 | +2~+10 | +9~+10 | H | H |
Gauge Increase
| Miss | Blocked | Hit | Parry (Gauge for opponent) |
| 2 | 5 | 10 | 4 |
Comments here
| Move | Motion | Damage | Stun Damage | Chains into itself | Special Cancel | Super Cancel | Juggle Value | Reset or Juggle |
| Neutral Jump Forward | (Air) MK | 80(14 life points) | 9 | No | No | No | 3 | Reset |
Frame Data
| Startup | Hit | Recovery | Blocked Advantage | Hit Advantage | Crouching Hit Advantage | Guard | Parry |
| 6 | 2 | - | -1~+10 | -1~+10 | +6~+10 | H | H |
Gauge Increase
| Miss | Blocked | Hit | Parry (Gauge for opponent) |
| 2 | 5 | 10 | 4 |
Comments here
| Move | Motion | Damage | Stun Damage | Chains into itself | Special Cancel | Super Cancel | Juggle Value | Reset or Juggle |
| Jump Roundhouse | (Air) HK | 110(19 life points) | 13 | No | No | No | 3 | Juggle |
Frame Data
| Startup | Hit | Recovery | Blocked Advantage | Hit Advantage | Crouching Hit Advantage | Guard | Parry |
| 10 | 3 | - | +2~+13 | +2~+13 | +4~+13 | H | H |
Gauge Increase
| Miss | Blocked | Hit | Parry (Gauge for opponent) |
| 3 | 9 | 18 | 4 |
Comments here
| Move | Motion | Damage | Stun Damage | Chains into itself | Special Cancel | Super Cancel | Juggle Value | Reset or Juggle |
| Neutral Jump Roundhouse | (Air) HK | 130(23 life points) | 13 | No | No | No | 3 | Reset |
Frame Data
| Startup | Hit | Recovery | Blocked Advantage | Hit Advantage | Crouching Hit Advantage | Guard | Parry |
| 8 | 5 | - | +1~+13 | +1~+13 | +9~+13 | H | H |
Gauge Increase
| Miss | Blocked | Hit | Parry (Gauge for opponent) |
| 3 | 9 | 18 | 4 |
Comments here
| Move | Motion | Damage | Stun Damage | Chains into itself | Special Cancel | Super Cancel | Juggle Value | Reset or Juggle |
| Universal Overhead | MP+MK | 40(7 life points) | 3 | No | No | No | 1 | Reset |
Frame Data
| Startup | Hit | Recovery | Blocked Advantage | Hit Advantage | Crouching Hit Advantage | Guard | Parry |
| 15 | 10 | 5 | -5~+7 | 0~+8 | +1~+9 | HL | H |
Gauge Increase
| Miss | Blocked | Hit | Parry (Gauge for opponent) |
| 0 | 1 | 2 | 4 |
Comments here
Throws
| Move | Motion | Damage | Stun Damage | Throw Range | Kara-Throw | Kara-Throw Range |
| Hiza Geri | B/F/N+LP+LK | 120(21 life points) | 9 | 26 | Far S.MK / Close S.HK / C.MP / B.MP / Close S.MK / C.HP | 58 / 36 / 30 / 28 / 28 / 28 |
Frame Data
| Startup | Hit | Recovery | Blocked Advantage | Hit Advantage | Crouching Hit Advantage | Guard | Parry |
| 2 | 1 | 21 | - | - | - | LP+LK | - |
Gauge Increase
| Miss | Blocked | Hit |
| 0 | 7 (for the player who blocked) | 8 |
Comments here
| Move | Motion | Damage | Stun Damage | Throw Range | Kara-Throw | Kara-Throw Range | Juggle Value | Reset or Juggle |
| Seoi Nage | Close to Oponnent On Air LP+LK | 80(14 life points) | 9 | Width 14,53~89 Height | - | - | 0 | Juggle |
Frame Data
| Startup | Hit | Recovery | Blocked Advantage | Hit Advantage | Crouching Hit Advantage | Guard | Parry |
| 5 | 1 | - | - | - | - | Close to Oponnent On Air LP+LK | - |
Gauge Increase
| Miss | Blocked | Hit |
| 0 | 7 (for the player who blocked) | 8 |
Comments here
Crouching Normals
| Move | Motion | Damage | Stun Damage | Chains into itself | Special Cancel | Super Cancel | Juggle Value | Reset or Juggle |
| Crouch Jab | D+LP | 15(3 life points) | 3 | Yes | Yes | Yes | 15 | Reset |
Frame Data
| Startup | Hit | Recovery | Blocked Advantage | Hit Advantage | Crouching Hit Advantage | Guard | Parry |
| 2 | 4 | 5 | +3 | +3 | +3 | HL | HL |
Gauge Increase
| Miss | Blocked | Hit | Parry (Gauge for opponent) |
| 0 | 1 | 2 | 4 |
Comments here
| Move | Motion | Damage | Stun Damage | Chains into itself | Special Cancel | Super Cancel | Juggle Value | Reset or Juggle |
| Crouch Strong | D+MP | 90(16 life points) | 7 | No | No | No | 15 | Reset |
Frame Data
| Startup | Hit | Recovery | Blocked Advantage | Hit Advantage | Crouching Hit Advantage | Guard | Parry |
| 8 | 2 | 18 | -4 | -3 | -2 | L | L |
Gauge Increase
| Miss | Blocked | Hit | Parry (Gauge for opponent) |
| 2 | 3 | 7 | 4 |
Comments here
| Move | Motion | Damage | Stun Damage | Chains into itself | Special Cancel | Super Cancel | Juggle Value | Reset or Juggle |
| Crouch Fierce | D+HP | 130(19 life points) | 13 | No | Yes | Yes | 15 | Reset |
Frame Data
| Startup | Hit | Recovery | Blocked Advantage | Hit Advantage | Crouching Hit Advantage | Guard | Parry |
| 8 | 2 | 22 | -1 | +1 | +3 | HL | HL |
Gauge Increase
| Miss | Blocked | Hit | Parry (Gauge for opponent) |
| 3 | 5 | 13 | 4 |
Comments here
| Move | Motion | Damage | Stun Damage | Chains into itself | Special Cancel | Super Cancel | Juggle Value | Reset or Juggle |
| Crouch Short | D+LK | 40(3 life points) | 3 | No | Yes | No | 15 | Reset |
Frame Data
| Startup | Hit | Recovery | Blocked Advantage | Hit Advantage | Crouching Hit Advantage | Guard | Parry |
| 4 | 2 | 6 | +3 | +3 | +3 | L | L |
Gauge Increase
| Miss | Blocked | Hit | Parry (Gauge for opponent) |
| 0 | 1 | 2 | 4 |
Comments here
| Move | Motion | Damage | Stun Damage | Chains into itself | Special Cancel | Super Cancel | Juggle Value | Reset or Juggle |
| Crouch Forward | D+MK | 90(16 life points) | 3 | No | Yes | Yes | 15 | Reset |
Frame Data
| Startup | Hit | Recovery | Blocked Advantage | Hit Advantage | Crouching Hit Advantage | Guard | Parry |
| 6 | 2 | 14 | -2 | -1 | 0 | L | L |
Gauge Increase
| Miss | Blocked | Hit | Parry (Gauge for opponent) |
| 2 | 3 | 7 | 4 |
Comments here
Low forward is one of her more notorious buttons along with back+fierce. This move is particularly interesting in that it has a dedicated late cancel window for specials and supers, with a dead zone of uncancellable frames in between the early cancel and late cancel frames, and more uncancellable frames during the recovery. This means that confirming this move into super is functionally similar to a link, but without the added risk of being too late on the link. The two late cancel frames occur 17 and 18 frames after hitspark, making this move rather generously hitconfirmable, especially when the super input is done with a piano. Aim to ALWAYS hit this late cancel window when cancelling into super, as the early cancel frames are not within a reasonable reaction time.
| Move | Motion | Damage | Stun Damage | Chains into itself | Special Cancel | Super Cancel | Juggle Value | Reset or Juggle |
| Crouch Roundhouse | D+HK | 110(19 life points) | 5 | No | No | No | 15 | Juggle |
Frame Data
| Startup | Hit | Recovery | Blocked Advantage | Hit Advantage | Crouching Hit Advantage | Guard | Parry |
| 7 | 3 | 21 | -7 | Down | Down | HL | HL |
Gauge Increase
| Miss | Blocked | Hit | Parry (Gauge for opponent) |
| 3 | 5 | 13 | 4 |
Comments here
Command Normals
| Move | Motion | Damage | Stun Damage | Chains into itself | Special Cancel | Super Cancel | Juggle Value | Reset or Juggle |
| Souren Shou | B+MP | 110(60+50)(17 life points) | 16(7+9) | No | Yes/Yes | Yes/Yes | 3/15 | Reset/Reset |
Frame Data
| Startup | Hit | Recovery | Blocked Advantage | Hit Advantage | Crouching Hit Advantage | Guard | Parry |
| 5 | 2,1 | 18 | -2 | 0 | 0 | HL | H |
Gauge Increase
| Miss | Blocked | Hit | Parry (Gauge for opponent) |
| 2 | 6 | 11 | 8(4+4) |
Comments here
| Move | Motion | Damage | Stun Damage | Chains into itself | Special Cancel | Super Cancel | Juggle Value | Reset or Juggle |
| Hakkei | B+HP | 130(23 life points) | 15 | No | Yes | Yes | 15 | Reset |
Frame Data
| Startup | Hit | Recovery | Blocked Advantage | Hit Advantage | Crouching Hit Advantage | Guard | Parry |
| 7 | 9 | 10 | -1 | +1 | 3 | HL | H |
Gauge Increase
| Miss | Blocked | Hit | Parry (Gauge for opponent) |
| 3 | 9 | 18 | 4 |
Comments here
The move that everyone thinks of first for 3s Chun-li. It has some of the highest priority for a normal in the game, an extremely active far reaching hitbox, is great for meter building, very quick, special and super cancellable, and very hitconfirmable. It is a great button, but do not delude yourself into thinking that it can be simply spammed mindlessly, whether you are playing as Chun or against her, as anyone who is even halfway looking at the screen will be able to whiff punish poorly placed b+HP. Can be cancelled into kikouken to increase the confirmability of the move, but the fireball can be red parried, and depending on spacing, can even be a blue parry, so be wary of using the fireball as a crutch for confirming b+HP.
| Move | Motion | Damage | Stun Damage | Chains into itself | Special Cancel | Super Cancel | Juggle Value | Reset or Juggle |
| Senjou Shuu | F+MK | 80(14 life points) | 5 | No | No | No | 10 | Reset |
Frame Data
| Startup | Hit | Recovery | Blocked Advantage | Hit Advantage | Crouching Hit Advantage | Guard | Parry |
| 11 | 7 | 11 | 0 | +1 | +2 | HL | H |
Gauge Increase
| Miss | Blocked | Hit | Parry (Gauge for opponent) |
| 2 | 5 | 10 | 4 |
Comments here
| Move | Motion | Damage | Stun Damage | Chains into itself | Special Cancel | Super Cancel | Juggle Value | Reset or Juggle |
| Kakushu Raku Kyaku | MK,Hold MK | 120(80+20+20) | 19(5+7+7) | No | No | No | 15 for all hits | Reset for all hits |
Frame Data
| Startup | Hit | Recovery | Blocked Advantage | Hit Advantage | Crouching Hit Advantage | Guard | Parry |
| 6 | 6 | 2 | -1 | +3 | +3 | HL/H/H | H/H/H |
Gauge Increase
| Miss | Blocked | Hit | Parry (Gauge for opponent) |
| 2 | 5 | 12 | 12(4+4+4) |
Comments here
| Move | Motion | Damage | Stun Damage | Chains into itself | Special Cancel | Super Cancel | Juggle Value | Reset or Juggle |
| Yoku Sen Kyaku | F+HK | 120(21 life points) | 13 | No | No | No | 15 | Reset |
Frame Data
| Startup | Hit | Recovery | Blocked Advantage | Hit Advantage | Crouching Hit Advantage | Guard | Parry |
| 12 | 1 | 15 | 0 | +2 | +4 | H | H |
Gauge Increase
| Miss | Blocked | Hit | Parry (Gauge for opponent) |
| 3 | 9 | 18 | 4 |
Comments here
| Move | Motion | Damage | Stun Damage | Chains into itself | Special Cancel | Super Cancel | Juggle Value | Reset or Juggle |
| Tenshin Shuu Kyaku | DF+HK | 110(19 life points) | 13 | No | No | No | 1 | Juggle |
Frame Data
| Startup | Hit | Recovery | Blocked Advantage | Hit Advantage | Crouching Hit Advantage | Guard | Parry |
| 37 | 5 | 2 | +9 | +11 | +15 | HL | H |
Gauge Increase
| Miss | Blocked | Hit | Parry (Gauge for opponent) |
| 3 | 9 | 18 | 4 |
Comments here
| Move | Motion | Damage | Stun Damage | Chains into itself | Special Cancel | Super Cancel | Juggle Value | Reset or Juggle |
| Yousou Suitotsu Da | (Air) D+HP | 110(3 life points) | 15 | No | No | No | 3 | Juggle |
Frame Data
| Startup | Hit | Recovery | Blocked Advantage | Hit Advantage | Crouching Hit Advantage | Guard | Parry |
| 10 | 3 | - | - | - | - | - | - |
Gauge Increase
| Miss | Blocked | Hit | Parry (Gauge for opponent) |
| 2 | 5 | 10 | 4 |
Comments here
| Move | Motion | Damage | Stun Damage | Chains into itself | Special Cancel | Super Cancel | Juggle Value | Reset or Juggle |
| Yosou Kyaku | (Air) D+MK | 50(8 life points) | 5 | No | No | No | 3 | Juggle |
Frame Data
| Startup | Hit | Recovery | Blocked Advantage | Hit Advantage | Crouching Hit Advantage | Guard | Parry |
| 9 | Until Landing | - | - | - | - | - | - |
Gauge Increase
| Miss | Blocked | Hit | Parry (Gauge for opponent) |
| 0 | 1 | 2 | 4 |
Comments here
Target Combo
| Move | Motion | Damage | Stun Damage | Chains into itself | Special Cancel | Super Cancel | Juggle Value | Reset or Juggle |
| Target Combo | Jumping Diagonal HP -> HP | 80+60 | 9+5 | No/No | No/No | No/No | 3/3 | Reset/Reset |
Frame Data
| Startup | Hit | Recovery | Blocked Advantage | Hit Advantage | Crouching Hit Advantage | Guard | Parry |
| 9 | - | - | - | - | - | HL/HL | H/H |
Gauge Increase
| Miss | Blocked | Hit | Parry (Gauge for opponent) |
| 3+? | 9+1 | 18+1 | 8(4+4) |
Comments here
Special Moves
Please note that in this section you will see mainly 3 images for the special moves, this means the image on the left its done with LP (or LK), the image on the center its done with MP (or MK), and the image on the right its done with HP (or HK). Also its the same "rule" as the sections above, its the 1rst frame it hits for every of the moves.
| Move | Motion | Damage | Blocked Damage | Stun Damage | Super Cancel | Juggle Value | Reset or Juggle |
| Kikkoken (Jab) | HCF+LP | 45(8 life points) | 3 | 3 | Yes | 7 | Reset |
| Kikkoken (Strong) | HCF+MP | 50(8 life points) | 4 | 3 | Yes | 7 | Reset |
| Kikkoken (Fierce) | HCF+HP | 60(8 life points) | 5 | 3 | Yes | 7 | Reset |
Frame Data
| Move | Startup | Hit | Recovery | Blocked Advantage | Hit Advantage | Crouching Hit Advantage | Guard | Parry |
| Kikkoken (Jab) | 13 | 1 | 45 | -17 | -16 | -15 | HL | H |
| Kikkoken (Strong) | 12 | 1 | 38 | -10 | -9 | -8 | HL | H |
| Kikkoken (Fierce) | 10 | 1 | 32 | -4 | -3 | -2 | HL | H |
Gauge Increase
| Move | Miss | Blocked | Hit | Parry (Gauge for opponent) |
| Kikkoken (Jab) | 0 | 2 | 3 | 4 |
| Kikkoken (Strong) | 0 | 2 | 3 | 4 |
| Kikkoken (Fierce) | 0 | 2 | 3 | 4 |
Comments here
| Move | Motion | Damage | Blocked Damage | Stun Damage | Super Cancel | Juggle Value | Reset or Juggle |
| Hyakuretsu Kyaku (Short) | Mash LK | 150(6 hits)(17 life points) | 9 | 15 | No | 15 for each hit | Juggle for each hit |
| Hyakuretsu Kyaku (Forward) | Mash MK | 160(6 hits)(18 life points) | 10 | 15 | No | 15 for each hit | Juggle for each hit |
| Hyakuretsu Kyaku (Roundhouse) | Mash HK | 165(6 hits)(21 life points) | 12 | 15 | No | 15 for each hit | Juggle for each hit |
Frame Data
| Move | Startup | Hit | Recovery | Blocked Advantage | Hit Advantage | Crouching Hit Advantage | Guard | Parry |
| Hyakuretsu Kyaku (Short) | 6・10・13・17 | 2・1・2・2 | 12 | +3 | +5 | -3 | HL | H |
| Hyakuretsu Kyaku (Forward) | 6・9・12・15 | 1・1・1・1 | 13 | +1 | +3 | -4 | HL | H |
| Hyakuretsu Kyaku (Roundhouse) | 5・7・9・11・13・15・17・19 | 1・1・1・1・1・1・1・1 | 15 | +1 | -1 | -1 | HL | H |
Gauge Increase
| Move | Miss | Blocked | Hit | Parry (Gauge for opponent) |
| Hyakuretsu Kyaku (Short) | 3 | 16 | 22 | 4 |
| Hyakuretsu Kyaku (Forward) | 3 | 16 | 22 | 4 |
| Hyakuretsu Kyaku (Roundhouse) | 3 | 16 | 22 | 4 |
Comments here
| Move | Motion | Damage | Blocked Damage | Stun Damage | Super Cancel | Juggle Value | Reset or Juggle |
| Spinning Bird Kick (Short) | Charge D,U+LK | 140(21 life points) | 9 | 17 | No | 3 for each hit | Juggle for each hit |
| Spinning Bird Kick (Forward) | Charge D,U+MK | 175(27 life points) | 11 | 19 | No | 3 for each hit | Juggle for each hit |
| Spinning Bird Kick (Roundhouse) | Charge D,U+HK | 195(32 life points) | 12 | 21 | No | 3 for each hit | Juggle for each hit |
Frame Data
| Move | Startup | Hit | Recovery | Blocked Advantage | Hit Advantage | Crouching Hit Advantage | Guard | Parry |
| Spinning Bird Kick (Short) | 12・13・18・23 | 1x4 | 21 | -2 | -1 | -1 | HL/HL | H |
| Spinning Bird Kick (Forward) | 14・15・20・25・30・35 | 1x6 | 22 | -3 | -1 | -1 | HL | H |
| Spinning Bird Kick (Roundhouse) | 17・18・23・28・33・38・43・48 | 1x8 | 22 | -3 | -1 | -1 | HL | H |
Gauge Increase
| Move | Miss | Blocked | Hit | Parry (Gauge for opponent) |
| Spinning Bird Kick (Short) | 3 | 14 | 20 | 16(4x4) |
| Spinning Bird Kick (Forward) | 3 | 17 | 23 | 24(6x4) |
| Spinning Bird Kick (Roundhouse) | 3 | 20 | 26 | 32(8x4) |
Comments here
| Move | Motion | Damage | Blocked Damage | Stun Damage | Super Cancel | Juggle Value | Reset or Juggle |
| Hazan Shu (Short) | HCB+LK | 100(17 life points) | 13 | 11 | No | 1 | Juggle |
| Hazan Shu (Forward) | HCB+MK | 110(19 life points) | 14 | 13 | No | 1 | Juggle |
| Hazan Shu (Roundhouse) | HCB+HK | 120(21 life points) | 15 | 15 | No | 1 | Juggle |
Frame Data
| Move | Startup | Hit | Recovery | Blocked Advantage | Hit Advantage | Crouching Hit Advantage | Guard | Parry |
| Hazan Shu (Short) | 22 | 3 | 18 | -2 | 0 | +2 | HL | H |
| Hazan Shu (Forward) | 24 | 3 | 18 | -2 | 0 | +2 | HL | H |
| Hazan Shu (Roundhouse) | 29 | 3 | 17 | -1 | +1 | +3 | HL | H |
Gauge Increase
| Move | Miss | Blocked | Hit | Parry (Gauge for opponent) |
| Hazan Shu (Short) | 3 | 11 | 17 | 4 |
| Hazan Shu (Forward) | 3 | 12 | 18 | 4 |
| Hazan Shu (Roundhouse) | 3 | 13 | 19 | 4 |
Comments here
EX Moves
| Move | Motion | Gauge Needed | Damage | Blocked Damage | Stun Damage | Super Cancel | Juggle Value | Reset or Juggle |
| Kikkoken (EX) | HCF+PP | 40 | 80(14 life points) | 5 | 3 | Yes | 2 | Reset |
Frame Data
| Move | Startup | Hit | Recovery | Blocked Advantage | Hit Advantage | Crouching Hit Advantage | Guard | Parry |
| Kikkoken (EX) | 14 | 1 | 41 | -7 | -6 | -5 | H | H |
Gauge Increase
| Move | Miss | Blocked | Hit | Parry (Gauge for opponent) |
| Kikkoken (EX) | - | - | - | 4 |
Comments here
| Move | Motion | Gauge Needed | Damage | Blocked Damage | Stun Damage | Super Cancel | Juggle Value | Reset or Juggle |
| Hyakuretsu Kyaku (EX) | Mash KK | 40 | 210(80+50+40+40)(28 life points) | 24(10+6+5+3) | 20(11+3(x3)) | Yes | 1 for each hit | Juggle for each hit |
Frame Data
| Move | Startup | Hit | Recovery | Blocked Advantage | Hit Advantage | Crouching Hit Advantage | Guard | Parry |
| Hyakuretsu Kyaku (EX) | 3・5・7・9 | 1・1・1・1 | 17 | -** | Down | Down | HL | H |
Gauge Increase
| Move | Miss | Blocked | Hit | Parry (Gauge for opponent) |
| Hyakuretsu Kyaku (EX) | - | - | - | 16(4+4+4+4) |
Comments here
THE INFORMATION BELOW IS NOT RELIABLE. Frame advantage on this move varies a ton based on if the move is meaty and how far spaced she is as well. Just know that EX legs is potentially the most minus.
\** This move has varying minus frames based on who blocked it and whether they were crouching or standing
RY: -2 cr, -3 st
KE: -6 cr, -6 st[shippu punish from crouch block, too far on stand block]
GO: -4 cr, -3 st
SE: -6 cr, -6 st
YU: -6 cr, -3 st[sourai rengeki punish from crouch block, too far on stand block]
YA: -6 cr, -6 st
CH: -2 cr, -4 st
MA: -6 cr, -3 st
DU: -3 cr, -3 st[rolling thunder punish from crouch or stand block]
RE: -3 cr, -3 st
OR: -3 cr, -3 st
UR: -3 cr, -2 st
Q: -1 cr, -2 st
NE: -6 cr, -7 st[electric snake punish from stand block, too far on crouch block]
IB: -3 cr, -3 st
EL: -5 cr, -4 st
HU: -3 cr, -3 st
AL: -3 cr, -7 st
TW: -6 cr, -3 st
| Move | Motion | Gauge Needed | Damage | Blocked Damage | Stun Damage | Super Cancel | Juggle Value | Reset or Juggle |
| Spinning Bird Kick (EX) | Charge D,U+KK | 40 | 220(5 hits)(35 life points) | 15(3x5)) | 25 | No | 1 per hit, 3 for final hit (grounded only) | Juggle for all hits |
Frame Data
| Move | Startup | Hit | Recovery | Blocked Advantage | Hit Advantage | Crouching Hit Advantage | Guard | Parry |
| Spinning Bird Kick (EX) | 12・17・22・27・32 | 2x5 | 22(21) | -8 | Down | Down | HL | H |
Gauge Increase
| Move | Miss | Blocked | Hit | Parry (Gauge for opponent) |
| Spinning Bird Kick (EX) | - | - | - | 20(4x5) |
Comments here
This move has full invulnerability on startup, but is completely vulnerable for several frames before the move becomes active, meaning it can be hit with delayed meaties. This move (nor the other versions) is not considered airborne during startup, so she does not flip out on hit.
| Move | Motion | Gauge Needed | Damage | Blocked Damage | Stun Damage | Super Cancel | Juggle Value | Reset or Juggle |
| Hazan Shu (EX) | HCB+KK | 40 | 160(28 life points) | 20 | 17 | No | 1 | Juggle |
Frame Data
| Move | Startup | Hit | Recovery | Blocked Advantage | Hit Advantage | Crouching Hit Advantage | Guard | Parry |
| Hazan Shu (EX) | 31 | 1 | 12 | -2 | Down | Down | H | H |
Gauge Increase
| Move | Miss | Blocked | Hit | Parry (Gauge for opponent) |
| Hazan Shu (EX) | - | - | - | 4 |
Comments here
Super Arts
| Super Art | Super Art Name | Super Art Stock | Motion | Damage | Blocked Damage | Stun Damage | Damage/Gauge | Juggle Value | Reset or Juggle |
| I | Kikoshou | 1 bar (88) | QCF QCF+P | 360*(57 life points) | 78** | 0 | 4.09 | 0 for all hits | Juggle for all hits |
| * (40×3+35×17) Damage is when all hits connect. |
| ** (6×13) Damage is when all hits connect. |
Frame Data
| Startup | Hit | Recovery | Blocked Advantage | Hit Advantage | Crouching Hit Advantage | Guard | Parry |
| 1・2・3・4・5・6・7・8・9・10・12・14・16・18・20・22・24・26・28・30 | 1x20 | 48 | -38 | Down | Down | HLx20 | HLx20 |
Comments here
| Super Art | Super Art Name | Super Art Stock | Motion | Damage | Blocked Damage | Stun Damage | Damage/Gauge | Juggle Value | Reset or Juggle |
| II | Houyoku Sen | 1 bar (104) | QCF QCF+K | 390*(67 life points) | 58** | 22 | 3.75 (x2) | 1 per hit, 2 for final hit | Reset, Juggle for final hit |
| * 「30+40(×3)」×2+「30+40(×3)」×2+200 Damage is when all hits connect. |
| ** 5×4+5×4+50 Damage is when all hits connect. |
| ** 3×8+3×8+9 is when all hits connect. |
Frame Data
| Startup | Hit | Recovery | Blocked Advantage | Hit Advantage | Crouching Hit Advantage | Guard | Parry |
| 3・5・7・9・11・13・15・17・32・34・36・38・40・42・44・46・71 | 1×16・3 | 35 | -25 | Launch | Launch | HLx17 | HLx17 |
Comments here
| Super Art | Super Art Name | Super Art Stock | Motion | Damage | Blocked Damage | Stun Damage | Damage/Gauge | Juggle Value | Reset or Juggle |
| III | Tensei Ranka | 3 bars (72 each bar) | QCF QCF+K | 280*(49 life points) | 45** | 18*** | 3,89 (x3) | 0 for first hits, 1 for last four hits | Juggle for all hits |
| * 80+(25×4)+(30×3)+140 Damage is when all hits connect. |
| ** 5+(2×7)+35 Damage is when all hits connect. |
| *** (3×8)+9 Damage is when all hits connect. |
Frame Data
| Startup | Hit | Recovery | Blocked Advantage | Hit Advantage | Crouching Hit Advantage | Guard | Parry |
| 3・8・10・12・14・16・17・18・19・20・30 | 3・1×5・3・4・1 | 46(40) | -30(-24) | Down | Down | HLx3~5/H | Hx3~5/H |
Comments here
Combos
Meterless
| 1st Move | 2nd Move | 3rd Move | 4th Move | Damage | Stun Damage |
| Back HP | Kikoken | - | - | 345 (30%) | 27 |
| Jumping HP | Crouch MK | Spinning Bird Kick | - | 414 (36%) | 33 |
| Crouch MK | Hyakturetsu Kyaku | - | - | 380 (33%) | 28 |
Ex Moves
| 1st Move | 2nd Move | 3rd Move | 4th Move | Damage | Stun Damage |
| Crouch HP | EX Spinning Bird Kick | - | - | 345 (30%) | 27 |
| Crouch MK | EX Hyakturetsu Kyaku | - | - | 380 (33%) | 28 |
Super Art I
Cr. mk, SAI
B + hp, SAI
Cl. hk xx SAI (must be super-jump cancelled)
Super Art II
Cr. mk, SAII (the most common SAII combo, by far.)
B + hp, SAII
Cr. lp, SAII (has uses, such as punishing certain fast-recovering moves, or getting out of a corner lightning-legs trap against another Chun-Li.)
B + mp, SAII (dumb, but it's there.)
Far HK, SAII (on certain crouching opponents, such as the shotos, Hugo, Q, and Dudley.)
Close HK xx SAII (must be super-jump cancelled.)
Lp, Cr. lp xx SAII
Super Art III
Cr. mk, SAIII (only if opponent is crouching, but not too sure. Needs to be confirmed.)
Strategies
Overview
Chun-Li is a top-tier character, sharing the top slots with Yun, Ken and (arguably) Makoto. Her greatest assets are her extremely damaging Super Art (Houyoku-Sen), extreme range of her kara-throw, her fast dash, and fast/high-priority normal moves. She has the capabilities to rush other characters down using her quick dash and faster moves such as s.LP, c.LP and close HK, as well as adding her throw to the mix and fear of Houyoku-Sen super which can be cancelled off of plethora of moves. However, she is often played as a reactive character; one that reacts to an enemy rather than trying to pressure them with a rushdown. As such, she makes an excellent turtle. She also has an extremely short hitbox while crouching, allowing her to duck an enormous number of moves that would normally hit.
Her main weaknesses are that she has no damaging combos that she can perform when she has no meter, and in some cases lacks a definitive anti-air such as a typical DP maneuver. Her assortment of high-priority normals and quick dash, however, can be used as anti-air devices with a great deal of success. Also, she lacks a fast overhead; both the universal overhead and flip kick are fairly slow and easy to block on reaction. She does, however, have an extremely long kara-universal overhead which can compensate for the lack of speed. Finally, she has a large falling/juggling hitbox, which means she's more prone to eating high-damage combos than a lot of characters (for example, Ken can do strong, fierce, jab uppercut x2 in the corner on her fairly easily, without a kara or strict timing at all.)
Basics
Chun-Li can dominate a match with simply her normals and throws alone, but much of her strategy stems from having at least one stock of the Houyoku-Sen super ready and available. It can easily be hitconfirmed off of a c.MK and b + HP, which are two of her most commonly used moves for poking, punishing, and during mixup.
Having a Houyoku-Sen stock can drastically change the flow of the match. Its damage is very high, and the last kick can be cancelled into a superjump, offering an array of different resets or simple extra-damage knockdowns that can set Chun-Li up for more mixups. Landing the Houyoku-Sen is not always necessary to take control of the match; the fear incited from being hit by the Houyoku-Sen is usually enough to turn the tide in your favor.
back + FP is good for building meter when you're a safe distance away
st.MP is good for building meter from closer or if you feel back + FP might be risky
cr.MK is a good poke
cr.MP is good every once in a while if your opponent thinks he's safely out of cr.MK range
FP is good, don't do it from stupidly close
far FK goes over low pokes and links into SAII on crouching opponents (buffer the super, piano the kicks when you land)
cr. FK beats a lot of stuff and it's a high parry that knocks down
back + FP beats a lot of stuff and cancels into super. Throw it out to beat pokes, buffer the super and if it connects with something, hit kick
up close, FK super jump cancels into super as well
back + MP, back + FP + FK (mash on FK for lightning legs if parried) and MK are decent anti-airs. neutral jump FK is a very good anti-air if you can pre-empt jumps well
up close, Chun-Li's main mix-up is ticking with cr.LP (which comes out lightning fast) or cr.LK (slightly slower but has to be parried low) then kara-throwing or throwing out cr.MK for hit confirm
And yeah, Chun players do that tapping down thing after a knockdown to throw other player off what they're going to do. I don't do that myself but like to walk backwards and forwards slightly, tap down, then kara-throw. Just learn how to disguise your patterns and mix-up your play.
Tick with cr.LP, walk up slightly so it looks like you're going for plain old vanilla throw, then cr.MK. Tap down, then go for cr.MK. Just do whatever. You'll develop your own tricks and techniques over time. Everyone reacts differently. Some Ken players like to SRK right after you do cr.LP or cr.LK for example, so cr.LK, then blocking is another idea, just to see how they react. Of course, you can also use the delay while blocking to try and fish for another cr.MK.
EX SBK is her best wake-up option if you're going to be aggressive
EX fireball xx SAII is good for chip damage KO
Super Art Selection
Chun-Li's most powerful Super Art is the Houyoku-Sen. It has a healthy stock of two supers, is very damaging, and can be super-cancelled or linked into using many of her attacks:
- c.MK
- c.LP
- s.MP
- b + MP (first or second hit)
- b.HP
- c.HP
- close HK (must be super-jump cancelled)
- F + HK (only on crouching opponents)
- DF + HK
- Kikouken
- EX Kikouken
The Houyoku-Sen's final kick can be super-jump cancelled. As the last hit connects, perform a super-jump, and she will leap into the air. The opponent may be juggled following the Houyoku-Sen, and it is another useful tool in her mixup arsenal. It is almost a guaranteed free ride for your opponent into the corner, so you can take that into consideration if it proves advantageous for your position. Common Houyoku-Sen enders include:
- sj.HP, HP (Target Combo, Resets)
- sj.HP (First hit only, Resets)
- sj.HP, HP (First hit whiffs, second connects, Resets)
- sj.MP (Resets)
- sj.d+MK, d+MK (Character-Specific, Knockdown)
- sj.d+MK, MP/HP/MK/LK (Character-Specific, Resets)
- sj.HK (Knockdown)
The Houyoku-Sen is also a 17-hit Super Art, making it a notorious ender of rounds via chip damage. You may also cancel a Kikouken or EX Kikouken into the Houyoku-Sen for the purpose of disrupting the timing for the opponent should they decide to try and parry it.
The Houyoku-Sen also has invincibility frames on startup during her initial rush to the opponent. It can be used to punish fireballs.
---
Other Supers:
Kikou-Shou (SA1) - The Kikou-Shou is a relatively high-damage super and comes with a rather short bar, which means you can have this super stocked more often than the Houyoku-Sen. It does more chip damage and is more difficult to parry than the Houyoku-Sen, but the primary drawbacks are the fact that it only comes with one stock which bars liberal use of EXs, and that its range is fairly limited. You cannot cancel a max-ranged c.MK into a Kikou-Shou and expect it to hit. For this reason, SA2 is considered a much more powerful super. However, the SA1 does have its merits as an anti-air.
Tensei-Ranka (SA3) - The Tensei-Ranka comes with a much healthier 3-stock limit as opposed to the Kikou-Shou, but it's much more difficult to use successfully. Unless the opponent is very tall or standing, you will not be able to hit them on the way up using the super, which turns the Tensei-Ranka most of the time into an extremely delayed, readable overhead. It is best used as an anti-air or confirmable damage off of an anti-air. Since a common way to punish jumpins with Chun-Li is to either close s.HK or parry into close s.HK, you can super-jump cancel into the Tensei-Ranka after a confirmed hit in order to do more damage than you normally would, at the expense of a reset.
Kara-Techniques
Chun-Li has two useful kara-throws available to her:
- MK
- close HK
A kara-throw is executed by inputting the correct attack (in this case, either MK or close HK) and cancelling the first frame into a throw. For example:
Execute the MK kara-throw by pressing the MK button and immediately pressing LP + LK. You will see Chun-Li move forward as she executes the throw, which will drastically improve the range of your throw and strengthen your game.
Her best kara-throw is her standing MK. It is tied with Q for the farthest reaching kara-throw. Her close HK kara-throw has a few uses against certain characters such as Dudley, whose hitbox can be deceiving, making the s.MK karathrow fail, and having the close MK technique execute instead.
Zoning
Mixups
Additional Notes
- Personal Action: Recovers stun meter (when she yawns) and either Attack up (when she cracks her neck), Defense up (when she pats her shoulders), or both (when she arches forward). Note: Her taunt actions are completely random.
Buffering/Partitioning Hyakuretsu Kyaku (Lightning Legs)
Cancelling normals into Hyakuretsu Kyaku (from now on, referred to as simply 'Lightning Legs') is a great way to make an opponent think twice about punishing certain moves, and is also used to make b + HP a much more powerful anti-air, as the opponent will not only need to parry the b + HP, but also several kicks as they descend.
There are few ways to improve buffering Lightning Legs other than improving your own manual dexterity, but here are a few helpful hints:
- Double-tap each of your buttons (drum two or three fingers each time you go to press the appropriate button -- easier on Japanese-style buttons which are more sensitive in activation).
- Press the appropriate kick button in addition to the normal move you are trying to cancel. For example, if you wanted to cancel a s.MP into HK lightning legs, press MP~HK, then continually double-tap the HK key as fast as you can.
Lightning Legs can also be partitioned. That is, the button inputs for the technique can be stored through dashing. The most simple way to see and perform this is to dash continuously, pressing a single kick button as many times as possible while the dash animation occurs, then to stop dashing and press the kick button again. If done correctly, the lightning legs move will be performed.
This is useful in matches when you need to 'hide' the button inputs. If a player sees one or two standing shorts or repeated presses of the same kick button, they may interpret this as preparation for the move and adjust their gameplay accordingly. By masking the inputs in the dashes, you can spring the technique on your opponent more covertly. This is especially useful during air resets, since the lightning legs technique is a very good way of obtaining chip damage.
Match-ups
Serious Advantage Match-ups
- Oro
- Alex
- Remy
- Q
- Hugo - One of the few matchups where SA I can come in handy, due to its usefulness as a zoning tool to keep Hugo out.
- Sean
Advantage Match-ups
- Ken
- Makoto
- Yang
- Akuma
- Urien
- Ryu
- Ibuki
- Elena
- Necro
- Twelve
Fair Match-ups
- Chun-Li
- Dudley - For the most part, Chun-Li can win this match-up by playing it as though it were any other match, however, should Dudley earn a knockdown, you're in trouble. With Chun-Li's lengthy standing animation and Dudley's ridiculous wake-up control it can be devastating considering the amount of damage he can distribute on Chun-Li especially
Disadvantage Match-ups
- Yun - Easily Chun-Li's worst matchup, due to her inability to counter Yun's dive kicks effectively, and the universal difficulty of dealing with Genei-Jin. Although Chun-Li is normally played with a more defensive/opportunistic mindset, it is important to pressure Yun before he can get meter. While Yun has no meter, it's difficult for him to damage Chun. Chun's superior normals will keep him at bay, and in any circumstance, regardless of whether or not Yun has meter, a stocked Chun will allow her many opportunities to throw or karathrow, as the threat of Houyoku-Sen is often too great to risk counter-throwing or sometimes tech-throwing. Being able to parry Yun's dive kicks is also very helpful, although good Yun players will often vary the ranges of the dive kicks in order to rush Chun down with well-placed mixups. For players who find it difficult to telegraph dive kicks, learn the ranges. Yun is restricted to only 3 different ranges (LK, MK, HK) and must land at a precise distance. Also, know that Yun's superjump arcs him slightly backward, adjusting the range ever so slightly. Knowing the correct ranges of the dive kicks and being able to see where they will land allows you to perform the appropriate anti-air (close s.HK, d+HK, b+HP, s.MP, parry, block, or air-to-air are all effective counters to divekicks at the correct ranges). Finally, be patient! Yun's main weakness (aside from his lack of non-meter offense) is his poor stamina, so one c.MK xx Houyoku-Sen is 40-50% of his life.
Serious Disadvantage Match-ups
Chun-Li has no match-ups where she is at a serious disadvantage
