GigaTempest (talk | contribs) No edit summary |
GigaTempest (talk | contribs) No edit summary |
||
| Line 6: | Line 6: | ||
== Gameplay == | == Gameplay == | ||
{{Content Box|content= | {{Content Box|content= | ||
Kain is a setplay character with both zoning and rushdown elements in his play. His main gameplan is to build meter while controlling space in neutral, then to go in for a guard crush setup once he has the resources (super and/or T.O.P.) required to do so. T.O.P. placement is very important for Kain as it is often used in his guard crush setups. Typically you would want to have a combination of S-Power and T.O.P. ''or'' P-Power for a guaranteed guard crush setup, otherwise a reset is necessary. | |||
{{ProConTable | {{ProConTable | ||
| Line 582: | Line 582: | ||
|Cancel on Block=No | |Cancel on Block=No | ||
|Guard Crush Value=6 | |Guard Crush Value=6 | ||
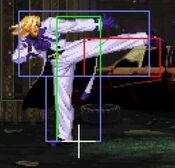
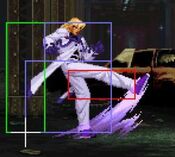
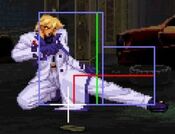
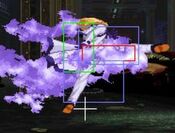
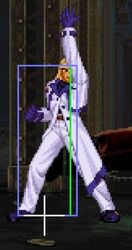
|description=1~6F upper-body invincibility | |description=A good anti-air option against jumps or hops farther out in front of Kain, where his Lanze break would otherwise whiff. Can be cancelled into Panzer B for a knockdown. | ||
1~6F upper-body invincibility | |||
}} | }} | ||
{{AttackData-Garou | {{AttackData-Garou | ||
| Line 598: | Line 600: | ||
|Cancel on Block=Yes | |Cancel on Block=Yes | ||
|Guard Crush Value=6, 3 | |Guard Crush Value=6, 3 | ||
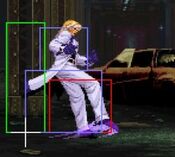
|description=Target combo from 2AB (on both hit and block). | |description=Target combo from 2AB (on both hit and block). Launches the opponent up into the air on hit for a juggle combo. | ||
block by feint | |||
do this. | You can make 2AB safe on block by feint cancelling the C follow-up (Kain is the only character that can do this). | ||
}} | }} | ||
}} | }} | ||
| Line 627: | Line 629: | ||
|Cancel on Block= | |Cancel on Block= | ||
|Guard Crush Value=25 | |Guard Crush Value=25 | ||
|description=Kain's | |description=One of Kain's main tools used for guard crush setups. Usually used at the end of a guard crush blockstring, if Kain guard crushes the opponent with this move, he is able to convert into a full combo afterwards. Depending on the spacing, the move can be hard to punish for some characters due to its pushback on block, but it generally isn't used in neutral because it has a fair amount of startup and is easy to jump over. The move is also used as an optimal meterless combo ender in some juggle combos as it does slightly more damage than Panzer B. | ||
It is possible to use this move in conjunction with the Seele bug by kara cancelling from a st.C or cr.C (depending on whether the opponent crouch or stand JDs respectively), which can lead the move hitting multiple times, quickly guard crushing the opponent and doing a massive amount of damage. | |||
}} | }} | ||
}} | }} | ||
| Line 656: | Line 660: | ||
|Cancel on Block= | |Cancel on Block= | ||
|Guard Crush Value= | |Guard Crush Value= | ||
|description=Kain | |description=Kain is able to combo after his throw in the corner with Lanze or Seele D. | ||
}} | }} | ||
}} | }} | ||
| Line 685: | Line 689: | ||
|Cancel on Block= | |Cancel on Block= | ||
|Guard Crush Value= | |Guard Crush Value= | ||
|description=Mimics the start of | |description=Mimics the start of Schwarze Panzer D and its break. | ||
}} | }} | ||
}} | }} | ||
| Line 712: | Line 716: | ||
|Cancel on Block= | |Cancel on Block= | ||
|Guard Crush Value= | |Guard Crush Value= | ||
|description=Mimics the start of | |description=Mimics the start of Himmlische Atem. | ||
}} | }} | ||
}} | }} | ||
| Line 744: | Line 748: | ||
| Cancel on Block = | | Cancel on Block = | ||
| Guard Crush Value =8 | | Guard Crush Value =8 | ||
| description = | | description = A fireball that travels horizontally, used for controlling space in neutral. One of Kain's main tools for building meter and keeping the opponent out. It can also be cancelled into from a light normal in close range to act as a frame trap. Kain travels backwards slightly and is airborne for part of its recovery. | ||
}} | }} | ||
{{AttackData-Garou | {{AttackData-Garou | ||
| Line 762: | Line 766: | ||
| Cancel on Block = | | Cancel on Block = | ||
| Guard Crush Value =8, 5 | | Guard Crush Value =8, 5 | ||
| description = | | description = A fireball that travels diagonally upwards, used for controlling the air space in front of Kain. Typically not used as much as his Flamme A, as it leaves Kain vulnerable to attacks on the ground, with him having a good anti-air in Lanze break already. Kain travels backwards slightly and is airborne for part of its recovery. | ||
}} | }} | ||
}} | }} | ||
| Line 792: | Line 796: | ||
| Cancel on Block = | | Cancel on Block = | ||
| Guard Crush Value =7 | | Guard Crush Value =7 | ||
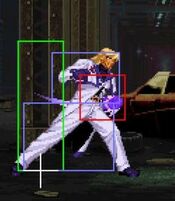
| description = | | description = Used as a combo ender, commonly after a Lanze break or cancelled into from a 2AB. Leads to a knockdown for a meaty Seele setup. | ||
}} | }} | ||
{{AttackData-Garou | {{AttackData-Garou | ||
| Line 810: | Line 814: | ||
| Cancel on Block = | | Cancel on Block = | ||
| Guard Crush Value = 2×3, 3 | | Guard Crush Value = 2×3, 3 | ||
| description = | | description = Generally not used because it can't be comboed into and is fairly unsafe on block. | ||
}} | }} | ||
{{AttackData-Garou | {{AttackData-Garou | ||
| Line 828: | Line 832: | ||
| Cancel on Block = | | Cancel on Block = | ||
| Guard Crush Value =2×3 | | Guard Crush Value =2×3 | ||
| description = | | description = Genearlly not used outside of gimmicky resets. | ||
}} | }} | ||
}} | }} | ||
| Line 858: | Line 862: | ||
| Cancel on Block = | | Cancel on Block = | ||
| Guard Crush Value =7, 5, 7 | | Guard Crush Value =7, 5, 7 | ||
| description =1~6F full-body invincibility | | description = The non-break version generally isn't used outside of missing your break. | ||
1~6F full-body invincibility | |||
}} | }} | ||
| Line 876: | Line 882: | ||
| Cancel on Block = | | Cancel on Block = | ||
| Guard Crush Value =7 | | Guard Crush Value =7 | ||
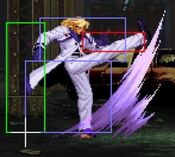
| description =1~6F full-body invincibility | | description = Has slightly more invincibility, more frame advantage, and does more damage than his D break, so it's the preferred break move. Excellent as an anti-air due to its invincibility and quick recovery, making it very difficult for most characters to punish even if they air JD (since he can just do another Lanze break). Also used to combo from a hop or jump and sets up a knockdown in conjunction with Panzer. | ||
1~6F full-body invincibility | |||
| Line 896: | Line 904: | ||
| Cancel on Block = | | Cancel on Block = | ||
| Guard Crush Value =8, 5×2, 7 | | Guard Crush Value =8, 5×2, 7 | ||
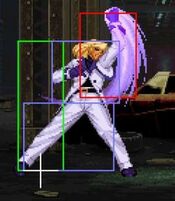
| description = 1~5F full-body invincibility | | description = Used as a combo ender in some scenarios, such as after a throw in the corner. It is often difficult to JD the downwards fireball from this move as Kain throws two out in quick succession, making it impossible to JD them if they both connect and overlap. | ||
1~5F full-body invincibility | |||
| Line 940: | Line 950: | ||
Have 1~4F full-body invincibility <br> | Have 1~4F full-body invincibility <br> | ||
Guaranteed to go through their entire startup and come out. | |||
{{AttackData-Garou | {{AttackData-Garou | ||
| version = {{Motion|236}}{{Motion|236}} + {{Icon-SNK|B}} | | version = {{Motion|236}}{{Motion|236}} + {{Icon-SNK|B}} | ||
| Line 956: | Line 966: | ||
| Cancel on Block = | | Cancel on Block = | ||
| Guard Crush Value = 2×7 | | Guard Crush Value = 2×7 | ||
| description = | | description = Kain's bread and butter for his guard crush setups. Usually done in a blockstring or as a meaty setup after a knockdown from Panzer midscreen. If Kain performs the super just as the opponent touches the ground from a knockdown, the super freeze will prevent the opponent from being able input a tech roll, so they are forced to take the resulting Seele as a meaty. | ||
| Line 976: | Line 986: | ||
| Cancel on Block = | | Cancel on Block = | ||
| Guard Crush Value = 2×10 | | Guard Crush Value = 2×10 | ||
| description = | | description = Used in more niche situations such as to combo after a throw in the corner or as a meaty setup after a Panzer knockdown close to the corner (it travels slower than Seele B, so it won't whiff in some instances close to the corner where Seele B would). | ||
| Line 996: | Line 1,006: | ||
Have 1~6F full-body invincibility <br> | Have 1~6F full-body invincibility <br> | ||
Guaranteed to go through their entire startup and come out. | |||
<br> | <br> | ||
{{AttackData-Garou | {{AttackData-Garou | ||
| Line 1,013: | Line 1,023: | ||
| Cancel on Block = | | Cancel on Block = | ||
| Guard Crush Value =15 | | Guard Crush Value =15 | ||
| description = | | description = Used in combos, commonly after a launcher with 2AB > 5C or Lanze break. Easier to combo into after a counter hit Lanze break starter, but can also be done from a non-counter hit if done quickly enough (e.g. if you anti-air with Lanze break, it leads to a higher juggle which can give you more time to confirm). Can also combo into it from a Seele B juggle. It can potentially be used as a raw anti-air in neutral, but more experienced players will often be able to air JD it and will result in wasting meter. | ||
| Line 1,033: | Line 1,043: | ||
| Cancel on Block = | | Cancel on Block = | ||
| Guard Crush Value = 15, 8×2 | | Guard Crush Value = 15, 8×2 | ||
| description = | | description = Similar in function to the A version, but hits 3 times and deals more damage. You are able to combo into Flamme A midscreen with the C version, unlike the A version. | ||
Revision as of 20:39, 31 July 2023
Introduction
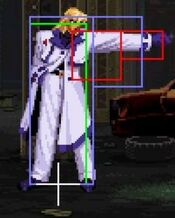
Kain R. Heinlein is the final boss in Garou. He is uncle to Rock Howard, and runs the family business after Geese's death.
Gameplay
Kain is a setplay character with both zoning and rushdown elements in his play. His main gameplan is to build meter while controlling space in neutral, then to go in for a guard crush setup once he has the resources (super and/or T.O.P.) required to do so. T.O.P. placement is very important for Kain as it is often used in his guard crush setups. Typically you would want to have a combination of S-Power and T.O.P. or P-Power for a guaranteed guard crush setup, otherwise a reset is necessary.
| Strengths | Weaknesses |
|---|---|
|
|
Character Colors
Move List
Frame Data Source : https://w.atwiki.jp/garoumow/pages/32.html and https://w.atwiki.jp/garoumow/pages/70.html
| Data Help | |
|---|---|
| Disclaimer: This is meant to teach basic terminology used when describing moves. | |
| HitBox: | A predefined area (usually a group of rectangles or circles) that tell the game how any given attack can come in contact with a character. Hitboxes are invisible to the player when normally playing. |
| HurtBox: | A predefined area (usually a group of rectangles or circles) that tell the game how your character is allowed to get hit by any incoming attack. Specifically, you'll get hit by (or block) an attack if that attack's hitbox ever overlaps your hurtbox. |
| Throw Box/Range: | Active throw frames and range. Your opponent will be thrown in this field if not in block or hit stun. |
| Projectile Box: | Hit box on a projectile attack. |
| Guard/Counter Box: | The Guard Box or Counter Box. This appears when blocking or using a counter move. |
| Push Box: | Has no bearing on hurt/hit boxes. Just allows characters to not pass through each other. (Also known as "Collision Box".) |
| Command | the input for the attack. |
| Start Up | The number of frames that initiate at the beginning of an attack after the input.
And when the first hitbox is present.
The first active frame is after the last startup frame. |
| Guard | The way this move must be blocked.
High or H or Overhead (especially when from the ground) -- must be blocked standing. |
| Damage | "basic" damage -- unmodified damage values
"correct" damage -- damage values modified for damage scaling, TOP multiplier, and defense rate |
| Guard Crush Value | Decrease your guard durability gauge/meter by that value/s |
| + | signifies how many advantage frames the attacker has. |
| - | signifies how many disadvantage frames the attacker has. |
| KD | means the attack will knock the opponent down. |
| ◯ | circle means cancelable on both hit/block. |
| ∞ | infinity means chain cancelable with the same button (renda cancel). |
| ※ | means cancelable on the first hit/part only. |
| 《 》OR « » OR << >> OR ( ) | The numbers in the brackets are the startup frames until the next stage (the gap until the next hit's first active frame). |
| △ | up triangle means only cancelable on block. |
| ▽ | down triangle means only cancelable on hit. |
| × OR X | means not cancelable. |
Close Standing Normals
| Damage | Guard | Startup | Active | Recovery | Total |
|---|---|---|---|---|---|
| 4 | Mid | 4 | 4 | 5 | 13 |
| Hit Adv | Block Adv | Feint Cancel | Cancel on Hit | Cancel on Block | Guard Crush Value |
| +6 | +6 | Yes | Yes/chainable | Yes/chainable | 4 |
|
Standing jab. | |||||
| Damage | Guard | Startup | Active | Recovery | Total |
|---|---|---|---|---|---|
| 7 | Mid | 5 | 4 | 11 | 20 |
| Hit Adv | Block Adv | Feint Cancel | Cancel on Hit | Cancel on Block | Guard Crush Value |
| +0 | +0 | Yes | Yes | Yes | 4 |
| Damage | Guard | Startup | Active | Recovery | Total |
|---|---|---|---|---|---|
| 10 | Mid | 8 | 3 | 24 | 35 |
| Hit Adv | Block Adv | Feint Cancel | Cancel on Hit | Cancel on Block | Guard Crush Value |
| -6 | -6 | Yes | Yes | Yes | 5 |
| Damage | Guard | Startup | Active | Recovery | Total |
|---|---|---|---|---|---|
| 5×3 | Mid | 9 | 1, 1, 3 | 30 | 44 |
| Hit Adv | Block Adv | Feint Cancel | Cancel on Hit | Cancel on Block | Guard Crush Value |
| -12 | -12 | No | No | No | 3, 3, 3 |
Far Standing Normals
| Damage | Guard | Startup | Active | Recovery | Total |
|---|---|---|---|---|---|
| 5 | Mid | 4 | 4 | 5 | 13 |
| Hit Adv | Block Adv | Feint Cancel | Cancel on Hit | Cancel on Block | Guard Crush Value |
| +6 | +6 | Yes | Yes/chainable | Yes/chainable | 4 |
| Damage | Guard | Startup | Active | Recovery | Total |
|---|---|---|---|---|---|
| 7 | Mid | 5 | 4 | 11 | 20 |
| Hit Adv | Block Adv | Feint Cancel | Cancel on Hit | Cancel on Block | Guard Crush Value |
| +0 | +0 | Yes | Yes | Yes | 4 |
| Damage | Guard | Startup | Active | Recovery | Total |
|---|---|---|---|---|---|
| 8, 8 | Mid | 12 | 2, 1 | 23 | 38 |
| Hit Adv | Block Adv | Feint Cancel | Cancel on Hit | Cancel on Block | Guard Crush Value |
| -3 | -3 | Yes (1st hit) | Yes (1st hit) | Yes (1st hit) | 3, 3 |
| Damage | Guard | Startup | Active | Recovery | Total |
|---|---|---|---|---|---|
| 6×3 | HL | 9 | 1, 1, 3 | 30 | 44 |
| Hit Adv | Block Adv | Feint Cancel | Cancel on Hit | Cancel on Block | Guard Crush Value |
| -12 | -12 | No | No | No | 3, 3, 3 |
Crouching Normals
| Damage | Guard | Startup | Active | Recovery | Total |
|---|---|---|---|---|---|
| 10 | Mid | 7 | 3 | 19 | 29 |
| Hit Adv | Block Adv | Feint Cancel | Cancel on Hit | Cancel on Block | Guard Crush Value |
| -1 | -1 | No | No | No | 5 |
| Damage | Guard | Startup | Active | Recovery | Total |
|---|---|---|---|---|---|
| 10 | Low | 11 | 5 | 21 | 37 |
| Hit Adv | Block Adv | Feint Cancel | Cancel on Hit | Cancel on Block | Guard Crush Value |
| KD | -5 | No | No | No | 5 |
Jumping Normals
| Damage | Guard | Startup | Active | Recovery | Total |
|---|---|---|---|---|---|
| 6 | High | 5 | 6 | - | - |
| Hit Adv | Block Adv | Feint Cancel | Cancel on Hit | Cancel on Block | Guard Crush Value |
| - | - | - | No | No | 4 |
| Damage | Guard | Startup | Active | Recovery | Total |
|---|---|---|---|---|---|
| 6 | High | 6 | 8 | - | - |
| Hit Adv | Block Adv | Feint Cancel | Cancel on Hit | Cancel on Block | Guard Crush Value |
| - | - | - | No | No | 4 |
| Damage | Guard | Startup | Active | Recovery | Total |
|---|---|---|---|---|---|
| 10 | High | 9 | 6 | - | - |
| Hit Adv | Block Adv | Feint Cancel | Cancel on Hit | Cancel on Block | Guard Crush Value |
| - | - | - | No | No | 5 |
| Damage | Guard | Startup | Active | Recovery | Total |
|---|---|---|---|---|---|
| 10 | High | 8 | 6 | - | - |
| Hit Adv | Block Adv | Feint Cancel | Cancel on Hit | Cancel on Block | Guard Crush Value |
| - | - | - | No | No | 5 |
|
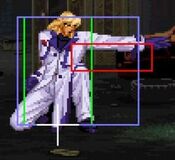
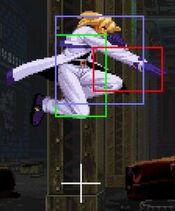
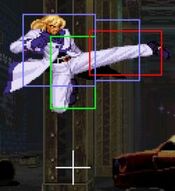
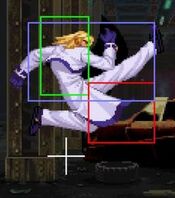
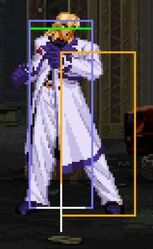
Small jump D can beat out upper-body evasion attacks. | |||||
Universal Moves
| Damage | Guard | Startup | Active | Recovery | Total |
|---|---|---|---|---|---|
| 6, 6 | Overhead | 23 | 3, 8 | 12 | 46 |
| Hit Adv | Block Adv | Feint Cancel | Cancel on Hit | Cancel on Block | Guard Crush Value |
| -1 | +5 | No | No | No | 3, 3 |
|
Overhead. | |||||
| Damage | Guard | Startup | Active | Recovery | Total |
|---|---|---|---|---|---|
| 19 (base damage) | Mid | 18 | - | - | - |
| Hit Adv | Block Adv | Feint Cancel | Cancel on Hit | Cancel on Block | Guard Crush Value |
| KD | -13 | - | - | - | 25 |
|
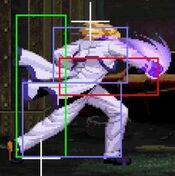
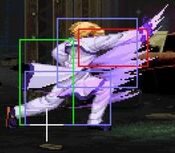
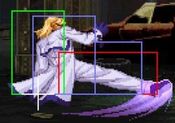
One of Kain's main tools used for guard crush setups. Usually used at the end of a guard crush blockstring, if Kain guard crushes the opponent with this move, he is able to convert into a full combo afterwards. Depending on the spacing, the move can be hard to punish for some characters due to its pushback on block, but it generally isn't used in neutral because it has a fair amount of startup and is easy to jump over. The move is also used as an optimal meterless combo ender in some juggle combos as it does slightly more damage than Panzer B. It is possible to use this move in conjunction with the Seele bug by kara cancelling from a st.C or cr.C (depending on whether the opponent crouch or stand JDs respectively), which can lead the move hitting multiple times, quickly guard crushing the opponent and doing a massive amount of damage. | |||||
Throws
| Damage | Guard | Startup | Active | Recovery | Total |
|---|---|---|---|---|---|
| 7×3 | - | 1 | - | - | - |
| Hit Adv | Block Adv | Feint Cancel | Cancel on Hit | Cancel on Block | Guard Crush Value |
| +78 | - | - | - | - | - |
|
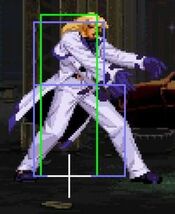
Kain is able to combo after his throw in the corner with Lanze or Seele D. | |||||
Feints
| Damage | Guard | Startup | Active | Recovery | Total |
|---|---|---|---|---|---|
| - | - | - | - | - | 10 |
| Hit Adv | Block Adv | Feint Cancel | Cancel on Hit | Cancel on Block | Guard Crush Value |
| - | - | - | - | - | - |
|
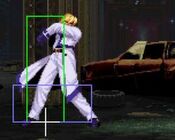
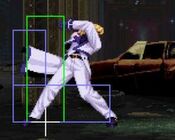
Mimics the start of Schwarze Panzer D and its break. | |||||
| Damage | Guard | Startup | Active | Recovery | Total |
|---|---|---|---|---|---|
| - | - | - | - | - | 10 |
| Hit Adv | Block Adv | Feint Cancel | Cancel on Hit | Cancel on Block | Guard Crush Value |
| - | - | - | - | - | - |
|
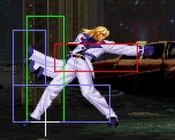
Mimics the start of Himmlische Atem. | |||||
Special Moves
Super Moves
Impossible to just defend at 0-pixel health bar
Have 1~4F full-body invincibility
Guaranteed to go through their entire startup and come out.
Impossible to just defend at 0-pixel health bar
Have 1~6F full-body invincibility
Guaranteed to go through their entire startup and come out.


