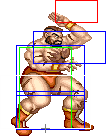
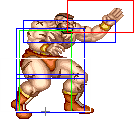
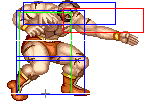
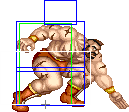
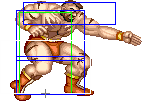
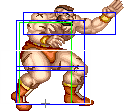
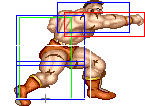
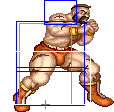
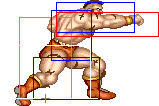
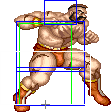
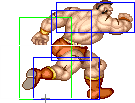
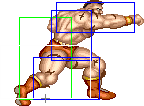
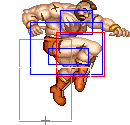
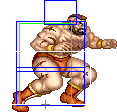
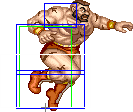
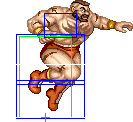
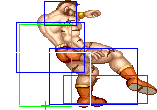
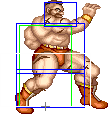
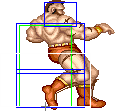
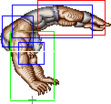
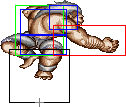
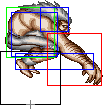
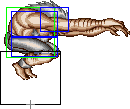
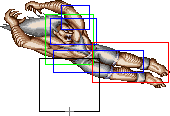
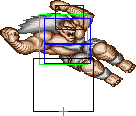
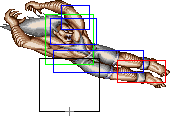
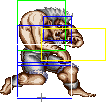
| Zangief | |
|---|---|
| Character Data | |
| Damage Scaling Factor | 22/32 |
| Forward Walk Speed | 40 |
| Backwards Walk Speed | 24 |
| Pre-Jump Frames | 4 |
| Forwards Jump Duration | 38 |
| Backwards Jump Duration | 39 |
| Landing Frames | 8* |
| Jump Height Apex | 73 |
| Forwards Jump Distance | 89 |
| Backwards Jump Distance | 99 |
| Soft Knockdown Recovery | 42 |
| Hard Knockdown Recovery | 76 |
Normal Moves
Disclaimer: To better understand the diagrams, read this.
Standing Normals
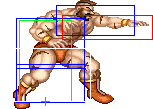
cl.lp
| Damage | Dizzy | Dizzy Time | Cancel | Guard | Act. Range |
|---|---|---|---|---|---|
| 16[1] / 14[1] | 0~5 | 40 | Chain, Special* | Mid | 0-48 |
| Startup | Active | Recovery | Total | Frame Adv. | Meter |
| 2 | 6 | 15 | 23 | -8/-6/-4 | 2/1 |
|
Zangief does a knife hand strike from over his head.
General Strategies
| |||||
Click to toggle detailed hitbox data.
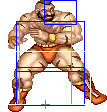
frlp
| Damage | Dizzy | Dizzy Time | Cancel | Guard | Act. Range |
|---|---|---|---|---|---|
| 16[1] | 0~5 | 40 | Chain, Special | Mid | 49+ |
| Startup | Active | Recovery | Total | Frame Adv. | Meter |
| 3 | 4 | 5 | 12 | +4 | 2/1 |
|
A fast straight punch that can be canceled into itself.
| |||||
Click to toggle detailed hitbox data.
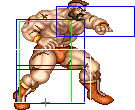
cl.mp
| Damage | Dizzy | Dizzy Time | Cancel | Guard | Act. Range |
|---|---|---|---|---|---|
| 24[1] | 5~11 | 60 | None | Mid | N/A |
| Startup | Active | Recovery | Total | Frame Adv. | Meter |
| 5 | 3 | 5 | 18 | +10 | 4/3 |
|
A relatively fast horizontal knife strike. This move doesn't change when you're close or far away.
| |||||
Click to toggle detailed hitbox data.
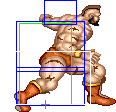
clhp
| Damage | Dizzy | Dizzy Time | Cancel | Guard | Act. Range |
|---|---|---|---|---|---|
| 30[1] | 10~16 | 80 | None | Mid | N/A |
| Startup | Active | Recovery | Total | Frame Adv. | Meter |
| 7 | 6 | 29 | 42 | -13 | 5/4 |
|
A powerful straight punch with very long recovery. Does not change based on distance from your opponent.
| |||||
Click to toggle detailed hitbox data.
cllk
| Damage | Dizzy | Dizzy Time | Cancel | Guard | Act. Range |
|---|---|---|---|---|---|
| 18[1] | 0~5 | 40 | None | Mid | 0-32 |
| Startup | Active | Recovery | Total | Frame Adv. | Meter |
| 8 | 8 | 5 | 21 | 0 | 2/1 |
|
Zangief jumps and does a weak knee drop on the way down.
| |||||
Click to toggle detailed hitbox data.
frlk
| Damage | Dizzy | Dizzy Time | Cancel | Guard | Act. Range |
|---|---|---|---|---|---|
| 18[1] | 0~5 | 40 | None | Low | 33+ |
| Startup | Active | Recovery | Total | Frame Adv. | Meter |
| 5 | 5 | 0 | 10 | +8 | 2/1 |
|
A low hitting kick with no recovery.
| |||||
Click to toggle detailed hitbox data.
clmk
| Damage | Dizzy | Dizzy Time | Cancel | Guard | Act. Range |
|---|---|---|---|---|---|
| 22[0] x 2 | 5~11 x 2 | 60 x 2 | None | Mid | 0-46 |
| Startup | Active | Recovery | Total | Frame Adv. | Meter |
| 12 | 6 (2 + 4) | 13 | 31 | +1/+1(0) | 4/3 x 2 |
|
A double-hitting knee attack.
| |||||
Click to toggle detailed hitbox data.
- Startup/Active:
 |
 |
 |
 |
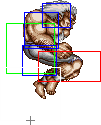 |
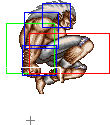
| |
| Frame Count | 1 + 3 | 3 | 3 | 2 | 2 | 4 |
| Simplified | 12 | 2 | 4 | |||
- Recovery:
 |
 |
 |
 |

| |
| Frame Count | 3 | 3 | 3 | 3 | 1 |
| Simplified | 13 | ||||
frmk
| Damage | Dizzy | Dizzy Time | Cancel | Guard | Act. Range |
|---|---|---|---|---|---|
| 22[0] | 5~11 | 60 | None | Mid | 47+ |
| Startup | Active | Recovery | Total | Frame Adv. | Meter |
| 7 | 4 | 7 | 18 | +7 | 4/3 |
|
A more acrobatic kick.
| |||||
Click to toggle detailed hitbox data.
clhk
| Damage | Dizzy | Dizzy Time | Cancel | Guard | Act. Range |
|---|---|---|---|---|---|
| 28[1] | 10~16 | 80 | None | Mid | N/A |
| Startup | Active | Recovery | Total | Frame Adv. | Meter |
| 7 | 11 (6/5) | 21 | 39 | -10/-4 | 5/4 |
|
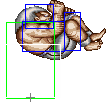
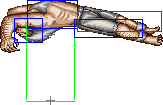
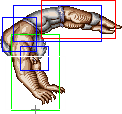
Blanka does a cool flip.
| |||||
Click to toggle detailed hitbox data.
- Startup/Active:
 |
 |
 |
| |
| Frame Count | 1 + 3 | 3 | 6 | 5 |
| Simplified | 7 | 11 | ||
- Recovery:
 |
 |
 |
 |

| |
| Frame Count | 5 | 5 | 5 | 5 | 1 |
| Simplified | 21 | ||||
Crouching Normals
crlp
| Damage | Dizzy | Dizzy Time | Cancel | Guard | Act. Range |
|---|---|---|---|---|---|
| 12[0] | 0~5 | 40 | None | Mid | N/A |
| Startup | Active | Recovery | Total | Frame Adv. | Meter |
| 9 | 3 | 7 | 19 | +3 | 2/1 |
|
A claw swipe.
| |||||
Click to toggle detailed hitbox data.
crmp
| Damage | Dizzy | Dizzy Time | Cancel | Guard | Act. Range |
|---|---|---|---|---|---|
| 20[0] | 5~11 | 60 | None | Mid | N/A |
| Startup | Active | Recovery | Total | Frame Adv. | Meter |
| 7 | 3 | 17 | 27 | -2 | 4/3 |
|
A more upwards claw swipe.
| |||||
Click to toggle detailed hitbox data.
crhp
| Damage | Dizzy | Dizzy Time | Cancel | Guard | Act. Range |
|---|---|---|---|---|---|
| 26[1] | 10~16 | 80 | None | Mid | N/A |
| Startup | Active | Recovery | Total | Frame Adv. | Meter |
| 9 | 6 | 18 | 33 | -2 | 5/4 |
|
Blanka's long range crouching punch.
| |||||
Click to toggle detailed hitbox data.
crlk
| Damage | Dizzy | Dizzy Time | Cancel | Guard | Act. Range |
|---|---|---|---|---|---|
| 12[0] | 0~5 | 40 | Special, Super | Low | N/A |
| Startup | Active | Recovery | Total | Frame Adv. | Meter |
| 5 | 4 | 7 | 16 | +2 | 2/1 |
|
A shorter range, safer version of crouching Forward.
| |||||
Click to toggle detailed hitbox data.
frmk
| Damage | Dizzy | Dizzy Time | Cancel | Guard | Act. Range |
|---|---|---|---|---|---|
| 20[0] | 5~11 | 60 | Special, Super | Low | N/A |
| Startup | Active | Recovery | Total | Frame Adv. | Meter |
| 5 | 4 | 7 | 16 | +7 | 4/3 |
|
A pretty good kick.
| |||||
Click to toggle detailed hitbox data.
crhk
| Damage | Dizzy | Dizzy Time | Cancel | Guard | Act. Range |
|---|---|---|---|---|---|
| 26[1] | 5~11 | 130 | None | Low | N/A |
| Startup | Active | Recovery | Total | Frame Adv. | Meter |
| 10 | 4 | 18 | 32 | 0/Down | 5/4 |
|
Blanka turns back and sweeps with one leg extended.
| |||||
Click to toggle detailed hitbox data.
Jumping Normals
njlp
| Damage | Dizzy | Dizzy Time | Cancel | Guard | Act. Range |
|---|---|---|---|---|---|
| 14[1] | 1~7(-2) | 40 | None | High | N/A |
| Startup | Active | Recovery | Total | Frame Adv. | Meter |
| 5 | 20 | ∞ | 25+∞ | Dependent | 2/1 |
|
A far reaching, torso twisting punch.
| |||||
Click to toggle detailed hitbox data.
njmp
| Damage | Dizzy | Dizzy Time | Cancel | Guard | Act. Range |
|---|---|---|---|---|---|
| 24[1] | 5~11 | 50(+10) | None | High | N/A |
| Startup | Active | Recovery | Total | Frame Adv. | Meter |
| 5 | 12 | ∞ | 17+∞ | Dependent | 4/3 |
|
Visually identical to jumping LP.
| |||||
Click to toggle detailed hitbox data.
- Neutral Jump Version:
 |
 |
 |
 |

| |
| Frame Count | 2 | 3 | 12 | 3 | ∞ |
| Simplified | 5 | 12 | ∞ | ||
- Diagonal Jump Version:
 |
 |
 |
 |

| |
| Frame Count | 2 | 3 | 12 | 3 | ∞ |
| Simplified | 5 | 12 | ∞ | ||
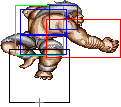
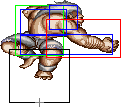
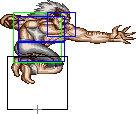
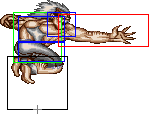
njhp
| Damage | Dizzy | Dizzy Time | Cancel | Guard | Act. Range |
|---|---|---|---|---|---|
| 30[1] | 11~17(-1) | 60(+20) | None | High | N/A |
| Startup | Active | Recovery | Total | Frame Adv. | Meter |
| 1 | 3 | ∞ | 4+∞ | Dependent | 5/4 |
|
Blanka sticks his arm out.
| |||||
Click to toggle detailed hitbox data.
 |
 |
 |
 |
 |
 |

| |
| Frame Count | 1 | 3 | 3 | 6 | 3 | 3 | style="border: 1px solid #999; border-collapse:collapse;" align="center" | ∞ | |
| Simplified | 1 | 3 | ∞ | ||||
djhp
| Damage | Dizzy | Dizzy Time | Cancel | Guard | Act. Range |
|---|---|---|---|---|---|
| 30[1] | 3~9 | 40 | None | High | N/A |
| Startup | Active | Recovery | Total | Frame Adv. | Meter |
| 5 | 6 | ∞ | 11+∞ | Dependent | 5/4 |
|
A double-armed claw slash.
| |||||
Click to toggle detailed hitbox data.
njlk
| Damage | Dizzy | Dizzy Time | Cancel | Guard | Act. Range |
|---|---|---|---|---|---|
| 30[1] | 1~7(-2) | 40 | None | High | N/A |
| Startup | Active | Recovery | Total | Frame Adv. | Meter |
| 5 | 20 | ∞ | 25+∞ | Dependent | 2/1 |
|
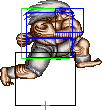
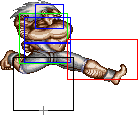
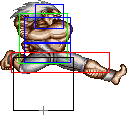
A standard jumping kick. The neutral jump and diagonal jump versions have different hitboxes.
| |||||
Click to toggle detailed hitbox data.
- Neutral Jump Version:
 |
 |
 |
 |

| |
| Frame Count | 2 | 3 | 20 | 3 | ∞ |
| Simplified | 5 | 20 | ∞ | ||
- Diagonal Jump Version:
 |
 |
 |
 |

| |
| Frame Count | 2 | 3 | 20 | 3 | ∞ |
| Simplified | 5 | 20 | ∞ | ||
njmk
| Damage | Dizzy | Dizzy Time | Cancel | Guard | Act. Range |
|---|---|---|---|---|---|
| 24[1] | 5~11 | 50(+10) | None | High | N/A |
| Startup | Active | Recovery | Total | Frame Adv. | Meter |
| 5 | 12 | ∞ | 17+∞ | Dependent | 4/3 |
|
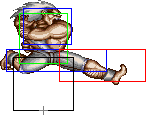
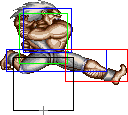
Visually identical to jumping Short. Once again, neutral jump and diagonal jump have different hitboxes.
| |||||
Click to toggle detailed hitbox data.
 |
 |
 |
 |

| |
| Frame Count | 2 | 3 | 12 | 3 | ∞ |
| Simplified | 5 | 12 | ∞ | ||
- Diagonal Jump Version:
 |
 |
 |
 |

| |
| Frame Count | 2 | 3 | 12 | 3 | ∞ |
| Simplified | 5 | 12 | ∞ | ||
njhk
| Damage | Dizzy | Dizzy Time | Cancel | Guard | Act. Range |
|---|---|---|---|---|---|
| 30[2] | 11~17 (-1) | 60(+20) | None | Mid | N/A |
| Startup | Active | Recovery | Total | Frame Adv. | Meter |
| 5 | 6 | ∞ | 11+∞ | Dependent | 5/4 |
|
A midair dropkick.
| |||||
Click to toggle detailed hitbox data.
djhk
| Damage | Dizzy | Dizzy Time | Cancel | Guard | Act. Range |
|---|---|---|---|---|---|
| 30[1] | 11~17(-1) | 60(+20) | None | High | N/A |
| Startup | Active | Recovery | Total | Frame Adv. | Meter |
| 7 | 6 | ∞ | 13+∞ | Dependent | 5/4 |
|
Like the neutral jump version except slower and with a worse hitbox.
| |||||
Click to toggle detailed hitbox data.
Command Normals
Rock Crusher
| Damage | Dizzy | Dizzy Time | Cancel | Guard | Act. Range |
|---|---|---|---|---|---|
| 18[0] x 2 | 5~11 x 2 | 60 x 2 | Special, Super (First hit only) | Mid/Low | N/A |
| Startup | Active | Recovery | Total | Frame Adv. | Meter |
| 4 | 9 (4 + 3 + 2) | 13 | 26 | -4 / -0 / +3(+2) | 4/3 x 2 |
|
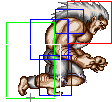
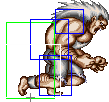
An interesting command normal that's executed the same way as a throw.
| |||||
Click to toggle detailed hitbox data.
- Startup/Active:
 |
 |
 |
 |

| |
| Frame Count | 1 + 1 | 2 | 4 | 3 | 2 |
| Simplified | 4 | 7 | 2 | ||
- Recovery:
 |
 |
 |

| |
| Frame Count | 5 | 4 | 3 | 1 |
| Simplified | 13 | |||
Amazon River Run
| Damage | Dizzy | Dizzy Time | Cancel | Guard | Act. Range |
|---|---|---|---|---|---|
| 28[1] | 5~11 | 130 | None | Mid | N/A |
| Startup | Active | Recovery | Total | Frame Adv. | Meter |
| 12 | 16 | 21 | 49 | -15/Down | 5/4 |
|
Blanka slides along the ground arms first.
| |||||
Throw
Blanka can perform a hold with ![]() .
.
| Damage | Dizzy | Dizzy Time | Cancel | Guard | Act. Range |
|---|---|---|---|---|---|
| 26 + 4xn | 5~11 | 0 | None | Grab | 64 (from axis) 34 (from throwable box) |
| Startup | Active | Recovery | Total | Frame Adv. | Meter |
| 1 | 1 | Dependent | 2 | N/A | - |
|
Blanka's hold, where he jumps on his opponent and starts biting their face.
| |||||
Click to toggle throwbox data.
Special Moves
Electric Thunder
Click to toggle detailed hitbox data.
- Jab and Strong versions
 |
 |
 |
 |
 |

| |
| Frame Count (Jab) | 3 | 52+ | 2 | 4 | 1 | 6 |
| Simplified (Jab) | 3 | 52+ | 13 | |||
| Frame Count (Strong) | 5 | 34+ | 2 | 4 | 1 | 6 |
| Simplified (Strong) | 5 | 34+ | 13 | |||
- Fierce Version:
 |
 |
 |
 |
 |
 |
 |

| |
| Frame Count | 7 | 25+ | 3 | 4 | 2 | 4 | 1 | 6 |
| Simplified | 7 | 25+ | 20 | |||||
Rolling Attack
| Damage | Dizzy | Dizzy Time | Cancel | Guard | Act. Range | |
|---|---|---|---|---|---|---|
| 28[3] | 9~15 | 100 | None | Mid | N/A | |
| Startup | Active | Recovery | Total | Frame Adv. | Meter | |
| 0 | 25 | 5 on whiff 45 on block/hit |
30 on whiff 70 on block/hit |
-23 | 7 | |
|
| ||||||
| Damage | Dizzy | Dizzy Time | Cancel | Guard | Act. Range | |
| 30[3] | 9~15 | 100 | None | Mid | N/A | |
| Startup | Active | Recovery | Total | Frame Adv. | Meter | |
| 0 | 25 | 6 on whiff 46 on block/hit |
31 on whiff 71 on block/hit |
Dependent | 7 | |
|
| ||||||
| Damage | Dizzy | Dizzy Time | Cancel | Guard | Act. Range | |
| 32[3] | 9~15 | 100 | None | Mid | N/A | |
| Startup | Active | Recovery | Total | Frame Adv. | Meter | |
| 0 | 60 | 7 on whiff 47 on block/hit |
67 on whiff 117 on block/hit |
Dependent | 7 | |
|
Blanka launches himself horizontally at his opponent.
Rolling Attack Block/Hit Punishes
| ||||||
Click to toggle detailed hitbox data.
- Full Animation:
 |
 |
 |

| |
| Frame Count (Jab) | 25 | 1 | 2 | 2 |
| Simplified (Jab) | 25 | 5 | ||
| Frame Count (Strong) | 25 | 1 | 2 | 3 |
| Simplified (Strong) | 25 | 6 | ||
| Frame Count (Fierce) | 60 | 1 | 2 | 4 |
| Simplified (Fierce) | 60 | 7 | ||
- Knockback:
 |
 |
 |

| |
| Frame Count (Jab) | 40 | 1 | 2 | 2 |
| Simplified (Jab) | 40 | 5 | ||
| Frame Count (Strong) | 40 | 1 | 2 | 3 |
| Simplified (Strong) | 40 | 6 | ||
| Frame Count (Fierce) | 40 | 1 | 2 | 4 |
| Simplified (Fierce) | 40 | 7 | ||
Vertical Roll
Click to toggle detailed hitbox data.
- Active:
 |
 |
 |
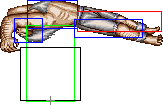 |
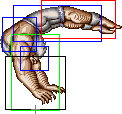
| |
| Frame Count (Short) | 18 | 12 | 3 | 4 | 4 |
| Simplified (Short) | 18 | 15 | 8 | ||
| Frame Count (Forward) | 17 | 12 | 3 | 4 | 4 |
| Simplified (Forward) | 17 | 15 | 8 | ||
| Frame Count (Roundhouse) | 16 | 12 | 3 | 4 | 4 |
| Simplified (Roundhouse) | 16 | 15 | 8 | ||
- Recovery
 |
 |
 |
 |
 |
 |

| |
| Frame Count (Short) | 4 | 4 | 3 | 1 | 2 | 4 | |
| Simplified (Short) | 11 | 7 | |||||
| Frame Count (Forward) | 4 | 4 | 3 | 1 | 2 | 5 | |
| Simplified (Forward) | 11 | 8 | |||||
| Frame Count (Rh) | 4 | 4 | 4 | 3 | 1 | 2 | 6 |
| Simplified (Rh) | 15 | 9 | |||||
- Knockback:
 |
 |
 |

| |
| Frame Count (Short) | 40+ | 1 | 2 | 4 |
| Simplified (Short) | 40+ | 7 | ||
| Frame Count (Forward) | 40+ | 1 | 2 | 5 |
| Simplified (Forward) | 40+ | 8 | ||
| Frame Count (Rh) | 40+ | 1 | 2 | 6 |
| Simplified (Rh) | 40+ | 9 | ||
Backstep Roll
| Damage | Dizzy | Dizzy Time | Cancel | Guard | Act. Range | |
|---|---|---|---|---|---|---|
| (12[0] x 3) / 28[1] | (1~7 x 3) / 1~7 | (30 x 3) / 30 | None | Mid | N/A | |
| Startup | Active | Recovery | Total | Frame Adv. | Meter | |
| 44 | 20 (4/3/2/11) | 5 on whiff/combo 33+ on spin block/hit |
69/97+ | Dependent | 7 | |
|
| ||||||
| Damage | Dizzy | Dizzy Time | Cancel | Guard | Act. Range | |
| (12[1] x 3) / 28[2] | (1~7 x 3) / 1~7 | (30 x 3) / 30 | None | Mid | N/A | |
| Startup | Active | Recovery | Total | Frame Adv. | Meter | |
| 38 | 23 (4/3/2/14) | 6 on whiff/combo 34+ on spin block/hit |
67/95+ | Dependent | 7 | |
|
| ||||||
| Damage | Dizzy | Dizzy Time | Cancel | Guard | Act. Range | |
| (12[2] x 3) / 28[3] | (1~7 x 3) / 1~7 | (30 x 3) / 30 | None | Mid | N/A | |
| Startup | Active | Recovery | Total | Frame Adv. | Meter | |
| 31 | 25 (4/3/2/16) | 7 on whiff/combo 35+ on spin block/hit |
63/91+ | Dependent | 7 | |
|
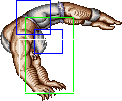
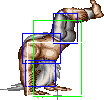
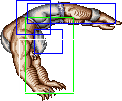
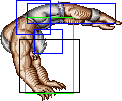
Blanka flips back and jumps forward, rolling on his way down.
| ||||||
Click to toggle detailed hitbox data.
Startup:
 |
 |
 |
 |
 |
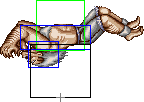 |
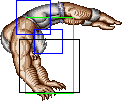
| |
| Frame Count (Short) | 2 | 4 | 2 | 3 | 5 | 5 | 2 |
| Simplified (Short) | 11 | 12 | |||||
| Frame Count (Forward) | 1 | 3 | 1 | 3 | 5 | 5 | 3 |
| Simplified (Forward) | 8 | 13 | |||||
| Frame Count (Rh) | 1 | 2 | 1 | 1 | 5 | 5 | 3 |
| Simplified (Rh) | 5 | 13 | |||||
 |
 |
 |
 |
 |

| |
| Frame Count (Short) | 3 | 6 | 3 | 3 | 3 | 3 |
| Simplified (Short) | 12 | 9 | ||||
| Frame Count (Forward) | 2 | 4 | 2 | 3 | 3 | 3 |
| Simplified (Forward) | 8 | 9 | ||||
| Frame Count (Rh) | 1 | 2 | 1 | 3 | 3 | 3 |
| Simplified (Rh) | 4 | 9 | ||||
Active/Recovery:
 |
 |
 |
 |
 |
 |

| |
| Frame Count (Short) | 4 | 3 | 2 | 11 | 1 | 2 | 2 |
| Simplified (Short) | 4 | 3 | 2 | 11 | 5 | ||
| Frame Count (Forward) | 4 | 3 | 2 | 14 | 1 | 2 | 3 |
| Simplified (Forward) | 4 | 3 | 2 | 14 | 6 | ||
| Frame Count (Rh) | 4 | 3 | 2 | 16 | 1 | 2 | 4 |
| Simplified (Rh) | 4 | 3 | 2 | 16 | 7 | ||
- Knockback:
 |
 |
 |

| |
| Frame Count (Short) | 28+ | 1 | 2 | 2 |
| Simplified (Short) | 28+ | 5 | ||
| Frame Count (Forward) | 28+ | 1 | 2 | 3 |
| Simplified (Forward) | 28+ | 6 | ||
| Frame Count (Rh) | 28+ | 1 | 2 | 4 |
| Simplified (Rh) | 28+ | 7 | ||
Surprise Forward
Blanka jumps forward. The hop lasts for about 18 frames before an 8 frame landing animation.
- Gives you 5 points of meter.
- Allows you to pass through opponents.
- Use this sparingly, mostly as a mixup tool. Experienced players can react and punish.
Click to toggle detailed hitbox data.
Surprise Back
Blanka jumps backwards. Invincible from frames 1-13.
- Gives you 5 points of meter.
- An excellent meter building move.
- The invincibility allows you to escape from some nasty situations.
Click to toggle detailed hitbox data.
Super Combo
| Damage | Dizzy | Dizzy Time | Cancel | Guard | Act. Range |
|---|---|---|---|---|---|
| 20[1] x 4 | 0~4 x 4 | 20 x 4 | None | Mid | N/A |
| Startup | Active | Recovery | Total | Frame Adv. | Meter |
| 14 | 29 (Jumping down) 0 to 90 (Charging) ∞ (Rolling) |
0 on whiff 40 on block/hit |
57 | -17/Hard Down | - |
|
Invincible on frames 1-14. Blanka jumps up in an invincible state, falls down with a hitbox, then rolls forward until he hits a wall.
General Strategies
| |||||
Click to toggle detailed hitbox data.
 |
 |
 |
 |

| |
| Frame Count | 1 + [18] + 5 | 5 | 3 | 29 | 0 to 90 + ∞ |
| Simplified | 14 | 29 | ∞ | ||
- Knockback:
 |
 |
 |
 |

| |
| Frame Count | 28 | 3 | 5 | 3 | 1 |
| Simplified | 28 | 12 | |||
Misc Animations
Jump Animations
- Prejump:
 |
 |
 |

| |
| Frame Count (Neutral) | 1 | 1 | 1 | 1 |
| Simplified (Neutral) | 4 | |||
| Frame Count (Back) | 1 | 1 | 1 | 1 |
| Simplified (Back) | 4 | |||
| Frame Count (Forward) | 1 | 1 | 1 | |
| Simplified (Forward) | 3 | |||
- Neutral/Back Jump, Airborne + Landing:
 |
 |
 |
 |
 |
 |
 |
 |
 |

| |
| Frame Count (Neutral) | 1 | 10 | 4 | 4 | 6 | 4 | 4 | 6 | 1 | 7* |
| Simplified (Neutral) | 1 | 38 | 1 | 7* | ||||||
| Frame Count (Back) | 1 | 10 | 4 | 4 | 6 | 4 | 4 | 7 | 1 | 7* |
| Simplified (Back) | 1 | 39 | 1 | 7* | ||||||
- Forward Jump, Airborne + Landing:
 |
 |
 |
 |
 |
 |
 |
 |
 |
 |
 |
 |

| |
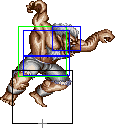
| Frame Count | 1 | 4 | 4 | 4 | 4 | 4 | 4 | 4 | 4 | 4 | 2 | 1 | 7* |
| Simplified | 1 | 38 | 1 | 7* | |||||||||
Blanka is the only character in the game that doesn't have the same prejump speed on all 3 forms of jumps. On his Neutral and Back Jumps, the prejump takes 4f to finish, which is considered slow. On his Forward Jump, it takes one frame less, so it's of average speed. With all that said, Blanka has the second quickest overall jump duration on the game (losing only to Claw's, draws with O.Sagat's).
The landing recovery has a special property which allows it to be canceled into certain actions. At the first landing frame, you can perform throws (including command throws), and on the second landing frame, you can start another jump, attack with a normal or special move, or block. Blocking not being until the second landing frame, as well as hitbox-hurtbox interactions having priority over throwbox-throw hurtbox is why sweeps work as anti airs in this game.
Things are different when jumping over your opponent, however. In that situation it's possible to walk back/forward, to jump again or to even block on the first landing frame! Strangely, if a throw is timed on the first landing frame of a jump that crosses over, a throwbox will never come out, even though that input will result in a normal coming out 2 frames later (like it normally would). Anyway, being able to block on the first landing frame can help a little bit on some safe jump crossup setups, or maybe in other situations as well if your character has a huge jump arc.

