Introduction
A Criminal in Second South that had a similar look about a fusion of Iori and Benimaru.
Later,in KOF 12 Iori based his new non-flame moveset about him.
| Pros | Cons |
|---|---|
|
|
Character Colors
Move List
Frame Data Source: https://w.atwiki.jp/garoumow/pages/28.html
| Data Help | |
|---|---|
| Disclaimer: This is meant to teach basic terminology used when describing moves. | |
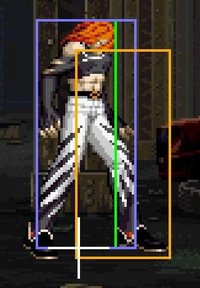
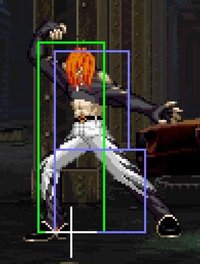
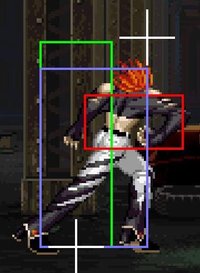
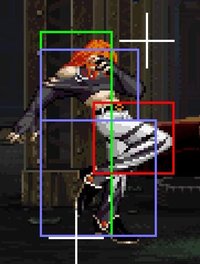
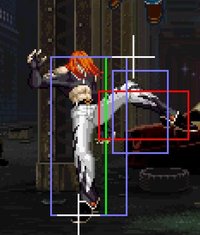
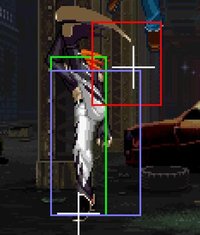
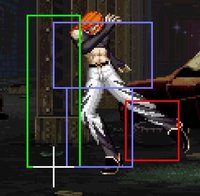
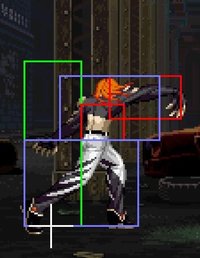
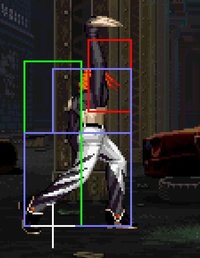
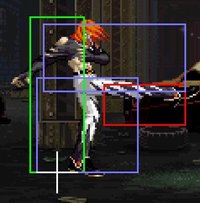
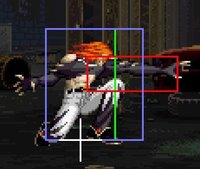
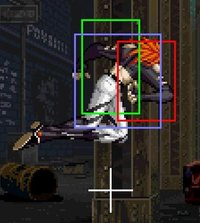
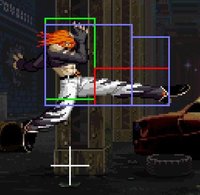
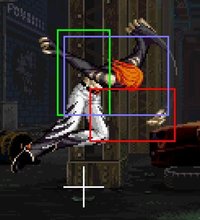
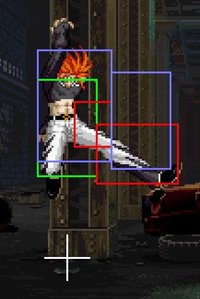
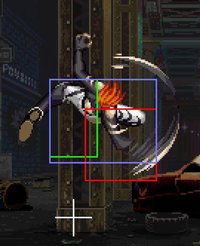
| HitBox: | A predefined area (usually a group of rectangles or circles) that tell the game how any given attack can come in contact with a character. Hitboxes are invisible to the player when normally playing. |
| HurtBox: | A predefined area (usually a group of rectangles or circles) that tell the game how your character is allowed to get hit by any incoming attack. Specifically, you'll get hit by (or block) an attack if that attack's hitbox ever overlaps your hurtbox. |
| Throw Box/Range: | Active throw frames and range. Your opponent will be thrown in this field if not in block or hit stun. |
| Projectile Box: | Hit box on a projectile attack. |
| Guard/Counter Box: | The Guard Box or Counter Box. This appears when blocking or using a counter move. |
| Push Box: | Has no bearing on hurt/hit boxes. Just allows characters to not pass through each other. (Also known as "Collision Box".) |
| Command | the input for the attack. |
| Start Up | The number of frames that initiate at the beginning of an attack after the input.
And when the first hitbox is present.
The first active frame is after the last startup frame. |
| Guard | The way this move must be blocked.
High or H or Overhead (especially when from the ground) -- must be blocked standing. |
| Damage | "basic" damage -- unmodified damage values
"correct" damage -- damage values modified for damage scaling, TOP multiplier, and defense rate |
| Guard Crush Value | Decrease your guard durability gauge/meter by that value/s |
| + | signifies how many advantage frames the attacker has. |
| - | signifies how many disadvantage frames the attacker has. |
| KD | means the attack will knock the opponent down. |
| ◯ | circle means cancelable on both hit/block. |
| ∞ | infinity means chain cancelable with the same button (renda cancel). |
| ※ | means cancelable on the first hit/part only. |
| 《 》OR « » OR << >> OR ( ) | The numbers in the brackets are the startup frames until the next stage (the gap until the next hit's first active frame). |
| △ | up triangle means only cancelable on block. |
| ▽ | down triangle means only cancelable on hit. |
| × OR X | means not cancelable. |
Close Standing Normals
| Damage | Guard | Startup | Active | Recovery | Total |
|---|---|---|---|---|---|
| - | - | 4 | - | - | - |
| Hit Adv | Block Adv | Feint Cancel | Cancel on Hit | Cancel on Block | Guard Crush Value |
| +6 | +6 | Yes | Yes | Yes | - |
|
Standing jab. | |||||
| Damage | Guard | Startup | Active | Recovery | Total |
|---|---|---|---|---|---|
| - | - | 3 | - | - | - |
| Hit Adv | Block Adv | Feint Cancel | Cancel on Hit | Cancel on Block | Guard Crush Value |
| +6 | +6 | Yes | Yes | Yes | - |
| Damage | Guard | Startup | Active | Recovery | Total |
|---|---|---|---|---|---|
| - | - | 7 | - | - | - |
| Hit Adv | Block Adv | Feint Cancel | Cancel on Hit | Cancel on Block | Guard Crush Value |
| -7 | -7 | Yes | Yes | Yes | - |
| Damage | Guard | Startup | Active | Recovery | Total |
|---|---|---|---|---|---|
| - | - | 4 | - | - | - |
| Hit Adv | Block Adv | Feint Cancel | Cancel on Hit | Cancel on Block | Guard Crush Value |
| -2 | -2 | Yes (1st hit) | Yes (1st hit) | Yes (1st hit) | - |
Far Standing Normals
| Damage | Guard | Startup | Active | Recovery | Total |
|---|---|---|---|---|---|
| - | - | 4 | - | - | - |
| Hit Adv | Block Adv | Feint Cancel | Cancel on Hit | Cancel on Block | Guard Crush Value |
| -1 | -1 | Yes | Yes | Yes | - |
| Damage | Guard | Startup | Active | Recovery | Total |
|---|---|---|---|---|---|
| - | - | 5 | - | - | - |
| Hit Adv | Block Adv | Feint Cancel | Cancel on Hit | Cancel on Block | Guard Crush Value |
| -5 | -5 | Yes | Yes | Yes | - |
| Damage | Guard | Startup | Active | Recovery | Total |
|---|---|---|---|---|---|
| - | - | 9 | - | - | - |
| Hit Adv | Block Adv | Feint Cancel | Cancel on Hit | Cancel on Block | Guard Crush Value |
| +1 | +1 | No | No | No | - |
| Damage | Guard | Startup | Active | Recovery | Total |
|---|---|---|---|---|---|
| - | - | 8 | - | - | - |
| Hit Adv | Block Adv | Feint Cancel | Cancel on Hit | Cancel on Block | Guard Crush Value |
| -2 | -2 | Yes (on Block) | No | Yes | - |
Crouching Normals
| Damage | Guard | Startup | Active | Recovery | Total |
|---|---|---|---|---|---|
| - | - | 5 | - | - | - |
| Hit Adv | Block Adv | Feint Cancel | Cancel on Hit | Cancel on Block | Guard Crush Value |
| +4 | +4 | Yes | Yes | Yes | - |
| Damage | Guard | Startup | Active | Recovery | Total |
|---|---|---|---|---|---|
| - | - | 4 | - | - | - |
| Hit Adv | Block Adv | Feint Cancel | Cancel on Hit | Cancel on Block | Guard Crush Value |
| +4 | +4 | Yes | Yes | Yes | - |
| Damage | Guard | Startup | Active | Recovery | Total |
|---|---|---|---|---|---|
| - | - | 6 | - | - | - |
| Hit Adv | Block Adv | Feint Cancel | Cancel on Hit | Cancel on Block | Guard Crush Value |
| +4 | +4 | Yes | Yes | Yes | - |
| Damage | Guard | Startup | Active | Recovery | Total |
|---|---|---|---|---|---|
| - | - | 10 | - | - | - |
| Hit Adv | Block Adv | Feint Cancel | Cancel on Hit | Cancel on Block | Guard Crush Value |
| KD | -10 | No | No | No | - |
Jumping Normals
| Damage | Guard | Startup | Active | Recovery | Total |
|---|---|---|---|---|---|
| - | - | 4 | - | - | - |
| Hit Adv | Block Adv | Feint Cancel | Cancel on Hit | Cancel on Block | Guard Crush Value |
| - | - | - | - | - | - |
| Damage | Guard | Startup | Active | Recovery | Total |
|---|---|---|---|---|---|
| - | - | 5 | - | - | - |
| Hit Adv | Block Adv | Feint Cancel | Cancel on Hit | Cancel on Block | Guard Crush Value |
| - | - | - | - | - | - |
| Damage | Guard | Startup | Active | Recovery | Total |
|---|---|---|---|---|---|
| - | - | 9 | - | - | - |
| Hit Adv | Block Adv | Feint Cancel | Cancel on Hit | Cancel on Block | Guard Crush Value |
| - | - | - | - | - | - |
| Damage | Guard | Startup | Active | Recovery | Total |
|---|---|---|---|---|---|
| - | - | 10 | - | - | - |
| Hit Adv | Block Adv | Feint Cancel | Cancel on Hit | Cancel on Block | Guard Crush Value |
| - | - | - | - | - | - |
Command Normals
| Damage | Guard | Startup | Active | Recovery | Total |
|---|---|---|---|---|---|
| - | - | 21 | - | - | - |
| Hit Adv | Block Adv | Feint Cancel | Cancel on Hit | Cancel on Block | Guard Crush Value |
| -1 | +5 | - | - | - | - |
| Damage | Guard | Startup | Active | Recovery | Total |
|---|---|---|---|---|---|
| - | - | - | - | - | - |
| Hit Adv | Block Adv | Feint Cancel | Cancel on Hit | Cancel on Block | Guard Crush Value |
| - | - | Yes | Yes | No | - |
| Damage | Guard | Startup | Active | Recovery | Total |
|---|---|---|---|---|---|
| - | - | - | - | - | - |
| Hit Adv | Block Adv | Feint Cancel | Cancel on Hit | Cancel on Block | Guard Crush Value |
| - | - | - | - | - | - |
Throws
Feint Cancels
Special Moves
Super Moves
Attributes
When a move can be canceled, it can either be canceled into a special/super/feint. Some moves that can't be canceled when they hit can be canceled when the opponent blocks while some moves that can be Special/Super canceled cannot be Feint Canceled.
Frame Data
Legend :
Command = the input for the attack.
Start Up = How many start up frames an attack has.
Hit = When the attack hits.
Block = When the attack is blocked.
+ signifies how many advantage frames the attacker has.
- signifies how many disadvantage frames the attacker has.
KD means the attack will knock the opponent down.
Data from Howard's Arena
Hitboxes
| Command | Total Frames |
| Close |
- |
| Command | Total Frames |
| - |
| Command | Total Frames |
| - |
| Command | Start Up | Hit | Guard |
| Close |
4 | +6 | +6 |
| Command | Start Up | Hit | Guard |
| Close |
3 | +6 | +6 |
| Command | Start Up | Hit | Guard |
| Close |
7 | -7 | -7 |
| Command | Start Up | Hit | Guard |
| Close |
4 | -2 | -2 |
| Command | Start Up | Hit | Guard |
| Far |
4 | -1 | -1 |
| Command | Start Up | Hit | Guard |
| Far |
5 | -5 | -5 |
| Command | Start Up | Hit | Guard |
| Far |
9 | +1 | +1 |
| Command | Start Up | Hit | Guard |
| Far |
8 | -2 | -2 |
| Command | Start Up | Hit | Guard |
| 5 | +5 | +5 |
| Command | Start Up | Hit | Guard |
| 4 | +5 | +5 |
| Command | Start Up | Hit | Guard |
| 6 | +4 | +4 |
| Command | Start Up | Hit | Guard |
| 10 | KD | -10 |
| Command | Start Up | Hit | Guard |
| Jumping |
4 | ? | ? |
| Command | Start Up | Hit | Guard |
| Jumping |
5 | ? | ? |
| Command | Start Up | Hit | Guard |
| Jumping |
9 | ? | ? |
| Command | Start Up | Hit | Guard |
| Jumping |
10 | ? | ? |
| Command | Start Up | Hit | Guard |
| 21 | -1 | +5 |
Attack Notes
His dash is different from the rest of the cast, if you maintain forward (forward neutral forward+hold) his dash will travel more distance.
You can alternate between rekka C and A, therefore it is recomended to always use the A version for the 3rd rekka as it is the safest one, and prefer the A version as well as 2nd since it hits low and has the best frame advantage.
Also note that if you are out of range, you can whiff cancel rekkas (karacancel), for example 2C > rekka A(whiff) karacancel 2nd rekka A (will combo with the 2C). It is also a blockstring on block.
A simple pressure string would be rekka A > rekka A > 2C > rekka A karacancel into rekka A.
You can make your opponent guess by delaying your rekkas or doing something else (mainly after the 2nd rekka A).
Other than his rekkas, his special moves are either unsafe or can be reacted to easily so it is not recommended to use them.
His far C is an amazing poke as it covers the air very well.
He is one of the few characters able to confirm his super via 3 lights midscreen : clB 2B stA Super (use the 2B 236AD 236A shortcut for easy execution).
Combos
Basic Combos
Crouching B 1~3 times (at least one if not at corner)-->QCB+A (x3)
Jumping C or D-->Down+AB-->QCB+C (x3)
Jumping C or D-->Standing C-->QCF+A
Jumping C or D-->Standing C-->QCFx2+P
Crouching B 1~3 times (at least one if not at corner)-->QCFx2+P
Advanced Combos
Jumping C or D-->Down+AB-Feint->Crouching C-->QCFx2+P (Better chance of working at the corner)
HCF+K, Break-->Standing C-Feint->Crouching C-->QCFx2+P
T.O.P. Notes
Freeman's TOP move is a barrier that surrounds his body. Recovery on the move is ok, but be cautious.
Basic Strategy
Freeman is a pure ground rushdown character based on quick and speedyful combos, your main objetive in far combat is to use your grab and break and in close combat to use your rekkas for pressure.
He is a bottom tier along with Tizoc due that his Break Shot and Feint Moves are more a tactic than a combo adding.
Freeman is a bit of an odd character. On paper, he looks fantastic, with decent speed, good damage behind his attacks, and invincibility frames on a lot of his specials. However, he suffers three crippling flaws: worst brake move in the game, terrible combo-ability, and lack of any sort of a jump-in stopper. The last one is the worst; he somewhat makes up for poor combo-ability with his powerful attacks, but since almost any character can jump in on him at will, there is little he can do on defense.
Advanced Tactics
In-depth video lecture on Freeman. Please use the timestamps to navigate the topics.
Matchup Notes
To come.
