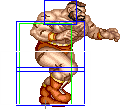
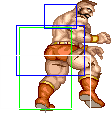
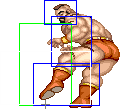
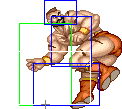
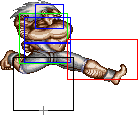
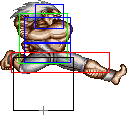
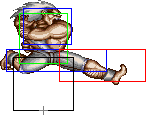
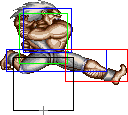
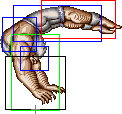
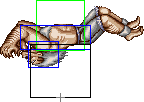
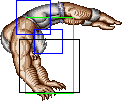
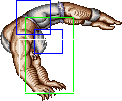
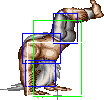
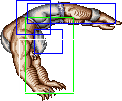
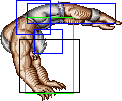
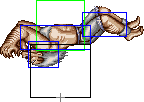
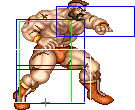
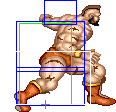
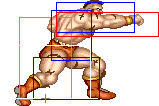
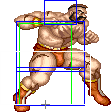
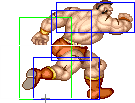
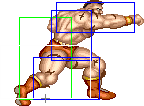
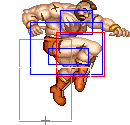
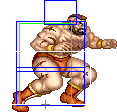
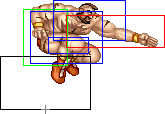
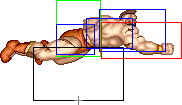
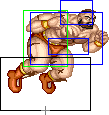
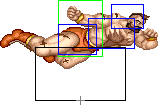
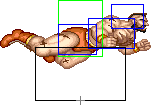
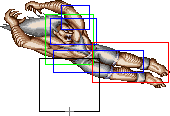
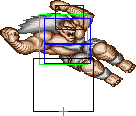
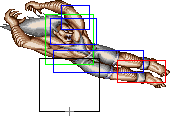
User:ReckyDaGuy/sandbox: Difference between revisions

From SuperCombo Wiki
No edit summary
mNo edit summary
Line 877: Line 877:
  }}
  }}


<span class="mw-customtoggle-jlp" style="color: cyan">'''Click to toggle detailed hitbox data.'''</span>
<span class="mw-customtoggle-jmp" style="color: cyan">'''Click to toggle detailed hitbox data.'''</span>
<div class="mw-collapsible mw-collapsed"  id="mw-customcollapsible-jlp">
<div class="mw-collapsible mw-collapsed"  id="mw-customcollapsible-jmp">


'''Neutral Jump Version:'''

Revision as of 14:12, 6 August 2023

Zangief
Zangief's portrait in Super Turbo.
Character Data
Damage Scaling Factor 22/32
Forward Walk Speed 40
Backwards Walk Speed 24
Pre-Jump Frames 4
Forwards Jump Duration 38
Backwards Jump Duration 39
Landing Frames 8*
Jump Height Apex 73
Forwards Jump Distance 89
Backwards Jump Distance 99
Soft Knockdown Recovery 42
Hard Knockdown Recovery 76


Normal Moves

Disclaimer: To better understand the diagrams, read this.

Standing Normals

cl.lp
Close Jab
Close Light Punch
5LP / cl.Lp.png
Zangief stcljab2.png
Zangief stcljab3.png
Zangief stcljab4.png
Damage Dizzy Dizzy Time Cancel Guard Act. Range
16[1] / 14[1] 0~5 40 Chain, Special* Mid 0-48
Startup Active Recovery Total Frame Adv. Meter
2 6 15 23 -8/-6/-4 2/1

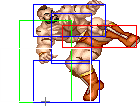
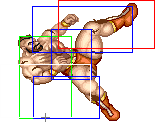
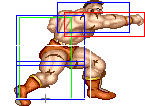
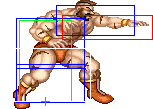
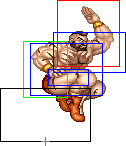
Zangief does a knife hand strike from over his head.

  • The first part of this move does slightly more damage.

General Strategies

  • The first and second parts make this move an incredible anti-air, able to beat almost anything thanks to incredible priority and a 2 frame startup.
  • The second part is Zangief's only response to Ken's Jumping Fierce.
  • The third part isn't particularly useful and leaves Zangief at disadvantage, so limit this move's use to anti-airs.
  • If you manage to anti-air with this move, you can cancel into Banishing Flat, allowing you to recover before your opponent lands and be just in range for the tick mixup.

Click to toggle detailed hitbox data.

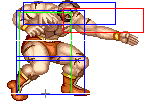
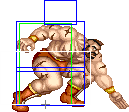
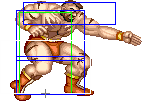
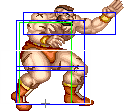
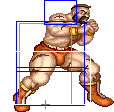
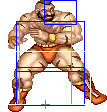
Zangief stcljab1&8.png Zangief stcljab2.png Zangief stcljab3.png Zangief stcljab4.png Zangief stcljab5.png Zangief stcljab6.png Zangief stcljab7.png Zangief stcljab1&8.png
Frame Count 1 + 1 2 2 2 2 4 4 5
Simplified 2 6 15

frlp

Far Jab
Far Light Punch
5LP / cl.Lp.png
Zangief stfarjab2.png
Damage Dizzy Dizzy Time Cancel Guard Act. Range
16[1] 0~5 40 Chain, Special Mid 49+
Startup Active Recovery Total Frame Adv. Meter
3 4 5 12 +4 2/1

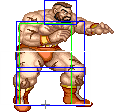
A fast straight punch that can be canceled into itself.

  • A very damaging Jab, even doing the strong sound when it hits.
  • Will whiff on most crouching characters, the exceptions being Boxer, Dhalsim, Old Fei Long, Sagat, T.Hawk, another Zangief, and in rare cases, Dee Jay.


General Strategies

  • Unlike most far jabs, this shouldn't be used to beat advancing moves like Blanka's rolls or Honda's headbutts due to the protruding hurtbox. It's still important against Boxer, as this is his only reliable way to deal with his low Rush Punches.
  • Also beats Cammy's Roundhouse Cannon Drills and trades with Dictator's Scissor Kicks.
  • Better suited as a counter poke (e.g. beats Claw's crouching Jab/Strong and Dictator's standing Forward from the right range) or as a tick (e.g. allows you to tick Dhalsim from a more comfortable range).
  • Can also be whiffed in footsies to force the opponent to get stuck in the block animation, allowing you to attempt a walk in SPD or, with the use of a glitch, to jump at the opponent without allowing them to walk back, leaving them stuck in their blocking animation (this is especially useful against charge characters).

Click to toggle detailed hitbox data.

Zangief stfarjab1&3.png Zangief stfarjab2.png Zangief stfarjab1&3.png
Frame Count 1 + 2 4 5
Simplified 3 4 5


cl.mp

Standing Strong
Standing Medium Punch
5MP / st.Mp.png
Zangief stclstrng3 stfarstrng3.png
Damage Dizzy Dizzy Time Cancel Guard Act. Range
24[1] 5~11 60 None Mid N/A
Startup Active Recovery Total Frame Adv. Meter
5 3 5 18 +10 4/3

A relatively fast horizontal knife strike. This move doesn't change when you're close or far away.

  • Used in most of Zangief's combos thanks to the solid damage and fairly good frame advantage, allowing Zangief to link into most of his normals.
  • Can also be used as a poke similar to Far Standing Jab, as their hitboxes are similar alongside added damage and stun, but keep in mind this move has a slower startup and has premature projected hurtboxes, making it easily stuffable.
  • Whiffs on most crouching characters, with the exceptions being Boxer, Dhalsim, Old Fei Long, Sagat, T.Hawk, himself, and Dee Jay (in Dee Jay's case, he leans back while crouch blocking, requiring you to be poing blank. As such, save this strategy for crossup combos/strings).
  • Old Zangief's version of this move is a little better since he can special cancel it, you don't have to worry about accidentally using Hop as Old Zangief, and it does a little more random damage.

Click to toggle detailed hitbox data.

Zangief stclstrng1 stfarstrng1.png Zangief stclstrng2 stfarstrng2.png Zangief stclstrng3 stfarstrng3.png Zangief stclstrng4 stfarstrng4.png
Frame Count 1 + 2 2 3 5
Simplified 5 3 5


clhp

Standing Fierce
Heavy Punch
5HP / Hp.png
Zangief stclfrc3 stfarfrc3.png
Damage Dizzy Dizzy Time Cancel Guard Act. Range
30[1] 10~16 80 None Mid N/A
Startup Active Recovery Total Frame Adv. Meter
7 6 29 42 -13 5/4

A powerful straight punch with very long recovery. Does not change based on distance from your opponent.

  • Nice damage and dizzy potential.
  • Can be linked from a standing Strong for dizzy combos.
  • Can also be used as a trade anti-air.
  • Avoid this move in most cases however, since the exaggerated recovery kills any viable use.
  • Old Zangief does a little more random damage with this move.

Click to toggle detailed hitbox data.


Zangief stclfrc1&7 stfarfrc1&7.png Zangief stclfrc2&6 stfarfrc2&6.png Zangief stclfrc3 stfarfrc3.png Zangief stclfrc4 stfarfrc4.png Zangief stclfrc5 stfarfrc5.png Zangief stclfrc2&6 stfarfrc2&6.png Zangief stclfrc1&7 stfarfrc1&7.png
Frame Count 1 + 3 3 6 10 8 6 5
Simplified 7 6 29

cllk

Close Short
Close Light Kick
5LK / cl.Lk.png
Zangief stclshrt4.png
Ticking for dummies.
Damage Dizzy Dizzy Time Cancel Guard Act. Range
18[1] 0~5 40 None Mid 0-32
Startup Active Recovery Total Frame Adv. Meter
8 8 5 21 0 2/1

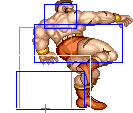
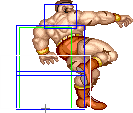
Zangief jumps and does a weak knee drop on the way down.

  • By far his easiest move to use as a tick due to the fairly long duration.
  • Leaves him at optimal range to tick into Super.
  • Since this move is 0 on block, it's a good move to tick into Atomic Suplex (i.e. if you don't time this as a meaty then a Flying Power Bomb will always come out).
  • Zangief has better moves though, and you should use this move less and less as you get better at ticking.

Click to toggle detailed hitbox data.

Zangief stclshrt1&6.png Zangief stclshrt2.png Zangief stclshrt3.png Zangief stclshrt4.png Zangief stclshrt5.png Zangief stclshrt1&6.png
Frame Count 1 + 3 2 2 8 4 1
Simplified 8 8 5

frlk

Far Short
Far Light Kick
5LK / fr.Lk.png
Zangief stfarshrt3.png
Trip 'em and tick 'em.
Damage Dizzy Dizzy Time Cancel Guard Act. Range
18[1] 0~5 40 None Low 33+
Startup Active Recovery Total Frame Adv. Meter
5 5 0 10 +8 2/1

A low hitting kick with no recovery.

  • Zangief's best standing tick, and one of his most important normals.
  • When hitting this on wakeup, you can mix between tick into SPD or a linked sweep to give your opponent extra trouble when trying to do a reversal.
  • This move's lack of recovery frames allows use as a safe tick/meaty.

Click to toggle detailed hitbox data.

Zangief stfarshrt1 stfarfrwrd1&5.png Zangief stfarshrt2.png Zangief stfarshrt3.png
Frame Count 1 + 2 2 5
Simplified 5 5


clmk

Close Forward
Close Medium Kick
5MK / cl.Mk.png
Zangief stclfrwrd3.png
Damage Dizzy Dizzy Time Cancel Guard Act. Range
24[1] 5~11 60 None Mid 0-56
Startup Active Recovery Total Frame Adv. Meter
7 4 9 20 +5 4/3 x 2

A front kick with moderate startup and recovery.

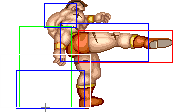
  • Semi-useful against Ken's Jumping Fierce: you can make this move whiff (or at the very least make it hit late enough so he can't cancel into Air Tatsu, which you can then counter with an SAC SPD) by timing your move so his punch is active during the 7f window in which Zangief doesn't have an active head hurtbox.
  • However, most of the time you're better off just using close Standing Jab instead, since that's much more safer and consistent unless you're too far away to use it.
  • Too slow to be used in combos, with the only practical normal to link into it being far Standing Jab, and that move whiffs against most of the cast while crouching.
  • Also too fast to be used as a tick into Atomic Suplex. It can be used as a tick into SPD, but you'll probably want to use crouching Forward as a medium hitstun/damage option instead since it might do more damage against a standing opponent.
  • You may also use this as a tick into Super, but have to do it like a Sako Tick since Final Atomic Buster has a very small throw range.

Click to toggle detailed hitbox data.

Zangief stclfrwrd1&5.png Zangief stclfrwrd2.png Zangief stclfrwrd3.png Zangief stclfrwrd4.png Zangief stclfrwrd1&5.png
Frame Count 1 + 3 3 4 4 5
Simplified 7 4 4

frmk

Far Forward
Far Medium Kick
5MK / fr.Mk.png
Zangief stfarfrwrd3.png
Damage Dizzy Dizzy Time Cancel Guard Act. Range
24[1] 5~11 60 None Mid 57+
Startup Active Recovery Total Frame Adv. Meter
7 4 9 20 +5 4/3

A semi-circular middle kick, and Zangief's main poke.

  • Very good for punishing missed low pokes due to its long range.
  • Also hits the entire cast even while crouching.
  • Has a little more range than your SPD, so use it as a punish if you're too far for it.
  • Can beat Tatsus clearly if done early.
  • Can also be used as a safe meaty.
  • Has poor priority, so refrain from spamming this move since it can be punished on prediction if it whiffs.

Click to toggle detailed hitbox data.

Zangief stfarshrt1 stfarfrwrd1&5.png Zangief stfarfrwrd2.png Zangief stfarfrwrd3.png Zangief stfarfrwrd4.png Zangief stfarshrt1 stfarfrwrd1&5.png
Frame Count 1 + 3 3 4 4 5
Simplified 7 4 9


cl.hk

Close Roundhouse
Close Heavy Kick
5HK / Hk.png
Zangief stclrh5.png
Zangief stclrh6.png
Damage Dizzy Dizzy Time Cancel Guard Act. Range
30[1] + 4[1] 10~16 + 1~7 80 + 70 None Mid N/A
Startup Active Recovery Total Frame Adv. Meter
10 14 (6+8) 31 39 -23/-17(-18) 5/4

A weird butterfly kick that hits twice.

  • Quite useless.
  • Can hit twice from close range and is themost damaging normal Zangief has, but it has a long startup and recovery.
  • The second hit has decent anti-air priority, but the situations where you can use it like that are limited and use is often overshadowed by close Jab anyway (i.e. worse startup, does less damage and has worse priority).
  • Old Zangief does a little more random damage with this move.

Click to toggle detailed hitbox data.

  • Startup/Active:
Zangief stclrh1.png Zangief stclrh2.png Zangief stclrh3.png Zangief stclrh4.png Zangief stclrh5.png Zangief stclrh6.png
Frame Count 1 + 2 2 2 3 6 8
Simplified 10 6 8
  • Recovery:
Zangief stclrh7.png Zangief stclrh8.png Zangief stclrh9.png Zangief stclrh10.png
Frame Count 8 10 8 5
Simplified 31

fr.hk

Far Roundhouse
Far Heavy Kick
5HK / Hk.png
Zangief stfarrh2.png
Damage Dizzy Dizzy Time Cancel Guard Act. Range
30[1] 10~16 80 None Mid N/A
Startup Active Recovery Total Frame Adv. Meter
5 8 11 24 +3 5/4

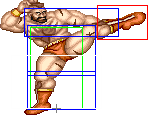
Zangief performs a high side kick.

  • This move is a good anti-air, especially if done early. If your enemy manages to stuff this move, get your reversal SPD ready as they land.
  • Also good for shenanigans: whiff it into SPD after your opponent wakes up from a knockdown.
  • It can beat Honda's Headbutts since it has just enough priority, is a fast move in general, stays active for a sufficient amount of time and does solid damge.
  • Also his only decent counter to New Chun-Li's neutral jumping Roundhouse: if spaced at round start distance it will beat it cleanly. The range for this is very specific though, if you're too far way it'll whiff and if you're too close you might get a trade, but in this case you'll always get beat if she does her kick early enough.
  • Old Zangief can special cancel this move, but in exchange for it having pretty bad priority. It also does a little more random damage with him.

Click to toggle detailed hitbox data.

{{STDiagramCell| Simplified} || style="border: 1px solid #999; border-collapse:collapse;" align="center" | 5 || style="border: 1px solid #999; border-collapse:collapse;" align="center" | 8 || style="border: 1px solid #999; border-collapse:collapse;" align="center" | 11
Zangief stfarrh1&3.png Zangief stfarrh2.png Zangief stfarrh1&3.png
Frame Count 1 + 4 8 11

Crouching Normals

crlp

Crouching Jab
Crouching Light Punch
2LP / D.png+Lp.png
Zangief crjab2.png
Damage Dizzy Dizzy Time Cancel Guard Act. Range
4[1] 0~5 40 Chain, Special Mid N/A
Startup Active Recovery Total Frame Adv. Meter
4 5 0 9 +8 2/1

A crouching spear hand strike.

  • Though it does very low damage, this is your most important ticking move.
  • Can be used into hit confirm combos such as Crouching Jab (n times) linked into Standing Short or Crouching Roundhouse.
  • Can beat a lot of different moves like Honda's Headbutts and HHS, Blanka's rolls and River Run slide, Dictator's Scissor Kicks and various other normals.
  • This move has no recovery frames, allowing it to be used as a safe tick/meaty.

Click to toggle detailed hitbox data.

Zangief crjab1.png Zangief crjab2.png
Frame Count 1 + 3 5
Simplified 4 5

crmp

Crouching Strong
Crouching Medium Punch
2MP / D.png+Mp.png
Zangief crstrng3.png
Damage Dizzy Dizzy Time Cancel Guard Act. Range
24[1] 5~11 60 None Mid N/A
Startup Active Recovery Total Frame Adv. Meter
7 8 9 24 +1 4/3

A crouching straight punch that hits around the stomach, with moderate recovery.

  • Can be used as a poke or to trade with some moves.
  • Excels as a tick into Atomic Suplex for two reasons: it leaves Zangief at a perfect range (outside most characters normal throw ranges, but inside Roundhouse Atomic Suplex range) and it leaves Zangief at onme frame of advantage (or 0 if you use this as the last hit of a block string), minimizing the chances of a Running Bear Grab coming out.

Click to toggle detailed hitbox data.

Zangief crstrng1&5 crfrc1&5.png Zangief crstrng2&4 crfrc2&4.png Zangief crstrng3.png Zangief crstrng2&4 crfrc2&4.png Zangief crstrng1&5 crfrc1&5.png
Frame Count 1 + 3 3 8 4 5
Simplified 7 8 9


crhp

Crouching Fierce
Crouching Heavy Punch
2HP / D.png+Hp.png
Zangief crfrc3.png
Damage Dizzy Dizzy Time Cancel Guard Act. Range
30[1] 10~16 80 None Mid N/A
Startup Active Recovery Total Frame Adv. Meter
7 8 23 38 -9 5/4

Similar to crouching Strong with a slightly longer hitbox and MUCH longer recovery.

  • Works decently as an anti-air against certain moves (e.g. T.Hawk's jumping Jab, Fei Long's jumping Jab, Blanka's jumping Jab and Strong and Claw's Dive).
  • Also works decently as a trade move against Honda's HHS or Shoto's Tatsus, but not as a poke due to the long recovery.
  • Old Zangief does a little more random damage with this move.

Click to toggle detailed hitbox data.

Zangief crstrng1&5 crfrc1&5.png Zangief crstrng2&4 crfrc2&4.png Zangief crstrng3.png Zangief crstrng2&4 crfrc2&4.png Zangief crstrng1&5 crfrc1&5.png
Frame Count 1 + 3 3 8 10 13
Simplified 7 8 23


crlk

Crouching Short
Crouching Light Kick
2LK / D.png+Lk.png
Zangief crshrt2.png
All of his crouching kicks share the same animation.
Damage Dizzy Dizzy Time Cancel Guard Act. Range
18[1] 0~5 40 Special Low N/A
Startup Active Recovery Total Frame Adv. Meter
4 4 7 15 +2 2/1

A crouching sidekick, the first of 3.

  • Zangief's best ground move to tick into Super, despite poor priority.
  • Also OK as a tick into his other grabs.
  • Special Cancel properties allow you to cancel this into a Lariat or Banishing Flat, but crouching Forward is better suited for that.
  • You can also cancel a Running Bear Grab out of this, which will usually connect but won't do much damage.
  • A useful footsies tool once in a while to lure your opponent into trying to punish a crouching Roundhouse, since it animates the same but recovers much quicker.

Click to toggle detailed hitbox data.

Zangief crshrt1&3 crfrwrd1&3 crrh1&4.png Zangief crshrt2.png Zangief crshrt1&3 crfrwrd1&3 crrh1&4.png
Frame Count 1 + 3 4 7
Simplified 4 4 7


crmk

Crouching Forward
Crouching Medium Kick
2MK / D.png+Mk.png
Zangief crfrwrd2.png
Damage Dizzy Dizzy Time Cancel Guard Act. Range
24[1] 5~11 60 Special Low N/A
Startup Active Recovery Total Frame Adv. Meter
4 6 9 19 +3 4/3

Another crouching side kick.

  • Better damage and priority than crouching Short, but longer recovery.
  • Has Special Cancel properties just like the former so you can cancel into Lariat, Banishing Flat, or Running Bear Grab. Cross-up fierce Body Press, crouching Forward into Quick Lariat is a particularly hot combo.
  • Can also be used as a tick into SPD or Atomic Suplex, but you usually have better options for that, unless you're looking for the medium blockstun.

Click to toggle detailed hitbox data.

Zangief crshrt1&3 crfrwrd1&3 crrh1&4.png Zangief crfrwrd2.png Zangief crshrt1&3 crfrwrd1&3 crrh1&4.png
Frame Count 1 + 3 6 9
Simplified 4 6 9


crhk

Crouching Roundhouse
Crouching Heavy Kick
2HK / D.png+Hk.png
Zangief crrh2.png
Damage Dizzy Dizzy Time Cancel Guard Act. Range
30[1] 5~11 130 None Low N/A
Startup Active Recovery Total Frame Adv. Meter
5 8 13 26 +1/Down 5/4

Zangief's sweep, same animation as his crouching Short and Roundhouse but with longer recovery.

  • A pretty awesome move, with good recovery for a sweep and deceptive reach.
  • Can be linked into well, recovers fairly quickly, does good damage, has decent recovery, not to mention the knockdown on hit which can lead into ticking mix-ups or safe jumps.
  • Very important in tick mix-ups alongside far standing Short: Both can be used to punish the enemy for standing up, which is often necessary for inputting invincible reversal specials.
  • Always going for an SPD at max range can get predicable, so this is a good mix-up.
  • Old Zangief can Special Cancel this move, which is a gimmick at best. He also does a little more random damage.

Click to toggle detailed hitbox data.

Zangief crshrt1&3 crfrwrd1&3 crrh1&4.png Zangief crrh2.png Zangief crrh3.png Zangief crshrt1&3 crfrwrd1&3 crrh1&4.png
Frame Count 1 + 4 8 12 1
Simplified 5 8 13

Jumping Normals

njlp
Jumping Jab
Jumping Light Punch
8LP / U.png+Lp.png
Zangief njjab2 djjab2.png
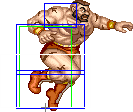
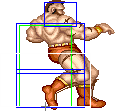
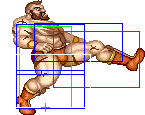
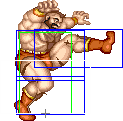
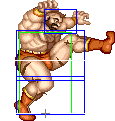
First hitbox
Zangief njjab3.png
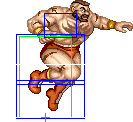
Second hitbox (Neutral Jump ver.)
Zangief djjab3.png
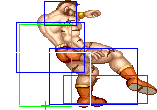
Second hitbox (Diagonal Jump ver.)
Damage Dizzy Dizzy Time Cancel Guard Act. Range
18[1] 1~7(-2) 40 None High N/A
Startup Active Recovery Total Frame Adv. Meter
2 11 (3/8) 13+∞ Dependent 2/1

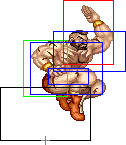
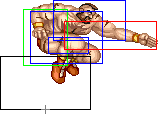
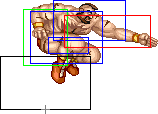
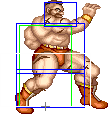
An aerial knife hand strike. The neutral and diagonal jump versions are the same, but with slightly different hitboxes.

  • Avoid the neutral jump version, since the Strong and Fierce versions are the same attack but with better damage and priority.
  • The diagonal jump version has its uses, having better vertical priority than diagonal Strong by 2 pixels, but the damage and horizontal priority/range is a lot worse, so favor Strong for air to airs.
  • The diagonal version can set up ticks into SPD from a little farther than diagonal jumping Short. It doesn't hit as low though, which makes it whiff vs. crouching characters (with Dee Jay being the only exception, but since he leans back during his crouch block animation it's harder to hit than Short).

Click to toggle detailed hitbox data.

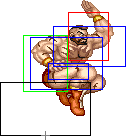
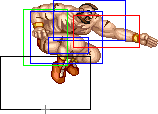
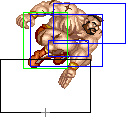
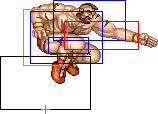
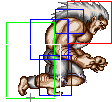
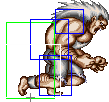
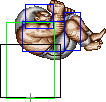
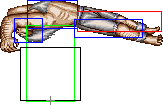
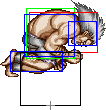
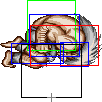
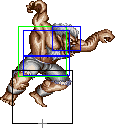
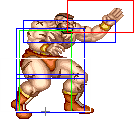
Neutral Jump Version:
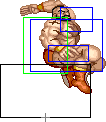
Zangief njjab1 djjab1 njstrng1 djstrng1 njfrc1.png Zangief njjab2 djjab2.png Zangief njjab3.png Zangief njjab4 djjab4 njstrng4 djstrng4 njfrc4.png
Frame Count 2 3 8
Simplified 2 11

Diagonal Jump Version:

Zangief njjab1 djjab1 njstrng1 djstrng1 njfrc1.png Zangief njjab2 djjab2.png Zangief djjab3.png Zangief njjab4 djjab4 njstrng4 djstrng4 njfrc4.png
Frame Count 2 3 8
Simplified 2 11


njmp
Jumping Strong
Jumping Medium Punch
8MP / U.png+Mp.png
Zangief njstrng2 djstrng2.png
First hitbox
Zangief njstrng3.png
Second hitbox (Neutral Jump ver.)
Zangief djstrng3.png
Second hitbox (Diagonal Jump ver.)
Neutral Jump ver. Damage Dizzy Dizzy Time Cancel Guard Act. Range
22[1] 1~7(-2) 40 None High N/A
Startup Active Recovery Total Frame Adv. Meter
2 11 (3/8) 13+∞ Dependent 4/3


Neutral Jump ver. Damage Dizzy Dizzy Time Cancel Guard Act. Range
22[1] 5~11 50(+10) None High N/A
Startup Active Recovery Total Frame Adv. Meter
2 11 (3/8) 13+∞ Dependent 4/3


Another aerial knife hand strike. The neutral and diagonal jump versions are again the same, but with slightly different hitboxes and stun values.

  • Once again, avoid the neutral jump version, since the Fierce version is the same attack but with better damage and priority.
  • The diagonal jump version is Zangief's main air-to-air option, mainly due to it being his diagonal jumping normal with the longest horizontal reach.
  • It's not that great, but it can beat some low priority moves like Blanka's jumping Strong, or it can be used against Claw's wall dives by anticipation, though that's very risky.

Click to toggle detailed hitbox data.

Neutral Jump Version:

Zangief njjab1 djjab1 njstrng1 djstrng1 njfrc1.png Zangief njstrng2 djstrng2.png Zangief njstrng3.png Zangief njjab4 djjab4 njstrng4 djstrng4 njfrc4.png
Frame Count 2 3 8
Simplified 2 11

Diagonal Jump Version:

Zangief njjab1 djjab1 njstrng1 djstrng1 njfrc1.png Zangief njstrng2 djstrng2.png Zangief djstrng3.png Zangief njjab4 djjab4 njstrng4 djstrng4 njfrc4.png
Frame Count 2 3 8
Simplified 2 11


njhp
Neutral Jumping Fierce
Neutral Jumping Heavy Punch
8HP / U.png+Hp.png
Zangief njfrc2.png
Zangief njfrc3.png
Damage Dizzy Dizzy Time Cancel Guard Act. Range
30[1] 11~17(-1) 60(+20) None High N/A
Startup Active Recovery Total Frame Adv. Meter
2 11 (3/8) 13+∞ Dependent 5/4

Zangief's best aerial hand knife strike.

  • Has the best damage and priority with the same frame data as his other neutral jumping punches.
  • Good enough to beat Claw's Wall Dive (it may trade if Claw does it late) and Cammy's Cannon Spike (if done from far enough).
  • Old Zangief does a little more random damage with this move.

Click to toggle detailed hitbox data.

Zangief njjab1 djjab1 njstrng1 djstrng1 njfrc1.png Zangief njfrc2.png Zangief njfrc3.png Zangief njjab4 djjab4 njstrng4 djstrng4 njfrc4.png
Frame Count 2 3 8
Simplified 2 11
djhp
Diagonal Jumping Fierce
Diagonal Jumping Heavy Punch
7 or 9 HP
Ub.png or Uf.png+Hp.png
Zangief djfrc4.png
Damage Dizzy Dizzy Time Cancel Guard Act. Range
30[1] 11~17(-1) 60(+20) None High N/A
Startup Active Recovery Total Frame Adv. Meter
7 7 14+∞ Dependent 5/4

An aerial long punch.

  • Zangief's main air to ground attack: great at jumping over fireballs (except against Low Tiger Shots, use diagonal Roundhouse for those), at surprise jumps and as a combo starter.
  • You you know your opponent will take the hit (i.e. you just jumped over a fireball) you can follow into an SPD for massive damage, or if you believe they'll block it you can walk up and SPD. If they don't expect this it can be very hard to escape, due to this move's long blockstun.
  • Old Zangief does a little more random damage with this move.

Click to toggle detailed hitbox data.

Zangief djfrc1&7.png Zangief djfrc2&6.png Zangief djfrc3&5.png [[File: ]] Zangief djfrc3&5.png Zangief djfrc2&6.png Zangief djfrc1&7.png
Frame Count 1 3 3 7 3 3
Simplified 7 7


njlk
Jumping Short
Jumping Light Kick
8LK / U.png+Lk.png
Blanka njshrt3.png
Neutral Jump version
Blanka djshrt3.png
Diagonal Jump version
Damage Dizzy Dizzy Time Cancel Guard Act. Range
30[1] 1~7(-2) 40 None High N/A
Startup Active Recovery Total Frame Adv. Meter
5 20 25+∞ Dependent 2/1

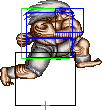
A standard jumping kick. The neutral jump and diagonal jump versions have different hitboxes.

  • The neutral jump version is an excellent defensive move. Some characters that lack a fireball may struggle to punish this from far away.
  • The diagonal jump version is a crossup that works great as a harassment tool.

Click to toggle detailed hitbox data.

  • Neutral Jump Version:
Blanka njshrt1&5 djshrt1&5 njfrwrd5 djfrwrd5.png Blanka njshrt2&4 djshrt2&4 njfrwrd4 djfrwrd4.png Blanka njshrt3.png Blanka njshrt2&4 djshrt2&4 njfrwrd4 djfrwrd4.png Blanka njshrt1&5 djshrt1&5 njfrwrd5 djfrwrd5.png
Frame Count 2 3 20 3
Simplified 5 20
  • Diagonal Jump Version:
Blanka njshrt1&5 djshrt1&5 njfrwrd5 djfrwrd5.png Blanka njshrt2&4 djshrt2&4 njfrwrd4 djfrwrd4.png Blanka djshrt3.png Blanka njshrt2&4 djshrt2&4 njfrwrd4 djfrwrd4.png Blanka njshrt1&5 djshrt1&5 njfrwrd5 djfrwrd5.png
Frame Count 2 3 20 3
Simplified 5 20


njmk
Jumping Forward
Jumping Medium Kick
8MK
U.png+Mk.png
Blanka njfrwrd3.png
Neutral Jump version
Blanka djfrwrd3.png
Diagonal Jump version
Damage Dizzy Dizzy Time Cancel Guard Act. Range
24[1] 5~11 50(+10) None High N/A
Startup Active Recovery Total Frame Adv. Meter
5 12 17+∞ Dependent 4/3

Visually identical to jumping Short. Once again, neutral jump and diagonal jump have different hitboxes.

  • The neutral jump version has deceptively long range.
  • The diagonal jump version has ok reach, but you'll usually prefer diagonal jump LK.

Click to toggle detailed hitbox data.

Blanka njshrt1&5 djshrt1&5 njfrwrd5 djfrwrd5.png Blanka njshrt2&4 djshrt2&4 njfrwrd4 djfrwrd4.png Blanka njfrwrd3.png Blanka njshrt2&4 djshrt2&4 njfrwrd4 djfrwrd4.png Blanka njshrt1&5 djshrt1&5 njfrwrd5 djfrwrd5.png
Frame Count 2 3 12 3
Simplified 5 12
  • Diagonal Jump Version:
Blanka njshrt1&5 djshrt1&5 njfrwrd5 djfrwrd5.png Blanka njshrt2&4 djshrt2&4 njfrwrd4 djfrwrd4.png Blanka djfrwrd3.png Blanka njshrt2&4 djshrt2&4 njfrwrd4 djfrwrd4.png Blanka njshrt1&5 djshrt1&5 njfrwrd5 djfrwrd5.png
Frame Count 2 3 12 3
Simplified 5 12


njhk
Neutral Jumping Roundhouse
Neutral Jumping Heavy Kick
8HK / U.png+Hk.png
Blanka njrh3.png
Damage Dizzy Dizzy Time Cancel Guard Act. Range
30[2] 11~17 (-1) 60(+20) None Mid N/A
Startup Active Recovery Total Frame Adv. Meter
5 6 11+∞ Dependent 5/4

A midair dropkick.

  • Good range and damage.

Click to toggle detailed hitbox data.

Blanka njrh1&5 djrh1&5.png Blanka njrh2&4 djrh2&4.png Blanka njrh3.png Blanka njrh2&4 djrh2&4.png Blanka njrh1&5 djrh1&5.png
Frame Count 2 3 6 3
Simplified 5 6


djhk
Diagonal Jumping Roundhouse
Diagonal Jumping Heavy Kick
7 or 9 HK
Ub.png or Uf.png+Hk.png
Blanka djrh3.png
Damage Dizzy Dizzy Time Cancel Guard Act. Range
30[1] 11~17(-1) 60(+20) None High N/A
Startup Active Recovery Total Frame Adv. Meter
7 6 13+∞ Dependent 5/4

Like the neutral jump version except slower and with a worse hitbox.

  • Still a key jump in that can catch people off guard, especially if they are crouching.

Click to toggle detailed hitbox data.

Blanka njrh1&5 djrh1&5.png Blanka njrh2&4 djrh2&4.png Blanka djrh3.png Blanka njrh2&4 djrh2&4.png Blanka njrh1&5 djrh1&5.png
Frame Count 3 4 6 3
Simplified 7 6


Command Normals

Rock Crusher
Rock Crusher
Headbutt
Close B.png or F.png + Mp.png
Close 4 or 6 + MP
Blanka hb3.png
Blanka hb4.png
Blanka hb5.png
Damage Dizzy Dizzy Time Cancel Guard Act. Range
18[0] x 2 5~11 x 2 60 x 2 Special, Super (First hit only) Mid/Low N/A
Startup Active Recovery Total Frame Adv. Meter
4 9 (4 + 3 + 2) 13 26 -4 / -0 / +3(+2) 4/3 x 2

An interesting command normal that's executed the same way as a throw.

  • The first hit can be canceled into a ball for a combo ender, or a hop for pressure.
  • The second hit hits low, and must be crouch blocked.

Click to toggle detailed hitbox data.

  • Startup/Active:
Blanka hb1&9.png Blanka hb2&8.png Blanka hb3.png Blanka hb4.png Blanka hb5.png
Frame Count 1 + 1 2 4 3 2
Simplified 4 7 2
  • Recovery:
Blanka hb6.png Blanka hb7.png Blanka hb2&8.png Blanka hb1&9.png
Frame Count 5 4 3 1
Simplified 13
Amazon River Run
Amazon River Run
Slide
3HP / Df.png+Hp.png
Blanka sld2.png
Damage Dizzy Dizzy Time Cancel Guard Act. Range
28[1] 5~11 130 None Mid N/A
Startup Active Recovery Total Frame Adv. Meter
12 16 21 49 -15/Down 5/4

Blanka slides along the ground arms first.

  • Works great to slide under fireballs and as an anti-air for most jump ins.
  • Invincible on the last frame.

Click to toggle detailed hitbox data.

Blanka sld1&3.png Blanka sld2.png Blanka sld1&3.png Blanka sld4.png Blanka sld5.png Blanka sld6.png
Frame Count 1 + 11 16 7 5 8 1
Simplified 12 16 21

Throw

Blanka can perform a hold with Hp.png.

Wild Fang
The Head Bite
cl. 4 or 6HP
cl. B.png or F.png+Hp.png
Ssf2t blanka hold.png
Damage Dizzy Dizzy Time Cancel Guard Act. Range
26 + 4xn 5~11 0 None Grab 64 (from axis)
34 (from throwable box)
Startup Active Recovery Total Frame Adv. Meter
1 1 Dependent 2 N/A -

Blanka's hold, where he jumps on his opponent and starts biting their face.

  • One of Blanka's major threats, since he doesn't have an overhead or a reliable way to deal chip damage.
  • Has the second best throw range in the game.
  • You can find lots of opportunities to start biting with your ground trickery and crossups.
  • Since you can only use this hold with HP, you can't piano this throw. In addition, mashing this throw might result in an Electric attack, which has long startup.


Click to toggle throwbox data.

Blanka throwb.png Blanka throw.png Blanka throwf.png

Special Moves

Electric Thunder

Electric Thunder
Press P.png Repeatedly
Blanka elec2anm.gif
Lp.png Damage Dizzy Dizzy Time Cancel Guard Act. Range
26[2] 9~15 100 None Mid N/A
Startup Active Recovery Total Frame Adv. Meter
3 52 per cycle 13 68+ Dependent
Hard Down
5


Mp.png Damage Dizzy Dizzy Time Cancel Guard Act. Range
28[2] 9~15 100 None Mid N/A
Startup Active Recovery Total Frame Adv. Meter
5 34 per cycle 13 52 Dependent
Hard Down
5


Hp.png Damage Dizzy Dizzy Time Cancel Guard Act. Range
30[2] 9~15 100 None Mid N/A
Startup Active Recovery Total Frame Adv. Meter
7 25 per cycle 20 52+ Dependent
Hard Down
5

Blanka lets out an electrical discharge.

  • Landing a hit with this will score a special knockdown where your opponent will be frozen for a few frames, then fall over.
  • Hard to score a hit with, but if you do, you get a ton of offense assuming you're holding a back charge.

Click to toggle detailed hitbox data.

  • Jab and Strong versions
Blanka elec1.png Blanka elec2anm.gif Blanka elec3&5jab 3&5strng 3&5&7frc.png Blanka elec4&6jab 4&6strng 4&6&8frc.png Blanka elec3&5jab 3&5strng 3&5&7frc.png Blanka elec4&6jab 4&6strng 4&6&8frc.png
Frame Count (Jab) 3 52+ 2 4 1 6
Simplified (Jab) 3 52+ 13
Frame Count (Strong) 5 34+ 2 4 1 6
Simplified (Strong) 5 34+ 13
  • Fierce Version:
Blanka elec1.png Blanka elec2anm.gif Blanka elec3&5jab 3&5strng 3&5&7frc.png Blanka elec4&6jab 4&6strng 4&6&8frc.png Blanka elec3&5jab 3&5strng 3&5&7frc.png Blanka elec4&6jab 4&6strng 4&6&8frc.png Blanka elec3&5jab 3&5strng 3&5&7frc.png Blanka elec4&6jab 4&6strng 4&6&8frc.png
Frame Count 7 25+ 3 4 2 4 1 6
Simplified 7 25+ 20

Rolling Attack

Rolling Attack
Lightning Legs
Cb.pngF.png + P.png / [4]6P
Blanka hroll1anm.gif
Lp.png Damage Dizzy Dizzy Time Cancel Guard Act. Range
28[3] 9~15 100 None Mid N/A
Startup Active Recovery Total Frame Adv. Meter
0 25 5 on whiff
45 on block/hit
30 on whiff
70 on block/hit
-23 7


Mp.png Damage Dizzy Dizzy Time Cancel Guard Act. Range
30[3] 9~15 100 None Mid N/A
Startup Active Recovery Total Frame Adv. Meter
0 25 6 on whiff
46 on block/hit
31 on whiff
71 on block/hit
Dependent 7


Hk.png Damage Dizzy Dizzy Time Cancel Guard Act. Range
32[3] 9~15 100 None Mid N/A
Startup Active Recovery Total Frame Adv. Meter
0 60 7 on whiff
47 on block/hit
67 on whiff
117 on block/hit
Dependent 7

Blanka launches himself horizontally at his opponent.

  • The strength of the punch button determines the damage and speed of the ball. The Fierce ball also has a lot more active frames than the other versions.
  • On block or hit, Blanka will go into a very lengthy recoil animation that many characters can punish. The whiff has a hitbox that lasts 40 frames, but it's impossible to hit with it.
  • Starts up instantly, but is not invincible. This will beat ground throws and command grabs, however.
  • Since the priority is poor, most characters can jab you out of this move.

Rolling Attack Block/Hit Punishes

  • Ryu - Fierce Fireball
  • Ken - Safe
  • Honda - Fierce Headbutt
  • Chun - Super
  • Blanka - Fierce Ball
  • Zangief - Safe
  • Guile - Safe
  • Dhalsim - St.HP
  • T.Hawk - Safe
  • Cammy - Cannon Drill (Her Super simply doesn't connect, even though it should)
  • Fei Long - Jab Rekka (whiff)> fierce Rekka (hit)> fierce Rekka
  • Dee Jay - Fierce Fireball
  • Boxer - any Rush Punch, or Super
  • Claw - Walk up far hp/ cr.mp
  • Sagat - HK Low Tiger Shot
  • Dictator - fierce Psycho Crusher, Scissor Kick, Super

Click to toggle detailed hitbox data.

  • Full Animation:
Blanka hroll1anm.gif Blanka lands1.png Blanka lands2.png Blanka lands3.png
Frame Count (Jab) 25 1 2 2
Simplified (Jab) 25 5
Frame Count (Strong) 25 1 2 3
Simplified (Strong) 25 6
Frame Count (Fierce) 60 1 2 4
Simplified (Fierce) 60 7
  • Knockback:
Blanka hroll1anm.gif Blanka lands1.png Blanka lands2.png Blanka lands3.png
Frame Count (Jab) 40 1 2 2
Simplified (Jab) 40 5
Frame Count (Strong) 40 1 2 3
Simplified (Strong) 40 6
Frame Count (Fierce) 40 1 2 4
Simplified (Fierce) 40 7

Vertical Roll

Vertical Roll
[2]8K / Cd.pngU.png+K.png
Blanka vroll2anm.gif
Blanka vroll5.png
Blanka vroll6.png
Lk.png Damage Dizzy Dizzy Time Cancel Guard Act. Range
26[2] / 28[2] 9~15 100 None High N/A
Startup Active Recovery Total Frame Adv. Meter
0 18(15)8 18 59 Dependent 7


Mk.png Damage Dizzy Dizzy Time Cancel Guard Act. Range
28[2] 9~15 100 None High N/A
Startup Active Recovery Total Frame Adv. Meter
0 17(15)8 19 59 Dependent 7


Hk.png Damage Dizzy Dizzy Time Cancel Guard Act. Range
30[2] 9~15 100 None High N/A
Startup Active Recovery Total Frame Adv. Meter
0 16(15)8 24 63 Dependent 7

Blanka launches himself vertically and ends with a flip kick, falling to the ground.

  • A very good anti-air and crossup tool.
  • The LK version deals a bit more damage during the kick part.

Click to toggle detailed hitbox data.

  • Active:
Blanka vroll2anm.gif Blanka vroll3anm.gif Blanka vroll4.png Blanka vroll5.png Blanka vroll6.png
Frame Count (Short) 18 12 3 4 4
Simplified (Short) 18 15 8
Frame Count (Forward) 17 12 3 4 4
Simplified (Forward) 17 15 8
Frame Count (Roundhouse) 16 12 3 4 4
Simplified (Roundhouse) 16 15 8
  • Recovery
Blanka vroll7.png Blanka vroll8.png Blanka vroll9.png Blanka vroll10.png Blanka lands1.png Blanka lands2.png Blanka lands3.png
Frame Count (Short) 4 4 3 1 2 4
Simplified (Short) 11 7
Frame Count (Forward) 4 4 3 1 2 5
Simplified (Forward) 11 8
Frame Count (Rh) 4 4 4 3 1 2 6
Simplified (Rh) 15 9
  • Knockback:
Blanka vroll2anm.gif Blanka lands1.png Blanka lands2.png Blanka lands3.png
Frame Count (Short) 40+ 1 2 4
Simplified (Short) 40+ 7
Frame Count (Forward) 40+ 1 2 5
Simplified (Forward) 40+ 8
Frame Count (Rh) 40+ 1 2 6
Simplified (Rh) 40+ 9

Backstep Roll

Backstep Roll
[4]6K
Cb.pngF.png + K.png
Blanka broll14.png
Blanka broll15.png
Blanka broll16.png
Blanka broll17anm.gif
Lk.png Damage Dizzy Dizzy Time Cancel Guard Act. Range
(12[0] x 3) / 28[1] (1~7 x 3) / 1~7 (30 x 3) / 30 None Mid N/A
Startup Active Recovery Total Frame Adv. Meter
44 20 (4/3/2/11) 5 on whiff/combo
33+ on spin block/hit
69/97+ Dependent 7


Mk.png Damage Dizzy Dizzy Time Cancel Guard Act. Range
(12[1] x 3) / 28[2] (1~7 x 3) / 1~7 (30 x 3) / 30 None Mid N/A
Startup Active Recovery Total Frame Adv. Meter
38 23 (4/3/2/14) 6 on whiff/combo
34+ on spin block/hit
67/95+ Dependent 7


Hk.png Damage Dizzy Dizzy Time Cancel Guard Act. Range
(12[2] x 3) / 28[3] (1~7 x 3) / 1~7 (30 x 3) / 30 None Mid N/A
Startup Active Recovery Total Frame Adv. Meter
31 25 (4/3/2/16) 7 on whiff/combo
35+ on spin block/hit
63/91+ Dependent 7

Blanka flips back and jumps forward, rolling on his way down.

  • The first 3 hitboxes deal less damage than the last rolling part. If you somehow hit with them, they'll combo into each other. This is extremely difficult unless you're point blank range on a big character.
  • Impractical due to the ungodly startup, slow active part, and terrible recovery.

Click to toggle detailed hitbox data.

Startup:

Blanka broll1&3.png Blanka broll2.png Blanka broll1&3.png Blanka broll4.png Blanka broll5.png Blanka broll6.png Blanka broll7.png
Frame Count (Short) 2 4 2 3 5 5 2
Simplified (Short) 11 12
Frame Count (Forward) 1 3 1 3 5 5 3
Simplified (Forward) 8 13
Frame Count (Rh) 1 2 1 1 5 5 3
Simplified (Rh) 5 13
Blanka broll8.png Blanka broll9.png Blanka broll10.png Blanka broll11.png Blanka broll12.png Blanka broll13.png
Frame Count (Short) 3 6 3 3 3 3
Simplified (Short) 12 9
Frame Count (Forward) 2 4 2 3 3 3
Simplified (Forward) 8 9
Frame Count (Rh) 1 2 1 3 3 3
Simplified (Rh) 4 9

Active/Recovery:

Blanka broll14.png Blanka broll15.png Blanka broll16.png Blanka broll17anm.gif Blanka lands1.png Blanka lands2.png Blanka lands3.png
Frame Count (Short) 4 3 2 11 1 2 2
Simplified (Short) 4 3 2 11 5
Frame Count (Forward) 4 3 2 14 1 2 3
Simplified (Forward) 4 3 2 14 6
Frame Count (Rh) 4 3 2 16 1 2 4
Simplified (Rh) 4 3 2 16 7
  • Knockback:
Blanka broll17anm.gif Blanka lands1.png Blanka lands2.png Blanka lands3.png
Frame Count (Short) 28+ 1 2 2
Simplified (Short) 28+ 5
Frame Count (Forward) 28+ 1 2 3
Simplified (Forward) 28+ 6
Frame Count (Rh) 28+ 1 2 4
Simplified (Rh) 28+ 7

Surprise Forward

Surprise Forward
F.png + 3k.png
6+3K
Blanka hopf5.png

Blanka jumps forward. The hop lasts for about 18 frames before an 8 frame landing animation.
  • Gives you 5 points of meter.
  • Allows you to pass through opponents.
  • Use this sparingly, mostly as a mixup tool. Experienced players can react and punish.

Click to toggle detailed hitbox data.

Blanka hopf1&3&9&11 hopb9&11.png Blanka hopf2&10 hopb10.png Blanka hopf1&3&9&11 hopb9&11.png Blanka hopf4.png Blanka hopf5.png Blanka hopf6.png Blanka hopf7.png Blanka hopf8.png
Frame Count 1 1 1 6 2 2 4 4
Simplified 3 18
Blanka hopf1&3&9&11 hopb9&11.png Blanka hopf2&10 hopb10.png Blanka hopf1&3&9&11 hopb9&11.png Blanka hopf12 hopb12.png
Frame Count 2 3 2 1
Simplified 8

Surprise Back

Surprise Back
B.png + 3k.png
4+3K
Blanka hopb4&6.png

Blanka jumps backwards. Invincible from frames 1-13.
  • Gives you 5 points of meter.
  • An excellent meter building move.
  • The invincibility allows you to escape from some nasty situations.

Click to toggle detailed hitbox data.

Blanka hopb1&3.png Blanka hopb2.png Blanka hopb1&3.png Blanka hopb4&6.png Blanka hopb5.png Blanka hopb4&6.png Blanka hopb7.png Blanka hopb8.png
Frame Count 1 1 1 2 2 6 4 4
Simplified 13 8
Blanka hopf1&3&9&11 hopb9&11.png Blanka hopf2&10 hopb10.png Blanka hopf1&3&9&11 hopb9&11.png Blanka hopf12 hopb12.png
Frame Count 2 3 2 1
Simplified 8

Super Combo

Ground Shave Roll
[4]646P
Cb.pngF.pngB.pngF.png + P.png
Blanka super4anm.gif
Jumping down
Blanka super5anm.gif
Charging/Rolling
Damage Dizzy Dizzy Time Cancel Guard Act. Range
20[1] x 4 0~4 x 4 20 x 4 None Mid N/A
Startup Active Recovery Total Frame Adv. Meter
14 29 (Jumping down)
0 to 90 (Charging)
∞ (Rolling)
0 on whiff
40 on block/hit
57 -17/Hard Down -

Invincible on frames 1-14.

Blanka jumps up in an invincible state, falls down with a hitbox, then rolls forward until he hits a wall.

  • If you hold the Punch button down, you can continue to charge up the roll for up to 90 frames. This won't increase the damage.
  • If you release the roll after your opponent has jumped over you, it will autocorrect to face them.
  • While this move does great damage, it will rarely connect due to the slowness of the hop, giving your opponent plenty of time to block. It's not safe on block either, even if it does chip for 4 hits.

General Strategies

  • If your opponent tries to jump above this, you can usually counter with a Vertical Roll after you recover.
  • This can be used as an anti-air with good timing. If you hit them out of the air with the hop, you can hold the punch button briefly and juggle them just before they land.

Click to toggle detailed hitbox data.

Blanka super1.png Blanka super2.png Blanka super3.png Blanka super4anm.gif Blanka super5anm.gif
Frame Count 1 + [18] + 5 5 3 29 0 to 90 + ∞
Simplified 14 29
  • Knockback:
Blanka superb1anm.gif Blanka superb2&4.png Blanka superb3.png Blanka superb2&4.png Blanka superb5.png
Frame Count 28 3 5 3 1
Simplified 28 12

Misc Animations

Jump Animations

  • Prejump:
Blanka bj1 nj1 fj1.png Blanka bj2&4&14 nj2&4&14 fj2&4&17.png Blanka bj3 nj3 fj3.png Blanka bj2&4&14 nj2&4&14 fj2&4&17.png
Frame Count (Neutral) 1 1 1 1
Simplified (Neutral) 4
Frame Count (Back) 1 1 1 1
Simplified (Back) 4
Frame Count (Forward) 1 1 1
Simplified (Forward) 3
  • Neutral/Back Jump, Airborne + Landing:
Blanka bj5 nj5 fj5.png Blanka bj6&12 nj6&12 fj6.png Blanka bj7&11 nj7&11 fj7.png Blanka bj8&10 nj8&10 fj8.png Blanka bj9 nj9 fj9&15.png Blanka bj8&10 nj8&10 fj8.png Blanka bj7&11 nj7&11 fj7.png Blanka bj6&12 nj6&12 fj6.png Blanka bj13 nj13.png Blanka bj2&4&14 nj2&4&14 fj2&4&17.png
Frame Count (Neutral) 1 10 4 4 6 4 4 6 1 7*
Simplified (Neutral) 1 38 1 7*
Frame Count (Back) 1 10 4 4 6 4 4 7 1 7*
Simplified (Back) 1 39 1 7*
  • Forward Jump, Airborne + Landing:
Blanka bj5 nj5 fj5.png Blanka bj6&12 nj6&12 fj6.png Blanka bj7&11 nj7&11 fj7.png Blanka bj8&10 nj8&10 fj8.png Blanka bj9 nj9 fj9&15.png Blanka fj10&14.png Blanka fj11&13.png Blanka fj12.png Blanka fj11&13.png Blanka fj10&14.png Blanka bj9 nj9 fj9&15.png Blanka fj16.png Blanka bj2&4&14 nj2&4&14 fj2&4&17.png
Frame Count 1 4 4 4 4 4 4 4 4 4 2 1 7*
Simplified 1 38 1 7*

Blanka is the only character in the game that doesn't have the same prejump speed on all 3 forms of jumps. On his Neutral and Back Jumps, the prejump takes 4f to finish, which is considered slow. On his Forward Jump, it takes one frame less, so it's of average speed. With all that said, Blanka has the second quickest overall jump duration on the game (losing only to Claw's, draws with O.Sagat's).

The landing recovery has a special property which allows it to be canceled into certain actions. At the first landing frame, you can perform throws (including command throws), and on the second landing frame, you can start another jump, attack with a normal or special move, or block. Blocking not being until the second landing frame, as well as hitbox-hurtbox interactions having priority over throwbox-throw hurtbox is why sweeps work as anti airs in this game.
Things are different when jumping over your opponent, however. In that situation it's possible to walk back/forward, to jump again or to even block on the first landing frame! Strangely, if a throw is timed on the first landing frame of a jump that crosses over, a throwbox will never come out, even though that input will result in a normal coming out 2 frames later (like it normally would). Anyway, being able to block on the first landing frame can help a little bit on some safe jump crossup setups, or maybe in other situations as well if your character has a huge jump arc.

Game Navigation

General
Controls and Notation
System
HUD
FAQ
New Characters
Balrog
Blanka
Cammy
Chun-Li
Dee Jay
Dhalsim
E. Honda
Fei Long
Guile
Ken
M. Bison
Ryu
Sagat
T. Hawk
Vega
Zangief
Akuma
Old Characters
O. Balrog
O. Blanka
O. Cammy
O. Chun-Li
O. Dee Jay
O. Dhalsim
O. E. Honda
O. Fei Long
O. Guile
O. Ken
O. M. Bison
O. Ryu
O. Sagat
O. T. Hawk
O. Vega
O. Zangief