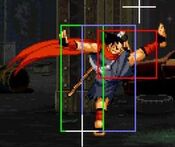
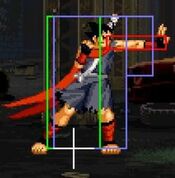
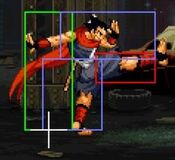
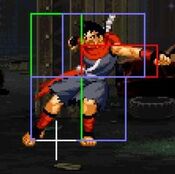
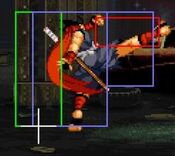
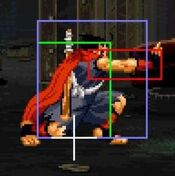
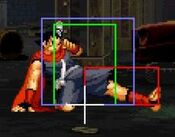
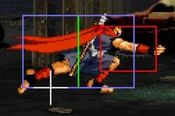
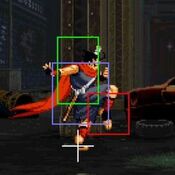
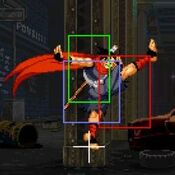
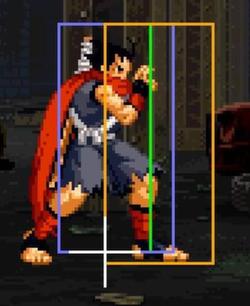
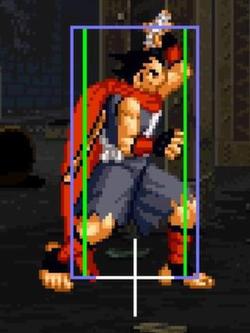
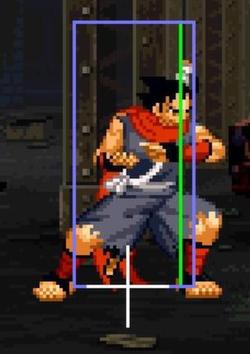
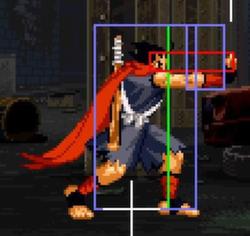
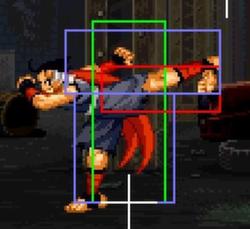
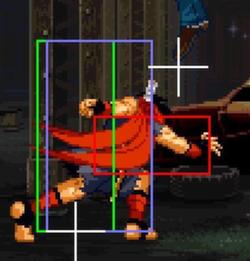
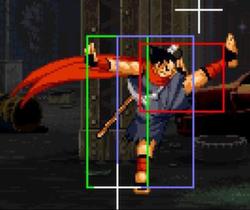
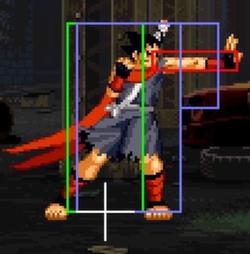
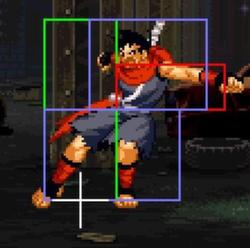
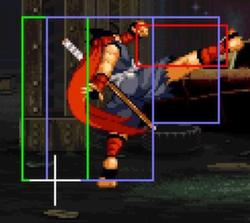
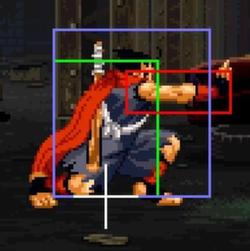
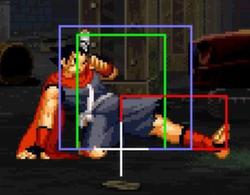
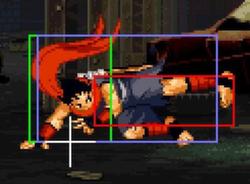
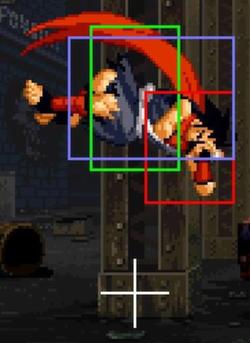
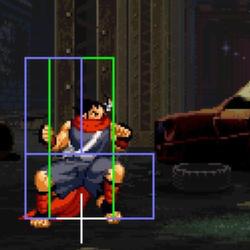
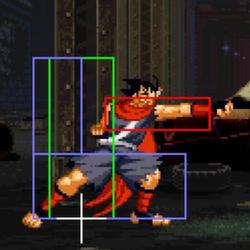
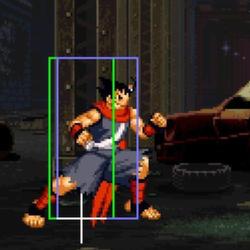
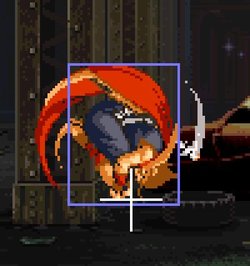
(Put frame data and cancel info into available MoveDatas) |
|||
| Line 26: | Line 26: | ||
Frame Data Source: https://w.atwiki.jp/garoumow/pages/27.html | Frame Data Source: https://w.atwiki.jp/garoumow/pages/27.html | ||
Legend | {{MOTW Legend}} | ||
===Close Standing Normals=== | ===Close Standing Normals=== | ||
| Line 53: | Line 40: | ||
|Damage= | |Damage= | ||
|Guard= | |Guard= | ||
|Startup= | |Startup=4 | ||
|Active= | |Active= | ||
|Recovery= | |Recovery= | ||
|Total= | |Total= | ||
|Hit Adv= | |Hit Adv=+6 | ||
|Block Adv= | |Block Adv=+6 | ||
|Feint Cancel= | |Feint Cancel=Yes | ||
|Cancel on Hit= | |Cancel on Hit=Yes | ||
|Cancel on Block= | |Cancel on Block=Yes | ||
|Guard Crush Value= | |Guard Crush Value= | ||
|description=Standing jab. | |description=Standing jab. | ||
| Line 78: | Line 65: | ||
|Damage= | |Damage= | ||
|Guard= | |Guard= | ||
|Startup= | |Startup=4 | ||
|Active= | |Active= | ||
|Recovery= | |Recovery= | ||
|Total= | |Total= | ||
|Hit Adv= | |Hit Adv=+3 | ||
|Block Adv= | |Block Adv=+3 | ||
|Feint Cancel= | |Feint Cancel=Yes | ||
|Cancel on Hit= | |Cancel on Hit=Yes | ||
|Cancel on Block= | |Cancel on Block=Yes | ||
|Guard Crush Value= | |Guard Crush Value= | ||
|description= | |description= | ||
| Line 104: | Line 91: | ||
|Damage= | |Damage= | ||
|Guard= | |Guard= | ||
|Startup= | |Startup=5 | ||
|Active= | |Active= | ||
|Recovery= | |Recovery= | ||
|Total= | |Total= | ||
|Hit Adv= | |Hit Adv=+2 | ||
|Block Adv= | |Block Adv=+2 | ||
|Feint Cancel= | |Feint Cancel=Yes | ||
|Cancel on Hit= | |Cancel on Hit=Yes | ||
|Cancel on Block= | |Cancel on Block=Yes | ||
|Guard Crush Value= | |Guard Crush Value= | ||
|description= | |description= | ||
| Line 129: | Line 116: | ||
|Damage= | |Damage= | ||
|Guard= | |Guard= | ||
|Startup= | |Startup=3 | ||
|Active= | |Active= | ||
|Recovery= | |Recovery= | ||
|Total= | |Total= | ||
|Hit Adv= | |Hit Adv=-1 | ||
|Block Adv= | |Block Adv=-1 | ||
|Feint Cancel= | |Feint Cancel=Yes | ||
|Cancel on Hit= | |Cancel on Hit=Yes | ||
|Cancel on Block= | |Cancel on Block=Yes | ||
|Guard Crush Value= | |Guard Crush Value= | ||
|description= | |description= | ||
| Line 155: | Line 142: | ||
|Damage= | |Damage= | ||
|Guard= | |Guard= | ||
|Startup= | |Startup=4 | ||
|Active= | |Active= | ||
|Recovery= | |Recovery= | ||
|Total= | |Total= | ||
|Hit Adv= | |Hit Adv=+5 | ||
|Block Adv= | |Block Adv=+5 | ||
|Feint Cancel= | |Feint Cancel=Yes | ||
|Cancel on Hit= | |Cancel on Hit=Yes | ||
|Cancel on Block= | |Cancel on Block=Yes | ||
|Guard Crush Value= | |Guard Crush Value= | ||
|description= | |description= | ||
| Line 180: | Line 167: | ||
|Damage= | |Damage= | ||
|Guard= | |Guard= | ||
|Startup= | |Startup=6 | ||
|Active= | |Active= | ||
|Recovery= | |Recovery= | ||
|Total= | |Total= | ||
|Hit Adv= | |Hit Adv=+1 | ||
|Block Adv= | |Block Adv=+1 | ||
|Feint Cancel= | |Feint Cancel=Yes | ||
|Cancel on Hit= | |Cancel on Hit=Yes | ||
|Cancel on Block= | |Cancel on Block=Yes | ||
|Guard Crush Value= | |Guard Crush Value= | ||
|description= | |description= | ||
| Line 205: | Line 192: | ||
|Damage= | |Damage= | ||
|Guard= | |Guard= | ||
|Startup= | |Startup=11 | ||
|Active= | |Active= | ||
|Recovery= | |Recovery= | ||
|Total= | |Total= | ||
|Hit Adv= | |Hit Adv=-11 | ||
|Block Adv= | |Block Adv=-11 | ||
|Feint Cancel= | |Feint Cancel=No | ||
|Cancel on Hit= | |Cancel on Hit=No | ||
|Cancel on Block= | |Cancel on Block=No | ||
|Guard Crush Value= | |Guard Crush Value= | ||
|description= | |description= | ||
| Line 230: | Line 217: | ||
|Damage= | |Damage= | ||
|Guard= | |Guard= | ||
|Startup= | |Startup=11 | ||
|Active= | |Active= | ||
|Recovery= | |Recovery= | ||
|Total= | |Total= | ||
|Hit Adv= | |Hit Adv=-3 | ||
|Block Adv= | |Block Adv=-3 | ||
|Feint Cancel= | |Feint Cancel=No | ||
|Cancel on Hit= | |Cancel on Hit=No | ||
|Cancel on Block= | |Cancel on Block=No | ||
|Guard Crush Value= | |Guard Crush Value= | ||
|description= | |description= | ||
| Line 256: | Line 243: | ||
|Damage= | |Damage= | ||
|Guard= | |Guard= | ||
|Startup= | |Startup=4 | ||
|Active= | |Active= | ||
|Recovery= | |Recovery= | ||
|Total= | |Total= | ||
|Hit Adv= | |Hit Adv=+5 | ||
|Block Adv= | |Block Adv=+5 | ||
|Feint Cancel= | |Feint Cancel=Yes | ||
|Cancel on Hit= | |Cancel on Hit=Yes | ||
|Cancel on Block= | |Cancel on Block=Yes | ||
|Guard Crush Value= | |Guard Crush Value= | ||
|description=*Typical crouching {{Icon-SNK|A}}. Chains into {{Icon-SNK|A}},{{Icon-SNK|B}} and {{Icon-SNK|C}} | |description=*Typical crouching {{Icon-SNK|A}}. Chains into {{Icon-SNK|A}},{{Icon-SNK|B}} and {{Icon-SNK|C}} | ||
| Line 282: | Line 269: | ||
|Damage= | |Damage= | ||
|Guard= | |Guard= | ||
|Startup= | |Startup=5 | ||
|Active= | |Active= | ||
|Recovery= | |Recovery= | ||
|Total= | |Total= | ||
|Hit Adv= | |Hit Adv=+1 | ||
|Block Adv= | |Block Adv=+2 | ||
|Feint Cancel= | |Feint Cancel=Yes | ||
|Cancel on Hit= | |Cancel on Hit=Yes | ||
|Cancel on Block= | |Cancel on Block=Yes | ||
|Guard Crush Value= | |Guard Crush Value= | ||
|description=*Your go-to low poke and confirm. You can confirm {{Icon-SNK|A}}/{{Icon-SNK|C}} super by doing 2{{Icon-SNK|B}}362{{Icon-SNK|B}}{{Icon-SNK|C}}36 then confirming if it hit or not. | |description=*Your go-to low poke and confirm. You can confirm {{Icon-SNK|A}}/{{Icon-SNK|C}} super by doing 2{{Icon-SNK|B}}362{{Icon-SNK|B}}{{Icon-SNK|C}}36 then confirming if it hit or not. | ||
| Line 308: | Line 295: | ||
|Damage= | |Damage= | ||
|Guard= | |Guard= | ||
|Startup= | |Startup=6 | ||
|Active= | |Active= | ||
|Recovery= | |Recovery= | ||
|Total= | |Total= | ||
|Hit Adv= | |Hit Adv=-20 | ||
|Block Adv= | |Block Adv=-20 | ||
|Feint Cancel= | |Feint Cancel=No | ||
|Cancel on Hit= | |Cancel on Hit=No | ||
|Cancel on Block= | |Cancel on Block=No | ||
|Guard Crush Value= | |Guard Crush Value= | ||
|description=*A somewhat quick poke that reaches far away and recovers quickly. It's +1 too so , making it very useful to just throw out in neutral since you aren't risking much. | |description=*A somewhat quick poke that reaches far away and recovers quickly. It's +1 too so , making it very useful to just throw out in neutral since you aren't risking much. | ||
| Line 333: | Line 320: | ||
|Damage= | |Damage= | ||
|Guard= | |Guard= | ||
|Startup= | |Startup=10 | ||
|Active= | |Active= | ||
|Recovery= | |Recovery= | ||
|Total= | |Total= | ||
|Hit Adv= | |Hit Adv=KD | ||
|Block Adv= | |Block Adv=-14 | ||
|Feint Cancel= | |Feint Cancel=No | ||
|Cancel on Hit= | |Cancel on Hit=No | ||
|Cancel on Block= | |Cancel on Block=No | ||
|Guard Crush Value= | |Guard Crush Value= | ||
|description=*Sweep. Can be used as an anti-air by low profiling some moves and hitting the landing frames. | |description=*Sweep. Can be used as an anti-air by low profiling some moves and hitting the landing frames. | ||
| Line 365: | Line 352: | ||
|Hit Adv= | |Hit Adv= | ||
|Block Adv= | |Block Adv= | ||
|Feint Cancel= | |Feint Cancel=Yes | ||
|Cancel on Hit= | |Cancel on Hit=Yes | ||
|Cancel on Block= | |Cancel on Block= | ||
|Guard Crush Value= | |Guard Crush Value= | ||
| Line 390: | Line 377: | ||
|Hit Adv= | |Hit Adv= | ||
|Block Adv= | |Block Adv= | ||
|Feint Cancel= | |Feint Cancel=Yes | ||
|Cancel on Hit= | |Cancel on Hit=Yes | ||
|Cancel on Block= | |Cancel on Block= | ||
|Guard Crush Value= | |Guard Crush Value= | ||
| Line 415: | Line 402: | ||
|Hit Adv= | |Hit Adv= | ||
|Block Adv= | |Block Adv= | ||
|Feint Cancel= | |Feint Cancel=Yes | ||
|Cancel on Hit= | |Cancel on Hit=Yes | ||
|Cancel on Block= | |Cancel on Block= | ||
|Guard Crush Value= | |Guard Crush Value= | ||
| Line 440: | Line 427: | ||
|Hit Adv= | |Hit Adv= | ||
|Block Adv= | |Block Adv= | ||
|Feint Cancel= | |Feint Cancel=Yes | ||
|Cancel on Hit= | |Cancel on Hit=Yes | ||
|Cancel on Block= | |Cancel on Block= | ||
|Guard Crush Value= | |Guard Crush Value= | ||
| Line 461: | Line 448: | ||
|Damage= | |Damage= | ||
|Guard= | |Guard= | ||
|Startup= | |Startup=7 | ||
|Active= | |Active= | ||
|Recovery= | |Recovery= | ||
|Total= | |Total= | ||
|Hit Adv= | |Hit Adv=KD | ||
|Block Adv= | |Block Adv=-15 | ||
|Feint Cancel= | |Feint Cancel=No | ||
|Cancel on Hit= | |Cancel on Hit=No | ||
|Cancel on Block= | |Cancel on Block=No | ||
|Guard Crush Value= | |Guard Crush Value= | ||
|description= | |description= | ||
| Line 487: | Line 474: | ||
|Damage= | |Damage= | ||
|Guard= | |Guard= | ||
|Startup= | |Startup=8 | ||
|Active= | |Active= | ||
|Recovery= | |Recovery= | ||
|Total= | |Total= | ||
|Hit Adv= | |Hit Adv=KD | ||
|Block Adv= | |Block Adv=-13 | ||
|Feint Cancel= | |Feint Cancel=No | ||
|Cancel on Hit= | |Cancel on Hit=No | ||
|Cancel on Block= | |Cancel on Block= | ||
|Guard Crush Value= | |Guard Crush Value= | ||
Revision as of 15:41, 17 April 2022
Introduction
| Pros | Cons |
|---|---|
|
|
Character Colors
Move List
Esoterics
Frame Data Source: https://w.atwiki.jp/garoumow/pages/27.html
| Data Help | |
|---|---|
| Disclaimer: This is meant to teach basic terminology used when describing moves. | |
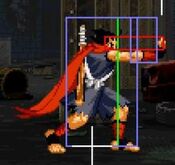
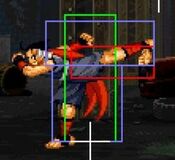
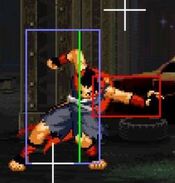
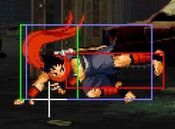
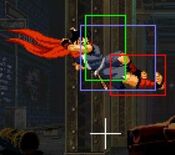
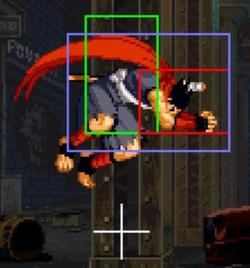
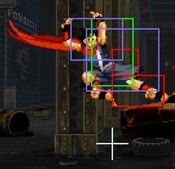
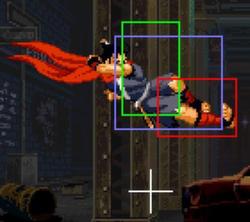
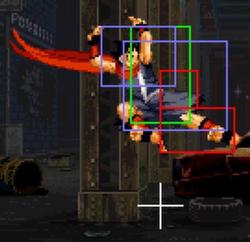
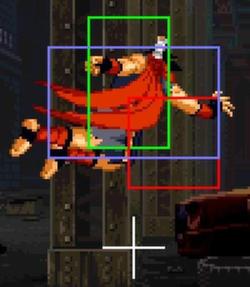
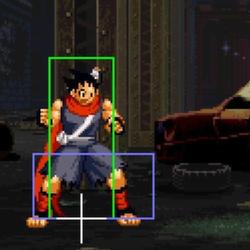
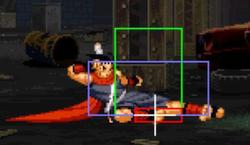
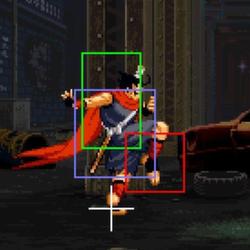
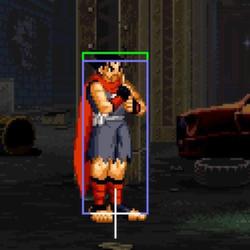
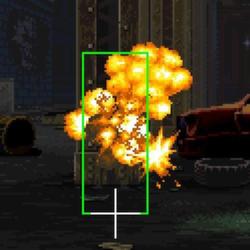
| HitBox: | A predefined area (usually a group of rectangles or circles) that tell the game how any given attack can come in contact with a character. Hitboxes are invisible to the player when normally playing. |
| HurtBox: | A predefined area (usually a group of rectangles or circles) that tell the game how your character is allowed to get hit by any incoming attack. Specifically, you'll get hit by (or block) an attack if that attack's hitbox ever overlaps your hurtbox. |
| Throw Box/Range: | Active throw frames and range. Your opponent will be thrown in this field if not in block or hit stun. |
| Projectile Box: | Hit box on a projectile attack. |
| Guard/Counter Box: | The Guard Box or Counter Box. This appears when blocking or using a counter move. |
| Push Box: | Has no bearing on hurt/hit boxes. Just allows characters to not pass through each other. (Also known as "Collision Box".) |
| Command | the input for the attack. |
| Start Up | The number of frames that initiate at the beginning of an attack after the input.
And when the first hitbox is present.
The first active frame is after the last startup frame. |
| Guard | The way this move must be blocked.
High or H or Overhead (especially when from the ground) -- must be blocked standing. |
| Damage | "basic" damage -- unmodified damage values
"correct" damage -- damage values modified for damage scaling, TOP multiplier, and defense rate |
| Guard Crush Value | Decrease your guard durability gauge/meter by that value/s |
| + | signifies how many advantage frames the attacker has. |
| - | signifies how many disadvantage frames the attacker has. |
| KD | means the attack will knock the opponent down. |
| ◯ | circle means cancelable on both hit/block. |
| ∞ | infinity means chain cancelable with the same button (renda cancel). |
| ※ | means cancelable on the first hit/part only. |
| 《 》OR « » OR << >> OR ( ) | The numbers in the brackets are the startup frames until the next stage (the gap until the next hit's first active frame). |
| △ | up triangle means only cancelable on block. |
| ▽ | down triangle means only cancelable on hit. |
| × OR X | means not cancelable. |
Close Standing Normals
| Damage | Guard | Startup | Active | Recovery | Total |
|---|---|---|---|---|---|
| - | - | 4 | - | - | - |
| Hit Adv | Block Adv | Feint Cancel | Cancel on Hit | Cancel on Block | Guard Crush Value |
| +6 | +6 | Yes | Yes | Yes | - |
|
Standing jab. | |||||
| Damage | Guard | Startup | Active | Recovery | Total |
|---|---|---|---|---|---|
| - | - | 4 | - | - | - |
| Hit Adv | Block Adv | Feint Cancel | Cancel on Hit | Cancel on Block | Guard Crush Value |
| +3 | +3 | Yes | Yes | Yes | - |
| Damage | Guard | Startup | Active | Recovery | Total |
|---|---|---|---|---|---|
| - | - | 5 | - | - | - |
| Hit Adv | Block Adv | Feint Cancel | Cancel on Hit | Cancel on Block | Guard Crush Value |
| +2 | +2 | Yes | Yes | Yes | - |
| Damage | Guard | Startup | Active | Recovery | Total |
|---|---|---|---|---|---|
| - | - | 3 | - | - | - |
| Hit Adv | Block Adv | Feint Cancel | Cancel on Hit | Cancel on Block | Guard Crush Value |
| -1 | -1 | Yes | Yes | Yes | - |
Far Standing Normals
| Damage | Guard | Startup | Active | Recovery | Total |
|---|---|---|---|---|---|
| - | - | 4 | - | - | - |
| Hit Adv | Block Adv | Feint Cancel | Cancel on Hit | Cancel on Block | Guard Crush Value |
| +5 | +5 | Yes | Yes | Yes | - |
| Damage | Guard | Startup | Active | Recovery | Total |
|---|---|---|---|---|---|
| - | - | 6 | - | - | - |
| Hit Adv | Block Adv | Feint Cancel | Cancel on Hit | Cancel on Block | Guard Crush Value |
| +1 | +1 | Yes | Yes | Yes | - |
| Damage | Guard | Startup | Active | Recovery | Total |
|---|---|---|---|---|---|
| - | - | 11 | - | - | - |
| Hit Adv | Block Adv | Feint Cancel | Cancel on Hit | Cancel on Block | Guard Crush Value |
| -11 | -11 | No | No | No | - |
| Damage | Guard | Startup | Active | Recovery | Total |
|---|---|---|---|---|---|
| - | - | 11 | - | - | - |
| Hit Adv | Block Adv | Feint Cancel | Cancel on Hit | Cancel on Block | Guard Crush Value |
| -3 | -3 | No | No | No | - |
Crouching Normals
| Damage | Guard | Startup | Active | Recovery | Total |
|---|---|---|---|---|---|
| - | - | 5 | - | - | - |
| Hit Adv | Block Adv | Feint Cancel | Cancel on Hit | Cancel on Block | Guard Crush Value |
| +1 | +2 | Yes | Yes | Yes | - |
| Damage | Guard | Startup | Active | Recovery | Total |
|---|---|---|---|---|---|
| - | - | 6 | - | - | - |
| Hit Adv | Block Adv | Feint Cancel | Cancel on Hit | Cancel on Block | Guard Crush Value |
| -20 | -20 | No | No | No | - |
| |||||
| Damage | Guard | Startup | Active | Recovery | Total |
|---|---|---|---|---|---|
| - | - | 10 | - | - | - |
| Hit Adv | Block Adv | Feint Cancel | Cancel on Hit | Cancel on Block | Guard Crush Value |
| KD | -14 | No | No | No | - |
| |||||
Jumping Normals
| Damage | Guard | Startup | Active | Recovery | Total |
|---|---|---|---|---|---|
| - | - | - | - | - | - |
| Hit Adv | Block Adv | Feint Cancel | Cancel on Hit | Cancel on Block | Guard Crush Value |
| - | - | Yes | Yes | - | - |
| Damage | Guard | Startup | Active | Recovery | Total |
|---|---|---|---|---|---|
| - | - | - | - | - | - |
| Hit Adv | Block Adv | Feint Cancel | Cancel on Hit | Cancel on Block | Guard Crush Value |
| - | - | Yes | Yes | - | - |
| Damage | Guard | Startup | Active | Recovery | Total |
|---|---|---|---|---|---|
| - | - | - | - | - | - |
| Hit Adv | Block Adv | Feint Cancel | Cancel on Hit | Cancel on Block | Guard Crush Value |
| - | - | Yes | Yes | - | - |
| Damage | Guard | Startup | Active | Recovery | Total |
|---|---|---|---|---|---|
| - | - | - | - | - | - |
| Hit Adv | Block Adv | Feint Cancel | Cancel on Hit | Cancel on Block | Guard Crush Value |
| - | - | Yes | Yes | - | - |
Command Normals
| Damage | Guard | Startup | Active | Recovery | Total |
|---|---|---|---|---|---|
| - | - | 7 | - | - | - |
| Hit Adv | Block Adv | Feint Cancel | Cancel on Hit | Cancel on Block | Guard Crush Value |
| KD | -15 | No | No | No | - |
| Damage | Guard | Startup | Active | Recovery | Total |
|---|---|---|---|---|---|
| - | - | 8 | - | - | - |
| Hit Adv | Block Adv | Feint Cancel | Cancel on Hit | Cancel on Block | Guard Crush Value |
| KD | -13 | No | No | - | - |
Throws
Feint Cancels
Special Moves
Super Moves
Attributes
When a move can be canceled, it can either be canceled into a special/super/feint. Some moves that can't be canceled when they hit can be canceled when the opponent blocks while some moves that can be Special/Super canceled cannot be Feint Canceled.
Frame Data
Legend :
Command = the input for the attack.
Start Up = How many start up frames an attack has.
Hit = When the attack hits.
Block = When the attack is blocked.
+ signifies how many advantage frames the attacker has.
- signifies how many disadvantage frames the attacker has.
KD means the attack will knock the opponent down.
Data from Howard's Arena
Attack Notes
Chou Hissatsu Tatsumaki-
S. Power does a total of 32 points of damage.
P. Power does a total of 47 points of damage.
Chou Hissatsu Shuriken-
This S. Power does a total of 33 points of damage, if the final shuriken isn't fired early.
Chou Hissatsu Kunai-
This S. Power does a total of 45 points of damage, if the final kunai isn't fired early.
Combos
Anywhere
Corner only
Hitboxes
| Command | Total Frames |
| Close |
x |
| Command | Total Frames |
| x |
| Command | Total Frames |
| x |
| Command | Start Up | Hit | Guard |
| Close |
4 | +6 | +6 |
| Command | Start Up | Hit | Guard |
| Close |
4 | +3 | +3 |
| Command | Start Up | Hit | Guard |
| Close |
5 | +2 | +2 |
| Command | Start Up | Hit | Guard |
| Close |
3 | -1 | -1 |
| Command | Start Up | Hit | Guard |
| Far |
4 | +5 | +5 |
| Command | Start Up | Hit | Guard |
| Far |
6 | +1 | +1 |
| Command | Start Up | Hit | Guard |
| Far |
11 | -10 | -10 |
| Command | Start Up | Hit | Guard |
| Far |
11 | -3 | -3 |
| Command | Start Up | Hit | Guard |
| 4 | +5 | +5 |
| Command | Start Up | Hit | Guard |
| 5 | +1 | +2 |
| Command | Start Up | Hit | Guard |
| 6 | -20 | -20 |
| Command | Start Up | Hit | Guard |
| 10 | KD | -14 |
| Command | Start Up | Hit | Guard |
| Jumping |
6 | ? | ? |
| Command | Start Up | Hit | Guard |
| Jumping |
3 | ? | ? |
| Command | Start Up | Hit | Guard |
| Jumping |
6 | ? | ? |
| Command | Start Up | Hit | Guard |
| Jumping |
7 | ? | ? |
| Command | Start Up | Hit | Guard |
| 18 | -1 | +5 |
| Command | Start Up | Hit | Guard |
| 10 | +1 | +7 |
| Command | Start Up | Hit | Guard |
| --- |
x | -12 | -6 |
| Command | Start Up | Hit | Guard |
| 7 | KD | -15 |
| Command | Start Up | Hit | Guard |
| 8 | KD | -13 |
| Command | Start Up | Hit | Guard |
| 10 | KD | -34 |
T.O.P. Notes
This is a rising attack that is good for one hit and travels at a 45 degree angle. It has a slow start and can be used as an anti-air. Don't ever get this attack blocked!
Basic Strategy
Hokutomaru is a mid-low tier character with all around moves based on speed moves.
His projectiles can be in ground or air, they are weaks but faster, his Kuuhadan its a good middle range anti air and also his blade move its quick and your main 2-in-1 combo meterless ender.
His corner game is one of his objetives due that their faint moves and breaks can be connected in a same corner combo, along with a command move that is your corner link.
His Super Move homage to Mai Shiranui its your anti air close combat tool and best corner combo ender, and the Projectile Spam Super Move its your midscreen combo ender.
He had low stamina as Hotaru or Freeman but his moves are useful to zone or rush, and his T.O.P. Attack its a bit awful.
Advanced Tactics
In-depth video lecture on Hokutomaru. Please use the timestamps to navigate the topics.
Matchup info
Rock Howard
 X
X 
5 - 5
(Slightly favorable matchup)
Kim Dong-Hwan
 X
X 
5 - 5
(Slightly unfavorable matchup)
Hotaru Futaba
 X
X 
5 - 5
(Slightly unfavorable matchup)
Marco Rodrigez
 X
X 
5 - 5
(Slightly unfavorable matchup)
Terry Bogard
 X
X 
5 - 5
(Slightly favorable matchup)
Kevin Rian
 X
X 
3 - 7
(Highly unfavorable matchup)
Freeman
 X
X 
5 - 5
(Slightly favorable matchup)
The Griffon
 X
X 
6 - 4
(Favorable matchup)
B. Jenet
 X
X 
3 - 7
(Highly unfavorable matchup)
Gato
 X
X 
3 - 7
(Highly unfavorable matchup)
Kim Jae Hoon
 X
X 
5 - 5
(Fair matchup)
Grant
 X
X 
4 - 6
(Unfavorable matchup)
Kain R. Heinlein
 X
X 
4 - 6
(Unfavorable matchup)
