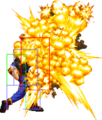
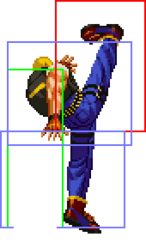
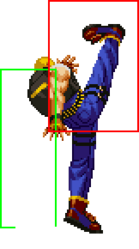
(Add damage into Movedata templates and remove old table) |
|||
| (29 intermediate revisions by 5 users not shown) | |||
| Line 1: | Line 1: | ||
{{MOTW Character Intro|char=Kevin |content= | |||
{{ | |||
==Introduction== | ==Introduction== | ||
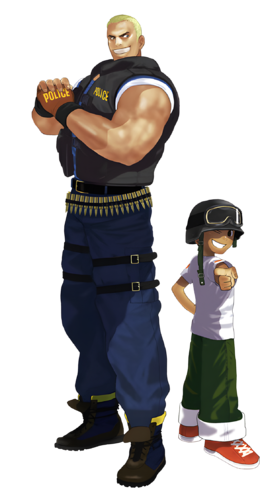
'''Kevin Rian''' | |||
>Got his knife removed during development because it created balance issues | |||
>Still Top 1 | |||
>Bingo! | |||
== Gameplay == | |||
{{Content Box|content= | |||
TBD | |||
{{ProConTable | |||
|pros= | |||
* '''Insane damage potential''' | |||
* '''Has arguably the best super in the game in Gatling Freezer D''' | |||
* '''The only character with a low-hitting break move''' | |||
* '''Best cr.AB in the game''' | |||
* '''One of the best, if not the best st.A in the game''' | |||
* '''Rotor cancel gives him the fastest meter build in the game and leads to more optimal combos than using feint cancels''' | |||
* '''Infinite corner blockstring that leads to guard crush''' | |||
* '''Higher guard crush gauge than average''' | |||
|cons= | |||
* '''Doesn't have the best guard cancels without meter (however it is possible for him to guard cancel then rotor cancel into a normal)''' | |||
* '''His most optimal combos and techniques require relatively high execution''' | |||
}} | |||
}} | |||
}} | |||
'''Character Colors''' | '''Character Colors''' | ||
| Line 28: | Line 38: | ||
==Move List== | ==Move List== | ||
Frame Data Source: https://w.atwiki.jp/garoumow/pages/30.html | Frame Data Source: https://w.atwiki.jp/garoumow/pages/30.html and https://w.atwiki.jp/garoumow/pages/74.html | ||
{{MOTW Legend}} | {{MOTW Legend}} | ||
Notes: | |||
* Special/Super moves with <span style="color:#ff0000;">"Guard" data in red text</span> are impossible to just defend at 0-pixel health bar. | |||
{| border="1em" cellspacing="0" style="border: 1px solid #999;" | |||
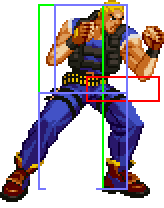
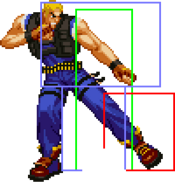
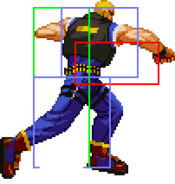
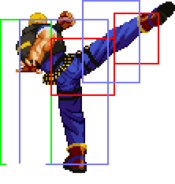
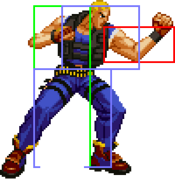
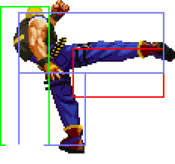
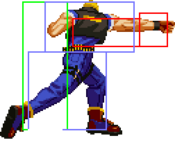
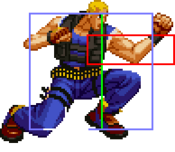
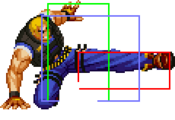
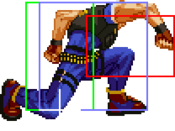
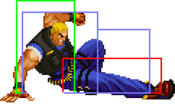
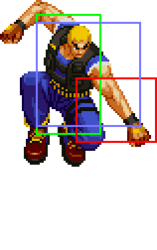
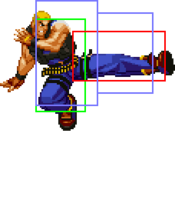
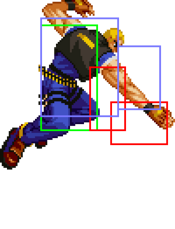
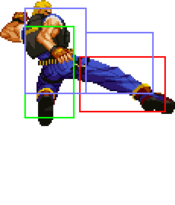
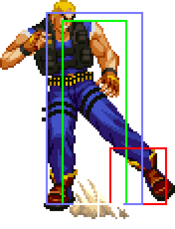
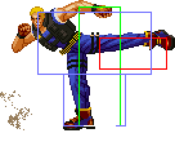
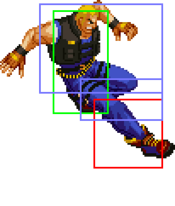
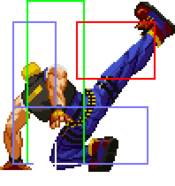
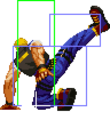
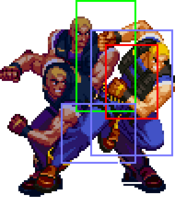
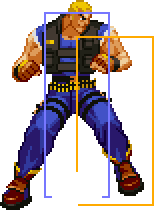
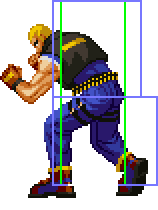
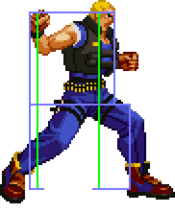
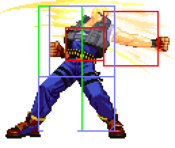
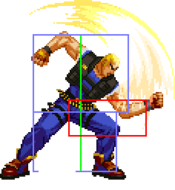
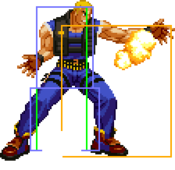
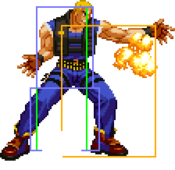
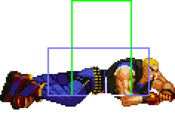
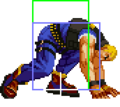
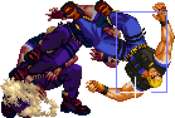
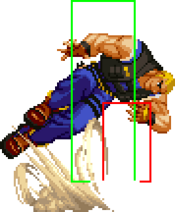
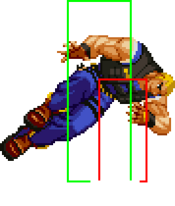
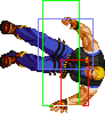
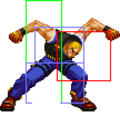
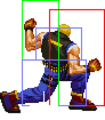
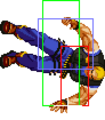
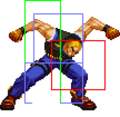
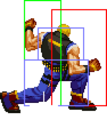
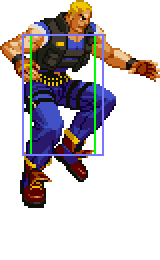
| align="center" | Standing/Taunting || align="center" | Crouching || align="center" | Dash || align="center" | Jumping | |||
|- | |||
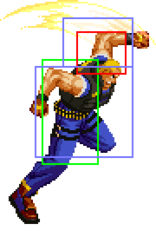
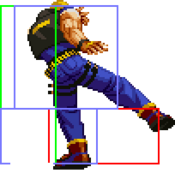
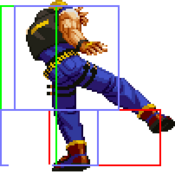
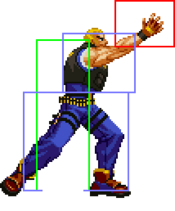
| align="center"; valign="bottom" | [[File:Garou Kevin Stand.png]] || align="center"; valign="bottom" | [[File:Garou Kevin Crouch.png|bottom]] || align="center"; valign="bottom" | [[File:Garou Kevin Dash.png]] || align="center"; valign="bottom" | [[File:Garou Kevin Jump.png]] | |||
|- | |||
| align="center" | || align="center" | || align="center" | || align="center" | 33F | |||
|} | |||
===Close Standing Normals=== | ===Close Standing Normals=== | ||
===== <span class="invisible-header"></span> ===== | |||
===== <span class="invisible-header">Close 5A</span> ===== | |||
<font style="visibility:hidden" size="0"></font> | <font style="visibility:hidden" size="0"></font> | ||
{{MoveData | {{MoveData | ||
|image= | |image=Garou_Kevin_c5A.png | ||
|name= | |name=c.5A | ||
|subtitle= | |subtitle= | ||
|caption= | |caption= | ||
|data= | |data= | ||
{{AttackData-Garou | {{AttackData-Garou | ||
|Damage= | |Damage=4 | ||
|Guard= | |Guard=Mid | ||
|Startup= | |Startup=4 | ||
|Active= | |Active=4 | ||
|Recovery= | |Recovery=9 | ||
|Total= | |Total=17 | ||
|Hit Adv= | |Hit Adv=+2 | ||
|Block Adv= | |Block Adv=+2 | ||
|Feint Cancel= | |Feint Cancel=◯ | ||
|Cancel on Hit= | |Cancel on Hit=◯ / ∞ | ||
|Cancel on Block= | |Cancel on Block=◯ / ∞ | ||
|Guard Crush Value= | |Guard Crush Value=4 | ||
|description=Standing jab. | |description=Standing jab. | ||
}} | }} | ||
}} | }} | ||
===== <span class="invisible-header"></span> ===== | |||
===== <span class="invisible-header">Close 5B</span> ===== | |||
<font style="visibility:hidden" size="0"></font> | <font style="visibility:hidden" size="0"></font> | ||
{{MoveData | {{MoveData | ||
|image= | |image=Garou_Kevin_c5B.png | ||
|name= | |name=c.5B | ||
|subtitle= | |subtitle= | ||
|caption= | |caption= | ||
|data= | |data= | ||
{{AttackData-Garou | {{AttackData-Garou | ||
|Damage= | |Damage=6 | ||
|Guard= | |Guard=Mid | ||
|Startup= | |Startup=4 | ||
|Active= | |Active=3 | ||
|Recovery= | |Recovery=10 | ||
|Total= | |Total=17 | ||
|Hit Adv= | |Hit Adv=+2 | ||
|Block Adv= | |Block Adv=+2 | ||
|Feint Cancel= | |Feint Cancel=◯ | ||
|Cancel on Hit= | |Cancel on Hit=◯ / ∞ | ||
|Cancel on Block= | |Cancel on Block=◯ / ∞ | ||
|Guard Crush Value= | |Guard Crush Value=4 | ||
|description= | |description= | ||
}} | }} | ||
}} | }} | ||
===== <span class="invisible-header"></span> ===== | |||
===== <span class="invisible-header">Close 5C</span> ===== | |||
<font style="visibility:hidden" size="0"></font> | <font style="visibility:hidden" size="0"></font> | ||
{{MoveData | {{MoveData | ||
|image= | |image=Garou_Kevin_c5C.png | ||
|name= | |name=c.5C | ||
|subtitle= | |subtitle= | ||
|caption= | |caption= | ||
|data= | |data= | ||
{{AttackData-Garou | {{AttackData-Garou | ||
|Damage= | |Damage=10 | ||
|Guard= | |Guard=Mid | ||
|Startup= | |Startup=6 | ||
|Active= | |Active=1 | ||
|Recovery= | |Recovery=29 | ||
|Total= | |Total=36 | ||
|Hit Adv= | |Hit Adv=-9 | ||
|Block Adv= | |Block Adv=-9 | ||
|Feint Cancel= | |Feint Cancel=◯ | ||
|Cancel on Hit= | |Cancel on Hit=◯ | ||
|Cancel on Block= | |Cancel on Block=◯ | ||
|Guard Crush Value= | |Guard Crush Value=5 | ||
|description= | |description= | ||
}} | }} | ||
}} | }} | ||
===== <span class="invisible-header"></span> ===== | |||
===== <span class="invisible-header">Close 5D</span> ===== | |||
<font style="visibility:hidden" size="0"></font> | <font style="visibility:hidden" size="0"></font> | ||
{{MoveData | {{MoveData | ||
|image= | |image=Garou_Kevin_5D.png | ||
|name= | |name=c.5D | ||
|subtitle= | |subtitle= | ||
|caption= | |caption= | ||
|data= | |data= | ||
{{AttackData-Garou | {{AttackData-Garou | ||
|Damage= | |Damage=14 | ||
|Guard= | |Guard=Mid | ||
|Startup= | |Startup=11 | ||
|Active= | |Active=3 | ||
|Recovery= | |Recovery=27 | ||
|Total= | |Total=41 | ||
|Hit Adv= | |Hit Adv=-9 | ||
|Block Adv= | |Block Adv=-9 | ||
|Feint Cancel= | |Feint Cancel=△ | ||
|Cancel on Hit= | |Cancel on Hit=X | ||
|Cancel on Block= | |Cancel on Block=◯ | ||
|Guard Crush Value= | |Guard Crush Value=5 | ||
|description= | |description= | ||
}} | }} | ||
}} | }} | ||
===Far Standing Normals=== | ===Far Standing Normals=== | ||
===== <span class="invisible-header"></span> ===== | |||
===== <span class="invisible-header">Far 5A</span> ===== | |||
<font style="visibility:hidden" size="0"></font> | |||
{{MoveData | |||
|image=Garou_Kevin_f5A.png | |||
|name=f.5A | |||
|subtitle= | |||
|caption= | |||
|data= | |||
{{AttackData-Garou | |||
|Damage=5 | |||
|Guard=Mid | |||
|Startup=3 | |||
|Active=3 | |||
|Recovery=10 | |||
|Total=16 | |||
|Hit Adv=+2 | |||
|Block Adv=+2 | |||
|Feint Cancel=◯ | |||
|Cancel on Hit=◯ / ∞ | |||
|Cancel on Block=◯ / ∞ | |||
|Guard Crush Value=4 | |||
|description= | |||
}} | |||
}} | |||
===== <span class="invisible-header">Far 5B</span> ===== | |||
<font style="visibility:hidden" size="0"></font> | |||
{{MoveData | |||
|image=Garou_Kevin_f5B.png | |||
|name=f.5B | |||
|subtitle= | |||
|caption= | |||
|data= | |||
{{AttackData-Garou | |||
|Damage=7 | |||
|Guard=Mid | |||
|Startup=9 | |||
|Active=4 | |||
|Recovery=17 | |||
|Total=30 | |||
|Hit Adv=-6 | |||
|Block Adv=-6 | |||
|Feint Cancel=X | |||
|Cancel on Hit=X | |||
|Cancel on Block=X | |||
|Guard Crush Value=4 | |||
|description= | |||
}} | |||
}} | |||
===== <span class="invisible-header">Far 5C</span> ===== | |||
<font style="visibility:hidden" size="0"></font> | <font style="visibility:hidden" size="0"></font> | ||
{{MoveData | {{MoveData | ||
|image= | |image=Garou_Kevin_f5C.png | ||
|name= | |name=f.5C | ||
|subtitle= | |subtitle= | ||
|caption= | |caption= | ||
|data= | |data= | ||
{{AttackData-Garou | {{AttackData-Garou | ||
|Damage= | |Damage=11 | ||
|Guard= | |Guard=Mid | ||
|Startup= | |Startup=11 | ||
|Active= | |Active=4 | ||
|Recovery= | |Recovery=28 | ||
|Total= | |Total=43 | ||
|Hit Adv= | |Hit Adv=-11 | ||
|Block Adv= | |Block Adv=-11 | ||
|Feint Cancel= | |Feint Cancel=X | ||
|Cancel on Hit= | |Cancel on Hit=X | ||
|Cancel on Block= | |Cancel on Block=X | ||
|Guard Crush Value= | |Guard Crush Value=10 | ||
|description= | |||
}} | |||
}} | |||
===== <span class="invisible-header">Far 5D</span> ===== | |||
<font style="visibility:hidden" size="0"></font> | |||
{{MoveData | |||
|image=Garou_Kevin_5D.png | |||
|name=f.5D | |||
|subtitle= | |||
|caption= | |||
|data= | |||
{{AttackData-Garou | |||
|Damage=14 | |||
|Guard=Mid | |||
|Startup=11 | |||
|Active=3 | |||
|Recovery=27 | |||
|Total=41 | |||
|Hit Adv=-9 | |||
|Block Adv=-9 | |||
|Feint Cancel=△ | |||
|Cancel on Hit=X | |||
|Cancel on Block=◯ | |||
|Guard Crush Value=5 | |||
|description= | |||
}} | |||
}} | |||
===Crouching Normals=== | |||
===== <span class="invisible-header">2A</span> ===== | |||
<font style="visibility:hidden" size="0"></font> | |||
{{MoveData | |||
|image=Garou_Kevin_2A.png | |||
|name=2A | |||
|subtitle= | |||
|caption= | |||
|data= | |||
{{AttackData-Garou | |||
|Damage=4 | |||
|Guard=Mid | |||
|Startup=4 | |||
|Active=3 | |||
|Recovery=10 | |||
|Total=17 | |||
|Hit Adv=+2 | |||
|Block Adv=+2 | |||
|Feint Cancel=◯ | |||
|Cancel on Hit=◯ / ∞ | |||
|Cancel on Block=◯ / ∞ | |||
|Guard Crush Value=4 | |||
|description= | |description= | ||
}} | }} | ||
}} | }} | ||
===== <span class="invisible-header"></span> ===== | |||
===== <span class="invisible-header">2B</span> ===== | |||
<font style="visibility:hidden" size="0"></font> | <font style="visibility:hidden" size="0"></font> | ||
{{MoveData | {{MoveData | ||
|image= | |image=Garou_Kevin_2B.png | ||
|name= | |name=2B | ||
|subtitle= | |subtitle= | ||
|caption= | |caption= | ||
|data= | |data= | ||
{{AttackData-Garou | {{AttackData-Garou | ||
|Damage= | |Damage=6 | ||
|Guard= | |Guard=Low | ||
|Startup= | |Startup=5 | ||
|Active= | |Active=3 | ||
|Recovery= | |Recovery=10 | ||
|Total= | |Total=18 | ||
|Hit Adv= | |Hit Adv=+2 | ||
|Block Adv= | |Block Adv=+2 | ||
|Feint Cancel=No | |Feint Cancel=No | ||
|Cancel on Hit=No | |Cancel on Hit=No | ||
|Cancel on Block=No | |Cancel on Block=No | ||
|Guard Crush Value= | |Guard Crush Value=4 | ||
|description= | |description= | ||
}} | }} | ||
}} | }} | ||
===== <span class="invisible-header"></span> ===== | |||
===== <span class="invisible-header">2C</span> ===== | |||
<font style="visibility:hidden" size="0"></font> | <font style="visibility:hidden" size="0"></font> | ||
{{MoveData | {{MoveData | ||
|image= | |image=Garou_Kevin_2C.png | ||
|name= | |name=2C | ||
|subtitle= | |subtitle= | ||
|caption= | |caption= | ||
|data= | |data= | ||
{{AttackData-Garou | {{AttackData-Garou | ||
|Damage= | |Damage=9 | ||
|Guard= | |Guard=Mid | ||
|Startup= | |Startup=6 | ||
|Active= | |Active=3 | ||
|Recovery= | |Recovery=25 | ||
|Total= | |Total=34 | ||
|Hit Adv= | |Hit Adv=-7 | ||
|Block Adv= | |Block Adv=-7 | ||
|Feint Cancel= | |Feint Cancel=◯ | ||
|Cancel on Hit= | |Cancel on Hit=◯ | ||
|Cancel on Block= | |Cancel on Block=◯ | ||
|Guard Crush Value= | |Guard Crush Value=5 | ||
|description= | |description= | ||
}} | }} | ||
}} | }} | ||
===== <span class="invisible-header"></span> ===== | |||
===== <span class="invisible-header">2D</span> ===== | |||
<font style="visibility:hidden" size="0"></font> | <font style="visibility:hidden" size="0"></font> | ||
{{MoveData | {{MoveData | ||
|image= | |image=Garou_Kevin_2D.png | ||
|name= | |name=2D | ||
|subtitle= | |subtitle= | ||
|caption= | |caption= | ||
|data= | |data= | ||
{{AttackData-Garou | {{AttackData-Garou | ||
|Damage= | |Damage=10 | ||
|Guard= | |Guard=Low | ||
|Startup= | |Startup=7 | ||
|Active= | |Active=2 | ||
|Recovery= | |Recovery=31 | ||
|Total= | |Total=40 | ||
|Hit Adv= | |Hit Adv=KD | ||
|Block Adv= | |Block Adv=-12 | ||
|Feint Cancel= | |Feint Cancel=X | ||
|Cancel on Hit= | |Cancel on Hit=X | ||
|Cancel on Block= | |Cancel on Block=X | ||
|Guard Crush Value= | |Guard Crush Value=5 | ||
|description= | |description= | ||
}} | }} | ||
}} | }} | ||
=== | |||
===== <span class="invisible-header"></span> ===== | |||
===Jumping Normals=== | |||
===== <span class="invisible-header">jA</span> ===== | |||
<font style="visibility:hidden" size="0"></font> | <font style="visibility:hidden" size="0"></font> | ||
{{MoveData | {{MoveData | ||
|image= | |image=Garou_Kevin_jA.png | ||
|name= | |name=j.A | ||
|subtitle= | |subtitle= | ||
|caption= | |caption= | ||
|data= | |data= | ||
{{AttackData-Garou | {{AttackData-Garou | ||
|Damage= | |Damage=6 | ||
|Guard= | |Guard=High | ||
|Startup= | |Startup=4 | ||
|Active= | |Active=9 | ||
|Recovery= | |Recovery= | ||
|Total= | |Total= | ||
|Hit Adv= | |Hit Adv= | ||
|Block Adv= | |Block Adv= | ||
|Feint Cancel= | |Feint Cancel= | ||
|Cancel on Hit= | |Cancel on Hit=X | ||
|Cancel on Block= | |Cancel on Block=X | ||
|Guard Crush Value= | |Guard Crush Value=4 | ||
|description= | |description= | ||
}} | }} | ||
}} | }} | ||
===== <span class="invisible-header"></span> ===== | |||
===== <span class="invisible-header">jB</span> ===== | |||
<font style="visibility:hidden" size="0"></font> | <font style="visibility:hidden" size="0"></font> | ||
{{MoveData | {{MoveData | ||
|image= | |image=Garou_Kevin_jB.png | ||
|name= | |name=j.B | ||
|subtitle= | |subtitle= | ||
|caption= | |caption= | ||
|data= | |data= | ||
{{AttackData-Garou | {{AttackData-Garou | ||
|Damage= | |Damage=6 | ||
|Guard= | |Guard=High | ||
|Startup= | |Startup=6 | ||
|Active= | |Active=8 | ||
|Recovery= | |Recovery= | ||
|Total= | |Total= | ||
|Hit Adv= | |Hit Adv= | ||
|Block Adv= | |Block Adv= | ||
|Feint Cancel= | |Feint Cancel= | ||
|Cancel on Hit= | |Cancel on Hit=X | ||
|Cancel on Block= | |Cancel on Block=X | ||
|Guard Crush Value= | |Guard Crush Value=4 | ||
|description= | |description= | ||
}} | }} | ||
}} | }} | ||
===== <span class="invisible-header"></span> ===== | |||
===== <span class="invisible-header">jC</span> ===== | |||
<font style="visibility:hidden" size="0"></font> | <font style="visibility:hidden" size="0"></font> | ||
{{MoveData | {{MoveData | ||
|image= | |image=Garou_Kevin_jC.png | ||
|name= | |name=j.C | ||
|subtitle= | |subtitle= | ||
|caption= | |caption= | ||
|data= | |data= | ||
{{AttackData-Garou | {{AttackData-Garou | ||
|Damage= | |Damage=10 | ||
|Guard= | |Guard=High | ||
|Startup= | |Startup=9 | ||
|Active= | |Active=6 | ||
|Recovery= | |Recovery= | ||
|Total= | |Total= | ||
|Hit Adv= | |Hit Adv= | ||
|Block Adv= | |Block Adv= | ||
|Feint Cancel= | |Feint Cancel= | ||
|Cancel on Hit= | |Cancel on Hit=X | ||
|Cancel on Block= | |Cancel on Block=X | ||
|Guard Crush Value= | |Guard Crush Value=5 | ||
|description= | |description= Small Jump C has 9 damage. | ||
}} | }} | ||
}} | }} | ||
===== <span class="invisible-header"></span> ===== | |||
===== <span class="invisible-header">jD</span> ===== | |||
<font style="visibility:hidden" size="0"></font> | <font style="visibility:hidden" size="0"></font> | ||
{{MoveData | {{MoveData | ||
|image= | |image=Garou_Kevin_jD.png | ||
|name= | |name=j.D | ||
|subtitle= | |subtitle= | ||
|caption= | |caption= | ||
|data= | |data= | ||
{{AttackData-Garou | {{AttackData-Garou | ||
|Damage= | |Damage=10 | ||
|Guard= | |Guard=High | ||
|Startup= | |Startup=12 | ||
|Active= | |Active=6 | ||
|Recovery= | |Recovery= | ||
|Total= | |Total= | ||
|Hit Adv= | |Hit Adv= | ||
|Block Adv= | |Block Adv= | ||
|Feint Cancel= | |Feint Cancel= | ||
|Cancel on Hit= | |Cancel on Hit=X | ||
|Cancel on Block= | |Cancel on Block=X | ||
|Guard Crush Value= | |Guard Crush Value=5 | ||
|description= Small Jump D has 9 damage. | |||
}} | |||
}} | |||
===Command Normals=== | |||
===== <span class="invisible-header">Poli-Kick (6B)</span> ===== | |||
<font style="visibility:hidden" size="0"></font> | |||
{{MoveData | |||
|image=Garou_Kevin_6B.png | |||
|image2=Garou_Kevin_6B_1.png | |||
|name=Poli-Kick | |||
|input=6B | |||
|subtitle= | |||
|caption= | |||
|data= | |||
{{AttackData-Garou | |||
|Damage=6, 6 | |||
|Guard=Low, Mid | |||
|Startup=7 | |||
|Active=2, 《14》, 7 | |||
|Recovery=16 | |||
|Total=46 | |||
|Hit Adv=-2 | |||
|Block Adv=-2 | |||
|Feint Cancel=X | |||
|Cancel on Hit=X | |||
|Cancel on Block=X | |||
|Guard Crush Value=4, 4 | |||
|description= | |description= | ||
}} | }} | ||
}} | }} | ||
=== | |||
===== <span class="invisible-header"></span> ===== | |||
===Universal Moves=== | |||
===== <span class="invisible-header">Lower-body Evasion Attack (5AB)</span> ===== | |||
<font style="visibility:hidden" size="0"></font> | |||
{{MoveData | |||
|image=Garou_Kevin_5AB.png | |||
|name=5A+B | |||
|subtitle=Lower-body evasion attack | |||
|caption= | |||
|data= | |||
{{AttackData-Garou | |||
|Damage=10 | |||
|Guard=Overhead | |||
|Startup=22 | |||
|Active=6 | |||
|Recovery=13 | |||
|Total=41 | |||
|Hit Adv=0 | |||
|Block Adv=+6 | |||
|Feint Cancel=X | |||
|Cancel on Hit=X | |||
|Cancel on Block=X | |||
|Guard Crush Value=6 | |||
|description= Overhead. | |||
<div class="mw-collapsible"> | |||
<gallery> | |||
Garou_Kevin_5AB 1.png|Frame 1 Lower-Body Invincibility | |||
</gallery> | |||
</div> | |||
}} | |||
}} | |||
===== <span class="invisible-header">Upper-body Evasion Attack (2AB)</span> ===== | |||
<font style="visibility:hidden" size="0"></font> | |||
{{MoveData | |||
|image=Garou_Kevin_2AB.png | |||
|name=2A+B | |||
|subtitle=Upper-body evasion attack | |||
|caption= | |||
|data= | |||
{{AttackData-Garou | |||
|Damage=10 | |||
|Guard=Mid | |||
|Startup=8 | |||
|Active=3 | |||
|Recovery=22 | |||
|Total=33 | |||
|Hit Adv=-6 | |||
|Block Adv=0 | |||
|Feint Cancel=▽ | |||
|Cancel on Hit=◯ | |||
|Cancel on Block=X | |||
|Guard Crush Value=6 | |||
|description= 1~8F upper-body invincibility | |||
Kevin has the only 2AB in the game that doesn't expose a hurtbox before being active, | |||
which makes it much more reliable. | |||
Every other characters has a hurtbox that appears before being active, | |||
so if an active hitbox was there (ex: jump ins, delayed normals), | |||
they get hit even if the move didn't hit the low part. | |||
In this situation the worst case scenario for Kevin is a trade, | |||
for everyone else it's a full combo. | |||
<div class="mw-collapsible"> | |||
<gallery> | |||
Garou_Kevin_2AB_1.png|Startup | |||
Garou_Kevin_2AB_2.png|Recovery | |||
</gallery> | |||
</div> | |||
}} | |||
}} | |||
===== <span class="invisible-header">T.O.P. Attack (CD)</span> ===== | |||
<font style="visibility:hidden" size="0"></font> | <font style="visibility:hidden" size="0"></font> | ||
{{MoveData | {{MoveData | ||
|image= | |image=Garou_Kevin_5CD.png | ||
|name= | |name=Blast Charge (T.O.P. Attack) | ||
|input=C+D (T.O.P. Only) | |||
|subtitle= | |subtitle= | ||
|caption= | |caption= | ||
|data= | |data= | ||
{{AttackData-Garou | {{AttackData-Garou | ||
|Damage= | |Damage=7x3 (base damage) | ||
|Guard= | |Guard=Mid | ||
|Startup= | |Startup=10 | ||
|Active= | |Active= | ||
|Recovery= | |Recovery= | ||
|Total= | |Total= | ||
|Hit Adv= | |Hit Adv=KD | ||
|Block Adv= | |Block Adv=-5 | ||
|Feint Cancel= | |Feint Cancel= | ||
|Cancel on Hit= | |Cancel on Hit= | ||
|Cancel on Block= | |Cancel on Block= | ||
|Guard Crush Value= | |Guard Crush Value=9×3 | ||
|description= | |description= | ||
<div class="mw-collapsible"> | |||
<gallery> | |||
Garou_Kevin_5CD_1.png| | |||
Garou_Kevin_5CD_2.png| | |||
</gallery> | |||
</div> | |||
}} | }} | ||
}} | }} | ||
===== <span class="invisible-header"></span> ===== | ===Throws=== | ||
===== <span class="invisible-header">Ground Throw</span> ===== | |||
<font style="visibility:hidden" size="0"></font> | <font style="visibility:hidden" size="0"></font> | ||
{{MoveData | {{MoveData | ||
|image= | |image=Garou_Kevin_Grab.png | ||
|name= | |name=Poli-Throw | ||
|input='''Close''' 4/6C | |||
|subtitle= | |subtitle= | ||
|caption= | |caption= | ||
|data= | |data= | ||
{{AttackData-Garou | {{AttackData-Garou | ||
|Damage= | |Damage=14 | ||
|Guard= | |Guard= | ||
|Startup= | |Startup=1 | ||
|Active= | |Active= | ||
|Recovery= | |Recovery= | ||
|Total= | |Total= | ||
|Hit Adv= | |Hit Adv=+48 | ||
|Block Adv= | |Block Adv= | ||
|Feint Cancel= | |Feint Cancel= | ||
| Line 382: | Line 658: | ||
|Cancel on Block= | |Cancel on Block= | ||
|Guard Crush Value= | |Guard Crush Value= | ||
|description= | |description= Normal throw. | ||
}} | }} | ||
}} | }} | ||
===== <span class="invisible-header"></span> ===== | |||
===Feints=== | |||
===== <span class="invisible-header">Forward Feint (6AC)</span> ===== | |||
<font style="visibility:hidden" size="0"></font> | <font style="visibility:hidden" size="0"></font> | ||
{{MoveData | {{MoveData | ||
|image= | |image=Garou_Kevin_6AC.png | ||
|name= | |name=6A+C | ||
|subtitle= | |subtitle=Forward Feint | ||
|caption= | |caption= | ||
|data= | |data= | ||
| Line 400: | Line 680: | ||
|Active= | |Active= | ||
|Recovery= | |Recovery= | ||
|Total= | |Total=10 | ||
|Hit Adv= | |Hit Adv= | ||
|Block Adv= | |Block Adv= | ||
| Line 407: | Line 687: | ||
|Cancel on Block= | |Cancel on Block= | ||
|Guard Crush Value= | |Guard Crush Value= | ||
|description= | |description= Mimics the start of Hell Rotor. | ||
}} | }} | ||
}} | }} | ||
===== <span class="invisible-header"></span> ===== | |||
===== <span class="invisible-header">Down Feint (2AC)</span> ===== | |||
<font style="visibility:hidden" size="0"></font> | <font style="visibility:hidden" size="0"></font> | ||
{{MoveData | {{MoveData | ||
|image= | |image=Garou_Kevin_2AC.png | ||
|name= | |name=2A+C | ||
|subtitle= | |subtitle=Down Feint | ||
|caption= | |caption= | ||
|data= | |data= | ||
| Line 425: | Line 707: | ||
|Active= | |Active= | ||
|Recovery= | |Recovery= | ||
|Total= | |Total=11 | ||
|Hit Adv= | |Hit Adv= | ||
|Block Adv= | |Block Adv= | ||
| Line 432: | Line 714: | ||
|Cancel on Block= | |Cancel on Block= | ||
|Guard Crush Value= | |Guard Crush Value= | ||
|description= | |description= Mimics the start of cl.5C or f.5C. | ||
}} | }} | ||
}} | }} | ||
=== | |||
===== <span class="invisible-header"></span> ===== | |||
===Special Moves=== | |||
===== <span class="invisible-header">Hell Rotor (214P)</span> ===== | |||
<font style="visibility:hidden" size="0"></font> | <font style="visibility:hidden" size="0"></font> | ||
{{MoveData | {{MoveData | ||
|image= | |image=Garou Kevin 214A.png | ||
| | |caption=A | ||
|image2=Garou Kevin 214C.png | |||
|caption2=C | |||
|name=Hell Rotor | |||
|input=214A/C | |||
|subtitle= | |subtitle= | ||
|data= | |data= | ||
{{AttackData-Garou | {{AttackData-Garou | ||
|Damage= | |version=A Lvl.1 | ||
|Guard= | |Damage=14 | ||
|Startup= | |Guard=<span style="color:#ff0000;">Mid</span> | ||
|Active= | |Startup=14 | ||
|Active=2 | |||
|Recovery= | |||
|Total= | |||
|Hit Adv=-1 | |||
|Block Adv=-1 | |||
|Feint Cancel= | |||
|Cancel on Hit= | |||
|Cancel on Block= | |||
|Guard Crush Value=7 | |||
|description= No charge. (Charge can't be held past 1~9F of startup.) | |||
}} | |||
{{AttackData-Garou | |||
|version=[A] Lvl.2 | |||
|Damage=20 | |||
|Guard=<span style="color:#ff0000;">Mid</span> | |||
|Startup=15-34 | |||
|Active=2 | |||
|Recovery= | |||
|Total= | |||
|Hit Adv=KD | |||
|Block Adv=-14 | |||
|Feint Cancel= | |||
|Cancel on Hit= | |||
|Cancel on Block= | |||
|Guard Crush Value=8~10 | |||
|description= Charge held past 9 frames of startup, between the window of 10~29F of startup (20 frame window). (How long you hold increases the startup by that amount.) | |||
}} | |||
{{AttackData-Garou | |||
|version=[A] Lvl.3 | |||
|Damage=26 | |||
|Guard=<span style="color:#ff0000;">Mid</span> | |||
|Startup=35-66 | |||
|Active=2 | |||
|Recovery= | |||
|Total= | |||
|Hit Adv=KD | |||
|Block Adv=-14 | |||
|Feint Cancel= | |||
|Cancel on Hit= | |||
|Cancel on Block= | |||
|Guard Crush Value=8~10 | |||
|description= Charge held past 29 frames of startup, between the window of 30~61F (max) of startup (32 frame window). (How long you hold increases the startup by that amount.) | |||
}} | |||
{{AttackData-Garou | |||
|version=C Lvl.1 | |||
|Damage=15 | |||
|Guard=<span style="color:#ff0000;">Overhead</span> | |||
|Startup=20 | |||
|Active=3 | |||
|Recovery= | |||
|Total= | |||
|Hit Adv=KD | |||
|Block Adv=-8 | |||
|Feint Cancel= | |||
|Cancel on Hit= | |||
|Cancel on Block= | |||
|Guard Crush Value=7 | |||
|description= No charge. (Charge can't be held past 1~15F of startup.) | |||
}} | |||
{{AttackData-Garou | |||
|version=[C] Lvl.2 | |||
|Damage=19 | |||
|Guard=<span style="color:#ff0000;">Overhead</span> | |||
|Startup=21-40 | |||
|Active=3 | |||
|Recovery= | |||
|Total= | |||
|Hit Adv=KD | |||
|Block Adv=-8 | |||
|Feint Cancel= | |||
|Cancel on Hit= | |||
|Cancel on Block= | |||
|Guard Crush Value=8 | |||
|description= Charge held past 15 frames of startup, between the window of 16~35F of startup (20 frame window). (How long you hold increases the startup by that amount.) | |||
}} | |||
{{AttackData-Garou | |||
|version=C Lvl.3 | |||
|Damage=23 | |||
|Guard=<span style="color:#ff0000;">Overhead</span> | |||
|Startup=41-72 | |||
|Active=3 | |||
|Recovery= | |Recovery= | ||
|Total= | |Total= | ||
|Hit Adv= | |Hit Adv=KD | ||
|Block Adv= | |Block Adv=-8 | ||
|Feint Cancel= | |Feint Cancel= | ||
|Cancel on Hit= | |Cancel on Hit= | ||
|Cancel on Block= | |Cancel on Block= | ||
|Guard Crush Value= | |Guard Crush Value=10 | ||
|description= | |description= Charge held past 35 frames of startup, between the window of 36~67F of startup (32 frame window). (How long you hold increases the startup by that amount.) | ||
}} | }} | ||
}} | }} | ||
===== <span class="invisible-header"></span> ===== | ===== <span class="invisible-header">Hell Arrest (41236P)</span> ===== | ||
<font style="visibility:hidden" size="0"></font> | <font style="visibility:hidden" size="0"></font> | ||
{{MoveData | {{MoveData | ||
|image= | |image=Garou Kevin 41236A.png | ||
| | |caption=A | ||
|image2=Garou Kevin 41236C.png | |||
|caption2=C | |||
|name=Hell Arrest | |||
|input= 41236A/C | |||
|subtitle= | |subtitle= | ||
|data= | |data= | ||
{{AttackData-Garou | {{AttackData-Garou | ||
|Damage= | |version=A | ||
|Damage=10, 10 | |||
|Guard= | |Guard= | ||
|Startup= | |Startup=8 | ||
|Active= | |Active= | ||
|Recovery= | |Recovery= | ||
|Total= | |Total= | ||
|Hit Adv= | |Hit Adv=KD | ||
|Block Adv= | |Block Adv= | ||
|Feint Cancel= | |Feint Cancel= | ||
|Cancel on Hit= | |Cancel on Hit= | ||
|Cancel on Block= | |Cancel on Block= | ||
|Guard Crush Value= | |Guard Crush Value= | ||
|description= | |description= | ||
}} | }} | ||
{{AttackData-Garou | {{AttackData-Garou | ||
|Damage= | |version=C | ||
|Damage=12, 12 | |||
|Guard= | |Guard= | ||
|Startup= | |Startup=9 | ||
|Active= | |Active= | ||
|Recovery= | |Recovery= | ||
|Total= | |Total= | ||
|Hit Adv= | |Hit Adv=KD | ||
|Block Adv= | |Block Adv= | ||
|Feint Cancel= | |Feint Cancel= | ||
| Line 512: | Line 876: | ||
}} | }} | ||
===== <span class="invisible-header"></span> ===== | |||
===== <span class="invisible-header">Creeper (214B)</span> ===== | |||
<font style="visibility:hidden" size="0"></font> | <font style="visibility:hidden" size="0"></font> | ||
{{MoveData | {{MoveData | ||
|image= | |image=Garou Kevin 214B.png | ||
|name= | |name=Creeper | ||
|input= | |input= 214B | ||
|subtitle= | |subtitle= | ||
|caption= | |caption= | ||
|data= | |data= | ||
{{AttackData-Garou | {{AttackData-Garou | ||
|header=no | |||
|version= B | |||
|Damage= | |Damage= | ||
|Guard= | |Guard= | ||
| Line 530: | Line 898: | ||
|Hit Adv= | |Hit Adv= | ||
|Block Adv= | |Block Adv= | ||
|Feint Cancel= | |Feint Cancel= | ||
|Cancel on Hit= | |Cancel on Hit= | ||
|Cancel on Block= | |Cancel on Block= | ||
|Guard Crush Value= | |||
|description=Kevin advances forward with a low-profile crawl. Can be cancelled into 3 follow-ups. | |||
}} | |||
{{AttackData-Garou | |||
|version= B>A | |||
|subtitle= | |||
|Damage=20 | |||
|Guard=Low | |||
|Startup=9 | |||
|Active= | |||
|Recovery= | |||
|Total= | |||
|Hit Adv=KD | |||
|Block Adv=-11 | |||
|Feint Cancel= | |||
|Cancel on Hit= | |||
|Cancel on Block= | |||
|Guard Crush Value=7 | |||
|description=Low follow-up | |||
<div class="mw-collapsible"> | |||
<gallery> | |||
Garou_Kevin_214B_1.png| | |||
</gallery> | |||
</div> | |||
}} | |||
{{AttackData-Garou | |||
|version= B>B | |||
|subtitle= | |||
|Damage=20 | |||
|Guard=Overhead | |||
|Startup=17 | |||
|Active= | |||
|Recovery= | |||
|Total= | |||
|Hit Adv=KD | |||
|Block Adv=-10 | |||
|Feint Cancel= | |||
|Cancel on Hit= | |||
|Cancel on Block= | |||
|Guard Crush Value=7 | |||
|description=Overhead follow-up | |||
<div class="mw-collapsible"> | |||
<gallery> | |||
Garou_Kevin_214B_2.png| | |||
</gallery> | |||
</div> | |||
}} | |||
{{AttackData-Garou | |||
|version= B>C | |||
|subtitle= | |||
|Damage=0 | |||
|Guard= | |||
|Startup= | |||
|Active= | |||
|Recovery= | |||
|Total=7 | |||
|Hit Adv= | |||
|Block Adv= | |||
|Feint Cancel= | |||
|Cancel on Hit= | |||
|Cancel on Block= | |||
|Guard Crush Value= | |Guard Crush Value= | ||
|description= | |description=Cancels Creeper. | ||
<div class="mw-collapsible"> | |||
<gallery> | |||
Garou_Kevin_214B_3.png| | |||
</gallery> | |||
</div> | |||
}} | }} | ||
}} | }} | ||
===== <span class="invisible-header"></span> ===== | |||
===== <span class="invisible-header">Abide Mine (214D)</span> ===== | |||
<font style="visibility:hidden" size="0"></font> | <font style="visibility:hidden" size="0"></font> | ||
{{MoveData | {{MoveData | ||
|image= | |image=Garou Kevin 214D.png | ||
|name= | |name=Abide Mine | ||
|input= 214D | |||
|subtitle= | |subtitle= | ||
|caption= | |caption= | ||
|data= | |data= | ||
{{AttackData-Garou | {{AttackData-Garou | ||
|Damage= | |version=D | ||
|Damage=0 | |||
|Guard= | |Guard= | ||
|Startup= | |Startup= | ||
|Active= | |Active= | ||
|Recovery= | |Recovery= | ||
|Total= | |Total=32 | ||
|Hit Adv= | |Hit Adv= | ||
|Block Adv= | |Block Adv= | ||
| Line 560: | Line 997: | ||
|Cancel on Block= | |Cancel on Block= | ||
|Guard Crush Value= | |Guard Crush Value= | ||
|description= | |description= 1~11F full-body invincibility. 12~20F airborne hurtbox. | ||
}} | }} | ||
}} | }} | ||
===== <span class="invisible-header"></span> ===== | |||
===== <span class="invisible-header">Hell Snipe (623P)</span> ===== | |||
<font style="visibility:hidden" size="0"></font> | <font style="visibility:hidden" size="0"></font> | ||
{{MoveData | {{MoveData | ||
|image= | |image=Garou Kevin 623A.png | ||
| | |caption=A | ||
|image2=Garou Kevin 623C.png | |||
|caption2=C | |||
|name=Hell Snipe | |||
|input= 623A/C | |||
|subtitle= | |subtitle= | ||
|data= | |data= | ||
{{AttackData-Garou | {{AttackData-Garou | ||
|Damage= | |version=A | ||
|Guard= | |Damage=15 | ||
|Startup= | |Guard=Mid | ||
|Startup=15 | |||
|Active= | |||
|Recovery= | |||
|Total= | |||
|Hit Adv=0 | |||
|Block Adv=-1 | |||
|Feint Cancel= | |||
|Cancel on Hit= | |||
|Cancel on Block= | |||
|Guard Crush Value=7 | |||
|description= 1~4F full-body invincibility. | |||
<div class="mw-collapsible"> | |||
<gallery> | |||
Garou_Kevin_623A_1.png| | |||
</gallery> | |||
</div> | |||
}} | |||
{{AttackData-Garou | |||
|version=C | |||
|Damage=16 | |||
|Guard=Mid | |||
|Startup=18 | |||
|Active= | |Active= | ||
|Recovery= | |Recovery= | ||
|Total= | |Total= | ||
|Hit Adv= | |Hit Adv=KD | ||
|Block Adv= | |Block Adv= | ||
|Feint Cancel= | |Feint Cancel= | ||
|Cancel on Hit= | |Cancel on Hit= | ||
|Cancel on Block= | |Cancel on Block= | ||
|Guard Crush Value= | |Guard Crush Value=8 | ||
|description= | |description= 1~4F full-body invincibility. Whiffs against opponents on the ground. | ||
<div class="mw-collapsible"> | |||
<gallery> | |||
Garou_Kevin_623C_1.png| | |||
</gallery> | |||
</div> | |||
}} | }} | ||
}} | }} | ||
===== <span class="invisible-header">Hell Trap (236K)</span> ===== | |||
<font style="visibility:hidden" size="0"></font> | <font style="visibility:hidden" size="0"></font> | ||
{{MoveData | {{MoveData | ||
|image= | |image=Garou Kevin 236B.png | ||
| | |caption=B | ||
|image2=Garou Kevin 236D.png | |||
|caption2=D | |||
|image3=Garou Kevin 236K_1.png | |||
|caption3=Second hit | |||
|name=Hell Trap | |||
|input= 236B/D (Brake OK) | |||
|subtitle= | |subtitle= | ||
|data= | |data= | ||
{{AttackData-Garou | {{AttackData-Garou | ||
|Damage= | |version= B | ||
|Guard= | |Damage=9, 12 | ||
|Startup= | |Guard=<span style="color:#ff0000;">Low, Mid</span> | ||
|Startup=10 | |||
|Active= | |||
|Recovery= | |||
|Total= | |||
|Hit Adv=KD | |||
|Block Adv=-22 | |||
|Feint Cancel= | |||
|Cancel on Hit= | |||
|Cancel on Block= | |||
|Guard Crush Value=7 | |||
|description= Second hit is a hitgrab that can be air JDed. | |||
}} | |||
{{AttackData-Garou | |||
|version= B Break | |||
|Damage=9 | |||
|Guard=<span style="color:#ff0000;">Low</span> | |||
|Startup=10 | |||
|Active= | |||
|Recovery= | |||
|Total= | |||
|Hit Adv=KD | |||
|Block Adv=+11 | |||
|Feint Cancel= | |||
|Cancel on Hit= | |||
|Cancel on Block= | |||
|Guard Crush Value=7 | |||
|description=The only brake move that hits low. Can't be avoided by 2ABs. | |||
}} | |||
{{AttackData-Garou | |||
|version= D | |||
|Damage=9, 12 | |||
|Guard=<span style="color:#ff0000;">Low, Mid</span> | |||
|Startup=14 | |||
|Active= | |||
|Recovery= | |||
|Total= | |||
|Hit Adv=KD | |||
|Block Adv=-25 | |||
|Feint Cancel= | |||
|Cancel on Hit= | |||
|Cancel on Block= | |||
|Guard Crush Value=8 | |||
|description= Second hit is a hitgrab that can be air JDed. | |||
}} | |||
{{AttackData-Garou | |||
|version= D Break | |||
|Damage=9 | |||
|Guard=<span style="color:#ff0000;">Low</span> | |||
|Startup=14 | |||
|Active= | |Active= | ||
|Recovery= | |Recovery= | ||
|Total= | |Total= | ||
|Hit Adv= | |Hit Adv=KD | ||
|Block Adv= | |Block Adv=+9 | ||
|Feint Cancel= | |Feint Cancel= | ||
|Cancel on Hit= | |Cancel on Hit= | ||
|Cancel on Block= | |Cancel on Block= | ||
|Guard Crush Value= | |Guard Crush Value=8 | ||
|description= | |description= | ||
}} | }} | ||
}} | }} | ||
===Super Moves=== | ===Super Moves=== | ||
== | ===== <span class="invisible-header">Lucky Strike (236236P)</span> ===== | ||
<font style="visibility:hidden" size="0"></font> | |||
{{MoveData | |||
|image =Garou Kevin 236236A.png | |||
|caption=A | |||
|image2=Garou Kevin 236236C.png | |||
|caption2=C | |||
|name =Lucky Strike | |||
|input =236236A/C | |||
|data= | |||
{{AttackData-Garou | |||
|version = A | |||
|Damage=3, 3, 11, 11, 11 | |||
| | |Guard=Mid | ||
| | |Startup=3 | ||
| | |Active= | ||
| | |Recovery= | ||
| | |Total= | ||
| | |Hit Adv=KD | ||
|Block Adv=-9 | |||
| | |Feint Cancel= | ||
| | |Cancel on Hit= | ||
| | |Cancel on Block= | ||
| | |Guard Crush Value=3×2, 4, 3×2 | ||
|description= 1~6F full-body invincibility, 7~14F lower-body invincibility, 15~18F upper-body invincibility. | |||
<div class="mw-collapsible"> | |||
| | <gallery> | ||
| | Garou_Kevin_236236A_1.png| | ||
| | Garou_Kevin_236236A_2.png| | ||
| | Garou_Kevin_236236A_3.png| | ||
| | Garou_Kevin_236236A_4.png| | ||
</gallery> | |||
| | </div> | ||
| | }} | ||
| | {{AttackData-Garou | ||
| | | header = | ||
|- | |version =C | ||
|Damage=2, 2, 10, 10, 10, 32 | |||
|Guard=Mid | |||
|Startup=3 | |||
|Active= | |||
|Recovery= | |||
| | |Total= | ||
|Hit Adv=KD | |||
|Block Adv=-25 | |||
|Feint Cancel= | |||
|Cancel on Hit= | |||
|Cancel on Block= | |||
|Guard Crush Value=4×2, 5×3, 20 | |||
| | |description= 1~7F full-body invincibility, 8~14F lower-body invincibility. | ||
| | <div class="mw-collapsible"> | ||
| | <gallery> | ||
Garou_Kevin_236236C_1.png| | |||
Garou_Kevin_236236C_2.png| | |||
| | Garou_Kevin_236236C_3.png| | ||
| | Garou_Kevin_236236C_4.png| | ||
| | </gallery> | ||
| | </div> | ||
| | }} | ||
| | }} | ||
|- | |||
| | |||
| | |||
| | |||
| | |||
|- | |||
| | |||
| | |||
</ | |||
===== <span class="invisible-header">Gatling Freezer (236236K)</span> ===== | |||
<font style="visibility:hidden" size="0"></font> | |||
{{MoveData | |||
|image =Garou Kevin 236236B.png | |||
|caption=B | |||
|image2=Garou Kevin 236236D.png | |||
|caption2=D | |||
|name =Gatling Freezer | |||
|input =236236B/D | |||
|data= | |||
{{AttackData-Garou | |||
< | |version = B | ||
|Damage=21 | |||
|Guard=Mid | |||
|Startup=11 | |||
|Active= | |||
|Recovery= | |||
|Total= | |||
|Hit Adv=KD | |||
|Block Adv=+1 | |||
|Feint Cancel= | |||
|Cancel on Hit= | |||
|Cancel on Block= | |||
< | |Guard Crush Value=7 | ||
|description= 1~7F full-body invincibility, 10~11F full-body invincibility. | |||
}} | |||
{{AttackData-Garou | |||
| header = | |||
|version =D | |||
|Damage=7, 8, 9, 10, 11 | |||
|Guard=Mid | |||
|Startup=0 | |||
|Active= | |||
|Recovery= | |||
< | |Total= | ||
|Hit Adv=KD | |||
|Block Adv=+3 | |||
|Feint Cancel= | |||
|Cancel on Hit= | |||
|Cancel on Block= | |||
|Guard Crush Value=10 | |||
|description= 1F full-body invincibility. | |||
<div class="mw-collapsible"> | |||
<gallery> | |||
Garou_Kevin_236236D_1.png| | |||
</gallery> | |||
</div> | |||
}} | |||
}} | |||
< | |||
| | |||
| | |||
| | |||
| | |||
| | |||
| | |||
| | |||
| | |||
| | |||
| | |||
| | |||
| | |||
| | |||
| | |||
| | |||
| | |||
{ | |||
| | |||
| | |||
| | |||
| | |||
| | |||
| | |||
| | |||
| | |||
| | |||
| | |||
| | |||
| | |||
| | |||
= | |||
< | |||
{{Navbox-MOTW}} | {{Navbox-MOTW}} | ||
[[Category:Garou: Mark of the Wolves]] | [[Category:Garou: Mark of the Wolves]] | ||
Latest revision as of 11:53, 17 June 2024
Introduction
Kevin Rian
>Got his knife removed during development because it created balance issues
>Still Top 1
>Bingo!
Gameplay
TBD
| Strengths | Weaknesses |
|---|---|
|
|
Character Colors
Move List
Frame Data Source: https://w.atwiki.jp/garoumow/pages/30.html and https://w.atwiki.jp/garoumow/pages/74.html
| Data Help | |
|---|---|
| Disclaimer: This is meant to teach basic terminology used when describing moves. | |
| HitBox: | A predefined area (usually a group of rectangles or circles) that tell the game how any given attack can come in contact with a character. Hitboxes are invisible to the player when normally playing. |
| HurtBox: | A predefined area (usually a group of rectangles or circles) that tell the game how your character is allowed to get hit by any incoming attack. Specifically, you'll get hit by (or block) an attack if that attack's hitbox ever overlaps your hurtbox. |
| Throw Box/Range: | Active throw frames and range. Your opponent will be thrown in this field if not in block or hit stun. |
| Projectile Box: | Hit box on a projectile attack. |
| Guard/Counter Box: | The Guard Box or Counter Box. This appears when blocking or using a counter move. |
| Push Box: | Has no bearing on hurt/hit boxes. Just allows characters to not pass through each other. (Also known as "Collision Box".) |
| Command | the input for the attack. |
| Start Up | The number of frames that initiate at the beginning of an attack after the input.
And when the first hitbox is present.
The first active frame is after the last startup frame. |
| Guard | The way this move must be blocked.
High or H or Overhead (especially when from the ground) -- must be blocked standing. |
| Damage | "basic" damage -- unmodified damage values
"correct" damage -- damage values modified for damage scaling, TOP multiplier, and defense rate |
| Guard Crush Value | Decrease your guard durability gauge/meter by that value/s |
| + | signifies how many advantage frames the attacker has. |
| - | signifies how many disadvantage frames the attacker has. |
| KD | means the attack will knock the opponent down. |
| ◯ | circle means cancelable on both hit/block. |
| ∞ | infinity means chain cancelable with the same button (renda cancel). |
| ※ | means cancelable on the first hit/part only. |
| 《 》OR « » OR << >> OR ( ) | The numbers in the brackets are the startup frames until the next stage (the gap until the next hit's first active frame). |
| △ | up triangle means only cancelable on block. |
| ▽ | down triangle means only cancelable on hit. |
| × OR X | means not cancelable. |
Notes:
- Special/Super moves with "Guard" data in red text are impossible to just defend at 0-pixel health bar.
| Standing/Taunting | Crouching | Dash | Jumping |
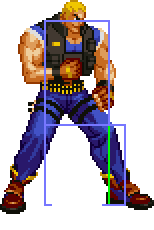 |
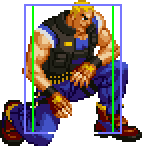 |
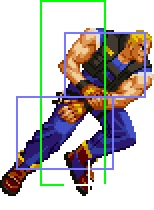 |
|
| 33F |
Close Standing Normals
Close 5A
| Damage | Guard | Startup | Active | Recovery | Total |
|---|---|---|---|---|---|
| 4 | Mid | 4 | 4 | 9 | 17 |
| Hit Adv | Block Adv | Feint Cancel | Cancel on Hit | Cancel on Block | Guard Crush Value |
| +2 | +2 | ◯ | ◯ / ∞ | ◯ / ∞ | 4 |
|
Standing jab. | |||||
Close 5B
| Damage | Guard | Startup | Active | Recovery | Total |
|---|---|---|---|---|---|
| 6 | Mid | 4 | 3 | 10 | 17 |
| Hit Adv | Block Adv | Feint Cancel | Cancel on Hit | Cancel on Block | Guard Crush Value |
| +2 | +2 | ◯ | ◯ / ∞ | ◯ / ∞ | 4 |
Close 5C
| Damage | Guard | Startup | Active | Recovery | Total |
|---|---|---|---|---|---|
| 10 | Mid | 6 | 1 | 29 | 36 |
| Hit Adv | Block Adv | Feint Cancel | Cancel on Hit | Cancel on Block | Guard Crush Value |
| -9 | -9 | ◯ | ◯ | ◯ | 5 |
Close 5D
| Damage | Guard | Startup | Active | Recovery | Total |
|---|---|---|---|---|---|
| 14 | Mid | 11 | 3 | 27 | 41 |
| Hit Adv | Block Adv | Feint Cancel | Cancel on Hit | Cancel on Block | Guard Crush Value |
| -9 | -9 | △ | X | ◯ | 5 |
Far Standing Normals
Far 5A
| Damage | Guard | Startup | Active | Recovery | Total |
|---|---|---|---|---|---|
| 5 | Mid | 3 | 3 | 10 | 16 |
| Hit Adv | Block Adv | Feint Cancel | Cancel on Hit | Cancel on Block | Guard Crush Value |
| +2 | +2 | ◯ | ◯ / ∞ | ◯ / ∞ | 4 |
Far 5B
| Damage | Guard | Startup | Active | Recovery | Total |
|---|---|---|---|---|---|
| 7 | Mid | 9 | 4 | 17 | 30 |
| Hit Adv | Block Adv | Feint Cancel | Cancel on Hit | Cancel on Block | Guard Crush Value |
| -6 | -6 | X | X | X | 4 |
Far 5C
| Damage | Guard | Startup | Active | Recovery | Total |
|---|---|---|---|---|---|
| 11 | Mid | 11 | 4 | 28 | 43 |
| Hit Adv | Block Adv | Feint Cancel | Cancel on Hit | Cancel on Block | Guard Crush Value |
| -11 | -11 | X | X | X | 10 |
Far 5D
| Damage | Guard | Startup | Active | Recovery | Total |
|---|---|---|---|---|---|
| 14 | Mid | 11 | 3 | 27 | 41 |
| Hit Adv | Block Adv | Feint Cancel | Cancel on Hit | Cancel on Block | Guard Crush Value |
| -9 | -9 | △ | X | ◯ | 5 |
Crouching Normals
2A
| Damage | Guard | Startup | Active | Recovery | Total |
|---|---|---|---|---|---|
| 4 | Mid | 4 | 3 | 10 | 17 |
| Hit Adv | Block Adv | Feint Cancel | Cancel on Hit | Cancel on Block | Guard Crush Value |
| +2 | +2 | ◯ | ◯ / ∞ | ◯ / ∞ | 4 |
2B
| Damage | Guard | Startup | Active | Recovery | Total |
|---|---|---|---|---|---|
| 6 | Low | 5 | 3 | 10 | 18 |
| Hit Adv | Block Adv | Feint Cancel | Cancel on Hit | Cancel on Block | Guard Crush Value |
| +2 | +2 | No | No | No | 4 |
2C
| Damage | Guard | Startup | Active | Recovery | Total |
|---|---|---|---|---|---|
| 9 | Mid | 6 | 3 | 25 | 34 |
| Hit Adv | Block Adv | Feint Cancel | Cancel on Hit | Cancel on Block | Guard Crush Value |
| -7 | -7 | ◯ | ◯ | ◯ | 5 |
2D
| Damage | Guard | Startup | Active | Recovery | Total |
|---|---|---|---|---|---|
| 10 | Low | 7 | 2 | 31 | 40 |
| Hit Adv | Block Adv | Feint Cancel | Cancel on Hit | Cancel on Block | Guard Crush Value |
| KD | -12 | X | X | X | 5 |
Jumping Normals
jA
| Damage | Guard | Startup | Active | Recovery | Total |
|---|---|---|---|---|---|
| 6 | High | 4 | 9 | - | - |
| Hit Adv | Block Adv | Feint Cancel | Cancel on Hit | Cancel on Block | Guard Crush Value |
| - | - | - | X | X | 4 |
jB
| Damage | Guard | Startup | Active | Recovery | Total |
|---|---|---|---|---|---|
| 6 | High | 6 | 8 | - | - |
| Hit Adv | Block Adv | Feint Cancel | Cancel on Hit | Cancel on Block | Guard Crush Value |
| - | - | - | X | X | 4 |
jC
| Damage | Guard | Startup | Active | Recovery | Total |
|---|---|---|---|---|---|
| 10 | High | 9 | 6 | - | - |
| Hit Adv | Block Adv | Feint Cancel | Cancel on Hit | Cancel on Block | Guard Crush Value |
| - | - | - | X | X | 5 |
|
Small Jump C has 9 damage. | |||||
jD
| Damage | Guard | Startup | Active | Recovery | Total |
|---|---|---|---|---|---|
| 10 | High | 12 | 6 | - | - |
| Hit Adv | Block Adv | Feint Cancel | Cancel on Hit | Cancel on Block | Guard Crush Value |
| - | - | - | X | X | 5 |
|
Small Jump D has 9 damage. | |||||
Command Normals
Poli-Kick (6B)
| Damage | Guard | Startup | Active | Recovery | Total |
|---|---|---|---|---|---|
| 6, 6 | Low, Mid | 7 | 2, 《14》, 7 | 16 | 46 |
| Hit Adv | Block Adv | Feint Cancel | Cancel on Hit | Cancel on Block | Guard Crush Value |
| -2 | -2 | X | X | X | 4, 4 |
Universal Moves
Lower-body Evasion Attack (5AB)
Upper-body Evasion Attack (2AB)
| Damage | Guard | Startup | Active | Recovery | Total |
|---|---|---|---|---|---|
| 10 | Mid | 8 | 3 | 22 | 33 |
| Hit Adv | Block Adv | Feint Cancel | Cancel on Hit | Cancel on Block | Guard Crush Value |
| -6 | 0 | ▽ | ◯ | X | 6 |
|
1~8F upper-body invincibility Kevin has the only 2AB in the game that doesn't expose a hurtbox before being active, which makes it much more reliable. Every other characters has a hurtbox that appears before being active, so if an active hitbox was there (ex: jump ins, delayed normals), they get hit even if the move didn't hit the low part. In this situation the worst case scenario for Kevin is a trade, for everyone else it's a full combo. | |||||
T.O.P. Attack (CD)
Throws
Ground Throw
| Damage | Guard | Startup | Active | Recovery | Total |
|---|---|---|---|---|---|
| 14 | - | 1 | - | - | - |
| Hit Adv | Block Adv | Feint Cancel | Cancel on Hit | Cancel on Block | Guard Crush Value |
| +48 | - | - | - | - | - |
|
Normal throw. | |||||
Feints
Forward Feint (6AC)
| Damage | Guard | Startup | Active | Recovery | Total |
|---|---|---|---|---|---|
| - | - | - | - | - | 10 |
| Hit Adv | Block Adv | Feint Cancel | Cancel on Hit | Cancel on Block | Guard Crush Value |
| - | - | - | - | - | - |
|
Mimics the start of Hell Rotor. | |||||
Down Feint (2AC)
| Damage | Guard | Startup | Active | Recovery | Total |
|---|---|---|---|---|---|
| - | - | - | - | - | 11 |
| Hit Adv | Block Adv | Feint Cancel | Cancel on Hit | Cancel on Block | Guard Crush Value |
| - | - | - | - | - | - |
|
Mimics the start of cl.5C or f.5C. | |||||
Special Moves
Hell Rotor (214P)
| A Lvl.1 | Damage | Guard | Startup | Active | Recovery | Total |
|---|---|---|---|---|---|---|
| 14 | Mid | 14 | 2 | - | - | |
| Hit Adv | Block Adv | Feint Cancel | Cancel on Hit | Cancel on Block | Guard Crush Value | |
| -1 | -1 | - | - | - | 7 | |
|
No charge. (Charge can't be held past 1~9F of startup.) | ||||||
| [A] Lvl.2 | Damage | Guard | Startup | Active | Recovery | Total |
| 20 | Mid | 15-34 | 2 | - | - | |
| Hit Adv | Block Adv | Feint Cancel | Cancel on Hit | Cancel on Block | Guard Crush Value | |
| KD | -14 | - | - | - | 8~10 | |
|
Charge held past 9 frames of startup, between the window of 10~29F of startup (20 frame window). (How long you hold increases the startup by that amount.) | ||||||
| [A] Lvl.3 | Damage | Guard | Startup | Active | Recovery | Total |
| 26 | Mid | 35-66 | 2 | - | - | |
| Hit Adv | Block Adv | Feint Cancel | Cancel on Hit | Cancel on Block | Guard Crush Value | |
| KD | -14 | - | - | - | 8~10 | |
|
Charge held past 29 frames of startup, between the window of 30~61F (max) of startup (32 frame window). (How long you hold increases the startup by that amount.) | ||||||
| C Lvl.1 | Damage | Guard | Startup | Active | Recovery | Total |
| 15 | Overhead | 20 | 3 | - | - | |
| Hit Adv | Block Adv | Feint Cancel | Cancel on Hit | Cancel on Block | Guard Crush Value | |
| KD | -8 | - | - | - | 7 | |
|
No charge. (Charge can't be held past 1~15F of startup.) | ||||||
| [C] Lvl.2 | Damage | Guard | Startup | Active | Recovery | Total |
| 19 | Overhead | 21-40 | 3 | - | - | |
| Hit Adv | Block Adv | Feint Cancel | Cancel on Hit | Cancel on Block | Guard Crush Value | |
| KD | -8 | - | - | - | 8 | |
|
Charge held past 15 frames of startup, between the window of 16~35F of startup (20 frame window). (How long you hold increases the startup by that amount.) | ||||||
| C Lvl.3 | Damage | Guard | Startup | Active | Recovery | Total |
| 23 | Overhead | 41-72 | 3 | - | - | |
| Hit Adv | Block Adv | Feint Cancel | Cancel on Hit | Cancel on Block | Guard Crush Value | |
| KD | -8 | - | - | - | 10 | |
|
Charge held past 35 frames of startup, between the window of 36~67F of startup (32 frame window). (How long you hold increases the startup by that amount.) | ||||||
Hell Arrest (41236P)
| A | Damage | Guard | Startup | Active | Recovery | Total |
|---|---|---|---|---|---|---|
| 10, 10 | - | 8 | - | - | - | |
| Hit Adv | Block Adv | Feint Cancel | Cancel on Hit | Cancel on Block | Guard Crush Value | |
| KD | - | - | - | - | - | |
| C | Damage | Guard | Startup | Active | Recovery | Total |
| 12, 12 | - | 9 | - | - | - | |
| Hit Adv | Block Adv | Feint Cancel | Cancel on Hit | Cancel on Block | Guard Crush Value | |
| KD | - | - | - | - | - |
Creeper (214B)
| B | Damage | Guard | Startup | Active | Recovery | Total |
|---|---|---|---|---|---|---|
| - | - | - | - | - | - | |
| Hit Adv | Block Adv | Feint Cancel | Cancel on Hit | Cancel on Block | Guard Crush Value | |
| - | - | - | - | - | - | |
|
Kevin advances forward with a low-profile crawl. Can be cancelled into 3 follow-ups. | ||||||
| B>A | Damage | Guard | Startup | Active | Recovery | Total |
| 20 | Low | 9 | - | - | - | |
| Hit Adv | Block Adv | Feint Cancel | Cancel on Hit | Cancel on Block | Guard Crush Value | |
| KD | -11 | - | - | - | 7 | |
|
Low follow-up | ||||||
| B>B | Damage | Guard | Startup | Active | Recovery | Total |
| 20 | Overhead | 17 | - | - | - | |
| Hit Adv | Block Adv | Feint Cancel | Cancel on Hit | Cancel on Block | Guard Crush Value | |
| KD | -10 | - | - | - | 7 | |
|
Overhead follow-up | ||||||
| B>C | Damage | Guard | Startup | Active | Recovery | Total |
| 0 | - | - | - | - | 7 | |
| Hit Adv | Block Adv | Feint Cancel | Cancel on Hit | Cancel on Block | Guard Crush Value | |
| - | - | - | - | - | - | |
|
Cancels Creeper. | ||||||
Abide Mine (214D)
| D | Damage | Guard | Startup | Active | Recovery | Total |
|---|---|---|---|---|---|---|
| 0 | - | - | - | - | 32 | |
| Hit Adv | Block Adv | Feint Cancel | Cancel on Hit | Cancel on Block | Guard Crush Value | |
| - | - | - | - | - | - | |
|
1~11F full-body invincibility. 12~20F airborne hurtbox. | ||||||
Hell Snipe (623P)
| A | Damage | Guard | Startup | Active | Recovery | Total |
|---|---|---|---|---|---|---|
| 15 | Mid | 15 | - | - | - | |
| Hit Adv | Block Adv | Feint Cancel | Cancel on Hit | Cancel on Block | Guard Crush Value | |
| 0 | -1 | - | - | - | 7 | |
|
1~4F full-body invincibility. | ||||||
| C | Damage | Guard | Startup | Active | Recovery | Total |
| 16 | Mid | 18 | - | - | - | |
| Hit Adv | Block Adv | Feint Cancel | Cancel on Hit | Cancel on Block | Guard Crush Value | |
| KD | - | - | - | - | 8 | |
|
1~4F full-body invincibility. Whiffs against opponents on the ground. | ||||||
Hell Trap (236K)
| B | Damage | Guard | Startup | Active | Recovery | Total |
|---|---|---|---|---|---|---|
| 9, 12 | Low, Mid | 10 | - | - | - | |
| Hit Adv | Block Adv | Feint Cancel | Cancel on Hit | Cancel on Block | Guard Crush Value | |
| KD | -22 | - | - | - | 7 | |
|
Second hit is a hitgrab that can be air JDed. | ||||||
| B Break | Damage | Guard | Startup | Active | Recovery | Total |
| 9 | Low | 10 | - | - | - | |
| Hit Adv | Block Adv | Feint Cancel | Cancel on Hit | Cancel on Block | Guard Crush Value | |
| KD | +11 | - | - | - | 7 | |
|
The only brake move that hits low. Can't be avoided by 2ABs. | ||||||
| D | Damage | Guard | Startup | Active | Recovery | Total |
| 9, 12 | Low, Mid | 14 | - | - | - | |
| Hit Adv | Block Adv | Feint Cancel | Cancel on Hit | Cancel on Block | Guard Crush Value | |
| KD | -25 | - | - | - | 8 | |
|
Second hit is a hitgrab that can be air JDed. | ||||||
| D Break | Damage | Guard | Startup | Active | Recovery | Total |
| 9 | Low | 14 | - | - | - | |
| Hit Adv | Block Adv | Feint Cancel | Cancel on Hit | Cancel on Block | Guard Crush Value | |
| KD | +9 | - | - | - | 8 | |
Super Moves
Lucky Strike (236236P)
| A | Damage | Guard | Startup | Active | Recovery | Total |
|---|---|---|---|---|---|---|
| 3, 3, 11, 11, 11 | Mid | 3 | - | - | - | |
| Hit Adv | Block Adv | Feint Cancel | Cancel on Hit | Cancel on Block | Guard Crush Value | |
| KD | -9 | - | - | - | 3×2, 4, 3×2 | |
|
1~6F full-body invincibility, 7~14F lower-body invincibility, 15~18F upper-body invincibility. | ||||||
| C | Damage | Guard | Startup | Active | Recovery | Total |
| 2, 2, 10, 10, 10, 32 | Mid | 3 | - | - | - | |
| Hit Adv | Block Adv | Feint Cancel | Cancel on Hit | Cancel on Block | Guard Crush Value | |
| KD | -25 | - | - | - | 4×2, 5×3, 20 | |
|
1~7F full-body invincibility, 8~14F lower-body invincibility. | ||||||
Gatling Freezer (236236K)
| B | Damage | Guard | Startup | Active | Recovery | Total |
|---|---|---|---|---|---|---|
| 21 | Mid | 11 | - | - | - | |
| Hit Adv | Block Adv | Feint Cancel | Cancel on Hit | Cancel on Block | Guard Crush Value | |
| KD | +1 | - | - | - | 7 | |
|
1~7F full-body invincibility, 10~11F full-body invincibility. | ||||||
| D | Damage | Guard | Startup | Active | Recovery | Total |
| 7, 8, 9, 10, 11 | Mid | 0 | - | - | - | |
| Hit Adv | Block Adv | Feint Cancel | Cancel on Hit | Cancel on Block | Guard Crush Value | |
| KD | +3 | - | - | - | 10 | |
|
1F full-body invincibility. | ||||||
