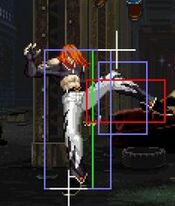
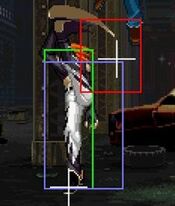
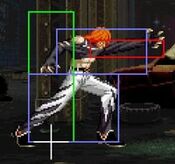
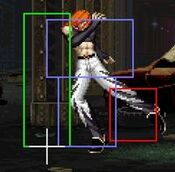
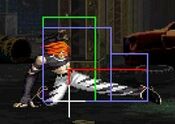
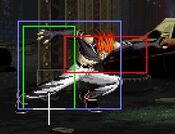
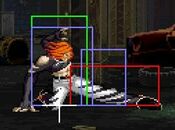
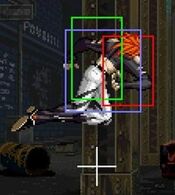
(Move the frame data credit for Howard's Arena) |
GigaTempest (talk | contribs) No edit summary |
||
| (66 intermediate revisions by 8 users not shown) | |||
| Line 1: | Line 1: | ||
{{MOTW Character | {{MOTW Character Intro|char=Freeman |content= | ||
==Introduction== | ==Introduction== | ||
| Line 9: | Line 6: | ||
Later,in KOF 12 Iori based his new non-flame moveset about him. | Later,in KOF 12 Iori based his new non-flame moveset about him. | ||
{| | == Gameplay == | ||
{{Content Box|content= | |||
'''Freeman's''' gameplan is to use his good burst movement and normals to establish pressure with his rekkas and to confirm into his Full Blast super. | |||
| | |||
| | {{ProConTable | ||
* | |pros= | ||
* '''Decent far-reaching normals for poking, alongside fast and advantageous normals for pressuring in close range''' | |||
* | * '''Rekkas are very versatile; used for combos, pressure, defense (guard cancels), and meter building''' | ||
* | * '''Can convert into his Full Blast super move from a decently far range''' | ||
|cons= | |||
* '''Practically no conversions off a hop''' | |||
* '''No invincible reversal''' | |||
* '''A lot of useless or bad special moves, including his break move and counter super''' | |||
* '''Somewhat limited anti-air and air-to-air options''' | |||
}} | |||
}} | |||
}} | |||
'''Character Colors''' | '''Character Colors''' | ||
| Line 26: | Line 33: | ||
==Move List== | ==Move List== | ||
Frame Data Source: https://w.atwiki.jp/garoumow/pages/28.html and | |||
Frame Data Source: https://w.atwiki.jp/garoumow/pages/28.html and https://w.atwiki.jp/garoumow/pages/75.html | |||
{{MOTW Legend}} | {{MOTW Legend}} | ||
Notes: | |||
* Special/Super moves with <span style="color:#ff0000;">"Guard" data in red text</span> are impossible to just defend at 0-pixel health bar. | |||
{| border="1em" cellspacing="0" style="border: 1px solid #999;" | |||
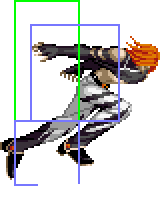
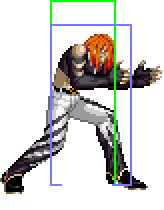
| align="center" | Standing || align="center" | Crouching || align="center" | Dash || align="center" | Taunt || align="center" | Jumping || align="center" | Landing | |||
|- | |||
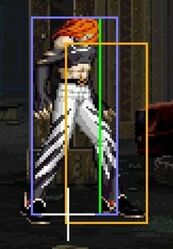
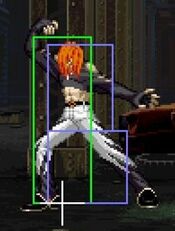
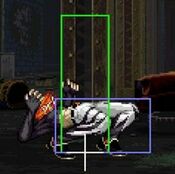
| align="center"; valign="bottom" | [[File:Garou Freeman Stand.png]] || align="center"; valign="bottom" | [[File:Garou Freeman Crouch.png|bottom]] || align="center"; valign="bottom" | [[File:Garou Freeman Dash.png]] || align="center"; valign="bottom" | [[File:Garou Freeman Taunt.png]] || align="center"; valign="bottom" | [[File:Garou Freeman Jump.png]] || align="center"; valign="bottom" | [[File:Garou Freeman Landing.png]] | |||
|- | |||
| align="center" | || align="center" | || align="center" | || align="center" | || align="center" | 37 total frames or 35 for a backwards jump. || align="center" | Freeman is invincible below the waist when landing from an empty jump. | |||
|} | |||
===Close Standing Normals=== | ===Close Standing Normals=== | ||
===== <span class="invisible-header"></span> ===== | |||
===== <span class="invisible-header">Close 5A</span> ===== | |||
<font style="visibility:hidden" size="0"></font> | <font style="visibility:hidden" size="0"></font> | ||
{{MoveData | {{MoveData | ||
|image= | |image=Garou_Freeman_cl.A.jpg | ||
|name= | |name=c.5A | ||
|subtitle= | |subtitle= | ||
|caption= | |caption= | ||
|data= | |data= | ||
{{AttackData-Garou | {{AttackData-Garou | ||
|Damage= | |version=c.5A | ||
|Guard= | |Damage=4 | ||
|Guard=Mid | |||
|Startup=4 | |Startup=4 | ||
|Active= | |Active=4 | ||
|Recovery= | |Recovery=5 | ||
|Total= | |Total=13 | ||
|Hit Adv=+6 | |Hit Adv=+6 | ||
|Block Adv=+6 | |Block Adv=+6 | ||
|Feint Cancel= | |Feint Cancel=◯ | ||
|Cancel on Hit= | |Cancel on Hit=◯ | ||
|Cancel on Block= | |Cancel on Block=◯ | ||
|Guard Crush Value= | |Guard Crush Value=4 | ||
|description=Standing jab. | |description=Standing jab. Proxomity normal, so tricky to get in range for but good nonetheless. | ||
Last 2F of recovery has full-body invincibility. | |||
}} | |||
{{AttackData-Garou | |||
|version=c.5A>A | |||
|Damage=4, 9 | |||
|Guard=HL | |||
|Startup=4 | |||
|Active=4 | |||
|Recovery=12 | |||
|Total=20 | |||
|Hit Adv=-1 | |||
|Block Adv=-1 | |||
|Feint Cancel=X | |||
|Cancel on Hit=X | |||
|Cancel on Block=X | |||
|Guard Crush Value=4, 9 | |||
|description= Target combo from cl.5A. | |||
}} | |||
{{AttackData-Garou | |||
|version=c.5A>A>A | |||
|Damage=4, 9, 8 | |||
|Guard=HL | |||
|Startup=3 | |||
|Active=3 | |||
|Recovery=17 | |||
|Total=23 | |||
|Hit Adv=-5 | |||
|Block Adv=-5 | |||
|Feint Cancel=X | |||
|Cancel on Hit=X | |||
|Cancel on Block=X | |||
|Guard Crush Value=4, 9, 9 | |||
|description= Target combo from cl.5A. Bad damage and you're minus in hit, never do this | |||
}} | }} | ||
}} | }} | ||
===== <span class="invisible-header"></span> ===== | |||
===== <span class="invisible-header">Close 5B</span> ===== | |||
<font style="visibility:hidden" size="0"></font> | <font style="visibility:hidden" size="0"></font> | ||
{{MoveData | {{MoveData | ||
|image= | |image=Garou_Freeman_cl.B.jpg | ||
|name= | |name=c.5B | ||
|subtitle= | |subtitle= | ||
|caption= | |caption= | ||
|data= | |data= | ||
{{AttackData-Garou | {{AttackData-Garou | ||
|Damage= | |Damage=6 | ||
|Guard= | |Guard=Mid | ||
|Startup=3 | |Startup=3 | ||
|Active= | |Active=4 | ||
|Recovery= | |Recovery=5 | ||
|Total= | |Total=12 | ||
|Hit Adv=+6 | |Hit Adv=+6 | ||
|Block Adv=+6 | |Block Adv=+6 | ||
|Feint Cancel= | |Feint Cancel=◯ | ||
|Cancel on Hit= | |Cancel on Hit=◯ / ∞ | ||
|Cancel on Block= | |Cancel on Block=◯ / ∞ | ||
|Guard Crush Value= | |Guard Crush Value=4 | ||
|description= | |description=Very fast, advantageous move. Proximity normal, so tricky to get in range for, but useful for pressure and hitconfirms. | ||
}} | }} | ||
}} | }} | ||
===== <span class="invisible-header"></span> ===== | |||
===== <span class="invisible-header">Close 5C</span> ===== | |||
<font style="visibility:hidden" size="0"></font> | <font style="visibility:hidden" size="0"></font> | ||
{{MoveData | {{MoveData | ||
|image= | |image=Garou_Freeman_cl.C.jpg | ||
|name= | |name=c.5C | ||
|subtitle= | |subtitle= | ||
|caption= | |caption= | ||
|data= | |data= | ||
{{AttackData-Garou | {{AttackData-Garou | ||
|Damage= | |Damage=10 | ||
|Guard= | |Guard=Mid | ||
|Startup=7 | |Startup=7 | ||
|Active= | |Active=3 | ||
|Recovery= | |Recovery=25 | ||
|Total= | |Total=35 | ||
|Hit Adv=-7 | |Hit Adv=-7 | ||
|Block Adv=-7 | |Block Adv=-7 | ||
|Feint Cancel= | |Feint Cancel=◯ | ||
|Cancel on Hit= | |Cancel on Hit=◯ | ||
|Cancel on Block= | |Cancel on Block=◯ | ||
|Guard Crush Value= | |Guard Crush Value=5 | ||
|description= | |description=Very unsafe, but feint cancelling it makes it very plus and helpful for punishes | ||
}} | }} | ||
}} | }} | ||
===== <span class="invisible-header"></span> ===== | ===== <span class="invisible-header">Close 5D</span> ===== | ||
<font style="visibility:hidden" size="0"></font> | <font style="visibility:hidden" size="0"></font> | ||
{{MoveData | {{MoveData | ||
|image= | |image=Garou_Freeman_cl.D-1.jpg | ||
| | |image2=Garou_Freeman_cl.D-2.jpg | ||
|name=c.5D | |||
|subtitle= | |subtitle= | ||
|caption= | |caption= | ||
|data= | |data= | ||
{{AttackData-Garou | {{AttackData-Garou | ||
|Damage= | |Damage=6, 6 | ||
|Guard= | |Guard=Mid | ||
|Startup=4 | |Startup=4 | ||
|Active= | |Active=3, 3 | ||
|Recovery= | |Recovery=20 | ||
|Total= | |Total=30 | ||
|Hit Adv=-2 | |Hit Adv=-2 | ||
|Block Adv=-2 | |Block Adv=-2 | ||
|Feint Cancel= | |Feint Cancel=※ | ||
|Cancel on Hit= | |Cancel on Hit=※ | ||
|Cancel on Block= | |Cancel on Block=※ | ||
|Guard Crush Value= | |Guard Crush Value=3, 3 | ||
|description= | |description=Decent proximity normal. Your heavy hitconfirm of choice, as FCing this gives you enough time to link into 2C for optimal punishes. Make sure to cancel before the second hit. | ||
}} | }} | ||
}} | }} | ||
===Far Standing Normals=== | ===Far Standing Normals=== | ||
===== <span class="invisible-header"></span> ===== | |||
===== <span class="invisible-header">Far 5A</span> ===== | |||
<font style="visibility:hidden" size="0"></font> | <font style="visibility:hidden" size="0"></font> | ||
{{MoveData | {{MoveData | ||
|image= | |image=Garou_Freeman_s.A.jpg | ||
|name= | |name=f.5A | ||
|subtitle= | |subtitle= | ||
|caption= | |caption= | ||
|data= | |data= | ||
{{AttackData-Garou | {{AttackData-Garou | ||
|Damage= | |version=f.5A | ||
|Guard= | |Damage=5 | ||
|Guard=Mid | |||
|Startup=4 | |Startup=4 | ||
|Active= | |Active=4 | ||
|Recovery= | |Recovery=12 | ||
|Total= | |Total=20 | ||
|Hit Adv=-1 | |Hit Adv=-1 | ||
|Block Adv=-1 | |Block Adv=-1 | ||
|Feint Cancel= | |Feint Cancel=◯ | ||
|Cancel on Hit= | |Cancel on Hit=◯ | ||
|Cancel on Block= | |Cancel on Block=◯ | ||
|Guard Crush Value= | |Guard Crush Value=4 | ||
|description= | |description=Average far jab. Decent ground poke, but moreso valuable as a fast anti air, even if mediocre | ||
}} | |||
{{AttackData-Garou | |||
|version=f.5A>A | |||
|Damage=5, 8 | |||
|Guard=Mid | |||
|Startup=3 | |||
|Active=3 | |||
|Recovery=17 | |||
|Total=23 | |||
|Hit Adv=-5 | |||
|Block Adv=-5 | |||
|Feint Cancel=X | |||
|Cancel on Hit=X | |||
|Cancel on Block=X | |||
|Guard Crush Value=4, 9 | |||
|description= Target combo from f.5A. | |||
}} | }} | ||
}} | }} | ||
===== <span class="invisible-header"></span> ===== | |||
===== <span class="invisible-header">Far 5B</span> ===== | |||
<font style="visibility:hidden" size="0"></font> | <font style="visibility:hidden" size="0"></font> | ||
{{MoveData | {{MoveData | ||
|image= | |image=Garou_Freeman_s.B.jpg | ||
|name= | |name=f.5B | ||
|subtitle= | |subtitle= | ||
|caption= | |caption= | ||
|data= | |data= | ||
{{AttackData-Garou | {{AttackData-Garou | ||
|Damage= | |Damage=7 | ||
|Guard= | |Guard=Mid | ||
|Startup=5 | |Startup=5 | ||
|Active= | |Active=4 | ||
|Recovery= | |Recovery=16 | ||
|Total= | |Total=25 | ||
|Hit Adv=-5 | |Hit Adv=-5 | ||
|Block Adv=-5 | |Block Adv=-5 | ||
|Feint Cancel= | |Feint Cancel=◯ | ||
|Cancel on Hit= | |Cancel on Hit=◯ | ||
|Cancel on Block= | |Cancel on Block=◯ | ||
|Guard Crush Value= | |Guard Crush Value=4 | ||
|description= | |description=Standing poke with speed, cancellable and actually a good hitbox to beat lows. Has a good bunch of recovery and is vrry minus, so be sure to always buffer rekkas, and dont throw this out often | ||
}} | }} | ||
}} | }} | ||
===== <span class="invisible-header"></span> ===== | |||
===== <span class="invisible-header">Far 5C</span> ===== | |||
<font style="visibility:hidden" size="0"></font> | <font style="visibility:hidden" size="0"></font> | ||
{{MoveData | {{MoveData | ||
|image= | |image=Garou_Freeman_s.C-1.jpg | ||
| | |image2=Garou_Freeman_s.C-2.jpg | ||
|name=f.5C | |||
|subtitle= | |subtitle= | ||
|caption= | |caption= | ||
|data= | |data= | ||
{{AttackData-Garou | {{AttackData-Garou | ||
|Damage= | |Damage=14 | ||
|Guard= | |Guard=Mid | ||
|Startup=9 | |Startup=9 | ||
|Active= | |Active=3, «2», 4 | ||
|Recovery= | |Recovery=11 | ||
|Total= | |Total=29 | ||
|Hit Adv=+1 | |Hit Adv=+1 | ||
|Block Adv=+1 | |Block Adv=+1 | ||
|Feint Cancel= | |Feint Cancel=X | ||
|Cancel on Hit= | |Cancel on Hit=X | ||
|Cancel on Block= | |Cancel on Block=X | ||
|Guard Crush Value= | |Guard Crush Value=5 | ||
|description= | |description=One of Freeman's few anti air options. While it may be a bit slow, its got solid hitboxes and is plus on block, without too much recovery. | ||
}} | }} | ||
}} | }} | ||
===== <span class="invisible-header"></span> ===== | |||
===== <span class="invisible-header">Far 5D</span> ===== | |||
<font style="visibility:hidden" size="0"></font> | <font style="visibility:hidden" size="0"></font> | ||
{{MoveData | {{MoveData | ||
|image= | |image=Garou_Freeman_s.D.jpg | ||
|name= | |name=f.5D | ||
|subtitle= | |subtitle= | ||
|caption= | |caption= | ||
|data= | |data= | ||
{{AttackData-Garou | {{AttackData-Garou | ||
|Damage= | |Damage=14 | ||
|Guard= | |Guard=Mid | ||
|Startup=8 | |Startup=8 | ||
|Active= | |Active=3 | ||
|Recovery= | |Recovery=20 | ||
|Total= | |Total=31 | ||
|Hit Adv=-2 | |Hit Adv=-2 | ||
|Block Adv=-2 | |Block Adv=-2 | ||
|Feint Cancel= | |Feint Cancel=△ | ||
|Cancel on Hit= | |Cancel on Hit=X | ||
|Cancel on Block= | |Cancel on Block=◯ | ||
|Guard Crush Value= | |Guard Crush Value=5 | ||
|description= | |description= | ||
}} | }} | ||
}} | }} | ||
===Crouching Normals=== | ===Crouching Normals=== | ||
===== <span class="invisible-header"></span> ===== | |||
===== <span class="invisible-header">2A</span> ===== | |||
<font style="visibility:hidden" size="0"></font> | <font style="visibility:hidden" size="0"></font> | ||
{{MoveData | {{MoveData | ||
|image= | |image=Garou_Freeman_cr.A.jpg | ||
|name= | |name=2A | ||
|subtitle= | |subtitle= | ||
|caption= | |caption= | ||
|data= | |data= | ||
{{AttackData-Garou | {{AttackData-Garou | ||
|Damage= | |Damage=4 | ||
|Guard= | |Guard=Mid | ||
|Startup=5 | |Startup=5 | ||
|Active= | |Active=4 | ||
|Recovery= | |Recovery=6 | ||
|Total= | |Total=15 | ||
|Hit Adv=+ | |Hit Adv=+5 | ||
|Block Adv=+ | |Block Adv=+5 | ||
|Feint Cancel= | |Feint Cancel=◯ | ||
|Cancel on Hit= | |Cancel on Hit=◯ / ∞ | ||
|Cancel on Block= | |Cancel on Block=◯ / ∞ | ||
|Guard Crush Value= | |Guard Crush Value=4 | ||
|description= | |description= | ||
}} | }} | ||
}} | }} | ||
===== <span class="invisible-header"></span> ===== | |||
===== <span class="invisible-header">2B</span> ===== | |||
<font style="visibility:hidden" size="0"></font> | <font style="visibility:hidden" size="0"></font> | ||
{{MoveData | {{MoveData | ||
|image= | |image=Garou_Freeman_cr.B.jpg | ||
|name= | |name=2B | ||
|subtitle= | |subtitle= | ||
|caption= | |caption= | ||
|data= | |data= | ||
{{AttackData-Garou | {{AttackData-Garou | ||
|Damage= | |Damage=6 | ||
|Guard= | |Guard=Low | ||
|Startup=4 | |Startup=4 | ||
|Active= | |Active=4 | ||
|Recovery= | |Recovery=6 | ||
|Total= | |Total=14 | ||
|Hit Adv=+ | |Hit Adv=+5 | ||
|Block Adv=+ | |Block Adv=+5 | ||
|Feint Cancel= | |Feint Cancel=◯ | ||
|Cancel on Hit= | |Cancel on Hit=◯ | ||
|Cancel on Block= | |Cancel on Block=◯ | ||
|Guard Crush Value= | |Guard Crush Value=4 | ||
|description= | |description=Your typical crouching B, which means its great for pressure, combos and poking. Doesn't self-chain, but can still link into itself. Combos into rekkas and Full Blast. | ||
}} | }} | ||
}} | }} | ||
===== <span class="invisible-header"></span> ===== | |||
===== <span class="invisible-header">2C</span> ===== | |||
<font style="visibility:hidden" size="0"></font> | <font style="visibility:hidden" size="0"></font> | ||
{{MoveData | {{MoveData | ||
|image= | |image=Garou_Freeman_cr.C.jpg | ||
|name= | |name=2C | ||
|subtitle= | |subtitle= | ||
|caption= | |caption= | ||
|data= | |data= | ||
{{AttackData-Garou | {{AttackData-Garou | ||
|Damage= | |Damage=10 | ||
|Guard= | |Guard=Mid | ||
|Startup=6 | |Startup=6 | ||
|Active= | |Active=2 | ||
|Recovery= | |Recovery=15 | ||
|Total= | |Total=23 | ||
|Hit Adv=+4 | |Hit Adv=+4 | ||
|Block Adv=+4 | |Block Adv=+4 | ||
|Feint Cancel= | |Feint Cancel=◯ | ||
|Cancel on Hit= | |Cancel on Hit=◯ | ||
|Cancel on Block= | |Cancel on Block=◯ | ||
|Guard Crush Value= | |Guard Crush Value=5 | ||
|description= | |description=Great normal: very plus on block/hit at +4 (enough for a 2b to be a combo), deals good damage and combos into damaging confirms like Nightmare A. Has decent range and good ground priority. | ||
}} | }} | ||
}} | }} | ||
===== <span class="invisible-header"></span> ===== | ===== <span class="invisible-header">2D</span> ===== | ||
<font style="visibility:hidden" size="0"></font> | <font style="visibility:hidden" size="0"></font> | ||
{{MoveData | {{MoveData | ||
|image= | |image=Garou_Freeman_cr.D.jpg | ||
|name= | |name=2D | ||
|subtitle= | |subtitle= | ||
|caption= | |caption= | ||
|data= | |data= | ||
{{AttackData-Garou | {{AttackData-Garou | ||
|Damage= | |Damage=10 | ||
|Guard= | |Guard=Low | ||
|Startup=10 | |Startup=10 | ||
|Active= | |Active=3 | ||
|Recovery= | |Recovery=28 | ||
|Total= | |Total=41 | ||
|Hit Adv=KD | |Hit Adv=KD | ||
|Block Adv=-10 | |Block Adv=-10 | ||
|Feint Cancel= | |Feint Cancel=X | ||
|Cancel on Hit= | |Cancel on Hit=X | ||
|Cancel on Block= | |Cancel on Block=X | ||
|Guard Crush Value= | |Guard Crush Value=5 | ||
|description= | |description= | ||
}} | }} | ||
}} | }} | ||
===Jumping Normals=== | ===Jumping Normals=== | ||
===== <span class="invisible-header"></span> ===== | |||
===== <span class="invisible-header">jA</span> ===== | |||
<font style="visibility:hidden" size="0"></font> | <font style="visibility:hidden" size="0"></font> | ||
{{MoveData | {{MoveData | ||
|image= | |image=Garou_Freeman_j.A.jpg | ||
|name= | |name=j.A | ||
|subtitle= | |subtitle= | ||
|caption= | |caption= | ||
|data= | |data= | ||
{{AttackData-Garou | {{AttackData-Garou | ||
|Damage= | |Damage=6 | ||
|Guard= | |Guard=High | ||
|Startup=4 | |Startup=4 | ||
|Active= | |Active=10 | ||
|Recovery= | |Recovery= | ||
|Total= | |Total= | ||
| Line 352: | Line 450: | ||
|Block Adv= | |Block Adv= | ||
|Feint Cancel= | |Feint Cancel= | ||
|Cancel on Hit= | |Cancel on Hit=X | ||
|Cancel on Block= | |Cancel on Block=X | ||
|Guard Crush Value= | |Guard Crush Value=4 | ||
|description= | |description=Quick air move with decent hitbox for meeting opponents in the air | ||
}} | }} | ||
}} | }} | ||
===== <span class="invisible-header"></span> ===== | |||
===== <span class="invisible-header">jB</span> ===== | |||
<font style="visibility:hidden" size="0"></font> | <font style="visibility:hidden" size="0"></font> | ||
{{MoveData | {{MoveData | ||
|image= | |image=Garou_Freeman_j.B.jpg | ||
|name= | |name=j.B | ||
|subtitle= | |subtitle= | ||
|caption= | |caption= | ||
|data= | |data= | ||
{{AttackData-Garou | {{AttackData-Garou | ||
|Damage= | |Damage=6 | ||
|Guard= | |Guard=High | ||
|Startup=5 | |Startup=5 | ||
|Active= | |Active=9 | ||
|Recovery= | |Recovery= | ||
|Total= | |Total= | ||
| Line 377: | Line 477: | ||
|Block Adv= | |Block Adv= | ||
|Feint Cancel= | |Feint Cancel= | ||
|Cancel on Hit= | |Cancel on Hit=X | ||
|Cancel on Block= | |Cancel on Block=X | ||
|Guard Crush Value= | |Guard Crush Value=4 | ||
|description= | |description=More range but the hurtbox is also extended. Decent quick jump-in and alternative air poke | ||
}} | }} | ||
}} | }} | ||
===== <span class="invisible-header"></span> ===== | |||
===== <span class="invisible-header">jC</span> ===== | |||
<font style="visibility:hidden" size="0"></font> | <font style="visibility:hidden" size="0"></font> | ||
{{MoveData | {{MoveData | ||
|image= | |image=Garou_Freeman_j.C.jpg | ||
|name= | |name=j.C | ||
|subtitle= | |subtitle= | ||
|caption= | |caption= | ||
|data= | |data= | ||
{{AttackData-Garou | {{AttackData-Garou | ||
|Damage= | |Damage=10 | ||
|Guard= | |Guard=High | ||
|Startup=9 | |Startup=9 | ||
|Active= | |Active=5 | ||
|Recovery= | |Recovery= | ||
|Total= | |Total= | ||
| Line 402: | Line 504: | ||
|Block Adv= | |Block Adv= | ||
|Feint Cancel= | |Feint Cancel= | ||
|Cancel on Hit= | |Cancel on Hit=X | ||
|Cancel on Block= | |Cancel on Block=X | ||
|Guard Crush Value= | |Guard Crush Value=5 | ||
|description= | |description=Good aggressive air normal, for air-to-ground approaches. Slower, but better hitbox | ||
Can beat out upper-body evasion attacks. | |||
}} | }} | ||
}} | }} | ||
===== <span class="invisible-header"></span> ===== | |||
===== <span class="invisible-header">jD</span> ===== | |||
<font style="visibility:hidden" size="0"></font> | <font style="visibility:hidden" size="0"></font> | ||
{{MoveData | {{MoveData | ||
|image= | |image=Garou_Freeman_j.D.jpg | ||
|name= | |name=j.D | ||
|subtitle= | |subtitle= | ||
|caption= | |caption= | ||
|data= | |data= | ||
{{AttackData-Garou | {{AttackData-Garou | ||
|Damage= | |Damage=10 | ||
|Guard= | |Guard=High | ||
|Startup=10 | |Startup=10 | ||
|Active= | |Active=6 | ||
|Recovery= | |Recovery= | ||
|Total= | |Total= | ||
|Hit Adv= | |Hit Adv= | ||
|Block Adv= | |Block Adv= | ||
|Feint Cancel= | |||
|Cancel on Hit=X | |||
|Cancel on Block=X | |||
|Guard Crush Value=5 | |||
|description= | |||
}} | |||
}} | |||
===Universal Moves=== | |||
===== <span class="invisible-header">Lower-body Evasion Attack (5AB)</span> ===== | |||
<font style="visibility:hidden" size="0"></font> | |||
{{MoveData | |||
|image=Garou_Freeman_AB.jpg | |||
|name=5A+B | |||
|subtitle=Lower-body evasion attack | |||
|caption= | |||
|data= | |||
{{AttackData-Garou | |||
|Damage=10 | |||
|Guard=Overhead | |||
|Startup=21 | |||
|Active=3 | |||
|Recovery=17 | |||
|Total=41 | |||
|Hit Adv=-1 | |||
|Block Adv=+5 | |||
|Feint Cancel= | |||
|Cancel on Hit=X | |||
|Cancel on Block=X | |||
|Guard Crush Value=6 | |||
|description=Pretty slow and fairly reactable, ignore this generally. | |||
}} | |||
}} | |||
===== <span class="invisible-header">Upper-body Evasion Attack (2AB)</span> ===== | |||
<font style="visibility:hidden" size="0"></font> | |||
{{MoveData | |||
|image= | |||
|name=2A+B | |||
|subtitle=Upper-body evasion attack | |||
|caption= | |||
|data= | |||
{{AttackData-Garou | |||
|Damage=10 | |||
|Guard=Mid | |||
|Startup=8 | |||
|Active=3 | |||
|Recovery=20 | |||
|Total=31 | |||
|Hit Adv=-4 | |||
|Block Adv=+2 | |||
|Feint Cancel=▽ | |||
|Cancel on Hit=◯ | |||
|Cancel on Block=X | |||
|Guard Crush Value=6 | |||
|description=1~6F of upper body invincibility. Last 3F has full-body invincibility. | |||
}} | |||
}} | |||
===== <span class="invisible-header">T.O.P. Attack (CD)</span> ===== | |||
<font style="visibility:hidden" size="0"></font> | |||
{{MoveData | |||
|image= | |||
|name=Overkill (T.O.P. Attack) | |||
|input=C+D (T.O.P. Only) | |||
|caption= | |||
|data= | |||
{{AttackData-Garou | |||
|Damage=17 (base damage) | |||
|Guard=Mid | |||
|Startup=16 | |||
|Active= | |||
|Recovery= | |||
|Total= | |||
|Hit Adv=KD | |||
|Block Adv=-11 | |||
|Feint Cancel= | |Feint Cancel= | ||
|Cancel on Hit= | |Cancel on Hit= | ||
|Cancel on Block= | |Cancel on Block= | ||
|Guard Crush Value= | |Guard Crush Value=25 | ||
|description= | |description=Used as an ender for guard crush setups, which allows Freeman to convert into a full combo upon a successful guard crush. This is usually done by cancelling into the move from a heavy normal, so that it is a true blockstring. | ||
}} | }} | ||
}} | }} | ||
=== | ===Throws=== | ||
===== <span class="invisible-header"></span> ===== | |||
===== <span class="invisible-header">Ground Throw</span> ===== | |||
<font style="visibility:hidden" size="0"></font> | <font style="visibility:hidden" size="0"></font> | ||
{{MoveData | {{MoveData | ||
|image= | |image=Garou_Freeman_Grab.jpg | ||
|name= | |name=Gorefest | ||
|input='''Close''' 4/6C | |||
|subtitle= | |subtitle= | ||
|caption= | |caption= | ||
|data= | |data= | ||
{{AttackData-Garou | {{AttackData-Garou | ||
|Damage= | |Damage=14 | ||
|Guard= | |Guard= | ||
|Startup= | |Startup=1 | ||
|Active= | |Active= | ||
|Recovery= | |Recovery= | ||
|Total= | |Total= | ||
|Hit Adv= | |Hit Adv=+73 | ||
|Block Adv= | |Block Adv= | ||
|Feint Cancel= | |Feint Cancel= | ||
|Cancel on Hit= | |Cancel on Hit= | ||
|Cancel on Block= | |Cancel on Block= | ||
|Guard Crush Value= | |Guard Crush Value= | ||
|description= | |description=Typical throw with no particular characteristics | ||
}} | }} | ||
}} | }} | ||
===== <span class="invisible-header"></span> ===== | |||
===Feint Cancels=== | |||
===== <span class="invisible-header">Forward Feint (6AC)</span> ===== | |||
<font style="visibility:hidden" size="0"></font> | <font style="visibility:hidden" size="0"></font> | ||
{{MoveData | {{MoveData | ||
|image= | |image=Garou_Freeman_ForwardTaunt.jpg | ||
|name= | |name=6A+C | ||
|subtitle= | |subtitle=Forward Feint | ||
|caption= | |caption= | ||
|data= | |data= | ||
| Line 471: | Line 666: | ||
|Damage= | |Damage= | ||
|Guard= | |Guard= | ||
|Startup= | |Startup= | ||
|Active= | |Active= | ||
|Recovery= | |Recovery= | ||
|Total= | |Total=11 | ||
|Hit Adv= | |Hit Adv= | ||
|Block Adv= | |Block Adv= | ||
|Feint Cancel= | |Feint Cancel= | ||
|Cancel on Hit= | |Cancel on Hit= | ||
|Cancel on Block= | |Cancel on Block= | ||
|Guard Crush Value= | |Guard Crush Value= | ||
|description= | |description= Mimics the animation of a delayed Full Blast after blackout. | ||
}} | }} | ||
}} | }} | ||
===== <span class="invisible-header"></span> ===== | |||
===== <span class="invisible-header">Down Feint (2AC)</span> ===== | |||
<font style="visibility:hidden" size="0"></font> | <font style="visibility:hidden" size="0"></font> | ||
{{MoveData | {{MoveData | ||
|image= | |image=Garou_Freeman_DownTaunt.jpg | ||
|name= | |name=2A+C | ||
|subtitle= | |subtitle=Down Feint | ||
|caption= | |caption= | ||
|data= | |data= | ||
| Line 499: | Line 696: | ||
|Active= | |Active= | ||
|Recovery= | |Recovery= | ||
|Total= | |Total=10 | ||
|Hit Adv= | |Hit Adv= | ||
|Block Adv= | |Block Adv= | ||
| Line 506: | Line 703: | ||
|Cancel on Block= | |Cancel on Block= | ||
|Guard Crush Value= | |Guard Crush Value= | ||
|description= | |description= Mimics the start of Phobia (and to a less extent Nightmare). | ||
Has upper-body invincibility when his body is lowered. | |||
}} | }} | ||
}} | }} | ||
===Special Moves=== | ===Special Moves=== | ||
===== <span class="invisible-header"></span> ===== | ===== <span class="invisible-header">V.O.D. (214P)</span> ===== | ||
<font style="visibility:hidden" size="0"></font> | <font style="visibility:hidden" size="0"></font> | ||
{{MoveData | {{MoveData | ||
|image= | |image= | ||
|name=V.O.D. | |name=V.O.D. | ||
|input= | |input=214A/C * 3 | ||
|subtitle= | |subtitle= | ||
|caption= | |caption= | ||
|data= | |data= | ||
{{AttackData-Garou | {{AttackData-Garou | ||
|version= | |version=A | ||
|Damage=8 | |Damage=8 | ||
|Guard= | |Guard=Mid | ||
|Startup=9 | |Startup=9 | ||
|Active= | |Active= | ||
| Line 536: | Line 734: | ||
|Cancel on Hit= | |Cancel on Hit= | ||
|Cancel on Block= | |Cancel on Block= | ||
|Guard Crush Value= | |Guard Crush Value=2 | ||
|description= | |description= | ||
*Freeman's rekka series, easily his best special move. | |||
*He can cancel each part rekka into a followup of whatever strength (For example, Freeman can do 214A > 214A > 214C as a string). | |||
*Rekkas are often used for pressure and combos, as well as occassionally for poking and meter building in neutral. | |||
The first part of Freeman's light rekkas, is +1 on block and starts up rekka offense. | |||
}} | }} | ||
{{AttackData-Garou | {{AttackData-Garou | ||
|version= | |version=A>A | ||
|Damage=8 | |Damage=8 | ||
|Guard= | |Guard=Low | ||
|Startup= | |Startup= | ||
|Active= | |Active= | ||
| Line 552: | Line 756: | ||
|Cancel on Hit= | |Cancel on Hit= | ||
|Cancel on Block= | |Cancel on Block= | ||
|Guard Crush Value= | |Guard Crush Value=2 | ||
|description= | |description= | ||
The second hit of Freeman's rekkas. Only 0 on block and with generous cancel timing, its great for pressure and combos. Also Freeman's only low rekka. Can be cancelled into from the rekka starter on whiff as well. | |||
}} | }} | ||
{{AttackData-Garou | {{AttackData-Garou | ||
|version= | |version=A>A>A | ||
|Damage=8 | |Damage=8 | ||
|Guard= | |Guard=Mid | ||
|Startup= | |Startup= | ||
|Active= | |Active= | ||
| Line 568: | Line 773: | ||
|Cancel on Hit= | |Cancel on Hit= | ||
|Cancel on Block= | |Cancel on Block= | ||
|Guard Crush Value= | |Guard Crush Value=3 | ||
|description= | |description= | ||
Third part of Freeman's light rekkas, knocks the opponent far away but is very punishable on block. Mostly used in combos exclusively. | |||
}} | }} | ||
{{AttackData-Garou | {{AttackData-Garou | ||
|version= | |version=C | ||
|Damage=8 | |Damage=8 | ||
|Guard= | |Guard=Mid | ||
|Startup=14 | |Startup=14 | ||
|Active= | |Active= | ||
| Line 596: | Line 790: | ||
|Cancel on Hit= | |Cancel on Hit= | ||
|Cancel on Block= | |Cancel on Block= | ||
|Guard Crush Value= | |Guard Crush Value=3 | ||
|description= | |description= | ||
*Freeman's rekka series, easily his best special move. | |||
*He can cancel each part rekka into a followup of whatever strenght (For example, Freeman can do 214a214a214c as a string). | |||
*Rekkas are often used for pressure and combos, as well as occassionally for poking and meter building in neutral | |||
Slower and more unsafe with no real benefit. | |||
}} | }} | ||
{{AttackData-Garou | {{AttackData-Garou | ||
|version= | |version=C>C | ||
|Damage=8 | |Damage=8 | ||
|Guard= | |Guard=Mid | ||
|Startup= | |Startup= | ||
|Active= | |Active= | ||
| Line 612: | Line 811: | ||
|Cancel on Hit= | |Cancel on Hit= | ||
|Cancel on Block= | |Cancel on Block= | ||
|Guard Crush Value= | |Guard Crush Value=3 | ||
|description= | |description= | ||
Second hit of Freeman's heavy rekkas. Much more unsafe and not a low. No real benefit, avoid using this. | |||
}} | }} | ||
{{AttackData-Garou | {{AttackData-Garou | ||
|version= | |version=C>C>C | ||
|Damage=8 | |Damage=8 | ||
|Guard= | |Guard=Mid | ||
|Startup= | |Startup= | ||
|Active= | |Active= | ||
| Line 628: | Line 828: | ||
|Cancel on Hit= | |Cancel on Hit= | ||
|Cancel on Block= | |Cancel on Block= | ||
|Guard Crush Value= | |Guard Crush Value=3 | ||
|description= | |description= | ||
Final hit of Freeman's heavy rekkas. Actually better then the light ender, since it launches opponents into the air for a knockdown, landing closer. Also much more safe, so used to end pressure safely. | |||
}} | }} | ||
}} | }} | ||
===== <span class="invisible-header"></span> ===== | ===== <span class="invisible-header">Nightmare (236P)</span> ===== | ||
<font style="visibility:hidden" size="0"></font> | <font style="visibility:hidden" size="0"></font> | ||
{{MoveData | {{MoveData | ||
|image= | |image= | ||
|name=Nightmare | |name=Nightmare | ||
|input= | |input= 236A/C | ||
|subtitle= | |subtitle= | ||
|caption= | |caption= | ||
|data= | |data= | ||
{{AttackData-Garou | {{AttackData-Garou | ||
|version= | |version=A | ||
|Damage=17 | |Damage=17 | ||
|Guard= | |Guard=<span style="color:#ff0000;">Mid</span> | ||
|Startup=18 | |Startup=18 | ||
|Active= | |Active= | ||
| Line 655: | Line 856: | ||
|Cancel on Hit= | |Cancel on Hit= | ||
|Cancel on Block= | |Cancel on Block= | ||
|Guard Crush Value= | |Guard Crush Value=7 | ||
|description= | |description=Freeman slides back a short distance before dashing with a slash attack. Has 1~12F upper-body invincibility during it's startup, which let it dodge some moves in neutral. Good callout punish and combo tool from heavy normals | ||
}} | }} | ||
{{AttackData-Garou | {{AttackData-Garou | ||
|version= | |version=C | ||
|Damage=21 | |Damage=21 | ||
|Guard= | |Guard=<span style="color:#ff0000;">Mid</span> | ||
|Startup= | |Startup=28 | ||
|Active= | |Active= | ||
|Recovery= | |Recovery= | ||
| Line 671: | Line 872: | ||
|Cancel on Hit= | |Cancel on Hit= | ||
|Cancel on Block= | |Cancel on Block= | ||
|Guard Crush Value= | |Guard Crush Value=8 | ||
|description= | |description=Has 1~20F upper-body invincibility during it's startup, which let it dodge some moves in neutral but now it's way too slow. | ||
}} | }} | ||
}} | }} | ||
===== <span class="invisible-header"></span> ===== | ===== <span class="invisible-header">Crow (214K)</span> ===== | ||
<font style="visibility:hidden" size="0"></font> | <font style="visibility:hidden" size="0"></font> | ||
{{MoveData | {{MoveData | ||
|image= | |image= | ||
|name=Crow | |name=Crow | ||
|input= | |input= 214B/D | ||
|subtitle= | |subtitle= | ||
|caption= | |caption= | ||
|data= | |data= | ||
{{AttackData-Garou | {{AttackData-Garou | ||
|version= | |version=B | ||
|Damage= | |Damage=9, 9 | ||
|Guard= | |Guard=<span style="color:#ff0000;">High</span> | ||
|Startup=29 | |Startup=29 | ||
|Active= | |Active= | ||
|Recovery= | |Recovery= | ||
|Total= | |Total= | ||
|Hit Adv= | |Hit Adv=+1 | ||
|Block Adv= | |Block Adv=+1 | ||
|Feint Cancel= | |Feint Cancel= | ||
|Cancel on Hit= | |Cancel on Hit= | ||
|Cancel on Block= | |Cancel on Block= | ||
|Guard Crush Value= | |Guard Crush Value=4, 4 | ||
|description= | |description=Leaps to the air to do a slow, overhead attack. The slow startup combined with the low reward makes this move never worth using. | ||
}} | }} | ||
{{AttackData-Garou | {{AttackData-Garou | ||
|version= | |version=D | ||
|Damage= | |Damage=10, 10 | ||
|Guard= | |Guard=<span style="color:#ff0000;">High</span> | ||
|Startup=41 | |Startup=41 | ||
|Active= | |Active= | ||
| Line 714: | Line 915: | ||
|Cancel on Hit= | |Cancel on Hit= | ||
|Cancel on Block= | |Cancel on Block= | ||
|Guard Crush Value= | |Guard Crush Value=4, 4 | ||
|description= | |description= | ||
}} | }} | ||
}} | }} | ||
===== <span class="invisible-header"></span> ===== | |||
===== <span class="invisible-header">Phobia (623P)</span> ===== | |||
<font style="visibility:hidden" size="0"></font> | <font style="visibility:hidden" size="0"></font> | ||
{{MoveData | {{MoveData | ||
|image= | |image= | ||
|name=Phobia | |name=Phobia | ||
|input= | |input= 623A/C | ||
|subtitle= | |subtitle= | ||
|caption= | |caption= | ||
|data= | |data= | ||
{{AttackData-Garou | {{AttackData-Garou | ||
|version= | |version=A | ||
|Damage=18 | |Damage=18 | ||
|Guard= | |Guard=<span style="color:#ff0000;">Mid</span> | ||
|Startup=17 | |Startup=17 | ||
|Active= | |Active= | ||
| Line 741: | Line 944: | ||
|Cancel on Hit= | |Cancel on Hit= | ||
|Cancel on Block= | |Cancel on Block= | ||
|Guard Crush Value= | |Guard Crush Value=7 | ||
|description= | |description=Anti-air slash, but quite too slow to be reliable, even with upper-body invincibility frames on startup (4~11F). Punishable on ground hit, so awful for ground combos, but knock opponents close if airborne | ||
}} | }} | ||
{{AttackData-Garou | {{AttackData-Garou | ||
|version= | |version=C | ||
|Damage=22 | |Damage=22 | ||
|Guard= | |Guard=<span style="color:#ff0000;">Mid</span> | ||
|Startup=20 | |Startup=20 | ||
|Active= | |Active= | ||
| Line 757: | Line 960: | ||
|Cancel on Hit= | |Cancel on Hit= | ||
|Cancel on Block= | |Cancel on Block= | ||
|Guard Crush Value= | |Guard Crush Value=8 | ||
|description= | |description=More damage and upper-body invincibility frames on startup (4~15F), as well as being safer, but even slower. | ||
}} | }} | ||
}} | }} | ||
===== <span class="invisible-header"></span> ===== | |||
===== <span class="invisible-header">Morbid Angel (41236K)</span> ===== | |||
<font style="visibility:hidden" size="0"></font> | <font style="visibility:hidden" size="0"></font> | ||
{{MoveData | {{MoveData | ||
|image= | |image= | ||
|name=Morbid Angel | |name=Morbid Angel | ||
|input= | |input= 41236B/D (Break OK) | ||
|subtitle= | |subtitle= | ||
|caption= | |caption= | ||
|data= | |data= | ||
{{AttackData-Garou | {{AttackData-Garou | ||
|version= | |version= B | ||
|Damage=21 | |Damage=21 | ||
|Guard= | |Guard= | ||
| Line 785: | Line 990: | ||
|Cancel on Block= | |Cancel on Block= | ||
|Guard Crush Value= | |Guard Crush Value= | ||
|description= | |description=Jumps in the air for a leaping, slow command grab that misses crouchers and fails close to the corner. Pretty shitty move as it's so hard to land and the reward isnt nearly worth. Switches sides | ||
}} | }} | ||
{{AttackData-Garou | {{AttackData-Garou | ||
|version= | |version= B Break | ||
|Damage= | |Damage= | ||
|Guard= | |Guard= | ||
|Startup=25 | |Startup=25 | ||
| Line 795: | Line 1,000: | ||
|Recovery= | |Recovery= | ||
|Total= | |Total= | ||
|Hit Adv=+ | |Hit Adv=+13 | ||
|Block Adv= | |Block Adv= | ||
|Feint Cancel= | |Feint Cancel= | ||
| Line 801: | Line 1,006: | ||
|Cancel on Block= | |Cancel on Block= | ||
|Guard Crush Value= | |Guard Crush Value= | ||
|description= | |description= Probably the worst brake move in the game. The reward is sctually very good but for the aformentioned reasons above you won't be able to rely on landing this move | ||
}} | }} | ||
{{AttackData-Garou | {{AttackData-Garou | ||
|version= | |version= D | ||
|Damage=21 | |Damage=21 | ||
|Guard= | |Guard= | ||
| Line 831: | Line 1,025: | ||
}} | }} | ||
{{AttackData-Garou | {{AttackData-Garou | ||
|version= | |version= D Break | ||
|Damage= | |Damage= | ||
|Guard= | |Guard= | ||
|Startup=27 | |Startup=27 | ||
| Line 838: | Line 1,032: | ||
|Recovery= | |Recovery= | ||
|Total= | |Total= | ||
|Hit Adv=+ | |Hit Adv=+13 | ||
|Block Adv= | |Block Adv= | ||
|Feint Cancel= | |Feint Cancel= | ||
| Line 849: | Line 1,043: | ||
===Super Moves=== | ===Super Moves=== | ||
===== <span class="invisible-header">Full Blast (236236P)</span> ===== | |||
<font style="visibility:hidden" size="0"></font> | |||
{{MoveData | {{MoveData | ||
|image = | |image = | ||
|name =Full Blast | |name =Full Blast | ||
|input = | |input =236236A/C | ||
|caption= | |caption= | ||
|data= | |data= | ||
{{AttackData-Garou | {{AttackData-Garou | ||
|version = | |version = A <br>(Can Hold A) | ||
|Damage=33 | |Damage=33 | ||
|Guard= | |Guard=<span style="color:#ff0000;">Mid</span> | ||
|Startup=11 | |Startup=11 | ||
|Active= | |Active= | ||
| Line 868: | Line 1,064: | ||
|Cancel on Hit= | |Cancel on Hit= | ||
|Cancel on Block= | |Cancel on Block= | ||
|Guard Crush Value= | |Guard Crush Value=15 | ||
|description= | |description=1~8F full-body invincibility. Projectile hitbox/hurtbox. Your main super to use in combos, as it adds a good chunk of damage and is very easy to combo into. Surprisingly safe if spaced. | ||
When the button is held, startup can be delayed 1~48F max after blackout. | |||
}} | }} | ||
{{AttackData-Garou | {{AttackData-Garou | ||
| header = | | header = | ||
|version = | |version =C <br>(Can Hold C) | ||
|Damage= | |Damage=23, 26 | ||
|Guard= | |Guard=<span style="color:#ff0000;">Mid</span> | ||
|Startup= | |Startup=11 | ||
|Active= | |Active= | ||
|Recovery= | |Recovery= | ||
|Total= | |Total= | ||
|Hit Adv=KD | |Hit Adv=KD | ||
|Block Adv=- | |Block Adv=-6 | ||
|Feint Cancel= | |Feint Cancel= | ||
|Cancel on Hit= | |Cancel on Hit= | ||
|Cancel on Block= | |Cancel on Block= | ||
|Guard Crush Value= | |Guard Crush Value=15×2 | ||
|description= | |description=1~11F full-body invincibility. Attack guaranteed to go through entire startup and come out. Has a projectile hitbox/hurtbox. | ||
One of the better 2 bar supers in this game due to it's respectable damage. | |||
More damaging than the above but be aware of the opponent's followup trajectory of used in juggles - it can be inconsistent | |||
When the button is held, startup can be delayed 1~48F max after blackout. | |||
}} | }} | ||
}} | }} | ||
===== <span class="invisible-header">Creeping Death (236236K)</span> ===== | |||
<font style="visibility:hidden" size="0"></font> | |||
{{MoveData | {{MoveData | ||
|image = | |image = | ||
|name =Creeping Death | |name =Creeping Death | ||
|input | |input =236236B/D | ||
|caption= | |caption= | ||
|data= | |data= | ||
{{AttackData-Garou | {{AttackData-Garou | ||
|version = | |version = B | ||
|Damage=33 | |Damage=33 | ||
|Guard= | |Guard= | ||
|Startup= | |Startup=7 | ||
|Active= | |Active= | ||
|Recovery= | |Recovery= | ||
| Line 911: | Line 1,115: | ||
|Cancel on Block= | |Cancel on Block= | ||
|Guard Crush Value= | |Guard Crush Value= | ||
|description= | |description=Freemam's second super series - after a few frames of invulnerability, he advances forward quickly, in a parry stance. Once hit, it guarantees a very damaging punish. Counters highs, mids and lows and is very consistent once triggered, although there's a frame where Freeman is totally defenseless. High-risk high-reward but a bit too slow to really rely on. | ||
1~6F full-body invincibility, 8~39F full-body counter. | |||
}} | }} | ||
{{AttackData-Garou | {{AttackData-Garou | ||
| header = | | header = | ||
|version = | |version =D | ||
|Damage= | |Damage=7×5, 25 | ||
|Guard= | |Guard= | ||
|Startup= | |Startup=9 | ||
|Active= | |Active= | ||
|Recovery= | |Recovery= | ||
| Line 928: | Line 1,134: | ||
|Cancel on Block= | |Cancel on Block= | ||
|Guard Crush Value= | |Guard Crush Value= | ||
|description= | |description= 1~9F full-body invincibility, 10~36F full-body counter. | ||
}} | }} | ||
}} | }} | ||
{{Navbox-MOTW}} | {{Navbox-MOTW}} | ||
[[Category:Garou: Mark of the Wolves]] | [[Category:Garou: Mark of the Wolves]] | ||
Latest revision as of 15:29, 29 June 2024
Introduction
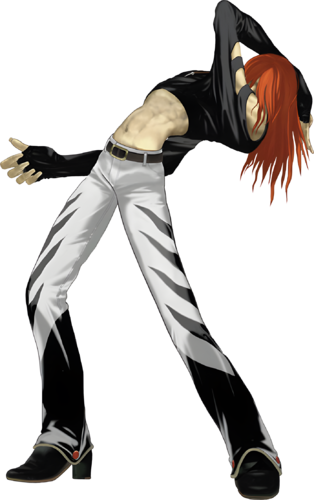
A Criminal in Second South that had a similar look about a fusion of Iori and Benimaru.
Later,in KOF 12 Iori based his new non-flame moveset about him.
Gameplay
Freeman's gameplan is to use his good burst movement and normals to establish pressure with his rekkas and to confirm into his Full Blast super.
| Strengths | Weaknesses |
|---|---|
|
|
Character Colors
Move List
Frame Data Source: https://w.atwiki.jp/garoumow/pages/28.html and https://w.atwiki.jp/garoumow/pages/75.html
| Data Help | |
|---|---|
| Disclaimer: This is meant to teach basic terminology used when describing moves. | |
| HitBox: | A predefined area (usually a group of rectangles or circles) that tell the game how any given attack can come in contact with a character. Hitboxes are invisible to the player when normally playing. |
| HurtBox: | A predefined area (usually a group of rectangles or circles) that tell the game how your character is allowed to get hit by any incoming attack. Specifically, you'll get hit by (or block) an attack if that attack's hitbox ever overlaps your hurtbox. |
| Throw Box/Range: | Active throw frames and range. Your opponent will be thrown in this field if not in block or hit stun. |
| Projectile Box: | Hit box on a projectile attack. |
| Guard/Counter Box: | The Guard Box or Counter Box. This appears when blocking or using a counter move. |
| Push Box: | Has no bearing on hurt/hit boxes. Just allows characters to not pass through each other. (Also known as "Collision Box".) |
| Command | the input for the attack. |
| Start Up | The number of frames that initiate at the beginning of an attack after the input.
And when the first hitbox is present.
The first active frame is after the last startup frame. |
| Guard | The way this move must be blocked.
High or H or Overhead (especially when from the ground) -- must be blocked standing. |
| Damage | "basic" damage -- unmodified damage values
"correct" damage -- damage values modified for damage scaling, TOP multiplier, and defense rate |
| Guard Crush Value | Decrease your guard durability gauge/meter by that value/s |
| + | signifies how many advantage frames the attacker has. |
| - | signifies how many disadvantage frames the attacker has. |
| KD | means the attack will knock the opponent down. |
| ◯ | circle means cancelable on both hit/block. |
| ∞ | infinity means chain cancelable with the same button (renda cancel). |
| ※ | means cancelable on the first hit/part only. |
| 《 》OR « » OR << >> OR ( ) | The numbers in the brackets are the startup frames until the next stage (the gap until the next hit's first active frame). |
| △ | up triangle means only cancelable on block. |
| ▽ | down triangle means only cancelable on hit. |
| × OR X | means not cancelable. |
Notes:
- Special/Super moves with "Guard" data in red text are impossible to just defend at 0-pixel health bar.
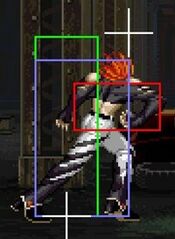
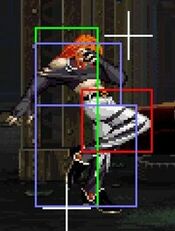
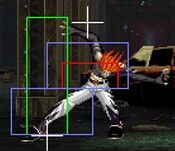
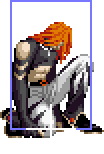
| Standing | Crouching | Dash | Taunt | Jumping | Landing |
 |
 |
 |
 |
 |

|
| 37 total frames or 35 for a backwards jump. | Freeman is invincible below the waist when landing from an empty jump. |
Close Standing Normals
Close 5A
| c.5A | Damage | Guard | Startup | Active | Recovery | Total |
|---|---|---|---|---|---|---|
| 4 | Mid | 4 | 4 | 5 | 13 | |
| Hit Adv | Block Adv | Feint Cancel | Cancel on Hit | Cancel on Block | Guard Crush Value | |
| +6 | +6 | ◯ | ◯ | ◯ | 4 | |
|
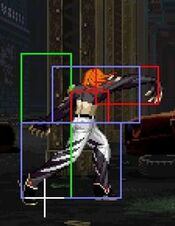
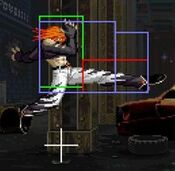
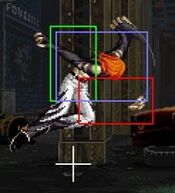
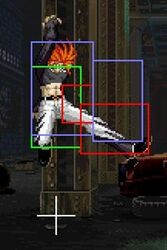
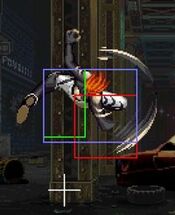
Standing jab. Proxomity normal, so tricky to get in range for but good nonetheless. Last 2F of recovery has full-body invincibility. | ||||||
| c.5A>A | Damage | Guard | Startup | Active | Recovery | Total |
| 4, 9 | HL | 4 | 4 | 12 | 20 | |
| Hit Adv | Block Adv | Feint Cancel | Cancel on Hit | Cancel on Block | Guard Crush Value | |
| -1 | -1 | X | X | X | 4, 9 | |
|
Target combo from cl.5A. | ||||||
| c.5A>A>A | Damage | Guard | Startup | Active | Recovery | Total |
| 4, 9, 8 | HL | 3 | 3 | 17 | 23 | |
| Hit Adv | Block Adv | Feint Cancel | Cancel on Hit | Cancel on Block | Guard Crush Value | |
| -5 | -5 | X | X | X | 4, 9, 9 | |
|
Target combo from cl.5A. Bad damage and you're minus in hit, never do this | ||||||
Close 5B
| Damage | Guard | Startup | Active | Recovery | Total |
|---|---|---|---|---|---|
| 6 | Mid | 3 | 4 | 5 | 12 |
| Hit Adv | Block Adv | Feint Cancel | Cancel on Hit | Cancel on Block | Guard Crush Value |
| +6 | +6 | ◯ | ◯ / ∞ | ◯ / ∞ | 4 |
|
Very fast, advantageous move. Proximity normal, so tricky to get in range for, but useful for pressure and hitconfirms. | |||||
Close 5C
| Damage | Guard | Startup | Active | Recovery | Total |
|---|---|---|---|---|---|
| 10 | Mid | 7 | 3 | 25 | 35 |
| Hit Adv | Block Adv | Feint Cancel | Cancel on Hit | Cancel on Block | Guard Crush Value |
| -7 | -7 | ◯ | ◯ | ◯ | 5 |
|
Very unsafe, but feint cancelling it makes it very plus and helpful for punishes | |||||
Close 5D
| Damage | Guard | Startup | Active | Recovery | Total |
|---|---|---|---|---|---|
| 6, 6 | Mid | 4 | 3, 3 | 20 | 30 |
| Hit Adv | Block Adv | Feint Cancel | Cancel on Hit | Cancel on Block | Guard Crush Value |
| -2 | -2 | ※ | ※ | ※ | 3, 3 |
|
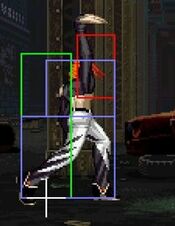
Decent proximity normal. Your heavy hitconfirm of choice, as FCing this gives you enough time to link into 2C for optimal punishes. Make sure to cancel before the second hit. | |||||
Far Standing Normals
Far 5A
| f.5A | Damage | Guard | Startup | Active | Recovery | Total |
|---|---|---|---|---|---|---|
| 5 | Mid | 4 | 4 | 12 | 20 | |
| Hit Adv | Block Adv | Feint Cancel | Cancel on Hit | Cancel on Block | Guard Crush Value | |
| -1 | -1 | ◯ | ◯ | ◯ | 4 | |
|
Average far jab. Decent ground poke, but moreso valuable as a fast anti air, even if mediocre | ||||||
| f.5A>A | Damage | Guard | Startup | Active | Recovery | Total |
| 5, 8 | Mid | 3 | 3 | 17 | 23 | |
| Hit Adv | Block Adv | Feint Cancel | Cancel on Hit | Cancel on Block | Guard Crush Value | |
| -5 | -5 | X | X | X | 4, 9 | |
|
Target combo from f.5A. | ||||||
Far 5B
| Damage | Guard | Startup | Active | Recovery | Total |
|---|---|---|---|---|---|
| 7 | Mid | 5 | 4 | 16 | 25 |
| Hit Adv | Block Adv | Feint Cancel | Cancel on Hit | Cancel on Block | Guard Crush Value |
| -5 | -5 | ◯ | ◯ | ◯ | 4 |
|
Standing poke with speed, cancellable and actually a good hitbox to beat lows. Has a good bunch of recovery and is vrry minus, so be sure to always buffer rekkas, and dont throw this out often | |||||
Far 5C
| Damage | Guard | Startup | Active | Recovery | Total |
|---|---|---|---|---|---|
| 14 | Mid | 9 | 3, «2», 4 | 11 | 29 |
| Hit Adv | Block Adv | Feint Cancel | Cancel on Hit | Cancel on Block | Guard Crush Value |
| +1 | +1 | X | X | X | 5 |
|
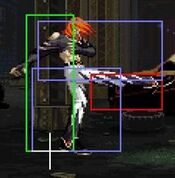
One of Freeman's few anti air options. While it may be a bit slow, its got solid hitboxes and is plus on block, without too much recovery. | |||||
Far 5D
| Damage | Guard | Startup | Active | Recovery | Total |
|---|---|---|---|---|---|
| 14 | Mid | 8 | 3 | 20 | 31 |
| Hit Adv | Block Adv | Feint Cancel | Cancel on Hit | Cancel on Block | Guard Crush Value |
| -2 | -2 | △ | X | ◯ | 5 |
Crouching Normals
2A
| Damage | Guard | Startup | Active | Recovery | Total |
|---|---|---|---|---|---|
| 4 | Mid | 5 | 4 | 6 | 15 |
| Hit Adv | Block Adv | Feint Cancel | Cancel on Hit | Cancel on Block | Guard Crush Value |
| +5 | +5 | ◯ | ◯ / ∞ | ◯ / ∞ | 4 |
2B
| Damage | Guard | Startup | Active | Recovery | Total |
|---|---|---|---|---|---|
| 6 | Low | 4 | 4 | 6 | 14 |
| Hit Adv | Block Adv | Feint Cancel | Cancel on Hit | Cancel on Block | Guard Crush Value |
| +5 | +5 | ◯ | ◯ | ◯ | 4 |
|
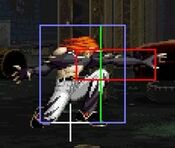
Your typical crouching B, which means its great for pressure, combos and poking. Doesn't self-chain, but can still link into itself. Combos into rekkas and Full Blast. | |||||
2C
| Damage | Guard | Startup | Active | Recovery | Total |
|---|---|---|---|---|---|
| 10 | Mid | 6 | 2 | 15 | 23 |
| Hit Adv | Block Adv | Feint Cancel | Cancel on Hit | Cancel on Block | Guard Crush Value |
| +4 | +4 | ◯ | ◯ | ◯ | 5 |
|
Great normal: very plus on block/hit at +4 (enough for a 2b to be a combo), deals good damage and combos into damaging confirms like Nightmare A. Has decent range and good ground priority. | |||||
2D
| Damage | Guard | Startup | Active | Recovery | Total |
|---|---|---|---|---|---|
| 10 | Low | 10 | 3 | 28 | 41 |
| Hit Adv | Block Adv | Feint Cancel | Cancel on Hit | Cancel on Block | Guard Crush Value |
| KD | -10 | X | X | X | 5 |
Jumping Normals
jA
| Damage | Guard | Startup | Active | Recovery | Total |
|---|---|---|---|---|---|
| 6 | High | 4 | 10 | - | - |
| Hit Adv | Block Adv | Feint Cancel | Cancel on Hit | Cancel on Block | Guard Crush Value |
| - | - | - | X | X | 4 |
|
Quick air move with decent hitbox for meeting opponents in the air | |||||
jB
| Damage | Guard | Startup | Active | Recovery | Total |
|---|---|---|---|---|---|
| 6 | High | 5 | 9 | - | - |
| Hit Adv | Block Adv | Feint Cancel | Cancel on Hit | Cancel on Block | Guard Crush Value |
| - | - | - | X | X | 4 |
|
More range but the hurtbox is also extended. Decent quick jump-in and alternative air poke | |||||
jC
| Damage | Guard | Startup | Active | Recovery | Total |
|---|---|---|---|---|---|
| 10 | High | 9 | 5 | - | - |
| Hit Adv | Block Adv | Feint Cancel | Cancel on Hit | Cancel on Block | Guard Crush Value |
| - | - | - | X | X | 5 |
|
Good aggressive air normal, for air-to-ground approaches. Slower, but better hitbox Can beat out upper-body evasion attacks. | |||||
jD
| Damage | Guard | Startup | Active | Recovery | Total |
|---|---|---|---|---|---|
| 10 | High | 10 | 6 | - | - |
| Hit Adv | Block Adv | Feint Cancel | Cancel on Hit | Cancel on Block | Guard Crush Value |
| - | - | - | X | X | 5 |
Universal Moves
Lower-body Evasion Attack (5AB)
| Damage | Guard | Startup | Active | Recovery | Total |
|---|---|---|---|---|---|
| 10 | Overhead | 21 | 3 | 17 | 41 |
| Hit Adv | Block Adv | Feint Cancel | Cancel on Hit | Cancel on Block | Guard Crush Value |
| -1 | +5 | - | X | X | 6 |
|
Pretty slow and fairly reactable, ignore this generally. | |||||
Upper-body Evasion Attack (2AB)
| Damage | Guard | Startup | Active | Recovery | Total |
|---|---|---|---|---|---|
| 10 | Mid | 8 | 3 | 20 | 31 |
| Hit Adv | Block Adv | Feint Cancel | Cancel on Hit | Cancel on Block | Guard Crush Value |
| -4 | +2 | ▽ | ◯ | X | 6 |
|
1~6F of upper body invincibility. Last 3F has full-body invincibility. | |||||
T.O.P. Attack (CD)
| Damage | Guard | Startup | Active | Recovery | Total |
|---|---|---|---|---|---|
| 17 (base damage) | Mid | 16 | - | - | - |
| Hit Adv | Block Adv | Feint Cancel | Cancel on Hit | Cancel on Block | Guard Crush Value |
| KD | -11 | - | - | - | 25 |
|
Used as an ender for guard crush setups, which allows Freeman to convert into a full combo upon a successful guard crush. This is usually done by cancelling into the move from a heavy normal, so that it is a true blockstring. | |||||
Throws
Ground Throw
| Damage | Guard | Startup | Active | Recovery | Total |
|---|---|---|---|---|---|
| 14 | - | 1 | - | - | - |
| Hit Adv | Block Adv | Feint Cancel | Cancel on Hit | Cancel on Block | Guard Crush Value |
| +73 | - | - | - | - | - |
|
Typical throw with no particular characteristics | |||||
Feint Cancels
Forward Feint (6AC)
| Damage | Guard | Startup | Active | Recovery | Total |
|---|---|---|---|---|---|
| - | - | - | - | - | 11 |
| Hit Adv | Block Adv | Feint Cancel | Cancel on Hit | Cancel on Block | Guard Crush Value |
| - | - | - | - | - | - |
|
Mimics the animation of a delayed Full Blast after blackout. | |||||
Down Feint (2AC)
| Damage | Guard | Startup | Active | Recovery | Total |
|---|---|---|---|---|---|
| - | - | - | - | - | 10 |
| Hit Adv | Block Adv | Feint Cancel | Cancel on Hit | Cancel on Block | Guard Crush Value |
| - | - | - | - | - | - |
|
Mimics the start of Phobia (and to a less extent Nightmare). Has upper-body invincibility when his body is lowered. | |||||
Special Moves
V.O.D. (214P)
| A | Damage | Guard | Startup | Active | Recovery | Total |
|---|---|---|---|---|---|---|
| 8 | Mid | 9 | - | - | - | |
| Hit Adv | Block Adv | Feint Cancel | Cancel on Hit | Cancel on Block | Guard Crush Value | |
| +1 | +1 | - | - | - | 2 | |
The first part of Freeman's light rekkas, is +1 on block and starts up rekka offense. | ||||||
| A>A | Damage | Guard | Startup | Active | Recovery | Total |
| 8 | Low | - | - | - | - | |
| Hit Adv | Block Adv | Feint Cancel | Cancel on Hit | Cancel on Block | Guard Crush Value | |
| 0 | 0 | - | - | - | 2 | |
|
The second hit of Freeman's rekkas. Only 0 on block and with generous cancel timing, its great for pressure and combos. Also Freeman's only low rekka. Can be cancelled into from the rekka starter on whiff as well. | ||||||
| A>A>A | Damage | Guard | Startup | Active | Recovery | Total |
| 8 | Mid | - | - | - | - | |
| Hit Adv | Block Adv | Feint Cancel | Cancel on Hit | Cancel on Block | Guard Crush Value | |
| KD | -24 | - | - | - | 3 | |
|
Third part of Freeman's light rekkas, knocks the opponent far away but is very punishable on block. Mostly used in combos exclusively. | ||||||
| C | Damage | Guard | Startup | Active | Recovery | Total |
| 8 | Mid | 14 | - | - | - | |
| Hit Adv | Block Adv | Feint Cancel | Cancel on Hit | Cancel on Block | Guard Crush Value | |
| -5 | -5 | - | - | - | 3 | |
Slower and more unsafe with no real benefit. | ||||||
| C>C | Damage | Guard | Startup | Active | Recovery | Total |
| 8 | Mid | - | - | - | - | |
| Hit Adv | Block Adv | Feint Cancel | Cancel on Hit | Cancel on Block | Guard Crush Value | |
| -12 | -12 | - | - | - | 3 | |
|
Second hit of Freeman's heavy rekkas. Much more unsafe and not a low. No real benefit, avoid using this. | ||||||
| C>C>C | Damage | Guard | Startup | Active | Recovery | Total |
| 8 | Mid | - | - | - | - | |
| Hit Adv | Block Adv | Feint Cancel | Cancel on Hit | Cancel on Block | Guard Crush Value | |
| KD | -1 | - | - | - | 3 | |
|
Final hit of Freeman's heavy rekkas. Actually better then the light ender, since it launches opponents into the air for a knockdown, landing closer. Also much more safe, so used to end pressure safely. | ||||||
Nightmare (236P)
| A | Damage | Guard | Startup | Active | Recovery | Total |
|---|---|---|---|---|---|---|
| 17 | Mid | 18 | - | - | - | |
| Hit Adv | Block Adv | Feint Cancel | Cancel on Hit | Cancel on Block | Guard Crush Value | |
| KD | -6 | - | - | - | 7 | |
|
Freeman slides back a short distance before dashing with a slash attack. Has 1~12F upper-body invincibility during it's startup, which let it dodge some moves in neutral. Good callout punish and combo tool from heavy normals | ||||||
| C | Damage | Guard | Startup | Active | Recovery | Total |
| 21 | Mid | 28 | - | - | - | |
| Hit Adv | Block Adv | Feint Cancel | Cancel on Hit | Cancel on Block | Guard Crush Value | |
| KD | -6 | - | - | - | 8 | |
|
Has 1~20F upper-body invincibility during it's startup, which let it dodge some moves in neutral but now it's way too slow. | ||||||
Crow (214K)
| B | Damage | Guard | Startup | Active | Recovery | Total |
|---|---|---|---|---|---|---|
| 9, 9 | High | 29 | - | - | - | |
| Hit Adv | Block Adv | Feint Cancel | Cancel on Hit | Cancel on Block | Guard Crush Value | |
| +1 | +1 | - | - | - | 4, 4 | |
|
Leaps to the air to do a slow, overhead attack. The slow startup combined with the low reward makes this move never worth using. | ||||||
| D | Damage | Guard | Startup | Active | Recovery | Total |
| 10, 10 | High | 41 | - | - | - | |
| Hit Adv | Block Adv | Feint Cancel | Cancel on Hit | Cancel on Block | Guard Crush Value | |
| +1 | +1 | - | - | - | 4, 4 | |
Phobia (623P)
| A | Damage | Guard | Startup | Active | Recovery | Total |
|---|---|---|---|---|---|---|
| 18 | Mid | 17 | - | - | - | |
| Hit Adv | Block Adv | Feint Cancel | Cancel on Hit | Cancel on Block | Guard Crush Value | |
| -9 | -9 | - | - | - | 7 | |
|
Anti-air slash, but quite too slow to be reliable, even with upper-body invincibility frames on startup (4~11F). Punishable on ground hit, so awful for ground combos, but knock opponents close if airborne | ||||||
| C | Damage | Guard | Startup | Active | Recovery | Total |
| 22 | Mid | 20 | - | - | - | |
| Hit Adv | Block Adv | Feint Cancel | Cancel on Hit | Cancel on Block | Guard Crush Value | |
| -1 | -1 | - | - | - | 8 | |
|
More damage and upper-body invincibility frames on startup (4~15F), as well as being safer, but even slower. | ||||||
Morbid Angel (41236K)
| B | Damage | Guard | Startup | Active | Recovery | Total |
|---|---|---|---|---|---|---|
| 21 | - | 25 | - | - | - | |
| Hit Adv | Block Adv | Feint Cancel | Cancel on Hit | Cancel on Block | Guard Crush Value | |
| KD | - | - | - | - | - | |
|
Jumps in the air for a leaping, slow command grab that misses crouchers and fails close to the corner. Pretty shitty move as it's so hard to land and the reward isnt nearly worth. Switches sides | ||||||
| B Break | Damage | Guard | Startup | Active | Recovery | Total |
| - | - | 25 | - | - | - | |
| Hit Adv | Block Adv | Feint Cancel | Cancel on Hit | Cancel on Block | Guard Crush Value | |
| +13 | - | - | - | - | - | |
|
Probably the worst brake move in the game. The reward is sctually very good but for the aformentioned reasons above you won't be able to rely on landing this move | ||||||
| D | Damage | Guard | Startup | Active | Recovery | Total |
| 21 | - | 27 | - | - | - | |
| Hit Adv | Block Adv | Feint Cancel | Cancel on Hit | Cancel on Block | Guard Crush Value | |
| KD | - | - | - | - | - | |
| D Break | Damage | Guard | Startup | Active | Recovery | Total |
| - | - | 27 | - | - | - | |
| Hit Adv | Block Adv | Feint Cancel | Cancel on Hit | Cancel on Block | Guard Crush Value | |
| +13 | - | - | - | - | - | |
Super Moves
Full Blast (236236P)
| A (Can Hold A) |
Damage | Guard | Startup | Active | Recovery | Total |
|---|---|---|---|---|---|---|
| 33 | Mid | 11 | - | - | - | |
| Hit Adv | Block Adv | Feint Cancel | Cancel on Hit | Cancel on Block | Guard Crush Value | |
| KD | -7 | - | - | - | 15 | |
|
1~8F full-body invincibility. Projectile hitbox/hurtbox. Your main super to use in combos, as it adds a good chunk of damage and is very easy to combo into. Surprisingly safe if spaced. When the button is held, startup can be delayed 1~48F max after blackout. | ||||||
| C (Can Hold C) |
Damage | Guard | Startup | Active | Recovery | Total |
| 23, 26 | Mid | 11 | - | - | - | |
| Hit Adv | Block Adv | Feint Cancel | Cancel on Hit | Cancel on Block | Guard Crush Value | |
| KD | -6 | - | - | - | 15×2 | |
|
1~11F full-body invincibility. Attack guaranteed to go through entire startup and come out. Has a projectile hitbox/hurtbox. One of the better 2 bar supers in this game due to it's respectable damage. More damaging than the above but be aware of the opponent's followup trajectory of used in juggles - it can be inconsistent When the button is held, startup can be delayed 1~48F max after blackout. | ||||||
Creeping Death (236236K)
| B | Damage | Guard | Startup | Active | Recovery | Total |
|---|---|---|---|---|---|---|
| 33 | - | 7 | - | - | - | |
| Hit Adv | Block Adv | Feint Cancel | Cancel on Hit | Cancel on Block | Guard Crush Value | |
| KD | - | - | - | - | - | |
|
Freemam's second super series - after a few frames of invulnerability, he advances forward quickly, in a parry stance. Once hit, it guarantees a very damaging punish. Counters highs, mids and lows and is very consistent once triggered, although there's a frame where Freeman is totally defenseless. High-risk high-reward but a bit too slow to really rely on. 1~6F full-body invincibility, 8~39F full-body counter. | ||||||
| D | Damage | Guard | Startup | Active | Recovery | Total |
| 7×5, 25 | - | 9 | - | - | - | |
| Hit Adv | Block Adv | Feint Cancel | Cancel on Hit | Cancel on Block | Guard Crush Value | |
| KD | - | - | - | - | - | |
|
1~9F full-body invincibility, 10~36F full-body counter. | ||||||
