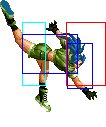
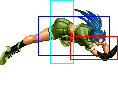
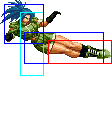
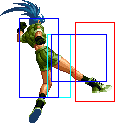
| Line 28: | Line 28: | ||
|} | |} | ||
==[[The_King_of_Fighters_2002/Normals_Guide|Movelist]]== | |||
{|border="1" | {|border="1" | ||
! | ! | ||
| Line 36: | Line 35: | ||
! Cancel | ! Cancel | ||
! Block | ! Block | ||
!colspan=" | !colspan="3"| Hitbox | ||
! Notes | ! Notes | ||
|- | |- | ||
|colspan=" | |colspan="9" align="center"| '''Standing Close''' | ||
|- | |- | ||
! [[image:snka.gif]] | ! [[image:snka.gif]] | ||
| Line 46: | Line 45: | ||
|align="center"| R,C,S,Su | |align="center"| R,C,S,Su | ||
|align="center"| HL | |align="center"| HL | ||
|colspan=" | |colspan="3" | [[image:Leona02_clA.png|center]] | ||
| | | | ||
|- | |- | ||
| Line 54: | Line 53: | ||
|align="center"| C,S,Su | |align="center"| C,S,Su | ||
|align="center"| HL | |align="center"| HL | ||
|colspan=" | |colspan="3" | [[image:Leona02_clB.png|center]] | ||
| | | | ||
|- | |- | ||
| Line 63: | Line 62: | ||
|align="center"| HL | |align="center"| HL | ||
|valign="bottom" style="border-right:0px;"| [[image:Leeona02_clC1.png|center]] | |valign="bottom" style="border-right:0px;"| [[image:Leeona02_clC1.png|center]] | ||
|valign="bottom" style="border-left:0px;"| [[image:Leona02_clC2.png|center]] | |colspan="2" valign="bottom" style="border-left:0px;"| [[image:Leona02_clC2.png|center]] | ||
| | | | ||
|- | |- | ||
| Line 72: | Line 71: | ||
|align="center"| HL | |align="center"| HL | ||
|valign="bottom" style="border-right:0px;"| [[image:Leeona02_clD1.png|center]] | |valign="bottom" style="border-right:0px;"| [[image:Leeona02_clD1.png|center]] | ||
|valign="bottom" style="border-left:0px;"| [[image:Leona02_clD2.png|center]] | |colspan="2" valign="bottom" style="border-left:0px;"| [[image:Leona02_clD2.png|center]] | ||
| | | | ||
|- | |- | ||
|colspan=" | |colspan="9" align="center"| '''Standing Far''' | ||
|- | |- | ||
! [[image:snka.gif]] | ! [[image:snka.gif]] | ||
| Line 82: | Line 81: | ||
|align="center"| R | |align="center"| R | ||
|align="center"| HL | |align="center"| HL | ||
|colspan=" | |colspan="3" | [[image:Leona02_stA.png|center]] | ||
| | | | ||
|- | |- | ||
| Line 90: | Line 89: | ||
| | | | ||
|align="center"| HL | |align="center"| HL | ||
|colspan=" | |colspan="3" | [[image:Leona02_stB.png|center]] | ||
| | | | ||
|- | |- | ||
| Line 98: | Line 97: | ||
| | | | ||
|align="center"| HL | |align="center"| HL | ||
|colspan=" | |colspan="3" | [[image:Leona02_stC.png|center]] | ||
| | | | ||
|- | |- | ||
| Line 106: | Line 105: | ||
| | | | ||
|align="center"| HL | |align="center"| HL | ||
|colspan=" | |colspan="3"| [[image:Leona02_stD.png|center]] | ||
| Goes over lows | | Goes over lows | ||
|- | |- | ||
| Line 114: | Line 113: | ||
|align="center"| S,Su | |align="center"| S,Su | ||
|align="center"| HL | |align="center"| HL | ||
|colspan=" | |colspan="3"| [[image:Leona02_stCD.png|center]] | ||
| | | | ||
|- | |- | ||
|colspan=" | |colspan="9" align="center"| '''Crouching''' | ||
|- | |- | ||
! [[image:snka.gif]] | ! [[image:snka.gif]] | ||
| Line 124: | Line 123: | ||
|align="center"| R,C,S,Su | |align="center"| R,C,S,Su | ||
|align="center"| HL | |align="center"| HL | ||
|colspan=" | |colspan="3" | [[image:Leona02_crA.png|center]] | ||
| | | | ||
|- | |- | ||
| Line 132: | Line 131: | ||
|align="center"| R | |align="center"| R | ||
|align="center"| L | |align="center"| L | ||
|colspan=" | |colspan="3" | [[image:Leona02_crB.png|center]] | ||
| | | | ||
|- | |- | ||
| Line 141: | Line 140: | ||
|align="center"| HL | |align="center"| HL | ||
|valign="bottom" style="border-right:0px;"| [[image:Leeona02_crC1.png|center]] | |valign="bottom" style="border-right:0px;"| [[image:Leeona02_crC1.png|center]] | ||
|valign="bottom" style="border-left:0px;"| [[image:Leona02_crC2.png|center]] | |colspan="2" valign="bottom" style="border-left:0px;"| [[image:Leona02_crC2.png|center]] | ||
| | | | ||
|- | |- | ||
| Line 149: | Line 148: | ||
| | | | ||
|align="center"| L | |align="center"| L | ||
|colspan=" | |colspan="3" | [[image:Leona02_crD.png|center]] | ||
| | | | ||
|- | |- | ||
|colspan=" | |colspan="9" align="center"| '''Jump''' | ||
|- | |- | ||
! [[image:snka.gif]] | ! [[image:snka.gif]] | ||
| Line 159: | Line 158: | ||
| | | | ||
|align="center"| H | |align="center"| H | ||
|colspan=" | |colspan="3" | [[image:Leona02_jA.png|center]] | ||
| | | | ||
|- | |- | ||
| Line 168: | Line 167: | ||
|align="center"| H | |align="center"| H | ||
|valign="bottom" style="border-right:0px;"| [[image:Leona02_jB1.png|center]] | |valign="bottom" style="border-right:0px;"| [[image:Leona02_jB1.png|center]] | ||
|valign="bottom" style="border-left:0px;"| [[image:Leona02_jB2.png|center]] | |colspan="2" valign="bottom" style="border-left:0px;"| [[image:Leona02_jB2.png|center]] | ||
| | | | ||
|- | |- | ||
| Line 176: | Line 175: | ||
| | | | ||
|align="center"| H | |align="center"| H | ||
|colspan=" | |colspan="3" | [[image:Leona02_jC.png|center]] | ||
| | | | ||
|- | |- | ||
| Line 184: | Line 183: | ||
|align="center"| S,Su | |align="center"| S,Su | ||
|align="center"| H | |align="center"| H | ||
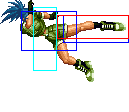
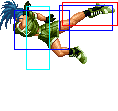
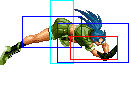
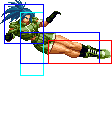
|colspan=" | |colspan="3" | [[image:Leona02_jD.png|center]] | ||
| | | | ||
|- | |- | ||
| Line 192: | Line 191: | ||
|align="center"| S,Su | |align="center"| S,Su | ||
|align="center"| HL | |align="center"| HL | ||
|colspan=" | |colspan="3"| [[image:Leona02_jCD.png|center]] | ||
| | | | ||
|- | |- | ||
|colspan=" | |colspan="9" align="center"| '''Neutral Jump''' | ||
|- | |- | ||
! [[image:snka.gif]] | ! [[image:snka.gif]] | ||
| Line 202: | Line 201: | ||
| | | | ||
|align="center"| H | |align="center"| H | ||
|colspan=" | |colspan="3" | [[image:Leona02_juA.png|center]] | ||
| | | | ||
|- | |- | ||
| Line 210: | Line 209: | ||
| | | | ||
|align="center"| H | |align="center"| H | ||
|colspan=" | |colspan="3" | [[image:Leona02_juB.png|center]] | ||
| | | | ||
|- | |- | ||
| Line 219: | Line 218: | ||
|align="center"| H | |align="center"| H | ||
|valign="bottom" style="border-right:0px;"| [[image:Leona02_juC1.png|center]] | |valign="bottom" style="border-right:0px;"| [[image:Leona02_juC1.png|center]] | ||
|valign="bottom" style="border-left:0px;"| [[image:Leona02_juC2.png|center]] | |colspan="2" valign="bottom" style="border-left:0px;"| [[image:Leona02_juC2.png|center]] | ||
| | | | ||
|- | |- | ||
| Line 227: | Line 226: | ||
|align="center"| S,Su | |align="center"| S,Su | ||
|align="center"| H | |align="center"| H | ||
|colspan=" | |colspan="3" | [[image:Leona02_juD.png|center]] | ||
| | | | ||
|- | |- | ||
|colspan=" | |colspan="9" align="center"| '''Hop''' | ||
|- | |- | ||
! [[image:snka.gif]] | ! [[image:snka.gif]] | ||
| Line 237: | Line 236: | ||
|align="center"| S,Su | |align="center"| S,Su | ||
|align="center"| H | |align="center"| H | ||
|colspan=" | |colspan="3" | [[image:Leona02_hA.png|center]] | ||
| | | | ||
|- | |- | ||
| Line 246: | Line 245: | ||
|align="center"| H | |align="center"| H | ||
|valign="bottom" style="border-right:0px;"| [[image:Leona02_jB1.png|center]] | |valign="bottom" style="border-right:0px;"| [[image:Leona02_jB1.png|center]] | ||
|valign="bottom" style="border-left:0px;"| [[image:Leona02_jB2.png|center]] | |colspan="2" valign="bottom" style="border-left:0px;"| [[image:Leona02_jB2.png|center]] | ||
| | | | ||
|- | |- | ||
| Line 254: | Line 253: | ||
| | | | ||
|align="center"| H | |align="center"| H | ||
|colspan=" | |colspan="3" | [[image:Leona02_hC.png|center]] | ||
| | | | ||
|- | |- | ||
| Line 262: | Line 261: | ||
|align="center"| S,Su | |align="center"| S,Su | ||
|align="center"| H | |align="center"| H | ||
|colspan=" | |colspan="3" | [[image:Leona02_hD.png|center]] | ||
| | | | ||
|- | |- | ||
|colspan=" | |colspan="9" align="center"| '''Command Normals''' | ||
|- | |- | ||
! <br>f+[[image:snkb.gif]]<br><br> | ! <br>f+[[image:snkb.gif]]<br><br> | ||
| Line 272: | Line 271: | ||
| | | | ||
|align="center"| H | |align="center"| H | ||
|rowspan="2" colspan=" | |rowspan="2" colspan="3" | [[image:Leona02_fB.png|center]] | ||
|align="center"| Goes over lows | |align="center"| Goes over lows | ||
|- | |- | ||
Revision as of 09:01, 12 September 2013
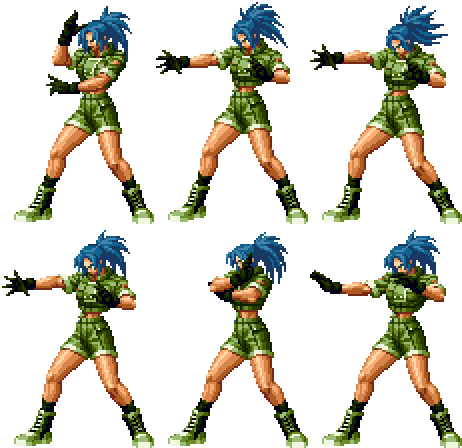
General Info
Crouch height: Low
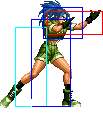
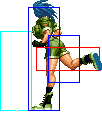
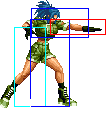
| Stand | Crouch | Jump | Grab | Run |
|---|---|---|---|---|

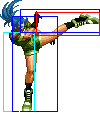
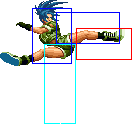
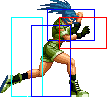
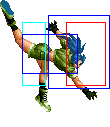
|

|

|

|
Colors

|

|

|

|
Movelist
Notes
- cancellable normals are close A, crouch A, close B, close C, far C, crouch C, close D, jump B, jump D
- CD is cancellable into specials and DMs
- far D can evade low attacks
Combos
Strategies
- to do the V-Slasher, it's best to buffer the qcf hcb on the ground then follow the qcb with ub u uf +C, this should give you a jump forward and a V slasher very close to the ground
- use the V-Slasher to punish any whiff from half screen, any fireball, any laggy move that usually staggers too far to punish on block. It has total invincibility to most attacks, with the exception of Robert's f b f+K kicks (although this can be punished by doing a jump D, V-Slasher instead)
- always jump around with Leona (usually straight up), and bait the opponent into attacking you (whether it is an anti-air, fireball, etc). Immediately cancel to V-Slasher to punish. Leona can also use her _b f+K to go through fireballs like Athena's
- her jump D has excellent priority and comes out reasonably fast. Jumping backwards with D will stuff most people out of their attacks, or attempted jumpins. This jumpin is also very meaty, as one can do it early on a waking up opponent, and it will still connect as they are getting up
- in the bomb combos with rdp+K, the bomb can usually be evaded with roll. Punish this by throwing them or using qcb hcf+K DM. If they roll, they will get hit by the DM or thrown, and if they block the DM, the bomb will explode on them
- one trick Leona has is her qcb+B hair pin. The exploding pin will hit low further out from half screen. At max range you can actually throw the hair pin then super jump forward D. The j.D will hit overhead, and the bomb will hit low. Timed right, you can actually land both at the same time for an unblockable. This you can then cancel to super. Generally this only works against unknowledgable or sleepy opponents, as the best counter is to roll the pin. In this case you can hyper hop forward and throw the opponent during his roll.
