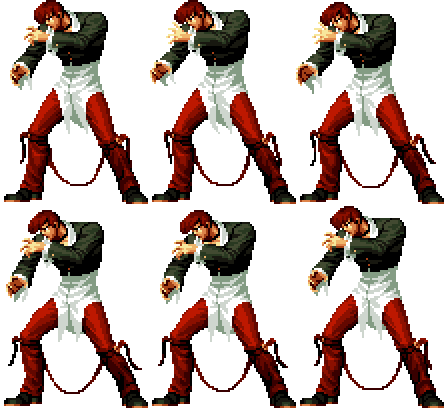
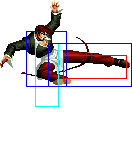
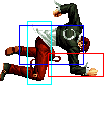
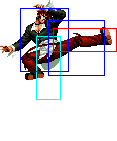
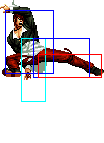
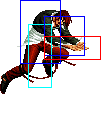
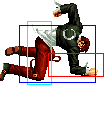
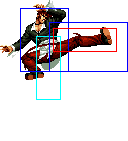
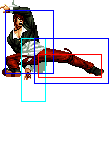
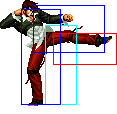
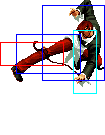
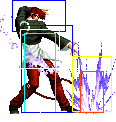
| Line 14: | Line 14: | ||
| [[image:Iori02_colorD.png]] | | [[image:Iori02_colorD.png]] | ||
|} | |} | ||
==[[The_King_of_Fighters_2002/Normals_Guide|Movelist]]== | |||
{|border="1" | {|border="1" | ||
! | !width="8%"| | ||
! Frames | ! Frames | ||
! Advantage | ! Advantage | ||
! Cancel | ! Cancel | ||
! Block | ! Block | ||
!colspan=" | !colspan="4"| Hitbox | ||
! Notes | ! Notes | ||
|- | |- | ||
|colspan=" | |colspan="10" align="center"| '''Standing Close''' | ||
|- | |- | ||
! [[image:snka.gif]] | ! [[image:snka.gif]] | ||
| Line 32: | Line 31: | ||
|align="center"| R,C,S,Su | |align="center"| R,C,S,Su | ||
|align="center"| HL | |align="center"| HL | ||
|colspan=" | |colspan="4" | [[image:Iori02_clA.png|center]] | ||
| | | | ||
|- | |- | ||
| Line 40: | Line 39: | ||
|align="center"| C,S,Su | |align="center"| C,S,Su | ||
|align="center"| L | |align="center"| L | ||
|colspan=" | |colspan="4" | [[image:Iori02_clB.png|center]] | ||
| | | | ||
|- | |- | ||
| Line 48: | Line 47: | ||
|align="center"| C,S,Su | |align="center"| C,S,Su | ||
|align="center"| HL | |align="center"| HL | ||
|valign="bottom" style="border-right:0px;"| [[image:Iori02_clC1.png|center]] | |valign="bottom" colspan="2" style="border-right:0px;"| [[image:Iori02_clC1.png|center]] | ||
|valign="bottom" style="border-left:0px;"| [[image:Iori02_clC2.png|center]] | |valign="bottom" colspan="2" style="border-left:0px;"| [[image:Iori02_clC2.png|center]] | ||
| | | | ||
|- | |- | ||
| Line 57: | Line 56: | ||
| | | | ||
|align="center"| HL | |align="center"| HL | ||
|colspan=" | |colspan="4" | [[image:Iori02_clD.png|center]] | ||
| | | | ||
|- | |- | ||
|colspan=" | |colspan="10" align="center"| '''Standing Far''' | ||
|- | |- | ||
! [[image:snka.gif]] | ! [[image:snka.gif]] | ||
| Line 67: | Line 66: | ||
|align="center"| R,C,S,Su | |align="center"| R,C,S,Su | ||
|align="center"| HL | |align="center"| HL | ||
|colspan=" | |colspan="4" | [[image:Iori02_stA.png|center]] | ||
| | | | ||
|- | |- | ||
| Line 75: | Line 74: | ||
| | | | ||
|align="center"| HL | |align="center"| HL | ||
|colspan=" | |colspan="4" | [[image:Iori02_stB.png|center]] | ||
| | | | ||
|- | |- | ||
| Line 83: | Line 82: | ||
|align="center"| C,S,Su | |align="center"| C,S,Su | ||
|align="center"| HL | |align="center"| HL | ||
|colspan=" | |colspan="4" | [[image:Iori02_stC.png|center]] | ||
| | | | ||
|- | |- | ||
| Line 91: | Line 90: | ||
| | | | ||
|align="center"| HL | |align="center"| HL | ||
|colspan=" | |colspan="4"| [[image:Iori02_stD.png|center]] | ||
| | | | ||
|- | |- | ||
| Line 99: | Line 98: | ||
|align="center"| C,S,Su | |align="center"| C,S,Su | ||
|align="center"| HL | |align="center"| HL | ||
|colspan=" | |colspan="4"| [[image:Iori02_stCD.png|center]] | ||
| | | | ||
|- | |- | ||
|colspan=" | |colspan="10" align="center"| '''Crouching''' | ||
|- | |- | ||
! [[image:snka.gif]] | ! [[image:snka.gif]] | ||
| Line 109: | Line 108: | ||
|align="center"| R,C,S,Su | |align="center"| R,C,S,Su | ||
|align="center"| HL | |align="center"| HL | ||
|colspan=" | |colspan="4" | [[image:Iori02_crA.png|center]] | ||
| | | | ||
|- | |- | ||
| Line 117: | Line 116: | ||
|align="center"| R | |align="center"| R | ||
|align="center"| L | |align="center"| L | ||
|colspan=" | |colspan="4" | [[image:Iori02_crB.png|center]] | ||
| | | | ||
|- | |- | ||
| Line 125: | Line 124: | ||
|align="center"| C,S,Su | |align="center"| C,S,Su | ||
|align="center"| HL | |align="center"| HL | ||
|colspan=" | |colspan="4"| [[image:Iori02_crC.png|center]] | ||
| | | | ||
|- | |- | ||
| Line 133: | Line 132: | ||
| | | | ||
|align="center"| L | |align="center"| L | ||
|colspan=" | |colspan="4" | [[image:Iori02_crD.png|center]] | ||
| | | | ||
|- | |- | ||
|colspan=" | |colspan="10" align="center"| '''Jump''' | ||
|- | |- | ||
! [[image:snka.gif]] | ! [[image:snka.gif]] | ||
| Line 143: | Line 142: | ||
| | | | ||
|align="center"| H | |align="center"| H | ||
|colspan=" | |colspan="4" | [[image:Iori02_jA.png|center]] | ||
| | | | ||
|- | |- | ||
| Line 151: | Line 150: | ||
| | | | ||
|align="center"| H | |align="center"| H | ||
|colspan=" | |colspan="4" | [[image:Iori02_jB.png|center]] | ||
| | | | ||
|- | |- | ||
| Line 159: | Line 158: | ||
| | | | ||
|align="center"| H | |align="center"| H | ||
|colspan=" | |colspan="4" | [[image:Iori02_jC.png|center]] | ||
| | | | ||
|- | |- | ||
| Line 167: | Line 166: | ||
| | | | ||
|align="center"| H | |align="center"| H | ||
|valign="bottom" style="border-right:0px;"| [[image:Iori02_jD1.png|center]] | |valign="bottom" colspan="2" style="border-right:0px;"| [[image:Iori02_jD1.png|center]] | ||
|valign="bottom" style="border-left:0px;"| [[image:Iori02_jD2.png|center]] | |valign="bottom" colspan="2" style="border-left:0px;"| [[image:Iori02_jD2.png|center]] | ||
| | | | ||
|- | |- | ||
| Line 176: | Line 175: | ||
| | | | ||
|align="center"| HL | |align="center"| HL | ||
|colspan=" | |colspan="4"| [[image:Iori02_jCD.png|center]] | ||
| | | | ||
|- | |- | ||
|colspan=" | |colspan="10" align="center"| '''Neutral Jump''' | ||
|- | |- | ||
! [[image:snka.gif]] | ! [[image:snka.gif]] | ||
| Line 186: | Line 185: | ||
| | | | ||
|align="center"| H | |align="center"| H | ||
|colspan=" | |colspan="4" | [[image:Iori02_jA.png|center]] | ||
| | | | ||
|- | |- | ||
| Line 194: | Line 193: | ||
| | | | ||
|align="center"| H | |align="center"| H | ||
|colspan=" | |colspan="4" | [[image:Iori02_jB.png|center]] | ||
| | | | ||
|- | |- | ||
| Line 202: | Line 201: | ||
| | | | ||
|align="center"| H | |align="center"| H | ||
|colspan=" | |colspan="4" | [[image:Iori02_jC.png|center]] | ||
| | | | ||
|- | |- | ||
| Line 210: | Line 209: | ||
| | | | ||
|align="center"| H | |align="center"| H | ||
|valign="bottom" style="border-right:0px;"| [[image:Iori02_jD1.png|center]] | |valign="bottom" colspan="2" style="border-right:0px;"| [[image:Iori02_jD1.png|center]] | ||
|valign="bottom" style="border-left:0px;"| [[image:Iori02_jD2.png|center]] | |valign="bottom" colspan="2" style="border-left:0px;"| [[image:Iori02_jD2.png|center]] | ||
| | | | ||
|- | |- | ||
|colspan=" | |colspan="10" align="center"| '''Hop''' | ||
|- | |- | ||
! [[image:snka.gif]] | ! [[image:snka.gif]] | ||
| Line 221: | Line 220: | ||
| | | | ||
|align="center"| H | |align="center"| H | ||
|colspan=" | |colspan="4" | [[image:Iori02_jA.png|center]] | ||
| | | | ||
|- | |- | ||
| Line 229: | Line 228: | ||
| | | | ||
|align="center"| H | |align="center"| H | ||
|colspan=" | |colspan="4" | [[image:Iori02_jB.png|center]] | ||
| | | | ||
|- | |- | ||
| Line 237: | Line 236: | ||
| | | | ||
|align="center"| H | |align="center"| H | ||
|colspan=" | |colspan="4" | [[image:Iori02_hC.png|center]] | ||
| | | | ||
|- | |- | ||
| Line 245: | Line 244: | ||
| | | | ||
|align="center"| H | |align="center"| H | ||
|valign="bottom" style="border-right:0px;"| [[image:Iori02_hD1.png|center]] | |valign="bottom" colspan="2" style="border-right:0px;"| [[image:Iori02_hD1.png|center]] | ||
|valign="bottom" style="border-left:0px;"| [[image:Iori02_hD2.png|center]] | |valign="bottom" colspan="2" style="border-left:0px;"| [[image:Iori02_hD2.png|center]] | ||
| | | | ||
|- | |- | ||
|colspan=" | |colspan="10" align="center"| '''Command Normals''' | ||
|- | |- | ||
! f+[[image:snka.gif]] | ! f+[[image:snka.gif]] | ||
| Line 256: | Line 255: | ||
|align="center"| Su,f+AA | |align="center"| Su,f+AA | ||
| | | | ||
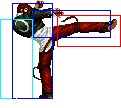
|colspan=" | |colspan="4" | [[image:Iori02_fA.png|center]] | ||
| | | | ||
|- | |- | ||
! f+[[image:snka.gif]][[image:snka.gif]] | ! f+[[image:snka.gif]],[[image:snka.gif]] | ||
|align="center"| 9/7/15 | |align="center"| 9/7/15 | ||
|align="center"| -2/-4 | |align="center"| -2/-4 | ||
|align="center"| S,Su | |align="center"| S,Su | ||
| | | | ||
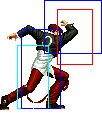
|colspan=" | |colspan="4" | [[image:Iori02_fAA.png|center]] | ||
| | | | ||
|- | |- | ||
| Line 272: | Line 271: | ||
| | | | ||
|align="center"| H | |align="center"| H | ||
|rowspan="2" valign="bottom" style="border-right:0px;"| [[image:Iori02_fB1.png|center]] | |rowspan="2" colspan="2" valign="bottom" style="border-right:0px;"| [[image:Iori02_fB1.png|center]] | ||
|rowspan="2" valign="bottom" style="border-left:0px;"| [[image:Iori02_fB2.png|center]] | |rowspan="2" colspan="2" valign="bottom" style="border-left:0px;"| [[image:Iori02_fB2.png|center]] | ||
|align="center"| Second hit usually whiffs, this has been taken into account in the frame advantage calculations. | |align="center"| Second hit usually whiffs, this has been taken into account in the frame advantage calculations. | ||
|- | |- | ||
! f+[[image:snkb.gif]] (cancel) | ! f+[[image:snkb.gif]]<br>(cancel) | ||
|align="center"| 23/5(3)/20 | |align="center"| 23/5(3)/20 | ||
|align="center"| -11/-13 | |align="center"| -11/-13 | ||
| Line 288: | Line 287: | ||
| | | | ||
|align="center"| HL | |align="center"| HL | ||
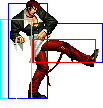
|colspan=" | |colspan="4" | [[image:Iori02_jb+B.png|center]] | ||
|align="center"| Has three frames of additional landing recovery. | |align="center"| Has three frames of additional landing recovery. Whiffs on most crouchers. | ||
| | |- | ||
|colspan="10" align="center"| '''Special Moves''' | |||
== | |- | ||
! qcf+[[image:snka.gif]] | |||
|align="center"| 10/-/39 | |||
|align="center"| -7/-9 | |||
| | |||
|align="center"| HL | |||
|rowspan="2" colspan="4" | [[image:Iori02_qcfP.png|center]] | |||
|rowspan="2" align="left"|'''108 Shiki: Yami Barai - qcf+P''' | |||
=== | |||
* Iori throws a ground projectile | * Iori throws a ground projectile | ||
* qcf+C travels alot faster than qcf+A, although both don't have good recovery | * qcf+C travels alot faster than qcf+A, although both don't have good recovery | ||
|- | |||
! qcf+[[image:snkc.gif]] | |||
2. 127 Shiki: Aoihana - qcb+Px3 | |align="center"| 9/-/40 | ||
|align="center"| -8/-10 | |||
| | |||
|align="center"| HL | |||
|- | |||
! qcb+[[image:snka.gif]] (1) | |||
|align="center"| 8/3/26 | |||
|align="center"| -9/-11 | |||
| | |||
|align="center"| HL | |||
|rowspan="6" | [[image:Iori02_qcbP1.png|center]] | |||
|rowspan="6" | [[image:Iori02_qcbP2.png|center]] | |||
|rowspan="6" colspan="2"| [[image:Iori02_qcbP3.png|center]] | |||
|rowspan="6" align="left"|'''127 Shiki: Aoihana - qcb+Px3''' | |||
* Iori will do a punch, moving him forward. This can be done three times. For the third hit, Iori will jump into the air and hit them from above | * Iori will do a punch, moving him forward. This can be done three times. For the third hit, Iori will jump into the air and hit them from above | ||
* the followups can be delayed to confuse the opponent | * the followups can be delayed to confuse the opponent | ||
| Line 330: | Line 324: | ||
* free cancellable into | * free cancellable into | ||
* free cancellable out of on the first and second hits | * free cancellable out of on the first and second hits | ||
|- | |||
! qcb+[[image:snka.gif]] (2) | |||
|align="center"| 7/3/28 | |||
|align="center"| KD/-13 | |||
| | |||
|align="center"| HL | |||
|- | |||
! qcb+[[image:snka.gif]] (3) | |||
|align="center"| 17/2/29 | |||
|align="center"| KD/-13 | |||
| | |||
|align="center"| H | |||
|- | |||
! qcb+[[image:snkc.gif]] (1) | |||
|align="center"| 11/3/28 | |||
|align="center"| -11/-13 | |||
| | |||
|align="center"| HL | |||
|- | |||
! qcb+[[image:snkc.gif]] (2) | |||
|align="center"| 11/3/29 | |||
|align="center"| KD/-14 | |||
| | |||
|align="center"| HL | |||
|- | |||
! qcb+[[image:snkc.gif]] (3) | |||
|align="center"| 17/9/31 | |||
|align="center"| KD/-22 | |||
| | |||
|align="center"| H | |||
|- | |||
|} | |||
=== Special Moves === | |||
3. 212 Shiki: Kototsuki In - hcb+K | 3. 212 Shiki: Kototsuki In - hcb+K | ||
Revision as of 05:13, 29 July 2013
General Info
Crouch height: Low
Colors:

|

|

|

|
Movelist
Special Moves
3. 212 Shiki: Kototsuki In - hcb+K
- Iori runs forward, faster than his running speed. If he connects, he will grab the opponent and blast them in the face
- hcb+B runs slightly more than half screen, while hcb+D will make him run full screen
- he recovers quickly if he whiffs but has horrible recovery time if the opponent blocks the attack
- hard knockdown
- does alot of guardcrush damage on the first hit
- free cancellable into
- free cancellable out of on the first hit
4. 100 Shiki: Oniyaki - dp+P
- a decent fast, vertical anti-air but lacks much invincibility
- free cancellable into
- dp+A free cancellable out of, dp+C free cancellable out of on the first and second hit
- dp+A is supercancellable, dp+C is supercancellable on the first and second hit while Iori is on the ground
5. Kuzukaze - hcb f+P
- a delayed command throw with some startup invincibility
- can be followed up by any combo, although running up to combo them before they recover requires some practice
DMs
1. Kin 1211 Shiki: Ya Otome - qcf hcb+P
- Iori dashes across the screen. If he connects, he does a combo on the opponent. Otherwise, he will do nothing and is very open to attack
- hard knockdown
- can be followed up by qcfx4+AC, which should be done the moment the explosion from the end of his qcf hcb+P begins
1a. Ura 316 Shiki: Saika - qcfx4+AC (after Ya Otome DM version only)
- the opponent is lifted into the air, where Iori hits them with an attack
- it is possible for this move to whiff if it was cancelled into a bit too late
- in the corner, it can hit opponents off the ground and still not whiff even if cancelled late
- hard knockdown
SDMs
1. Kin 1211 Shiki: Ya Otome - qcf hcb+AC
- Iori dashes forward full screen length. If he connects, he will do a series of attacks doing 50% damage to the opponent. Otherwise, he does nothing and is very open to attack
- hard knockdown
HSDMs
1. Ura 1219 Shiki: En'ou - qcb hcf b f+AC
- Iori jumps very quickly across the screen, grabbing the opponent
- unblockable
- Iori is invincible during the leap, and when he is recovering
Notes
- cancellable normals are close A, crouch A, close B, close C, far C, crouch C
- whiff cancellable normals are close A, crouch A, close B, far C, crouch C
- CD is cancellable into command moves, specials and DMs
- close B is a low attack
Combos
Anywhere
1. cr.B, cr.A, qcb+Ax3 - 20-25%
2. cl.B, cl.C, hcb+K - 33%
3. hcb f+P, C, qcf hcb+P, qcfx4+AC - 50%
4. j.b+B, cl.B, f+A, A, qcb+Cx3 - 33%
5. j.b+B, cl.B, f+A, A, qcf hcb+P, qcfx4+AC - 65%
6. cl.C, dp+C(2), (S)qcf hcb+P, qcfx4+AC - 70%
Corner
1. (Iori in corner) cr.A, hcb f+P, cr.A, hcb f+P, any combo
Maxmode
1. cl.D, BC, run cl.C, (C)hcb+K(1), (C)dp+C(2), (C)hcb+K(1), (C)dp+C(2), (C)hcb+K(1), (C)dp+C(2), (S)qcf hcb+P, qcfx4+AC - 87%
2. cl.D, BC, run cl.C, qcb+C, (C)hcb+K(1), (C)dp+C(2), (C)hcb+K(1), (C)dp+C(2), (S)qcf hcb+AC - 90%
4. (Opponent about one screen away from corner) cl.D, BC, run cl.C, hcb+K(1), (C)dp+C(2), (C)qcb+Cx2, (C)hcb+K(1), (C)qcb+A, delayed qcb+A, qcf hcb+P, qcfx4+AC - 85%
4. (Iori in corner) Jump over b+B, cr.A, hcb f+P, cl.D, BC, run cr.A, hcb f+P, run cl.C, f+A, qcb hcf b f+AC - 75%
2. Jump over b+B, cl.B, f+A, BC, run cl.C, qcb+C, (C)dp+C, (C)hcb+K, (C)dp+C, (C)hcb+K, (C)dp+C, (S)qcf hcb+P, qcfx4+AC
Counterhit
1. CD counter(counterhit), BC, qcf hcb+AC - 55%
2. j.CD, hcb+K/(qcf hcb+P, qcfx4+AC) - 32%/50%
Strategies
- Iori has a solid pressure game. His options include crouch B, close B, f+A (two lows) and hcb f+P scum gale. He can also attempt to tick scum gale from a close B. The mindgames can be further increased by instead doing a close C after close B (which does actually combo), in the case that he thought you would scum gale after the close B. Iori also has his jump b+B crossup, although it is best done as a surprise attack by hyper hopping over the opponent. Most people however, use it in a very obvious manner, by running full speed before jumping over the opponent, which is useless against an experienced player. This crossup can be blocked low. Some characters can simply sweep Iori when he attempts this crossup. Hyper hopping over the opponent into the crossup makes it a far more dangerous tool
- using b+B during the beginning of a backdash will make him dashback nearly a full screen length. Use this to easily get away from rushdown, as well as baiting opponents (mainly on wakeup). This can be used to run up then backdash away for mindgames
- sometimes attempt to do the jump b+B crossover (the trick to doing this is when jumping over your opponent hold the forward and hit the B reasonably late)
- use jump C or jump A air to ground battles, early jump D or jump CD for air to air battles. If opponent is close, hopping up or back with D stops most jump attempts
- if qcb+A is blocked, do it once more or stop, not a third time. You can use random delays between them, for mindgames. However, there are many pokes that can still punish this move even if it is not fully completed, such as Joe's far D
- hcb f+P has some startup of invincibility and can grab people out of their jumpins, similar to Clark's dp+K frankensteiner
- run up to opponent and do close C, as it will stop all jump attempts. Even better, if the opponent happens to jump behind you when the close C comes out, Iori automatically faces the correct side and will anti-air them
- hcb+K on the first hit guardcrushes fairly well. If the opponent's guardcrush bar begins to flash, a close C/far C, hcb+K will guardcrush on the first hit of hcb+K
