Freeman-12 (talk | contribs) |
|||
| (187 intermediate revisions by 19 users not shown) | |||
| Line 1: | Line 1: | ||
= Introduction = | {{MOTW Character Intro|char=Jae |content= | ||
Kim Jae Hoon is the younger brother of Kim Dong Hwan, both of them together are the sons of Taekwondo Master, Kim Kaphwan. Unlike his older brother, Kim Jae Hoon is much more serious with Taekwondo and believes firmly in his fathers ideals of justice. Jae Hoon uses many of the same techniques his father before him used, such has the Hangetsu Zan and Hou'ou Kyaku, with a bit of an original spin of his own, adding his element of fire to his attacks to amplify the power behind his blows. | |||
==Introduction== | |||
'''Kim Jae Hoon''' is the younger brother of Kim Dong Hwan, both of them together are the sons of Taekwondo Master, Kim Kaphwan. Unlike his older brother, Kim Jae Hoon is much more serious with Taekwondo and believes firmly in his fathers ideals of justice. Jae Hoon uses many of the same techniques his father before him used, such has the Hangetsu Zan and Hou'ou Kyaku, with a bit of an original spin of his own, adding his element of fire to his attacks to amplify the power behind his blows. | |||
Jae Hoon enters the Maximum Mayhem tournament with his older brother Dong Hwan after their father, whom was visiting the newly re-built Second South, was attacked by an very strong oppenent and was injured. Jae Hoon swears to avenge his fathers defeat, and so, dragging Dong Hwan with him, the two compete in the Maximum Mayhem tournament with hope that one of them will be able to face the monster that defeated their father. | Jae Hoon enters the Maximum Mayhem tournament with his older brother Dong Hwan after their father, whom was visiting the newly re-built Second South, was attacked by an very strong oppenent and was injured. Jae Hoon swears to avenge his fathers defeat, and so, dragging Dong Hwan with him, the two compete in the Maximum Mayhem tournament with hope that one of them will be able to face the monster that defeated their father. | ||
=Gameplay | == Gameplay == | ||
{{Content Box|content= | |||
'''Jae''' is an "honest" type of character. His main gameplan is to pressure the opponent with his great normals and hit confirm into damaging combos. | |||
His secondary gameplan is to use his great normal pressure to threaten with basic mix: high/low mix with jump/hop attacks; cross-up; throw; hienzan break; or even his other unsafe and risky moves. | |||
{{ProConTable | |||
|pros= | |||
* '''Great set of normals for poking and pressuring''' | |||
* '''Good meterless damage and highly damaging corner combos''' | |||
* '''Good high/low, left/right, and throw mixups''' | |||
|cons= | |||
* '''Most special moves are bad or hard to use outside of combos''' | |||
* '''Struggles to build meter''' | |||
* '''Needs to guard cancel with a charge move in order to have a reliable anti-air''' | |||
}} | |||
}} | |||
}} | |||
'''Character Colors''' | |||
[[File:Jaecolors.JPG]] | |||
==Move List== | |||
Frame Data Source : https://w.atwiki.jp/garoumow/pages/22.html and https://w.atwiki.jp/garoumow/pages/82.html | |||
{{MOTW Legend}} | |||
Notes: | |||
* Special/Super moves with <span style="color:#ff0000;">"Guard" data in red text</span> are impossible to just defend at 0-pixel health bar. | |||
===Close Standing Normals=== | |||
===== <span class="invisible-header">Close 5A</span> ===== | |||
<font style="visibility:hidden" size="0"></font> | |||
{{MoveData | |||
|image=Garou_Kim_cl.A.jpg | |||
|name=c.5A | |||
|subtitle= | |||
|caption= | |||
|data= | |||
{{AttackData-Garou | |||
|Damage=4 | |||
|Guard=Mid | |||
|Startup=3 | |||
|Active=4 | |||
|Recovery=5 | |||
|Total=12 | |||
|Hit Adv=+6 | |||
|Block Adv=+6 | |||
|Feint Cancel=◯ | |||
|Cancel on Hit=◯ / ∞ | |||
|Cancel on Block=◯ / ∞ | |||
|Guard Crush Value=4 | |||
|description=Pretty much the same as far A, but in proximity form -- which means it's great, and a primary tool for pressure, combos and poking | |||
}} | |||
}} | |||
===== <span class="invisible-header">Close 5B</span> ===== | |||
<font style="visibility:hidden" size="0"></font> | |||
{{MoveData | |||
|image=Garou_Kim_cl.B.jpg | |||
|name=c.5B | |||
|subtitle= | |||
|caption= | |||
|data= | |||
{{AttackData-Garou | |||
|Damage=6 | |||
|Guard=Mid | |||
|Startup=4 | |||
|Active=4 | |||
|Recovery=7 | |||
|Total=15 | |||
|Hit Adv=+4 | |||
|Block Adv=+4 | |||
|Feint Cancel=◯ | |||
|Cancel on Hit=◯ | |||
|Cancel on Block=◯ | |||
|Guard Crush Value=4 | |||
|description=outdone by cl.A in most situation, but in the corner you could link into standing A and get a combo after | |||
}} | |||
}} | |||
===== <span class="invisible-header">Close 5C</span> ===== | |||
<font style="visibility:hidden" size="0"></font> | |||
{{MoveData | |||
|image=Garou_Kim_cl.C-1.jpg | |||
|image2=Garou_Kim_cl.C-2.jpg | |||
|name=c.5C | |||
|subtitle= | |||
|caption= | |||
|data= | |||
{{AttackData-Garou | |||
|Damage=5, 5 | |||
|Guard=Mid | |||
|Startup=5 | |||
|Active=1, 4 | |||
|Recovery=22 | |||
|Total=32 | |||
|Hit Adv=-5 | |||
|Block Adv=-5 | |||
|Feint Cancel=※ | |||
|Cancel on Hit=※ | |||
|Cancel on Block=※ | |||
|Guard Crush Value=3, 3 | |||
|description= Solid move for pressure after FCing it, mostly in the corner | |||
}} | |||
}} | |||
<!-- cl.5C damage seems to be 5, 5, even though the JPN wiki says it is 6, 6. --> | |||
===== <span class="invisible-header">Close 5D</span> ===== | |||
<font style="visibility:hidden" size="0"></font> | |||
{{MoveData | |||
|image=Garou_Kim_cl.D-1.jpg | |||
|image2=Garou_Kim_cl.D-2.jpg | |||
|name=c.5D | |||
|subtitle= | |||
|caption= | |||
|data= | |||
{{AttackData-Garou | |||
|Damage=6, 6 | |||
|Guard=Mid | |||
|Startup=4 | |||
|Active=1, «5», 3 | |||
|Recovery=24 | |||
|Total=37 | |||
|Hit Adv=-6 | |||
|Block Adv=-6 | |||
|Feint Cancel=※ | |||
|Cancel on Hit=※ | |||
|Cancel on Block=※ | |||
|Guard Crush Value=3, 3 | |||
|description=You can insert the first hit in some punish combos, its best used is in his corner infinite using its big advantage on FC. | |||
Can't be JDed crouching. The 2nd hit whiffs when crouching. | |||
}} | |||
}} | |||
===Far Standing Normals=== | |||
===== <span class="invisible-header">Far 5A</span> ===== | |||
<font style="visibility:hidden" size="0"></font> | |||
{{MoveData | |||
|image=Garou_Kim_s.A.jpg | |||
|name=f.5A | |||
|subtitle= | |||
|caption= | |||
|data= | |||
{{AttackData-Garou | |||
|Damage=5 | |||
|Guard=Mid | |||
|Startup=3 | |||
|Active=4 | |||
|Recovery=5 | |||
|Total=12 | |||
|Hit Adv=+6 | |||
|Block Adv=+6 | |||
|Feint Cancel=◯ | |||
|Cancel on Hit=◯ / ∞ | |||
|Cancel on Block=◯ / ∞ | |||
|Guard Crush Value=4 | |||
|description= Very big hitbox for a jab, amazing speed and advantage on block, its good for pressure and basic antiairing/jabbing. Used a lot for safe poking and pressure - its so plus on block you can microwalk in the corner after hitting this move and still link a second one as a true combo. | |||
}} | |||
}} | |||
===== <span class="invisible-header">Far 5B</span> ===== | |||
<font style="visibility:hidden" size="0"></font> | |||
{{MoveData | |||
|image=Garou_Kim_s.B.jpg | |||
|name=f.5B | |||
|subtitle= | |||
|caption= | |||
|data= | |||
{{AttackData-Garou | |||
|Damage=7 | |||
|Guard=Mid | |||
|Startup=4 | |||
|Active=3 | |||
|Recovery=12 | |||
|Total=19 | |||
|Hit Adv=0 | |||
|Block Adv=0 | |||
|Feint Cancel=◯ | |||
|Cancel on Hit=◯ | |||
|Cancel on Block=◯ | |||
|Guard Crush Value=4 | |||
|description= An okay poke at far range | |||
}} | |||
}} | |||
===== <span class="invisible-header">Far 5C</span> ===== | |||
<font style="visibility:hidden" size="0"></font> | |||
{{MoveData | |||
|image=Garou_Kim_s.C.jpg | |||
|name=f.5C | |||
|subtitle= | |||
|caption= | |||
|data= | |||
{{AttackData-Garou | |||
|Damage=14 | |||
|Guard=Mid | |||
|Startup=12 | |||
|Active=3 | |||
|Recovery=28 | |||
|Total=43 | |||
|Hit Adv=-10 | |||
|Block Adv=-10 | |||
|Feint Cancel=△ | |||
|Cancel on Hit=X | |||
|Cancel on Block=◯ | |||
|Guard Crush Value=5 | |||
|description=Too slow to be a reliable anti air, despite the hitbox. don't use this move | |||
}} | |||
}} | |||
===== <span class="invisible-header">Far 5D</span> ===== | |||
<font style="visibility:hidden" size="0"></font> | |||
{{MoveData | |||
|image=Garou_Kim_s.D.jpg | |||
|name=f.5D | |||
|subtitle= | |||
|caption= | |||
|data= | |||
{{AttackData-Garou | |||
|Damage=14 | |||
|Guard=Mid | |||
|Startup=13 | |||
|Active=2 | |||
|Recovery=22 | |||
|Total=37 | |||
|Hit Adv=-3 | |||
|Block Adv=-3 | |||
|Feint Cancel=X | |||
|Cancel on Hit=X | |||
|Cancel on Block=X | |||
|Guard Crush Value=5 | |||
|description=Will go over low pokes but its not rewarding and very slow. | |||
Note: It's possible to reduce the move's overall recovery by canceling its landing recovery. | |||
}} | |||
}} | |||
===Crouching Normals=== | |||
===== <span class="invisible-header">2A</span> ===== | |||
<font style="visibility:hidden" size="0"></font> | |||
{{MoveData | |||
|image=Garou_Kim_cr.A.jpg | |||
|name=2A | |||
|subtitle= | |||
|caption= | |||
|data= | |||
{{AttackData-Garou | |||
|Damage=4 | |||
|Guard=Low | |||
|Startup=5 | |||
|Active=4 | |||
|Recovery=8 | |||
|Total=17 | |||
|Hit Adv=+3 | |||
|Block Adv=+3 | |||
|Feint Cancel=X | |||
|Cancel on Hit=X / ∞ | |||
|Cancel on Block=X / ∞ | |||
|Guard Crush Value=4 | |||
|description= Would be so good if you could cancel. you can chain 3 of these midscreen and it's plus on block. thanks to its plus frames and how fast your kick super is, though, you can still potentially link it afterwards for a combo. Even without the cancel its just generally a crazy poke that stacks up damage over time. | |||
}} | |||
}} | |||
===== <span class="invisible-header">2B</span> ===== | |||
<font style="visibility:hidden" size="0"></font> | |||
{{MoveData | |||
|image=Garou_Kim_cr.B.jpg | |||
|name=2B | |||
|subtitle= | |||
|caption= | |||
|data= | |||
{{AttackData-Garou | |||
|Damage=6 | |||
|Guard=Low | |||
|Startup=4 | |||
|Active=4 | |||
|Recovery=5 | |||
|Total=13 | |||
|Hit Adv=+6 | |||
|Block Adv=+6 | |||
|Feint Cancel=◯ | |||
|Cancel on Hit=◯ / ∞ | |||
|Cancel on Block=◯ / ∞ | |||
|Guard Crush Value=4 | |||
|description=The core of your pressure, poking and many combos. Low, fast, self chains and links into many normals including 2c, 5a and 5b | |||
}} | |||
}} | |||
===== <span class="invisible-header">2C</span> ===== | |||
<font style="visibility:hidden" size="0"></font> | |||
{{MoveData | |||
|image=Garou_Kim_cr.C.jpg | |||
|name=2C | |||
|subtitle= | |||
|caption= | |||
|data= | |||
{{AttackData-Garou | |||
|Damage=10 | |||
|Guard=Mid | |||
|Startup=5 | |||
|Active=3 | |||
|Recovery=17 | |||
|Total=25 | |||
|Hit Adv=+1 | |||
|Block Adv=+1 | |||
|Feint Cancel=◯ | |||
|Cancel on Hit=◯ | |||
|Cancel on Block=◯ | |||
|Guard Crush Value=5 | |||
|description=Great normal, as its fast, damaging, plus on block, and has decent range. used in many combos, poking, pressure (very plus if FCed), etc. | |||
}} | |||
}} | |||
===== <span class="invisible-header">2D</span> ===== | |||
<font style="visibility:hidden" size="0"></font> | |||
{{MoveData | |||
|image=Garou_Kim_cr.D.jpg | |||
|name=2D | |||
|subtitle= | |||
|caption= | |||
|data= | |||
{{AttackData-Garou | |||
|Damage=10 | |||
|Guard=Low | |||
|Startup=7 | |||
|Active=4 | |||
|Recovery=25 | |||
|Total=36 | |||
|Hit Adv=KD | |||
|Block Adv=-8 | |||
|Feint Cancel=X | |||
|Cancel on Hit=X | |||
|Cancel on Block=X | |||
|Guard Crush Value=5 | |||
|description=Typical sweep, which means it aint that good. heavy knockdown is nice and the range is nice but its quite unsafe on block with no cancel options | |||
}} | |||
}} | |||
===Jumping Normals=== | |||
===== <span class="invisible-header">jA</span> ===== | |||
<font style="visibility:hidden" size="0"></font> | |||
{{MoveData | |||
|image=Garou_Kim_j.A.jpg | |||
|name=j.A | |||
|subtitle= | |||
|caption= | |||
|data= | |||
{{AttackData-Garou | |||
|Damage=5 | |||
|Guard=High | |||
|Startup=6 | |||
|Active=5 | |||
|Recovery= | |||
|Total= | |||
|Hit Adv= | |||
|Block Adv= | |||
|Feint Cancel= | |||
|Cancel on Hit=◯ | |||
|Cancel on Block=◯ | |||
|Guard Crush Value=4 | |||
|description= Probably your best jump in due to its good active frames, great speed and hitbox. the hitstun aint that long so its hard to get significany advantage after, the key is to hit it right before landing. Also your only crossup. | |||
If done deep enough, the j.A can beat upper-body evasion attacks. | |||
}} | |||
}} | |||
===== <span class="invisible-header">jB</span> ===== | |||
<font style="visibility:hidden" size="0"></font> | |||
{{MoveData | |||
|image=Garou_Kim_j.B.jpg | |||
|name=j.B | |||
|subtitle= | |||
|caption= | |||
|data= | |||
{{AttackData-Garou | |||
|Damage=6 | |||
|Guard=High | |||
|Startup=6 | |||
|Active=8 | |||
|Recovery= | |||
|Total= | |||
|Hit Adv= | |||
|Block Adv= | |||
|Feint Cancel= | |||
|Cancel on Hit=◯ | |||
|Cancel on Block=◯ | |||
|Guard Crush Value=4 | |||
|description=An alternative option, has a worse hitbox for jumping ins but instead is very active and reaches further. also a great air to air potentially, and is also a crossup option, albeit a harder one<br> | |||
* For a hop (small jump) B, the startup is 7F and is active for 6F. | |||
}} | |||
}} | |||
===== <span class="invisible-header">jC</span> ===== | |||
<font style="visibility:hidden" size="0"></font> | |||
{{MoveData | |||
|image=Garou_Kim_j.C.jpg | |||
|name=j.C | |||
|subtitle= | |||
|caption= | |||
|data= | |||
{{AttackData-Garou | |||
|Damage=9 | |||
|Guard=High | |||
|Startup=6 | |||
|Active=6 | |||
|Recovery= | |||
|Total= | |||
|Hit Adv= | |||
|Block Adv= | |||
|Feint Cancel= | |||
|Cancel on Hit=◯ | |||
|Cancel on Block=◯ | |||
|Guard Crush Value=5 | |||
|description=Hits above Jae Hoon. | |||
* Good as an air-to-air | |||
* Use it to hit when you're closer to the ground. You'll have more advantage | |||
}} | |||
}} | |||
===== <span class="invisible-header">jD</span> ===== | |||
<font style="visibility:hidden" size="0"></font> | |||
{{MoveData | |||
|image=Garou_Kim_j.D.jpg | |||
|name=j.D | |||
|subtitle= | |||
|caption= | |||
|data= | |||
{{AttackData-Garou | |||
|Damage=10 | |||
|Guard=High | |||
|Startup=8 | |||
|Active=6 | |||
|Recovery= | |||
|Total= | |||
|Hit Adv= | |||
|Block Adv= | |||
|Feint Cancel= | |||
|Cancel on Hit=◯ | |||
|Cancel on Block=◯ | |||
|Guard Crush Value=5 | |||
|description=Your best heavy jump in and with massive range and an exceptional air poke. Hopped j.D compliments his ground low pokes really well | |||
}} | |||
}} | |||
===Command Normals=== | |||
===== <span class="invisible-header">Shou-kyaku Hou (44B)</span> ===== | |||
<font style="visibility:hidden" size="0"></font> | |||
{{MoveData | |||
|image=Garou_Kim_bbB.jpg | |||
|name=Shou-kyaku Hou | |||
|input= 44 B | |||
|subtitle= | |||
|caption= | |||
|data= | |||
{{AttackData-Garou | |||
|Damage=12 | |||
|Guard=Mid | |||
|Startup=23 | |||
|Active=5 | |||
|Recovery=25 | |||
|Total=53 | |||
|Hit Adv=KD | |||
|Block Adv=-9 | |||
|Feint Cancel=◯ | |||
|Cancel on Hit=◯ | |||
|Cancel on Block=◯ | |||
|Guard Crush Value=9 | |||
|description= | |||
You backdash, then lunge forward with an upward, launching kick (a strong normal). You can avoid attacks with the backdash, but the move itself is somewhat slow, stubby and unsafe. So mix this with doing other options after backdash. | |||
* During a backdash, press B. B can be inputted anytime during the backdash frames (comes out the earliest after invincible frames end). | |||
* You can kara cancel the startup, (1) when the move starts after the backdash, and (2) after the lunge and before the kick comes out, usually done with Hienzan D break or Ryusei Raku. | |||
* Rewarding on hit. Whether on hit or on guard, a feint cancel and special cancel can be done. | |||
** If you don't cancel it, on guard you'll be minus, so be sure to always feint cancel it or cancel it with Hienzan (BR). | |||
** Launches opponent into the air on hit. On hit, you can combo into Houou kyaku (236(x2)B/D). | |||
}} | |||
}} | |||
===Universal Moves=== | |||
===== <span class="invisible-header">Lower-body Evasion Attack (5AB)</span> ===== | |||
<font style="visibility:hidden" size="0"></font> | |||
{{MoveData | |||
|image=Garou_Kim_AB.jpg | |||
|name=5A+B | |||
|subtitle=Lower-body evasion attack | |||
|caption= | |||
|data= | |||
{{AttackData-Garou | |||
|Damage=10 | |||
|Guard=Overhead | |||
|Startup=25 | |||
|Active=1 | |||
|Recovery=19 | |||
|Total=45 | |||
|Hit Adv=-1 | |||
|Block Adv=+5 | |||
|Feint Cancel= | |||
|Cancel on Hit=X | |||
|Cancel on Block=X | |||
|Guard Crush Value=6 | |||
|description= | |||
* airborne from the 1st frame. | |||
* on the ground at the last 16 frames. | |||
}} | |||
}} | |||
===== <span class="invisible-header">Upper-body Evasion Attack (2AB)</span> ===== | |||
<font style="visibility:hidden" size="0"></font> | |||
{{MoveData | |||
|image=Garou_Kim_2AB-1.jpg | |||
|image2=Garou_Kim_2AB-2.jpg | |||
|image3=Garou_Kim_2AB-3.jpg | |||
|image4=Garou_Kim_2AB-4.jpg | |||
|name=2A+B | |||
|subtitle=Upper-body evasion attack | |||
|caption= | |||
|data= | |||
{{AttackData-Garou | |||
|Damage=10 | |||
|Guard=Mid | |||
|Startup=11 | |||
|Active=2 | |||
|Recovery=20 | |||
|Total=33 | |||
|Hit Adv=-3 | |||
|Block Adv=+3 | |||
|Feint Cancel=▽ | |||
|Cancel on Hit=◯ | |||
|Cancel on Block=X | |||
|Guard Crush Value=6 | |||
|description= Decent range and its cancelable, along with its excellent hitbox. Decent for occasional poking and you get a combo with ease. | |||
* 1~5F upper-body invincibility. | |||
* 18F hitstun, 24F blockstun. | |||
}} | |||
}} | |||
===== <span class="invisible-header">T.O.P. Attack (CD)</span> ===== | |||
<font style="visibility:hidden" size="0"></font> | |||
{{MoveData | |||
|image=Garou_Kim_CD-1.jpg | |||
|image2=Garou_Kim_CD-2.jpg | |||
|name=High-angle Neri-chagi (T.O.P. Attack) | |||
|input=C+D (T.O.P. Only) | |||
|subtitle=Axe Kick | |||
|caption= | |||
|data= | |||
{{AttackData-Garou | |||
|Damage=17 (base damage) | |||
|Guard=Overhead | |||
|Startup=30 | |||
|Active= | |||
|Recovery= | |||
|Total= | |||
|Hit Adv=KD | |||
|Block Adv=-1 | |||
|Feint Cancel= | |||
|Cancel on Hit= | |||
|Cancel on Block= | |||
|Guard Crush Value=25 | |||
|description= | |||
A very slow startup overhead attack that might not knockdown at further ranges. Generally unsafe to use. | |||
But because it has an extremely high guard crush value of 25, | |||
and its fast recovery makes it -1F if guarded against, it is a useful TOP attack. | |||
For some reason, Jae Hoon's side has an advantage when the move is JDed. | |||
Since it can be canceled into, it is effective to mix using it in a string. | |||
}} | |||
}} | |||
===Throws=== | |||
===== <span class="invisible-header">Ground Throw</span> ===== | |||
<font style="visibility:hidden" size="0"></font> | |||
{{MoveData | |||
|image=Garou_Kim_Grab.jpg | |||
|name=Tai Otoshi | |||
|input='''Close''' 4/6 C | |||
|subtitle=Body Throw | |||
|caption= | |||
|data= | |||
{{AttackData-Garou | |||
|Damage=14 | |||
|Guard= | |||
|Startup=1 | |||
|Active= | |||
|Recovery= | |||
|Total= | |||
|Hit Adv=34 | |||
|Block Adv= | |||
|Feint Cancel= | |||
|Cancel on Hit= | |||
|Cancel on Block= | |||
|Guard Crush Value= | |||
|description= | |||
Normal throw. The opponent is hard knockdowned a short distance in front of Jae hoon. | |||
After throwing, you are able to set solid left/right mixups midscreen | |||
by either staying in front with your jump-in | |||
or with ambiguous cross-up using jump A or jump B | |||
(by going slightly further with microwalking or dash jumping). | |||
The ease of hitting varies depending on the character, so practice is required. | |||
After throwing the opponent at the corner, | |||
you can also use the reverse guard corner cross-up bug | |||
that cross-up's even though it looks like it's from the front. | |||
}} | |||
}} | |||
===Feints=== | |||
===== <span class="invisible-header">Forward Feint (6AC)</span> ===== | |||
<font style="visibility:hidden" size="0"></font> | |||
{{MoveData | |||
|image=Garou_Kim_ForwardTaunt.jpg | |||
|name=6A+C | |||
|subtitle=Forward Feint | |||
|caption= | |||
|data= | |||
{{AttackData-Garou | |||
|Damage= | |||
|Guard= | |||
|Startup= | |||
|Active= | |||
|Recovery= | |||
|Total=10 | |||
|Hit Adv= | |||
|Block Adv= | |||
|Feint Cancel= | |||
|Cancel on Hit= | |||
|Cancel on Block= | |||
|Guard Crush Value= | |||
|description= Mimics the start of Shakka Shuu being held briefly. You can use the threat of a fake Shakka Shuu to move forward. | |||
}} | |||
}} | |||
===== <span class="invisible-header">Down Feint (2AC)</span> ===== | |||
<font style="visibility:hidden" size="0"></font> | |||
{{MoveData | |||
|image=Garou_Kim_DownTaunt.jpg | |||
|name=2A+C | |||
|subtitle=Down Feint | |||
|caption= | |||
|data= | |||
{{AttackData-Garou | |||
|Damage= | |||
|Guard= | |||
|Startup= | |||
|Active= | |||
|Recovery= | |||
|Total=10 | |||
|Hit Adv= | |||
|Block Adv= | |||
|Feint Cancel= | |||
|Cancel on Hit= | |||
|Cancel on Block= | |||
|Guard Crush Value= | |||
|description= Mimics the start of the super Houou Kyaku. Down feint cancel makes it easier to go into down direction attacks or go straight to charging Hienzan. | |||
}} | |||
}} | |||
===Special Moves=== | |||
===== <span class="invisible-header">Shakka Shuu (236P)</span> ===== | |||
<font style="visibility:hidden" size="0"></font> | |||
{{MoveData | |||
|image= | |||
|name=Shakka Shuu | |||
|input= 236 A/C | |||
|subtitle= | |||
|caption= | |||
|data= | |||
{{AttackData-Garou | |||
|version=A <br>(Can Hold) | |||
|Damage=5, 5, 5, 8 | |||
|Guard=Mid | |||
|Startup=19 | |||
|Active= | |||
|Recovery= | |||
|Total= | |||
|Hit Adv=KD | |||
|Block Adv=-16 | |||
|Feint Cancel= | |||
|Cancel on Hit= | |||
|Cancel on Block= | |||
|Guard Crush Value=1×3, 2 | |||
|description= | |||
}} | |||
{{AttackData-Garou | |||
|version=C<br>(Can Hold) | |||
|Damage=5, 5, 5, 8 | |||
|Guard=Mid | |||
|Startup=19 | |||
|Active= | |||
|Recovery= | |||
|Total= | |||
|Hit Adv=KD | |||
|Block Adv=-16 | |||
|Feint Cancel= | |||
|Cancel on Hit= | |||
|Cancel on Block= | |||
|Guard Crush Value=1×3, 2 | |||
|description= | |||
After a stance with an upper-body guard point centered (horizontally) in the middle of the character, there is a successive flurry series of kicks. | |||
The startup before the guard point is not that quick, so it will be difficult to use as an interrupt during gaps in the opponent's offense, or other defensive uses. | |||
The upper-body guard point is at 11~12F and absorbs mids and highs. | |||
When the button is held, Jae will hold his stance with his leg fully raised, having the GP persist. But you won't be able to stop the kick. Because of that there is not much of a point in charging completely all the way. | |||
The total startup can be nearly 60F at maximum length: | |||
* Shakka Shuu [A] -- extended GP at 13~44F (max 32 frames), then goes through remaining 7F of startup. | |||
* Shakka Shuu [C] -- extended GP at 13~50F (max 38 frames), then goes through remaining 7F of startup. | |||
C Version travels further. | |||
If you want to JD this, there are only 2 hits to JD, but it is -3 afterwards. | |||
Slow, so they don't combo from lights, but are an okay combo finisher. | |||
Unsafe on block. | |||
Main uses: | |||
* For a stable (reliable) combo when you think you are too far away for Ryuusei Raku (especially 236B) to reach after hitting with 2C. | |||
* Use when prioritizing corner carry. | |||
** Offers you corner carry but you get no mixups. | |||
* GCing fireballs | |||
* Killing through chip damage. | |||
}} | |||
}} | |||
===== <span class="invisible-header">Ryuusei Raku (236K)</span> ===== | |||
<font style="visibility:hidden" size="0"></font> | |||
{{MoveData | |||
|image= | |||
|name=Ryuusei Raku | |||
|input= 236 B/D | |||
|subtitle= | |||
|caption= | |||
|data= | |||
A move that, after a low-hitting leg sweep forward, leaps up to put out a heel drop. <br> | |||
Best used in combos by special canceling from 2C or the upper-body evasion attack. <br> | |||
Gives you decent oki as well. <br> | |||
However, you can also catch the opponent not blocking low while you use it in a blockstring, or do it alone. <br> | |||
And you can use it as a situational guard cancel. <br> | |||
If you guard the first hit, both versions have the same gap between the end of blockstun and the 2nd hit. But the gap depends on when the 2nd hit reaches you (between 7-10F). <br><br> | |||
{{AttackData-Garou | |||
|version=B | |||
|Damage=11, 12 | |||
|Guard=Low, Mid | |||
|Startup=14 | |||
|Active= | |||
|Recovery= | |||
|Total= | |||
|Hit Adv=KD | |||
|Block Adv=-6 | |||
|Feint Cancel= | |||
|Cancel on Hit= | |||
|Cancel on Block= | |||
|Guard Crush Value=3, 4 | |||
|description= | |||
The initial kick in the B version is extremely stubby. Don't use this unless you are within closer range, otherwise its very hard to make it land. | |||
}} | |||
{{AttackData-Garou | |||
|version=D | |||
|Damage=11, 15 | |||
|Guard=Low, Mid | |||
|Startup=16 | |||
|Active= | |||
|Recovery= | |||
|Total= | |||
|Hit Adv=KD | |||
|Block Adv=-6 | |||
|Feint Cancel= | |||
|Cancel on Hit= | |||
|Cancel on Block= | |||
|Guard Crush Value=4, 4 | |||
|description= | |||
The D version has a longer reach and does more damage than the B version. | |||
It is actually your most damaging ender, so it's almost always your best way to finish combos on the ground, meterlessly. | |||
}} | |||
}} | |||
<!-- 236D seems to have 16F startup, even though the JPN wiki says it is 15F. --> | |||
===== <span class="invisible-header">Hangetsu Zan (214K)</span> ===== | |||
<font style="visibility:hidden" size="0"></font> | |||
{{MoveData | |||
|image= | |||
|name=Hangetsu Zan | |||
|input= 214 B/D | |||
|subtitle= | |||
|caption= | |||
|data= Be careful when attempting to do GC Hienzan because you might get this move coming out instead. <br> | |||
<br> | |||
{{AttackData-Garou | |||
|version=B | |||
|Damage=9, 9, 9 | |||
|Guard=<span style="color:#ff0000;">Mid</span> | |||
|Startup=14 | |||
|Active= | |||
|Recovery= | |||
|Total= | |||
|Hit Adv=KD | |||
|Block Adv=-8 | |||
|Feint Cancel= | |||
|Cancel on Hit= | |||
|Cancel on Block= | |||
|Guard Crush Value=2, 2, 4 | |||
|description= | |||
Your worst ground combo ender. | |||
Very inconsistent at range due to the first hit being very vertical and not comboing from range. | |||
The second hit may sometimes connect but only if you do a single normal point blank first. | |||
For combos, you should use Ryuusei Raku (236K). | |||
The only other use is as a situational guard cancel -- it is slow, but the lack of lower-body hurtbox means you can avoid follow-up low attacks. | |||
Risky to use alone, and not even an overhead, there is not much utility. | |||
}} | |||
{{AttackData-Garou | |||
|version=D | |||
|Damage=9, 9, 9 | |||
|Guard=<span style="color:#ff0000;">Mid</span> | |||
|Startup=22 | |||
|Active= | |||
|Recovery= | |||
|Total= | |||
|Hit Adv=KD | |||
|Block Adv=-8 | |||
|Feint Cancel= | |||
|Cancel on Hit= | |||
|Cancel on Block= | |||
|Guard Crush Value=3, 3, 5 | |||
|description= | |||
The D version is even slower, so there is even less utility than the B version. | |||
Riskier to use alone, you should probably use at farther ranges when the opponent is caught off guard. | |||
It's an even worse option to use as a guard cancel. | |||
}} | |||
}} | |||
===== <span class="invisible-header">Hishou Kyaku (j2K)</span> ===== | |||
<font style="visibility:hidden" size="0"></font> | |||
{{MoveData | |||
|image= | |||
|name=Hishou Kyaku | |||
|input= Air 2 B/D | |||
|subtitle=Divekick | |||
|caption= | |||
|data= | |||
{{AttackData-Garou | |||
|version=B | |||
|Damage=5, 6, 6, 6 | |||
|Guard=<span style="color:#ff0000;">Mid</span> | |||
|Startup=9 | |||
|Active= | |||
|Recovery= | |||
|Total= | |||
|Hit Adv=-5 or more | |||
|Block Adv=-5 or more | |||
|Feint Cancel= | |||
|Cancel on Hit= | |||
|Cancel on Block= | |||
|Guard Crush Value=2×4 | |||
|description= | |||
}} | |||
{{AttackData-Garou | |||
|version=D | |||
|Damage=5, 6, 6, 6 | |||
|Guard=<span style="color:#ff0000;">Mid</span> | |||
|Startup=10 | |||
|Active= | |||
|Recovery= | |||
|Total= | |||
|Hit Adv=-5 or more | |||
|Block Adv=-5 or more | |||
|Feint Cancel= | |||
|Cancel on Hit= | |||
|Cancel on Block= | |||
|Guard Crush Value=2×4 | |||
|description= | |||
The divekick. A successive series of up to 4 kicks in a row while diving diagonally downwards. Comboable from all air normals. Punishable on hit at best, and can be even worse depending on how it hits. Pretty bad. | |||
Done high enough on a taller character, it might reach 5 kicks. | |||
D version travels further and faster at a slightly wider angle. | |||
Both versions can beat out upper-body evasion attacks. | |||
The main uses are as a counterattack when you special cancel into it from an air normal that was JDed, and as a GC after you JD in mid-air. | |||
Although it is a move that is impossible to JD at 0-pixel health, it has a slow startup and travel time, and a punishable gap of recovery as it whiffs (as well as on hit and block), so it's important to apply it properly. | |||
The button of follow-up must be the same as the one used for the divekick's. | |||
}} | |||
{{AttackData-Garou | |||
|subtitle=High Follow-up | |||
|version= Air 214 B/D | |||
|Damage=10 | |||
|Guard=High | |||
|Startup= | |||
|Active= | |||
|Recovery= | |||
|Total= | |||
|Hit Adv=KD | |||
|Block Adv=-13 or more | |||
|Feint Cancel= | |||
|Cancel on Hit= | |||
|Cancel on Block= | |||
|Guard Crush Value=7 | |||
|description= | |||
Each hit of the divekick can be canceled into this 214 additional follow-up, stopping in mid-air after a hit, forming a gap before putting out a high-hitting divekick. | |||
But it's too slow to combo and can be very very unsafe on block. | |||
}} | |||
{{AttackData-Garou | |||
|subtitle= Low Follow-up | |||
|version= Air 3 B/D | |||
|Damage=15 | |||
|Guard=Low | |||
|Startup= | |||
|Active= | |||
|Recovery= | |||
|Total= | |||
|Hit Adv=KD | |||
|Block Adv=-16 | |||
|Feint Cancel= | |||
|Cancel on Hit= | |||
|Cancel on Block= | |||
|Guard Crush Value=2 | |||
|description= | |||
The 3-direction additional follow-up inputted during the divekick is a low-hitting slide that, after the divekick ends, is comboed into and knocks down. | |||
But it is very unsafe. | |||
}} | |||
}} | |||
===== <span class="invisible-header">Hienzan ([2]8K)</span> ===== | |||
<font style="visibility:hidden" size="0"></font> | |||
{{MoveData | |||
|image= | |||
|name=Hienzan | |||
|input= [2]8 B/D | |||
|subtitle=Flash Kick | |||
|caption= | |||
|data= | |||
After Hienzan (BR) hits, or after Hienzan trades, it is possible to follow up with Houou Kyaku (236(x2)K). <br><br> | |||
In the case of hitting at the corner, you can follow up the trade or break move with Houyoku Tenshou Kyaku (236(x2)P). For Hienzan B (BR), you can only connect to Houyoku if the opponent is airborne high enough. <br><br> | |||
Jae Hoon's main special move that's frequently used as an anti-air, an interrupt during gaps in the opponent's offense with its fast startup and invincibility, your GC of choice, and an anti-GC through special canceling. It can also be used on whiff to do meter gain. <br><br> | |||
By adding throw invincibility to this special move with the "throw bug escape technique", you won't be easily counterattacked with a throw (especially after the opponent blocks D version break and does reversal throw), so always add throw invincibility if you can. (Especially when you are on the 2P side.) <br><br> | |||
{{AttackData-Garou | |||
|version=B | |||
|Damage=9, 8 | |||
|Guard=<span style="color:#ff0000;">Mid</span> | |||
|Startup=4 | |||
|Active= | |||
|Recovery= | |||
|Total= | |||
|Hit Adv=KD | |||
|Block Adv=-16 | |||
|Feint Cancel= | |||
|Cancel on Hit= | |||
|Cancel on Block= | |||
|Guard Crush Value=4, 4 | |||
|description= | |||
[2]8B maybe used in some optimal punishes more than the D version. | |||
1~2F full-body invincibility. | |||
}} | |||
{{AttackData-Garou | |||
|version=B Break | |||
|Damage=9 | |||
|Guard=<span style="color:#ff0000;">Mid</span> | |||
|Startup=4 | |||
|Active= | |||
|Recovery= | |||
|Total= | |||
|Hit Adv=KD | |||
|Block Adv=-3 | |||
|Feint Cancel= | |||
|Cancel on Hit= | |||
|Cancel on Block= | |||
|Guard Crush Value=4 | |||
|description= | |||
[2]8B (BR), although -3 on block, distances you safely away from the opponent. | |||
In case of hitting at the corner, you can also follow up with [2]8D. | |||
Whiffed [2]8B (BR) is your best move for passive meter building -- it's somewhat slowish and hard to spam, but you do not stray far from your current position. | |||
}} | |||
{{AttackData-Garou | |||
|version=D | |||
|Damage=9, 7, 7 | |||
|Guard=<span style="color:#ff0000;">Mid</span> | |||
|Startup=4 | |||
|Active= | |||
|Recovery= | |||
|Total= | |||
|Hit Adv=KD | |||
|Block Adv=-37 | |||
|Feint Cancel= | |||
|Cancel on Hit= | |||
|Cancel on Block= | |||
|Guard Crush Value=4, 4 | |||
|description= | |||
Very fast and deals decent damage. | |||
The D version is still a true reversal -- better than B version because of the invincibility throughout all startup and the vertical coverage. | |||
This makes [2]8D and [2]8D (BR) your main go-to for optimal punishes. | |||
But [2]8D is an unsafe anti-air, and [2]8D (BR)'s hitbox is so small and stubby | |||
that it whiffs beyond point blank on the ground, making them bad for anti-airing. | |||
1~4F full-body invincibility. | |||
}} | |||
{{AttackData-Garou | |||
|subtitle= (Follow-up) | |||
|version=Air 2D | |||
|Damage=7 | |||
|Guard=<span style="color:#ff0000;">Mid</span> | |||
|Startup= | |||
|Active= | |||
|Recovery= | |||
|Total= | |||
|Hit Adv=KD | |||
|Block Adv= | |||
|Feint Cancel= | |||
|Cancel on Hit= | |||
|Cancel on Block= | |||
|Guard Crush Value= | |||
|description= | |||
Improved Oki over non follow-up version. | |||
And even if a mid-air opponent air JD's all the way through the 2D follow-up, they won't be able to do much of a counterattack. | |||
}} | |||
{{AttackData-Garou | |||
|version=D Break | |||
|Damage=9 | |||
|Guard=<span style="color:#ff0000;">Mid</span> | |||
|Startup=4 | |||
|Active=2 | |||
|Recovery=15+8=23 | |||
|Total=29 | |||
|Hit Adv=KD | |||
|Block Adv=0 | |||
|Feint Cancel= | |||
|Cancel on Hit= | |||
|Cancel on Block= | |||
|Guard Crush Value=4 | |||
|description= | |||
On block, [2]8D (BR) moves you next to the opponent but is at 0 advantage, meaning you are able to move at the same time. | |||
On hit, you can follow up with [2]8D (or [2]8B if you are close enough). | |||
Whiffed [2]8D (BR) done for meter building is also good for movement because it advances forward more than the B version. | |||
Empty break must be done during 2~7F. | |||
12F of hitstop/blockstop. 24F blockstun on block. | |||
}} | |||
}} | |||
===Super Moves=== | |||
===== <span class="invisible-header">Houyoku Tenshou Kyaku (236236P)</span> ===== | |||
<font style="visibility:hidden" size="0"></font> | |||
{{MoveData | |||
|image = | |||
|name =Houyoku Tenshou Kyaku | |||
|input =236236 A/C | |||
|caption= | |||
|data= | |||
{{AttackData-Garou | |||
|version =A | |||
|Damage=10, 8, 5×5 | |||
|Guard=Overhead | |||
|Startup=11 | |||
|Active= | |||
|Recovery= | |||
|Total= | |||
|Hit Adv=KD | |||
|Block Adv=-52 | |||
|Feint Cancel= | |||
|Cancel on Hit= | |||
|Cancel on Block= | |||
|Guard Crush Value=5×7 | |||
|description=1~11F full-body invincibility (just before it hits). | |||
Stubby range, slow startup time, and long recovery. | |||
It's difficult to use because it's a very inconsistent and risky tool that can be easily punished when it fails. Both when (1) done as a reversal -- using it as something like an interrupt during gaps in the opponent's offense or as an anti-air; and (2) done primarily as a combo tool -- that may not even launch if too far away. | |||
Generally it would be useless, but it does have one big utility -- you can follow-up with Houou Kyaku B anywhere on screen afterwards, massive damage for 2 bars. | |||
After Hienzan BR, if Houyoku A is done and connects, it's still possible to follow-up with Hienzan D. | |||
Used in optimal punishes when you have the meter -- just make sure you're close. | |||
}} | |||
{{AttackData-Garou | |||
| header = | |||
|version =C | |||
|Damage=6×10 | |||
|Guard=Overhead | |||
|Startup=11 | |||
|Active= | |||
|Recovery= | |||
|Total= | |||
|Hit Adv=KD | |||
|Block Adv=-28 | |||
|Feint Cancel= | |||
|Cancel on Hit= | |||
|Cancel on Block= | |||
|Guard Crush Value=10×10 | |||
|description=1~14F full-body invincibility (past some time after startup). Deals more damage, obviously. | |||
Because of the longer invincibility, it's a better reversal and anti-air tool than the A version. | |||
Still a very inconsistent move, though it's oddly enough nearly twice as safer as the A version (still -28 on block). | |||
You do get a follow-up by either (1) charging/holding C and releasing it after the super freeze; or (2) juggling with Hienzan ([2]8K). | |||
No real reason to ever use this, except for the full charge version. | |||
== | }} | ||
{{AttackData-Garou | |||
== | | header = | ||
|version = Hold C | |||
|subtitle= (Follow-up) | |||
|Damage=27 | |||
|Guard= | |||
|Startup= | |||
|Active= | |||
|Recovery= | |||
|Total= | |||
|Hit Adv=KD | |||
|Block Adv= | |||
|Feint Cancel= | |||
|Cancel on Hit= | |||
|Cancel on Block= | |||
|Guard Crush Value= | |||
|description=The full charge version gives you a follow-up after 236236C hits. It's done by holding C at the beginning and releasing as the opponent nears the ground. | |||
Note: The damage of Houyoku P-Power follow-up kick is less than that of S-Power Houyoku > Houou (236(x2)B). | |||
}} | |||
}} | |||
= | ===== <span class="invisible-header">Kouou Kyaku (236236K)</span> ===== | ||
< | <font style="visibility:hidden" size="0"></font> | ||
{{MoveData | |||
|image = | |||
|name =Houou Kyaku | |||
|input =236236 B/D | |||
|caption= | |||
|data= | |||
A high-performance super special move -- you can say it's Jae Hoon's representative move. <br> | |||
It's a fast rush/lunge type move with a long travel distance that becomes a "ranbu" on hit. <br> | |||
Even though this is a 0F move, both versions' hitbox is narrow/small, so the range at the front is short. <br> | |||
Both versions' rush/lunge speed is about the same, but in the case of the strong version, the travel distance is longer. <br> | |||
< | There are frequent opportunities connect to this super: from hit confirm, TOP hit confirm, Hienzan (BR) (something like a trade is good), 0F unblockable on landing, and so on. <br><br> | ||
{{AttackData-Garou | |||
|version = B | |||
|Damage=13, 3×3, 5, 13×3 | |||
|Guard=Mid | |||
|Startup=0 | |||
|Active= | |||
|Recovery= | |||
|Total= | |||
|Hit Adv=KD | |||
|Block Adv=-18 | |||
|Feint Cancel= | |||
|Cancel on Hit= | |||
|Cancel on Block= | |||
|Guard Crush Value=15 | |||
|description=Your better super. Great range, ''0 startup'', great damage. its very easy to combo into, to the point you can link into it from plus on hit normals for an easy hitconfirm. | |||
Also great for punishing anything minus, though keep in mind it doesn't travel too far in an instant. | |||
= | }} | ||
{{AttackData-Garou | |||
| header = | |||
|version =D | |||
|Damage=18, 4×9, 5×7, 18 | |||
|Guard=Mid | |||
|Startup=0 | |||
|Active= | |||
|Recovery= | |||
|Total= | |||
|Hit Adv=KD | |||
|Block Adv=-25 | |||
|Feint Cancel= | |||
|Cancel on Hit= | |||
|Cancel on Block= | |||
|Guard Crush Value=30 | |||
|description= 1F full body invulnerability. A more consistent way to burn 2 bars for damage, it still keeps all the great qualities of B super. | |||
Overloads and slows the game hilariously, though this has no real practical implication. Goes further faster and reaches fullscreen. | |||
}} | |||
}} | |||
{{Navbox-MOTW}} | |||
[[Category:Garou: Mark of the Wolves]] | [[Category:Garou: Mark of the Wolves]] | ||
Latest revision as of 11:57, 17 June 2024
Introduction
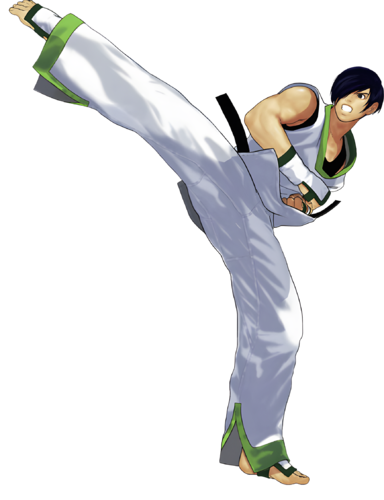
Kim Jae Hoon is the younger brother of Kim Dong Hwan, both of them together are the sons of Taekwondo Master, Kim Kaphwan. Unlike his older brother, Kim Jae Hoon is much more serious with Taekwondo and believes firmly in his fathers ideals of justice. Jae Hoon uses many of the same techniques his father before him used, such has the Hangetsu Zan and Hou'ou Kyaku, with a bit of an original spin of his own, adding his element of fire to his attacks to amplify the power behind his blows.
Jae Hoon enters the Maximum Mayhem tournament with his older brother Dong Hwan after their father, whom was visiting the newly re-built Second South, was attacked by an very strong oppenent and was injured. Jae Hoon swears to avenge his fathers defeat, and so, dragging Dong Hwan with him, the two compete in the Maximum Mayhem tournament with hope that one of them will be able to face the monster that defeated their father.
Gameplay
Jae is an "honest" type of character. His main gameplan is to pressure the opponent with his great normals and hit confirm into damaging combos. His secondary gameplan is to use his great normal pressure to threaten with basic mix: high/low mix with jump/hop attacks; cross-up; throw; hienzan break; or even his other unsafe and risky moves.
| Strengths | Weaknesses |
|---|---|
|
|
Character Colors
Move List
Frame Data Source : https://w.atwiki.jp/garoumow/pages/22.html and https://w.atwiki.jp/garoumow/pages/82.html
| Data Help | |
|---|---|
| Disclaimer: This is meant to teach basic terminology used when describing moves. | |
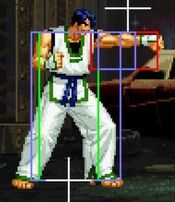
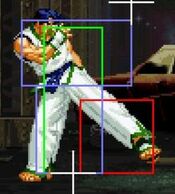
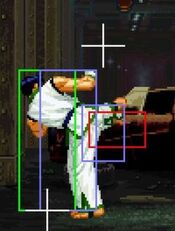
| HitBox: | A predefined area (usually a group of rectangles or circles) that tell the game how any given attack can come in contact with a character. Hitboxes are invisible to the player when normally playing. |
| HurtBox: | A predefined area (usually a group of rectangles or circles) that tell the game how your character is allowed to get hit by any incoming attack. Specifically, you'll get hit by (or block) an attack if that attack's hitbox ever overlaps your hurtbox. |
| Throw Box/Range: | Active throw frames and range. Your opponent will be thrown in this field if not in block or hit stun. |
| Projectile Box: | Hit box on a projectile attack. |
| Guard/Counter Box: | The Guard Box or Counter Box. This appears when blocking or using a counter move. |
| Push Box: | Has no bearing on hurt/hit boxes. Just allows characters to not pass through each other. (Also known as "Collision Box".) |
| Command | the input for the attack. |
| Start Up | The number of frames that initiate at the beginning of an attack after the input.
And when the first hitbox is present.
The first active frame is after the last startup frame. |
| Guard | The way this move must be blocked.
High or H or Overhead (especially when from the ground) -- must be blocked standing. |
| Damage | "basic" damage -- unmodified damage values
"correct" damage -- damage values modified for damage scaling, TOP multiplier, and defense rate |
| Guard Crush Value | Decrease your guard durability gauge/meter by that value/s |
| + | signifies how many advantage frames the attacker has. |
| - | signifies how many disadvantage frames the attacker has. |
| KD | means the attack will knock the opponent down. |
| ◯ | circle means cancelable on both hit/block. |
| ∞ | infinity means chain cancelable with the same button (renda cancel). |
| ※ | means cancelable on the first hit/part only. |
| 《 》OR « » OR << >> OR ( ) | The numbers in the brackets are the startup frames until the next stage (the gap until the next hit's first active frame). |
| △ | up triangle means only cancelable on block. |
| ▽ | down triangle means only cancelable on hit. |
| × OR X | means not cancelable. |
Notes:
- Special/Super moves with "Guard" data in red text are impossible to just defend at 0-pixel health bar.
Close Standing Normals
Close 5A
| Damage | Guard | Startup | Active | Recovery | Total |
|---|---|---|---|---|---|
| 4 | Mid | 3 | 4 | 5 | 12 |
| Hit Adv | Block Adv | Feint Cancel | Cancel on Hit | Cancel on Block | Guard Crush Value |
| +6 | +6 | ◯ | ◯ / ∞ | ◯ / ∞ | 4 |
|
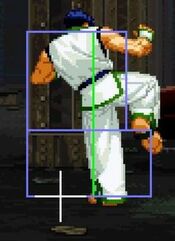
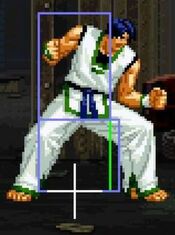
Pretty much the same as far A, but in proximity form -- which means it's great, and a primary tool for pressure, combos and poking | |||||
Close 5B
| Damage | Guard | Startup | Active | Recovery | Total |
|---|---|---|---|---|---|
| 6 | Mid | 4 | 4 | 7 | 15 |
| Hit Adv | Block Adv | Feint Cancel | Cancel on Hit | Cancel on Block | Guard Crush Value |
| +4 | +4 | ◯ | ◯ | ◯ | 4 |
|
outdone by cl.A in most situation, but in the corner you could link into standing A and get a combo after | |||||
Close 5C
| Damage | Guard | Startup | Active | Recovery | Total |
|---|---|---|---|---|---|
| 5, 5 | Mid | 5 | 1, 4 | 22 | 32 |
| Hit Adv | Block Adv | Feint Cancel | Cancel on Hit | Cancel on Block | Guard Crush Value |
| -5 | -5 | ※ | ※ | ※ | 3, 3 |
|
Solid move for pressure after FCing it, mostly in the corner | |||||
Close 5D
| Damage | Guard | Startup | Active | Recovery | Total |
|---|---|---|---|---|---|
| 6, 6 | Mid | 4 | 1, «5», 3 | 24 | 37 |
| Hit Adv | Block Adv | Feint Cancel | Cancel on Hit | Cancel on Block | Guard Crush Value |
| -6 | -6 | ※ | ※ | ※ | 3, 3 |
|
You can insert the first hit in some punish combos, its best used is in his corner infinite using its big advantage on FC. Can't be JDed crouching. The 2nd hit whiffs when crouching. | |||||
Far Standing Normals
Far 5A
| Damage | Guard | Startup | Active | Recovery | Total |
|---|---|---|---|---|---|
| 5 | Mid | 3 | 4 | 5 | 12 |
| Hit Adv | Block Adv | Feint Cancel | Cancel on Hit | Cancel on Block | Guard Crush Value |
| +6 | +6 | ◯ | ◯ / ∞ | ◯ / ∞ | 4 |
|
Very big hitbox for a jab, amazing speed and advantage on block, its good for pressure and basic antiairing/jabbing. Used a lot for safe poking and pressure - its so plus on block you can microwalk in the corner after hitting this move and still link a second one as a true combo. | |||||
Far 5B
| Damage | Guard | Startup | Active | Recovery | Total |
|---|---|---|---|---|---|
| 7 | Mid | 4 | 3 | 12 | 19 |
| Hit Adv | Block Adv | Feint Cancel | Cancel on Hit | Cancel on Block | Guard Crush Value |
| 0 | 0 | ◯ | ◯ | ◯ | 4 |
|
An okay poke at far range | |||||
Far 5C
| Damage | Guard | Startup | Active | Recovery | Total |
|---|---|---|---|---|---|
| 14 | Mid | 12 | 3 | 28 | 43 |
| Hit Adv | Block Adv | Feint Cancel | Cancel on Hit | Cancel on Block | Guard Crush Value |
| -10 | -10 | △ | X | ◯ | 5 |
|
Too slow to be a reliable anti air, despite the hitbox. don't use this move | |||||
Far 5D
| Damage | Guard | Startup | Active | Recovery | Total |
|---|---|---|---|---|---|
| 14 | Mid | 13 | 2 | 22 | 37 |
| Hit Adv | Block Adv | Feint Cancel | Cancel on Hit | Cancel on Block | Guard Crush Value |
| -3 | -3 | X | X | X | 5 |
|
Will go over low pokes but its not rewarding and very slow. Note: It's possible to reduce the move's overall recovery by canceling its landing recovery. | |||||
Crouching Normals
2A
| Damage | Guard | Startup | Active | Recovery | Total |
|---|---|---|---|---|---|
| 4 | Low | 5 | 4 | 8 | 17 |
| Hit Adv | Block Adv | Feint Cancel | Cancel on Hit | Cancel on Block | Guard Crush Value |
| +3 | +3 | X | X / ∞ | X / ∞ | 4 |
|
Would be so good if you could cancel. you can chain 3 of these midscreen and it's plus on block. thanks to its plus frames and how fast your kick super is, though, you can still potentially link it afterwards for a combo. Even without the cancel its just generally a crazy poke that stacks up damage over time. | |||||
2B
| Damage | Guard | Startup | Active | Recovery | Total |
|---|---|---|---|---|---|
| 6 | Low | 4 | 4 | 5 | 13 |
| Hit Adv | Block Adv | Feint Cancel | Cancel on Hit | Cancel on Block | Guard Crush Value |
| +6 | +6 | ◯ | ◯ / ∞ | ◯ / ∞ | 4 |
|
The core of your pressure, poking and many combos. Low, fast, self chains and links into many normals including 2c, 5a and 5b | |||||
2C
| Damage | Guard | Startup | Active | Recovery | Total |
|---|---|---|---|---|---|
| 10 | Mid | 5 | 3 | 17 | 25 |
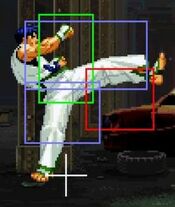
| Hit Adv | Block Adv | Feint Cancel | Cancel on Hit | Cancel on Block | Guard Crush Value |
| +1 | +1 | ◯ | ◯ | ◯ | 5 |
|
Great normal, as its fast, damaging, plus on block, and has decent range. used in many combos, poking, pressure (very plus if FCed), etc. | |||||
2D
| Damage | Guard | Startup | Active | Recovery | Total |
|---|---|---|---|---|---|
| 10 | Low | 7 | 4 | 25 | 36 |
| Hit Adv | Block Adv | Feint Cancel | Cancel on Hit | Cancel on Block | Guard Crush Value |
| KD | -8 | X | X | X | 5 |
|
Typical sweep, which means it aint that good. heavy knockdown is nice and the range is nice but its quite unsafe on block with no cancel options | |||||
Jumping Normals
jA
| Damage | Guard | Startup | Active | Recovery | Total |
|---|---|---|---|---|---|
| 5 | High | 6 | 5 | - | - |
| Hit Adv | Block Adv | Feint Cancel | Cancel on Hit | Cancel on Block | Guard Crush Value |
| - | - | - | ◯ | ◯ | 4 |
|
Probably your best jump in due to its good active frames, great speed and hitbox. the hitstun aint that long so its hard to get significany advantage after, the key is to hit it right before landing. Also your only crossup. If done deep enough, the j.A can beat upper-body evasion attacks. | |||||
jB
| Damage | Guard | Startup | Active | Recovery | Total |
|---|---|---|---|---|---|
| 6 | High | 6 | 8 | - | - |
| Hit Adv | Block Adv | Feint Cancel | Cancel on Hit | Cancel on Block | Guard Crush Value |
| - | - | - | ◯ | ◯ | 4 |
|
An alternative option, has a worse hitbox for jumping ins but instead is very active and reaches further. also a great air to air potentially, and is also a crossup option, albeit a harder one
| |||||
jC
| Damage | Guard | Startup | Active | Recovery | Total |
|---|---|---|---|---|---|
| 9 | High | 6 | 6 | - | - |
| Hit Adv | Block Adv | Feint Cancel | Cancel on Hit | Cancel on Block | Guard Crush Value |
| - | - | - | ◯ | ◯ | 5 |
|
Hits above Jae Hoon.
| |||||
jD
| Damage | Guard | Startup | Active | Recovery | Total |
|---|---|---|---|---|---|
| 10 | High | 8 | 6 | - | - |
| Hit Adv | Block Adv | Feint Cancel | Cancel on Hit | Cancel on Block | Guard Crush Value |
| - | - | - | ◯ | ◯ | 5 |
|
Your best heavy jump in and with massive range and an exceptional air poke. Hopped j.D compliments his ground low pokes really well | |||||
Command Normals
Shou-kyaku Hou (44B)
| Damage | Guard | Startup | Active | Recovery | Total |
|---|---|---|---|---|---|
| 12 | Mid | 23 | 5 | 25 | 53 |
| Hit Adv | Block Adv | Feint Cancel | Cancel on Hit | Cancel on Block | Guard Crush Value |
| KD | -9 | ◯ | ◯ | ◯ | 9 |
|
You backdash, then lunge forward with an upward, launching kick (a strong normal). You can avoid attacks with the backdash, but the move itself is somewhat slow, stubby and unsafe. So mix this with doing other options after backdash.
| |||||
Universal Moves
Lower-body Evasion Attack (5AB)
| Damage | Guard | Startup | Active | Recovery | Total |
|---|---|---|---|---|---|
| 10 | Overhead | 25 | 1 | 19 | 45 |
| Hit Adv | Block Adv | Feint Cancel | Cancel on Hit | Cancel on Block | Guard Crush Value |
| -1 | +5 | - | X | X | 6 |
| |||||
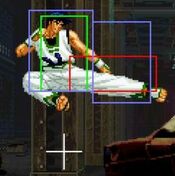
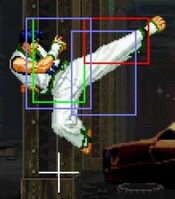
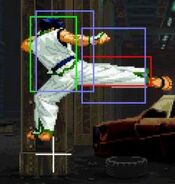
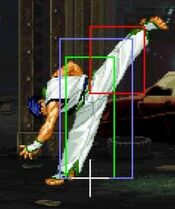
Upper-body Evasion Attack (2AB)
| Damage | Guard | Startup | Active | Recovery | Total |
|---|---|---|---|---|---|
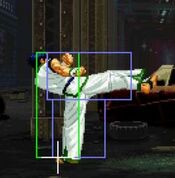
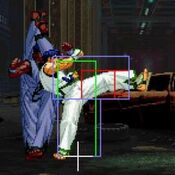
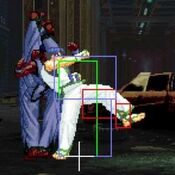
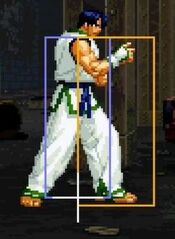
| 10 | Mid | 11 | 2 | 20 | 33 |
| Hit Adv | Block Adv | Feint Cancel | Cancel on Hit | Cancel on Block | Guard Crush Value |
| -3 | +3 | ▽ | ◯ | X | 6 |
|
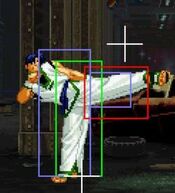
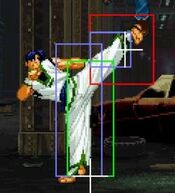
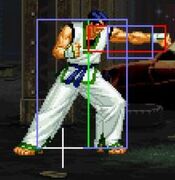
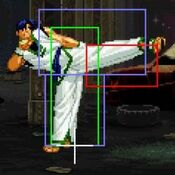
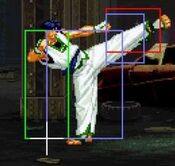
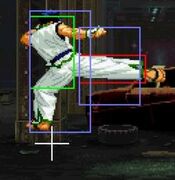
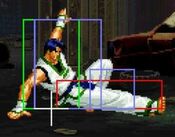
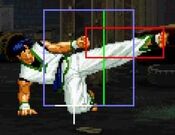
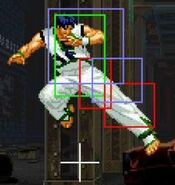
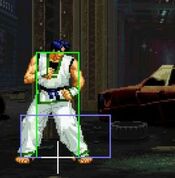
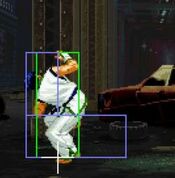
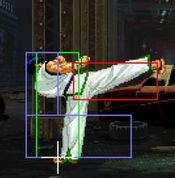
Decent range and its cancelable, along with its excellent hitbox. Decent for occasional poking and you get a combo with ease.
| |||||
T.O.P. Attack (CD)
| Damage | Guard | Startup | Active | Recovery | Total |
|---|---|---|---|---|---|
| 17 (base damage) | Overhead | 30 | - | - | - |
| Hit Adv | Block Adv | Feint Cancel | Cancel on Hit | Cancel on Block | Guard Crush Value |
| KD | -1 | - | - | - | 25 |
|
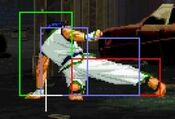
A very slow startup overhead attack that might not knockdown at further ranges. Generally unsafe to use. But because it has an extremely high guard crush value of 25, and its fast recovery makes it -1F if guarded against, it is a useful TOP attack. For some reason, Jae Hoon's side has an advantage when the move is JDed. Since it can be canceled into, it is effective to mix using it in a string. | |||||
Throws
Ground Throw
| Damage | Guard | Startup | Active | Recovery | Total |
|---|---|---|---|---|---|
| 14 | - | 1 | - | - | - |
| Hit Adv | Block Adv | Feint Cancel | Cancel on Hit | Cancel on Block | Guard Crush Value |
| 34 | - | - | - | - | - |
|
Normal throw. The opponent is hard knockdowned a short distance in front of Jae hoon. After throwing, you are able to set solid left/right mixups midscreen by either staying in front with your jump-in or with ambiguous cross-up using jump A or jump B (by going slightly further with microwalking or dash jumping). The ease of hitting varies depending on the character, so practice is required. After throwing the opponent at the corner, you can also use the reverse guard corner cross-up bug that cross-up's even though it looks like it's from the front. | |||||
Feints
Forward Feint (6AC)
| Damage | Guard | Startup | Active | Recovery | Total |
|---|---|---|---|---|---|
| - | - | - | - | - | 10 |
| Hit Adv | Block Adv | Feint Cancel | Cancel on Hit | Cancel on Block | Guard Crush Value |
| - | - | - | - | - | - |
|
Mimics the start of Shakka Shuu being held briefly. You can use the threat of a fake Shakka Shuu to move forward. | |||||
Down Feint (2AC)
| Damage | Guard | Startup | Active | Recovery | Total |
|---|---|---|---|---|---|
| - | - | - | - | - | 10 |
| Hit Adv | Block Adv | Feint Cancel | Cancel on Hit | Cancel on Block | Guard Crush Value |
| - | - | - | - | - | - |
|
Mimics the start of the super Houou Kyaku. Down feint cancel makes it easier to go into down direction attacks or go straight to charging Hienzan. | |||||
Special Moves
Shakka Shuu (236P)
| A (Can Hold) |
Damage | Guard | Startup | Active | Recovery | Total |
|---|---|---|---|---|---|---|
| 5, 5, 5, 8 | Mid | 19 | - | - | - | |
| Hit Adv | Block Adv | Feint Cancel | Cancel on Hit | Cancel on Block | Guard Crush Value | |
| KD | -16 | - | - | - | 1×3, 2 | |
| C (Can Hold) |
Damage | Guard | Startup | Active | Recovery | Total |
| 5, 5, 5, 8 | Mid | 19 | - | - | - | |
| Hit Adv | Block Adv | Feint Cancel | Cancel on Hit | Cancel on Block | Guard Crush Value | |
| KD | -16 | - | - | - | 1×3, 2 | |
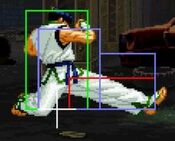
|
After a stance with an upper-body guard point centered (horizontally) in the middle of the character, there is a successive flurry series of kicks. The startup before the guard point is not that quick, so it will be difficult to use as an interrupt during gaps in the opponent's offense, or other defensive uses. The upper-body guard point is at 11~12F and absorbs mids and highs. When the button is held, Jae will hold his stance with his leg fully raised, having the GP persist. But you won't be able to stop the kick. Because of that there is not much of a point in charging completely all the way. The total startup can be nearly 60F at maximum length:
C Version travels further. If you want to JD this, there are only 2 hits to JD, but it is -3 afterwards. Slow, so they don't combo from lights, but are an okay combo finisher. Unsafe on block. Main uses:
| ||||||
Ryuusei Raku (236K)
Best used in combos by special canceling from 2C or the upper-body evasion attack.
Gives you decent oki as well.
However, you can also catch the opponent not blocking low while you use it in a blockstring, or do it alone.
And you can use it as a situational guard cancel.
If you guard the first hit, both versions have the same gap between the end of blockstun and the 2nd hit. But the gap depends on when the 2nd hit reaches you (between 7-10F).
| B | Damage | Guard | Startup | Active | Recovery | Total |
|---|---|---|---|---|---|---|
| 11, 12 | Low, Mid | 14 | - | - | - | |
| Hit Adv | Block Adv | Feint Cancel | Cancel on Hit | Cancel on Block | Guard Crush Value | |
| KD | -6 | - | - | - | 3, 4 | |
|
The initial kick in the B version is extremely stubby. Don't use this unless you are within closer range, otherwise its very hard to make it land. | ||||||
| D | Damage | Guard | Startup | Active | Recovery | Total |
| 11, 15 | Low, Mid | 16 | - | - | - | |
| Hit Adv | Block Adv | Feint Cancel | Cancel on Hit | Cancel on Block | Guard Crush Value | |
| KD | -6 | - | - | - | 4, 4 | |
|
The D version has a longer reach and does more damage than the B version. It is actually your most damaging ender, so it's almost always your best way to finish combos on the ground, meterlessly. | ||||||
Hangetsu Zan (214K)
| B | Damage | Guard | Startup | Active | Recovery | Total |
|---|---|---|---|---|---|---|
| 9, 9, 9 | Mid | 14 | - | - | - | |
| Hit Adv | Block Adv | Feint Cancel | Cancel on Hit | Cancel on Block | Guard Crush Value | |
| KD | -8 | - | - | - | 2, 2, 4 | |
|
Your worst ground combo ender. Very inconsistent at range due to the first hit being very vertical and not comboing from range. The second hit may sometimes connect but only if you do a single normal point blank first. For combos, you should use Ryuusei Raku (236K). The only other use is as a situational guard cancel -- it is slow, but the lack of lower-body hurtbox means you can avoid follow-up low attacks. Risky to use alone, and not even an overhead, there is not much utility. | ||||||
| D | Damage | Guard | Startup | Active | Recovery | Total |
| 9, 9, 9 | Mid | 22 | - | - | - | |
| Hit Adv | Block Adv | Feint Cancel | Cancel on Hit | Cancel on Block | Guard Crush Value | |
| KD | -8 | - | - | - | 3, 3, 5 | |
|
The D version is even slower, so there is even less utility than the B version. Riskier to use alone, you should probably use at farther ranges when the opponent is caught off guard. It's an even worse option to use as a guard cancel. | ||||||
Hishou Kyaku (j2K)
| B | Damage | Guard | Startup | Active | Recovery | Total |
|---|---|---|---|---|---|---|
| 5, 6, 6, 6 | Mid | 9 | - | - | - | |
| Hit Adv | Block Adv | Feint Cancel | Cancel on Hit | Cancel on Block | Guard Crush Value | |
| -5 or more | -5 or more | - | - | - | 2×4 | |
| D | Damage | Guard | Startup | Active | Recovery | Total |
| 5, 6, 6, 6 | Mid | 10 | - | - | - | |
| Hit Adv | Block Adv | Feint Cancel | Cancel on Hit | Cancel on Block | Guard Crush Value | |
| -5 or more | -5 or more | - | - | - | 2×4 | |
|
The divekick. A successive series of up to 4 kicks in a row while diving diagonally downwards. Comboable from all air normals. Punishable on hit at best, and can be even worse depending on how it hits. Pretty bad. Done high enough on a taller character, it might reach 5 kicks. D version travels further and faster at a slightly wider angle. Both versions can beat out upper-body evasion attacks. The main uses are as a counterattack when you special cancel into it from an air normal that was JDed, and as a GC after you JD in mid-air. Although it is a move that is impossible to JD at 0-pixel health, it has a slow startup and travel time, and a punishable gap of recovery as it whiffs (as well as on hit and block), so it's important to apply it properly. The button of follow-up must be the same as the one used for the divekick's. | ||||||
| Air 214 B/D High Follow-up |
Damage | Guard | Startup | Active | Recovery | Total |
| 10 | High | - | - | - | - | |
| Hit Adv | Block Adv | Feint Cancel | Cancel on Hit | Cancel on Block | Guard Crush Value | |
| KD | -13 or more | - | - | - | 7 | |
|
Each hit of the divekick can be canceled into this 214 additional follow-up, stopping in mid-air after a hit, forming a gap before putting out a high-hitting divekick. But it's too slow to combo and can be very very unsafe on block. | ||||||
| Air 3 B/D Low Follow-up |
Damage | Guard | Startup | Active | Recovery | Total |
| 15 | Low | - | - | - | - | |
| Hit Adv | Block Adv | Feint Cancel | Cancel on Hit | Cancel on Block | Guard Crush Value | |
| KD | -16 | - | - | - | 2 | |
|
The 3-direction additional follow-up inputted during the divekick is a low-hitting slide that, after the divekick ends, is comboed into and knocks down. But it is very unsafe. | ||||||
Hienzan ([2]8K)
In the case of hitting at the corner, you can follow up the trade or break move with Houyoku Tenshou Kyaku (236(x2)P). For Hienzan B (BR), you can only connect to Houyoku if the opponent is airborne high enough.
Jae Hoon's main special move that's frequently used as an anti-air, an interrupt during gaps in the opponent's offense with its fast startup and invincibility, your GC of choice, and an anti-GC through special canceling. It can also be used on whiff to do meter gain.
By adding throw invincibility to this special move with the "throw bug escape technique", you won't be easily counterattacked with a throw (especially after the opponent blocks D version break and does reversal throw), so always add throw invincibility if you can. (Especially when you are on the 2P side.)
| B | Damage | Guard | Startup | Active | Recovery | Total |
|---|---|---|---|---|---|---|
| 9, 8 | Mid | 4 | - | - | - | |
| Hit Adv | Block Adv | Feint Cancel | Cancel on Hit | Cancel on Block | Guard Crush Value | |
| KD | -16 | - | - | - | 4, 4 | |
|
[2]8B maybe used in some optimal punishes more than the D version. 1~2F full-body invincibility. | ||||||
| B Break | Damage | Guard | Startup | Active | Recovery | Total |
| 9 | Mid | 4 | - | - | - | |
| Hit Adv | Block Adv | Feint Cancel | Cancel on Hit | Cancel on Block | Guard Crush Value | |
| KD | -3 | - | - | - | 4 | |
|
[2]8B (BR), although -3 on block, distances you safely away from the opponent. In case of hitting at the corner, you can also follow up with [2]8D. Whiffed [2]8B (BR) is your best move for passive meter building -- it's somewhat slowish and hard to spam, but you do not stray far from your current position. | ||||||
| D | Damage | Guard | Startup | Active | Recovery | Total |
| 9, 7, 7 | Mid | 4 | - | - | - | |
| Hit Adv | Block Adv | Feint Cancel | Cancel on Hit | Cancel on Block | Guard Crush Value | |
| KD | -37 | - | - | - | 4, 4 | |
|
Very fast and deals decent damage. The D version is still a true reversal -- better than B version because of the invincibility throughout all startup and the vertical coverage. This makes [2]8D and [2]8D (BR) your main go-to for optimal punishes. But [2]8D is an unsafe anti-air, and [2]8D (BR)'s hitbox is so small and stubby that it whiffs beyond point blank on the ground, making them bad for anti-airing. 1~4F full-body invincibility. | ||||||
| Air 2D (Follow-up) |
Damage | Guard | Startup | Active | Recovery | Total |
| 7 | Mid | - | - | - | - | |
| Hit Adv | Block Adv | Feint Cancel | Cancel on Hit | Cancel on Block | Guard Crush Value | |
| KD | - | - | - | - | - | |
|
Improved Oki over non follow-up version. And even if a mid-air opponent air JD's all the way through the 2D follow-up, they won't be able to do much of a counterattack. | ||||||
| D Break | Damage | Guard | Startup | Active | Recovery | Total |
| 9 | Mid | 4 | 2 | 15+8=23 | 29 | |
| Hit Adv | Block Adv | Feint Cancel | Cancel on Hit | Cancel on Block | Guard Crush Value | |
| KD | 0 | - | - | - | 4 | |
|
On block, [2]8D (BR) moves you next to the opponent but is at 0 advantage, meaning you are able to move at the same time. On hit, you can follow up with [2]8D (or [2]8B if you are close enough). Whiffed [2]8D (BR) done for meter building is also good for movement because it advances forward more than the B version. Empty break must be done during 2~7F. 12F of hitstop/blockstop. 24F blockstun on block. | ||||||
Super Moves
Houyoku Tenshou Kyaku (236236P)
| A | Damage | Guard | Startup | Active | Recovery | Total |
|---|---|---|---|---|---|---|
| 10, 8, 5×5 | Overhead | 11 | - | - | - | |
| Hit Adv | Block Adv | Feint Cancel | Cancel on Hit | Cancel on Block | Guard Crush Value | |
| KD | -52 | - | - | - | 5×7 | |
|
1~11F full-body invincibility (just before it hits). Stubby range, slow startup time, and long recovery. It's difficult to use because it's a very inconsistent and risky tool that can be easily punished when it fails. Both when (1) done as a reversal -- using it as something like an interrupt during gaps in the opponent's offense or as an anti-air; and (2) done primarily as a combo tool -- that may not even launch if too far away. Generally it would be useless, but it does have one big utility -- you can follow-up with Houou Kyaku B anywhere on screen afterwards, massive damage for 2 bars. After Hienzan BR, if Houyoku A is done and connects, it's still possible to follow-up with Hienzan D. Used in optimal punishes when you have the meter -- just make sure you're close. | ||||||
| C | Damage | Guard | Startup | Active | Recovery | Total |
| 6×10 | Overhead | 11 | - | - | - | |
| Hit Adv | Block Adv | Feint Cancel | Cancel on Hit | Cancel on Block | Guard Crush Value | |
| KD | -28 | - | - | - | 10×10 | |
|
1~14F full-body invincibility (past some time after startup). Deals more damage, obviously. Because of the longer invincibility, it's a better reversal and anti-air tool than the A version. Still a very inconsistent move, though it's oddly enough nearly twice as safer as the A version (still -28 on block). You do get a follow-up by either (1) charging/holding C and releasing it after the super freeze; or (2) juggling with Hienzan ([2]8K). No real reason to ever use this, except for the full charge version. | ||||||
| Hold C (Follow-up) |
Damage | Guard | Startup | Active | Recovery | Total |
| 27 | - | - | - | - | - | |
| Hit Adv | Block Adv | Feint Cancel | Cancel on Hit | Cancel on Block | Guard Crush Value | |
| KD | - | - | - | - | - | |
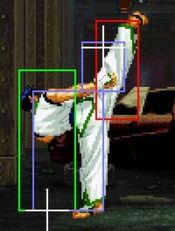
|
The full charge version gives you a follow-up after 236236C hits. It's done by holding C at the beginning and releasing as the opponent nears the ground. Note: The damage of Houyoku P-Power follow-up kick is less than that of S-Power Houyoku > Houou (236(x2)B). | ||||||
Kouou Kyaku (236236K)
It's a fast rush/lunge type move with a long travel distance that becomes a "ranbu" on hit.
Even though this is a 0F move, both versions' hitbox is narrow/small, so the range at the front is short.
Both versions' rush/lunge speed is about the same, but in the case of the strong version, the travel distance is longer.
There are frequent opportunities connect to this super: from hit confirm, TOP hit confirm, Hienzan (BR) (something like a trade is good), 0F unblockable on landing, and so on.
| B | Damage | Guard | Startup | Active | Recovery | Total |
|---|---|---|---|---|---|---|
| 13, 3×3, 5, 13×3 | Mid | 0 | - | - | - | |
| Hit Adv | Block Adv | Feint Cancel | Cancel on Hit | Cancel on Block | Guard Crush Value | |
| KD | -18 | - | - | - | 15 | |
|
Your better super. Great range, 0 startup, great damage. its very easy to combo into, to the point you can link into it from plus on hit normals for an easy hitconfirm. Also great for punishing anything minus, though keep in mind it doesn't travel too far in an instant. | ||||||
| D | Damage | Guard | Startup | Active | Recovery | Total |
| 18, 4×9, 5×7, 18 | Mid | 0 | - | - | - | |
| Hit Adv | Block Adv | Feint Cancel | Cancel on Hit | Cancel on Block | Guard Crush Value | |
| KD | -25 | - | - | - | 30 | |
|
1F full body invulnerability. A more consistent way to burn 2 bars for damage, it still keeps all the great qualities of B super. Overloads and slows the game hilariously, though this has no real practical implication. Goes further faster and reaches fullscreen. | ||||||
