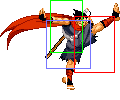
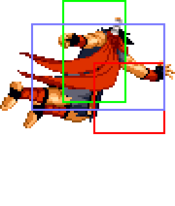
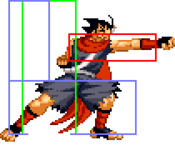
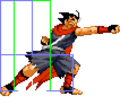
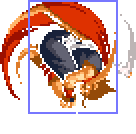
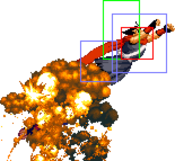
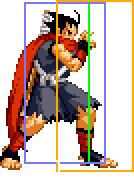
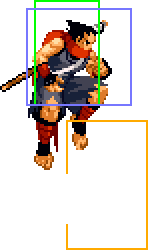
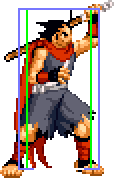
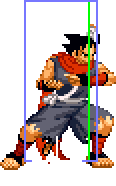
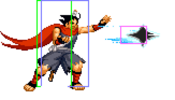
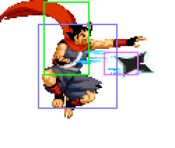
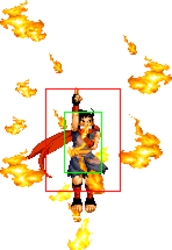
mNo edit summary |
(redone hitbox images + hitboxes for specials + some move descriptions) |
||
| Line 57: | Line 57: | ||
<font style="visibility:hidden" size="0"></font> | <font style="visibility:hidden" size="0"></font> | ||
{{MoveData | {{MoveData | ||
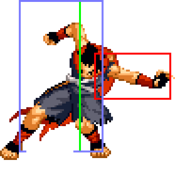
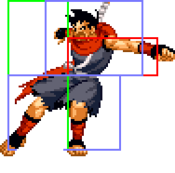
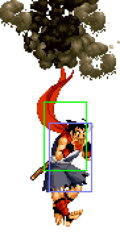
|image= | |image=Garou_Hokutomaru_c5A.png | ||
|name=Cl. {{Icon-SNK|A}} | |name=Cl. {{Icon-SNK|A}} | ||
|subtitle= | |subtitle= | ||
|caption= | |caption= | ||
|data= | |data= | ||
| Line 125: | Line 125: | ||
|Guard Crush Value=4, 3, 0 | |Guard Crush Value=4, 3, 0 | ||
|description= Target combo from cl.5A. Ends in a cancel. | |description= Target combo from cl.5A. Ends in a cancel. | ||
<div class="mw-collapsible"> | |||
<gallery> | |||
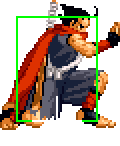
Garou_Hokutomaru Target Pose.png | |||
</gallery> | |||
</div> | |||
}} | }} | ||
}} | }} | ||
| Line 133: | Line 138: | ||
<font style="visibility:hidden" size="0"></font> | <font style="visibility:hidden" size="0"></font> | ||
{{MoveData | {{MoveData | ||
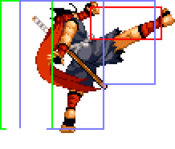
|image= | |image=Garou_Hokutomaru_c5B.png | ||
|name=Cl. {{Icon-SNK|B}} | |name=Cl. {{Icon-SNK|B}} | ||
|subtitle= | |subtitle= | ||
| Line 185: | Line 190: | ||
|Guard Crush Value=4, 3, 0 | |Guard Crush Value=4, 3, 0 | ||
|description= Target combo from cl.5B. Ends in a cancel. | |description= Target combo from cl.5B. Ends in a cancel. | ||
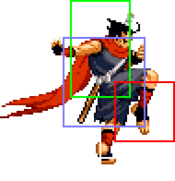
<div class="mw-collapsible"> | |||
<gallery> | |||
Garou_Hokutomaru Target Pose.png | |||
</gallery> | |||
</div> | |||
}} | }} | ||
}} | }} | ||
| Line 193: | Line 203: | ||
<font style="visibility:hidden" size="0"></font> | <font style="visibility:hidden" size="0"></font> | ||
{{MoveData | {{MoveData | ||
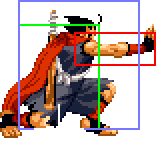
|image= | |image=Garou_Hokutomaru_c5C.png | ||
|image2= | |image2=Garou_Hokutomaru_c5C_1.png | ||
|name=Cl. {{Icon-SNK|C}} | |name=Cl. {{Icon-SNK|C}} | ||
|subtitle= | |subtitle= | ||
| Line 221: | Line 231: | ||
<font style="visibility:hidden" size="0"></font> | <font style="visibility:hidden" size="0"></font> | ||
{{MoveData | {{MoveData | ||
|image= | |image=Garou_Hokutomaru_c5D.png | ||
|name=Cl. {{Icon-SNK|D}} | |name=Cl. {{Icon-SNK|D}} | ||
|subtitle= | |subtitle= | ||
| Line 250: | Line 260: | ||
<font style="visibility:hidden" size="0"></font> | <font style="visibility:hidden" size="0"></font> | ||
{{MoveData | {{MoveData | ||
|image= | |image=Garou_Hokutomaru_f5A.png | ||
|name=Far {{Icon-SNK|A}} | |name=Far {{Icon-SNK|A}} | ||
|subtitle= | |subtitle= | ||
| Line 318: | Line 328: | ||
|Guard Crush Value=4, 3, 0 | |Guard Crush Value=4, 3, 0 | ||
|description= Target combo from f.5A. Ends in a cancel. | |description= Target combo from f.5A. Ends in a cancel. | ||
<div class="mw-collapsible"> | |||
<gallery> | |||
Garou_Hokutomaru Target Pose.png | |||
</gallery> | |||
</div> | |||
}} | }} | ||
}} | }} | ||
| Line 324: | Line 339: | ||
<font style="visibility:hidden" size="0"></font> | <font style="visibility:hidden" size="0"></font> | ||
{{MoveData | {{MoveData | ||
|image= | |image=Garou_Hokutomaru_f5B.png | ||
|name=Far {{Icon-SNK|B}} | |name=Far {{Icon-SNK|B}} | ||
|subtitle= | |subtitle= | ||
| Line 376: | Line 391: | ||
|Guard Crush Value=4, 3, 0 | |Guard Crush Value=4, 3, 0 | ||
|description= Target combo from f.5B. Ends in a cancel. | |description= Target combo from f.5B. Ends in a cancel. | ||
<div class="mw-collapsible"> | |||
<gallery> | |||
Garou_Hokutomaru Target Pose.png | |||
</gallery> | |||
</div> | |||
}} | }} | ||
}} | }} | ||
| Line 384: | Line 404: | ||
<font style="visibility:hidden" size="0"></font> | <font style="visibility:hidden" size="0"></font> | ||
{{MoveData | {{MoveData | ||
|image= | |image=Garou_Hokutomaru_f5C.png | ||
|name=Far {{Icon-SNK|C}} | |name=Far {{Icon-SNK|C}} | ||
|subtitle= | |subtitle= | ||
| Line 411: | Line 431: | ||
<font style="visibility:hidden" size="0"></font> | <font style="visibility:hidden" size="0"></font> | ||
{{MoveData | {{MoveData | ||
|image= | |image=Garou_Hokutomaru_f5D.png | ||
|name=Far {{Icon-SNK|D}} | |name=Far {{Icon-SNK|D}} | ||
|subtitle= | |subtitle= | ||
| Line 440: | Line 460: | ||
<font style="visibility:hidden" size="0"></font> | <font style="visibility:hidden" size="0"></font> | ||
{{MoveData | {{MoveData | ||
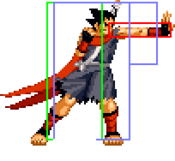
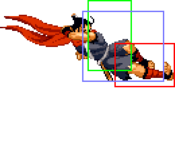
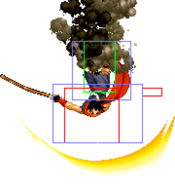
|image= | |image=Garou_Hokutomaru_2A.png | ||
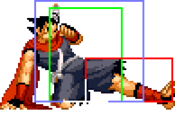
|image2=Garou Hokutomaru 2A_1.png | |||
|caption2=Invincible Recovery Frames | |||
|name=Cr. {{Icon-SNK|A}} | |name=Cr. {{Icon-SNK|A}} | ||
|subtitle= | |subtitle= | ||
| Line 494: | Line 516: | ||
|Guard Crush Value=4, 3, 0 | |Guard Crush Value=4, 3, 0 | ||
|description= Target combo from 2A. Ends in a cancel. | |description= Target combo from 2A. Ends in a cancel. | ||
<div class="mw-collapsible"> | |||
<gallery> | |||
Garou_Hokutomaru 2AB 1.png | |||
</gallery> | |||
</div> | |||
}} | }} | ||
}} | }} | ||
| Line 502: | Line 529: | ||
<font style="visibility:hidden" size="0"></font> | <font style="visibility:hidden" size="0"></font> | ||
{{MoveData | {{MoveData | ||
|image= | |image=Garou_Hokutomaru_2B.png | ||
|name=Cr. {{Icon-SNK|B}} | |name=Cr. {{Icon-SNK|B}} | ||
|subtitle= | |subtitle= | ||
| Line 539: | Line 566: | ||
|Guard Crush Value=4, 3, 0 | |Guard Crush Value=4, 3, 0 | ||
|description= Target combo from 2B. Ends in a cancel. | |description= Target combo from 2B. Ends in a cancel. | ||
<div class="mw-collapsible"> | |||
<gallery> | |||
Garou_Hokutomaru 2AB 1.png | |||
</gallery> | |||
</div> | |||
}} | }} | ||
{{AttackData-Garou | {{AttackData-Garou | ||
| Line 554: | Line 586: | ||
|Cancel on Block= | |Cancel on Block= | ||
|Guard Crush Value=4, 5, 0 | |Guard Crush Value=4, 5, 0 | ||
|description= Target combo from f.5B. Ends in | |description= Target combo from f.5B. Ends in the same cancel. | ||
You can kara cancel the 2D with the follow-up C cancel. | You can kara cancel the 2D with the follow-up C cancel. | ||
| Line 565: | Line 597: | ||
<font style="visibility:hidden" size="0"></font> | <font style="visibility:hidden" size="0"></font> | ||
{{MoveData | {{MoveData | ||
|image= | |image=Garou_Hokutomaru_2C.png | ||
|name=Cr. {{Icon-SNK|C}} | |name=Cr. {{Icon-SNK|C}} | ||
|subtitle= | |subtitle= | ||
| Line 592: | Line 624: | ||
<font style="visibility:hidden" size="0"></font> | <font style="visibility:hidden" size="0"></font> | ||
{{MoveData | {{MoveData | ||
|image= | |image=Garou_Hokutomaru_2D.png | ||
|name=Cr. {{Icon-SNK|D}} | |name=Cr. {{Icon-SNK|D}} | ||
|subtitle= | |subtitle= | ||
| Line 621: | Line 653: | ||
<font style="visibility:hidden" size="0"></font> | <font style="visibility:hidden" size="0"></font> | ||
{{MoveData | {{MoveData | ||
|image= | |image=Garou_Hokutomaru_jA.png | ||
|name=Jump {{Icon-SNK|A}} | |name=Jump {{Icon-SNK|A}} | ||
|subtitle= | |subtitle= | ||
| Line 650: | Line 682: | ||
<font style="visibility:hidden" size="0"></font> | <font style="visibility:hidden" size="0"></font> | ||
{{MoveData | {{MoveData | ||
|image= | |image=Garou_Hokutomaru_jB.png | ||
|name=Jump {{Icon-SNK|B}} | |name=Jump {{Icon-SNK|B}} | ||
|subtitle= | |subtitle= | ||
| Line 678: | Line 710: | ||
<font style="visibility:hidden" size="0"></font> | <font style="visibility:hidden" size="0"></font> | ||
{{MoveData | {{MoveData | ||
|image= | |image=Garou_Hokutomaru_jC.png | ||
|name=Jump {{Icon-SNK|C}} | |name=Jump {{Icon-SNK|C}} | ||
|subtitle= | |subtitle= | ||
| Line 705: | Line 737: | ||
<font style="visibility:hidden" size="0"></font> | <font style="visibility:hidden" size="0"></font> | ||
{{MoveData | {{MoveData | ||
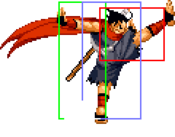
|image= | |image=Garou_Hokutomaru_jD.png | ||
|name=Jump {{Icon-SNK|D}} | |name=Jump {{Icon-SNK|D}} | ||
|subtitle= | |subtitle= | ||
| Line 736: | Line 768: | ||
<font style="visibility:hidden" size="0"></font> | <font style="visibility:hidden" size="0"></font> | ||
{{MoveData | {{MoveData | ||
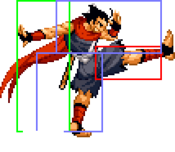
|image=Garou_Hokutomaru_3B. | |image=Garou_Hokutomaru_3B.png | ||
|name=Sliding | |name=Sliding | ||
|input={{Motion|3}}+{{Icon-SNK|B}} | |input={{Motion|3}}+{{Icon-SNK|B}} | ||
| Line 766: | Line 798: | ||
<font style="visibility:hidden" size="0"></font> | <font style="visibility:hidden" size="0"></font> | ||
{{MoveData | {{MoveData | ||
|image=Garou_Hokutomaru_3D | |image=Garou_Hokutomaru_3D.png | ||
|image2= | |image2=Garou_Hokutomaru_3D_1.png | ||
|name=Kuuten Kyaku | |name=Kuuten Kyaku | ||
|input={{Motion|3}}+{{Icon-SNK|D}} | |input={{Motion|3}}+{{Icon-SNK|D}} | ||
| Line 802: | Line 834: | ||
<font style="visibility:hidden" size="0"></font> | <font style="visibility:hidden" size="0"></font> | ||
{{MoveData | {{MoveData | ||
|image= | |image=Garou_Hokutomaru_5AB.png | ||
|name=St. {{Icon-SNK|A}}+{{Icon-SNK|B}} | |name=St. {{Icon-SNK|A}}+{{Icon-SNK|B}} | ||
|subtitle=Lower-body evasion attack | |subtitle=Lower-body evasion attack | ||
| Line 830: | Line 862: | ||
<font style="visibility:hidden" size="0"></font> | <font style="visibility:hidden" size="0"></font> | ||
{{MoveData | {{MoveData | ||
|image=Garou_Hokutomaru_2AB | |image=Garou_Hokutomaru_2AB.png | ||
|name= Cr. {{Icon-SNK|A}}+{{Icon-SNK|B}} | |name= Cr. {{Icon-SNK|A}}+{{Icon-SNK|B}} | ||
|subtitle=Upper-body evasion attack | |subtitle=Upper-body evasion attack | ||
| Line 854: | Line 883: | ||
18F hitstun and 24F blockstun. | 18F hitstun and 24F blockstun. | ||
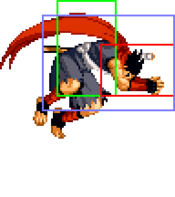
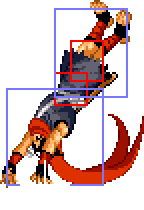
<div class="mw-collapsible"> | |||
<gallery> | |||
Garou_Hokutomaru_2AB 1.png|Upper-Body Invincible Frames | |||
Garou_Hokutomaru_2AB 2.png|Vulnerable Startup | |||
Garou_Hokutomaru_2AB 3.png|Recovery | |||
</gallery> | |||
</div> | |||
}} | }} | ||
}} | }} | ||
| Line 862: | Line 899: | ||
<font style="visibility:hidden" size="0"></font> | <font style="visibility:hidden" size="0"></font> | ||
{{MoveData | {{MoveData | ||
|image= | |image=Garou_Hokutomaru_2AB BC.png | ||
|name=Cr. {{Icon-SNK|A}}+{{Icon-SNK|B}}>{{Icon-SNK|B}}+{{Icon-SNK|C}} | |name=Cr. {{Icon-SNK|A}}+{{Icon-SNK|B}}>{{Icon-SNK|B}}+{{Icon-SNK|C}} | ||
|subtitle= | |subtitle= | ||
| Line 892: | Line 929: | ||
<font style="visibility:hidden" size="0"></font> | <font style="visibility:hidden" size="0"></font> | ||
{{MoveData | {{MoveData | ||
|image=Garou_Hokutomaru_CD | |image=Garou_Hokutomaru_CD.png | ||
|name=Ninpou Bakuho (T.O.P. Attack) | |name=Ninpou Bakuho (T.O.P. Attack) | ||
|input={{Icon-SNK|C}}{{Icon-SNK|D}} | |input={{Icon-SNK|C}}{{Icon-SNK|D}} | ||
| Line 916: | Line 951: | ||
12~14F full-body invincibility. | 12~14F full-body invincibility. | ||
<div class="mw-collapsible"> | |||
<gallery> | |||
Garou_Hokutomaru_CD 1.png| | |||
Garou_Hokutomaru_CD 2.png|Invincible Frames | |||
</gallery> | |||
</div> | |||
}} | }} | ||
}} | }} | ||
| Line 926: | Line 968: | ||
<font style="visibility:hidden" size="0"></font> | <font style="visibility:hidden" size="0"></font> | ||
{{MoveData | {{MoveData | ||
|image=Garou_Hokutomaru_Grab. | |image=Garou_Hokutomaru_Grab.png | ||
|name=Hikkakimanesu | |name=Hikkakimanesu | ||
|input='''Close''' {{Motion|4}}/{{Motion|6}}+{{Icon-SNK|C}} | |input='''Close''' {{Motion|4}}/{{Motion|6}}+{{Icon-SNK|C}} | ||
| Line 954: | Line 996: | ||
<font style="visibility:hidden" size="0"></font> | <font style="visibility:hidden" size="0"></font> | ||
{{MoveData | {{MoveData | ||
|image= | |image=Garou Hokutomaru Air Grab.png | ||
|name=Noumen Tsukuri | |name=Noumen Tsukuri | ||
|input='''Air Close''' {{Motion|2}}+{{Icon-SNK|C}} | |input='''Air Close''' {{Motion|2}}+{{Icon-SNK|C}} | ||
| Line 984: | Line 1,026: | ||
<font style="visibility:hidden" size="0"></font> | <font style="visibility:hidden" size="0"></font> | ||
{{MoveData | {{MoveData | ||
|image= | |image=Garou_Hokutomaru_6AC.png | ||
|name={{Motion|6}}+{{Icon-SNK|A}}+{{Icon-SNK|C}} | |name={{Motion|6}}+{{Icon-SNK|A}}+{{Icon-SNK|C}} | ||
|subtitle=Forward Feint | |subtitle=Forward Feint | ||
| Line 1,008: | Line 1,050: | ||
<font style="visibility:hidden" size="0"></font> | <font style="visibility:hidden" size="0"></font> | ||
{{MoveData | {{MoveData | ||
|image= | |image=Garou_Hokutomaru_2AC.png | ||
|name={{Motion|2}}+{{Icon-SNK|A}}+{{Icon-SNK|C}} | |name={{Motion|2}}+{{Icon-SNK|A}}+{{Icon-SNK|C}} | ||
|subtitle=Down Feint | |subtitle=Down Feint | ||
| Line 1,037: | Line 1,079: | ||
<font style="visibility:hidden" size="0"></font> | <font style="visibility:hidden" size="0"></font> | ||
{{MoveData | {{MoveData | ||
|image= | |image=Garou Hokutomaru 236A.png | ||
|caption=236A | |||
|image2=Garou Hokutomaru 236C.png | |||
|caption2=236C | |||
|name=Shuriken | |name=Shuriken | ||
|input= {{Motion|236}}+{{Icon-SNK|A}}/{{Icon-SNK|C}} | |input= {{Motion|236}}+{{Icon-SNK|A}}/{{Icon-SNK|C}} | ||
|subtitle= | |subtitle= | ||
|data= | |data= | ||
{{AttackData-Garou | {{AttackData-Garou | ||
| Line 1,082: | Line 1,126: | ||
<font style="visibility:hidden" size="0"></font> | <font style="visibility:hidden" size="0"></font> | ||
{{MoveData | {{MoveData | ||
|image= | |image=Garou Hokutomaru j236P.png | ||
|name=Shuriken (Air) | |name=Shuriken (Air) | ||
|input= Air {{Motion|236}}+{{Icon-SNK|A}}/{{Icon-SNK|C}} | |input= Air {{Motion|236}}+{{Icon-SNK|A}}/{{Icon-SNK|C}} | ||
| Line 1,128: | Line 1,172: | ||
<font style="visibility:hidden" size="0"></font> | <font style="visibility:hidden" size="0"></font> | ||
{{MoveData | {{MoveData | ||
|image= | |image=Garou Hokutomaru 214B.png | ||
|caption=214B | |||
|image2=Garou Hokutomaru 214D.png | |||
|caption2=214D | |||
|name=Rakkazan | |name=Rakkazan | ||
|input={{Motion|214}}+{{Icon-SNK|B}}/{{Icon-SNK|D}} (Air Ok) | |input={{Motion|214}}+{{Icon-SNK|B}}/{{Icon-SNK|D}} (Air Ok) | ||
|subtitle= | |subtitle= | ||
|data= | |data= | ||
{{AttackData-Garou | {{AttackData-Garou | ||
| Line 1,175: | Line 1,221: | ||
<font style="visibility:hidden" size="0"></font> | <font style="visibility:hidden" size="0"></font> | ||
{{MoveData | {{MoveData | ||
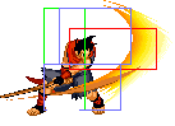
|image= | |image=Garou Hokutomaru 214A.png | ||
|caption=Hitbox is the same for 214C's second hit | |||
|name=Karakusa Giri | |name=Karakusa Giri | ||
|input={{Motion|214}}+{{Icon-SNK|A}}/{{Icon-SNK|C}} | |input={{Motion|214}}+{{Icon-SNK|A}}/{{Icon-SNK|C}} | ||
|subtitle= | |subtitle= | ||
|data= | |data= | ||
{{AttackData-Garou | {{AttackData-Garou | ||
| Line 1,195: | Line 1,241: | ||
|Cancel on Block= | |Cancel on Block= | ||
|Guard Crush Value=7 | |Guard Crush Value=7 | ||
|description= | |description= Used in meterless combos. Can GC into this to punish a fireball at footsies range. | ||
}} | }} | ||
{{AttackData-Garou | {{AttackData-Garou | ||
| Line 1,212: | Line 1,258: | ||
|Cancel on Block=/ | |Cancel on Block=/ | ||
|Guard Crush Value=/ | |Guard Crush Value=/ | ||
|description= Hold the button input to stop/cancel the attack. | |description= Hold the button input to stop/cancel the attack. Trying to make use of this after a blocked normal still leaves Hokutomaru very minus, but it can be useful to approach a downed opponent while building a bit of meter. | ||
}} | }} | ||
{{AttackData-Garou | {{AttackData-Garou | ||
| Line 1,228: | Line 1,274: | ||
|Cancel on Block= | |Cancel on Block= | ||
|Guard Crush Value=4, 4 | |Guard Crush Value=4, 4 | ||
|description= | |description=Far too slow to be comboed into practically and is extremely unsafe. | ||
}} | }} | ||
{{AttackData-Garou | {{AttackData-Garou | ||
| Line 1,252: | Line 1,298: | ||
<font style="visibility:hidden" size="0"></font> | <font style="visibility:hidden" size="0"></font> | ||
{{MoveData | {{MoveData | ||
|image= | |image=Garou Hokutomaru 236B.png | ||
|name=Kuuha Dan | |name=Kuuha Dan | ||
|input= {{Motion|236}}+{{Icon-SNK|B}} | |input= {{Motion|236}}+{{Icon-SNK|B}} | ||
| Line 1,273: | Line 1,319: | ||
|Guard Crush Value=3, 3, 3 | |Guard Crush Value=3, 3, 3 | ||
|description= | |description= | ||
<div class="mw-collapsible"> | |||
<gallery> | |||
Garou_Hokutomaru_236B 1.png | |||
Garou_Hokutomaru_236B 2.png | |||
Garou_Hokutomaru_236B 3.png | |||
Garou_Hokutomaru_236B 4.png | |||
Garou_Hokutomaru_236B 5.png | |||
</gallery> | |||
</div> | |||
}} | }} | ||
{{AttackData-Garou | {{AttackData-Garou | ||
| Line 1,288: | Line 1,343: | ||
|Cancel on Block= | |Cancel on Block= | ||
|Guard Crush Value=3 | |Guard Crush Value=3 | ||
|description= | |description= Hokutomaru's fastest meterless guard cancel and his fastest way to build meter when braked. | ||
}} | }} | ||
}} | }} | ||
| Line 1,295: | Line 1,350: | ||
<font style="visibility:hidden" size="0"></font> | <font style="visibility:hidden" size="0"></font> | ||
{{MoveData | {{MoveData | ||
|image= | |image=Garou Hokutomaru 236B.png | ||
|name=Kuuha Dan | |name=Kuuha Dan | ||
|input= {{Motion|236}}+{{Icon-SNK|D}} | |input= {{Motion|236}}+{{Icon-SNK|D}} | ||
| Line 1,315: | Line 1,370: | ||
|Cancel on Block= | |Cancel on Block= | ||
|Guard Crush Value=3, 3, 3, 3 | |Guard Crush Value=3, 3, 3, 3 | ||
|description= | |description= Combo fodder. | ||
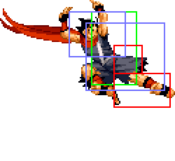
<div class="mw-collapsible"> | |||
<gallery> | |||
Garou_Hokutomaru_236B 1.png | |||
Garou_Hokutomaru_236B 2.png | |||
Garou_Hokutomaru_236B 3.png | |||
Garou_Hokutomaru_236B 4.png | |||
Garou_Hokutomaru_236B 5.png | |||
</gallery> | |||
</div> | |||
}} | }} | ||
{{AttackData-Garou | {{AttackData-Garou | ||
| Line 1,340: | Line 1,404: | ||
<font style="visibility:hidden" size="0"></font> | <font style="visibility:hidden" size="0"></font> | ||
{{MoveData | {{MoveData | ||
|image = | |image=Garou Hokutomaru 236236A.png | ||
|name | |image2=Garou Hokutomaru 236236A 1.png | ||
|input | |name=Chou Hissatsu Shuriken | ||
|input={{Motion|236}},{{Motion|236}} + {{Icon-SNK|A}} | |||
|caption= | |caption= | ||
|data= | |data= | ||
| Line 1,359: | Line 1,424: | ||
|Cancel on Block= | |Cancel on Block= | ||
|Guard Crush Value=2×4, 5 | |Guard Crush Value=2×4, 5 | ||
|description=1~6F full-body invincibility. | |description=Midscreen combo ender. | ||
1~6F full-body invincibility. | |||
When far away from the opponent, this move will only hit 4 times. | |||
}} | }} | ||
{{AttackData-Garou | {{AttackData-Garou | ||
| Line 1,384: | Line 1,451: | ||
<font style="visibility:hidden" size="0"></font> | <font style="visibility:hidden" size="0"></font> | ||
{{MoveData | {{MoveData | ||
|image = | |image=Garou Hokutomaru 236236C.png | ||
|name | |image2=Garou Hokutomaru 236236C 1.png | ||
|input | |name=Chou Bakuen Kunai | ||
|input={{Motion|236}},{{Motion|236}} + {{Icon-SNK|C}} | |||
|caption= | |caption= | ||
|data= | |data= | ||
| Line 1,429: | Line 1,497: | ||
<font style="visibility:hidden" size="0"></font> | <font style="visibility:hidden" size="0"></font> | ||
{{MoveData | {{MoveData | ||
|image = | |image=Garou Hokutomaru 236236B.png | ||
|name | |name=Ougi • Chou Hissatsu Tatsumaki | ||
|input | |input={{Motion|236}},{{Motion|236}} + {{Icon-SNK|B}} | ||
|caption= | |caption= | ||
|data= | |data= | ||
| Line 1,448: | Line 1,516: | ||
|Cancel on Block= | |Cancel on Block= | ||
|Guard Crush Value=2×9 | |Guard Crush Value=2×9 | ||
|description=1~2F full-body invincibility. | |description=Corner combo ender. | ||
1~2F full-body invincibility. | |||
* Causes Hard Knockdown. | |||
<div class="mw-collapsible"> | |||
<gallery> | |||
Garou_Hokutomaru_236236B 1.png | |||
Garou_Hokutomaru_236236B 2.png | |||
Garou_Hokutomaru_236236B 3.png | |||
</gallery> | |||
</div> | |||
}} | }} | ||
}} | }} | ||
| Line 1,457: | Line 1,534: | ||
<font style="visibility:hidden" size="0"></font> | <font style="visibility:hidden" size="0"></font> | ||
{{MoveData | {{MoveData | ||
|image = | |image=Garou_Hokutomaru_236236D.png | ||
|name | |name=Kyuukyoku Ougi • Chou Bakuen Tatsumaki | ||
|input | |input={{Motion|236}},{{Motion|236}} + {{Icon-SNK|D}} | ||
|caption= | |caption= | ||
|data= | |data= | ||
{{AttackData-Garou | {{AttackData-Garou | ||
| header = | |header= | ||
|version ={{Motion|236}},{{Motion|236}} + {{Icon-SNK|D}} | |version={{Motion|236}},{{Motion|236}} + {{Icon-SNK|D}} | ||
|Damage=7×10 | |Damage=7×10 | ||
|Guard=Mid | |Guard=Mid | ||
| Line 1,478: | Line 1,555: | ||
|Guard Crush Value=3×10 | |Guard Crush Value=3×10 | ||
|description= | |description= | ||
* Causes Soft Knockdown, unlike 236236B. | |||
<div class="mw-collapsible"> | |||
<gallery> | |||
Garou_Hokutomaru_236236D 1.png | |||
Garou_Hokutomaru_236236D 2.png | |||
Garou_Hokutomaru_236236D 3.png | |||
</gallery> | |||
</div> | |||
}} | }} | ||
}} | }} | ||
Revision as of 01:13, 10 April 2024
Introduction
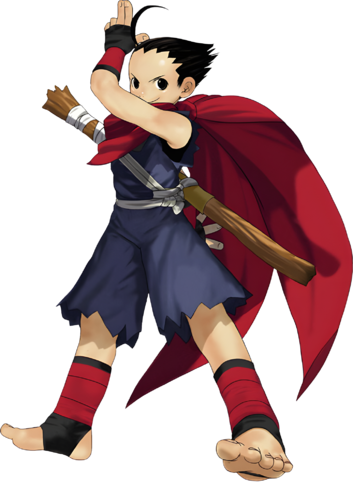
Hokutomaru
Gameplay
TBD
| Strengths | Weaknesses |
|---|---|
|
|
Character Colors
Move List
Frame Data Source: https://w.atwiki.jp/garoumow/pages/27.html and https://w.atwiki.jp/garoumow/pages/80.html
| Data Help | |
|---|---|
| Disclaimer: This is meant to teach basic terminology used when describing moves. | |
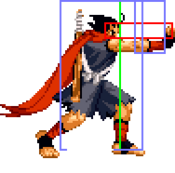
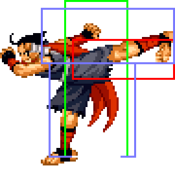
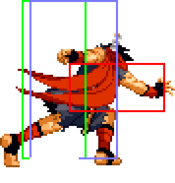
| HitBox: | A predefined area (usually a group of rectangles or circles) that tell the game how any given attack can come in contact with a character. Hitboxes are invisible to the player when normally playing. |
| HurtBox: | A predefined area (usually a group of rectangles or circles) that tell the game how your character is allowed to get hit by any incoming attack. Specifically, you'll get hit by (or block) an attack if that attack's hitbox ever overlaps your hurtbox. |
| Throw Box/Range: | Active throw frames and range. Your opponent will be thrown in this field if not in block or hit stun. |
| Projectile Box: | Hit box on a projectile attack. |
| Guard/Counter Box: | The Guard Box or Counter Box. This appears when blocking or using a counter move. |
| Push Box: | Has no bearing on hurt/hit boxes. Just allows characters to not pass through each other. (Also known as "Collision Box".) |
| Command | the input for the attack. |
| Start Up | The number of frames that initiate at the beginning of an attack after the input.
And when the first hitbox is present.
The first active frame is after the last startup frame. |
| Guard | The way this move must be blocked.
High or H or Overhead (especially when from the ground) -- must be blocked standing. |
| Damage | "basic" damage -- unmodified damage values
"correct" damage -- damage values modified for damage scaling, TOP multiplier, and defense rate |
| Guard Crush Value | Decrease your guard durability gauge/meter by that value/s |
| + | signifies how many advantage frames the attacker has. |
| - | signifies how many disadvantage frames the attacker has. |
| KD | means the attack will knock the opponent down. |
| ◯ | circle means cancelable on both hit/block. |
| ∞ | infinity means chain cancelable with the same button (renda cancel). |
| ※ | means cancelable on the first hit/part only. |
| 《 》OR « » OR << >> OR ( ) | The numbers in the brackets are the startup frames until the next stage (the gap until the next hit's first active frame). |
| △ | up triangle means only cancelable on block. |
| ▽ | down triangle means only cancelable on hit. |
| × OR X | means not cancelable. |
Notes:
- Guard crush values within ( ) are when the move is used as the next hit of a target combo.
- From the 2nd hit and after of the target combo, the active frames and recovery frames will be the same as far moves and crouching moves
- Jump D, Jump A, and Jump B (Jump A and Jump B are usually diagonal jumps only) can beat out upper-body evasive attacks.
- Special/Super moves with "Guard" data in red text are impossible to just defend at 0-pixel health bar.
Close Standing Normals
| Damage | Guard | Startup | Active | Recovery | Total |
|---|---|---|---|---|---|
| 6, 6 | Mid | 5 | 2, 《5》, 3 | 16 | 31 |
| Hit Adv | Block Adv | Feint Cancel | Cancel on Hit | Cancel on Block | Guard Crush Value |
| +2 | +2 | ※ | ※ | ※ | 3, 3 |
| Damage | Guard | Startup | Active | Recovery | Total |
|---|---|---|---|---|---|
| 9 | Mid | 3 | 3 | 19 | 25 |
| Hit Adv | Block Adv | Feint Cancel | Cancel on Hit | Cancel on Block | Guard Crush Value |
| -1 | -1 | ◯ | ◯ | ◯ | 5 |
Far Standing Normals
| Damage | Guard | Startup | Active | Recovery | Total |
|---|---|---|---|---|---|
| 12 | Mid | 11 | 1 | 30 | 42 |
| Hit Adv | Block Adv | Feint Cancel | Cancel on Hit | Cancel on Block | Guard Crush Value |
| -10 | -10 | X | X | X | 5(3) |
| Damage | Guard | Startup | Active | Recovery | Total |
|---|---|---|---|---|---|
| 12 | Mid | 11 | 3 | 21 | 35 |
| Hit Adv | Block Adv | Feint Cancel | Cancel on Hit | Cancel on Block | Guard Crush Value |
| -3 | -3 | X | X | X | 5(3) |
Crouching Normals
| Damage | Guard | Startup | Active | Recovery | Total |
|---|---|---|---|---|---|
| 9 | Mid | 6 | 4 | 16 | 26 |
| Hit Adv | Block Adv | Feint Cancel | Cancel on Hit | Cancel on Block | Guard Crush Value |
| +1 | +1 | X | X | X | 5(3) |
| |||||
| Damage | Guard | Startup | Active | Recovery | Total |
|---|---|---|---|---|---|
| 9 | Low | 10 | 5 | 19 | 34 |
| Hit Adv | Block Adv | Feint Cancel | Cancel on Hit | Cancel on Block | Guard Crush Value |
| KD | -3 | X | X | X | 5(5) |
| |||||
Jumping Normals
| Damage | Guard | Startup | Active | Recovery | Total |
|---|---|---|---|---|---|
| 6 | High | 6 | 12 | - | - |
| Hit Adv | Block Adv | Feint Cancel | Cancel on Hit | Cancel on Block | Guard Crush Value |
| - | - | - | ◯ | ◯ | 4 |
|
Jump A (usually diagonal jump only) can beat out upper-body evasion attacks. | |||||
| Damage | Guard | Startup | Active | Recovery | Total |
|---|---|---|---|---|---|
| 6 | High | 3 | 10 | - | - |
| Hit Adv | Block Adv | Feint Cancel | Cancel on Hit | Cancel on Block | Guard Crush Value |
| - | - | - | ◯ | ◯ | 4 |
|
Jump B (usually diagonal jump only) can beat out upper-body evasion attacks. | |||||
| Damage | Guard | Startup | Active | Recovery | Total |
|---|---|---|---|---|---|
| 8 | High | 6 | 5 | - | - |
| Hit Adv | Block Adv | Feint Cancel | Cancel on Hit | Cancel on Block | Guard Crush Value |
| - | - | - | ◯ | ◯ | 5 |
| Damage | Guard | Startup | Active | Recovery | Total |
|---|---|---|---|---|---|
| 8 | High | 7 | 7 | - | - |
| Hit Adv | Block Adv | Feint Cancel | Cancel on Hit | Cancel on Block | Guard Crush Value |
| - | - | - | ◯ | ◯ | 5 |
|
Jump D can beat out upper-body evasion attacks. | |||||
Command Normals
| Damage | Guard | Startup | Active | Recovery | Total |
|---|---|---|---|---|---|
| 10 | Low | 7 | 13 | 22 | 42 |
| Hit Adv | Block Adv | Feint Cancel | Cancel on Hit | Cancel on Block | Guard Crush Value |
| KD | -13 | X | X | X | 9 |
|
On hit/block, unless hit on the last active frame, 1 frame of active frame recovery is removed. (e.g., hitting on the first frame has 20F blockstun - (11F remaining active recovery + 22F recovery) = -13 adv. Max advantage is -2. | |||||
| Damage | Guard | Startup | Active | Recovery | Total |
|---|---|---|---|---|---|
| 6, 6 | Mid | 8 | 4, 4 | 30 | 46 |
| Hit Adv | Block Adv | Feint Cancel | Cancel on Hit | Cancel on Block | Guard Crush Value |
| KD | -13 | - | X , ◯ | X , ◯ | 9, 9 |
|
Block adv on 1st hit only = -17 Apart from kara canceling during the attack's startup, after the 2nd hit it's possible to special cancel anytime in the air, on hit or on whiff. | |||||
Universal Moves
| Damage | Guard | Startup | Active | Recovery | Total |
|---|---|---|---|---|---|
| 6, 6 | Overhead | 18 | 3, 《4》, 3 | 17 | 45 |
| Hit Adv | Block Adv | Feint Cancel | Cancel on Hit | Cancel on Block | Guard Crush Value |
| -1 | +5 | - | X | X | 3, 3 |
|
18F hitstun and 24F blockstun. 1st hit only, -8 on hit, -2 on block. | |||||
| Damage | Guard | Startup | Active | Recovery | Total |
|---|---|---|---|---|---|
| - | - | - | - | - | 30 |
| Hit Adv | Block Adv | Feint Cancel | Cancel on Hit | Cancel on Block | Guard Crush Value |
| -12 | -6 | - | - | - | 6, 0 |
|
Target combo follow-up (non-attack, movement-type) from 2AB. Lower-body evasion (upper-body hurtbox) for 12F while transitioning and up until landing there is an airborne hurtbox. | |||||
| Damage | Guard | Startup | Active | Recovery | Total |
|---|---|---|---|---|---|
| 17 (base damage) | Mid | 14 | - | - | - |
| Hit Adv | Block Adv | Feint Cancel | Cancel on Hit | Cancel on Block | Guard Crush Value |
| KD | -31 | - | - | - | 25 |
|
This is a rising attack that is good for one hit and travels at a 45 degree angle. It has a slow start and can be used as an anti-air. Don't ever get this attack blocked! 12~14F full-body invincibility. | |||||
Throws
| Damage | Guard | Startup | Active | Recovery | Total |
|---|---|---|---|---|---|
| 4, 4, 4, 4 | - | 1 | - | - | - |
| Hit Adv | Block Adv | Feint Cancel | Cancel on Hit | Cancel on Block | Guard Crush Value |
| +59 | - | - | - | - | - |
| Damage | Guard | Startup | Active | Recovery | Total |
|---|---|---|---|---|---|
| - | - | 1 | - | - | - |
| Hit Adv | Block Adv | Feint Cancel | Cancel on Hit | Cancel on Block | Guard Crush Value |
| - | - | - | - | - | - |
Feints
| Damage | Guard | Startup | Active | Recovery | Total |
|---|---|---|---|---|---|
| - | - | - | - | - | 10 |
| Hit Adv | Block Adv | Feint Cancel | Cancel on Hit | Cancel on Block | Guard Crush Value |
| - | - | - | - | - | - |
|
Mimics the end recovery animation of Karakusa Giri. | |||||
| Damage | Guard | Startup | Active | Recovery | Total |
|---|---|---|---|---|---|
| - | - | - | - | - | 8 |
| Hit Adv | Block Adv | Feint Cancel | Cancel on Hit | Cancel on Block | Guard Crush Value |
| - | - | - | - | - | - |
|
Mimics the start of Shuriken. | |||||
Special Moves
Super Moves
