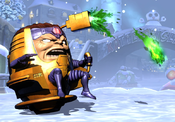
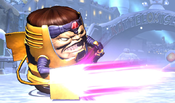
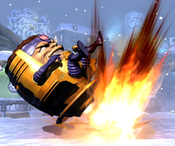
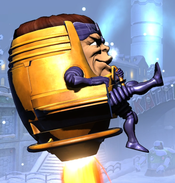
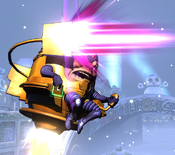
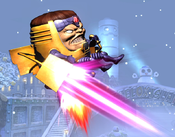
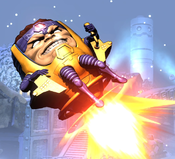
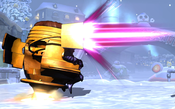
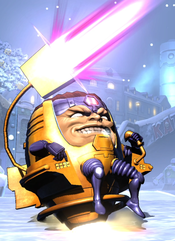
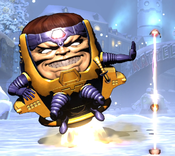
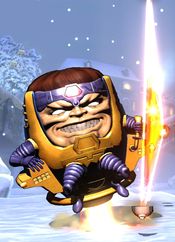
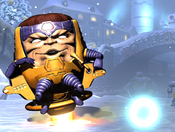
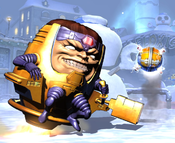
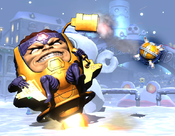
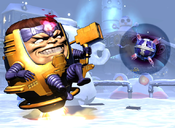
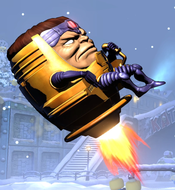
(→Hyper Moves: Ce.) |
No edit summary |
||
| (40 intermediate revisions by 11 users not shown) | |||
| Line 1: | Line 1: | ||
{{ | <div style="display: flex; flex-wrap:wrap-reverse;"> | ||
<div style="display: flex;flex-direction: column;flex:5;min-width:300px;padding: 10px;"> | |||
{{Character Subnav UMVC3|name=M.O.D.O.K.}} | |||
==Introduction== | |||
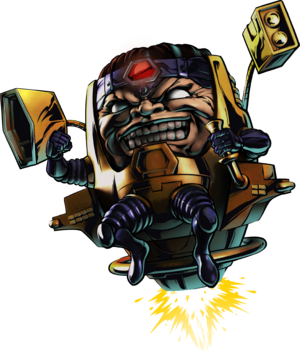
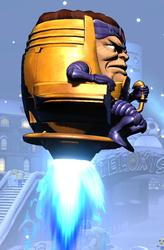
Previously a technician named George Tarleton, the organization of criminal scientists A.I.M. experimented on him, transforming him into MODOK. The Mental Organism Designed Only for Killing is a living supercomputer with immense intelligence, psionic powers that can be channeled into destructive beams, and telepathy. As a consequence of his oversized brain and head, MODOK's body can not support itself, and he moves around using his highly advanced Doomsday Chair. | |||
'''In UMvC3,''' MODOK is an unorthodox character, as his movement options are quite different from the more standard ones, and his normal attacks include several unorthodox projectile attacks besides the standard regular hits. MODOK has several tools to support a keepaway playstyle, including beams, projectiles, flight, and a defensive barrier. He also can use his movement tools and delayed-hitting projectiles to support a more aggressive playstyle, with dangerous mixups and several strong solo combo extensions. | |||
MODOK is unorthodox | |||
{{ProConTable | |||
| pros = | |||
*'''Powerful Mobility:''' Mobility tools include two flight modes at 5 seconds duration each, an 8-Way airdash, and Battering Ram (X+S) for additional mobility. | |||
*'''Excellent Zoning:''' Large arsenal of projectile tools for a strong zoning game. MODOK has a fast, standard beam projectile in Psionic Blaster (236X). He can also control space with Balloon Bomb (623X) and Analysis Cubes (214X). This is supported by his unique Barrier (4H) and Big Barrier (4S) moves, which destroy enemy attacks, block movement, and generally hamper the opponent's ability to counter MODOK's keepaway game. | |||
*'''Great Support Assists:''' Two choices of powerful assists in Psionic Blaster and Barrier, as well as some strong DHC options, give MODOK solid support capability. | |||
*'''Good Damage:''' MODOK has good damage and meter-build both with and without assists. | |||
*'''Strong Snowball Potential:''' MODOK has several tools for oncoming mixups and corner pressure, including his 2M "Snot Puddle", his extremely fast j.5L overheads, and his ability to repeatedly jump-cancel or dash-cancel attacks. Despite being strong as a keepaway character, if MODOK gets momentum in the corner, his rushdown game can be equally scary. | |||
*'''Unique Special Tactic:''' Can use his unique "Jamming Bomb" (623S) move to scramble the controls of an opponent's character, making it much harder for them to defend themselves. | |||
| cons = | |||
*'''Exclusively Bad Defense:''' Because of MODOK's unique jump (or rather, his inability to jump normally), MODOK is the only character in the game that cannot Chicken Block, or hold up-back to escape pressure from the ground. In this sense, he is uniquely bad at defending himself from enemy rushdown. | |||
*'''Rough Normals:''' Awkward normals that often have specific spacing requirements or niche use. Many of MODOK's normals whiff on crouching characters, whiff if the opponent is too close, don't hit airborne opponents well, or have other issues. | |||
*'''High Execution:''' High execution requirement in order to deal good damage, with multiple difficult extensions featured in his standard BnB routes. | |||
*'''Requires Buildup:''' Needs to build up Levels of Understanding in order to access his most powerful moves. | |||
}} | }} | ||
== | === Unique Mechanics === | ||
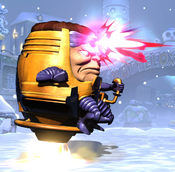
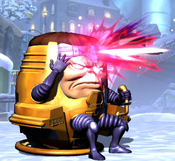
[[File:UMVC3_Modok_Levels.png|thumb|right|As MODOK gains Understanding, his headband glows. Here he is shown with zero, one, five and nine levels of Understanding.]] | |||
MODOK does not have a regular jump. Instead, holding up (or up-forward / up-back) will cause MODOK to enter flight mode. MODOK can also enter flight using the standard command (214S) and, in fact, MODOK can fly twice in the same "jump" by using his jump flight and then entering flight normally once the first one expires. MODOK also automatically leaves flight (either version) if he uses his Battering Ram special or performs an airdash. MODOK using up to enter flight provides some key differences from other characters. Most characters have three pre-jump frames during a jump before they are actually considered airborne, but MODOK is airborne the next frame after he inputs an upward direction. This allows MODOK to escape some grab setups that other characters could not evade. Conversely, most characters can cancel their prejump frames into other actions, and also attack as soon as they are airborne. MODOK's flight activation takes a total of 5 frames to complete, during which he can not act. MODOK's flight is also unique in that it lasts 300 total frames, more than twice as long as most other flight modes in UMvC3. | |||
MODOK has a unique resource called "Levels of Understanding" (usually abbreviated to "Understanding" or "Knowledge"). MODOK gains Understanding by hitting opponents with his Analyze Cube (214X) special. Understanding is displayed in game on MODOK's headband, which starts to glow more and more intensely as he gains Understanding. MODOK can store up to 9 levels of Understanding at once. MODOK can spend Understanding on one of three enhanced special moves: | |||
*Big Barrier (4S) - an enhanced version of his normal 4H Barrier. Is physically larger and stays on screen for longer, but is otherwise the same. | |||
*Psionic High Blast (236S) - an enhanced version of 236X Psionic Blast. Deals more damage, has more durability, and is easier to combo after than the standard beam. Unlike the regular version, can only be performed on the ground. | |||
*Jamming Bomb (623S) - an enhanced version of 623X Balloon Bomb. The Jamming version lasts much longer than the regular version, slowly homes in on the opponent, and reverses the opponent's controls if it hits. Unlike the regular version, can only be performed on the ground. | |||
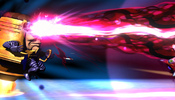
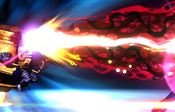
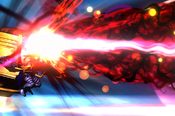
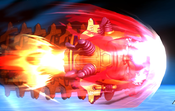
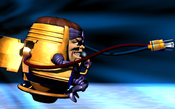
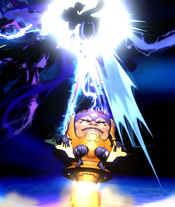
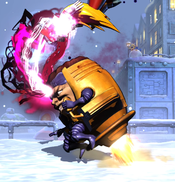
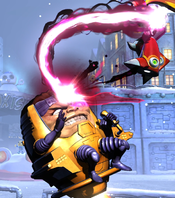
== | Besides spending one level to use any of these three moves, MODOK can spend all of his current Understanding by using Hyper Psionic Blast (236XX). This Hyper always consumes all of MODOK's current Understanding in order to increase the number of hits, and thus the total damage dealt. Note that while a powered up HPB is visually different from the 0 Understanding version, the move's hitbox is always the same. | ||
</div> | |||
<div style="display: flex;flex-direction: column;flex:2;min-width:350px;padding: 10px;">{{UMVC3_Character_Query|reversals=623XX}}</div></div> | |||
== Move List == | |||
=== | === Assists === | ||
{{MoveData | |||
|image=UMVC3_Modok_AssistA.png | |||
|caption= | |||
|name=Barrier | |||
|input=Assist A | |||
|data= | |||
{{AttackData-UMVC3 | |||
|damage=- | |||
|guard=- | |||
|startup=54 | |||
|active=122 | |||
|recovery=107, 77 | |||
|onhit=- | |||
|onblock=- | |||
|properties=- | |||
|description= | |||
THC Hyper: Hyper Psionic Blaster. Recommended assist. MODOK appears and creates a barrier which floats in place. The barrier will absorb and destroy both physical and projectile attacks from the opponent, preventing them from harming characters on the other side. Even attacks which can normally pierce multiple targets, like beams, are fully negated by Barrier and hit other targets. Barrier is also not considered a projectile, and does not have durability to be exhausted. Any hyper attack will destroy the barrier, but it can absorb any number of non-hyper attacks. | |||
Barrier lasts for 122 frames after appearing. This is actually longer than the cooldown for the assist call itself, so MODOK can be continually re-called to maintain 100% uptime on barrier so long as MODOK is not sniped as he enters. Only one Barrier can be active at a time. Barrier disappears if MODOK is hit, but not if the point character is hit. | |||
The barrier also blocks enemy movement, preventing an opponent's characters from passing through it while active. The barrier reaches up to just below regular jump height, so airborne characters can pass over it. | |||
The protections from MODOK's barrier are entirely one-sided. Your characters can freely attack through the barrier and hit opponents on the other side, and they can also walk back and forth through the barrier freely. | |||
}} | |||
}} | |||
== | {{MoveData | ||
|image=UMVC3_Modok_AssistB.png | |||
|caption= | |||
|name=Balloon Bomb | |||
|input=Assist B | |||
|data= | |||
{{AttackData-UMVC3 | |||
|damage=80,000 | |||
|guard=Mid | |||
|startup=64 | |||
|active=182 | |||
|recovery=117, 87 | |||
|onhit=- | |||
|onblock=- | |||
|properties={{otg}}, {{strk}}, Ignores* other projectiles | |||
|description= | |||
THC Hyper: Hyper Psionic Blaster. MODOK deploys a floating bomb, which shoots forward fairly quickly before slowing down to a complete stop. In total, the bomb travels roughly halfscreen distance before running out of speed and floating in place. The bomb will explode 182 frames after being deployed, or explode automatically if an opponent enters proximity. | |||
Balloon Bomb as an assist is unique because - despite appearing as a projectile - it ignores the typical Durability/Priority system and does not have projectile durability. The bomb ignores other projectiles that make contact with it, including hypers. Although there is a "hit" effect when the bomb makes contact with another projectile, it has no effect, and the bomb can not be destroyed by projectiles (it is also immune to physical hits). Conversely, the bomb's lack of durability means it lacks any ability to block or destroy other projectiles itself. This property only applies to the assist version of Balloon Bomb, not the point character version. | |||
The bomb's proximity trigger can be activated by an opponent who is knocked down, and the explosion can hit OTG. However, it is a very impractical OTG tool due to the slow speed and slightly inconsistent spacing requirement. | |||
}} | |||
}} | }} | ||
=== | {{MoveData | ||
|image=UMVC3_Modok_AssistY.png | |||
|caption= | |||
|name=Psionic Blast | |||
|input=Assist Y | |||
|data= | |||
{{AttackData-UMVC3 | |||
|damage=30,000 x4 | |||
|guard=Mid | |||
|startup=44 | |||
|active=20 | |||
|recovery=108, 78 | |||
|onhit=- | |||
|onblock=- | |||
|properties={{strk}}, Priority: Low, Beam Durability: 3 per frame for 4 frames | |||
|description= | |||
THC Hyper: Hyper Psionic Blaster. Recommended assist. MODOK fires a beam from his forehead, which travels directly forward. | |||
Psionic Blast is a standard beam assist with very good startup, comparable to Doom's Plasma Beam and Iron Man's Unibeam. At 12 total durability points, it actually has more durability than those two beams. However, if called at the same time as one of those beams, Psionic Blast will actually lose due to how the durability is distributed. It is still a very good screen clear, pressure tool, and combo extender. As a bonus, it only hits 4 times, which has a smaller impact on Damage Scaling. | |||
}} | |||
}} | |||
=== | === Ground Normals === | ||
{{ | {{MoveData | ||
|image=UMVC3_Modok_5L.png | |||
{{ | |caption= | ||
|name=Stand Light | |||
|input=5L | |||
{{ | |data= | ||
{{AttackData-UMVC3 | |||
|damage=45,000 | |||
|guard=High | |||
|startup=7 | |||
|active=6 | |||
|recovery=11 | |||
|onhit=-1 | |||
|onblock=-1 | |||
|properties={{rpdfire}} | |||
|description= | |||
MODOK produces a short-range burst of energy from his forehead. Normal-sized characters can crouch underneath this hit, so be careful about using it as a pressure tool against grounded opponents. | |||
Can be used an a mashed anti-air due to its relatively fast startup and Rapid Fire property. Repeated 5Ls can chain into each other to catch an opponent at regular jump height and then confirm into 5S. | |||
}} | |||
}} | |||
{{ | {{MoveData | ||
|image=UMVC3_Modok_5M.png | |||
{{ | |caption= | ||
|name=Stand Medium | |||
|input=5M | |||
|data= | |||
{{ | {{AttackData-UMVC3 | ||
|damage=20,000 x5 | |||
|guard=Mid | |||
|startup=10 | |||
|active=9 | |||
|recovery=17 | |||
|onhit=+3 | |||
|onblock=+3 | |||
|properties={{chipdamage}}, Priority: Low, Durability: 3 per shot. | |||
|description= | |||
Modok fires 5 bullets at a down-forward angle, striking the ground at about 1/3 of fullscreen distance. Has very good range, beating out all of MODOK's other normals in terms of pure horizontal reach. It is a strong poke against grounded opponents, but struggles to hit anyone airborne. It also has a deadzone immediately in front of MODOK where some character can crouch underneath the bullets. | |||
}} | |||
}} | |||
=== | {{MoveData | ||
|image=UMVC3_Modok_5H.png | |||
|caption= | |||
|name=Stand Heavy | |||
|input=5H | |||
|data= | |||
{{AttackData-UMVC3 | |||
|damage=80,000 | |||
|guard=High | |||
|startup=16 | |||
|active=10 | |||
|recovery=20 | |||
|onhit=+1 | |||
|onblock=-4 | |||
|properties={{strk}}, {{jcancel}} | |||
|description= | |||
MODOK fires a burst of energy above his head. Normal-sized characters can crouch underneath this attack. | |||
Can be jump-canceled on contact - hit or block, which places MODOK into his Flight mode, giving 5H effectively only 5f of recovery. On hit, the opponent is popped into the air, which MODOK can pursue with a Jump Cancel to perform extended combos. | |||
}} | |||
}} | |||
=== | {{MoveData | ||
|image=UMVC3_Modok_2L.png | |||
|caption= | |||
|name=Crouching Light | |||
|input=2L | |||
|data= | |||
{{AttackData-UMVC3 | |||
|damage=45,000 | |||
|guard=Mid | |||
|startup=5 | |||
|active=6 | |||
|recovery=10 | |||
|onhit=0 | |||
|onblock=0 | |||
|properties={{rpdfire}} | |||
|description= | |||
Note: Not a low. MODOK ducks down slightly before attacking with an energy burst similar to his 5L. This attack hits low enough that it can not be crouched by normal characters, unlike 5L, and starts up slightly faster. | |||
}} | |||
}} | |||
{{MoveData | |||
|image=UMVC3_Modok_2M.png | |||
|image2=UMVC3_Modok_2M_Puddle.png | |||
|caption= | |||
|name=Crouching Medium | |||
|subtitle=Snot | |||
|input=2M | |||
|data= | |||
{{AttackData-UMVC3 | |||
|damage=60,000 | |||
|guard=Mid / Low | |||
|startup=10 | |||
|active=- | |||
|recovery=25 | |||
|onhit=0 | |||
|onblock=0 | |||
|properties={{chipdamage}}, {{otg}} (puddle) | |||
|description= | |||
MODOK fires a gross-looking green blob from above his head. It quickly arcs downward, landing on the ground about two character lengths in front of MODOK. If the projectile reaches the ground without touching an opponent, it creates a puddle on the ground for a short duration. The initial projectile hits Mid, but the puddle hits Low and is OTG-capable. | |||
2M is MODOK's only OTG attack and is an important combo tool. Tossing a puddle onto a knocked down opponent can be chained into an H normal or canceled into a special to solo pick up. It can also be hyper canceled into Hyper Psionic Blaster as a combo ender. At higher levels of Hitstun Deterioration, 2M canceled or chained into other attacks may not combo, but this can be compensated for with assist calls. | |||
The Low hit of 2M's puddle can be used for dangerous mixups if you can set up a way for the opponent to block it. By placing down a puddle where a knocked down opponent is tech rolling (easiest to do in the corner), you can fly and attack with a fast Overhead attack while the opponent is forced to block the Low puddle meaty. This can create powerful High/Low mixups or even solo Unblockables. | |||
When doing an OTG pickup in the corner, this move can sometimes fail to connect. This is more common against small body characters and against Dormammu (?!?), but can happen against any character in certain circumstances. This can be compensated for by performing a small backdash before 2M to adjust the spacing where it lands. | |||
}} | |||
}} | |||
{{MoveData | |||
|image=UMVC3_Modok_2H.png | |||
|caption= | |||
|name=Crouching Heavy | |||
|input=2H | |||
|data= | |||
{{AttackData-UMVC3 | |||
|damage=80,000 | |||
|guard=Low | |||
|startup=15 | |||
|active=10 | |||
|recovery=21 | |||
|onhit=+3 | |||
|onblock=-5 | |||
|properties={{strk}}, {{softknockdown}}, {{jcancel}} | |||
|description= | |||
MODOK shoots a burst of energy from his cannon, similar to 5H but fired from below MODOK rather than above him. This is MODOK's only Low attack besides the puddle created by 2M, and thus the only incentive you can give opponents to block low. | |||
Pops up opponents on hit, and can be jump-canceled on hit or block. 2H jump-canceled into Flight, which itself is dash-canceled into an air normal, is both a staple combo route for MODOK and an important pressure tool. MODOK can repeatedly cycle between 2H and j.5L when close to attack with Overhead and Low attacks as an offensive option. | |||
}} | |||
}} | |||
=== | {{MoveData | ||
|image=UMVC3_Modok_5S.png | |||
|caption= | |||
|name=Launcher/Special | |||
|input=S | |||
|data= | |||
{{AttackData-UMVC3 | |||
|damage=80,000 | |||
|guard=Mid | |||
|startup=10 | |||
|active=12 | |||
|recovery=22 | |||
|onhit=Launch | |||
|onblock=-8 | |||
|properties={{launch}}, {{nocancel}} | |||
|description= | |||
MODOK attacks with the propulsion system of his hoverchair. The attack is not as large as the graphic would suggest, but is still fairly large. Fairly standard launcher. | |||
}} | |||
}} | |||
== | === Aerial Normals === | ||
{{MoveData | |||
|image=UMVC3_Modok_jL.png | |||
|caption= | |||
|name=Jumping Light | |||
|input=j.5L | |||
|data= | |||
{{AttackData-UMVC3 | |||
|damage=25,000 per kick | |||
|guard=OH | |||
|startup=6 | |||
|active=Until grounded | |||
|recovery=1 | |||
|onhit=+11 | |||
|onblock=+11 | |||
|properties={{airdashcancel}} | |||
|description= | |||
MODOK repeatedly kicks with his stubby legs. He will continue to kick while traveling through the air indefinitely, until he reaches the ground or cancels the move into a Special/Hyper. Upon reaching the ground, MODOK recovers almost instantly. If MODOK uses j.5L while in Flight, it instantly ends Flight and causes him to fall straight down. | |||
Although j.5L has terrible range, it is a very strong pressure tool. MODOK's unique Flight jump automatically keeps him low to the ground, allowing j.5L to work as an extremely fast Instant Overhead attack that can be repeatedly looped into itself. | |||
}} | |||
}} | |||
{{MoveData | |||
|image=UMVC3_Modok_jM.png | |||
|caption= | |||
|name=Jumping Medium | |||
|input=j.5M | |||
|data= | |||
{{AttackData-UMVC3 | |||
|damage=70,000 | |||
|guard=OH | |||
|startup=10 | |||
|active=10 | |||
|recovery=16 | |||
|onhit=-5 | |||
|onblock=-5 | |||
|properties={{airdashcancel}} | |||
|description= | |||
Energy burst attack fired from above MODOK's head, similar to his grounded 5H. It is technically an Overhead, but can not hit normal-sized opponents who are crouching. Has excellent range making it a staple neutral tool, and also helps keep combos consistent. | |||
j.5M is also a good choice for canceling airdashes in order to preserve their momentum. Superjump up-back > airdash downback > j.5M or <code><nowiki>27 > 1XX~j.5M</nowiki></code> is a basic retreat option to gain distance from the opponent while also covering yourself with a forward-facing hitbox. | |||
}} | |||
}} | |||
=== | {{MoveData | ||
|image=UMVC3_Modok_jH.png | |||
|caption= | |||
|name=Jumping Heavy | |||
|input=j.5H | |||
|data= | |||
{{AttackData-UMVC3 | |||
|damage=80,000 | |||
|guard=OH | |||
|startup=16 | |||
|active=10 | |||
|recovery=20 | |||
|onhit=-8 | |||
|onblock=-8 | |||
|properties={{airdashcancel}} | |||
|description= | |||
Energy burst attack similar to MODOK's other heavy normals, but angled downwards to make it more easily hit grounded opponents. Has good range and can be used in pressure, jump loop combos, or defensively as a throw tech OS. | |||
}} | |||
}} | |||
{{MoveData | |||
|image=UMVC3_Modok_jS.png | |||
|caption= | |||
|name=Jumping Special | |||
|input=j.5S | |||
|data= | |||
{{AttackData-UMVC3 | |||
|damage=90,000 | |||
|guard=OH | |||
|startup=13 | |||
|active=8 | |||
|recovery=20 | |||
|onhit=- | |||
|onblock=+18 | |||
|properties={{aircombofinisher}}, {{groundbounce}} (when used outside a Launcher Combo) | |||
|description= | |||
MODOK flares the propulsion of his hoverchair, attacking below himself. Has a small ability to hit cross-up. | |||
j.5S is notable because it causes a Ground Bounce if it hits outside of its use as an Air Combo Finisher. This is helpful as a combo extension tool and can give MODOK some capability to convert air-to-airs, although it basically only hits below MODOK and has no hitbox in front of himself. | |||
When falling from superjump height, airdash down canceled into a falling j.5S is a relatively safe and quick way to reach the ground, and will discourage opponents from trying to attack MODOK from below. As with all j.5S attacks on characters who have Flight mode, using j.5S in Flight will immediately end it and cause MODOK to start falling. | |||
}} | |||
}} | |||
=== Command Normals === | |||
{{MoveData | |||
|image=UMVC3_Modok_6H.png | |||
|caption= | |||
|name=Force Beam | |||
|input=6H | |||
|data= | |||
{{AttackData-UMVC3 | |||
|damage=80,000 | |||
|guard=Mid | |||
|startup=18 | |||
|active=10 | |||
|recovery=13 | |||
|onhit=- | |||
|onblock=+3 | |||
|properties={{wallbounce}}, {{jcancel}} | |||
|description= | |||
MODOK swings his energy cannon while firing it. This creates a burst of energy similar to MODOK's other H attacks, and can be jump-canceled on contact the same way. On hit, causes a Wall Bounce which is fairly easy to combo both out of and into. | |||
If Wall Bounce has already been used, 6H still causes a large hit into a True Soft Knockdown, and so it can still be used in combos by special-canceling into certain attacks, or when paired with an assist call. | |||
}} | |||
}} | |||
{{MoveData | |||
|image=UMVC3_Modok_3H.png | |||
|caption= | |||
|name=Anti-Air Force Beam | |||
|input=3H | |||
|data= | |||
{{AttackData-UMVC3 | |||
|damage=80,000 | |||
|guard=High | |||
|startup=18 | |||
|active=10 | |||
|recovery=13 | |||
|onhit=+18 | |||
|onblock=+3 | |||
|properties={{strk}}, {{jcancel}} | |||
|description= | |||
MODOK angles his regular H attack energy burst upward, starting from above his head. Does not hit crouching opponents, even big bodies, and will whiff on standing normal-sized characters, so it is extremely specialized against airborne opponents. Unlike 6H, does not cause a Wall Bounce, but still knocks up and can be jump-canceled. | |||
Can be used as a meaty attack against oncoming characters. | |||
}} | |||
}} | |||
{{MoveData | |||
|image=UMVC3_Modok_4H.png | |||
|caption= | |||
|name=Barrier | |||
|subtitle=Dorito | |||
|input=4H | |||
|data= | |||
{{AttackData-UMVC3 | |||
|damage=- | |||
|guard=- | |||
|startup=30 | |||
|active=122 | |||
|recovery=15 | |||
|onhit=- | |||
|onblock=- | |||
|properties={{nocancel}} | |||
|description= | |||
MODOK creates a barrier in front of himself. The barrier negates both projectiles and physical attacks which come into contact with it, preventing those attacks from harming MODOK or his teammates. Even attacks which normally pierce multiple targets can not penetrate through Barrier. The shield has no durability or upper limit on attacks absorbed, it can negate an infinite number of non-hyper attacks, but is instantly destroyed by any hyper. | |||
Additionally, the barrier physically blocks an opponent's movement, preventing them from moving past it in either direction. The barrier reaches to just below regular jump height, so it can be passed from above. | |||
The barrier only blocks attacks and movement from the opponent, and has no effect on MODOK or his teammates. MODOK can freely attack through the barrier and hit opponents on the other side from relative safety. | |||
MODOK's Barrier is a very powerful tool for his keepaway game that gives him an immediate edge in projectile battles, by protecting him from the opponent's non-hyper attacks while he freely shoots from the other side. It can also be used in pressure, to prevent an opponent from mashing out while MODOK runs his offense. | |||
}} | |||
}} | |||
=== | {{MoveData | ||
|image=UMVC3_Modok_4S.png | |||
|caption= | |||
|name=Big Barrier | |||
|subtitle=Big Dorito | |||
|input=(With at least one Understanding) 4S | |||
|data= | |||
{{AttackData-UMVC3 | |||
|damage=- | |||
|guard=- | |||
|startup=30 | |||
|active=180 | |||
|recovery=15 | |||
|onhit=- | |||
|onblock=- | |||
|properties=- | |||
|description= | |||
MODOK spends one level of Understanding to create an even larger Barrier. 4S Big Barrier is functionally identical to the normal one, with two additional benefits: | |||
*The barrier lasts longer, remaining active for three full seconds rather than two. | |||
*The barrier is physically larger. It can no longer be jumped over by a regular jump, requiring a superjump, doublejump, or other additional source of height to pass over. It also more easily blocks projectiles and other attacks due to its increased size. | |||
Unlike regular Barrier, Big Barrier is considered a special move for the purposes of cancels, and normals can be canceled into Big Barrier even on whiff. | |||
}} | |||
}} | |||
=== Special Moves === | |||
{{MoveData | |||
|image=UMVC3_Modok_214L.png | |||
|caption=L Version | |||
|image2=UMVC3_Modok_214M.png | |||
|caption2=M Version | |||
|image3=UMVC3_Modok_214H.png | |||
|caption3=H Version | |||
|image4=UMVC3_Modok_j214L.png | |||
|caption4=Air L Version | |||
|image5=UMVC3_Modok_j214M.png | |||
|caption5=Air M Version | |||
|name=Analysis Cube | |||
|input=214X | |||
|data= | |||
{{AttackData-UMVC3 | |||
|damage=50,000 | |||
|guard=Mid | |||
|startup=10 (15 for H version) | |||
|active=- | |||
|recovery=25 (20 for H version) | |||
|onhit=- | |||
|onblock=- | |||
|properties={{airok}}, Priority: Low, Durability: 1 | |||
|description= | |||
MODOK causes a stationary cube of energy to appear at a location determined by button strength. For the grounded version: | |||
*L causes the cube to appear on the ground directly in front of MODOK. | |||
*M causes the cube to appear in the air above MODOK, roughly two character lengths in front of him. | |||
*H causes the cube to appear horizontally ahead of MODOK, about halfscreen distance away. | |||
: | For the air version: | ||
*L causes the cube to appear just below and in front of MODOK. | |||
*M causes the cube to appear directly in front of MODOK. | |||
*H causes the cube to appear just above and in front of MODOK. | |||
All versions of Analysis Cube remain active for 60 frames (1 second) after appearing. | |||
If an opponent is hit by Analysis Cube, MODOK gains one level of Understanding. This is the only way for MODOK to gain Understanding, a resource he can use to empower certain other attacks. Analysis Cube is easy to combo into, and can be followed up with additional attacks or even another Cube when spaced properly, so MODOK can build several levels of Understanding in a single combo if desired. | |||
Besides it use in combos and for gaining Understanding, Analysis Cube is a situational zoning tool, because MODOK can cause it to appear at several different locations without having to actually travel there. It can be used to move past other projectiles, such as Nova's Gravimetric Pulse, and hit a character on the other side. | |||
}} | |||
}} | |||
{{MoveData | |||
|image=UMVC3_Modok_236S.png | |||
|caption= | |||
|name=Psionic Blast | |||
|input=236X | |||
|data= | |||
{{AttackData-UMVC3 | |||
|version=L | |||
|subtitle={{qcf}} + {{l}} | |||
|damage=30,000 x3 | |||
|guard=Mid | |||
|startup=12 | |||
|active=20 | |||
|recovery=14 | |||
|onhit=- | |||
|onblock=-4 | |||
|properties={{airok}}, {{softknockdown}}, Priority: Low, Beam Durability: 3 per frame for 3 frames. | |||
}} | |||
{{AttackData-UMVC3 | |||
|version=M | |||
|subtitle={{qcf}} + {{m}} | |||
|damage=30,000 x4 | |||
|guard=Mid | |||
|startup=20 | |||
|active=20 | |||
|recovery=16 | |||
|onhit=- | |||
|onblock=-4 | |||
|properties={{airok}}, {{softknockdown}}, Priority: Low, Beam Durability: 3 per frame for 4 frames. | |||
}} | |||
{{AttackData-UMVC3 | |||
|version=H | |||
|subtitle={{qcf}} + {{h}} | |||
|damage=30,000 x5 | |||
|guard=Mid | |||
|startup=28 | |||
|active=20 | |||
|recovery=18 | |||
|onhit=- | |||
|onblock=-4 | |||
|properties={{airok}}, {{softknockdown}}, Priority: Low, Beam Durability: 3 per frame for 5 frames. | |||
|description= | |||
MODOK's beam special. Fires a beam from his forehead, which travels horizontally across the screen. All versions are fired directly horizontally forward except for the aerial H version, which is fired at a down-forward angle. | |||
Psionic Blast is very quick, especially the L versions. It is a foundational part of MODOK's zoning plan and ability to deal chip damage. It is a low-risk, low-reward callout against opponent's assist calls to snipe them as well. | |||
Air Psionic Blast also has uses for MODOK's extended corner combos. It has very high hitstun on hittin an airborne opponent, basically forcing a Soft Knockdown. When spaced properly, MODOK can cancel into j.236L off an air chain, the airdash down to catch the opponent with a falling attack before they reach the ground. | |||
}} | |||
}} | |||
{{MoveData | |||
|image=UMVC3_Modok_236S.png | |||
|caption= | |||
|name=Psionic High Blast | |||
|input=(With at least one Understanding) 236S | |||
|data= | |||
{{AttackData-UMVC3 | |||
|damage=40,000 x5 | |||
|guard=Mid | |||
|startup=28 | |||
|active=20 | |||
|recovery=18 | |||
|onhit=+17 | |||
|onblock=-9 | |||
|properties={{stagger}} (vs grounded), {{softknockdown}} (vs airborne) Priority: Low, Beam Durability: 5 per frame for 5 frames | |||
|description= | |||
Enhanced version of Psionic Blast, which costs one level of Understanding to perform. Unlike regular Psionic Blast, it can not be performed in the air. | |||
High Blast has identical frame data to 236H. In exchange for spending one Understanding to empower the move, it gains additional damage and durability. Additionally, High Blast does not knock grounded opponents into the air on hit. Instead, it causes a lengthy Stagger animation. | |||
}} | |||
}} | |||
{{MoveData | |||
|image=UMVC3_Modok_623L.png | |||
|caption=L Version | |||
|image2=UMVC3_Modok_623M.png | |||
|caption2=M Version | |||
|image3=UMVC3_Modok_623H.png | |||
|caption3=H Version | |||
|name=Balloon Bomb | |||
|input=623X | |||
|data= | |||
{{AttackData-UMVC3 | |||
|version=L | |||
|subtitle={{dp}} + {{l}} | |||
|damage=80,000 | |||
|guard=Mid | |||
|startup=30 | |||
|active=- | |||
|recovery=25 | |||
|onhit=- | |||
|onblock=+1 | |||
|properties={{airok}}, {{softknockdown}}, Priority: Medium: Durability: 1 | |||
}} | |||
{{AttackData-UMVC3 | |||
|version=M | |||
|subtitle={{dp}} + {{m}} | |||
|damage=80,000 | |||
|guard=Mid | |||
|startup=40 | |||
|active=- | |||
|recovery=25 | |||
|onhit=- | |||
|onblock=+1 | |||
|properties={{airok}}, {{softknockdown}}, Priority: Medium: Durability: 1 | |||
}} | |||
{{AttackData-UMVC3 | |||
|version=H | |||
|subtitle={{dp}} + {{h}} | |||
|damage=80,000 | |||
|guard=Mid | |||
|startup=50 | |||
|active=- | |||
|recovery=25 | |||
|onhit=- | |||
|onblock=+1 | |||
|properties={{airok}}, {{softknockdown}}, Priority: Medium: Durability: 1 | |||
|description= | |||
MODOK fires a bomb from his chair's cannon, which travels in a direction dependent on button strength. The bomb moves fairly slowly, and slows down as it travels, before coming to a stop: | |||
*L version on the ground appears at MODOK's feet and floats straight up, stopping in the air just above and in front of him. | |||
*M version on the ground appears above MODOK's head and travels at a down-forward angle, stopping just above the ground at halfscreen distance. | |||
*L and M version in the air appear just below/above MODOK respectively, and travel horizontally forward to roughly halfscreen distance. | |||
*On both the ground and in the air, H version fires in the current direction of the opponent's point character, and tracks them across the screen. | |||
All versions remain active for 180 frames before exploding. MODOK can only have one Balloon Bomb active at a time, and using another will immediately explode the previous one. This restriction is shared with Jamming Bomb. | |||
Balloon Bomb is a powerful space-control and zoning tool whenever MODOK can manage to cover its lengthy startup. It is very difficult for most opponents to approach MODOK when a bomb is active between the two of them. Additionally, because Balloon Bomb is considered Medium Priority, it will block and nullify almost all non-hyper projectiles that come into contact with it, protecting MODOK from long-range retaliation as well. | |||
}} | |||
}} | |||
{{MoveData | |||
|image=UMVC3_Modok_623S.png | |||
|image2=UMVC3_Modok_623S_Effect.png | |||
|caption2=An opponent hit by Jamming Bomb has their controls scrambled, indicated by a fuzzy effect over the character. | |||
|name=Jamming Bomb | |||
|input=(With at least one Understanding) 623S | |||
|data= | |||
{{AttackData-UMVC3 | |||
|damage=80,000 | |||
|guard=Mid | |||
|startup=50 | |||
|active=- | |||
|recovery=25 | |||
|onhit=- | |||
|onblock=+1 | |||
|properties={{softknockdown}}, Priority: Medium: Durability: 1 | |||
|description= | |||
Enhanced version of Balloon Bomb, which costs one level of Understanding to perform. Unlike regular Balloon Bomb, it can not be performed in the air. | |||
Jamming Bomb has identical frame data to 623H Balloon Bomb, and tracks opponents across the stage in the same way. It lasts 300 frames (5 seconds) rather than the normal 180 frames. If Jamming Bomb hits an opponent, it applies a debuff to that character, reversing their directional controls: | |||
*Left and Right inputs are switched | |||
*Up and Down inputs are switched | |||
The debuff lasts for 4 seconds, and makes it very difficult for an opponent to effectively control their character or even defend themselves for the duration. | |||
Despite the extremely long startup, it is possible to combo into Jamming Bomb, and this is the recommended way to use the move in order to ensure its debuff is actually applied. A common strategy is to combo into Jamming Bomb and then immediately perform a Snap Back on the jammed opponent. The debuff while remain on that character and not lose duration while they are on the backrow. When that character re-enters the stage, their controls will still be reversed, which will make it much harder to defend against any oncoming mixup you have ready for them. | |||
}} | |||
}} | |||
{{MoveData | |||
|image=UMVC3_Modok_XS.png | |||
|caption=By default, Battering Ram travels directly forward. | |||
|image2=UMVC3_Modok_1XS.png | |||
|caption2=Battering Ram can be aimed in any direction. | |||
|name=Battering Ram | |||
|subtitle=Body Attack | |||
|input=X+S | |||
|data= | |||
{{AttackData-UMVC3 | |||
|damage=90,000 | |||
|guard=Mid | |||
|startup=13 (airborne frame 1) | |||
|active=10 | |||
|recovery=23 | |||
|onhit=-7 | |||
|onblock=-7 | |||
|properties={{airok}} | |||
|description= | |||
MODOK charges in any direction, using his entire body as a physical attack. Battering Ram can be steered in any of the eight directions by holding that direction during the input, but it can not be steered down when used on the ground. | |||
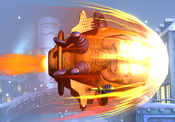
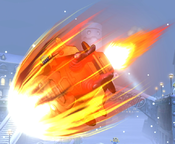
' | Battering Ram can be used as a mobility tool to quickly change MODOK's aiir trajectory or cancel a badly spaced normal if needed. It has limited combo potential. Upward-angled Battering Ram allows MODOK to escape to superjump height without using superjump, allowing him to still call assists. For some reason, using grounded Battering Ram to go airborne, rather than jumping, flying or superjumping, allows MODOK to perform two airdashes instead of just one. You can consistently get a grounded upwards Battering Ram by performing any grounded normal and whiff-canceling into Battering Ram: <code><nowiki>5L~8M+S</nowiki></code>. 8X+S > j.9X+S > Airdash > Airdash is a basic mobility option that lets MODOK approach or retreat unpredictably from above while backed by an assist. | ||
Activating Battering Ram while in Flight Mode cancels Flight. | |||
Battering Ram can be used up to three times per airborne state. It shares this limit with Hyper Battering Ram, meaning that if MODOK uses Battering Ram in a combo, he loses some of the additional hits from Hyper Battering Ram in that same combo. | |||
}} | |||
}} | |||
{{MoveData | |||
|image=UMVC3_Modok_214S.png | |||
|caption= | |||
|name=Flight | |||
|input=214S | |||
|data= | |||
{{AttackData-UMVC3 | |||
|damage=- | |||
|guard=Mid | |||
|startup=8 | |||
|active=300 | |||
|recovery=0 | |||
|onhit=- | |||
|onblock=- | |||
|properties={{airok}}, 300 frame Flight Mode. | |||
|description= | |||
MODOK enters Flight. While in Flight, MODOK floats in place, and can perform an unlimited number of air specials (although using Battering Ram will immediately cancel Flight). Unlike other characters who have both Flight and an airdash, MODOK's airdash cancels Flight on use, preventing him from repeatedly airdashing in Flight. | |||
MODOK is unique among Flight mode characters in that he can block attacks while in Flight. However, blocking any attack automatically ends Flight mode. This means that MODOK can emergency-cancel attacks into Flight in order to block. | |||
MODOK can also enter Flight by using a regular jump, but the input allows him to cancel most attacks into Flight, to perform it while already airborne (such as after a superjump), or to Fly twice in the same air state - once using Jump Flight and once using the command. | |||
Flight Mode lasts for 300 frames, and is canceled if MODOK uses j.5L, j.5S, Battering Ram, or an airdash. He can also manually cancel Flight by inputting 214S again, which can Unfly-cancel attacks. | |||
}} | |||
}} | |||
=== Hyper Combos === | |||
== | {{MoveData | ||
|image=UMVC3_Modok_236XX_Lvl0.png | |||
|caption=Base form | |||
|image2=UMVC3_Modok_236XX_Lvl5.png | |||
|caption2=With 5 levels of Understanding | |||
|image3=UMVC3_Modok_236XX_Lvl9.png | |||
|caption3=With 9 levels of Understanding | |||
|name=Hyper Psionic Blaster | |||
|input=236XX (1 bar) | |||
|data= | |||
{{AttackData-UMVC3 | |||
|damage=Varies | |||
|guard=Mid | |||
|startup=10+1 | |||
|active=120 | |||
|recovery=36 | |||
|onhit=- | |||
|onblock=-30 | |||
|properties={{airok}}, consumes all Understanding, {{hardknockdown}}, Priority: High, Beam Durability: 5 per frame for 22 frames, scales by 0.97. | |||
|description= | |||
MODOK fires a larger, more powerful version of his Psionic Blaster. The beam hits several times, ending in a Hard Knockdown. It can be used as a combo ender, or in neutral to snipe assists and slower attacks. The beam causes a Hard Knockdown, and MODOK can sometimes link a 2M after the knockdown to continue the combo. | |||
Hyper Psionic Blaster is notable because it automatically consumes all Understanding levels MODOK currently has in order to empower the beam, increasing the hit count and thus total damage: | |||
*Level 0 - 8,000 x22 (129,100) | |||
*Level 1 - 8,000 x26 (145,100) | |||
*Level 2 - 8,000 x34 (177,100) | |||
*Level 3 - 8,000 x40 (201,100) | |||
*Level 4 - 8,000 x50 (241,100) | |||
*Level 5 - 8,000 x58 (273,100) | |||
*Level 6 - 8,000 x68 (313,100) | |||
*Level 7 - 8,000 x76 (345,100) | |||
*Level 8 - 8,000 x85 (381,100) | |||
*Level 9 - 8,000 x100 (441,100) | |||
As you can see, HSB deals pathetically low damage when used with no understanding, but if charged with enough levels of Understanding, becomes the most damaging Level 1 hyper in the game. The break point where Blaster deals more damage than Hyper Battering Ram is 4 Understanding. Additionally, higher level HSB beams cause longer Hard Knockdowns, making linking an OTG afterwards easier. Besides the increased damage and Hard Knockdown, improved HSB is identical to the Level 0 version and shares the same hitbox and frame data. | |||
}} | |||
}} | |||
=== | {{MoveData | ||
|image=UMVC3_Modok_214XX.png | |||
|caption= | |||
|name=Hyper Battering Ram | |||
|input=214XX (1 bar) | |||
|data= | |||
{{AttackData-UMVC3 | |||
|damage=25,000 x3 ~ x15 | |||
|guard=Mid | |||
|startup=4+4 | |||
|active=11 | |||
|recovery=24 | |||
|onhit=- | |||
|onblock=-5 | |||
|properties={{airok}}, aimable, {{strk}}, scales by 0.97 | |||
|description= | |||
Hyper version Battering Ram. MODOK charges forward, physically attacking with his whole body. Normally, Hyper Battering Ram performs three quick hits. By pressing additional attack buttons, MODOK can perform up to four additional 3-hit bursts. Additionally, every burst after the first can be aimed by holding the stick in any direction while inputting the hit. The first burst always goes directly forward, and can not be aimed. | |||
Hyper Battering Ram can be used as a combo ender, especially if MODOK does not have enough Understanding to make Hyper Psionic Blaster deal decent damage. | |||
It is possible to loop Hyper Battering Ram into itself, by angling the final hits so that it pops the opponent into the air while MODOK land-cancels his own recovery. The basic sequence for this is: | |||
<code><nowiki>214XX > 3X > 3X > 1X > 6X, 214XX etc. </nowiki></code> <br> | |||
[ | [https://youtu.be/VuGZQ4q7OUo?t=169 Examples of combos that loop Hyper Battering Ram] | ||
}} | |||
}} | |||
{{MoveData | |||
|image=UMVC3_Modok_623XX.png | |||
|image2=UMVC3_Modok_623XX_Cinematic.png | |||
|caption= | |||
|name=Killer Illumination | |||
|input=623XX (1 bar) | |||
|data= | |||
{{AttackData-UMVC3 | |||
|damage=300,000 ~ 392,000 | |||
|guard=Throw | |||
|startup=18+1 | |||
|active=10 | |||
|recovery=40 | |||
|onhit=- | |||
|onblock=- | |||
|properties=Invuln until frame 24, mashable, {{hardknockdown}} | |||
|description= | |||
Cinematic command grab hyper. MODOK reaches out with some wires. If he grabs the opponent, they are placed into a cinematic where MODOK electrocutes them, then slams them onto the ground for a Hard Knockdown. MODOK can 2M OTG after this Hard Knockdown to pick up. | |||
This hyper has very slow startup for command grab standards, so its offensive potential is low. It is often mashed as a reversal due to its very high amount of invincibility frames. If the reversal grab fails, MODOK can be DHC's out with a safe hyper in the backline. | |||
}} | |||
}} | |||
=== Universal Mechanics === | |||
=== | {{MoveData | ||
|image=UMVC3_Modok_GroundThrow.png | |||
|caption= | |||
|name=Ground Throw | |||
|input=6H, 4H | |||
|data= | |||
{{AttackData-UMVC3 | |||
|damage=80,000 | |||
|guard=Throw | |||
|startup=1 | |||
|active=1 | |||
|recovery=- | |||
|onhit=- | |||
|onblock=- | |||
|properties={{hardknockdown}} | |||
|description= | |||
MODOK psionically grabs the opponent and slams them down. MODOK can follow up with OTG 2M. Dash up 2M is needed midscreen in order to actually convert into a full combo. | |||
}} | |||
}} | |||
{{MoveData | |||
|image=UMVC3_Modok_AirThrow.png | |||
|caption= | |||
|name=Air Throw | |||
|input=j.6H, j.4H | |||
|data= | |||
{{AttackData-UMVC3 | |||
|damage=80,000 | |||
|guard=Airthrow | |||
|startup=1 | |||
|active=1 | |||
|recovery=- | |||
|onhit=- | |||
|onblock=- | |||
|properties={{hardknockdown}} | |||
|description= | |||
MODOK throws the opponent fairly far away. | |||
For Back Airthrow, the standard followup is to land, wavedash twice, and OTG with <code><nowiki>2M xx 214S, 6XX, j.5M</nowiki></code> into a standard combo. | |||
For Forward Airthrow, MODOK can only follow up if he throws into the corner, and only from minimum airthrow height. The pickup is <code><nowiki>land, 2M xx 214S, 6XX j.5M</nowiki></code> | |||
}} | |||
}} | |||
{{MoveData | |||
|image=UMVC3_Modok_2H.png | |||
|caption= | |||
|name=Snap Back | |||
|input={{qcf}}+[[File:A1.png]]/[[File:A2.png]] | |||
|data= | |||
{{AttackData-UMVC3 | |||
|damage=50,000 | |||
|guard=Mid | |||
|startup=2 | |||
|active=4 | |||
|recovery=27 | |||
|onhit=- | |||
|onblock=-5 | |||
|properties=Snapback | |||
|description= | |||
Animation and hitbox based on 2H. | |||
}} | |||
}} | |||
{{MoveData | |||
|image=UMVC3_Modok_HardTag.png | |||
|caption= | |||
|name=Hard Tag | |||
|input=Hold 14f [[File:A1.png]]/[[File:A2.png]] | |||
|data= | |||
{{AttackData-UMVC3 | |||
|damage=30,000 | |||
|guard=OH | |||
|startup=- | |||
|active=20 | |||
|recovery=35 | |||
|onhit=- | |||
|onblock=-11 | |||
|properties={{softknockdown}} | |||
|description= | |||
- | |||
}} | |||
}} | |||
== Team Position == | |||
MODOK is a very flexible character, and has seen tournament success as both in both the '''Point''' and '''Second''' positions. In the second position, MODOK can support with some solid assists, either Psionic Blast or Barrier. However, his main support comes in the form of his great DHC options. Hyper Battering Ram can be looped into itself, allowing for big (although expensive) extra damage. With the correct setup, MODOK can also pick up with 2M after a DHC to Hyper Psionic Blaster as well, making it one of the most efficient DHC options in the game in terms of damage. MODOK second is an excellent choice for aggressive teams, as they can quickly secure the first kill and transition seamlessly into MODOKs devastating oncoming mixups. | |||
MODOK | As a point character, MODOK leans more towards his strengths as a keepaway character. One very unique aspect of point MODOK is his movement at round start. Characters generally can not superjump or fly at round start, but since MODOK's jump is replaced with flight mode, he can activate it right away to start ascending. MODOK can essentially start the match at superjump height (and still be able to call assists from up there), and from there his strong mobility tools ensure he never has to go near the opponent again, except on his own terms. | ||
=== | === Notable Synergies === | ||
MODOK can | '''Magneto:''' Although EM Disruptor is Magneto's most common assist choice, MODOK teams can run with Magneto's Hyper Grav assist, which ignores hitstun deterioration and forces a Capture state, for extra combo potential. A Magneto/MODOK shell has a very strong neutral game, combining Magneto's incredible mobility with a fast beam assist in Psionic Blaster. This shell can convert almost any hit into a 2-bar kill by DHCing from a standard Magneto BnB into Hyper Psionic Blaster, then using Hyper Grav assist alongside OTG 2M to get a post-hyper extension for heavy damage. | ||
'''Players to Watch:''' Priest (Magneto/MODOK/Doom, MODOK/Magneto/Doom) | |||
Nova: Nova wants to be run with a beam assist, such as Psionic Blaster, that can cover him while he approaches with 2M or Box Dash j.5H. This assist covers one of Nova's biggest weaknesses by keeping the opponent locked down while he closes the distance and gets within his limited range. Additionally, Nova excels at enabling Hard Tag combos and DHC extensions, which fits nicely with MODOK, who is a stellar character to bring in using either of those methods. | |||
'''Players to Watch:''' TA Moons (Nova/MODOK/Ammy) | |||
'''Captain America:''' Charging Star assist destroys projectiles on hit, giving MODOK an edge in zoning battles. Cap also offers high damage hypers as DHC options which MODOK can use to easily secure a kill. | |||
'''Players to Watch:''' Frutsy (Cap/MODOK/Doom, Cap/MODOK/Taskmaster) | |||
'''Strider Hiryu:''' MODOK is well-equipped to take advantage of the Hard Knockdown causes by Strider's Vajra assist, with his fast 2M OTG that transitions easily into jump loops. As a zoning character, MODOK appreciated having an assist which can cover superjump height, something only a handful of assists do as well as Vajra can. Additionally, Strider is a very meter-hungry anchor character, so MODOK's meter-positive combo rotues and zoning-heavy gameplan are great at generating bar for him to use. | |||
'''Players to Watch:''' Punisher (MODOK/Raccoon/Strider) | |||
'''Other Players to Watch:''' Punisher (MODOK/Hawkeye/Raccoon), Rubeks (Spencer/MODOK/Skrull), El Gato (MODOK/Strange/Doom), Flash Metroid (MODOK/Strange/Doom) | |||
== Alternate Colors == | |||
{{Chara-Colors-UMVC3}} | |||
{{Content Box|content= | |||
{{Navbox-UMVC3}} | |||
}} | |||
Latest revision as of 12:59, 22 March 2024
Introduction
Previously a technician named George Tarleton, the organization of criminal scientists A.I.M. experimented on him, transforming him into MODOK. The Mental Organism Designed Only for Killing is a living supercomputer with immense intelligence, psionic powers that can be channeled into destructive beams, and telepathy. As a consequence of his oversized brain and head, MODOK's body can not support itself, and he moves around using his highly advanced Doomsday Chair.
In UMvC3, MODOK is an unorthodox character, as his movement options are quite different from the more standard ones, and his normal attacks include several unorthodox projectile attacks besides the standard regular hits. MODOK has several tools to support a keepaway playstyle, including beams, projectiles, flight, and a defensive barrier. He also can use his movement tools and delayed-hitting projectiles to support a more aggressive playstyle, with dangerous mixups and several strong solo combo extensions.
| Strengths | Weaknesses |
|---|---|
|
|
Unique Mechanics
MODOK does not have a regular jump. Instead, holding up (or up-forward / up-back) will cause MODOK to enter flight mode. MODOK can also enter flight using the standard command (214S) and, in fact, MODOK can fly twice in the same "jump" by using his jump flight and then entering flight normally once the first one expires. MODOK also automatically leaves flight (either version) if he uses his Battering Ram special or performs an airdash. MODOK using up to enter flight provides some key differences from other characters. Most characters have three pre-jump frames during a jump before they are actually considered airborne, but MODOK is airborne the next frame after he inputs an upward direction. This allows MODOK to escape some grab setups that other characters could not evade. Conversely, most characters can cancel their prejump frames into other actions, and also attack as soon as they are airborne. MODOK's flight activation takes a total of 5 frames to complete, during which he can not act. MODOK's flight is also unique in that it lasts 300 total frames, more than twice as long as most other flight modes in UMvC3.
MODOK has a unique resource called "Levels of Understanding" (usually abbreviated to "Understanding" or "Knowledge"). MODOK gains Understanding by hitting opponents with his Analyze Cube (214X) special. Understanding is displayed in game on MODOK's headband, which starts to glow more and more intensely as he gains Understanding. MODOK can store up to 9 levels of Understanding at once. MODOK can spend Understanding on one of three enhanced special moves:
- Big Barrier (4S) - an enhanced version of his normal 4H Barrier. Is physically larger and stays on screen for longer, but is otherwise the same.
- Psionic High Blast (236S) - an enhanced version of 236X Psionic Blast. Deals more damage, has more durability, and is easier to combo after than the standard beam. Unlike the regular version, can only be performed on the ground.
- Jamming Bomb (623S) - an enhanced version of 623X Balloon Bomb. The Jamming version lasts much longer than the regular version, slowly homes in on the opponent, and reverses the opponent's controls if it hits. Unlike the regular version, can only be performed on the ground.
Besides spending one level to use any of these three moves, MODOK can spend all of his current Understanding by using Hyper Psionic Blast (236XX). This Hyper always consumes all of MODOK's current Understanding in order to increase the number of hits, and thus the total damage dealt. Note that while a powered up HPB is visually different from the 0 Understanding version, the move's hitbox is always the same.
Move List
Assists
| Damage | Startup | Active | Recovery |
|---|---|---|---|
| - | 54 | 122 | 107, 77 |
| On Hit | On Block | Guard | Properties |
| - | - | - | - |
|
THC Hyper: Hyper Psionic Blaster. Recommended assist. MODOK appears and creates a barrier which floats in place. The barrier will absorb and destroy both physical and projectile attacks from the opponent, preventing them from harming characters on the other side. Even attacks which can normally pierce multiple targets, like beams, are fully negated by Barrier and hit other targets. Barrier is also not considered a projectile, and does not have durability to be exhausted. Any hyper attack will destroy the barrier, but it can absorb any number of non-hyper attacks. Barrier lasts for 122 frames after appearing. This is actually longer than the cooldown for the assist call itself, so MODOK can be continually re-called to maintain 100% uptime on barrier so long as MODOK is not sniped as he enters. Only one Barrier can be active at a time. Barrier disappears if MODOK is hit, but not if the point character is hit. The barrier also blocks enemy movement, preventing an opponent's characters from passing through it while active. The barrier reaches up to just below regular jump height, so airborne characters can pass over it. The protections from MODOK's barrier are entirely one-sided. Your characters can freely attack through the barrier and hit opponents on the other side, and they can also walk back and forth through the barrier freely. | |||
| Damage | Startup | Active | Recovery |
|---|---|---|---|
| 80,000 | 64 | 182 | 117, 87 |
| On Hit | On Block | Guard | Properties |
| - | - | Mid | |
|
THC Hyper: Hyper Psionic Blaster. MODOK deploys a floating bomb, which shoots forward fairly quickly before slowing down to a complete stop. In total, the bomb travels roughly halfscreen distance before running out of speed and floating in place. The bomb will explode 182 frames after being deployed, or explode automatically if an opponent enters proximity. Balloon Bomb as an assist is unique because - despite appearing as a projectile - it ignores the typical Durability/Priority system and does not have projectile durability. The bomb ignores other projectiles that make contact with it, including hypers. Although there is a "hit" effect when the bomb makes contact with another projectile, it has no effect, and the bomb can not be destroyed by projectiles (it is also immune to physical hits). Conversely, the bomb's lack of durability means it lacks any ability to block or destroy other projectiles itself. This property only applies to the assist version of Balloon Bomb, not the point character version. The bomb's proximity trigger can be activated by an opponent who is knocked down, and the explosion can hit OTG. However, it is a very impractical OTG tool due to the slow speed and slightly inconsistent spacing requirement. | |||
| Damage | Startup | Active | Recovery |
|---|---|---|---|
| 30,000 x4 | 44 | 20 | 108, 78 |
| On Hit | On Block | Guard | Properties |
| - | - | Mid | |
|
THC Hyper: Hyper Psionic Blaster. Recommended assist. MODOK fires a beam from his forehead, which travels directly forward. Psionic Blast is a standard beam assist with very good startup, comparable to Doom's Plasma Beam and Iron Man's Unibeam. At 12 total durability points, it actually has more durability than those two beams. However, if called at the same time as one of those beams, Psionic Blast will actually lose due to how the durability is distributed. It is still a very good screen clear, pressure tool, and combo extender. As a bonus, it only hits 4 times, which has a smaller impact on Damage Scaling. | |||
Ground Normals
| Damage | Startup | Active | Recovery |
|---|---|---|---|
| 45,000 | 7 | 6 | 11 |
| On Hit | On Block | Guard | Properties |
| -1 | -1 | High | |
|
MODOK produces a short-range burst of energy from his forehead. Normal-sized characters can crouch underneath this hit, so be careful about using it as a pressure tool against grounded opponents. Can be used an a mashed anti-air due to its relatively fast startup and Rapid Fire property. Repeated 5Ls can chain into each other to catch an opponent at regular jump height and then confirm into 5S. | |||
| Damage | Startup | Active | Recovery |
|---|---|---|---|
| 20,000 x5 | 10 | 9 | 17 |
| On Hit | On Block | Guard | Properties |
| +3 | +3 | Mid | |
|
Modok fires 5 bullets at a down-forward angle, striking the ground at about 1/3 of fullscreen distance. Has very good range, beating out all of MODOK's other normals in terms of pure horizontal reach. It is a strong poke against grounded opponents, but struggles to hit anyone airborne. It also has a deadzone immediately in front of MODOK where some character can crouch underneath the bullets. | |||
| Damage | Startup | Active | Recovery |
|---|---|---|---|
| 80,000 | 16 | 10 | 20 |
| On Hit | On Block | Guard | Properties |
| +1 | -4 | High | |
|
MODOK fires a burst of energy above his head. Normal-sized characters can crouch underneath this attack. Can be jump-canceled on contact - hit or block, which places MODOK into his Flight mode, giving 5H effectively only 5f of recovery. On hit, the opponent is popped into the air, which MODOK can pursue with a Jump Cancel to perform extended combos. | |||
| Damage | Startup | Active | Recovery |
|---|---|---|---|
| 45,000 | 5 | 6 | 10 |
| On Hit | On Block | Guard | Properties |
| 0 | 0 | Mid | |
|
Note: Not a low. MODOK ducks down slightly before attacking with an energy burst similar to his 5L. This attack hits low enough that it can not be crouched by normal characters, unlike 5L, and starts up slightly faster. | |||
| Damage | Startup | Active | Recovery |
|---|---|---|---|
| 60,000 | 10 | - | 25 |
| On Hit | On Block | Guard | Properties |
| 0 | 0 | Mid / Low | |
|
MODOK fires a gross-looking green blob from above his head. It quickly arcs downward, landing on the ground about two character lengths in front of MODOK. If the projectile reaches the ground without touching an opponent, it creates a puddle on the ground for a short duration. The initial projectile hits Mid, but the puddle hits Low and is OTG-capable. 2M is MODOK's only OTG attack and is an important combo tool. Tossing a puddle onto a knocked down opponent can be chained into an H normal or canceled into a special to solo pick up. It can also be hyper canceled into Hyper Psionic Blaster as a combo ender. At higher levels of Hitstun Deterioration, 2M canceled or chained into other attacks may not combo, but this can be compensated for with assist calls. The Low hit of 2M's puddle can be used for dangerous mixups if you can set up a way for the opponent to block it. By placing down a puddle where a knocked down opponent is tech rolling (easiest to do in the corner), you can fly and attack with a fast Overhead attack while the opponent is forced to block the Low puddle meaty. This can create powerful High/Low mixups or even solo Unblockables. When doing an OTG pickup in the corner, this move can sometimes fail to connect. This is more common against small body characters and against Dormammu (?!?), but can happen against any character in certain circumstances. This can be compensated for by performing a small backdash before 2M to adjust the spacing where it lands. | |||
| Damage | Startup | Active | Recovery |
|---|---|---|---|
| 80,000 | 15 | 10 | 21 |
| On Hit | On Block | Guard | Properties |
| +3 | -5 | Low | |
|
MODOK shoots a burst of energy from his cannon, similar to 5H but fired from below MODOK rather than above him. This is MODOK's only Low attack besides the puddle created by 2M, and thus the only incentive you can give opponents to block low. Pops up opponents on hit, and can be jump-canceled on hit or block. 2H jump-canceled into Flight, which itself is dash-canceled into an air normal, is both a staple combo route for MODOK and an important pressure tool. MODOK can repeatedly cycle between 2H and j.5L when close to attack with Overhead and Low attacks as an offensive option. | |||
| Damage | Startup | Active | Recovery |
|---|---|---|---|
| 80,000 | 10 | 12 | 22 |
| On Hit | On Block | Guard | Properties |
| Launch | -8 | Mid | |
|
MODOK attacks with the propulsion system of his hoverchair. The attack is not as large as the graphic would suggest, but is still fairly large. Fairly standard launcher. | |||
Aerial Normals
| Damage | Startup | Active | Recovery |
|---|---|---|---|
| 25,000 per kick | 6 | Until grounded | 1 |
| On Hit | On Block | Guard | Properties |
| +11 | +11 | OH | |
|
MODOK repeatedly kicks with his stubby legs. He will continue to kick while traveling through the air indefinitely, until he reaches the ground or cancels the move into a Special/Hyper. Upon reaching the ground, MODOK recovers almost instantly. If MODOK uses j.5L while in Flight, it instantly ends Flight and causes him to fall straight down. Although j.5L has terrible range, it is a very strong pressure tool. MODOK's unique Flight jump automatically keeps him low to the ground, allowing j.5L to work as an extremely fast Instant Overhead attack that can be repeatedly looped into itself. | |||
| Damage | Startup | Active | Recovery |
|---|---|---|---|
| 70,000 | 10 | 10 | 16 |
| On Hit | On Block | Guard | Properties |
| -5 | -5 | OH | |
|
Energy burst attack fired from above MODOK's head, similar to his grounded 5H. It is technically an Overhead, but can not hit normal-sized opponents who are crouching. Has excellent range making it a staple neutral tool, and also helps keep combos consistent. j.5M is also a good choice for canceling airdashes in order to preserve their momentum. Superjump up-back > airdash downback > j.5M or | |||
| Damage | Startup | Active | Recovery |
|---|---|---|---|
| 80,000 | 16 | 10 | 20 |
| On Hit | On Block | Guard | Properties |
| -8 | -8 | OH | |
|
Energy burst attack similar to MODOK's other heavy normals, but angled downwards to make it more easily hit grounded opponents. Has good range and can be used in pressure, jump loop combos, or defensively as a throw tech OS. | |||
| Damage | Startup | Active | Recovery |
|---|---|---|---|
| 90,000 | 13 | 8 | 20 |
| On Hit | On Block | Guard | Properties |
| - | +18 | OH | |
|
MODOK flares the propulsion of his hoverchair, attacking below himself. Has a small ability to hit cross-up. j.5S is notable because it causes a Ground Bounce if it hits outside of its use as an Air Combo Finisher. This is helpful as a combo extension tool and can give MODOK some capability to convert air-to-airs, although it basically only hits below MODOK and has no hitbox in front of himself. When falling from superjump height, airdash down canceled into a falling j.5S is a relatively safe and quick way to reach the ground, and will discourage opponents from trying to attack MODOK from below. As with all j.5S attacks on characters who have Flight mode, using j.5S in Flight will immediately end it and cause MODOK to start falling. | |||
Command Normals
| Damage | Startup | Active | Recovery |
|---|---|---|---|
| 80,000 | 18 | 10 | 13 |
| On Hit | On Block | Guard | Properties |
| - | +3 | Mid | |
|
MODOK swings his energy cannon while firing it. This creates a burst of energy similar to MODOK's other H attacks, and can be jump-canceled on contact the same way. On hit, causes a Wall Bounce which is fairly easy to combo both out of and into. If Wall Bounce has already been used, 6H still causes a large hit into a True Soft Knockdown, and so it can still be used in combos by special-canceling into certain attacks, or when paired with an assist call. | |||
| Damage | Startup | Active | Recovery |
|---|---|---|---|
| 80,000 | 18 | 10 | 13 |
| On Hit | On Block | Guard | Properties |
| +18 | +3 | High | |
|
MODOK angles his regular H attack energy burst upward, starting from above his head. Does not hit crouching opponents, even big bodies, and will whiff on standing normal-sized characters, so it is extremely specialized against airborne opponents. Unlike 6H, does not cause a Wall Bounce, but still knocks up and can be jump-canceled. Can be used as a meaty attack against oncoming characters. | |||
| Damage | Startup | Active | Recovery |
|---|---|---|---|
| - | 30 | 122 | 15 |
| On Hit | On Block | Guard | Properties |
| - | - | - | |
|
MODOK creates a barrier in front of himself. The barrier negates both projectiles and physical attacks which come into contact with it, preventing those attacks from harming MODOK or his teammates. Even attacks which normally pierce multiple targets can not penetrate through Barrier. The shield has no durability or upper limit on attacks absorbed, it can negate an infinite number of non-hyper attacks, but is instantly destroyed by any hyper. Additionally, the barrier physically blocks an opponent's movement, preventing them from moving past it in either direction. The barrier reaches to just below regular jump height, so it can be passed from above. The barrier only blocks attacks and movement from the opponent, and has no effect on MODOK or his teammates. MODOK can freely attack through the barrier and hit opponents on the other side from relative safety. MODOK's Barrier is a very powerful tool for his keepaway game that gives him an immediate edge in projectile battles, by protecting him from the opponent's non-hyper attacks while he freely shoots from the other side. It can also be used in pressure, to prevent an opponent from mashing out while MODOK runs his offense. | |||
| Damage | Startup | Active | Recovery |
|---|---|---|---|
| - | 30 | 180 | 15 |
| On Hit | On Block | Guard | Properties |
| - | - | - | - |
|
MODOK spends one level of Understanding to create an even larger Barrier. 4S Big Barrier is functionally identical to the normal one, with two additional benefits:
Unlike regular Barrier, Big Barrier is considered a special move for the purposes of cancels, and normals can be canceled into Big Barrier even on whiff. | |||
Special Moves
| Damage | Startup | Active | Recovery |
|---|---|---|---|
| 50,000 | 10 (15 for H version) | - | 25 (20 for H version) |
| On Hit | On Block | Guard | Properties |
| - | - | Mid | |
|
MODOK causes a stationary cube of energy to appear at a location determined by button strength. For the grounded version:
For the air version:
All versions of Analysis Cube remain active for 60 frames (1 second) after appearing. If an opponent is hit by Analysis Cube, MODOK gains one level of Understanding. This is the only way for MODOK to gain Understanding, a resource he can use to empower certain other attacks. Analysis Cube is easy to combo into, and can be followed up with additional attacks or even another Cube when spaced properly, so MODOK can build several levels of Understanding in a single combo if desired. Besides it use in combos and for gaining Understanding, Analysis Cube is a situational zoning tool, because MODOK can cause it to appear at several different locations without having to actually travel there. It can be used to move past other projectiles, such as Nova's Gravimetric Pulse, and hit a character on the other side. | |||
| L |
Damage | Startup | Active | Recovery |
|---|---|---|---|---|
| 30,000 x3 | 12 | 20 | 14 | |
| On Hit | On Block | Guard | Properties | |
| - | -4 | Mid | ||
| M |
Damage | Startup | Active | Recovery |
| 30,000 x4 | 20 | 20 | 16 | |
| On Hit | On Block | Guard | Properties | |
| - | -4 | Mid | ||
| H |
Damage | Startup | Active | Recovery |
| 30,000 x5 | 28 | 20 | 18 | |
| On Hit | On Block | Guard | Properties | |
| - | -4 | Mid | ||
|
MODOK's beam special. Fires a beam from his forehead, which travels horizontally across the screen. All versions are fired directly horizontally forward except for the aerial H version, which is fired at a down-forward angle. Psionic Blast is very quick, especially the L versions. It is a foundational part of MODOK's zoning plan and ability to deal chip damage. It is a low-risk, low-reward callout against opponent's assist calls to snipe them as well. Air Psionic Blast also has uses for MODOK's extended corner combos. It has very high hitstun on hittin an airborne opponent, basically forcing a Soft Knockdown. When spaced properly, MODOK can cancel into j.236L off an air chain, the airdash down to catch the opponent with a falling attack before they reach the ground. | ||||
| Damage | Startup | Active | Recovery |
|---|---|---|---|
| 40,000 x5 | 28 | 20 | 18 |
| On Hit | On Block | Guard | Properties |
| +17 | -9 | Mid | |
|
Enhanced version of Psionic Blast, which costs one level of Understanding to perform. Unlike regular Psionic Blast, it can not be performed in the air. High Blast has identical frame data to 236H. In exchange for spending one Understanding to empower the move, it gains additional damage and durability. Additionally, High Blast does not knock grounded opponents into the air on hit. Instead, it causes a lengthy Stagger animation. | |||
| L |
Damage | Startup | Active | Recovery |
|---|---|---|---|---|
| 80,000 | 30 | - | 25 | |
| On Hit | On Block | Guard | Properties | |
| - | +1 | Mid | ||
| M |
Damage | Startup | Active | Recovery |
| 80,000 | 40 | - | 25 | |
| On Hit | On Block | Guard | Properties | |
| - | +1 | Mid | ||
| H |
Damage | Startup | Active | Recovery |
| 80,000 | 50 | - | 25 | |
| On Hit | On Block | Guard | Properties | |
| - | +1 | Mid | ||
|
MODOK fires a bomb from his chair's cannon, which travels in a direction dependent on button strength. The bomb moves fairly slowly, and slows down as it travels, before coming to a stop:
All versions remain active for 180 frames before exploding. MODOK can only have one Balloon Bomb active at a time, and using another will immediately explode the previous one. This restriction is shared with Jamming Bomb. Balloon Bomb is a powerful space-control and zoning tool whenever MODOK can manage to cover its lengthy startup. It is very difficult for most opponents to approach MODOK when a bomb is active between the two of them. Additionally, because Balloon Bomb is considered Medium Priority, it will block and nullify almost all non-hyper projectiles that come into contact with it, protecting MODOK from long-range retaliation as well. | ||||
| Damage | Startup | Active | Recovery |
|---|---|---|---|
| 80,000 | 50 | - | 25 |
| On Hit | On Block | Guard | Properties |
| - | +1 | Mid | |
|
Enhanced version of Balloon Bomb, which costs one level of Understanding to perform. Unlike regular Balloon Bomb, it can not be performed in the air. Jamming Bomb has identical frame data to 623H Balloon Bomb, and tracks opponents across the stage in the same way. It lasts 300 frames (5 seconds) rather than the normal 180 frames. If Jamming Bomb hits an opponent, it applies a debuff to that character, reversing their directional controls:
The debuff lasts for 4 seconds, and makes it very difficult for an opponent to effectively control their character or even defend themselves for the duration. Despite the extremely long startup, it is possible to combo into Jamming Bomb, and this is the recommended way to use the move in order to ensure its debuff is actually applied. A common strategy is to combo into Jamming Bomb and then immediately perform a Snap Back on the jammed opponent. The debuff while remain on that character and not lose duration while they are on the backrow. When that character re-enters the stage, their controls will still be reversed, which will make it much harder to defend against any oncoming mixup you have ready for them. | |||
| Damage | Startup | Active | Recovery |
|---|---|---|---|
| 90,000 | 13 (airborne frame 1) | 10 | 23 |
| On Hit | On Block | Guard | Properties |
| -7 | -7 | Mid | |
|
MODOK charges in any direction, using his entire body as a physical attack. Battering Ram can be steered in any of the eight directions by holding that direction during the input, but it can not be steered down when used on the ground. Battering Ram can be used as a mobility tool to quickly change MODOK's aiir trajectory or cancel a badly spaced normal if needed. It has limited combo potential. Upward-angled Battering Ram allows MODOK to escape to superjump height without using superjump, allowing him to still call assists. For some reason, using grounded Battering Ram to go airborne, rather than jumping, flying or superjumping, allows MODOK to perform two airdashes instead of just one. You can consistently get a grounded upwards Battering Ram by performing any grounded normal and whiff-canceling into Battering Ram: Activating Battering Ram while in Flight Mode cancels Flight. Battering Ram can be used up to three times per airborne state. It shares this limit with Hyper Battering Ram, meaning that if MODOK uses Battering Ram in a combo, he loses some of the additional hits from Hyper Battering Ram in that same combo. | |||
| Damage | Startup | Active | Recovery |
|---|---|---|---|
| - | 8 | 300 | 0 |
| On Hit | On Block | Guard | Properties |
| - | - | Mid | |
|
MODOK enters Flight. While in Flight, MODOK floats in place, and can perform an unlimited number of air specials (although using Battering Ram will immediately cancel Flight). Unlike other characters who have both Flight and an airdash, MODOK's airdash cancels Flight on use, preventing him from repeatedly airdashing in Flight. MODOK is unique among Flight mode characters in that he can block attacks while in Flight. However, blocking any attack automatically ends Flight mode. This means that MODOK can emergency-cancel attacks into Flight in order to block. MODOK can also enter Flight by using a regular jump, but the input allows him to cancel most attacks into Flight, to perform it while already airborne (such as after a superjump), or to Fly twice in the same air state - once using Jump Flight and once using the command. Flight Mode lasts for 300 frames, and is canceled if MODOK uses j.5L, j.5S, Battering Ram, or an airdash. He can also manually cancel Flight by inputting 214S again, which can Unfly-cancel attacks. | |||
Hyper Combos
| Damage | Startup | Active | Recovery |
|---|---|---|---|
| Varies | 10+1 | 120 | 36 |
| On Hit | On Block | Guard | Properties |
| - | -30 | Mid | |
|
MODOK fires a larger, more powerful version of his Psionic Blaster. The beam hits several times, ending in a Hard Knockdown. It can be used as a combo ender, or in neutral to snipe assists and slower attacks. The beam causes a Hard Knockdown, and MODOK can sometimes link a 2M after the knockdown to continue the combo. Hyper Psionic Blaster is notable because it automatically consumes all Understanding levels MODOK currently has in order to empower the beam, increasing the hit count and thus total damage:
As you can see, HSB deals pathetically low damage when used with no understanding, but if charged with enough levels of Understanding, becomes the most damaging Level 1 hyper in the game. The break point where Blaster deals more damage than Hyper Battering Ram is 4 Understanding. Additionally, higher level HSB beams cause longer Hard Knockdowns, making linking an OTG afterwards easier. Besides the increased damage and Hard Knockdown, improved HSB is identical to the Level 0 version and shares the same hitbox and frame data. | |||
| Damage | Startup | Active | Recovery |
|---|---|---|---|
| 25,000 x3 ~ x15 | 4+4 | 11 | 24 |
| On Hit | On Block | Guard | Properties |
| - | -5 | Mid | |
|
Hyper version Battering Ram. MODOK charges forward, physically attacking with his whole body. Normally, Hyper Battering Ram performs three quick hits. By pressing additional attack buttons, MODOK can perform up to four additional 3-hit bursts. Additionally, every burst after the first can be aimed by holding the stick in any direction while inputting the hit. The first burst always goes directly forward, and can not be aimed. Hyper Battering Ram can be used as a combo ender, especially if MODOK does not have enough Understanding to make Hyper Psionic Blaster deal decent damage. It is possible to loop Hyper Battering Ram into itself, by angling the final hits so that it pops the opponent into the air while MODOK land-cancels his own recovery. The basic sequence for this is:
| |||
| Damage | Startup | Active | Recovery |
|---|---|---|---|
| 300,000 ~ 392,000 | 18+1 | 10 | 40 |
| On Hit | On Block | Guard | Properties |
| - | - | Throw | Invuln until frame 24, mashable, |
|
Cinematic command grab hyper. MODOK reaches out with some wires. If he grabs the opponent, they are placed into a cinematic where MODOK electrocutes them, then slams them onto the ground for a Hard Knockdown. MODOK can 2M OTG after this Hard Knockdown to pick up. This hyper has very slow startup for command grab standards, so its offensive potential is low. It is often mashed as a reversal due to its very high amount of invincibility frames. If the reversal grab fails, MODOK can be DHC's out with a safe hyper in the backline. | |||
Universal Mechanics
| Damage | Startup | Active | Recovery |
|---|---|---|---|
| 80,000 | 1 | 1 | - |
| On Hit | On Block | Guard | Properties |
| - | - | Throw | |
|
MODOK psionically grabs the opponent and slams them down. MODOK can follow up with OTG 2M. Dash up 2M is needed midscreen in order to actually convert into a full combo. | |||
| Damage | Startup | Active | Recovery |
|---|---|---|---|
| 80,000 | 1 | 1 | - |
| On Hit | On Block | Guard | Properties |
| - | - | Airthrow | |
|
MODOK throws the opponent fairly far away. For Back Airthrow, the standard followup is to land, wavedash twice, and OTG with For Forward Airthrow, MODOK can only follow up if he throws into the corner, and only from minimum airthrow height. The pickup is | |||
| Damage | Startup | Active | Recovery |
|---|---|---|---|
| 50,000 | 2 | 4 | 27 |
| On Hit | On Block | Guard | Properties |
| - | -5 | Mid | Snapback |
|
Animation and hitbox based on 2H. | |||
| Damage | Startup | Active | Recovery |
|---|---|---|---|
| 30,000 | - | 20 | 35 |
| On Hit | On Block | Guard | Properties |
| - | -11 | OH | |
|
- | |||
Team Position
MODOK is a very flexible character, and has seen tournament success as both in both the Point and Second positions. In the second position, MODOK can support with some solid assists, either Psionic Blast or Barrier. However, his main support comes in the form of his great DHC options. Hyper Battering Ram can be looped into itself, allowing for big (although expensive) extra damage. With the correct setup, MODOK can also pick up with 2M after a DHC to Hyper Psionic Blaster as well, making it one of the most efficient DHC options in the game in terms of damage. MODOK second is an excellent choice for aggressive teams, as they can quickly secure the first kill and transition seamlessly into MODOKs devastating oncoming mixups.
As a point character, MODOK leans more towards his strengths as a keepaway character. One very unique aspect of point MODOK is his movement at round start. Characters generally can not superjump or fly at round start, but since MODOK's jump is replaced with flight mode, he can activate it right away to start ascending. MODOK can essentially start the match at superjump height (and still be able to call assists from up there), and from there his strong mobility tools ensure he never has to go near the opponent again, except on his own terms.
Notable Synergies
Magneto: Although EM Disruptor is Magneto's most common assist choice, MODOK teams can run with Magneto's Hyper Grav assist, which ignores hitstun deterioration and forces a Capture state, for extra combo potential. A Magneto/MODOK shell has a very strong neutral game, combining Magneto's incredible mobility with a fast beam assist in Psionic Blaster. This shell can convert almost any hit into a 2-bar kill by DHCing from a standard Magneto BnB into Hyper Psionic Blaster, then using Hyper Grav assist alongside OTG 2M to get a post-hyper extension for heavy damage.
Players to Watch: Priest (Magneto/MODOK/Doom, MODOK/Magneto/Doom)
Nova: Nova wants to be run with a beam assist, such as Psionic Blaster, that can cover him while he approaches with 2M or Box Dash j.5H. This assist covers one of Nova's biggest weaknesses by keeping the opponent locked down while he closes the distance and gets within his limited range. Additionally, Nova excels at enabling Hard Tag combos and DHC extensions, which fits nicely with MODOK, who is a stellar character to bring in using either of those methods.
Players to Watch: TA Moons (Nova/MODOK/Ammy)
Captain America: Charging Star assist destroys projectiles on hit, giving MODOK an edge in zoning battles. Cap also offers high damage hypers as DHC options which MODOK can use to easily secure a kill.
Players to Watch: Frutsy (Cap/MODOK/Doom, Cap/MODOK/Taskmaster)
Strider Hiryu: MODOK is well-equipped to take advantage of the Hard Knockdown causes by Strider's Vajra assist, with his fast 2M OTG that transitions easily into jump loops. As a zoning character, MODOK appreciated having an assist which can cover superjump height, something only a handful of assists do as well as Vajra can. Additionally, Strider is a very meter-hungry anchor character, so MODOK's meter-positive combo rotues and zoning-heavy gameplan are great at generating bar for him to use.
Players to Watch: Punisher (MODOK/Raccoon/Strider)
Other Players to Watch: Punisher (MODOK/Hawkeye/Raccoon), Rubeks (Spencer/MODOK/Skrull), El Gato (MODOK/Strange/Doom), Flash Metroid (MODOK/Strange/Doom)
Alternate Colors
| Color 1 | Color 2 | Color 3 | Color 4 | Color 5 | Color 6 | Alt Color |
|---|---|---|---|---|---|---|
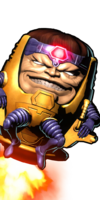
|
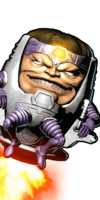
|
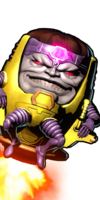
|
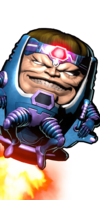
|
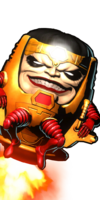
|
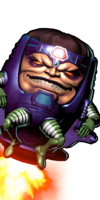
|
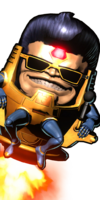
|


