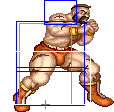
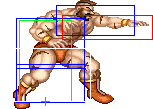
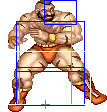
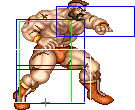
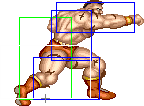
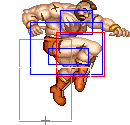
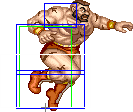
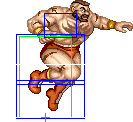
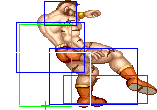
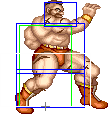
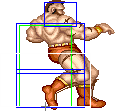
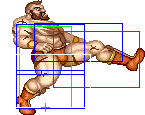
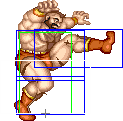
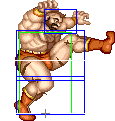
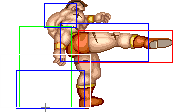
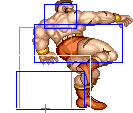
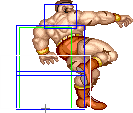
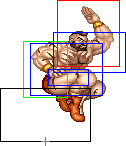
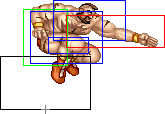
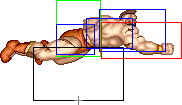
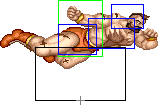
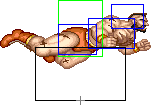
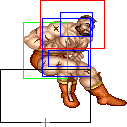
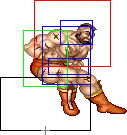
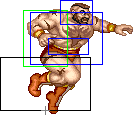
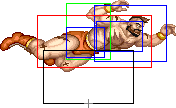
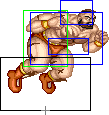
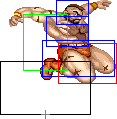
ReckyDaGuy (talk | contribs) (→frlk) |
ReckyDaGuy (talk | contribs) mNo edit summary |
||
| (87 intermediate revisions by the same user not shown) | |||
| Line 1: | Line 1: | ||
{{Infobox Character SSF2T | {{Infobox Character SSF2T | ||
|name= | |name=Zangief | ||
|image = | |image = Zangief.png | ||
|fwalk = | |dmgscal = 22/32 | ||
|bwalk = | |fwalk = 40 | ||
|prejump = | |bwalk = 24 | ||
|njumpdr = | |prejump = 4 | ||
|fjumpdr = | |njumpdr = 38 | ||
|bjumpdr = | |fjumpdr = 38 | ||
|landing = {{Tooltip | text= | |bjumpdr = 39 | ||
|jumpa = | |landing = {{Tooltip | text=8* | hovertext = Last 7 frames can be canceled into a throw from Frame 1 onward, or jumps, attacks, or blocks on Frame 2 onward.}} | ||
|fjumpdt = | |jumpa = 73 | ||
|bjumpdt = | |fjumpdt = 89 | ||
|skdr = | |bjumpdt = 99 | ||
|hkdr = | |skdr = 42 | ||
|hkdr = 76 | |||
}} | }} | ||
{{TOClimit|3}} | {{TOClimit|3}} | ||
| Line 23: | Line 24: | ||
<b>Disclaimer</b>: To better understand the diagrams, read [https://wiki.supercombo.gg/w/Super_Street_Fighter_2_Turbo/FAQ#SSF2T.27s_Wiki_Diagram_Conventions this]. | <b>Disclaimer</b>: To better understand the diagrams, read [https://wiki.supercombo.gg/w/Super_Street_Fighter_2_Turbo/FAQ#SSF2T.27s_Wiki_Diagram_Conventions this]. | ||
=== | ===Standing Normals=== | ||
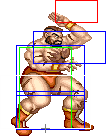
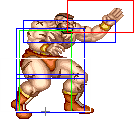
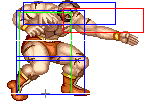
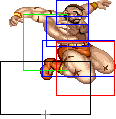
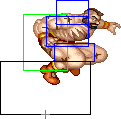
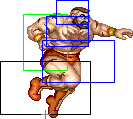
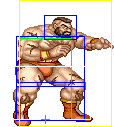
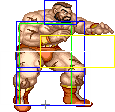
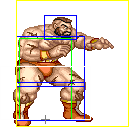
==== <span class="invisible-header"> | ===== <span class="invisible-header">cl.lp</span> ===== | ||
{{MoveData | {{MoveData | ||
| name = | | name = Close Jab | ||
| input = 5LP | | input = 5LP / cl.{{lp}} | ||
| subtitle = Close Light Punch | |||
| image = | | image = Zangief_stcljab2.png | ||
| imageSize = | | imageSize = 106x136px | ||
| image2 = Zangief_stcljab3.png | |||
| imageSize2 = 134x119px | |||
| image3 =Zangief_stcljab4.png | |||
| imageSize3 = 144x101px | |||
| caption = | | caption = | ||
| data = | | data = | ||
{{AttackData-SSF2T | {{AttackData-SSF2T | ||
|damage = | |damage = {{tooltip|text=16[1] / 14[1]|hovertext=[1] Random Damage Table: -2 = 3.125%, -1 = 3.125%, +0 = 68.75%, +1 = 9.375%, +2 = 9.375%, +3 = 6.25%}} | ||
|dizzy= 0~5 | |dizzy= 0~5 | ||
|dizzytime= 40 | |dizzytime= 40 | ||
|cancel = | |cancel = Chain, {{tooltip|text=Special*|hovertext=First 2 hitboxes only.}} | ||
|guard = Mid | |guard = Mid | ||
|startup= | |startup= 2 | ||
|active= | |active= 6 | ||
|recovery= | |recovery= 15 | ||
|total = | |total = 23 | ||
|frameAdv = | |frameAdv = -8/-6/-4 | ||
|actrange = 0-48 | |||
|actrange = | |||
|meter = 2/1 | |meter = 2/1 | ||
|description= | |description= Zangief does a knife hand strike from over his head. | ||
*The first part of this move does slightly more damage. | |||
*The | |||
'''General Strategies''' | |||
*The first and second parts make this move an incredible anti-air, able to beat almost anything thanks to incredible priority and a 2 frame startup. | |||
*The second part is Zangief's only response to Ken's Jumping Fierce. | |||
*The third part isn't particularly useful and leaves Zangief at disadvantage, so limit this move's use to anti-airs. | |||
*If you manage to anti-air with this move, you can cancel into Banishing Flat, allowing you to recover before your opponent lands and be just in range for the tick mixup. | |||
}} | }} | ||
}} | }} | ||
<span class="mw-customtoggle- | |||
<div class="mw-collapsible mw-collapsed" id="mw-customcollapsible- | <span class="mw-customtoggle-cllp" style="color: cyan">'''Click to toggle detailed hitbox data.'''</span> | ||
<div class="mw-collapsible mw-collapsed" id="mw-customcollapsible-cllp"> | |||
{{STDiagramHeader}} | {{STDiagramHeader}} | ||
{{STDiagramCell|}} |{{STDiagramImageCell| 1 | | {{STDiagramCell|}} |{{STDiagramImageCell| 1 | Zangief_stcljab1&8.png}} |{{STDiagramImageCell| 1 | Zangief_stcljab2.png}} |{{STDiagramImageCell| 1 | Zangief_stcljab3.png}} |{{STDiagramImageCell| 1 | Zangief_stcljab4.png}} |{{STDiagramImageCell| 1 | Zangief_stcljab5.png}} |{{STDiagramImageCell| 1 | Zangief_stcljab6.png}} |{{STDiagramImageCell| 1 | Zangief_stcljab7.png}} |{{STDiagramImageCell| 1 | Zangief_stcljab1&8.png}} | ||
|- | |- | ||
{{STDiagramCell| Frame Count}} |{{STDiagramCell| 1 + 2}} |{{STDiagramCell| 2}} |{{STDiagramCell| 2}} |{{STDiagramCell| | {{STDiagramCell| Frame Count}} |{{STDiagramCell| 1 + 1}} |{{STDiagramCell| 2}} |{{STDiagramCell| 2}} |{{STDiagramCell| 2}} |{{STDiagramCell| 2}} |{{STDiagramCell| 4}} |{{STDiagramCell| 4}} |{{STDiagramCell| 5}} | ||
|- | |- | ||
{{STDiagramCell| Simplified}} |{{ | {{STDiagramCell| Simplified}} |{{STDiagramCell| 2}} |{{STDiagramCellColSpan| 3 | 6}} |{{STDiagramCellColSpan| 4 | 15}} | ||
|} | |} | ||
</div> | </div> | ||
==== <span class="invisible-header">frlp</span> ==== | |||
==== <span class="invisible-header"> | |||
{{MoveData | {{MoveData | ||
| name = Far | | name = Far Jab | ||
| input = | | input = 5LP / cl.{{lp}} | ||
| subtitle = Far Light Punch | |||
| image = | | image = Zangief_stfarjab2.png | ||
| imageSize = | | imageSize = 145x106px | ||
| caption = | | caption = | ||
| data = | | data = | ||
{{AttackData-SSF2T | {{AttackData-SSF2T | ||
|damage = | |damage = {{tooltip|text=16[1]|hovertext=[1] Random Damage Table: -2 = 3.125%, -1 = 3.125%, +0 = 68.75%, +1 = 9.375%, +2 = 9.375%, +3 = 6.25%}} | ||
|dizzy= | |dizzy= 0~5 | ||
|dizzytime= | |dizzytime= 40 | ||
|cancel = | |cancel = Chain, Special | ||
|guard = Mid | |guard = Mid | ||
|startup= | |startup= 3 | ||
|active= 4 | |active= 4 | ||
|recovery= | |recovery= 5 | ||
|total = | |total = 12 | ||
|frameAdv = | |frameAdv = +4 | ||
|actrange = 49+ | |actrange = 49+ | ||
|meter = | |meter = 2/1 | ||
|description= A | |description= A fast straight punch that can be canceled into itself. | ||
* | *A very damaging Jab, even doing the strong sound when it hits. | ||
* | *Will whiff on most crouching characters, the exceptions being Boxer, Dhalsim, Old Fei Long, Sagat, T.Hawk, another Zangief, and in rare cases, Dee Jay. | ||
'''General Strategies''' | |||
*Unlike most far jabs, this shouldn't be used to beat advancing moves like Blanka's rolls or Honda's headbutts due to the protruding hurtbox. It's still important against Boxer, as this is his only reliable way to deal with his low Rush Punches. | |||
*Also beats Cammy's Roundhouse Cannon Drills and trades with Dictator's Scissor Kicks. | |||
*Better suited as a counter poke (e.g. beats Claw's crouching Jab/Strong and Dictator's standing Forward from the right range) or as a tick (e.g. allows you to tick Dhalsim from a more comfortable range). | |||
*Can also be whiffed in footsies to [https://wiki.supercombo.gg/w/Super_Street_Fighter_2_Turbo/Zangief#Proximity_Blocking_Abuse force the opponent to get stuck in the block animation], allowing you to attempt a walk in SPD or, with the use of a glitch, to jump at the opponent without allowing them to walk back, leaving them stuck in their blocking animation (this is especially useful against charge characters). | |||
* | |||
}} | }} | ||
}} | }} | ||
<span class="mw-customtoggle- | <span class="mw-customtoggle-frlp" style="color: cyan">'''Click to toggle detailed hitbox data.'''</span> | ||
<div class="mw-collapsible mw-collapsed" id="mw-customcollapsible- | <div class="mw-collapsible mw-collapsed" id="mw-customcollapsible-frlp"> | ||
{{STDiagramHeader}} | {{STDiagramHeader}} | ||
{{STDiagramCell|}} |{{STDiagramImageCell| 1 | | {{STDiagramCell|}} |{{STDiagramImageCell| 1 | Zangief_stfarjab1&3.png}} |{{STDiagramImageCell| 1 |Zangief_stfarjab2.png}} |{{STDiagramImageCell| 1 | Zangief_stfarjab1&3.png}} | ||
|- | |- | ||
{{STDiagramCell| Frame Count}} |{{STDiagramCell| 1 + | {{STDiagramCell| Frame Count}} |{{STDiagramCell| 1 + 2}} |{{STDiagramCell| 4}} |{{STDiagramCell| 5}} | ||
|- | |- | ||
{{STDiagramCell| Simplified}} |{{ | {{STDiagramCell| Simplified}} |{{STDiagramCell| 3}} |{{STDiagramCell| 4}} |{{STDiagramCell| 5}} | ||
|} | |} | ||
</div> | </div> | ||
==== <span class="invisible-header"> | |||
==== <span class="invisible-header">cl.mp</span> ==== | |||
{{MoveData | {{MoveData | ||
| name = | | name = Standing Strong | ||
| input = | | input = 5MP / st.{{mp}} | ||
| subtitle = Standing Medium Punch | |||
| image = | | image = Zangief_stclstrng3_stfarstrng3.png | ||
| imageSize = | | imageSize = 153x109px | ||
| caption = | | caption = | ||
| data = | | data = | ||
{{AttackData-SSF2T | {{AttackData-SSF2T | ||
|damage = | |damage ={{tooltip|text=24[1]|hovertext=[1] Random Damage Table: -2 = 3.125%, -1 = 3.125%, +0 = 68.75%, +1 = 9.375%, +2 = 9.375%, +3 = 6.25%}} | ||
|dizzy= 5~11 | |dizzy= 5~11 | ||
|dizzytime= 60 | |dizzytime= 60 | ||
|cancel = None | |cancel = None | ||
|guard = Mid | |guard = Mid | ||
|startup= | |startup= 5 | ||
|active= | |active= 3 | ||
|recovery= | |recovery= 5 | ||
|total = | |total = 18 | ||
|frameAdv = + | |frameAdv = +10 | ||
|actrange = | |actrange = N/A | ||
|meter = 4/3 | |meter = 4/3 | ||
|description= A | |description= A relatively fast horizontal knife strike. This move doesn't change when you're close or far away. | ||
* | *Used in most of Zangief's combos thanks to the solid damage and fairly good frame advantage, allowing Zangief to link into most of his normals. | ||
* | *Can also be used as a poke similar to Far Standing Jab, as their hitboxes are similar alongside added damage and stun, but keep in mind this move has a slower startup and has premature projected hurtboxes, making it easily stuffable. | ||
*Whiffs on most crouching characters, with the exceptions being Boxer, Dhalsim, Old Fei Long, Sagat, T.Hawk, himself, and Dee Jay (in Dee Jay's case, he leans back while crouch blocking, requiring you to be poing blank. As such, save this strategy for crossup combos/strings). | |||
*Old Zangief's version of this move is a little better since he can special cancel it, you don't have to worry about accidentally using Hop as Old Zangief, and it does a little more random damage. | |||
}} | }} | ||
}} | }} | ||
<span class="mw-customtoggle- | <span class="mw-customtoggle-stmp" style="color: cyan">'''Click to toggle detailed hitbox data.'''</span> | ||
<div class="mw-collapsible mw-collapsed" id="mw-customcollapsible- | <div class="mw-collapsible mw-collapsed" id="mw-customcollapsible-stmp"> | ||
{{STDiagramHeader}} | {{STDiagramHeader}} | ||
{{STDiagramCell|}} |{{STDiagramImageCell| 1 | | {{STDiagramCell|}} |{{STDiagramImageCell| 1 | Zangief_stclstrng1_stfarstrng1.png}} |{{STDiagramImageCell| 1 | Zangief_stclstrng2_stfarstrng2.png}} |{{STDiagramImageCell| 1 | Zangief_stclstrng3_stfarstrng3.png}} |{{STDiagramImageCell| 1 | Zangief_stclstrng4_stfarstrng4.png}} | ||
|- | |- | ||
{{STDiagramCell| Frame Count}} |{{STDiagramCell| 1 + | {{STDiagramCell| Frame Count}} |{{STDiagramCell| 1 + 2}} |{{STDiagramCell| 2}} |{{STDiagramCell| 3}} |{{STDiagramCell| 5}} | ||
|- | |- | ||
{{STDiagramCell| Simplified}} |{{STDiagramCellColSpan | 2 | | {{STDiagramCell| Simplified}} |{{STDiagramCellColSpan| 2 | 5}} |{{STDiagramCell| 3}} |{{STDiagramCell| 5}} | ||
|} | |} | ||
| Line 255: | Line 173: | ||
==== <span class="invisible-header"> | ==== <span class="invisible-header">clhp</span> ==== | ||
{{MoveData | {{MoveData | ||
| name = | | name = Standing Fierce | ||
| input = | | input = 5HP / {{hp}} | ||
| subtitle = | | subtitle = Heavy Punch | ||
| image | | image = Zangief_stclfrc3_stfarfrc3.png | ||
| imageSize = | | imageSize = 159x106px | ||
| caption = | | caption = | ||
| data = | | data = | ||
{{AttackData-SSF2T | {{AttackData-SSF2T | ||
|damage = | |damage ={{tooltip|text=30[1]|hovertext=[1] Random Damage Table: -2 = 3.125%, -1 = 3.125%, +0 = 68.75%, +1 = 9.375%, +2 = 9.375%, +3 = 6.25%}} | ||
|dizzy= 10~16 | |dizzy= 10~16 | ||
|dizzytime= 80 | |dizzytime= 80 | ||
|cancel = None | |cancel = None | ||
|guard = Mid | |guard = Mid | ||
|startup = | |startup= 7 | ||
|active = | |active= 6 | ||
|recovery= | |recovery= 29 | ||
|total = | |total = 42 | ||
|frameAdv = - | |frameAdv = -13 | ||
|actrange = N/A | |actrange = N/A | ||
|meter = 5/4 | |meter = 5/4 | ||
|description= | |description= A powerful straight punch with very long recovery. Does not change based on distance from your opponent. | ||
* | *Nice damage and dizzy potential. | ||
*Can | *Can be linked from a standing Strong for dizzy combos. | ||
* | *Can also be used as a trade anti-air. | ||
*Avoid this move in most cases however, since the exaggerated recovery kills any viable use. | |||
*Old Zangief does a little more random damage with this move. | |||
}} | }} | ||
}} | }} | ||
<span class="mw-customtoggle- | <span class="mw-customtoggle-hp" style="color: cyan">'''Click to toggle detailed hitbox data.'''</span> | ||
<div class="mw-collapsible mw-collapsed" id="mw-customcollapsible- | <div class="mw-collapsible mw-collapsed" id="mw-customcollapsible-hp"> | ||
{{STDiagramHeader}} | {{STDiagramHeader}} | ||
{{STDiagramCell|}} |{{STDiagramImageCell| 1 | | {{STDiagramCell|}} |{{STDiagramImageCell| 1 | Zangief_stclfrc1&7_stfarfrc1&7.png}} |{{STDiagramImageCell| 1 | Zangief_stclfrc2&6_stfarfrc2&6.png}} |{{STDiagramImageCell| 1 | Zangief_stclfrc3_stfarfrc3.png}} |{{STDiagramImageCell| 1 | Zangief_stclfrc4_stfarfrc4.png}} |{{STDiagramImageCell| 1 | Zangief_stclfrc5_stfarfrc5.png}} |{{STDiagramImageCell| 1 | Zangief_stclfrc2&6_stfarfrc2&6.png}} |{{STDiagramImageCell| 1 | Zangief_stclfrc1&7_stfarfrc1&7.png}} | ||
|- | |- | ||
{{STDiagramCell| Frame Count}} |{{STDiagramCell| 1 + | {{STDiagramCell| Frame Count}} |{{STDiagramCell| 1 + 3}} |{{STDiagramCell| 3}} |{{STDiagramCell| 6}} |{{STDiagramCell| 10}} |{{STDiagramCell| 8}} |{{STDiagramCell| 6}} |{{STDiagramCell| 5}} | ||
|- | |- | ||
{{STDiagramCell| Simplified}} |{{STDiagramCellColSpan | | {{STDiagramCell| Simplified}} |{{STDiagramCellColSpan| 2 | 7}} |{{STDiagramCell | 6}} |{{STDiagramCellColSpan|4|29}} | ||
|} | |} | ||
</div> | </div> | ||
==== <span class="invisible-header">cllk</span> ==== | |||
{{MoveData | {{MoveData | ||
| name = Close | | name = Close Short | ||
| input = | | input = 5LK / cl.{{lk}} | ||
| subtitle = Close Light Kick | |||
| image = | | image = Zangief_stclshrt4.png | ||
| imageSize = | | imageSize = 130x125px | ||
| caption = | | caption = Ticking for dummies. | ||
| data = | | data = | ||
{{AttackData-SSF2T | {{AttackData-SSF2T | ||
|damage = | |damage = {{tooltip|text=18[1]|hovertext=[1] Random Damage Table: -2 = 3.125%, -1 = 3.125%, +0 = 68.75%, +1 = 9.375%, +2 = 9.375%, +3 = 6.25%}} | ||
|dizzy= 0~5 | |dizzy= 0~5 | ||
|dizzytime= 40 | |dizzytime= 40 | ||
|cancel = | |cancel = None | ||
|guard = Mid | |guard = Mid | ||
|startup= | |startup= 8 | ||
|active= | |active= 8 | ||
|recovery= 5 | |recovery= 5 | ||
|total = | |total = 21 | ||
|frameAdv = | |frameAdv = 0 | ||
|actrange = 0- | |actrange = 0-32 | ||
|meter = 2/1 | |meter = 2/1 | ||
|description= | |description= Zangief jumps and does a weak knee drop on the way down. | ||
* | *By far his easiest move to use as a tick due to the fairly long duration. | ||
* | *Leaves him at optimal range to tick into Super. | ||
* | *Since this move is 0 on block, it's a good move to tick into Atomic Suplex (i.e. if you don't time this as a meaty then a Flying Power Bomb will always come out). | ||
*Zangief has better moves though, and you should use this move less and less as you get better at ticking. | |||
}} | }} | ||
}} | }} | ||
<span class="mw-customtoggle- | <span class="mw-customtoggle-cllk" style="color: cyan">'''Click to toggle detailed hitbox data.'''</span> | ||
<div class="mw-collapsible mw-collapsed" id="mw-customcollapsible- | <div class="mw-collapsible mw-collapsed" id="mw-customcollapsible-cllk"> | ||
{{STDiagramHeader}} | {{STDiagramHeader}} | ||
{{STDiagramCell|}} |{{STDiagramImageCell| 1 | | {{STDiagramCell|}} |{{STDiagramImageCell| 1 | Zangief_stclshrt1&6.png}} |{{STDiagramImageCell| 1 | Zangief_stclshrt2.png}} |{{STDiagramImageCell| 1 | Zangief_stclshrt3.png}} |{{STDiagramImageCell| 1 | Zangief_stclshrt4.png}} |{{STDiagramImageCell| 1 | Zangief_stclshrt5.png}} |{{STDiagramImageCell| 1 | Zangief_stclshrt1&6.png}} | ||
|- | |- | ||
{{STDiagramCell| Frame Count}} |{{STDiagramCell| 1 + 2}} |{{STDiagramCell| 4}} |{{STDiagramCell| | {{STDiagramCell| Frame Count}} |{{STDiagramCell| 1 + 3}} |{{STDiagramCell| 2}} |{{STDiagramCell| 2}} |{{STDiagramCell| 8}} |{{STDiagramCell| 4}} |{{STDiagramCell| 1}} | ||
|- | |- | ||
{{STDiagramCell| Simplified}} |{{ | {{STDiagramCell| Simplified}} |{{STDiagramCellColSpan | 3 | 8}} |{{STDiagramCell| 8}} |{{STDiagramCellColSpan | 2 | 5}} | ||
|} | |} | ||
</div> | </div> | ||
==== <span class="invisible-header">frlk</span> ==== | |||
==== <span class="invisible-header"> | |||
{{MoveData | {{MoveData | ||
| name = | | name = Far Short | ||
| input = | | input = 5LK / fr.{{lk}} | ||
| subtitle = Far Light Kick | |||
| image = | | image = Zangief_stfarshrt3.png | ||
| imageSize = | | imageSize = 157x110px | ||
| caption = | | caption = Trip 'em and tick 'em. | ||
| data = | | data = | ||
{{AttackData-SSF2T | {{AttackData-SSF2T | ||
|damage = | |damage = {{tooltip|text=18[1]|hovertext=[1] Random Damage Table: -2 = 3.125%, -1 = 3.125%, +0 = 68.75%, +1 = 9.375%, +2 = 9.375%, +3 = 6.25%}} | ||
|dizzy= 5 | |dizzy= 0~5 | ||
|dizzytime= | |dizzytime= 40 | ||
|cancel = | |cancel = None | ||
|guard = | |guard = Low | ||
|startup= | |startup= 5 | ||
|active= | |active= 5 | ||
|recovery= | |recovery= 0 | ||
|total = | |total = 10 | ||
|frameAdv = | |frameAdv = +8 | ||
|actrange = | |actrange = 33+ | ||
|meter = | |meter = 2/1 | ||
|description= | |description= A low hitting kick with no recovery. | ||
* | *Zangief's best standing tick, and one of his most important normals. | ||
*When hitting this on wakeup, you can mix between tick into SPD or a linked sweep to give your opponent extra trouble when trying to do a reversal. | |||
*This move's lack of recovery frames allows use as a [https://wiki.supercombo.gg/w/Super_Street_Fighter_2_Turbo/Zangief#Safe_Ticks.2FMeaties safe tick/meaty]. | |||
}} | }} | ||
}} | }} | ||
<span class="mw-customtoggle- | <span class="mw-customtoggle-frlk" style="color: cyan">'''Click to toggle detailed hitbox data.'''</span> | ||
<div class="mw-collapsible mw-collapsed" id="mw-customcollapsible- | <div class="mw-collapsible mw-collapsed" id="mw-customcollapsible-frlk"> | ||
{{STDiagramHeader}} | {{STDiagramHeader}} | ||
{{STDiagramCell|}} |{{STDiagramImageCell| 1 | | {{STDiagramCell|}} |{{STDiagramImageCell| 1 | Zangief_stfarshrt1_stfarfrwrd1&5.png}} |{{STDiagramImageCell| 1 |Zangief_stfarshrt2.png}} |{{STDiagramImageCell| 1 | Zangief_stfarshrt3.png}} | ||
|- | |- | ||
{{STDiagramCell| Frame Count}} |{{STDiagramCell| 1 + | {{STDiagramCell| Frame Count}} |{{STDiagramCell| 1 + 2}} |{{STDiagramCell| 2}} |{{STDiagramCell| 5}} | ||
|- | |- | ||
{{STDiagramCell| Simplified}} |{{STDiagramCellColSpan | 2 | | {{STDiagramCell| Simplified}} |{{STDiagramCellColSpan | 2 | 5}} |{{STDiagramCell| 5}} | ||
|} | |} | ||
| Line 388: | Line 305: | ||
==== <span class="invisible-header">clmk</span> ==== | |||
==== <span class="invisible-header"> | |||
{{MoveData | {{MoveData | ||
| name = Close | | name = Close Forward | ||
| input = | | input = 5MK / cl.{{mk}} | ||
| subtitle = Close Medium Kick | |||
| image = | | image = Zangief_stclfrwrd3.png | ||
| imageSize = | | imageSize = 145x115px | ||
| caption = | | caption = | ||
| data = | | data = | ||
{{AttackData-SSF2T | {{AttackData-SSF2T | ||
|damage = | |damage = {{tooltip|text=24[1]|hovertext=[1] Random Damage Table: -2 = 3.125%, -1 = 3.125%, +0 = 68.75%, +1 = 9.375%, +2 = 9.375%, +3 = 6.25%}} | ||
|dizzy= | |dizzy= 5~11 | ||
|dizzytime= | |dizzytime= 60 | ||
|cancel = | |cancel = None | ||
|guard = Mid | |guard = Mid | ||
|startup= | |startup= 7 | ||
|active= | |active= 4 | ||
|recovery= | |recovery= 9 | ||
|total = | |total = 20 | ||
|frameAdv = | |frameAdv = +5 | ||
|actrange = 0- | |actrange = 0-56 | ||
|meter = | |meter = 4/3 x 2 | ||
|description= A | |description= A front kick with moderate startup and recovery. | ||
* | *Semi-useful against Ken's Jumping Fierce: you can make this move whiff (or at the very least make it hit late enough so he can't cancel into Air Tatsu, which you can then counter with an SAC SPD) by timing your move so his punch is active during the 7f window in which Zangief doesn't have an active head hurtbox. | ||
*However, most of the time you're better off just using close Standing Jab instead, since that's much more safer and consistent unless you're too far away to use it. | |||
* | *Too slow to be used in combos, with the only practical normal to link into it being far Standing Jab, and that move whiffs against most of the cast while crouching. | ||
*Also too fast to be used as a tick into Atomic Suplex. It can be used as a tick into SPD, but you'll probably want to use crouching Forward as a medium hitstun/damage option instead since it might do more damage against a standing opponent. | |||
*You may also use this as a tick into Super, but [https://wiki.supercombo.gg/w/Super_Street_Fighter_2_Turbo/Zangief#Safe_Super_Setups have to do it like a Sako Tick] since Final Atomic Buster has a very small throw range. | |||
}} | }} | ||
}} | }} | ||
<span class="mw-customtoggle- | <span class="mw-customtoggle-clmk" style="color: cyan">'''Click to toggle detailed hitbox data.'''</span> | ||
<div class="mw-collapsible mw-collapsed" id="mw-customcollapsible- | <div class="mw-collapsible mw-collapsed" id="mw-customcollapsible-clmk"> | ||
{{STDiagramHeader}} | {{STDiagramHeader}} | ||
{{STDiagramCell|}} |{{STDiagramImageCell| 1 | | {{STDiagramCell|}} |{{STDiagramImageCell| 1 | Zangief_stclfrwrd1&5.png}} |{{STDiagramImageCell| 1 | Zangief_stclfrwrd2.png}} |{{STDiagramImageCell| 1 | Zangief_stclfrwrd3.png}} |{{STDiagramImageCell| 1 | Zangief_stclfrwrd4.png}} |{{STDiagramImageCell| 1 | Zangief_stclfrwrd1&5.png}} | ||
|- | |- | ||
{{STDiagramCell| Frame Count}} |{{STDiagramCell| 1 + 3}} |{{STDiagramCell| | {{STDiagramCell| Frame Count}} |{{STDiagramCell| 1 + 3}} |{{STDiagramCell| 3}} |{{STDiagramCell| 4}} |{{STDiagramCell| 4}} |{{STDiagramCell| 5}} | ||
|- | |- | ||
{{STDiagramCell| Simplified}} |{{ | {{STDiagramCell| Simplified}} |{{STDiagramCellColSpan | 2 | 7}} |{{STDiagramCell| 4}} |{{STDiagramCellColSpan| 2 | 4}} | ||
|} | |} | ||
</div> | </div> | ||
==== <span class="invisible-header">frmk</span> ==== | |||
==== <span class="invisible-header"> | |||
{{MoveData | {{MoveData | ||
| name = | | name = Far Forward | ||
| input = | | input = 5MK / fr.{{mk}} | ||
| subtitle = Far Medium Kick | |||
| image = | | image = Zangief_stfarfrwrd3.png | ||
| imageSize = | | imageSize = 173x112px | ||
| caption = | | caption = | ||
| data = | | data = | ||
{{AttackData-SSF2T | {{AttackData-SSF2T | ||
|damage = | |damage = {{tooltip|text=24[1]|hovertext=[1] Random Damage Table: -2 = 3.125%, -1 = 3.125%, +0 = 68.75%, +1 = 9.375%, +2 = 9.375%, +3 = 6.25%}} | ||
|dizzy= | |dizzy= 5~11 | ||
|dizzytime= | |dizzytime= 60 | ||
|cancel = | |cancel = None | ||
|guard = | |guard = Mid | ||
|startup= | |startup= 7 | ||
|active= | |active= 4 | ||
|recovery= | |recovery= 9 | ||
|total = | |total = 20 | ||
|frameAdv = + | |frameAdv = +5 | ||
|actrange = | |actrange = 57+ | ||
|meter = | |meter = 4/3 | ||
|description= A low | |description= A semi-circular middle kick, and Zangief's main poke. | ||
* | *Very good for punishing missed low pokes due to its long range. | ||
* | *Also hits the entire cast even while crouching. | ||
*Has a little more range than your SPD, so use it as a punish if you're too far for it. | |||
*Can beat Tatsus clearly if done early. | |||
*Can also be used as a [https://wiki.supercombo.gg/w/Super_Street_Fighter_2_Turbo/Zangief#Safe_Ticks.2FMeaties safe meaty]. | |||
*Has poor priority, so refrain from spamming this move since it can be punished on prediction if it whiffs. | |||
}} | }} | ||
}} | }} | ||
<span class="mw-customtoggle- | <span class="mw-customtoggle-frmk" style="color: cyan">'''Click to toggle detailed hitbox data.'''</span> | ||
<div class="mw-collapsible mw-collapsed" id="mw-customcollapsible- | <div class="mw-collapsible mw-collapsed" id="mw-customcollapsible-frmk"> | ||
{{STDiagramHeader}} | {{STDiagramHeader}} | ||
{{STDiagramCell|}} |{{STDiagramImageCell| 1 | | {{STDiagramCell|}} |{{STDiagramImageCell| 1 | Zangief_stfarshrt1_stfarfrwrd1&5.png}} |{{STDiagramImageCell| 1 |Zangief_stfarfrwrd2.png}} |{{STDiagramImageCell| 1 | Zangief_stfarfrwrd3.png}} |{{STDiagramImageCell| 1 | Zangief_stfarfrwrd4.png}} |{{STDiagramImageCell| 1 | Zangief_stfarshrt1_stfarfrwrd1&5.png}} | ||
|- | |- | ||
{{STDiagramCell| Frame Count}} |{{STDiagramCell| 1 + | {{STDiagramCell| Frame Count}} |{{STDiagramCell| 1 + 3}} |{{STDiagramCell| 3}} |{{STDiagramCell| 4}} |{{STDiagramCell| 4}} |{{STDiagramCell| 5}} | ||
|- | |- | ||
{{STDiagramCell| Simplified}} |{{STDiagramCellColSpan | 2 | | {{STDiagramCell| Simplified}} |{{STDiagramCellColSpan | 2 | 7}} |{{STDiagramCell| 4}} |{{STDiagramCellColSpan | 2 | 9}} | ||
|} | |} | ||
| Line 478: | Line 396: | ||
==== <span class="invisible-header">cl.hk</span> ==== | |||
==== <span class="invisible-header"> | |||
{{MoveData | {{MoveData | ||
| name = Close | | name = Close Roundhouse | ||
| input = | | input = 5HK / {{hk}} | ||
| subtitle = | | subtitle = Close Heavy Kick | ||
| image | | image = Zangief_stclrh5.png | ||
| imageSize = | | imageSize = 140x106px | ||
| caption = | | caption = | ||
| image2 = Zangief_stclrh6.png | |||
| imageSize2 = 155x122px | |||
| caption2 = | |||
| data = | | data = | ||
{{AttackData-SSF2T | {{AttackData-SSF2T | ||
|damage = | |damage = {{tooltip|text=30[1] + 4[1]|hovertext=[1] Random Damage Table: -2 = 3.125%, -1 = 3.125%, +0 = 68.75%, +1 = 9.375%, +2 = 9.375%, +3 = 6.25%}} | ||
|dizzy= | |dizzy= 10~16 + 1~7 | ||
|dizzytime= | |dizzytime= 80 + 70 | ||
|cancel = | |cancel = None | ||
|guard = Mid | |guard = Mid | ||
|startup= | |startup = 10 | ||
|active= 8 | |active = 14 (6+8) | ||
|recovery= | |recovery= 31 | ||
|total = | |total = 39 | ||
|frameAdv = - | |frameAdv = -23/-17(-18) | ||
|actrange = | |actrange = N/A | ||
|meter = 4 | |meter = 5/4 | ||
|description= A | |description= A weird butterfly kick that hits twice. | ||
* | *Quite useless. | ||
* | *Can hit twice from close range and is themost damaging normal Zangief has, but it has a long startup and recovery. | ||
* | *The second hit has decent anti-air priority, but the situations where you can use it like that are limited and use is often overshadowed by close Jab anyway (i.e. worse startup, does less damage and has worse priority). | ||
* | *Old Zangief does a little more random damage with this move. | ||
}} | }} | ||
}} | }} | ||
<span class="mw-customtoggle-clhk" style="color: cyan">'''Click to toggle detailed hitbox data.'''</span> | |||
<div class="mw-collapsible mw-collapsed" id="mw-customcollapsible-clhk"> | |||
*'''Startup/Active''': | |||
{{STDiagramHeader}} | {{STDiagramHeader}} | ||
{{STDiagramCell|}} |{{STDiagramImageCell| 1 | | {{STDiagramCell|}} |{{STDiagramImageCell| 1 | Zangief_stclrh1.png}} |{{STDiagramImageCell| 1 | Zangief_stclrh2.png}} |{{STDiagramImageCell| 1 | Zangief_stclrh3.png}} |{{STDiagramImageCell| 1 | Zangief_stclrh4.png}} |{{STDiagramImageCell| 1 | Zangief_stclrh5.png}} |{{STDiagramImageCell| 1 | Zangief_stclrh6.png}} | ||
|- | |- | ||
{{STDiagramCell| Frame Count}} |{{STDiagramCell| 1 + | {{STDiagramCell| Frame Count}} |{{STDiagramCell| 1 + 2}} |{{STDiagramCell| 2}} |{{STDiagramCell| 2}} |{{STDiagramCell | 3}} |{{STDiagramCell| 6}} |{{STDiagramCell | 8}} | ||
|- | |- | ||
{{STDiagramCell| Simplified}} |{{STDiagramCellColSpan | | {{STDiagramCell| Simplified}} |{{STDiagramCellColSpan | 4 | 10}} |{{STDiagramCell| 6}} |{{STDiagramCell | 8}} | ||
|} | |} | ||
*'''Recovery''': | |||
{{STDiagramHeader}} | |||
{{STDiagramCell|}} |{{STDiagramImageCell| 1 | Zangief_stclrh7.png}} |{{STDiagramImageCell| 1 | Zangief_stclrh8.png}} |{{STDiagramImageCell| 1 | Zangief_stclrh9.png}} |{{STDiagramImageCell| 1 | Zangief_stclrh10.png}} | |||
|- | |||
{{STDiagramCell| Frame Count}} |{{STDiagramCell| 8}} |{{STDiagramCell| 10}} |{{STDiagramCell| 8}} |{{STDiagramCell| 5}} | |||
|- | |||
{{STDiagramCell| Simplified}} |{{STDiagramCellColSpan | 4 | 31}} | |||
|} | |||
</div> | </div> | ||
==== <span class="invisible-header">fr.hk</span> ==== | |||
==== <span class="invisible-header"> | |||
{{MoveData | {{MoveData | ||
| name = Roundhouse | | name = Far Roundhouse | ||
| input = 5HK | | input = 5HK / {{hk}} | ||
| subtitle = Far Heavy Kick | |||
| image = | | image = Zangief_stfarrh2.png | ||
| imageSize = | | imageSize = 148x115px | ||
| caption = | | caption = | ||
| data = | | data = | ||
{{AttackData-SSF2T | {{AttackData-SSF2T | ||
|damage = | |damage = {{tooltip|text=30[1]|hovertext=[1] Random Damage Table: -2 = 3.125%, -1 = 3.125%, +0 = 68.75%, +1 = 9.375%, +2 = 9.375%, +3 = 6.25%}} | ||
|dizzy= 10~16 | |dizzy= 10~16 | ||
|dizzytime= 80 | |dizzytime= 80 | ||
|cancel = None | |cancel = None | ||
|guard = Mid | |guard = Mid | ||
|startup = | |startup = 5 | ||
|active = | |active = 8 | ||
|recovery= | |recovery= 11 | ||
|total = | |total = 24 | ||
|frameAdv = | |frameAdv = +3 | ||
|actrange = N/A | |actrange = N/A | ||
|meter = 5/4 | |meter = 5/4 | ||
|description= | |description= Zangief performs a high side kick. | ||
* | *This move is a good anti-air, especially if done early. If your enemy manages to stuff this move, [https://wiki.supercombo.gg/w/Super_Street_Fighter_2_Turbo/Zangief#SAC_SPDs get your reversal SPD ready as they land]. | ||
* | *Also good for shenanigans: whiff it into SPD after your opponent wakes up from a knockdown. | ||
* | *It can beat Honda's Headbutts since it has just enough priority, is a fast move in general, stays active for a sufficient amount of time and does solid damge. | ||
*Also his only decent counter to New Chun-Li's neutral jumping Roundhouse: if spaced at round start distance it will beat it cleanly. The range for this is very specific though, if you're too far way it'll whiff and if you're too close you might get a trade, but in this case you'll always get beat if she does her kick early enough. | |||
*Old Zangief can special cancel this move, but in exchange for it having pretty bad priority. It also does a little more random damage with him. | |||
}} | }} | ||
}} | }} | ||
<span class="mw-customtoggle-hk" style="color: cyan">'''Click to toggle detailed hitbox data.'''</span> | |||
<span class="mw-customtoggle- | <div class="mw-collapsible mw-collapsed" id="mw-customcollapsible-hk"> | ||
<div class="mw-collapsible mw-collapsed" id="mw-customcollapsible- | |||
{{STDiagramHeader}} | {{STDiagramHeader}} | ||
{{STDiagramCell|}} |{{STDiagramImageCell| 1 | | {{STDiagramCell|}} |{{STDiagramImageCell| 1 | Zangief_stfarrh1&3.png}} |{{STDiagramImageCell| 1 | Zangief_stfarrh2.png}} |{{STDiagramImageCell| 1 | Zangief_stfarrh1&3.png}} | ||
|- | |- | ||
{{STDiagramCell| Frame Count}} |{{STDiagramCell| 1 + | {{STDiagramCell| Frame Count}} |{{STDiagramCell| 1 + 4}} |{{STDiagramCell| 8}} |{{STDiagramCell| 11}} | ||
|- | |- | ||
{{STDiagramCell| Simplified | {{STDiagramCell| Simplified} |{{STDiagramCell| 5}} |{{STDiagramCell| 8}} |{{STDiagramCell| 11}} | ||
|} | |} | ||
</div> | </div> | ||
===Crouching Normals=== | ===Crouching Normals=== | ||
| Line 575: | Line 502: | ||
{{MoveData | {{MoveData | ||
| name = Crouching Jab | | name = Crouching Jab | ||
| input = 2LP | | input = 2LP / {{d}}+{{lp}} | ||
| subtitle = Crouching Light Punch | |||
| image = | | image = Zangief_crjab2.png | ||
| imageSize = | | imageSize = 139x84px | ||
| caption = | | caption = | ||
| data = | | data = | ||
{{AttackData-SSF2T | {{AttackData-SSF2T | ||
|damage = 4[1] | |damage = {{tooltip|text=4[1]|hovertext=[1] Random Damage Table: -2 = 3.125%, -1 = 3.125%, +0 = 68.75%, +1 = 9.375%, +2 = 9.375%, +3 = 6.25%}} | ||
|dizzy= 0~5 | |dizzy= 0~5 | ||
|dizzytime= 40 | |dizzytime= 40 | ||
|cancel = Chain, Special | |cancel = Chain, Special | ||
|guard = Mid | |guard =Mid | ||
|startup= | |startup= 4 | ||
|active= | |active= 5 | ||
|recovery= | |recovery= 0 | ||
|total = | |total = 9 | ||
|frameAdv = + | |frameAdv = +8 | ||
|actrange = N/A | |actrange = N/A | ||
|meter = 2/1 | |meter = 2/1 | ||
|description= | |description= A crouching spear hand strike. | ||
* | *Though it does very low damage, this is your most important ticking move. | ||
*Can be used into hit confirm combos such as Crouching Jab (n times) linked into Standing Short or Crouching Roundhouse. | |||
*Can beat a lot of different moves like Honda's Headbutts and HHS, Blanka's rolls and River Run slide, Dictator's Scissor Kicks and various other normals. | |||
*This move has no recovery frames, allowing it to be used as a [https://wiki.supercombo.gg/w/Super_Street_Fighter_2_Turbo/Zangief#Safe_Ticks.2FMeaties safe tick/meaty]. | |||
}} | }} | ||
}} | }} | ||
<span class="mw-customtoggle-crlp" style="color: cyan">Click to toggle detailed hitbox data.</span> | <span class="mw-customtoggle-crlp" style="color: cyan">'''Click to toggle detailed hitbox data.'''</span> | ||
<div class="mw-collapsible mw-collapsed" id="mw-customcollapsible-crlp"> | <div class="mw-collapsible mw-collapsed" id="mw-customcollapsible-crlp"> | ||
{{STDiagramHeader}} | {{STDiagramHeader}} | ||
{{STDiagramCell|}} |{{STDiagramImageCell| 1 | | {{STDiagramCell|}} |{{STDiagramImageCell| 1 | Zangief_crjab1.png}} |{{STDiagramImageCell| 1 | Zangief_crjab2.png}} | ||
|- | |- | ||
{{STDiagramCell| Frame Count}} |{{STDiagramCell| 1 + | {{STDiagramCell| Frame Count}} |{{STDiagramCell| 1 + 3}} |{{STDiagramCell| 5}} | ||
|- | |- | ||
{{STDiagramCell| Simplified}} |{{STDiagramCell| | {{STDiagramCell| Simplified}} |{{STDiagramCell| 4}} |{{STDiagramCell| 5}} | ||
|} | |} | ||
</div> | </div> | ||
==== <span class="invisible-header">crmp</span> ==== | ==== <span class="invisible-header">crmp</span> ==== | ||
{{MoveData | {{MoveData | ||
| name = Crouching Strong | | name = Crouching Strong | ||
| input = 2MP | | input = 2MP / {{d}}+{{mp}} | ||
| subtitle = Crouching Medium Punch | |||
| image = | | image = Zangief_crstrng3.png | ||
| imageSize = | | imageSize = 141x87px | ||
| caption = | | caption = | ||
| data = | | data = | ||
{{AttackData-SSF2T | {{AttackData-SSF2T | ||
|damage = | |damage = {{tooltip|text=24[1]|hovertext=[1] Random Damage Table: -2 = 3.125%, -1 = 3.125%, +0 = 68.75%, +1 = 9.375%, +2 = 9.375%, +3 = 6.25%}} | ||
|dizzy= 5~11 | |dizzy= 5~11 | ||
|dizzytime= 60 | |dizzytime= 60 | ||
|cancel = | |cancel = None | ||
|guard = Mid | |guard = Mid | ||
|startup= | |startup= 7 | ||
|active= | |active= 8 | ||
|recovery= | |recovery= 9 | ||
|total = | |total = 24 | ||
|frameAdv = + | |frameAdv = +1 | ||
|actrange = N/A | |actrange = N/A | ||
|meter = 4/3 | |meter = 4/3 | ||
|description= | |description= A crouching straight punch that hits around the stomach, with moderate recovery. | ||
*Can be used as a poke or to trade with some moves. | |||
* | *Excels as a tick into Atomic Suplex for two reasons: it leaves Zangief at a perfect range (outside most characters normal throw ranges, but inside Roundhouse Atomic Suplex range) and it leaves Zangief at onme frame of advantage (or 0 if you use this as the last hit of a block string), minimizing the chances of a Running Bear Grab coming out. | ||
}} | }} | ||
}} | }} | ||
<span class="mw-customtoggle-crmp" style="color: cyan">Click to toggle detailed hitbox data.</span> | <span class="mw-customtoggle-crmp" style="color: cyan">'''Click to toggle detailed hitbox data.'''</span> | ||
<div class="mw-collapsible mw-collapsed" id="mw-customcollapsible-crmp"> | <div class="mw-collapsible mw-collapsed" id="mw-customcollapsible-crmp"> | ||
{{STDiagramHeader}} | {{STDiagramHeader}} | ||
{{STDiagramCell|}} |{{STDiagramImageCell| 1 | | {{STDiagramCell|}} |{{STDiagramImageCell| 1 | Zangief_crstrng1%265_crfrc1%265.png}} |{{STDiagramImageCell| 1 | Zangief_crstrng2&4_crfrc2&4.png}} |{{STDiagramImageCell| 1 | Zangief_crstrng3.png}} |{{STDiagramImageCell| 1 | Zangief_crstrng2&4_crfrc2&4.png}} |{{STDiagramImageCell| 1 | Zangief_crstrng1%265_crfrc1%265.png}} | ||
|- | |- | ||
{{STDiagramCell| Frame Count}} |{{STDiagramCell| 1 + | {{STDiagramCell| Frame Count}} |{{STDiagramCell| 1 + 3}} |{{STDiagramCell| 3}} |{{STDiagramCell| 8}} |{{STDiagramCell| 4}} |{{STDiagramCell| 5}} | ||
|- | |- | ||
{{STDiagramCell| Simplified}} |{{STDiagramCellColSpan | 2 | | {{STDiagramCell| Simplified}} |{{STDiagramCellColSpan | 2 | 7}} |{{STDiagramCell| 8}} |{{STDiagramCellColSpan | 2 | 9}} | ||
|} | |} | ||
| Line 660: | Line 588: | ||
{{MoveData | {{MoveData | ||
| name = Crouching Fierce | | name = Crouching Fierce | ||
| input = 2HP | | input = 2HP / {{d}}+{{hp}} | ||
| subtitle = Crouching Heavy Punch | |||
| image = | | image = Zangief_crfrc3.png | ||
| imageSize = | | imageSize = 174x84px | ||
| caption = | | caption = | ||
| data = | | data = | ||
{{AttackData-SSF2T | {{AttackData-SSF2T | ||
|damage = | |damage ={{tooltip|text=30[1]|hovertext=[1] Random Damage Table: -2 = 3.125%, -1 = 3.125%, +0 = 68.75%, +1 = 9.375%, +2 = 9.375%, +3 = 6.25%}} | ||
|dizzy= | |dizzy= 10~16 | ||
|dizzytime= | |dizzytime= 80 | ||
|cancel = | |cancel = None | ||
|guard = Mid | |guard = Mid | ||
|startup= | |startup= 7 | ||
|active= | |active= 8 | ||
|recovery= 23 | |recovery= 23 | ||
|total = | |total = 38 | ||
|frameAdv = - | |frameAdv = -9 | ||
|actrange = N/A | |actrange = N/A | ||
|meter = 5/4 | |meter = 5/4 | ||
|description= | |description= Similar to crouching Strong with a slightly longer hitbox and MUCH longer recovery. | ||
*Works decently as an anti-air against certain moves (e.g. T.Hawk's jumping Jab, Fei Long's jumping Jab, Blanka's jumping Jab and Strong and Claw's Dive). | |||
*Also works decently as a trade move against Honda's HHS or Shoto's Tatsus, but not as a poke due to the long recovery. | |||
*Old Zangief does a little more random damage with this move. | |||
*Works as an anti-air as | |||
}} | }} | ||
}} | }} | ||
<span class="mw-customtoggle-crhp" style="color: cyan">Click to toggle detailed hitbox data.</span> | <span class="mw-customtoggle-crhp" style="color: cyan">'''Click to toggle detailed hitbox data.'''</span> | ||
<div class="mw-collapsible mw-collapsed" id="mw-customcollapsible-crhp"> | <div class="mw-collapsible mw-collapsed" id="mw-customcollapsible-crhp"> | ||
{{STDiagramHeader}} | {{STDiagramHeader}} | ||
{{STDiagramCell|}} |{{STDiagramImageCell| 1 | | {{STDiagramCell|}} |{{STDiagramImageCell| 1 | Zangief_crstrng1%265_crfrc1%265.png}} |{{STDiagramImageCell| 1 | Zangief_crstrng2&4_crfrc2&4.png}} |{{STDiagramImageCell| 1 | Zangief_crstrng3.png}} |{{STDiagramImageCell| 1 | Zangief_crstrng2&4_crfrc2&4.png}} |{{STDiagramImageCell| 1 | Zangief_crstrng1%265_crfrc1%265.png}} | ||
|- | |- | ||
{{STDiagramCell| Frame Count}} |{{STDiagramCell| 1 + 3}} |{{STDiagramCell| 3}} |{{STDiagramCell| 8}} |{{STDiagramCell| 10}} |{{STDiagramCell| | {{STDiagramCell| Frame Count}} |{{STDiagramCell| 1 + 3}} |{{STDiagramCell| 3}} |{{STDiagramCell| 8}} |{{STDiagramCell| 10}} |{{STDiagramCell| 13}} | ||
|- | |- | ||
{{STDiagramCell| Simplified}} |{{ | {{STDiagramCell| Simplified}} |{{STDiagramCellColSpan | 2 | 7}} |{{STDiagramCell| 8}} |{{STDiagramCellColSpan | 2 | 23}} | ||
|} | |} | ||
| Line 705: | Line 629: | ||
==== <span class="invisible-header">crlk</span> ==== | |||
{{MoveData | {{MoveData | ||
| name = Crouching Short | | name = Crouching Short | ||
| input = 2LK | | input = 2LK / {{d}}+{{lk}} | ||
| subtitle = Crouching Light Kick | |||
| image = | | image = Zangief_crshrt2.png | ||
| imageSize = | | imageSize = 159x93px | ||
| caption = | | caption = All of his crouching kicks share the same animation. | ||
| data = | | data = | ||
{{AttackData-SSF2T | {{AttackData-SSF2T | ||
|damage = | |damage = {{tooltip|text=18[1]|hovertext=[1] Random Damage Table: -2 = 3.125%, -1 = 3.125%, +0 = 68.75%, +1 = 9.375%, +2 = 9.375%, +3 = 6.25%}} | ||
|dizzy= 5 | |dizzy= 0~5 | ||
|dizzytime= 40 | |dizzytime= 40 | ||
|cancel = | |cancel = Special | ||
|guard = Low | |guard = Low | ||
|startup= 4 | |startup= 4 | ||
|active= 4 | |active= 4 | ||
|recovery= | |recovery= 7 | ||
|total = | |total = 15 | ||
|frameAdv = + | |frameAdv = +2 | ||
|actrange = N/A | |actrange = N/A | ||
|meter = 2/1 | |meter = 2/1 | ||
|description= | |description= A crouching sidekick, the first of 3. | ||
* | *Zangief's best ground move to tick into Super, despite poor priority. | ||
* | *Also OK as a tick into his other grabs. | ||
*Special Cancel properties allow you to cancel this into a Lariat or Banishing Flat, but crouching Forward is better suited for that. | |||
*You can also cancel a Running Bear Grab out of this, which will usually connect but won't do much damage. | |||
*A useful footsies tool once in a while to lure your opponent into trying to punish a crouching Roundhouse, since it animates the same but recovers much quicker. | |||
}} | }} | ||
}} | }} | ||
<span class="mw-customtoggle-crlk" style="color: cyan">Click to toggle detailed hitbox data.</span> | <span class="mw-customtoggle-crlk" style="color: cyan">'''Click to toggle detailed hitbox data.'''</span> | ||
<div class="mw-collapsible mw-collapsed" id="mw-customcollapsible-crlk"> | <div class="mw-collapsible mw-collapsed" id="mw-customcollapsible-crlk"> | ||
{{STDiagramHeader}} | {{STDiagramHeader}} | ||
{{STDiagramCell|}} |{{STDiagramImageCell| 1 | | {{STDiagramCell|}} |{{STDiagramImageCell| 1 | Zangief_crshrt1&3_crfrwrd1&3_crrh1&4.png}} |{{STDiagramImageCell| 1 | Zangief_crshrt2.png}} |{{STDiagramImageCell| 1 | Zangief_crshrt1&3_crfrwrd1&3_crrh1&4.png}} | ||
|- | |- | ||
{{STDiagramCell| Frame Count}} |{{STDiagramCell| 1 + 3}} |{{STDiagramCell| 4}} |{{STDiagramCell| | {{STDiagramCell| Frame Count}} |{{STDiagramCell| 1 + 3}} |{{STDiagramCell| 4}} |{{STDiagramCell| 7}} | ||
|- | |- | ||
{{STDiagramCell| Simplified}} |{{STDiagramCell| 4}} |{{STDiagramCell| 4}} |{{ | {{STDiagramCell| Simplified}} |{{STDiagramCell| 4}} |{{STDiagramCell| 4}} |{{STDiagramCell| 7}} | ||
|} | |} | ||
| Line 748: | Line 675: | ||
==== <span class="invisible-header">crmk</span> ==== | |||
{{MoveData | {{MoveData | ||
| name = Crouching Forward | | name = Crouching Forward | ||
| input = 2MK | | input = 2MK / {{d}}+{{mk}} | ||
| subtitle = Crouching Medium Kick | |||
| image = | | image = Zangief_crfrwrd2.png | ||
| imageSize = | | imageSize = 159x93px | ||
| caption = | | caption = | ||
| data = | | data = | ||
{{AttackData-SSF2T | {{AttackData-SSF2T | ||
|damage = | |damage = {{tooltip|text=24[1]|hovertext=[1] Random Damage Table: -2 = 3.125%, -1 = 3.125%, +0 = 68.75%, +1 = 9.375%, +2 = 9.375%, +3 = 6.25%}} | ||
|dizzy= 5~11 | |dizzy= 5~11 | ||
|dizzytime= 60 | |dizzytime= 60 | ||
|cancel = Special | |cancel = Special | ||
|guard = Low | |guard = Low | ||
|startup= 4 | |startup= 4 | ||
| Line 770: | Line 697: | ||
|actrange = N/A | |actrange = N/A | ||
|meter = 4/3 | |meter = 4/3 | ||
|description= | |description= Another crouching side kick. | ||
* | *Better damage and priority than crouching Short, but longer recovery. | ||
* | *Has Special Cancel properties just like the former so you can cancel into Lariat, Banishing Flat, or Running Bear Grab. Cross-up fierce Body Press, crouching Forward into Quick Lariat is a particularly hot combo. | ||
* | *Can also be used as a tick into SPD or Atomic Suplex, but you usually have better options for that, unless you're looking for the medium blockstun. | ||
}} | }} | ||
}} | }} | ||
<span class="mw-customtoggle-crmk" style="color: cyan">Click to toggle detailed hitbox data.</span> | <span class="mw-customtoggle-crmk" style="color: cyan">'''Click to toggle detailed hitbox data.'''</span> | ||
<div class="mw-collapsible mw-collapsed" id="mw-customcollapsible-crmk"> | <div class="mw-collapsible mw-collapsed" id="mw-customcollapsible-crmk"> | ||
{{STDiagramHeader}} | {{STDiagramHeader}} | ||
{{STDiagramCell|}} |{{STDiagramImageCell| 1 | | {{STDiagramCell|}} |{{STDiagramImageCell| 1 | Zangief_crshrt1&3_crfrwrd1&3_crrh1&4.png}} |{{STDiagramImageCell| 1 | Zangief_crfrwrd2.png}} |{{STDiagramImageCell| 1 | Zangief_crshrt1&3_crfrwrd1&3_crrh1&4.png}} | ||
|- | |- | ||
{{STDiagramCell| Frame Count}} |{{STDiagramCell| 1 + | {{STDiagramCell| Frame Count}} |{{STDiagramCell| 1 + 3}} |{{STDiagramCell| 6}} |{{STDiagramCell| 9}} | ||
|- | |- | ||
{{STDiagramCell| Simplified}} |{{ | {{STDiagramCell| Simplified}} |{{STDiagramCell| 4}} |{{STDiagramCell| 6}} |{{STDiagramCell| 9}} | ||
|} | |} | ||
| Line 792: | Line 719: | ||
==== <span class="invisible-header">crhk</span> ==== | |||
{{MoveData | {{MoveData | ||
| name = Crouching Roundhouse | | name = Crouching Roundhouse | ||
| input = 2HK | | input = 2HK / {{d}}+{{hk}} | ||
| subtitle = Crouching Heavy Kick | |||
| image = | | image = Zangief_crrh2.png | ||
| imageSize = | | imageSize = 165x93px | ||
| caption = | | caption = | ||
| data = | | data = | ||
{{AttackData-SSF2T | {{AttackData-SSF2T | ||
|damage = | |damage = {{tooltip|text=30[1]|hovertext=[1] Random Damage Table: -2 = 3.125%, -1 = 3.125%, +0 = 68.75%, +1 = 9.375%, +2 = 9.375%, +3 = 6.25%}} | ||
|dizzy= 5~11 | |dizzy= 5~11 | ||
|dizzytime= 130 | |dizzytime= 130 | ||
|cancel = | |cancel = None | ||
|guard = Low | |guard = Low | ||
|startup = | |startup = 5 | ||
|active = | |active = 8 | ||
|recovery = | |recovery = 13 | ||
|total = | |total = 26 | ||
|frameAdv = | |frameAdv = +1/Down | ||
|actrange = N/A | |actrange = N/A | ||
|meter = 5/4 | |meter = 5/4 | ||
|description= | |description= Zangief's sweep, same animation as his crouching Short and Roundhouse but with longer recovery. | ||
* | *A pretty awesome move, with good recovery for a sweep and deceptive reach. | ||
*Can be linked into well, recovers fairly quickly, does good damage, has decent recovery, not to mention the knockdown on hit which can lead into ticking mix-ups or safe jumps. | |||
* | *Very important in tick mix-ups alongside far standing Short: Both can be used to punish the enemy for standing up, which is often necessary for inputting invincible reversal specials. | ||
* | *Always going for an SPD at max range can get predicable, so this is a good mix-up. | ||
* | *Old Zangief can Special Cancel this move, which is a gimmick at best. He also does a little more random damage. | ||
* | |||
}} | }} | ||
}} | }} | ||
| Line 828: | Line 754: | ||
{{STDiagramHeader}} | {{STDiagramHeader}} | ||
{{STDiagramCell|}} |{{STDiagramImageCell| 1 | | {{STDiagramCell|}} |{{STDiagramImageCell| 1 | Zangief_crshrt1&3_crfrwrd1&3_crrh1&4.png}} |{{STDiagramImageCell| 1 | Zangief_crrh2.png}} |{{STDiagramImageCell| 1 | Zangief_crrh3.png}} |{{STDiagramImageCell| 1 | Zangief_crshrt1&3_crfrwrd1&3_crrh1&4.png}} | ||
|- | |- | ||
{{STDiagramCell| Frame Count}} |{{STDiagramCell| 1 + | {{STDiagramCell| Frame Count}} |{{STDiagramCell| 1 + 4}} |{{STDiagramCell| 8}} |{{STDiagramCell| 12}} |{{STDiagramCell| 1}} | ||
|- | |- | ||
{{STDiagramCell| Simplified}} |{{STDiagramCell| | {{STDiagramCell| Simplified}} |{{STDiagramCell| 5}} |{{STDiagramCell| 8}} |{{STDiagramCellColSpan| 2 | 13}} | ||
|} | |} | ||
</div> | </div> | ||
===Jumping Normals=== | |||
=== | |||
===== <span class="invisible-header">njlp</span> ===== | ===== <span class="invisible-header">njlp</span> ===== | ||
{{MoveData | {{MoveData | ||
| name = | | name = Jumping Jab | ||
| input = 8LP | | input = 8LP / {{u}}+{{lp}} | ||
| subtitle = Jumping Light Punch | |||
| image = | | image = Zangief_njjab2_djjab2.png | ||
| imageSize = | | imageSize = 126x140px | ||
| caption = | | caption = First hitbox | ||
| image2 = Zangief_njjab3.png | |||
| imageSize2 = 158x114px | |||
| caption2 = Second hitbox (Neutral Jump ver.) | |||
| image3 = Zangief_djjab3.png | |||
| imageSize3 = 158x114px | |||
| caption3 = Second hitbox (Diagonal Jump ver.) | |||
| data = | | data = | ||
{{AttackData-SSF2T | {{AttackData-SSF2T | ||
|damage = | |damage = {{tooltip|text=18[1]|hovertext=[1] Random Damage Table: -2 = 3.125%, -1 = 3.125%, +0 = 68.75%, +1 = 9.375%, +2 = 9.375%, +3 = 6.25%}} | ||
|dizzy= 1~7(-2) | |dizzy= 1~7(-2) | ||
|dizzytime= 40 | |dizzytime= 40 | ||
|cancel = | |cancel = None | ||
|guard = High | |guard = High | ||
|startup = 2 | |startup = 2 | ||
|active = | |active = 11 (3/8) | ||
|recovery = | |recovery = ∞ | ||
|total = | |total = 13+∞ | ||
|frameAdv = Dependent | |frameAdv = Dependent | ||
|actrange = N/A | |actrange = N/A | ||
|meter = 2/1 | |meter = 2/1 | ||
|description= | |description= An aerial knife hand strike. The neutral and diagonal jump versions are the same, but with slightly different hitboxes. | ||
* | *Avoid the neutral jump version, since the Strong and Fierce versions are the same attack but with better damage and priority. | ||
* | *The diagonal jump version has its uses, having better vertical priority than diagonal Strong by 2 pixels, but the damage and horizontal priority/range is a lot worse, so favor Strong for air to airs. | ||
*The diagonal version can set up ticks into SPD from a little farther than diagonal jumping Short. It doesn't hit as low though, which makes it whiff vs. crouching characters (with Dee Jay being the only exception, but since he leans back during his crouch block animation it's harder to hit than Short). | |||
}} | }} | ||
}} | }} | ||
<span class="mw-customtoggle- | <span class="mw-customtoggle-jlp" style="color: cyan">'''Click to toggle detailed hitbox data.'''</span> | ||
<div class="mw-collapsible mw-collapsed" id="mw-customcollapsible- | <div class="mw-collapsible mw-collapsed" id="mw-customcollapsible-jlp"> | ||
'''Neutral Jump Version:''' | |||
{{STDiagramHeader}} | |||
{{STDiagramCell|}} |{{STDiagramImageCell| 1 | Zangief_njjab1_djjab1_njstrng1_djstrng1_njfrc1.png}} |{{STDiagramImageCell| 1 | Zangief_njjab2_djjab2.png}} |{{STDiagramImageCell| 1 | Zangief_njjab3.png}} |{{STDiagramImageCell| 1 | Zangief_njjab4_djjab4_njstrng4_djstrng4_njfrc4.png}} | |||
|- | |||
{{STDiagramCell| Frame Count}} |{{STDiagramCell| 2}} |{{STDiagramCell| 3}} |{{STDiagramCell| 8}} |{{STDiagramCell| ∞}} | |||
|- | |||
{{STDiagramCell | Simplified}} |{{STDiagramCell| 2}} |{{STDiagramCellColSpan| 2 | 11}} |{{STDiagramCell| ∞}} | |||
|} | |||
'''Diagonal Jump Version:''' | |||
{{STDiagramHeader}} | {{STDiagramHeader}} | ||
{{STDiagramCell|}} |{{STDiagramImageCell| 1 | | {{STDiagramCell|}} |{{STDiagramImageCell| 1 | Zangief_njjab1_djjab1_njstrng1_djstrng1_njfrc1.png}} |{{STDiagramImageCell| 1 | Zangief_njjab2_djjab2.png}} |{{STDiagramImageCell| 1 | Zangief_djjab3.png}} |{{STDiagramImageCell| 1 | Zangief_njjab4_djjab4_njstrng4_djstrng4_njfrc4.png}} | ||
|- | |- | ||
{{STDiagramCell| Frame Count}} |{{STDiagramCell| 2}} |{{STDiagramCell| ∞}} | {{STDiagramCell| Frame Count}} |{{STDiagramCell| 2}} |{{STDiagramCell| 3}} |{{STDiagramCell| 8}} |{{STDiagramCell| ∞}} | ||
|- | |||
{{STDiagramCell | Simplified}} |{{STDiagramCell| 2}} |{{STDiagramCellColSpan| 2 | 11}} |{{STDiagramCell| ∞}} | |||
|} | |} | ||
| Line 883: | Line 827: | ||
===== <span class="invisible-header">njmp</span> ===== | ===== <span class="invisible-header">njmp</span> ===== | ||
{{MoveData | {{MoveData | ||
| name = | | name = Jumping Strong | ||
| input = 8MP | | input = 8MP / {{u}}+{{mp}} | ||
| subtitle = Jumping Medium Punch | |||
| image = | | image = Zangief_njstrng2_djstrng2.png | ||
| imageSize = | | imageSize = 126x145px | ||
| caption = First hitbox | |||
| image2 = Zangief_njstrng3.png | |||
| imageSize2 = 158x114px | |||
| caption2 = Second hitbox (Neutral Jump ver.) | |||
| image3 = Zangief_djstrng3.png | |||
| imageSize3 = 158x114px | |||
| caption3 = Second hitbox (Diagonal Jump ver.) | |||
| data = | | data = | ||
{{AttackData-SSF2T | {{AttackData-SSF2T | ||
|damage = 22[2] | |version = Neutral Jump | ||
|damage = {{tooltip|text=22[1]|hovertext=[1] Random Damage Table: -2 = 3.125%, -1 = 3.125%, +0 = 68.75%, +1 = 9.375%, +2 = 9.375%, +3 = 6.25%}} | |||
|dizzy= 1~7(-2) | |||
|dizzytime= 40 | |||
|cancel = None | |||
|guard = High | |||
|startup = 2 | |||
|active = 11 (3/8) | |||
|recovery = ∞ | |||
|total = 13+∞ | |||
|frameAdv = Dependent | |||
|actrange = N/A | |||
|meter = 4/3 | |||
|description= <br> | |||
}} | |||
{{AttackData-SSF2T | |||
|version = Diagonal Jump | |||
|damage = {{tooltip|text=22[1]|hovertext=[1] Random Damage Table: -2 = 3.125%, -1 = 3.125%, +0 = 68.75%, +1 = 9.375%, +2 = 9.375%, +3 = 6.25%}} | |||
|dizzy= 5~11 | |dizzy= 5~11 | ||
|dizzytime= 50 | |dizzytime= 50(+10) | ||
|cancel = | |cancel = None | ||
|guard = High | |guard = High | ||
|startup = | |startup = 2 | ||
|active = | |active = 11 (3/8) | ||
|recovery = ∞ | |recovery = ∞ | ||
|total = | |total = 13+∞ | ||
|frameAdv = Dependent | |frameAdv = Dependent | ||
|actrange = N/A | |actrange = N/A | ||
|meter = 4/3 | |meter = 4/3 | ||
|description= | |description= <br>Another aerial knife hand strike. The neutral and diagonal jump versions are again the same, but with slightly different hitboxes and stun values. | ||
*Once again, avoid the neutral jump version, since the Fierce version is the same attack but with better damage and priority. | |||
* | *The diagonal jump version is Zangief's main air-to-air option, mainly due to it being his diagonal jumping normal with the longest horizontal reach. | ||
*It's not that great, but it can beat some low priority moves like Blanka's jumping Strong, or it can be used against Claw's wall dives by anticipation, though that's very risky. | |||
*The diagonal version is the | |||
}} | }} | ||
}} | }} | ||
<span class="mw-customtoggle- | <span class="mw-customtoggle-jmp" style="color: cyan">'''Click to toggle detailed hitbox data.'''</span> | ||
<div class="mw-collapsible mw-collapsed" id="mw-customcollapsible- | <div class="mw-collapsible mw-collapsed" id="mw-customcollapsible-jmp"> | ||
'''Neutral Jump Version:''' | |||
{{STDiagramHeader}} | |||
{{STDiagramCell|}} |{{STDiagramImageCell| 1 | Zangief_njjab1_djjab1_njstrng1_djstrng1_njfrc1.png}} |{{STDiagramImageCell| 1 | Zangief_njstrng2_djstrng2.png}} |{{STDiagramImageCell| 1 | Zangief_njstrng3.png}} |{{STDiagramImageCell| 1 | Zangief_njjab4_djjab4_njstrng4_djstrng4_njfrc4.png}} | |||
|- | |||
{{STDiagramCell| Frame Count}} |{{STDiagramCell| 2}} |{{STDiagramCell| 3}} |{{STDiagramCell| 8}} |{{STDiagramCell| ∞}} | |||
|- | |||
{{STDiagramCell | Simplified}} |{{STDiagramCell| 2}} |{{STDiagramCellColSpan| 2 | 11}} |{{STDiagramCell| ∞}} | |||
|} | |||
'''Diagonal Jump Version:''' | |||
{{STDiagramHeader}} | {{STDiagramHeader}} | ||
{{STDiagramCell|}} |{{STDiagramImageCell| 1 | | {{STDiagramCell|}} |{{STDiagramImageCell| 1 | Zangief_njjab1_djjab1_njstrng1_djstrng1_njfrc1.png}} |{{STDiagramImageCell| 1 | Zangief_njstrng2_djstrng2.png}} |{{STDiagramImageCell| 1 | Zangief_djstrng3.png}} |{{STDiagramImageCell| 1 | Zangief_njjab4_djjab4_njstrng4_djstrng4_njfrc4.png}} | ||
|- | |- | ||
{{STDiagramCell| Frame Count}} |{{STDiagramCell| 2}} |{{STDiagramCell| | {{STDiagramCell| Frame Count}} |{{STDiagramCell| 2}} |{{STDiagramCell| 3}} |{{STDiagramCell| 8}} |{{STDiagramCell| ∞}} | ||
|- | |- | ||
{{STDiagramCell| Simplified}} |{{ | {{STDiagramCell | Simplified}} |{{STDiagramCell| 2}} |{{STDiagramCellColSpan| 2 | 11}} |{{STDiagramCell| ∞}} | ||
|} | |} | ||
</div> | </div> | ||
===== <span class="invisible-header">njhp</span> ===== | ===== <span class="invisible-header">njhp</span> ===== | ||
{{MoveData | {{MoveData | ||
| name = Neutral Jumping Fierce | | name = Neutral Jumping Fierce | ||
| input = 8HP | | input = 8HP / {{u}}+{{hp}} | ||
| subtitle = Neutral Jumping Heavy Punch | |||
| image = | | image = Zangief_njfrc2.png | ||
| imageSize = | | imageSize = 126x146px | ||
| caption = | |||
| image2 = Zangief_njfrc3.png | |||
| imageSize2 = 165x114px | |||
| caption2 = | |||
| data = | | data = | ||
{{AttackData-SSF2T | {{AttackData-SSF2T | ||
|damage = | |damage = {{tooltip|text=30[1]|hovertext=[1] Random Damage Table: -2 = 3.125%, -1 = 3.125%, +0 = 68.75%, +1 = 9.375%, +2 = 9.375%, +3 = 6.25%}} | ||
|dizzy= 11~17(-1) | |dizzy= 11~17(-1) | ||
|dizzytime= 60(+20) | |dizzytime= 60(+20) | ||
|cancel = | |cancel = None | ||
|guard = High | |guard = High | ||
|startup = | |startup = 2 | ||
|active = | |active = 11 (3/8) | ||
|recovery = ∞ | |recovery = ∞ | ||
|total = | |total = 13+∞ | ||
|frameAdv = Dependent | |frameAdv = Dependent | ||
|actrange = N/A | |actrange = N/A | ||
|meter = 5/4 | |meter = 5/4 | ||
|description= | |description= Zangief's best aerial hand knife strike. | ||
* | *Has the best damage and priority with the same frame data as his other neutral jumping punches. | ||
* | *Good enough to beat Claw's Wall Dive (it may trade if Claw does it late) and Cammy's Cannon Spike (if done from far enough). | ||
* | *Old Zangief does a little more random damage with this move. | ||
}} | }} | ||
}} | }} | ||
<span class="mw-customtoggle-njhp" style="color: cyan">Click to toggle detailed hitbox data.</span> | <span class="mw-customtoggle-njhp" style="color: cyan">'''Click to toggle detailed hitbox data.'''</span> | ||
<div class="mw-collapsible mw-collapsed" id="mw-customcollapsible-njhp"> | <div class="mw-collapsible mw-collapsed" id="mw-customcollapsible-njhp"> | ||
{{STDiagramHeader}} | {{STDiagramHeader}} | ||
{{STDiagramCell|}} |{{STDiagramImageCell| 1 | | {{STDiagramCell|}} |{{STDiagramImageCell| 1 | Zangief_njjab1_djjab1_njstrng1_djstrng1_njfrc1.png}} |{{STDiagramImageCell| 1 | Zangief_njfrc2.png}} |{{STDiagramImageCell| 1 | Zangief_njfrc3.png}} |{{STDiagramImageCell| 1 | Zangief_njjab4_djjab4_njstrng4_djstrng4_njfrc4.png}} | ||
|- | |- | ||
{{STDiagramCell| Frame Count}} |{{STDiagramCell| 2}} |{{STDiagramCell| | {{STDiagramCell| Frame Count}} |{{STDiagramCell| 2}} |{{STDiagramCell| 3}} |{{STDiagramCell| 8}} |{{STDiagramCell| ∞}} | ||
|- | |- | ||
{{STDiagramCell| Simplified}} |{{ | {{STDiagramCell | Simplified}} |{{STDiagramCell| 2}} |{{STDiagramCellColSpan| 2 | 11}} |{{STDiagramCell| ∞}} | ||
|} | |} | ||
</div> | </div> | ||
===== <span class="invisible-header"> | ===== <span class="invisible-header">djhp</span> ===== | ||
{{MoveData | {{MoveData | ||
| name = | | name = Diagonal Jumping Fierce | ||
| input = | | input = 7 or 9 HP<br>{{ub}} or {{uf}}+{{hp}} | ||
| subtitle = | | subtitle = Diagonal Jumping Heavy Punch | ||
| image = | | image = Zangief_djfrc4.png | ||
| imageSize = | | imageSize = 182x105px | ||
| caption = | |||
| data = | | data = | ||
{{AttackData-SSF2T | {{AttackData-SSF2T | ||
|damage = 14[2] | |damage = {{tooltip|text=30[1]|hovertext=[1] Random Damage Table: -2 = 3.125%, -1 = 3.125%, +0 = 68.75%, +1 = 9.375%, +2 = 9.375%, +3 = 6.25%}} | ||
|dizzy= 11~17(-1) | |||
|dizzytime= 60(+20) | |||
|cancel = None | |||
|guard = High | |||
|startup = 7 | |||
|active = 7 | |||
|recovery = ∞ | |||
|total = 14+∞ | |||
|frameAdv = Dependent | |||
|actrange = N/A | |||
|meter = 5/4 | |||
|description= An aerial long punch. | |||
*Zangief's main air to ground attack: great at jumping over fireballs (except against Low Tiger Shots, use diagonal Roundhouse for those), at surprise jumps and as a combo starter. | |||
*You you know your opponent will take the hit (i.e. you just jumped over a fireball) you can follow into an SPD for massive damage, or if you believe they'll block it you can walk up and SPD. If they don't expect this it can be very hard to escape, due to this move's long blockstun. | |||
*Old Zangief does a little more random damage with this move. | |||
}} | |||
}} | |||
<span class="mw-customtoggle-djhp" style="color: cyan">'''Click to toggle detailed hitbox data.'''</span> | |||
<div class="mw-collapsible mw-collapsed" id="mw-customcollapsible-djhp"> | |||
{{STDiagramHeader}} | |||
{{STDiagramCell|}} |{{STDiagramImageCell| 1 | Zangief_djfrc1&7.png}} |{{STDiagramImageCell| 1 | Zangief_djfrc2&6.png}} |{{STDiagramImageCell| 1 | Zangief_djfrc3&5.png}} |{{STDiagramImageCell| 1 | |{{STDiagramImageCell| 1 | Zangief_djfrc4.png}}}} |{{STDiagramImageCell| 1 | Zangief_djfrc3&5.png}} |{{STDiagramImageCell| 1 | Zangief_djfrc2&6.png}} |{{STDiagramImageCell| 1 | Zangief_djfrc1&7.png}} | |||
|- | |||
{{STDiagramCell| Frame Count}} |{{STDiagramCell| 1}} |{{STDiagramCell| 3}} |{{STDiagramCell| 3}} |{{STDiagramCell| 7}} |{{STDiagramCell| 3}} |{{STDiagramCell| 3}} |{{STDiagramCell| ∞}} | |||
|- | |||
{{STDiagramCell| Simplified}} |{{STDiagramCellColSpan| 3 | 7}} |{{STDiagramCell| 7}} |{{STDiagramCellColSpan| 3 | ∞}} | |||
|} | |||
</div> | |||
===== <span class="invisible-header">jlk</span> ===== | |||
{{MoveData | |||
| name = Jumping Short | |||
| input = 8LK / {{u}}+{{lk}} | |||
| subtitle = Jumping Light Kick | |||
| image = Zangief_njshrt2.png | |||
| imageSize = 179x112px | |||
| caption = Neutral Jump version | |||
| image2 = Zangief_djshrt2_djfrwrd2.png | |||
| imageSize2 = 179x112px | |||
| caption2 = Diagonal Jump version | |||
| data = | |||
{{AttackData-SSF2T | |||
|version = Neutral Jump | |||
|damage = {{tooltip|text=18[1]|hovertext=[1] Random Damage Table: -2 = 3.125%, -1 = 3.125%, +0 = 68.75%, +1 = 9.375%, +2 = 9.375%, +3 = 6.25%}} | |||
|dizzy= 1~7(-2) | |||
|dizzytime= 40 | |||
|cancel = None | |||
|guard = High | |||
|startup = 3 | |||
|active = ∞ | |||
|recovery = N/A | |||
|total = 3+∞ | |||
|frameAdv = Dependent | |||
|actrange = N/A | |||
|meter = 2/1 | |||
|description= <br> | |||
}} | |||
{{AttackData-SSF2T | |||
|version = Diagonal Jump | |||
|damage = {{tooltip|text=18[1]|hovertext=[1] Random Damage Table: -2 = 3.125%, -1 = 3.125%, +0 = 68.75%, +1 = 9.375%, +2 = 9.375%, +3 = 6.25%}} | |||
|dizzy= 1~7(-2) | |dizzy= 1~7(-2) | ||
|dizzytime= 40 | |dizzytime= 40 | ||
|cancel = | |cancel = None | ||
|guard = High | |guard = High | ||
|startup = 3 | |startup = 3 | ||
|active = | |active = 16 | ||
|recovery = ∞ | |recovery = ∞ | ||
|total = | |total = 19+∞ | ||
|frameAdv = Dependent | |frameAdv = Dependent | ||
|actrange = N/A | |actrange = N/A | ||
|meter = 2/1 | |meter = 2/1 | ||
|description= | |description= Zangief does a weak two foot kick. The neutral jump version lasts the whole jump and has worse vertical priority. | ||
* | *The neutral jump version is OK for tick throwing if you ever find yourself within range and with enough momentum, but this is a rare occurence. | ||
* | *The diagonal jump version is Zangief's main air tick move, with good range and great SPD timing (it's the same whether or not the move hits or is blocked since aerial lights have equal blockstun and hitstun). | ||
*If your opponent can consistently reverse these tick attempts, use Forward or Roundhouse instead, since they animate the same it'll be hard to tell the difference until it hits. Keep in mind this is only effective if your opponent actually blocks it (remember: aerial blockstun is gradual but aerial hitstun is constant). | |||
*Also the best move to be used on safe jumps and can be used as an instant overhead. | |||
}} | }} | ||
}} | }} | ||
<span class="mw-customtoggle- | <span class="mw-customtoggle-jlk" style="color: cyan">'''Click to toggle detailed hitbox data.'''</span> | ||
<div class="mw-collapsible mw-collapsed" id="mw-customcollapsible- | <div class="mw-collapsible mw-collapsed" id="mw-customcollapsible-jlk"> | ||
*'''Neutral Jump Version''': | |||
{{STDiagramHeader}} | {{STDiagramHeader}} | ||
{{STDiagramCell|}} |{{STDiagramImageCell| 1 | | {{STDiagramCell|}} |{{STDiagramImageCell| 1 | Zangief_njshrt1_djshrt1_njfrwrd1_djfrwrd1_njrh1.png}} |{{STDiagramImageCell| 1 | Zangief_njshrt2.png}} | ||
|- | |- | ||
{{STDiagramCell| Frame Count}} |{{STDiagramCell| 3 | {{STDiagramCell| Frame Count}}|{{STDiagramCell| 3}} |{{STDiagramCell| ∞}} | ||
|} | |} | ||
*'''Diagonal Jump Version''': | |||
{{STDiagramHeader}} | |||
{{STDiagramCell|}} |{{STDiagramImageCell| 1 | Zangief_njshrt1_djshrt1_njfrwrd1_djfrwrd1_njrh1.png}} |{{STDiagramImageCell| 1 | Zangief_djshrt2_djfrwrd2.png}} |{{STDiagramImageCell| 1 | Zangief_djshrt3_njfrwrd3_djfrwrd3_njrh3.png}} |{{STDiagramImageCell| 1 | Zangief_djshrt4_njfrwrd4_djfrwrd4_njrh4_djrh4.png}} |{{STDiagramImageCell| 1 | Zangief_djshrt5_njfrwrd5_djfrwrd5_njrh5_djrh5.png}} |{{STDiagramImageCell| 1 | Zangief_djshrt6_njfrwrd6_djfrwrd6_njrh6_djrh6.png}} | |||
|- | |||
{{STDiagramCell| Frame Count}} |{{STDiagramCell| 3}} |{{STDiagramCell| 16}} |{{STDiagramCell| 8}} |{{STDiagramCell| 6}} |{{STDiagramCell| 4}} |{{STDiagramCell| ∞}} | |||
|- | |||
{{STDiagramCell| Simplified}} |{{STDiagramCell| 3}} |{{STDiagramCell| 16}} |{{STDiagramCellColSpan| 4 | ∞}} | |||
|} | |||
</div> | </div> | ||
===== <span class="invisible-header">njmk</span> ===== | ===== <span class="invisible-header">njmk</span> ===== | ||
{{MoveData | {{MoveData | ||
| name = | | name = Jumping Forward | ||
| input = 8MK | | input = 8MK<br>{{u}}+{{mk}} | ||
| subtitle = Jumping Medium Kick | |||
| image = | | image = Zangief_njfrwrd2.png | ||
| imageSize = | | imageSize = 182x112px | ||
| caption = Neutral Jump version | |||
| image2 = Zangief_djshrt2_djfrwrd2.png | |||
| imageSize2 = 179x112px | |||
| caption2 = Diagonal Jump version | |||
| data = | | data = | ||
{{AttackData-SSF2T | {{AttackData-SSF2T | ||
|damage = 22[2 | |damage = {{tooltip|text=22[1]|hovertext=[1] Random Damage Table: -2 = 3.125%, -1 = 3.125%, +0 = 68.75%, +1 = 9.375%, +2 = 9.375%, +3 = 6.25%}} | ||
|dizzy= 5~11 | |dizzy= 5~11 | ||
|dizzytime= 50 | |dizzytime= 50(+10) | ||
|cancel = None | |cancel = None | ||
|guard = High | |guard = High | ||
|startup = | |startup = 3 | ||
|active = | |active = 16 | ||
|recovery = ∞ | |recovery = ∞ | ||
|total = | |total = 19+∞ | ||
|frameAdv = Dependent | |frameAdv = Dependent | ||
|actrange = N/A | |actrange = N/A | ||
|meter = 4/3 | |meter = 4/3 | ||
|description= | |description= Another two foot aerial kick. | ||
* | *The neutral jump version is again outclassed by neutral jump Roundhouse. | ||
*Can be used | *The diagonal jump version has the same animation and hurtboxes as the Short version, with more damage and stun. | ||
*Can be used as a mix-up when air ticking with the Short version, but it's not as efficient due to the difference on hit and block stuns (i.e. you will have to know beforehand if it will hit or be blocked). | |||
*Also his best move as an [https://wiki.supercombo.gg/w/Super_Street_Fighter_2_Turbo/Zangief#Instant_Overheads instant overhead]. | |||
}} | }} | ||
}} | }} | ||
<span class="mw-customtoggle- | <span class="mw-customtoggle-jmk" style="color: cyan">'''Click to toggle detailed hitbox data.'''</span> | ||
<div class="mw-collapsible mw-collapsed" id="mw-customcollapsible- | <div class="mw-collapsible mw-collapsed" id="mw-customcollapsible-jmk"> | ||
*'''Neutral Jump Version''': | |||
{{STDiagramHeader}} | {{STDiagramHeader}} | ||
{{STDiagramCell|}} |{{STDiagramImageCell| 1 | | {{STDiagramCell|}} |{{STDiagramImageCell| 1 | Zangief_njshrt1_djshrt1_njfrwrd1_djfrwrd1_njrh1.png}} |{{STDiagramImageCell| 1 | Zangief_njfrwrd2.png}} |{{STDiagramImageCell| 1 | Zangief_djshrt3_njfrwrd3_djfrwrd3_njrh3.png}} |{{STDiagramImageCell| 1 | Zangief_djshrt4_njfrwrd4_djfrwrd4_njrh4_djrh4.png}} |{{STDiagramImageCell| 1 | Zangief_djshrt5_njfrwrd5_djfrwrd5_njrh5_djrh5.png}} |{{STDiagramImageCell| 1 | Zangief_djshrt6_njfrwrd6_djfrwrd6_njrh6_djrh6.png}} | ||
|- | |- | ||
{{STDiagramCell| Frame Count}} |{{STDiagramCell| | {{STDiagramCell| Frame Count}} |{{STDiagramCell| 3}} |{{STDiagramCell| 16}} |{{STDiagramCell| 8}} |{{STDiagramCell| 6}} |{{STDiagramCell| 4}} |{{STDiagramCell| ∞}} | ||
|- | |- | ||
{{STDiagramCell| Simplified}} |{{STDiagramCell| | {{STDiagramCell| Simplified}} |{{STDiagramCell| 3}} |{{STDiagramCell| 16}} |{{STDiagramCellColSpan| 4 | ∞}} | ||
|} | |||
*'''Diagonal Jump Version''': | |||
{{STDiagramHeader}} | |||
{{STDiagramCell|}} |{{STDiagramImageCell| 1 | Zangief_njshrt1_djshrt1_njfrwrd1_djfrwrd1_njrh1.png}} |{{STDiagramImageCell| 1 | Zangief_djfrwrd2.png}} |{{STDiagramImageCell| 1 | Zangief_djshrt3_njfrwrd3_djfrwrd3_njrh3.png}} |{{STDiagramImageCell| 1 | Zangief_djshrt4_njfrwrd4_djfrwrd4_njrh4_djrh4.png}} |{{STDiagramImageCell| 1 | Zangief_djshrt5_njfrwrd5_djfrwrd5_njrh5_djrh5.png}} |{{STDiagramImageCell| 1 | Zangief_djshrt6_njfrwrd6_djfrwrd6_njrh6_djrh6.png}} | |||
|- | |||
{{STDiagramCell| Frame Count}} |{{STDiagramCell| 3}} |{{STDiagramCell| 16}} |{{STDiagramCell| 8}} |{{STDiagramCell| 6}} |{{STDiagramCell| 4}} |{{STDiagramCell| ∞}} | |||
|- | |||
{{STDiagramCell| Simplified}} |{{STDiagramCell| 3}} |{{STDiagramCell| 16}} |{{STDiagramCellColSpan| 4 | ∞}} | |||
|} | |} | ||
| Line 1,043: | Line 1,123: | ||
===== <span class="invisible-header"> | ===== <span class="invisible-header">jhk</span> ===== | ||
{{MoveData | {{MoveData | ||
| name = | | name = Jumping Roundhouse | ||
| input = 8HK | | input = 8HK / {{u}}+{{hk}} | ||
| subtitle = Jumping Heavy Kick | |||
| image = | | image = Zangief_njrh2.png | ||
| imageSize = | | imageSize = 198x112px | ||
| caption | | caption = Neutral Jump ver. | ||
| image2 = | | image2 = Zangief_djrh2.png | ||
| imageSize2 = | | imageSize2 = 181x112px | ||
| caption2 | | caption2 = Diagonal Jump ver. | ||
| data = | | data = | ||
{{AttackData-SSF2T | {{AttackData-SSF2T | ||
|damage = | |damage = {{tooltip|text=30[1]|hovertext=[1] Random Damage Table: -2 = 3.125%, -1 = 3.125%, +0 = 68.75%, +1 = 9.375%, +2 = 9.375%, +3 = 6.25%}} | ||
|dizzy= 11~17(-1) | |dizzy= 11~17 (-1) | ||
|dizzytime= 60(+20) | |dizzytime= 60(+20) | ||
|cancel = | |cancel = None | ||
|guard = | |guard = Mid | ||
|startup = | |startup = 3 | ||
|active = 8 | |active = 8 | ||
|recovery = ∞ | |recovery = ∞ | ||
|total = | |total = 11+∞ | ||
|frameAdv = Dependent | |frameAdv = Dependent | ||
|actrange = N/A | |actrange = N/A | ||
|meter = 5/4 | |meter = 5/4 | ||
|description= | |description= One more two foot aerial kick. | ||
*The | *The neutral jump version has awesome range compared to neutral jump Short and Forward, making it his best neutral jump kick. | ||
* | *Has about the same range as neutral jump Fierce with less priority, but it hits lower which allows Zangief to beat some low moves (e.g. Blanka's slide). | ||
* | *His startup hurtboxes are a lot smaller compared to his hurtboxes during his active frames, making this very good for trading. | ||
*The diagonal jump version may be a bad move for trading (due to the premature projected hurtbox during startup) it's great for ''shenanigans'': whiff it on purpose and do an SPD right when Zangief lands. This technique is known as the ''diet screw'' in Japan, and it only works with Roundhouse since his hurtbox during the first recovery animation is much smaller than his other jumping kicks. | |||
*This version can also be used as an [https://wiki.supercombo.gg/w/Super_Street_Fighter_2_Turbo/Zangief#Instant_Overheads instant overhead], but the timing is much more strict than the other kicks and it's impossible to perform against a significant chunk of the cast, so it's not very practical. You should only favor it over Forward when fighting Dee Jay, since he has the tallest crouching hurtbox in the game, making Roundhouse much more viable. | |||
*Note that this move has 2px less horizontal range than diagonal jumping Fierce, but it also hits 7px lower, making it the best move to use against Low Tiger Shot. Against other projectiles, favor diagonal jumping Fierce. | |||
*Both versions are very good moves for anticipating jump ins thanks to the fast startup. | |||
*Old Zangief does a little more random damage with both versions. | |||
}} | }} | ||
}} | }} | ||
<span class="mw-customtoggle-njhk" style="color: cyan">Click to toggle detailed hitbox data.</span> | <span class="mw-customtoggle-njhk" style="color: cyan">'''Click to toggle detailed hitbox data.'''</span> | ||
<div class="mw-collapsible mw-collapsed" id="mw-customcollapsible-njhk"> | <div class="mw-collapsible mw-collapsed" id="mw-customcollapsible-njhk"> | ||
*'''Neutral Jump Version''': | |||
{{STDiagramHeader}} | |||
{{STDiagramCell|}} |{{STDiagramImageCell| 1 | Zangief_njshrt1_djshrt1_njfrwrd1_djfrwrd1_njrh1.png}} |{{STDiagramImageCell| 1 | Zangief_njrh2.png}} |{{STDiagramImageCell| 1 | Zangief_djshrt3_njfrwrd3_djfrwrd3_njrh3.png}} |{{STDiagramImageCell| 1 | Zangief_djshrt4_njfrwrd4_djfrwrd4_njrh4_djrh4.png}} |{{STDiagramImageCell| 1 | Zangief_djshrt5_njfrwrd5_djfrwrd5_njrh5_djrh5.png}} |{{STDiagramImageCell| 1 | Zangief_djshrt6_njfrwrd6_djfrwrd6_njrh6_djrh6.png}} | |||
|- | |||
{{STDiagramCell| Frame Count}} |{{STDiagramCell| 3}} |{{STDiagramCell| 8}} |{{STDiagramCell| 8}} |{{STDiagramCell| 6}} |{{STDiagramCell| 4}} |{{STDiagramCell| ∞}} | |||
|- | |||
{{STDiagramCell| Simplified}} |{{STDiagramCell| 3}} |{{STDiagramCell| 8}} |{{STDiagramCellColSpan| 4 | ∞}} | |||
|} | |||
*'''Diagonal Jump Version''': | |||
{{STDiagramHeader}} | {{STDiagramHeader}} | ||
{{STDiagramCell|}} |{{STDiagramImageCell| 1 | | {{STDiagramCell|}} |{{STDiagramImageCell| 1 | Zangief_djrh1.png}} |{{STDiagramImageCell| 1 | Zangief_djrh2.png}} |{{STDiagramImageCell| 1 | Zangief_djrh3.png}} |{{STDiagramImageCell| 1 | Zangief_djshrt4_njfrwrd4_djfrwrd4_njrh4_djrh4.png}} |{{STDiagramImageCell| 1 | Zangief_djshrt5_njfrwrd5_djfrwrd5_njrh5_djrh5.png}} |{{STDiagramImageCell| 1 | Zangief_djshrt6_njfrwrd6_djfrwrd6_njrh6_djrh6.png}} | ||
|- | |- | ||
{{STDiagramCell| Frame Count}} |{{STDiagramCell| | {{STDiagramCell| Frame Count}} |{{STDiagramCell| 3}} |{{STDiagramCell| 8}} |{{STDiagramCell| 8}} |{{STDiagramCell| 6}} |{{STDiagramCell| 4}} |{{STDiagramCell| ∞}} | ||
|- | |- | ||
{{STDiagramCell| Simplified}} |{{STDiagramCell| | {{STDiagramCell| Simplified}} |{{STDiagramCell| 3}} |{{STDiagramCell| 8}} |{{STDiagramCellColSpan| 4 | ∞}} | ||
|} | |} | ||
</div> | </div> | ||
===== <span class="invisible-header"> | |||
===Command Normals=== | |||
===== <span class="invisible-header">Headbutt</span> ===== | |||
{{MoveData | {{MoveData | ||
| name = | | name = Headbutt | ||
| input = | | input ={{b}} or {{f}} + {{mp}} or {{hp}}<br>4 or 6 + MP or HP | ||
| subtitle = | | subtitle = Hop | ||
| image = | | image = Zangief_hop7.png | ||
| imageSize = | | imageSize = 127x115px | ||
| caption | | caption = | ||
| data = | | data = | ||
{{AttackData-SSF2T | {{AttackData-SSF2T | ||
|damage = | |version = {{mp}} | ||
|dizzy= 1~7 | |damage = {{tooltip|text=24[0]|hovertext=[0] Random Damage Table: -2 = 3.125%, -1 = 3.125%, +0 = 78.125%, +1 = 6.25%, +2 = 6.25%, +3 = 3.125%}} | ||
|dizzytime= | |dizzy= 1~7 | ||
|cancel = | |dizzytime= 70 | ||
|guard = | |cancel = None | ||
|guard = Mid | |||
|startup = 15 | |||
|active = 8 | |||
|recovery = 17 | |||
|total = 40 | |||
|frameAdv = Dependent | |||
|actrange = N/A | |actrange = N/A | ||
|startup = | |meter = 4/3 | ||
|active = | |description= <br> | ||
|recovery = | }} | ||
|total = | {{AttackData-SSF2T | ||
|version = {{hp}} | |||
|damage = {{tooltip|text=26[1]|hovertext=[1] Random Damage Table: -2 = 3.125%, -1 = 3.125%, +0 = 68.75%, +1 = 9.375%, +2 = 9.375%, +3 = 6.25%}} | |||
|dizzy= 1~7 | |||
|dizzytime= 70 | |||
|cancel = None | |||
|guard = Mid | |||
|startup = 15 | |||
|active = 10 | |||
|recovery = 18 | |||
|total = 43 | |||
|frameAdv = Dependent | |frameAdv = Dependent | ||
|meter = | |actrange = N/A | ||
|description= | |meter = 5/4 | ||
* | |description= Zangief does a stupid little hop into a headbutt. | ||
*It can | *Has no range, beats just about nothing and has a long recovery, making it just about useless, often coming out when you mistime a strong throw or try to use standing Strong as a poke. | ||
* | *Was likely meant to be a way for Zangief to hop over lows, but it's not very good at that. It can avoid Shoto's crouching Roundhouse and Honda's long range sweep reliably though. | ||
*The strong version has less attacking frames and momentum, but also less recovery. If you're going to try to use this move in footsies, against all odds, use the Strong version, since Fierce's recovery makes it pretty much unusable. | |||
*If you somehow happen to land the Strong version, do a command grab right when Zangief lands. | |||
*The only real use for this move is an easy and fast way to land a Super against a dizzied opponent. | |||
*This move also has two interesting properties: It can be used to hop over Low Tiger Shots, but it's not really usable (i.e. the timing is quite strict, and it only really works against the fast ones) and you can use it to [https://wiki.supercombo.gg/w/Super_Street_Fighter_2_Turbo/Zangief#Corpse_Hopping hop over certain characters if they are crouching]. Against New Ryu, if he has Super and you knocked him down, a Fierce Headbutt from point blank and with meaty timing can avoid his reversal super in the same fashion as Claw's crouching Jab. As a plus, if he just wakes up crouching, Zangief will simply land on the other side, allowing for a command throw. | |||
}} | }} | ||
}} | }} | ||
<span class="mw-customtoggle- | |||
<div class="mw-collapsible mw-collapsed" id="mw-customcollapsible- | <span class="mw-customtoggle-headbutt" style="color: cyan">'''Click to toggle detailed hitbox data.'''</span> | ||
<div class="mw-collapsible mw-collapsed" id="mw-customcollapsible-headbutt"> | |||
*'''Strong Version''': | |||
{{STDiagramHeader}} | {{STDiagramHeader}} | ||
{{STDiagramCell|}} |{{STDiagramImageCell| 1 | | {{STDiagramCell|}} |{{STDiagramImageCell| 1 | Zangief_hop1&3&10.png}} |{{STDiagramImageCell| 1 | Zangief_hop2.png}} |{{STDiagramImageCell| 1 | Zangief_hop1&3&10.png}} |{{STDiagramImageCell| 1 | Zangief_hop4.png}} |{{STDiagramImageCell| 1 | Zangief_hop5.png}} |{{STDiagramImageCell| 1 | Zangief_hop6.png}} |{{STDiagramImageCell| 1 | Zangief_hop7.png}} |{{STDiagramImageCell| 1 | Zangief_hop8strng.png}} |{{STDiagramImageCell| 1 | Zangief_hop9.png}} |{{STDiagramImageCell| 1 | Zangief_hop1&3&10.png}} | ||
|- | |- | ||
{{STDiagramCell| Frame Count}} |{{STDiagramCell| 2}} |{{STDiagramCell| | {{STDiagramCell| Frame Count}} |{{STDiagramCell| 1 + 1}} |{{STDiagramCell| 1}} |{{STDiagramCell| 1}} |{{STDiagramCell| 2}} |{{STDiagramCell| 3}} |{{STDiagramCell| 6}} |{{STDiagramCell| 8}} |{{STDiagramCell| 8}} |{{STDiagramCell| 6}} |{{STDiagramCell| 3}} | ||
|- | |||
{{STDiagramCell| Simplified}} |{{STDiagramCellColSpan| 6 | 15}} |{{STDiagramCell| 8}} |{{STDiagramCellColSpan| 3 | 17}} | |||
|} | |||
*'''Fierce Version''': | |||
{{STDiagramHeader}} | |||
{{STDiagramCell|}} |{{STDiagramImageCell| 1 | Zangief_hop1&3&10.png}} |{{STDiagramImageCell| 1 | Zangief_hop2.png}} |{{STDiagramImageCell| 1 | Zangief_hop1&3&10.png}} |{{STDiagramImageCell| 1 | Zangief_hop4.png}} |{{STDiagramImageCell| 1 | Zangief_hop5.png}} |{{STDiagramImageCell| 1 | Zangief_hop6.png}} |{{STDiagramImageCell| 1 | Zangief_hop7.png}} |{{STDiagramImageCell| 1 | Zangief_hop8frc.png}} |{{STDiagramImageCell| 1 | Zangief_hop9.png}} |{{STDiagramImageCell| 1 | Zangief_hop1&3&10.png}} | |||
|- | |||
{{STDiagramCell| Frame Count}} |{{STDiagramCell| 1 + 1}} |{{STDiagramCell| 1}} |{{STDiagramCell| 1}} |{{STDiagramCell| 2}} |{{STDiagramCell| 3}} |{{STDiagramCell| 6}} |{{STDiagramCell| 10}} |{{STDiagramCell| 6}} |{{STDiagramCell| 9}} |{{STDiagramCell| 3}} | |||
|- | |||
{{STDiagramCell| Simplified}} |{{STDiagramCellColSpan| 6 | 15}} |{{STDiagramCell| 10}} |{{STDiagramCellColSpan| 3 | 18}} | |||
|} | |} | ||
</div> | </div> | ||
===== <span class="invisible-header"> | ===== <span class="invisible-header">Air Headbutt</span> ===== | ||
{{MoveData | {{MoveData | ||
| name = | | name = Air Headbutt | ||
| input = | | input = During Neutral Jump<br>{{u}} + {{mp}} or {{hp}}<br> 8 MP or HP | ||
| subtitle = | |||
| image = | | image = Zangief_hb2strng.png | ||
| imageSize = | | imageSize = 127x127px | ||
| caption = Strong Version | |||
| image2 = Zangief_hb2frc.png | |||
| imageSize2 = 127x135px | |||
| caption2 = Fierce Version | |||
| data = | | data = | ||
{{AttackData-SSF2T | {{AttackData-SSF2T | ||
|damage = | |version = {{mp}} | ||
|dizzy= | |damage = {{tooltip|text=26[2]|hovertext=[2] Random Damage Table: -3 = 3.125%, -2 = 3.125%, -1 = 3.125%, +0 = 46.875%, +1 = 12.5%, +2 = 15.625%, +3 = 6.25%, +4 = 9.375%}} | ||
|dizzytime= | |dizzy= 21~27 (World)<br>28~34 (JP) | ||
|cancel = | |dizzytime= 100 (World)<br>90 (JP) | ||
|cancel = None | |||
|guard = High | |guard = High | ||
|startup = 3 | |||
|startup = | |||
|active = 8 | |active = 8 | ||
|recovery = ∞ | |recovery = ∞ | ||
|total = | |total = 11+∞ | ||
|frameAdv = Dependent | |frameAdv = Dependent | ||
|actrange = N/A | |||
|meter = 4/3 | |meter = 4/3 | ||
|description= | |description= <br> | ||
}} | }} | ||
{{AttackData-SSF2T | |||
|version = {{hp}} | |||
|damage = {{tooltip|text=32[2]|hovertext=[2] Random Damage Table: -3 = 3.125%, -2 = 3.125%, -1 = 3.125%, +0 = 46.875%, +1 = 12.5%, +2 = 15.625%, +3 = 6.25%, +4 = 9.375%}} | |||
|dizzy= 21~27 (World)<br>28~34 (JP) | |||
|dizzytime= 100 (World)<br>90 (JP) | |||
|cancel = None | |||
|guard = High | |||
|startup = 3 | |||
|active = 6 | |||
|recovery = ∞ | |||
|total = 9+∞ | |||
|frameAdv = Dependent | |||
|actrange = N/A | |||
|meter = 5/4 | |||
|description= Zangief does a headbutt midair. One of the hardest moves to land in the game, likely on purpose. | |||
*This move does differing stun depending on the region your game is in. The Japanese version gives you enough stun to usually stun your opponent in 1 hit, while every other region still does a respectable amount of stun, but can't 1 hit stun. | |||
*The Fierce version has better priority and damage in exchange for less attacking frames. | |||
*If you want that instant dizy, train yourself to punish badly whiffed specials (like non jab Shoryukens and the like). | |||
*Feeling brave? Try this against Dhalsim at max range to hit his limbs. | |||
}} | }} | ||
}} | |||
<span class="mw-customtoggle-airbutt" style="color: cyan">'''Click to toggle detailed hitbox data.'''</span> | |||
<div class="mw-collapsible mw-collapsed" id="mw-customcollapsible-airbutt"> | |||
*'''Strong Version''': | |||
{{STDiagramHeader}} | {{STDiagramHeader}} | ||
{{STDiagramCell|}} |{{STDiagramImageCell| 1 | | {{STDiagramCell|}} |{{STDiagramImageCell| 1 | Zangief_hb1.png}} |{{STDiagramImageCell| 1 | Zangief_hb2strng.png}} |{{STDiagramImageCell| 1 | Zangief_hb3.png}} | ||
|- | |- | ||
{{STDiagramCell| Frame Count}} |{{STDiagramCell| | {{STDiagramCell| Frame Count}} |{{STDiagramCell| 3}} |{{STDiagramCell| 8}} |{{STDiagramCell| ∞}} | ||
|} | |||
*'''Fierce Version''': | |||
{{STDiagramHeader}} | |||
{{STDiagramCell|}} |{{STDiagramImageCell| 1 | Zangief_hb1.png}} |{{STDiagramImageCell| 1 | Zangief_hb2frc.png}} |{{STDiagramImageCell| 1 | Zangief_hb3.png}} | |||
|- | |- | ||
{{STDiagramCell| | {{STDiagramCell| Frame Count}} |{{STDiagramCell| 3}} |{{STDiagramCell| 6}} |{{STDiagramCell| ∞}} | ||
|} | |} | ||
</div> | </div> | ||
===== <span class="invisible-header"> | |||
===== <span class="invisible-header">Flying Body Press</span> ===== | |||
{{MoveData | {{MoveData | ||
| name = | | name = Flying Body Press | ||
| input = | | input = During Diagonal Jump<br>{{d}} + {{hp}} <br> 2HP | ||
| subtitle = Chest Splash | |||
| image = | | image = Zangief_splash2.png | ||
| imageSize = | | imageSize = 176x108px | ||
| caption | | caption = | ||
| data = | | data = | ||
{{AttackData-SSF2T | {{AttackData-SSF2T | ||
|damage = | |damage = {{tooltip|text=26[1]|hovertext=[1] Random Damage Table: -2 = 3.125%, -1 = 3.125%, +0 = 68.75%, +1 = 9.375%, +2 = 9.375%, +3 = 6.25%}} | ||
|dizzy= | |dizzy= 11~17(-1) | ||
|dizzytime= | |dizzytime= 60(+20) | ||
|cancel = | |cancel = None | ||
|guard = High | |guard = High | ||
|startup = | |startup = 5 | ||
|active = | |active = ∞ | ||
|recovery = | |recovery = N/A | ||
|total = | |total = 5+∞ | ||
|frameAdv = Dependent | |frameAdv = Dependent | ||
|actrange = N/A | |actrange = N/A | ||
|meter = 5/4 | |meter = 5/4 | ||
|description= | |description= Zangief does a body press with his hairy chest. | ||
* | *His only crossup move, and for that reason a vital tool in his kit. It's very important in cross-up combos or block strings into ticking. | ||
* | *Damage is a little low for a Fierce move but the priority compensates for it. | ||
*Does a poor job in air to airs, but for air to ground it does OK against some of the worse anti-airs. | |||
*Zangief's legs are invulnerable during this move, great for crossups since he can use it while being safe from certain specials (e.g. Shoryukens) when he's landing on the opposite side. | |||
*There's some funny uses for this move: against New Ryu, if he's about to die and you can anticipate a reversal, you can jump and do it late, causing the move to trade with a reversal Shoryuken for the win. It can also beat Sagat's Tiger Uppercuts if timed to hit right after the invulnerable part. Don't rely on these tactics though, as an experienced player can just delay their reversal, hitting Zangief cleanly for big damage. | |||
}} | }} | ||
}} | }} | ||
<span class="mw-customtoggle- | |||
<div class="mw-collapsible mw-collapsed" id="mw-customcollapsible- | <span class="mw-customtoggle-press" style="color: cyan">'''Click to toggle detailed hitbox data.'''</span> | ||
<div class="mw-collapsible mw-collapsed" id="mw-customcollapsible-press"> | |||
{{STDiagramHeader}} | {{STDiagramHeader}} | ||
{{STDiagramCell|}} |{{STDiagramImageCell| 1 | | {{STDiagramCell|}} |{{STDiagramImageCell| 1 | Zangief_splash1.png}} |{{STDiagramImageCell| 1 | Zangief_splash2.png}} | ||
|- | |- | ||
{{STDiagramCell| | {{STDiagramCell| Frame Count}} |{{STDiagramCell| 5}} |{{STDiagramCell| ∞}} | ||
|} | |} | ||
</div> | </div> | ||
===== <span class="invisible-header"> | ===== <span class="invisible-header">Double Knee Drop</span> ===== | ||
{{MoveData | {{MoveData | ||
| name = | | name = Double Knee Drop | ||
| input = | | input = During Diagonal Jump<br>{{d}} + {{lk}} or {{mk}}<br> 2 LK or MK | ||
| subtitle = | |||
| image = | | image = Zangief_knee2shrt.png | ||
| imageSize = | | imageSize = 117x119px | ||
| caption | | caption = Short Version | ||
| image2 = Zangief_knee2frwrd.png | |||
| imageSize2 = 116x119px | |||
| caption2 = Forward Version | |||
| data = | | data = | ||
{{AttackData-SSF2T | {{AttackData-SSF2T | ||
|damage = | |version = {{lk}} | ||
|damage = {{tooltip|text=16[1]|hovertext=[1] Random Damage Table: -2 = 3.125%, -1 = 3.125%, +0 = 68.75%, +1 = 9.375%, +2 = 9.375%, +3 = 6.25%}} | |||
|dizzy= 1~7(-2) | |dizzy= 1~7(-2) | ||
|dizzytime= 40 | |dizzytime= 40 | ||
| Line 1,230: | Line 1,404: | ||
|active = ∞ | |active = ∞ | ||
|recovery = N/A | |recovery = N/A | ||
|total = | |total = +∞ | ||
|frameAdv = Dependent | |frameAdv = Dependent | ||
|actrange = N/A | |actrange = N/A | ||
|meter = 2/1 | |meter = 2/1 | ||
|description= | |description= <br> | ||
}} | }} | ||
{{AttackData-SSF2T | {{AttackData-SSF2T | ||
|version = | |version = {{mk}} | ||
|damage = | |damage = {{tooltip|text=22[1]|hovertext=[1] Random Damage Table: -2 = 3.125%, -1 = 3.125%, +0 = 68.75%, +1 = 9.375%, +2 = 9.375%, +3 = 6.25%}} | ||
|dizzy= | |dizzy= 1~7(-2) | ||
|dizzytime= 40 | |dizzytime= 40 | ||
|cancel = None | |cancel = None | ||
|guard = High | |guard = High | ||
|startup = 7 | |||
|startup = | |active = 18 | ||
|active = | |||
|recovery = ∞ | |recovery = ∞ | ||
|total = | |total = 25+∞ | ||
|frameAdv = Dependent | |frameAdv = Dependent | ||
|actrange = N/A | |||
|meter = 4/3 | |meter = 4/3 | ||
|description= | |description= Zangief does a double knee attack in the air. | ||
* | *The short version has two main uses: It's perfect as a [https://wiki.supercombo.gg/w/Super_Street_Fighter_2_Turbo/Zangief#Safe_Jumps safe jump] attack since it's light attack that stays active the whole jump (light attacks have the same hit/blockstun) and as a tick into Super. | ||
* | *It's a good idea to mix it up with diagonal Short when going for Super just to make thenm think that you're going to tick into SPD or whatnot. When folks know that Zangief is going for a Super they may counter throw, and they tend to be successful since Zangief's Super has mediocre throw range. | ||
*The forward version is better as an air to ground tool thanks to its amazing vertical priority. It's very good against low hitting kicks and some other anti airs if timed right. Emphasis on the right timing: It's active for 18 frames, and the recovery has hurtboxes projected out of place which makes it easily punishable. | |||
*You can also use this to beat E.Honda's Headbutt, but keep in mind you will have to land on top of Honda or it will be beaten, cleanly. | |||
*This can also be used as an [https://wiki.supercombo.gg/w/Super_Street_Fighter_2_Turbo/Zangief#Instant_Overheads instant overhead] against some characters, but Zangief has better options for that. | |||
*Zangief inflicts very low dizzy with this move, so limit use for when you actually need its "anti-anti-air" priorities. | |||
*Old Zangief does more damage with both versions, for some reason. | |||
}} | }} | ||
}} | }} | ||
<span class="mw-customtoggle- | |||
<div class="mw-collapsible mw-collapsed" id="mw-customcollapsible- | <span class="mw-customtoggle-kneedrop" style="color: cyan">'''Click to toggle detailed hitbox data.'''</span> | ||
<div class="mw-collapsible mw-collapsed" id="mw-customcollapsible-kneedrop"> | |||
*'''Short Version''': | |||
{{STDiagramHeader}} | {{STDiagramHeader}} | ||
{{STDiagramCell|}} |{{STDiagramImageCell| 1 | | {{STDiagramCell|}} |{{STDiagramImageCell| 1 | Zangief_knee1short_knee1&3frwrd.png }} |{{STDiagramImageCell| 1 | Zangief_knee2shrt.png}} | ||
|- | |||
{{STDiagramCell| Frame Count}} |{{STDiagramCell| 5}} |{{STDiagramCell| ∞}} | |||
|} | |||
*'''Forward Version''': | |||
{{STDiagramHeader}} | |||
{{STDiagramCell|}} |{{STDiagramImageCell| 1 | Zangief_knee1short_knee1&3frwrd.png }} |{{STDiagramImageCell| 1 | Zangief_knee2frwrd.png}} |{{STDiagramImageCell| 1 | Zangief_knee1short_knee1&3frwrd.png }} |{{STDiagramImageCell| 1 | Zangief_knee4frwrd.png}} | |||
|- | |- | ||
{{STDiagramCell| Frame Count}} |{{STDiagramCell| | {{STDiagramCell| Frame Count}} |{{STDiagramCell| 7}} |{{STDiagramCell| 18}} |{{STDiagramCell| 6}} |{{STDiagramCell| ∞}} | ||
|- | |- | ||
{{STDiagramCell| Simplified}} |{{ | {{STDiagramCell| Simplified}} |{{STDiagramCell| 7}} |{{STDiagramCell| 18}} |{{STDiagramCellColSpan| 2 | ∞}} | ||
|} | |} | ||
</div> | </div> | ||
==Throws== | |||
Zangief can perform throws/holds with {{Icon-Capcom|mp}}, {{Icon-Capcom|hp}}, {{Icon-Capcom|mk}} and {{Icon-Capcom|hk}}. He can also perform a throw while crouching using {{Icon-Capcom|mp}} or {{Icon-Capcom|hp}}. He even has two air throws with {{Icon-Capcom|mp}}/{{Icon-Capcom|hp}} or {{Icon-Capcom|mk}}/{{Icon-Capcom|hk}}. | |||
{{MoveData | {{MoveData | ||
| name = | | name = Stomach Claw | ||
| input = | | input = Close<br> {{d}} + {{mp}} or {{hp}}<br>2 MP/HP | ||
| subtitle = | | subtitle = | ||
| image = | | image = zangief_stomclaw.png | ||
| imageSize = | | imageSize = 154x114px | ||
| caption = | | caption = | ||
| data = | | data = | ||
{{AttackData-SSF2T | {{AttackData-SSF2T | ||
|damage = 26 | |damage = 26 + 4*n | ||
|dizzy= | |dizzy= 0 | ||
|dizzytime= | |dizzytime= 0 | ||
|cancel = None | |cancel = None | ||
|guard = | |guard = Grab | ||
|startup = | |startup = 1 | ||
|active = | |active = 1 | ||
|recovery = | |recovery = Dependent | ||
|total = | |total = 2 | ||
|frameAdv | |frameAdv = N/A | ||
|actrange = 69 (from axis)<br>24 (from throwable box) | |||
| | |description= Zangief's unique crouching hold, a variation of his standing Fierce grab. | ||
|description= | *Sometimes comes out when you're trying to do a crouching Strong opke, and that's fine since this hold does more damage. It's still mediocre for a hold (Long startup on the first hit, usually hits 2 to 3 times), but it's still a great defensive move, making Zangief practically immune to low/grab mixups, since you can do both while crouching. | ||
* | *Also very good on the Dee Jay matchup: it work as an OS on his wake up, since if it whiffs, the crouching Strong that comes out instead will beat his Jackknife Maximum upkicks as well as his Rolling Sobat. | ||
* | |||
}} | }} | ||
}} | }} | ||
<span class="mw-customtoggle- | |||
<div class="mw-collapsible mw-collapsed" id="mw-customcollapsible- | |||
<span class="mw-customtoggle-crthrow" style="color: cyan">'''Click to toggle throwbox data.'''</span> | |||
<div class="mw-collapsible mw-collapsed" id="mw-customcollapsible-crthrow"> | |||
{{STDiagramHeader}} | {{STDiagramHeader}} | ||
{{STDiagramImageCell| 1 | Zangief_crthrow.png}} | |||
|} | |} | ||
</div> | |||
{{MoveData | |||
| name = Piledriver | |||
| input = Close<br> {{b}}/{{f}} + {{mp}}<br>4/6 MP | |||
| subtitle = | |||
| image = zangief_piledriver.png | |||
| imageSize = 102x92px | |||
| caption = | |||
| data = | |||
{{AttackData-SSF2T | |||
|damage = 32 | |||
|dizzy= 7~13 | |||
|dizzytime= 100 | |||
|cancel = None | |||
|guard = Grab | |||
|startup = 1 | |||
|active = 1 | |||
|recovery = Dependent | |||
|total = 2 | |||
|frameAdv = N/A | |||
|actrange = 69 (from axis)<br>24 (from throwable box) | |||
|description= A piledriver, without the spin. | |||
*Zangief's most important normal throw, alongside his crouching one. | |||
*Since Zangief sits on his opponent's head, they'll always stay in front of Zangief. | |||
*Sets up a crossup Body Press when unteched. This makes it very good against Old characters (since they can't tech throws) because you can "loop" it. It works like this: after you grab them, do a Banishing Flat, cross up Press, and now you can mix up with 0-2 crouching Jabs and then throw again. | |||
}} | |||
}} | |||
== | {{MoveData | ||
| name = Iron Claw | |||
| input = Close<br> {{b}}/{{f}} + {{hp}}<br>4/6 HP | |||
| subtitle = | |||
| image = zangief_ironclaw.png | |||
| imageSize = 126x110px | |||
| caption = | |||
| data = | |||
{{AttackData-SSF2T | |||
|damage = 26 + 4*n | |||
|dizzy= 0 | |||
|dizzytime= 0 | |||
|cancel = None | |||
|guard = Grab | |||
|startup = 1 | |||
|active = 1 | |||
|recovery = Dependent | |||
|total = 2 | |||
|frameAdv = N/A | |||
|actrange = 69 (from axis)<br>24 (from throwable box) | |||
|description= Zangief noogies his opponent's face for multiple hits. | |||
*Totally outclassed by Bite since it has more startup (i.e. it takes longer for Zangief to do the first hit), the opponent is released farther away from you and it has the same maximum theoretical amount of hits. | |||
*Don't use this on purpose. | |||
}} | |||
}} | |||
{{MoveData | {{MoveData | ||
| name = | | name = Brain Buster | ||
| input = | | input = Close<br> {{b}}/{{f}} + {{mk}}<br>4/6 MK | ||
| subtitle = | | subtitle = | ||
| image = | | image = zangief_brainbuster.png | ||
| imageSize = | | imageSize = 224x71px | ||
| caption = | | caption = | ||
| data = | | data = | ||
| Line 1,363: | Line 1,573: | ||
|total = 2 | |total = 2 | ||
|frameAdv = N/A | |frameAdv = N/A | ||
|actrange = 69 (from axis)<br>24 (from throwable box) | |||
|actrange = | |description= Zangief brings his opponent's head down to the floor, throwing them behind him. | ||
*Not as useful as Piledriver since his opponent is thrown too far for a crossup, but if you're cornered and need the opponent on the other side, here you go. | |||
|description= | |||
* | |||
}} | }} | ||
}} | }} | ||
| Line 1,375: | Line 1,581: | ||
{{MoveData | {{MoveData | ||
| name = | | name = Bite | ||
| input = | | input = Close<br> {{b}}/{{f}} + {{hk}}<br>4/6 HK | ||
| subtitle = | | subtitle = Kamitsuki | ||
| image = | | image = zangief_bite.png | ||
| imageSize = | | imageSize = 116x104px | ||
| caption = | | caption = | ||
| data = | | data = | ||
{{AttackData-SSF2T | {{AttackData-SSF2T | ||
| Line 1,393: | Line 1,599: | ||
|total = 2 | |total = 2 | ||
|frameAdv = N/A | |frameAdv = N/A | ||
|actrange = 69 (from axis)<br>24 (from throwable box) | |||
|actrange = | |description= Zangief bites his opponent for multiple hits. | ||
*Does great damage, and would be amazing on any other character, but if you're going to grab you'll usually want to SPD instead. | |||
|description= | *It's possible to [https://wiki.supercombo.gg/w/Super_Street_Fighter_2_Turbo/Zangief#Bite_Cross_Unders cross under] some characters if you trap them in the corner. | ||
* | |||
* | |||
}} | }} | ||
}} | }} | ||
<span class="mw-customtoggle-throw" style="color: cyan">'''Click to toggle throwbox data.'''</span> | |||
<div class="mw-collapsible mw-collapsed" id="mw-customcollapsible-throw"> | |||
{{STDiagramHeader}} | |||
{{STDiagramImageCell| 1 | Zangief_stthrowb.png}} {{STDiagramImageCell| 1 | Zangief_stthrow.png}} {{STDiagramImageCell| 1 | Zangief_stthrowf.png}} | |||
|} | |||
</div> | |||
{{MoveData | {{MoveData | ||
| name = | | name = Aerial Deadly Drive | ||
| input = | | input = {{tooltip|text=Close, in Air<br> Any direction but {{u}} + {{mp}}/{{hp}}<br>Any direction but 8 + MP/HP|hovertext=Min activation height: 48/48 upwards/downwards}} | ||
| subtitle = | | subtitle = | ||
| image = | | image = Zangief_airdeaddrive.png | ||
| imageSize = | | imageSize = 191x102px | ||
| caption = | | caption = | ||
| data = | | data = | ||
{{AttackData-SSF2T | {{AttackData-SSF2T | ||
|damage = | |damage = 42 | ||
|dizzy= 7~13 | |dizzy= 7~13 | ||
|dizzytime= 100 | |dizzytime= 100 | ||
| Line 1,425: | Line 1,635: | ||
|total = 2 | |total = 2 | ||
|frameAdv = N/A | |frameAdv = N/A | ||
|actrange = 61 (from axis)<br>16 (from throwable box) | |||
|actrange = | |description= Zangief throws his opponent down in the direction pressed. | ||
*Does more damage than the Kick air throw but the follow up game is weaker. | |||
|description= | |||
* | |||
}} | }} | ||
}} | }} | ||
<span class="mw-customtoggle- | <span class="mw-customtoggle-pairthrow" style="color: cyan">'''Click to toggle throwbox data.'''</span> | ||
<div class="mw-collapsible mw-collapsed" id="mw-customcollapsible- | <div class="mw-collapsible mw-collapsed" id="mw-customcollapsible-pairthrow"> | ||
{{STDiagramHeader}} | {{STDiagramHeader}} | ||
{{STDiagramImageCell| 1 | | {{STDiagramImageCell| 1 | Zangief_pairthrow.png}} | ||
|} | |} | ||
</div> | |||
{{MoveData | |||
| name = Aerial Leg Throw | |||
| input = {{tooltip|text=Close, in Air<br> Any direction but {{u}} + {{mk}}/{{hk}}<br>Any direction but 8 + MK/HK|hovertext=Min activation height: 48/48 upwards/downwards}} | |||
| subtitle = | |||
| image = Zangief_airdeaddrive.png | |||
| imageSize = 191x102px | |||
| caption = | |||
| data = | |||
{{AttackData-SSF2T | |||
|damage = 32 | |||
|dizzy= 7~13 | |||
|dizzytime= 100 | |||
|cancel = None | |||
|guard = Grab | |||
|startup = 1 | |||
|active = 1 | |||
|recovery = Dependent | |||
|total = 2 | |||
|frameAdv = N/A | |||
|actrange = 61 (from axis)<br>16 (from throwable box) | |||
|description= Zangief tosses his opponent over his head in the direction pressed. | |||
*This is the better air throw because it leaves the opponent closer, but it's still rarely used. | |||
}} | |||
}} | |||
<span class="mw-customtoggle-kairthrow" style="color: cyan">'''Click to toggle throwbox data.'''</span> | |||
<div class="mw-collapsible mw-collapsed" id="mw-customcollapsible-kairthrow"> | |||
{{STDiagramHeader}} | {{STDiagramHeader}} | ||
{{STDiagramImageCell| 1 | | {{STDiagramImageCell| 1 | Zangief_kairthrow.png}} | ||
|} | |} | ||
</div> | </div> | ||
==Special Moves== | ==Special Moves== | ||
=== <span class="invisible-header"> | === <span class="invisible-header">Spinning Piledriver</span> === | ||
{{MoveData | {{MoveData | ||
| name = | | name = Spinning Piledriver | ||
| input = | | input = {{tooltip|text={{360}} + {{p}}|hovertext=Detailed Input: (→ [7~14f] ↓ [7~14f] ← [7~14f] ↑ [12/9/7/4f] Jab/Strong/Fierce/any P if you are at a jumpable state and the last direction was ↑. The first direction and the side you spin is not fixed. You just need to input the 4 main directions in order. More explanation in the Strategy page.)}} | ||
| | | subtitle = | ||
| image = | | image = Zangief_spd.png | ||
| imageSize = | | imageSize = 108x105px | ||
| | | image2 = Zangief_piledriver.png | ||
| imageSize2 = 102x92px | |||
| data = | | data = | ||
{{AttackData-SSF2T | {{AttackData-SSF2T | ||
|version = {{Icon-Capcom|lp}} | |version = {{Icon-Capcom|lp}} | ||
|damage = | |damage = {{tooltip|text=42[1]|hovertext=[1] Random Damage Table: -2 = 3.125%, -1 = 3.125%, +0 = 68.75%, +1 = 9.375%, +2 = 9.375%, +3 = 6.25%}} | ||
|dizzy= | |dizzy= 7~13 | ||
|dizzytime= | |dizzytime= 100 | ||
|cancel = None | |cancel = None | ||
|guard = Mid | |guard = Mid | ||
|startup = | |startup = 1 | ||
|active = | |active = 1* | ||
|recovery = | |recovery = 32 | ||
|total = | |total = 34 | ||
|frameAdv = | |frameAdv = Hard Down | ||
|actrange = N/A | |actrange = N/A | ||
|meter = 20* | |||
|meter = | |description= <br> | ||
|description= | |||
}} | }} | ||
{{AttackData-SSF2T | {{AttackData-SSF2T | ||
|version = {{Icon-Capcom|mp}} | |version = {{Icon-Capcom|mp}} | ||
|damage = | |damage = {{tooltip|text=46[1]|hovertext=[1] Random Damage Table: -2 = 3.125%, -1 = 3.125%, +0 = 68.75%, +1 = 9.375%, +2 = 9.375%, +3 = 6.25%}} | ||
|dizzy= 7~13 | |dizzy= 7~13 | ||
|dizzytime= | |dizzytime= 100 | ||
|cancel = None | |cancel = None | ||
|guard = Mid | |guard = Mid | ||
|startup = | |startup = 1 | ||
|active = | |active = 1* | ||
|recovery = | |recovery = 34 | ||
|total = | |total = 36 | ||
|frameAdv = | |frameAdv = Hard Down | ||
|actrange = N/A | |actrange = N/A | ||
|meter = 20* | |||
|meter = | |description= <br> | ||
|description= | |||
}} | }} | ||
{{AttackData-SSF2T | {{AttackData-SSF2T | ||
|version = {{Icon-Capcom|hp}} | |version = {{Icon-Capcom|hp}} | ||
|damage = | |damage = {{tooltip|text=50[1]|hovertext=[1] Random Damage Table: -2 = 3.125%, -1 = 3.125%, +0 = 68.75%, +1 = 9.375%, +2 = 9.375%, +3 = 6.25%}} | ||
|dizzy= 7~13 | |dizzy= 7~13 | ||
|dizzytime= | |dizzytime= 100 | ||
|cancel = None | |cancel = None | ||
|guard = Mid | |guard = Mid | ||
|startup = | |startup = 1 | ||
|active = | |active = 1* | ||
|recovery = | |recovery = 36 | ||
|total = | |total = 38 | ||
|frameAdv = | |frameAdv = Hard Down | ||
|actrange = N/A | |actrange = N/A | ||
|meter = 20* | |||
|meter = | |description= Zangief attempts to grab the enemy. If he succeeds, he'll jump up, spin, and slam their head to the ground. | ||
|description= | *This is a command throw with excellent range that does good damage; this is Zangief's most important move. | ||
* | *All versions have the same range, unlike later games in the series that give Jab a better range and Fierce a worse one. | ||
* | *The Jab version does the worst damage and Fierce does the highest, this alone is enough reason for you to favor using the Fierce version most of the time. Fierce also covers more ground during the spinning animation and Jab covers less, that's another reason why Fierce is preferable most of the time since you always want to push the opponent to the nearest corner whenever possible. | ||
*Also, the Jab version also has a whiff animation that doesn't last as long as Fierce, although it does not vary that much: if the opponent manages to get a reversal out or if you do it incorrectly, you'll get hit either way. | |||
*Finally, Jab has a more lenient window for the P input, which as a consequence allows for more grabbable frames during the whiff animation (See Getting more throw attempts during the SPD in the Strategy section). | |||
*Another minor tidbit to be aware of is that a successful SPD will only give you the full 20 points of Super meter when it grabs the opponent on the first grabbing frame, if it grabs the opponent during the whiff animation then it will give only 5 points of super meter. | |||
*As stated above, you should be using the Fierce version on most cases, but there are a few exceptions. Good uses for the Jab version are: when any SPD can win the round and you'd preffer to just get more active frames on your SPD to guarantee the tick, or if you're doing a SPD in a situation in which the opponent's throwbox is delayed. Also, on a few matchups, when you already have the opponent cornered, a Jab/Strong SPD may be used instead because landing too close to the corner may result in the opponent getting knocked down in a strange way that may not allow you to follow up with anything (they get up faster), specially if the tick string leaves Zangief too close to the opponent (e.g. an aerial move linked into a single light attack). There's only 4 matchups that you really need to care about it though: against Guile and Dhalsim, as long the safe jump tick string spaces Zangief far enough then the problem is negated; agaisnt Claw it's apparently impossible to make he bounce high enough for you to be able to safe jump him, but if you space it well you can still safe tick; against Chun there isn't much you can do, unfortunatelly. Anyway, if you do reversals with triple taps you'll never end up using the Strong version, but some players like to piano Strong and Fierce for reversals. If that's what you choose to do, keep in mind that you shouldn't piano all 3 P buttons to increase your reversal chances, because a Lariat may come out by accident. | |||
*If done after a tick and out of opponents throw range, the opponent can only escape by doing a reversal-timed instantly-invincible attack, like a dragon punch, or a move that puts the character in the air instantly, like Blanka's rolling attack. | |||
}} | }} | ||
}} | }} | ||
<span class="mw-customtoggle- | <span class="mw-customtoggle-spd" style="color: cyan">'''Click to toggle detailed hitbox data.'''</span> | ||
<div class="mw-collapsible mw-collapsed" id="mw-customcollapsible- | <div class="mw-collapsible mw-collapsed" id="mw-customcollapsible-spd"> | ||
*<b> | *<b>Throwbox</b>: | ||
{{STDiagramHeader}} | {{STDiagramHeader}} | ||
{{STDiagramCell|}} |{{STDiagramImageCell| 1 | | {{STDiagramCell|}} |{{STDiagramImageCell| 1 | Zangief_spd0.png}} | ||
|} | |} | ||
*<b> | *<b>Whiff Animation</b>: | ||
{{STDiagramHeader}} | {{STDiagramHeader}} | ||
{{STDiagramCell|}} |{{STDiagramImageCell| 1 | | {{STDiagramCell|}} |{{STDiagramImageCell| 1 | Zangief_whiff1%265.png}} |{{STDiagramImageCell| 1 | Zangief_whiff2&4.png}} |{{STDiagramImageCell| 1 | Zangief_whiff3.png}} |{{STDiagramImageCell| 1 | Zangief_whiff2&4.png}} |{{STDiagramImageCell| 1 | Zangief_whiff1%265.png}} | ||
|- | |- | ||
{{STDiagramCell| Frame Count}} |{{STDiagramCell| | {{STDiagramCell| Frame Count (Jab)}} |{{STDiagramCell| 5}} |{{STDiagramCell| 5}} |{{STDiagramCell| 16}} |{{STDiagramCell| 3}} |{{STDiagramCell| 3}} | ||
|- | |- | ||
{{STDiagramCell| Simplified}} |{{STDiagramCellColSpan| | {{STDiagramCell| Simplified (Jab)}} |{{STDiagramCellColSpan| 5 | 32}} | ||
|- | |- | ||
{{STDiagramCell| Frame Count}} |{{STDiagramCell| | {{STDiagramCell| Frame Count (Strong)}} |{{STDiagramCell| 5}} |{{STDiagramCell| 5}} |{{STDiagramCell| 18}} |{{STDiagramCell| 3}} |{{STDiagramCell| 3}} | ||
|- | |- | ||
{{STDiagramCell| Simplified}} |{{STDiagramCellColSpan| | {{STDiagramCell| Simplified (Strong)}} |{{STDiagramCellColSpan| 5 | 34}} | ||
|- | |- | ||
{{STDiagramCell| Frame Count}} |{{STDiagramCell| | {{STDiagramCell| Frame Count (Fierce)}} |{{STDiagramCell| 5}} |{{STDiagramCell| 5}} |{{STDiagramCell| 20}} |{{STDiagramCell| 3}} |{{STDiagramCell| 3}} | ||
|- | |- | ||
{{STDiagramCell| Simplified}} |{{STDiagramCellColSpan| | {{STDiagramCell| Simplified (Fierce)}} |{{STDiagramCellColSpan| 5 | 20}} | ||
|} | |} | ||
</div> | </div> | ||
| Line 1,579: | Line 1,789: | ||
=== <span class="invisible-header"> | === <span class="invisible-header">Atomic Suplex</span> === | ||
{{MoveData | {{MoveData | ||
| name = | | name = Atomic Suplex | ||
| input = | | input = {{tooltip|text=Close<br>{{360}} + {{k}} / 360K|hovertext=Detailed Input: → [7~14f] ↓ [7~14f] ← [7~14f] ↑ [12/9/7/4f] Short/Forward/Roundhouse/any K if you are at a jumpable state and the last direction was ↑. The first direction and the side you spin is not fixed. You just need to input the 4 main directions in order. More explanation in the Strategy page.} | ||
| | | subtitle = | ||
| | | image = Zangief_atomicsuplex.png | ||
| imageSize = 166x92x | |||
| caption = | |||
| | |||
| | |||
| | |||
| | |||
| data = | | data = | ||
{{AttackData-SSF2T | {{AttackData-SSF2T | ||
|version = {{Icon-Capcom| | |version = {{Icon-Capcom|lk}} | ||
|damage = | |damage = 20 + {{tooltip|text=30[0]|hovertext=[0] Random Damage Table: -2 = 3.125%, -1 = 3.125%, +0 = 78.125%, +1 = 6.25%, +2 = 6.25%, +3 = 3.125%}} | ||
|dizzy= | |dizzy= 7~13 | ||
|dizzytime= 100 | |dizzytime= 100 | ||
|cancel = None | |cancel = None | ||
|guard = | |guard = Grab | ||
|startup = | |startup = 0 | ||
|active = | |active = 1 | ||
|recovery = | |recovery = {{tooltip|text=N/A|hovertext=If this move whiffs, you'll perform a Flying Power Bomb instead.}} | ||
|total = | |total = Dependent | ||
|frameAdv = | |frameAdv = Hard Down | ||
|actrange = | |actrange = 0-66 (from axis)<br>0-21 (from throwable box) | ||
|meter = | |meter = 24 | ||
|description= | |description= <br> | ||
}} | }} | ||
{{AttackData-SSF2T | {{AttackData-SSF2T | ||
|version = {{Icon-Capcom| | |version = {{Icon-Capcom|mk}} | ||
|damage = 34[0] | |damage = 20 + {{tooltip|text=34[0]|hovertext=[0] Random Damage Table: -2 = 3.125%, -1 = 3.125%, +0 = 78.125%, +1 = 6.25%, +2 = 6.25%, +3 = 3.125%}} | ||
|dizzy= | |dizzy= 7~13 | ||
|dizzytime= 100 | |dizzytime= 100 | ||
|cancel = None | |cancel = None | ||
|guard = | |guard = Grab | ||
|startup = | |startup = 0 | ||
|active = | |active = 1 | ||
|recovery = | |recovery = {{tooltip|text=N/A|hovertext=If this move whiffs, you'll perform a Flying Power Bomb instead.}} | ||
|total = | |total = Dependent | ||
|frameAdv = | |frameAdv = Grab, Hard Down | ||
|actrange = | |actrange = 0-669(from axis)<br>0-24 (from throwable box) | ||
|meter = 24 | |||
|meter = | |description= <br> | ||
|description= | |||
}} | }} | ||
{{AttackData-SSF2T | {{AttackData-SSF2T | ||
|version = {{Icon-Capcom| | |version = {{Icon-Capcom|hk}} | ||
|damage = | |damage = 20 + {{tooltip|text=32[0]|hovertext=[0] Random Damage Table: -2 = 3.125%, -1 = 3.125%, +0 = 78.125%, +1 = 6.25%, +2 = 6.25%, +3 = 3.125%}} | ||
|dizzy= | |dizzy= 9~15 | ||
|dizzytime= | |dizzytime= 100 | ||
|cancel = None | |cancel = None | ||
|guard = | |guard = Grab | ||
|startup = 0 | |startup = 0 | ||
|active = | |active = 1 | ||
|recovery = | |recovery = {{tooltip|text=N/A|hovertext=If this move whiffs, you'll perform a Flying Power Bomb instead.}} | ||
|total = | |total = Dependent | ||
|frameAdv = | |frameAdv = Hard Down | ||
|actrange = | |actrange = 0-83 (from axis)<br>0-38 (from throwable box) | ||
|meter = | |meter = 7 | ||
|description = | |description= When used up close, Zangief will deal massive damage with 2 suplexes. | ||
* | |||
* | *If the grab attempt is not successful, this move turns into the Flying Power Bomb, also known as the Running Bear Grab. | ||
* | *This command throw deals more damage than the SPD, but its range is much smaller. If you are right up close, you can go for this instead of a SPD for more damage, but your follow up game is usually worse: If done on any distance that won't corner the opponent (e.g. midscreen), doing a SPD instead will allow Zangief to get much more closer to the waking up opponent (around 30px closer) than if he did a Suplex. | ||
* | *On the other hand, this move has better potential for moving the opponent to their own corner, specially the Roundhouse version. This also gives a little more meter than a SPD, but since Zangief's Super is very unpractical to use, this distinction tends to be ignored. | ||
* | *If done after a tick, the opponent can only escape by doing a reversal-timed frame 1 invincible/airborne attack. | ||
* | *Always use the Roundhouse version because it has better throw range, damage potential and releases the opponent sligthly closer to their corner, while having meaningless downsides (smaller input window; built in OS with Roundhouse Running Bear Grab that has a slower startup than the other Running Bear Grabs). | ||
*The best moves to tick this from are Close Standing Short and Crouching Strong because they both leave Zangief at very little or no frame advantage, this means that a Flying Power Bomb will very rarely come out (unless the normal was meaty timed), with Crouching Strong leaving Zangief at optimal range for it. | |||
*Something worth mentioning is that the Roundhouse version is Zangief's best command grab to use on a crossup before turning (the throwbox extends after the pushbox's back by some pixels) | |||
}} | }} | ||
}} | }} | ||
<span class="mw-customtoggle- | <span class="mw-customtoggle-atomsuplex" style="color: cyan">'''Click to toggle detailed hitbox data.'''</span> | ||
<div class="mw-collapsible mw-collapsed" id="mw-customcollapsible- | <div class="mw-collapsible mw-collapsed" id="mw-customcollapsible-atomsuplex"> | ||
{{STDiagramHeader}} | {{STDiagramHeader}} | ||
{{STDiagramCell|}} |{{ | {{STDiagramCell| Short}} |{{STDiagramCell| Forward}} |{{STDiagramCell| Roundhouse}} | ||
|- | |- | ||
{{ | {{STDiagramImageCell| 1 | Zangief_suplexshrt.png}} |{{STDiagramImageCell| 1 | Zangief_suplexfrwrd.png}} |{{STDiagramImageCell| 1 | Zangief_suplexrh.png}} | ||
|} | |} | ||
</div> | </div> | ||
=== <span class="invisible-header"> | === <span class="invisible-header">Vertical Roll</span> === | ||
{{MoveData | {{MoveData | ||
| name = | | name = Vertical Roll | ||
| input = | | input = {{tooltip|text=[2]8K / {{cd}}{{u}}+{{k}}|hovertext=Detailed Input: (Charge ↓/↙/↘ for at least 60f, [7~14f] ↑/↖/↗ [10/9/7/4f] Short/Forward/Roundhouse/any K if you are at a jumpable state. It is needed to wait at least 1 frame after leaving the charge direction to enter with the K button)}} | ||
| | | subtitle = | ||
| image = | | image = Blanka_vroll2anm.gif | ||
| imageSize = | | imageSize = 90x104px | ||
| caption = | | caption = | ||
| image2 = | | image2 = Blanka_vroll5.png | ||
| imageSize2 = | | imageSize2 = 163x105px | ||
| caption2 = | | caption2 = | ||
| image3 = | | image3 = Blanka_vroll6.png | ||
| imageSize3 = | | imageSize3 = 122x114px | ||
| caption3 = | | caption3 = | ||
| data = | | data = | ||
{{AttackData-SSF2T | {{AttackData-SSF2T | ||
|damage = | |version = {{Icon-Capcom|lk}} | ||
|dizzy= | |damage = 26[2] / 28[2] | ||
|dizzytime= | |dizzy= 9~15 | ||
|dizzytime= 100 | |||
|cancel = None | |cancel = None | ||
|guard = | |guard = High | ||
|startup = | |startup = 0 | ||
|active = | |active = 18(15)8 | ||
|recovery = | |recovery = 18 | ||
|total = | |total = 59 | ||
| | |frameAdv = Dependent | ||
| | |actrange = N/A | ||
|meter = 7 | |||
|description= <br> | |||
}} | |||
{{AttackData-SSF2T | |||
|version = {{Icon-Capcom|mk}} | |||
|damage = 28[2] | |||
|dizzy= 9~15 | |||
|dizzytime= 100 | |||
|cancel = None | |||
|guard = High | |||
|startup = 0 | |||
|active = 17(15)8 | |||
|recovery = 19 | |||
|total = 59 | |||
|frameAdv = Dependent | |||
|actrange = N/A | |||
|meter = 7 | |||
|description= <br> | |||
}} | |||
{{AttackData-SSF2T | |||
|version = {{Icon-Capcom|hk}} | |||
|damage = 30[2] | |||
|dizzy= 9~15 | |||
|dizzytime= 100 | |||
|cancel = None | |||
|guard = High | |||
|startup = 0 | |||
|active = 16(15)8 | |||
|recovery = 24 | |||
|total = 63 | |||
|frameAdv = Dependent | |||
|actrange = N/A | |actrange = N/A | ||
|meter = 7 | |||
|meter = | |description= Blanka launches himself vertically and ends with a flip kick, falling to the ground. | ||
|description= | *A very good anti-air and crossup tool. | ||
*The LK version deals a bit more damage during the kick part. | |||
* | |||
* | |||
}} | }} | ||
}} | }} | ||
<span class="mw-customtoggle-vertroll" style="color: cyan">'''Click to toggle detailed hitbox data.'''</span> | |||
<div class="mw-collapsible mw-collapsed" id="mw-customcollapsible-vertroll"> | |||
*<b>Active:</b> | |||
*<b> | |||
{{STDiagramHeader}} | {{STDiagramHeader}} | ||
{{STDiagramCell|}} |{{STDiagramImageCell| 1 | | {{STDiagramCell|}} |{{STDiagramImageCell| 1 | Blanka_vroll2anm.gif}} |{{STDiagramImageCell| 1 | Blanka_vroll3anm.gif}} |{{STDiagramImageCell| 1 | Blanka_vroll4.png}} |{{STDiagramImageCell| 1 | Blanka_vroll5.png}} |{{STDiagramImageCell| 1 | Blanka_vroll6.png}} | ||
|- | |- | ||
{{STDiagramCell| Frame Count}} |{{STDiagramCell| | {{STDiagramCell| Frame Count (Short)}} |{{STDiagramCell| 18}} |{{STDiagramCell| 12}} |{{STDiagramCell| 3}} |{{STDiagramCell| 4}} |{{STDiagramCell| 4}} | ||
|- | |- | ||
{{STDiagramCell| Simplified}} | {{STDiagramCell| Simplified (Short)}} |{{STDiagramCell| 18}} |{{STDiagramCellColSpan| 2 | 15}} |{{STDiagramCellColSpan| 2 | 8}} | ||
|- | |||
{{STDiagramCell| Frame Count (Forward)}} |{{STDiagramCell| 17}} |{{STDiagramCell| 12}} |{{STDiagramCell| 3}} |{{STDiagramCell| 4}} |{{STDiagramCell| 4}} | |||
|- | |||
{{STDiagramCell| Simplified (Forward)}} |{{STDiagramCell| 17}} |{{STDiagramCellColSpan| 2 | 15}} |{{STDiagramCellColSpan| 2 | 8}} | |||
|- | |||
{{STDiagramCell| Frame Count (Roundhouse)}} |{{STDiagramCell| 16}} |{{STDiagramCell| 12}} |{{STDiagramCell| 3}} |{{STDiagramCell| 4}} |{{STDiagramCell| 4}} | |||
|- | |||
{{STDiagramCell| Simplified (Roundhouse)}} |{{STDiagramCell| 16}} |{{STDiagramCellColSpan| 2 | 15}} |{{STDiagramCellColSpan| 2 | 8}} | |||
|} | |} | ||
*<b>Recovery</b> | |||
*<b> | |||
{{STDiagramHeader}} | {{STDiagramHeader}} | ||
{{STDiagramCell|}} |{{STDiagramImageCell| 1 | | {{STDiagramCell|}} |{{STDiagramImageCell| 1 | Blanka_vroll7.png}} |{{STDiagramImageCell| 1 | Blanka_vroll8.png}} |{{STDiagramImageCell| 1 | Blanka_vroll9.png}} |{{STDiagramImageCell| 1 | Blanka_vroll10.png}} |{{STDiagramImageCell| 1 | Blanka_lands1.png}} |{{STDiagramImageCell| 1 | Blanka_lands2.png}} |{{STDiagramImageCell| 1 | Blanka_lands3.png}} | ||
|- | |- | ||
{{STDiagramCell| Frame Count}} |{{STDiagramCell| 2}} |{{STDiagramCell| 1}} |{{STDiagramCell| 2}} |{{STDiagramCell| 2}} | {{STDiagramCell| Frame Count (Short)}} |{{STDiagramCell| 4}} |{{STDiagramCell| 4}} |{{STDiagramCell| 3}} |{{STDiagramCellNull| 1}} |{{STDiagramCell| 1}} |{{STDiagramCell| 2}} |{{STDiagramCell| 4}} | ||
|- | |||
{{STDiagramCell| Simplified (Short)}} |{{STDiagramCellColSpan| 4 | 11}} |{{STDiagramCellColSpan| 3 | 7}} | |||
|- | |||
{{STDiagramCell| Frame Count (Forward)}} |{{STDiagramCell| 4}} |{{STDiagramCell| 4}} |{{STDiagramCell| 3}} |{{STDiagramCellNull| 1}} |{{STDiagramCell| 1}} |{{STDiagramCell| 2}} |{{STDiagramCell| 5}} | |||
|- | |||
{{STDiagramCell| Simplified (Forward)}} |{{STDiagramCellColSpan| 4 | 11}} |{{STDiagramCellColSpan| 3 | 8}} | |||
|- | |||
{{STDiagramCell| Frame Count (Rh)}} |{{STDiagramCell| 4}} |{{STDiagramCell| 4}} |{{STDiagramCell| 4}} |{{STDiagramCell| 3}} |{{STDiagramCell| 1}} |{{STDiagramCell| 2}} |{{STDiagramCell| 6}} | |||
|- | |||
{{STDiagramCell| Simplified (Rh)}} |{{STDiagramCellColSpan| 4 | 15}} |{{STDiagramCellColSpan| 3 | 9}} | |||
|} | |} | ||
*'''Knockback''': | |||
* | |||
{{STDiagramHeader}} | {{STDiagramHeader}} | ||
{{STDiagramCell|}} |{{STDiagramImageCell| 1 | | {{STDiagramCell|}} |{{STDiagramImageCell| 1 | Blanka_vroll2anm.gif}} |{{STDiagramImageCell| 1 | Blanka_lands1.png}} |{{STDiagramImageCell| 1 | Blanka_lands2.png}} |{{STDiagramImageCell| 1 | Blanka_lands3.png}} | ||
|- | |- | ||
{{STDiagramCell| Frame Count}} |{{STDiagramCell| | {{STDiagramCell| Frame Count (Short)}} |{{STDiagramCell| 40+}} |{{STDiagramCell| 1}} |{{STDiagramCell| 2}} |{{STDiagramCell| 4}} | ||
|- | |- | ||
{{STDiagramCell| Simplified}} |{{STDiagramCellColSpan| 3 | | {{STDiagramCell| Simplified (Short)}} |{{STDiagramCell| 40+}} |{{STDiagramCellColSpan| 3 | 7}} | ||
|- | |||
{{STDiagramCell| Frame Count (Forward)}} |{{STDiagramCell| 40+}} |{{STDiagramCell| 1}} |{{STDiagramCell| 2}} |{{STDiagramCell| 5}} | |||
|- | |||
{{STDiagramCell| Simplified (Forward)}} |{{STDiagramCell| 40+}} |{{STDiagramCellColSpan| 3 | 8}} | |||
|- | |||
{{STDiagramCell| Frame Count (Rh)}} |{{STDiagramCell| 40+}} |{{STDiagramCell| 1}} |{{STDiagramCell| 2}} |{{STDiagramCell| 6}} | |||
|- | |||
{{STDiagramCell| Simplified (Rh)}} |{{STDiagramCell| 40+}} |{{STDiagramCellColSpan| 3 | 9}} | |||
|} | |} | ||
</div> | </div> | ||
=== <span class="invisible-header"> | === <span class="invisible-header">Backstep Roll</span> === | ||
{{MoveData | {{MoveData | ||
| name = | | name = Backstep Roll | ||
| input = | | input = {{Tooltip| text= [4]6K<br>{{cb}}{{f}} + {{k}} | hovertext= Charge ←/↙/↖ for at least 60f, [7~14f] → [10/9/7f] Short/Forward/Roundhouse. It is needed to wait at least 1 frame after leaving the charge direction to enter with the K button}} | ||
| | | subtitle = | ||
| image = | | image = Blanka_broll14.png | ||
| imageSize = | | imageSize = 93x127px | ||
| caption = | | caption = | ||
| image2 = | | image2 = Blanka_broll15.png | ||
| imageSize2 = | | imageSize2 = 106x110px | ||
| caption2 = | | caption2 = | ||
| image3 = Blanka_broll16.png | |||
| imageSize3 = 102x102px | |||
| caption3 = | |||
| image4 = Blanka_broll17anm.gif | |||
| imageSize4 = 90x104px | |||
| caption4 = | |||
| data = | | data = | ||
{{AttackData-SSF2T | {{AttackData-SSF2T | ||
|damage = 12[ | |version = {{lk}} | ||
|dizzy= | |damage = (12[0] x 3) / 28[1] | ||
| | |dizzy= (1~7 x 3) / 1~7 | ||
|dizzytime= (30 x 3) / 30 | |||
|cancel = None | |||
|guard = Mid | |||
|startup = 44 | |||
|active = 20 (4/3/2/11) | |||
|recovery = 5 on whiff/combo<br>33+ on spin block/hit | |||
|total = 69/97+ | |||
|frameAdv = Dependent | |||
|actrange = N/A | |||
|meter = 7 | |||
|description= <br> | |||
}} | |||
{{AttackData-SSF2T | |||
|version = {{mk}} | |||
|damage = (12[1] x 3) / 28[2] | |||
|dizzy= (1~7 x 3) / 1~7 | |||
|dizzytime= (30 x 3) / 30 | |||
|cancel = None | |cancel = None | ||
|guard = | |guard = Mid | ||
| | |startup = 38 | ||
| | |active = 23 (4/3/2/14) | ||
| | |recovery = 6 on whiff/combo<br>34+ on spin block/hit | ||
| | |total = 67/95+ | ||
|frameAdv = Dependent | |||
|actrange = N/A | |||
|meter = 7 | |||
|description= <br> | |||
}} | |||
{{AttackData-SSF2T | |||
|version = {{hk}} | |||
|damage = (12[2] x 3) / 28[3] | |||
|dizzy= (1~7 x 3) / 1~7 | |||
|dizzytime= (30 x 3) / 30 | |||
|cancel = None | |||
|guard = Mid | |||
|startup = 31 | |||
|active = 25 (4/3/2/16) | |||
|recovery = 7 on whiff/combo<br>35+ on spin block/hit | |||
|total = 63/91+ | |||
|frameAdv = Dependent | |frameAdv = Dependent | ||
|actrange = N/A | |actrange = N/A | ||
|meter = 7 | |||
|meter = | |description= Blanka flips back and jumps forward, rolling on his way down. | ||
|description= | *The first 3 hitboxes deal less damage than the last rolling part. If you somehow hit with them, they'll combo into each other. This is extremely difficult unless you're point blank range on a big character. | ||
*Impractical due to the ungodly startup, slow active part, and terrible recovery. | |||
* | |||
* | |||
}} | }} | ||
}} | }} | ||
<span class="mw-customtoggle- | <span class="mw-customtoggle-backstephop" style="color: cyan">'''Click to toggle detailed hitbox data.'''</span> | ||
<div class="mw-collapsible mw-collapsed" id="mw-customcollapsible- | <div class="mw-collapsible mw-collapsed" id="mw-customcollapsible-backstephop"> | ||
'''Startup:''' | |||
{{STDiagramHeader}} | {{STDiagramHeader}} | ||
{{STDiagramCell|}} |{{STDiagramImageCell| 1 | | {{STDiagramCell|}} |{{STDiagramImageCell| 1 | Blanka_broll1&3.png}} |{{STDiagramImageCell| 1 | Blanka_broll2.png}} |{{STDiagramImageCell| 1 | Blanka_broll1&3.png}} |{{STDiagramImageCell| 1 | Blanka_broll4.png}} |{{STDiagramImageCell| 1 | Blanka_broll5.png}} |{{STDiagramImageCell| 1 | Blanka_broll6.png}} |{{STDiagramImageCell| 1 | Blanka_broll7.png}} | ||
|- | |||
{{STDiagramCell| Frame Count (Short)}} |{{STDiagramCell| 2}} |{{STDiagramCell| 4}} |{{STDiagramCell| 2}} |{{STDiagramCell| 3}} |{{STDiagramCell| 5}} |{{STDiagramCell| 5}} |{{STDiagramCell| 2}} | |||
|- | |||
{{STDiagramCell| Simplified (Short)}} |{{STDiagramCellColSpan| 4 | 11}} |{{STDiagramCellColSpan| 3 | 12}} | |||
|- | |||
{{STDiagramCell| Frame Count (Forward)}} |{{STDiagramCell| 1}} |{{STDiagramCell| 3}} |{{STDiagramCell| 1}} |{{STDiagramCell| 3}} |{{STDiagramCell| 5}} |{{STDiagramCell| 5}} |{{STDiagramCell| 3}} | |||
|- | |||
{{STDiagramCell| Simplified (Forward)}} |{{STDiagramCellColSpan| 4 | 8}} |{{STDiagramCellColSpan| 3 | 13}} | |||
|- | |- | ||
{{STDiagramCell| Frame Count}} |{{STDiagramCell| 2}} |{{STDiagramCell| 1}} |{{STDiagramCell| | {{STDiagramCell| Frame Count (Rh)}} |{{STDiagramCell| 1}} |{{STDiagramCell| 2}} |{{STDiagramCell| 1}} |{{STDiagramCell| 1}} |{{STDiagramCell| 5}} |{{STDiagramCell| 5}} |{{STDiagramCell| 3}} | ||
|- | |||
{{STDiagramCell| Simplified (Rh)}} |{{STDiagramCellColSpan| 4 | 5}} |{{STDiagramCellColSpan| 3 | 13}} | |||
|} | |} | ||
{{STDiagramHeader}} | {{STDiagramHeader}} | ||
{{STDiagramCell|}} |{{STDiagramImageCell| 1 | | {{STDiagramCell|}} |{{STDiagramImageCell| 1 | Blanka_broll8.png}} |{{STDiagramImageCell| 1 | Blanka_broll9.png}} |{{STDiagramImageCell| 1 | Blanka_broll10.png}} |{{STDiagramImageCell| 1 | Blanka_broll11.png}} |{{STDiagramImageCell| 1 | Blanka_broll12.png}} |{{STDiagramImageCell| 1 | Blanka_broll13.png}} | ||
|- | |- | ||
{{STDiagramCell| Frame Count}} |{{STDiagramCell| | {{STDiagramCell| Frame Count (Short)}} |{{STDiagramCell| 3}} |{{STDiagramCell| 6}} |{{STDiagramCell| 3}} |{{STDiagramCell| 3}} |{{STDiagramCell| 3}} |{{STDiagramCell| 3}} | ||
|- | |- | ||
{{STDiagramCell| Simplified}} |{{STDiagramCellColSpan| | {{STDiagramCell| Simplified (Short)}} |{{STDiagramCellColSpan| 3 | 12}} |{{STDiagramCellColSpan| 3 | 9}} | ||
|- | |||
{{STDiagramCell| Frame Count (Forward)}} |{{STDiagramCell| 2}} |{{STDiagramCell| 4}} |{{STDiagramCell| 2}} |{{STDiagramCell| 3}} |{{STDiagramCell| 3}} |{{STDiagramCell| 3}} | |||
|- | |||
{{STDiagramCell| Simplified (Forward)}} |{{STDiagramCellColSpan| 3 | 8}} |{{STDiagramCellColSpan| 3 | 9}} | |||
|- | |||
{{STDiagramCell| Frame Count (Rh)}} |{{STDiagramCell| 1}} |{{STDiagramCell| 2}} |{{STDiagramCell| 1}} |{{STDiagramCell| 3}} |{{STDiagramCell| 3}} |{{STDiagramCell| 3}} | |||
|- | |||
{{STDiagramCell| Simplified (Rh)}} |{{STDiagramCellColSpan| 3 | 4}} |{{STDiagramCellColSpan| 3 | 9}} | |||
|} | |} | ||
'''Active/Recovery:''' | |||
{{STDiagramHeader}} | {{STDiagramHeader}} | ||
{{STDiagramCell|}} |{{STDiagramImageCell| 1 | | {{STDiagramCell|}} |{{STDiagramImageCell| 1 | Blanka_broll14.png}} |{{STDiagramImageCell| 1 | Blanka_broll15.png}} |{{STDiagramImageCell| 1 | Blanka_broll16.png}} |{{STDiagramImageCell| 1 | Blanka_broll17anm.gif}} |{{STDiagramImageCell| 1 | Blanka_lands1.png}} |{{STDiagramImageCell| 1 | Blanka_lands2.png}} |{{STDiagramImageCell| 1 | Blanka_lands3.png}} | ||
|- | |- | ||
{{STDiagramCell| Frame Count}} |{{STDiagramCell| 2}} |{{STDiagramCell| 2}} |{{STDiagramCell| | {{STDiagramCell| Frame Count (Short)}} |{{STDiagramCell| 4}} |{{STDiagramCell| 3}} |{{STDiagramCell| 2}} |{{STDiagramCell| 11}} |{{STDiagramCell| 1}} |{{STDiagramCell| 2}} |{{STDiagramCell| 2}} | ||
|- | |- | ||
{{STDiagramCell| Simplified}} |{{STDiagramCellColSpan| 3 | 7}} | {{STDiagramCell| Simplified (Short)}} |{{STDiagramCell| 4}} |{{STDiagramCell| 3}} |{{STDiagramCell| 2}} |{{STDiagramCell| 11}} |{{STDiagramCellColSpan| 3 | 5}} | ||
|- | |||
{{STDiagramCell| Frame Count (Forward)}} |{{STDiagramCell| 4}} |{{STDiagramCell| 3}} |{{STDiagramCell| 2}} |{{STDiagramCell| 14}} |{{STDiagramCell| 1}} |{{STDiagramCell| 2}} |{{STDiagramCell| 3}} | |||
|- | |||
{{STDiagramCell| Simplified (Forward)}} |{{STDiagramCell| 4}} |{{STDiagramCell| 3}} |{{STDiagramCell| 2}} |{{STDiagramCell| 14}} |{{STDiagramCellColSpan| 3 | 6}} | |||
|- | |||
{{STDiagramCell| Frame Count (Rh)}} |{{STDiagramCell| 4}} |{{STDiagramCell| 3}} |{{STDiagramCell| 2}} |{{STDiagramCell| 16}} |{{STDiagramCell| 1}} |{{STDiagramCell| 2}} |{{STDiagramCell| 4}} | |||
|- | |||
{{STDiagramCell| Simplified (Rh)}} |{{STDiagramCell| 4}} |{{STDiagramCell| 3}} |{{STDiagramCell| 2}} |{{STDiagramCell| 16}} |{{STDiagramCellColSpan| 3 | 7}} | |||
|} | |} | ||
* | *'''Knockback:''' | ||
{{STDiagramHeader}} | {{STDiagramHeader}} | ||
{{STDiagramCell|}} |{{STDiagramImageCell| 1 | | {{STDiagramCell|}} |{{STDiagramImageCell| 1 | Blanka_broll17anm.gif}} |{{STDiagramImageCell| 1 | Blanka_lands1.png}} |{{STDiagramImageCell| 1 | Blanka_lands2.png}} |{{STDiagramImageCell| 1 | Blanka_lands3.png}} | ||
|- | |- | ||
{{STDiagramCell| Frame Count}} |{{STDiagramCell| | {{STDiagramCell| Frame Count (Short)}} |{{STDiagramCell| 28+}} |{{STDiagramCell| 1}} |{{STDiagramCell| 2}} |{{STDiagramCell| 2}} | ||
|} | |- | ||
{{STDiagramCell| Simplified (Short)}} |{{STDiagramCell| 28+}} |{{STDiagramCellColSpan| 3 | 5}} | |||
|- | |||
{{STDiagramCell| Frame Count (Forward)}} |{{STDiagramCell| 28+}} |{{STDiagramCell| 1}} |{{STDiagramCell| 2}} |{{STDiagramCell| 3}} | |||
{{ | |- | ||
{{STDiagramCell|}} |{{ | {{STDiagramCell| Simplified (Forward)}} |{{STDiagramCell| 28+}} |{{STDiagramCellColSpan| 3 | 6}} | ||
|- | |- | ||
{{STDiagramCell| Frame Count}} |{{STDiagramCell| | {{STDiagramCell| Frame Count (Rh)}} |{{STDiagramCell| 28+}} |{{STDiagramCell| 1}} |{{STDiagramCell| 2}} |{{STDiagramCell| 4}} | ||
|- | |- | ||
{{STDiagramCell| Simplified}} |{{STDiagramCellColSpan| 7 | {{STDiagramCell| Simplified (Rh)}} |{{STDiagramCell| 28+}} |{{STDiagramCellColSpan| 3 | 7}} | ||
|} | |} | ||
</div> | </div> | ||
=== <span class="invisible-header">Surprise Forward</span> === | |||
{{MoveData | {{MoveData | ||
| name = | | name = Surprise Forward | ||
| input = | | input = {{f}} + {{3k}}<br>6+3K | ||
| subtitle = | |||
| image = | | image = Blanka_hopf5.png | ||
| imageSize = | | imageSize = 126x87px | ||
| caption = | | caption = | ||
| data = <br>Blanka jumps forward. The hop lasts for about 18 frames before an 8 frame landing animation. | |||
*Gives you 5 points of meter. | |||
*Allows you to pass through opponents. | |||
| data = | *Use this sparingly, mostly as a mixup tool. Experienced players can react and punish. | ||
* | |||
* | |||
* | |||
}} | }} | ||
<span class="mw-customtoggle- | <span class="mw-customtoggle-fhop" style="color: cyan">'''Click to toggle detailed hitbox data.'''</span> | ||
<div class="mw-collapsible mw-collapsed" id="mw-customcollapsible- | <div class="mw-collapsible mw-collapsed" id="mw-customcollapsible-fhop"> | ||
{{STDiagramHeader}} | {{STDiagramHeader}} | ||
{{STDiagramCell|}} |{{STDiagramImageCell| 1 | | {{STDiagramCell|}} |{{STDiagramImageCell| 1 | Blanka_hopf1&3&9&11_hopb9&11.png}} |{{STDiagramImageCell| 1 | Blanka_hopf2&10_hopb10.png}} |{{STDiagramImageCell| 1 | Blanka_hopf1&3&9&11_hopb9&11.png}} |{{STDiagramImageCell| 1 | Blanka_hopf4.png}} |{{STDiagramImageCell| 1 | Blanka_hopf5.png}} |{{STDiagramImageCell| 1 | Blanka_hopf6.png}} |{{STDiagramImageCell| 1 | Blanka_hopf7.png}} |{{STDiagramImageCell| 1 | Blanka_hopf8.png}} | ||
|- | |- | ||
{{STDiagramCell| Frame Count}} |{{STDiagramCell| | {{STDiagramCell| Frame Count}} |{{STDiagramCell| 1}} |{{STDiagramCell| 1}} |{{STDiagramCell| 1}} |{{STDiagramCell| 6}} |{{STDiagramCell| 2}} |{{STDiagramCell| 2}} |{{STDiagramCell| 4}} |{{STDiagramCell| 4}} | ||
|- | |- | ||
{{STDiagramCell| Simplified}} |{{STDiagramCellColSpan| 5 | | {{STDiagramCell| Simplified}} |{{STDiagramCellColSpan| 3 | 3}} |{{STDiagramCellColSpan| 5 | 18}} | ||
|} | |} | ||
{{STDiagramHeader}} | {{STDiagramHeader}} | ||
{{STDiagramCell|}} |{{STDiagramImageCell| 1 | | {{STDiagramCell|}} |{{STDiagramImageCell| 1 | Blanka_hopf1&3&9&11_hopb9&11.png}} |{{STDiagramImageCell| 1 | Blanka_hopf2&10_hopb10.png}} |{{STDiagramImageCell| 1 | Blanka_hopf1&3&9&11_hopb9&11.png}} |{{STDiagramImageCell| 1 | Blanka_hopf12_hopb12.png}} | ||
|- | |- | ||
{{STDiagramCell| Frame Count}} |{{STDiagramCell| | {{STDiagramCell| Frame Count}} |{{STDiagramCell| 2}} |{{STDiagramCell| 3}} |{{STDiagramCell| 2}} |{{STDiagramCell| 1}} | ||
|- | |- | ||
{{STDiagramCell| Simplified | {{STDiagramCell| Simplified}} |{{STDiagramCellColSpan| 4 | 8}} | ||
|} | |} | ||
</div> | </div> | ||
=== <span class="invisible-header">Surprise Back</span> === | |||
{{MoveData | {{MoveData | ||
| name = | | name = Surprise Back | ||
| input = | | input = {{b}} + {{3k}}<br>4+3K | ||
| subtitle = | |||
| image = | | image = Blanka_hopb4&6.png | ||
| imageSize = | | imageSize = 81x101px | ||
| caption = | | caption = | ||
| data = <br>Blanka jumps backwards. Invincible from frames 1-13. | |||
*Gives you 5 points of meter. | |||
*An excellent meter building move. | |||
| data = | *The invincibility allows you to escape from some nasty situations. | ||
* | |||
* | |||
* | |||
}} | }} | ||
<span class="mw-customtoggle- | <span class="mw-customtoggle-asbk" style="color: cyan">'''Click to toggle detailed hitbox data.'''</span> | ||
<div class="mw-collapsible mw-collapsed" id="mw-customcollapsible- | <div class="mw-collapsible mw-collapsed" id="mw-customcollapsible-asbk"> | ||
{{STDiagramHeader}} | {{STDiagramHeader}} | ||
{{STDiagramCell|}} |{{STDiagramImageCell| 1 | | {{STDiagramCell|}} |{{STDiagramImageCell| 1 | Blanka_hopb1&3.png}} |{{STDiagramImageCell| 1 | Blanka_hopb2.png}} |{{STDiagramImageCell| 1 | Blanka_hopb1&3.png}} |{{STDiagramImageCell| 1 | Blanka_hopb4&6.png}} |{{STDiagramImageCell| 1 | Blanka_hopb5.png}} |{{STDiagramImageCell| 1 | Blanka_hopb4&6.png}} |{{STDiagramImageCell| 1 | Blanka_hopb7.png}} |{{STDiagramImageCell| 1 | Blanka_hopb8.png}} | ||
|- | |- | ||
{{STDiagramCell| Frame Count}} |{{STDiagramCell| | {{STDiagramCell| Frame Count}} |{{STDiagramCell| 1}} |{{STDiagramCell| 1}} |{{STDiagramCell| 1}} |{{STDiagramCell| 2}} |{{STDiagramCell| 2}} |{{STDiagramCell| 6}} |{{STDiagramCell| 4}} |{{STDiagramCell| 4}} | ||
|- | |- | ||
{{STDiagramCell| Simplified}} |{{STDiagramCellColSpan| | {{STDiagramCell| Simplified}} |{{STDiagramCellColSpan| 6| 13}} |{{STDiagramCellColSpan| 2 | 8}} | ||
|} | |} | ||
{{STDiagramHeader}} | {{STDiagramHeader}} | ||
{{STDiagramCell|}} |{{STDiagramImageCell| 1 | | {{STDiagramCell|}} |{{STDiagramImageCell| 1 | Blanka_hopf1&3&9&11_hopb9&11.png}} |{{STDiagramImageCell| 1 | Blanka_hopf2&10_hopb10.png}} |{{STDiagramImageCell| 1 | Blanka_hopf1&3&9&11_hopb9&11.png}} |{{STDiagramImageCell| 1 | Blanka_hopf12_hopb12.png}} | ||
|- | |- | ||
{{STDiagramCell| Frame Count}} |{{STDiagramCell| | {{STDiagramCell| Frame Count}} |{{STDiagramCell| 2}} |{{STDiagramCell| 3}} |{{STDiagramCell| 2}} |{{STDiagramCell| 1}} | ||
|- | |- | ||
{{STDiagramCell| Simplified | {{STDiagramCell| Simplified}} |{{STDiagramCellColSpan| 4 | 8}} | ||
|} | |} | ||
</div> | </div> | ||
==Super Combo== | |||
{{MoveData | {{MoveData | ||
| name = | | name = Ground Shave Roll | ||
| input = | | input = {{Tooltip | text=[4]646P<br>{{cb}}{{f}}{{b}}{{f}} + {{p}} | hovertext = Detailed Input: (Charge ←/↙/↖ for at least 60f, [7~14f] →/↘/↗ [7~14f] ←/↙/↖ [7~14f] →/↘/↗ [14f] P)}} | ||
| | | subtitle = | ||
| image | | image = Blanka_super4anm.gif | ||
| imageSize = | | imageSize = 90x79px | ||
| caption = | | caption = Jumping down | ||
| image2 | | image2 = Blanka_super5anm.gif | ||
| imageSize2 = | | imageSize2 = 90x79px | ||
| caption2 = | | caption2 = Charging/Rolling | ||
| data = | | data = | ||
{{AttackData-SSF2T | {{AttackData-SSF2T | ||
|damage = | |damage = 20[1] x 4 | ||
|dizzy= | |dizzy= 0~4 x 4 | ||
|dizzytime= | |dizzytime= 20 x 4 | ||
|cancel = None | |cancel = None | ||
|guard = | |guard = Mid | ||
|startup = {{Tooltip | text= | |startup = {{Tooltip | text=14 | hovertext = Plus 18 frames of Super flash.}} | ||
|active = | |active = 29 (Jumping down)<br>0 to 90 (Charging)<br>∞ (Rolling) | ||
|recovery = | |recovery = 0 on whiff <br> 40 on block/hit | ||
|total = | |total = 57 | ||
|frameAdv = | |frameAdv = -17/Hard Down | ||
|actrange = N/A | |actrange = N/A | ||
|description= Invincible on frames 1-14. | |||
|description= | |||
Blanka jumps up in an invincible state, falls down with a hitbox, then rolls forward until he hits a wall. | |||
*If you hold the Punch button down, you can continue to charge up the roll for up to 90 frames. This won't increase the damage. | |||
*If you release the roll after your opponent has jumped over you, it will autocorrect to face them. | |||
*While this move does great damage, it will rarely connect due to the slowness of the hop, giving your opponent plenty of time to block. It's not safe on block either, even if it does chip for 4 hits. | |||
'''General Strategies''' | |||
*If your opponent tries to jump above this, you can usually counter with a Vertical Roll after you recover. | |||
*This can be used as an anti-air with good timing. If you hit them out of the air with the hop, you can hold the punch button briefly and juggle them just before they land. | |||
}} | |||
}} | |||
< | <span class="mw-customtoggle-groundshaveroll" style="color: cyan">Click to toggle detailed hitbox data.</span> | ||
<div class="mw-collapsible mw-collapsed" id="mw-customcollapsible-groundshaveroll"> | |||
{{STDiagramHeader}} | {{STDiagramHeader}} | ||
{{STDiagramCell|}} |{{STDiagramImageCell| 1 | | {{STDiagramCell|}} |{{STDiagramImageCell| 1 | Blanka_super1.png}} |{{STDiagramImageCell| 1 | Blanka_super2.png}} |{{STDiagramImageCell| 1 | Blanka_super3.png}} |{{STDiagramImageCell| 1 | Blanka_super4anm.gif}} |{{STDiagramImageCell| 1 | Blanka_super5anm.gif}} | ||
|- | |- | ||
{{STDiagramCell| Frame Count}} |{{STDiagramCell| | {{STDiagramCell| Frame Count}} |{{STDiagramCell| 1 + [18] + 5}} |{{STDiagramCell| 5}} |{{STDiagramCell| 3}} |{{STDiagramCell| 29}} |{{STDiagramCell| 0 to 90 + ∞}} | ||
|- | |- | ||
{{STDiagramCell| Simplified}} | {{STDiagramCell| Simplified}} |{{STDiagramCellColSpan| 3 | 14}} |{{STDiagramCell| 29}} |{{STDiagramCell| ∞}} | ||
|} | |} | ||
*<b>Knockback:</b> | |||
* | |||
{{STDiagramHeader}} | {{STDiagramHeader}} | ||
{{STDiagramCell|}} |{{STDiagramImageCell| 1 | | {{STDiagramCell|}} |{{STDiagramImageCell| 1 | Blanka_superb1anm.gif}} |{{STDiagramImageCell| 1 | Blanka_superb2&4.png }} |{{STDiagramImageCell| 1 | Blanka_superb3.png}} |{{STDiagramImageCell| 1 | Blanka_superb2&4.png }} |{{STDiagramImageCell| 1 | Blanka_superb5.png}} | ||
|- | |- | ||
{{STDiagramCell| Frame Count}} |{{STDiagramCell| | {{STDiagramCell| Frame Count}} |{{STDiagramCell| 28}} |{{STDiagramCell| 3}} |{{STDiagramCell| 5}} |{{STDiagramCell| 3}} |{{STDiagramCell| 1}} | ||
|- | |- | ||
{{STDiagramCell| Simplified}} |{{STDiagramCellColSpan| | {{STDiagramCell| Simplified}} |{{STDiagramCell| 28}} |{{STDiagramCellColSpan| 4 | 12}} | ||
|} | |} | ||
</div> | |||
==Misc Animations== | |||
====Jump Animations==== | |||
<!-- | |||
*<b>Neutral/Back Jump:</b> | |||
{{STDiagramHeader}} | {{STDiagramHeader}} | ||
{{STDiagramCell|}} |{{STDiagramImageCell| 1 | | {{STDiagramCell|}} |{{STDiagramImageCell| 1 | Blanka_bj1_nj1_fj1.png}} |{{STDiagramImageCell| 1 | Blanka_bj2&4&14_nj2&4&14_fj2&4&17.png}} |{{STDiagramImageCell| 1 | Blanka_bj3_nj3_fj3.png}} |{{STDiagramImageCell| 1 | Blanka_bj2&4&14_nj2&4&14_fj2&4&17.png}} |{{STDiagramImageCell| 1 | Blanka_bj5_nj5_fj5.png}} |{{STDiagramImageCell| 1 | Blanka_bj6&12_nj6&12_fj6.png}} |{{STDiagramImageCell| 1 | Blanka_bj7&11_nj7&11_fj7.png}} |{{STDiagramImageCell| 1 | Blanka_bj8&10_nj8&10_fj8.png}} |{{STDiagramImageCell| 1 | Blanka_bj9_nj9_fj9&15.png}} |{{STDiagramImageCell| 1 | Blanka_bj8&10_nj8&10_fj8.png}} |{{STDiagramImageCell| 1 | Blanka_bj7&11_nj7&11_fj7.png}} |{{STDiagramImageCell| 1 | Blanka_bj6&12_nj6&12_fj6.png}} |{{STDiagramImageCell| 1 | Blanka_bj13_nj13.png}} |{{STDiagramImageCell| 1 | Blanka_bj2&4&14_nj2&4&14_fj2&4&17.png}} | ||
|- | |- | ||
{{STDiagramCell| Frame Count}} |{{STDiagramCell| | {{STDiagramCell| Frame Count (Neutral)}} |{{STDiagramCell| 1}} |{{STDiagramCell| 1}} |{{STDiagramCell| 1}} |{{STDiagramCell| 1}} |{{STDiagramCell| 1}} |{{STDiagramCell| 10}} |{{STDiagramCell| 4}} |{{STDiagramCell| 4}} |{{STDiagramCell| 6}} |{{STDiagramCell| 4}} |{{STDiagramCell| 4}} |{{STDiagramCell| 6}} |{{STDiagramCell| 1}} |{{STDiagramCell| 7*}} | ||
|- | |- | ||
{{STDiagramCell| Simplified | {{STDiagramCell| Simplified (Neutral)}} |{{STDiagramCellColSpan| 4 | 4}} |{{STDiagramCell| 1}} |{{STDiagramCellColSpan| 7 | 38}} |{{STDiagramCell| 1}} |{{STDiagramCell| 7*}} | ||
| | |||
{{STDiagramCell | |||
|- | |- | ||
{{STDiagramCell| Frame Count}} |{{STDiagramCell| | {{STDiagramCell| Frame Count (Back)}} |{{STDiagramCell| 1}} |{{STDiagramCell| 1}} |{{STDiagramCell| 1}} |{{STDiagramCell| 1}} |{{STDiagramCell| 1}} |{{STDiagramCell| 10}} |{{STDiagramCell| 4}} |{{STDiagramCell| 4}} |{{STDiagramCell| 6}} |{{STDiagramCell| 4}} |{{STDiagramCell| 4}} |{{STDiagramCell| 7}} |{{STDiagramCell| 1}} |{{STDiagramCell| 7*}} | ||
|- | |- | ||
{{STDiagramCell| Simplified}} | {{STDiagramCell| Simplified (Back)}} |{{STDiagramCellColSpan| 4 | 4}} |{{STDiagramCell| 1}} |{{STDiagramCellColSpan| 7 | 39}} |{{STDiagramCell| 1}} |{{STDiagramCell| 7*}} | ||
|} | |} | ||
*<b>Forward Jump:</b> | |||
* | |||
{{STDiagramHeader}} | {{STDiagramHeader}} | ||
{{STDiagramCell|}} |{{STDiagramImageCell| 1 | | {{STDiagramCell|}} |{{STDiagramImageCell| 1 | Blanka_bj1_nj1_fj1.png}} |{{STDiagramImageCell| 1 | Blanka_bj2&4&14_nj2&4&14_fj2&4&17.png}} |{{STDiagramImageCell| 1 | Blanka_bj3_nj3_fj3.png}} |{{STDiagramImageCell| 1 | Blanka_bj5_nj5_fj5.png}} |{{STDiagramImageCell| 1 | Blanka_bj6&12_nj6&12_fj6.png}} |{{STDiagramImageCell| 1 | Blanka_bj7&11_nj7&11_fj7.png}} |{{STDiagramImageCell| 1 | Blanka_bj8&10_nj8&10_fj8.png}} |{{STDiagramImageCell| 1 | Blanka_bj9_nj9_fj9&15.png}} |{{STDiagramImageCell| 1 | Blanka_fj10&14.png}} |{{STDiagramImageCell| 1 | Blanka_fj11&13.png}} |{{STDiagramImageCell| 1 | Blanka_fj12.png}} |{{STDiagramImageCell| 1 | Blanka_fj11&13.png}} |{{STDiagramImageCell| 1 | Blanka_fj10&14.png}} |{{STDiagramImageCell| 1 | Blanka_bj9_nj9_fj9&15.png}} |{{STDiagramImageCell| 1 | Blanka_fj16.png}} |{{STDiagramImageCell| 1 | Blanka_bj2&4&14_nj2&4&14_fj2&4&17.png}} | ||
|- | |- | ||
{{STDiagramCell| Frame Count}} |{{STDiagramCell| | {{STDiagramCell| Frame Count}} |{{STDiagramCell| 1}} |{{STDiagramCell| 1}} |{{STDiagramCell| 1}} |{{STDiagramCell| 1}} |{{STDiagramCell| 4}} |{{STDiagramCell| 4}} |{{STDiagramCell| 4}} |{{STDiagramCell| 4}} |{{STDiagramCell| 4}} |{{STDiagramCell| 4}} |{{STDiagramCell| 4}} |{{STDiagramCell| 4}} |{{STDiagramCell| 4}} |{{STDiagramCell| 2}} |{{STDiagramCell| 1}} |{{STDiagramCell| 7*}} | ||
|- | |- | ||
{{STDiagramCell| Simplified}} |{{STDiagramCellColSpan| | {{STDiagramCell| Simplified}} |{{STDiagramCellColSpan| 3 | 3}} |{{STDiagramCell| 1}} |{{STDiagramCellColSpan| 10 | 38}} |{{STDiagramCell| 1}} |{{STDiagramCell| 7*}} | ||
|} | |} | ||
--> | |||
*<b>Prejump:</b> | |||
{{STDiagramHeader}} | {{STDiagramHeader}} | ||
{{STDiagramCell|}} |{{STDiagramImageCell| 1 | | {{STDiagramCell|}} |{{STDiagramImageCell| 1 | Blanka_bj1_nj1_fj1.png}} |{{STDiagramImageCell| 1 | Blanka_bj2&4&14_nj2&4&14_fj2&4&17.png}} |{{STDiagramImageCell| 1 | Blanka_bj3_nj3_fj3.png}} |{{STDiagramImageCell| 1 | Blanka_bj2&4&14_nj2&4&14_fj2&4&17.png}} | ||
|- | |- | ||
{{STDiagramCell| Frame Count}} |{{STDiagramCell| | {{STDiagramCell| Frame Count (Neutral)}} |{{STDiagramCell| 1}} |{{STDiagramCell| 1}} |{{STDiagramCell| 1}} |{{STDiagramCell| 1}} | ||
|- | |- | ||
{{STDiagramCell| Simplified | {{STDiagramCell| Simplified (Neutral)}} |{{STDiagramCellColSpan| 4 | 4}} | ||
|- | |- | ||
{{STDiagramCell| Frame Count}} |{{STDiagramCell| | {{STDiagramCell| Frame Count (Back)}} |{{STDiagramCell| 1}} |{{STDiagramCell| 1}} |{{STDiagramCell| 1}} |{{STDiagramCell| 1}} | ||
|- | |- | ||
{{STDiagramCell| Simplified}} | {{STDiagramCell| Simplified (Back)}} |{{STDiagramCellColSpan| 4 | 4}} | ||
| | |||
|- | |- | ||
{{STDiagramCell| Frame Count}} |{{STDiagramCell| | {{STDiagramCell| Frame Count (Forward)}} |{{STDiagramCell| 1}} |{{STDiagramCell| 1}} |{{STDiagramCell| 1}} |{{STDiagramCellNull| 1}} | ||
|- | |- | ||
{{STDiagramCell | Simplified | {{STDiagramCell| Simplified (Forward)}} |{{STDiagramCellColSpan| 4 | 3}} | ||
|} | |} | ||
*<b>Neutral/Back Jump, Airborne + Landing:</b> | |||
*<b>Neutral Jump:</b> | |||
{{STDiagramHeader}} | {{STDiagramHeader}} | ||
{{STDiagramCell|}} |{{STDiagramImageCell| 1 | | {{STDiagramCell|}} |{{STDiagramImageCell| 1 | Blanka_bj5_nj5_fj5.png}} |{{STDiagramImageCell| 1 | Blanka_bj6&12_nj6&12_fj6.png}} |{{STDiagramImageCell| 1 | Blanka_bj7&11_nj7&11_fj7.png}} |{{STDiagramImageCell| 1 | Blanka_bj8&10_nj8&10_fj8.png}} |{{STDiagramImageCell| 1 | Blanka_bj9_nj9_fj9&15.png}} |{{STDiagramImageCell| 1 | Blanka_bj8&10_nj8&10_fj8.png}} |{{STDiagramImageCell| 1 | Blanka_bj7&11_nj7&11_fj7.png}} |{{STDiagramImageCell| 1 | Blanka_bj6&12_nj6&12_fj6.png}} |{{STDiagramImageCell| 1 | Blanka_bj13_nj13.png}} |{{STDiagramImageCell| 1 | Blanka_bj2&4&14_nj2&4&14_fj2&4&17.png}} | ||
|- | |- | ||
{{STDiagramCell| Frame Count}} |{{STDiagramCell| | {{STDiagramCell| Frame Count (Neutral)}} |{{STDiagramCell| 1}} |{{STDiagramCell| 10}} |{{STDiagramCell| 4}} |{{STDiagramCell| 4}} |{{STDiagramCell| 6}} |{{STDiagramCell| 4}} |{{STDiagramCell| 4}} |{{STDiagramCell| 6}} |{{STDiagramCell| 1}} |{{STDiagramCell| 7*}} | ||
|- | |- | ||
{{STDiagramCell| Simplified | {{STDiagramCell| Simplified (Neutral)}} |{{STDiagramCell| 1}} |{{STDiagramCellColSpan| 7 | 38}} |{{STDiagramCell| 1}} |{{STDiagramCell| 7*}} | ||
|- | |- | ||
{{STDiagramCell| Frame Count}} |{{STDiagramCell| | {{STDiagramCell| Frame Count (Back)}} |{{STDiagramCell| 1}} |{{STDiagramCell| 10}} |{{STDiagramCell| 4}} |{{STDiagramCell| 4}} |{{STDiagramCell| 6}} |{{STDiagramCell| 4}} |{{STDiagramCell| 4}} |{{STDiagramCell| 7}} |{{STDiagramCell| 1}} |{{STDiagramCell| 7*}} | ||
|- | |- | ||
{{STDiagramCell| Simplified | {{STDiagramCell| Simplified (Back)}} |{{STDiagramCell| 1}} |{{STDiagramCellColSpan| 7 | 39}} |{{STDiagramCell| 1}} |{{STDiagramCell| 7*}} | ||
|} | |} | ||
*<b>Forward Jump:</b> | *<b>Forward Jump, Airborne + Landing:</b> | ||
{{STDiagramHeader}} | {{STDiagramHeader}} | ||
{{STDiagramCell|}} |{{STDiagramImageCell| 1 | | {{STDiagramCell|}} |{{STDiagramImageCell| 1 | Blanka_bj5_nj5_fj5.png}} |{{STDiagramImageCell| 1 | Blanka_bj6&12_nj6&12_fj6.png}} |{{STDiagramImageCell| 1 | Blanka_bj7&11_nj7&11_fj7.png}} |{{STDiagramImageCell| 1 | Blanka_bj8&10_nj8&10_fj8.png}} |{{STDiagramImageCell| 1 | Blanka_bj9_nj9_fj9&15.png}} |{{STDiagramImageCell| 1 | Blanka_fj10&14.png}} |{{STDiagramImageCell| 1 | Blanka_fj11&13.png}} |{{STDiagramImageCell| 1 | Blanka_fj12.png}} |{{STDiagramImageCell| 1 | Blanka_fj11&13.png}} |{{STDiagramImageCell| 1 | Blanka_fj10&14.png}} |{{STDiagramImageCell| 1 | Blanka_bj9_nj9_fj9&15.png}} |{{STDiagramImageCell| 1 | Blanka_fj16.png}} |{{STDiagramImageCell| 1 | Blanka_bj2&4&14_nj2&4&14_fj2&4&17.png}} | ||
|- | |- | ||
{{STDiagramCell| Frame Count}} |{{STDiagramCell| | {{STDiagramCell| Frame Count}} |{{STDiagramCell| 1}} |{{STDiagramCell| 4}} |{{STDiagramCell| 4}} |{{STDiagramCell| 4}} |{{STDiagramCell| 4}} |{{STDiagramCell| 4}} |{{STDiagramCell| 4}} |{{STDiagramCell| 4}} |{{STDiagramCell| 4}} |{{STDiagramCell| 4}} |{{STDiagramCell| 2}} |{{STDiagramCell| 1}} |{{STDiagramCell| 7*}} | ||
|- | |- | ||
{{STDiagramCell| Simplified | {{STDiagramCell| Simplified}} |{{STDiagramCell| 1}} |{{STDiagramCellColSpan| 10 | 38}} |{{STDiagramCell| 1}} |{{STDiagramCell| 7*}} | ||
|} | |} | ||
Blanka is the only character in the game that doesn't have the same prejump speed on all 3 forms of jumps. On his Neutral and Back Jumps, the prejump takes 4f to finish, which is considered slow. On his Forward Jump, it takes one frame less, so it's of average speed. With all that said, Blanka has the second quickest overall jump duration on the game (losing only to Claw's, draws with O.Sagat's).<br> | |||
{{STSharedJumpDescription}} | {{STSharedJumpDescription}} | ||
{{Navbox-ST}} | {{Navbox-ST}} | ||
[[Category:Hyper Street Fighter 2]] | [[Category: Super Street Fighter 2 Turbo]] | ||
[[Category: Hyper Street Fighter 2]] | |||
Latest revision as of 19:37, 13 November 2023
| Zangief | |
|---|---|
| Character Data | |
| Damage Scaling Factor | 22/32 |
| Forward Walk Speed | 40 |
| Backwards Walk Speed | 24 |
| Pre-Jump Frames | 4 |
| Forwards Jump Duration | 38 |
| Backwards Jump Duration | 39 |
| Landing Frames | 8* |
| Jump Height Apex | 73 |
| Forwards Jump Distance | 89 |
| Backwards Jump Distance | 99 |
| Soft Knockdown Recovery | 42 |
| Hard Knockdown Recovery | 76 |
Normal Moves
Disclaimer: To better understand the diagrams, read this.
Standing Normals
cl.lp
| Damage | Dizzy | Dizzy Time | Cancel | Guard | Act. Range |
|---|---|---|---|---|---|
| 16[1] / 14[1] | 0~5 | 40 | Chain, Special* | Mid | 0-48 |
| Startup | Active | Recovery | Total | Frame Adv. | Meter |
| 2 | 6 | 15 | 23 | -8/-6/-4 | 2/1 |
|
Zangief does a knife hand strike from over his head.
General Strategies
| |||||
Click to toggle detailed hitbox data.
frlp
| Damage | Dizzy | Dizzy Time | Cancel | Guard | Act. Range |
|---|---|---|---|---|---|
| 16[1] | 0~5 | 40 | Chain, Special | Mid | 49+ |
| Startup | Active | Recovery | Total | Frame Adv. | Meter |
| 3 | 4 | 5 | 12 | +4 | 2/1 |
|
A fast straight punch that can be canceled into itself.
| |||||
Click to toggle detailed hitbox data.
cl.mp
| Damage | Dizzy | Dizzy Time | Cancel | Guard | Act. Range |
|---|---|---|---|---|---|
| 24[1] | 5~11 | 60 | None | Mid | N/A |
| Startup | Active | Recovery | Total | Frame Adv. | Meter |
| 5 | 3 | 5 | 18 | +10 | 4/3 |
|
A relatively fast horizontal knife strike. This move doesn't change when you're close or far away.
| |||||
Click to toggle detailed hitbox data.
clhp
| Damage | Dizzy | Dizzy Time | Cancel | Guard | Act. Range |
|---|---|---|---|---|---|
| 30[1] | 10~16 | 80 | None | Mid | N/A |
| Startup | Active | Recovery | Total | Frame Adv. | Meter |
| 7 | 6 | 29 | 42 | -13 | 5/4 |
|
A powerful straight punch with very long recovery. Does not change based on distance from your opponent.
| |||||
Click to toggle detailed hitbox data.
cllk
| Damage | Dizzy | Dizzy Time | Cancel | Guard | Act. Range |
|---|---|---|---|---|---|
| 18[1] | 0~5 | 40 | None | Mid | 0-32 |
| Startup | Active | Recovery | Total | Frame Adv. | Meter |
| 8 | 8 | 5 | 21 | 0 | 2/1 |
|
Zangief jumps and does a weak knee drop on the way down.
| |||||
Click to toggle detailed hitbox data.
frlk
| Damage | Dizzy | Dizzy Time | Cancel | Guard | Act. Range |
|---|---|---|---|---|---|
| 18[1] | 0~5 | 40 | None | Low | 33+ |
| Startup | Active | Recovery | Total | Frame Adv. | Meter |
| 5 | 5 | 0 | 10 | +8 | 2/1 |
|
A low hitting kick with no recovery.
| |||||
Click to toggle detailed hitbox data.
clmk
| Damage | Dizzy | Dizzy Time | Cancel | Guard | Act. Range |
|---|---|---|---|---|---|
| 24[1] | 5~11 | 60 | None | Mid | 0-56 |
| Startup | Active | Recovery | Total | Frame Adv. | Meter |
| 7 | 4 | 9 | 20 | +5 | 4/3 x 2 |
|
A front kick with moderate startup and recovery.
| |||||
Click to toggle detailed hitbox data.
frmk
| Damage | Dizzy | Dizzy Time | Cancel | Guard | Act. Range |
|---|---|---|---|---|---|
| 24[1] | 5~11 | 60 | None | Mid | 57+ |
| Startup | Active | Recovery | Total | Frame Adv. | Meter |
| 7 | 4 | 9 | 20 | +5 | 4/3 |
|
A semi-circular middle kick, and Zangief's main poke.
| |||||
Click to toggle detailed hitbox data.
cl.hk
| Damage | Dizzy | Dizzy Time | Cancel | Guard | Act. Range |
|---|---|---|---|---|---|
| 30[1] + 4[1] | 10~16 + 1~7 | 80 + 70 | None | Mid | N/A |
| Startup | Active | Recovery | Total | Frame Adv. | Meter |
| 10 | 14 (6+8) | 31 | 39 | -23/-17(-18) | 5/4 |
|
A weird butterfly kick that hits twice.
| |||||
Click to toggle detailed hitbox data.
- Startup/Active:
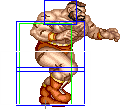 |
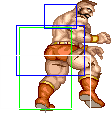 |
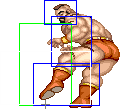 |
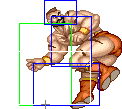 |
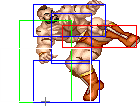 |
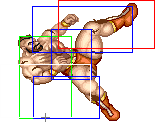
| |
| Frame Count | 1 + 2 | 2 | 2 | 3 | 6 | 8 |
| Simplified | 10 | 6 | 8 | |||
- Recovery:
 |
 |
 |
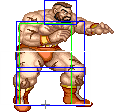
| |
| Frame Count | 8 | 10 | 8 | 5 |
| Simplified | 31 | |||
fr.hk
| Damage | Dizzy | Dizzy Time | Cancel | Guard | Act. Range |
|---|---|---|---|---|---|
| 30[1] | 10~16 | 80 | None | Mid | N/A |
| Startup | Active | Recovery | Total | Frame Adv. | Meter |
| 5 | 8 | 11 | 24 | +3 | 5/4 |
|
Zangief performs a high side kick.
| |||||
Click to toggle detailed hitbox data.
 |
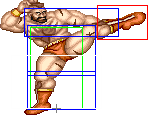 |

| |
| Frame Count | 1 + 4 | 8 | 11 |
Crouching Normals
crlp
| Damage | Dizzy | Dizzy Time | Cancel | Guard | Act. Range |
|---|---|---|---|---|---|
| 4[1] | 0~5 | 40 | Chain, Special | Mid | N/A |
| Startup | Active | Recovery | Total | Frame Adv. | Meter |
| 4 | 5 | 0 | 9 | +8 | 2/1 |
|
A crouching spear hand strike.
| |||||
Click to toggle detailed hitbox data.
crmp
| Damage | Dizzy | Dizzy Time | Cancel | Guard | Act. Range |
|---|---|---|---|---|---|
| 24[1] | 5~11 | 60 | None | Mid | N/A |
| Startup | Active | Recovery | Total | Frame Adv. | Meter |
| 7 | 8 | 9 | 24 | +1 | 4/3 |
|
A crouching straight punch that hits around the stomach, with moderate recovery.
| |||||
Click to toggle detailed hitbox data.
crhp
| Damage | Dizzy | Dizzy Time | Cancel | Guard | Act. Range |
|---|---|---|---|---|---|
| 30[1] | 10~16 | 80 | None | Mid | N/A |
| Startup | Active | Recovery | Total | Frame Adv. | Meter |
| 7 | 8 | 23 | 38 | -9 | 5/4 |
|
Similar to crouching Strong with a slightly longer hitbox and MUCH longer recovery.
| |||||
Click to toggle detailed hitbox data.
crlk
| Damage | Dizzy | Dizzy Time | Cancel | Guard | Act. Range |
|---|---|---|---|---|---|
| 18[1] | 0~5 | 40 | Special | Low | N/A |
| Startup | Active | Recovery | Total | Frame Adv. | Meter |
| 4 | 4 | 7 | 15 | +2 | 2/1 |
|
A crouching sidekick, the first of 3.
| |||||
Click to toggle detailed hitbox data.
crmk
| Damage | Dizzy | Dizzy Time | Cancel | Guard | Act. Range |
|---|---|---|---|---|---|
| 24[1] | 5~11 | 60 | Special | Low | N/A |
| Startup | Active | Recovery | Total | Frame Adv. | Meter |
| 4 | 6 | 9 | 19 | +3 | 4/3 |
|
Another crouching side kick.
| |||||
Click to toggle detailed hitbox data.
crhk
| Damage | Dizzy | Dizzy Time | Cancel | Guard | Act. Range |
|---|---|---|---|---|---|
| 30[1] | 5~11 | 130 | None | Low | N/A |
| Startup | Active | Recovery | Total | Frame Adv. | Meter |
| 5 | 8 | 13 | 26 | +1/Down | 5/4 |
|
Zangief's sweep, same animation as his crouching Short and Roundhouse but with longer recovery.
| |||||
Click to toggle detailed hitbox data.
Jumping Normals
njlp
| Damage | Dizzy | Dizzy Time | Cancel | Guard | Act. Range |
|---|---|---|---|---|---|
| 18[1] | 1~7(-2) | 40 | None | High | N/A |
| Startup | Active | Recovery | Total | Frame Adv. | Meter |
| 2 | 11 (3/8) | ∞ | 13+∞ | Dependent | 2/1 |
|
An aerial knife hand strike. The neutral and diagonal jump versions are the same, but with slightly different hitboxes.
| |||||
Click to toggle detailed hitbox data.
Neutral Jump Version:
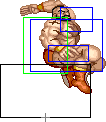 |
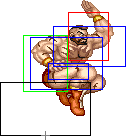 |
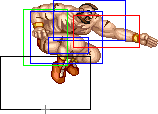 |
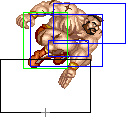
| |
| Frame Count | 2 | 3 | 8 | ∞ |
| Simplified | 2 | 11 | ∞ | |
Diagonal Jump Version:
 |
 |
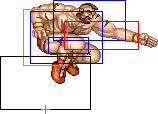 |

| |
| Frame Count | 2 | 3 | 8 | ∞ |
| Simplified | 2 | 11 | ∞ | |
njmp
| Neutral Jump | Damage | Dizzy | Dizzy Time | Cancel | Guard | Act. Range |
|---|---|---|---|---|---|---|
| 22[1] | 1~7(-2) | 40 | None | High | N/A | |
| Startup | Active | Recovery | Total | Frame Adv. | Meter | |
| 2 | 11 (3/8) | ∞ | 13+∞ | Dependent | 4/3 | |
|
| ||||||
| Diagonal Jump | Damage | Dizzy | Dizzy Time | Cancel | Guard | Act. Range |
| 22[1] | 5~11 | 50(+10) | None | High | N/A | |
| Startup | Active | Recovery | Total | Frame Adv. | Meter | |
| 2 | 11 (3/8) | ∞ | 13+∞ | Dependent | 4/3 | |
|
| ||||||
Click to toggle detailed hitbox data.
Neutral Jump Version:
 |
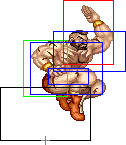 |
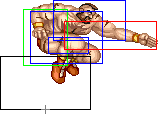 |

| |
| Frame Count | 2 | 3 | 8 | ∞ |
| Simplified | 2 | 11 | ∞ | |
Diagonal Jump Version:
 |
 |
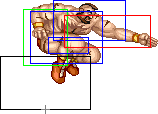 |

| |
| Frame Count | 2 | 3 | 8 | ∞ |
| Simplified | 2 | 11 | ∞ | |
njhp
| Damage | Dizzy | Dizzy Time | Cancel | Guard | Act. Range |
|---|---|---|---|---|---|
| 30[1] | 11~17(-1) | 60(+20) | None | High | N/A |
| Startup | Active | Recovery | Total | Frame Adv. | Meter |
| 2 | 11 (3/8) | ∞ | 13+∞ | Dependent | 5/4 |
|
Zangief's best aerial hand knife strike.
| |||||
Click to toggle detailed hitbox data.
djhp
| Damage | Dizzy | Dizzy Time | Cancel | Guard | Act. Range |
|---|---|---|---|---|---|
| 30[1] | 11~17(-1) | 60(+20) | None | High | N/A |
| Startup | Active | Recovery | Total | Frame Adv. | Meter |
| 7 | 7 | ∞ | 14+∞ | Dependent | 5/4 |
|
An aerial long punch.
| |||||
Click to toggle detailed hitbox data.
jlk
| Neutral Jump | Damage | Dizzy | Dizzy Time | Cancel | Guard | Act. Range |
|---|---|---|---|---|---|---|
| 18[1] | 1~7(-2) | 40 | None | High | N/A | |
| Startup | Active | Recovery | Total | Frame Adv. | Meter | |
| 3 | ∞ | N/A | 3+∞ | Dependent | 2/1 | |
|
| ||||||
| Diagonal Jump | Damage | Dizzy | Dizzy Time | Cancel | Guard | Act. Range |
| 18[1] | 1~7(-2) | 40 | None | High | N/A | |
| Startup | Active | Recovery | Total | Frame Adv. | Meter | |
| 3 | 16 | ∞ | 19+∞ | Dependent | 2/1 | |
|
Zangief does a weak two foot kick. The neutral jump version lasts the whole jump and has worse vertical priority.
| ||||||
Click to toggle detailed hitbox data.
- Neutral Jump Version:
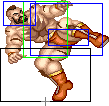 |
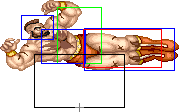
| |
| Frame Count | 3 | ∞ |
- Diagonal Jump Version:
 |
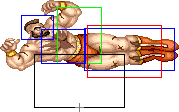 |
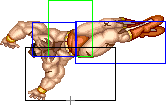 |
 |
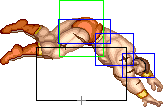 |

| |
| Frame Count | 3 | 16 | 8 | 6 | 4 | ∞ |
| Simplified | 3 | 16 | ∞ | |||
njmk
| Damage | Dizzy | Dizzy Time | Cancel | Guard | Act. Range |
|---|---|---|---|---|---|
| 22[1] | 5~11 | 50(+10) | None | High | N/A |
| Startup | Active | Recovery | Total | Frame Adv. | Meter |
| 3 | 16 | ∞ | 19+∞ | Dependent | 4/3 |
|
Another two foot aerial kick.
| |||||
Click to toggle detailed hitbox data.
- Neutral Jump Version:
 |
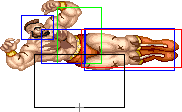 |
 |
 |
 |

| |
| Frame Count | 3 | 16 | 8 | 6 | 4 | ∞ |
| Simplified | 3 | 16 | ∞ | |||
- Diagonal Jump Version:
 |
File:Zangief djfrwrd2.png |  |
 |
 |

| |
| Frame Count | 3 | 16 | 8 | 6 | 4 | ∞ |
| Simplified | 3 | 16 | ∞ | |||
jhk
| Damage | Dizzy | Dizzy Time | Cancel | Guard | Act. Range |
|---|---|---|---|---|---|
| 30[1] | 11~17 (-1) | 60(+20) | None | Mid | N/A |
| Startup | Active | Recovery | Total | Frame Adv. | Meter |
| 3 | 8 | ∞ | 11+∞ | Dependent | 5/4 |
|
One more two foot aerial kick.
| |||||
Click to toggle detailed hitbox data.
- Neutral Jump Version:
 |
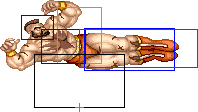 |
 |
 |
 |

| |
| Frame Count | 3 | 8 | 8 | 6 | 4 | ∞ |
| Simplified | 3 | 8 | ∞ | |||
- Diagonal Jump Version:
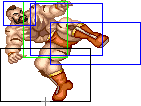 |
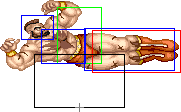 |
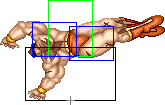 |
 |
 |

| |
| Frame Count | 3 | 8 | 8 | 6 | 4 | ∞ |
| Simplified | 3 | 8 | ∞ | |||
Command Normals
Headbutt
| Damage | Dizzy | Dizzy Time | Cancel | Guard | Act. Range | |
|---|---|---|---|---|---|---|
| 24[0] | 1~7 | 70 | None | Mid | N/A | |
| Startup | Active | Recovery | Total | Frame Adv. | Meter | |
| 15 | 8 | 17 | 40 | Dependent | 4/3 | |
|
| ||||||
| Damage | Dizzy | Dizzy Time | Cancel | Guard | Act. Range | |
| 26[1] | 1~7 | 70 | None | Mid | N/A | |
| Startup | Active | Recovery | Total | Frame Adv. | Meter | |
| 15 | 10 | 18 | 43 | Dependent | 5/4 | |
|
Zangief does a stupid little hop into a headbutt.
| ||||||
Click to toggle detailed hitbox data.
- Strong Version:
 |
 |
 |
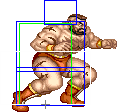 |
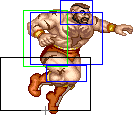 |
 |
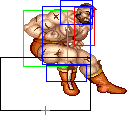 |
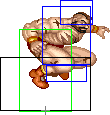 |
 |

| |
| Frame Count | 1 + 1 | 1 | 1 | 2 | 3 | 6 | 8 | 8 | 6 | 3 |
| Simplified | 15 | 8 | 17 | |||||||
- Fierce Version:
 |
 |
 |
 |
 |
 |
 |
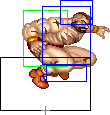 |
 |

| |
| Frame Count | 1 + 1 | 1 | 1 | 2 | 3 | 6 | 10 | 6 | 9 | 3 |
| Simplified | 15 | 10 | 18 | |||||||
Air Headbutt
| Damage | Dizzy | Dizzy Time | Cancel | Guard | Act. Range | |
|---|---|---|---|---|---|---|
| 26[2] | 21~27 (World) 28~34 (JP) |
100 (World) 90 (JP) |
None | High | N/A | |
| Startup | Active | Recovery | Total | Frame Adv. | Meter | |
| 3 | 8 | ∞ | 11+∞ | Dependent | 4/3 | |
|
| ||||||
| Damage | Dizzy | Dizzy Time | Cancel | Guard | Act. Range | |
| 32[2] | 21~27 (World) 28~34 (JP) |
100 (World) 90 (JP) |
None | High | N/A | |
| Startup | Active | Recovery | Total | Frame Adv. | Meter | |
| 3 | 6 | ∞ | 9+∞ | Dependent | 5/4 | |
|
Zangief does a headbutt midair. One of the hardest moves to land in the game, likely on purpose.
| ||||||
Click to toggle detailed hitbox data.
Flying Body Press
| Damage | Dizzy | Dizzy Time | Cancel | Guard | Act. Range |
|---|---|---|---|---|---|
| 26[1] | 11~17(-1) | 60(+20) | None | High | N/A |
| Startup | Active | Recovery | Total | Frame Adv. | Meter |
| 5 | ∞ | N/A | 5+∞ | Dependent | 5/4 |
|
Zangief does a body press with his hairy chest.
| |||||
Click to toggle detailed hitbox data.
Double Knee Drop
| Damage | Dizzy | Dizzy Time | Cancel | Guard | Act. Range | |
|---|---|---|---|---|---|---|
| 16[1] | 1~7(-2) | 40 | None | High | N/A | |
| Startup | Active | Recovery | Total | Frame Adv. | Meter | |
| 5 | ∞ | N/A | +∞ | Dependent | 2/1 | |
|
| ||||||
| Damage | Dizzy | Dizzy Time | Cancel | Guard | Act. Range | |
| 22[1] | 1~7(-2) | 40 | None | High | N/A | |
| Startup | Active | Recovery | Total | Frame Adv. | Meter | |
| 7 | 18 | ∞ | 25+∞ | Dependent | 4/3 | |
|
Zangief does a double knee attack in the air.
| ||||||
Click to toggle detailed hitbox data.
Throws
Zangief can perform throws/holds with ![]() ,
, ![]() ,
, ![]() and
and ![]() . He can also perform a throw while crouching using
. He can also perform a throw while crouching using ![]() or
or ![]() . He even has two air throws with
. He even has two air throws with ![]() /
/![]() or
or ![]() /
/![]() .
.
| Damage | Dizzy | Dizzy Time | Cancel | Guard | Act. Range |
|---|---|---|---|---|---|
| 26 + 4*n | 0 | 0 | None | Grab | 69 (from axis) 24 (from throwable box) |
| Startup | Active | Recovery | Total | Frame Adv. | Meter |
| 1 | 1 | Dependent | 2 | N/A | - |
|
Zangief's unique crouching hold, a variation of his standing Fierce grab.
| |||||
Click to toggle throwbox data.
| Damage | Dizzy | Dizzy Time | Cancel | Guard | Act. Range |
|---|---|---|---|---|---|
| 32 | 7~13 | 100 | None | Grab | 69 (from axis) 24 (from throwable box) |
| Startup | Active | Recovery | Total | Frame Adv. | Meter |
| 1 | 1 | Dependent | 2 | N/A | - |
|
A piledriver, without the spin.
| |||||
| Damage | Dizzy | Dizzy Time | Cancel | Guard | Act. Range |
|---|---|---|---|---|---|
| 26 + 4*n | 0 | 0 | None | Grab | 69 (from axis) 24 (from throwable box) |
| Startup | Active | Recovery | Total | Frame Adv. | Meter |
| 1 | 1 | Dependent | 2 | N/A | - |
|
Zangief noogies his opponent's face for multiple hits.
| |||||
| Damage | Dizzy | Dizzy Time | Cancel | Guard | Act. Range |
|---|---|---|---|---|---|
| 32 | 7~13 | 100 | None | Grab | 69 (from axis) 24 (from throwable box) |
| Startup | Active | Recovery | Total | Frame Adv. | Meter |
| 1 | 1 | Dependent | 2 | N/A | - |
|
Zangief brings his opponent's head down to the floor, throwing them behind him.
| |||||
| Damage | Dizzy | Dizzy Time | Cancel | Guard | Act. Range |
|---|---|---|---|---|---|
| 26 + 4*n | 0 | 0 | None | Grab | 69 (from axis) 24 (from throwable box) |
| Startup | Active | Recovery | Total | Frame Adv. | Meter |
| 1 | 1 | Dependent | 2 | N/A | - |
|
Zangief bites his opponent for multiple hits.
| |||||
Click to toggle throwbox data.
| Damage | Dizzy | Dizzy Time | Cancel | Guard | Act. Range |
|---|---|---|---|---|---|
| 42 | 7~13 | 100 | None | Grab | 61 (from axis) 16 (from throwable box) |
| Startup | Active | Recovery | Total | Frame Adv. | Meter |
| 1 | 1 | Dependent | 2 | N/A | - |
|
Zangief throws his opponent down in the direction pressed.
| |||||
Click to toggle throwbox data.
| Damage | Dizzy | Dizzy Time | Cancel | Guard | Act. Range |
|---|---|---|---|---|---|
| 32 | 7~13 | 100 | None | Grab | 61 (from axis) 16 (from throwable box) |
| Startup | Active | Recovery | Total | Frame Adv. | Meter |
| 1 | 1 | Dependent | 2 | N/A | - |
|
Zangief tosses his opponent over his head in the direction pressed.
| |||||
Click to toggle throwbox data.
Special Moves
Spinning Piledriver
Click to toggle detailed hitbox data.
- Throwbox:
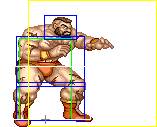
|
- Whiff Animation:
 |
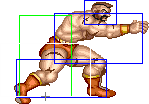 |
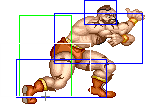 |
 |

| |
| Frame Count (Jab) | 5 | 5 | 16 | 3 | 3 |
| Simplified (Jab) | 32 | ||||
| Frame Count (Strong) | 5 | 5 | 18 | 3 | 3 |
| Simplified (Strong) | 34 | ||||
| Frame Count (Fierce) | 5 | 5 | 20 | 3 | 3 |
| Simplified (Fierce) | 20 | ||||
Atomic Suplex
{{MoveData
| name = Atomic Suplex
| input = Close![]() +
+ ![]() / 360K
/ 360K
Click to toggle detailed hitbox data.
Vertical Roll
Click to toggle detailed hitbox data.
- Active:
 |
 |
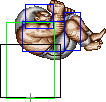 |
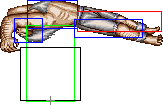 |
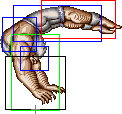
| |
| Frame Count (Short) | 18 | 12 | 3 | 4 | 4 |
| Simplified (Short) | 18 | 15 | 8 | ||
| Frame Count (Forward) | 17 | 12 | 3 | 4 | 4 |
| Simplified (Forward) | 17 | 15 | 8 | ||
| Frame Count (Roundhouse) | 16 | 12 | 3 | 4 | 4 |
| Simplified (Roundhouse) | 16 | 15 | 8 | ||
- Recovery
 |
 |
 |
 |
 |
 |

| |
| Frame Count (Short) | 4 | 4 | 3 | 1 | 2 | 4 | |
| Simplified (Short) | 11 | 7 | |||||
| Frame Count (Forward) | 4 | 4 | 3 | 1 | 2 | 5 | |
| Simplified (Forward) | 11 | 8 | |||||
| Frame Count (Rh) | 4 | 4 | 4 | 3 | 1 | 2 | 6 |
| Simplified (Rh) | 15 | 9 | |||||
- Knockback:
 |
 |
 |

| |
| Frame Count (Short) | 40+ | 1 | 2 | 4 |
| Simplified (Short) | 40+ | 7 | ||
| Frame Count (Forward) | 40+ | 1 | 2 | 5 |
| Simplified (Forward) | 40+ | 8 | ||
| Frame Count (Rh) | 40+ | 1 | 2 | 6 |
| Simplified (Rh) | 40+ | 9 | ||
Backstep Roll
| Damage | Dizzy | Dizzy Time | Cancel | Guard | Act. Range | |
|---|---|---|---|---|---|---|
| (12[0] x 3) / 28[1] | (1~7 x 3) / 1~7 | (30 x 3) / 30 | None | Mid | N/A | |
| Startup | Active | Recovery | Total | Frame Adv. | Meter | |
| 44 | 20 (4/3/2/11) | 5 on whiff/combo 33+ on spin block/hit |
69/97+ | Dependent | 7 | |
|
| ||||||
| Damage | Dizzy | Dizzy Time | Cancel | Guard | Act. Range | |
| (12[1] x 3) / 28[2] | (1~7 x 3) / 1~7 | (30 x 3) / 30 | None | Mid | N/A | |
| Startup | Active | Recovery | Total | Frame Adv. | Meter | |
| 38 | 23 (4/3/2/14) | 6 on whiff/combo 34+ on spin block/hit |
67/95+ | Dependent | 7 | |
|
| ||||||
| Damage | Dizzy | Dizzy Time | Cancel | Guard | Act. Range | |
| (12[2] x 3) / 28[3] | (1~7 x 3) / 1~7 | (30 x 3) / 30 | None | Mid | N/A | |
| Startup | Active | Recovery | Total | Frame Adv. | Meter | |
| 31 | 25 (4/3/2/16) | 7 on whiff/combo 35+ on spin block/hit |
63/91+ | Dependent | 7 | |
|
Blanka flips back and jumps forward, rolling on his way down.
| ||||||
Click to toggle detailed hitbox data.
Startup:
 |
 |
 |
 |
 |
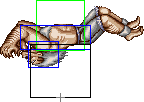 |
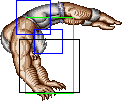
| |
| Frame Count (Short) | 2 | 4 | 2 | 3 | 5 | 5 | 2 |
| Simplified (Short) | 11 | 12 | |||||
| Frame Count (Forward) | 1 | 3 | 1 | 3 | 5 | 5 | 3 |
| Simplified (Forward) | 8 | 13 | |||||
| Frame Count (Rh) | 1 | 2 | 1 | 1 | 5 | 5 | 3 |
| Simplified (Rh) | 5 | 13 | |||||
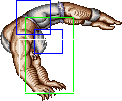 |
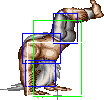 |
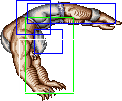 |
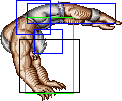 |
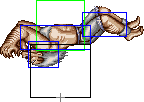 |

| |
| Frame Count (Short) | 3 | 6 | 3 | 3 | 3 | 3 |
| Simplified (Short) | 12 | 9 | ||||
| Frame Count (Forward) | 2 | 4 | 2 | 3 | 3 | 3 |
| Simplified (Forward) | 8 | 9 | ||||
| Frame Count (Rh) | 1 | 2 | 1 | 3 | 3 | 3 |
| Simplified (Rh) | 4 | 9 | ||||
Active/Recovery:
 |
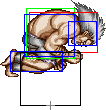 |
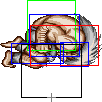 |
 |
 |
 |

| |
| Frame Count (Short) | 4 | 3 | 2 | 11 | 1 | 2 | 2 |
| Simplified (Short) | 4 | 3 | 2 | 11 | 5 | ||
| Frame Count (Forward) | 4 | 3 | 2 | 14 | 1 | 2 | 3 |
| Simplified (Forward) | 4 | 3 | 2 | 14 | 6 | ||
| Frame Count (Rh) | 4 | 3 | 2 | 16 | 1 | 2 | 4 |
| Simplified (Rh) | 4 | 3 | 2 | 16 | 7 | ||
- Knockback:
 |
 |
 |

| |
| Frame Count (Short) | 28+ | 1 | 2 | 2 |
| Simplified (Short) | 28+ | 5 | ||
| Frame Count (Forward) | 28+ | 1 | 2 | 3 |
| Simplified (Forward) | 28+ | 6 | ||
| Frame Count (Rh) | 28+ | 1 | 2 | 4 |
| Simplified (Rh) | 28+ | 7 | ||
Surprise Forward
Blanka jumps forward. The hop lasts for about 18 frames before an 8 frame landing animation.
- Gives you 5 points of meter.
- Allows you to pass through opponents.
- Use this sparingly, mostly as a mixup tool. Experienced players can react and punish.
Click to toggle detailed hitbox data.
Surprise Back
Blanka jumps backwards. Invincible from frames 1-13.
- Gives you 5 points of meter.
- An excellent meter building move.
- The invincibility allows you to escape from some nasty situations.
Click to toggle detailed hitbox data.
Super Combo
| Damage | Dizzy | Dizzy Time | Cancel | Guard | Act. Range |
|---|---|---|---|---|---|
| 20[1] x 4 | 0~4 x 4 | 20 x 4 | None | Mid | N/A |
| Startup | Active | Recovery | Total | Frame Adv. | Meter |
| 14 | 29 (Jumping down) 0 to 90 (Charging) ∞ (Rolling) |
0 on whiff 40 on block/hit |
57 | -17/Hard Down | - |
|
Invincible on frames 1-14. Blanka jumps up in an invincible state, falls down with a hitbox, then rolls forward until he hits a wall.
General Strategies
| |||||
Click to toggle detailed hitbox data.
 |
 |
 |
 |

| |
| Frame Count | 1 + [18] + 5 | 5 | 3 | 29 | 0 to 90 + ∞ |
| Simplified | 14 | 29 | ∞ | ||
- Knockback:
 |
 |
 |
 |

| |
| Frame Count | 28 | 3 | 5 | 3 | 1 |
| Simplified | 28 | 12 | |||
Misc Animations
Jump Animations
- Prejump:
 |
 |
 |

| |
| Frame Count (Neutral) | 1 | 1 | 1 | 1 |
| Simplified (Neutral) | 4 | |||
| Frame Count (Back) | 1 | 1 | 1 | 1 |
| Simplified (Back) | 4 | |||
| Frame Count (Forward) | 1 | 1 | 1 | |
| Simplified (Forward) | 3 | |||
- Neutral/Back Jump, Airborne + Landing:
 |
 |
 |
 |
 |
 |
 |
 |
 |

| |
| Frame Count (Neutral) | 1 | 10 | 4 | 4 | 6 | 4 | 4 | 6 | 1 | 7* |
| Simplified (Neutral) | 1 | 38 | 1 | 7* | ||||||
| Frame Count (Back) | 1 | 10 | 4 | 4 | 6 | 4 | 4 | 7 | 1 | 7* |
| Simplified (Back) | 1 | 39 | 1 | 7* | ||||||
- Forward Jump, Airborne + Landing:
 |
 |
 |
 |
 |
 |
 |
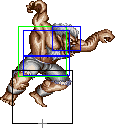 |
 |
 |
 |
 |

| |
| Frame Count | 1 | 4 | 4 | 4 | 4 | 4 | 4 | 4 | 4 | 4 | 2 | 1 | 7* |
| Simplified | 1 | 38 | 1 | 7* | |||||||||
Blanka is the only character in the game that doesn't have the same prejump speed on all 3 forms of jumps. On his Neutral and Back Jumps, the prejump takes 4f to finish, which is considered slow. On his Forward Jump, it takes one frame less, so it's of average speed. With all that said, Blanka has the second quickest overall jump duration on the game (losing only to Claw's, draws with O.Sagat's).
The landing recovery has a special property which allows it to be canceled into certain actions. At the first landing frame, you can perform throws (including command throws), and on the second landing frame, you can start another jump, attack with a normal or special move, or block. Blocking not being until the second landing frame, as well as hitbox-hurtbox interactions having priority over throwbox-throw hurtbox is why sweeps work as anti airs in this game.
Things are different when jumping over your opponent, however. In that situation it's possible to walk back/forward, to jump again or to even block on the first landing frame! Strangely, if a throw is timed on the first landing frame of a jump that crosses over, a throwbox will never come out, even though that input will result in a normal coming out 2 frames later (like it normally would). Anyway, being able to block on the first landing frame can help a little bit on some safe jump crossup setups, or maybe in other situations as well if your character has a huge jump arc.
