ReckyDaGuy (talk | contribs) No edit summary |
ReckyDaGuy (talk | contribs) No edit summary |
||
| Line 1,407: | Line 1,407: | ||
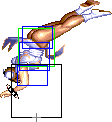
===== <span class="invisible-header">Flying Sumo Press</span> ===== | ===== <span class="invisible-header">Flying Sumo Press</span> ===== | ||
{{MoveData | {{MoveData | ||
| name = | | name = Yosokyaku | ||
| input = 2MK midair<br>{{d}}+{{mk}} midair | | input = 2MK midair<br>{{d}}+{{mk}} midair | ||
| subtitle = | | subtitle = Head Stomp | ||
| image = ChunLi_hs3.png | | image = ChunLi_hs3.png | ||
| imageSize = 62x109px | | imageSize = 62x109px | ||
| Line 1,427: | Line 1,427: | ||
|actrange = N/A | |actrange = N/A | ||
|meter = 4/3 | |meter = 4/3 | ||
|description= | |description= Chun-Li stomps on her opponent midair. | ||
* | *This move starts a juggle state and can be used up to 3 times before landing. | ||
*It is possible to use this move as an instant overhead. Simply jump and immediately do a head stomp, and the enemy will have to block high to avoid getting hit. | |||
*This move has "trip guard", meaning if you use it and someonetries to sweep or Low Tiger Shot you, you'll either beat it or land in a blocking position. | |||
}} | }} | ||
}} | }} | ||
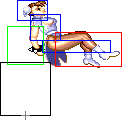
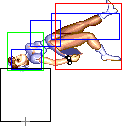
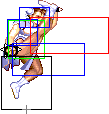
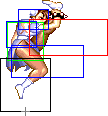
<span class="mw-customtoggle- | <span class="mw-customtoggle-stomp" style="color: cyan">'''Click to toggle detailed hitbox data.'''</span> | ||
<div class="mw-collapsible mw-collapsed" id="mw-customcollapsible- | <div class="mw-collapsible mw-collapsed" id="mw-customcollapsible-stomp"> | ||
{{STDiagramHeader}} | {{STDiagramHeader}} | ||
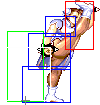
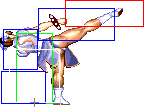
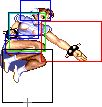
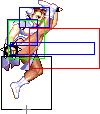
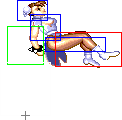
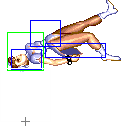
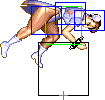
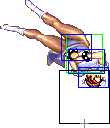
{{STDiagramCell|}} |{{STDiagramImageCell| 1 | | {{STDiagramCell|}} |{{STDiagramImageCell| 1 | ChunLi_hs1&4.png}} |{{STDiagramImageCell| 1 | ChunLi_hs2&5.png}} |{{STDiagramImageCell| 1 | ChunLi_hs3.png}} |{{STDiagramImageCell| 1 | ChunLi_hs1&4.png}} |{{STDiagramImageCell| 1 | ChunLi_hs2&5.png}} |{{STDiagramImageCell| 1 | ChunLi_hs6.png}} |{{STDiagramImageCell| 1 | ChunLi_hs7.png}} | ||
|- | |- | ||
{{STDiagramCell| Frame Count}} |{{STDiagramCell| | {{STDiagramCell| Frame Count}} |{{STDiagramCell| 1}} |{{STDiagramCell| 2}} |{{STDiagramCell| 16}} |{{STDiagramCell| 8}} |{{STDiagramCell| 4}} |{{STDiagramCell| 5}} |{{STDiagramCell| ∞}} | ||
|- | |- | ||
{{STDiagramCell| Simplified}} |{{STDiagramCellColSpan| 2 | | {{STDiagramCell| Simplified}} |{{STDiagramCellColSpan| 2 | 3}} |{{STDiagramCell| 16}} |{{STDiagramCellColSpan| 4 | ∞}} | ||
|} | |} | ||
| Line 1,450: | Line 1,450: | ||
==Throws== | ==Throws== | ||
Chun-Li can throw with {{Icon-Capcom|mp}} and {{Icon-Capcom|hp}}. She also has an air throw, performed with the same buttons. | |||
{{MoveData | {{MoveData | ||
| name = | | name = Koshuto | ||
| input = cl. 4 or 6MP<br>cl. {{b}} or {{f}}+{{mp}} | | input = cl. 4 or 6MP/HP<br>cl. {{b}} or {{f}}+{{mp}}/{{hp}} | ||
| subtitle = | | subtitle = | ||
| image = | | image = ssf2t_chunli_pthrow.png | ||
| imageSize = | | imageSize = 157x87px | ||
| caption = | | caption = | ||
| data = | | data = | ||
{{AttackData-SSF2T | {{AttackData-SSF2T | ||
|damage = <u>32</u> | |damage = <u>38</u> (MP)<br><u>32</u> (HP) | ||
|dizzy= 7~13 | |dizzy= 7~13 | ||
|dizzytime= 100 | |dizzytime= 100 | ||
| Line 1,471: | Line 1,471: | ||
|total = 2 | |total = 2 | ||
|frameAdv = N/A | |frameAdv = N/A | ||
|actrange = | |actrange = 48 (from axis)<br>23 (from throwable box) | ||
|description= | |description= Chun-Li's throw. | ||
*The direction | *The direction held when throwing determines the direction you'll throw at. | ||
* | *The Strong version does more damage than the Fierce version for some reason, so prefer the Strong version when you're not trying to throw tech. | ||
* | *Be careful when throwing cornered opponents towards the corner, since most characters can actually punish Chun-Li's recovery if they tech. | ||
}} | }} | ||
}} | }} | ||
| Line 1,481: | Line 1,481: | ||
{{MoveData | {{MoveData | ||
| name = | | name = Ryuseiraku | ||
| input = | | input = Any direction but 8 midair + MP/HP<br>Any direction but {{u}} midair + {{mp}}/{{hp}} | ||
| subtitle = | | subtitle = | ||
| image = | | image = ssf2t_chunli_pthrow.png | ||
| imageSize = | | imageSize = 157x87px | ||
| caption = | | caption = | ||
| data = | | data = | ||
{{AttackData-SSF2T | {{AttackData-SSF2T | ||
|damage = <u> | |damage = <u>34</u> | ||
|dizzy= | |dizzy= 7~13 | ||
|dizzytime= | |dizzytime= 100 | ||
|cancel = None | |cancel = None | ||
|guard = Grab | |guard = Grab | ||
| Line 1,499: | Line 1,499: | ||
|total = 2 | |total = 2 | ||
|frameAdv = N/A | |frameAdv = N/A | ||
|actrange = 58 (from axis) 33 (from throwable box) | |||
|actrange = | |description= Same sprite and basic function as Chun's grounded throw. | ||
*Very good range for an air throw. | |||
|description= | |||
* | |||
}} | }} | ||
}} | }} | ||
<span class="mw-customtoggle-throw" style="color: cyan">'''Click to toggle throwbox data.'''</span> | <span class="mw-customtoggle-throw" style="color: cyan">'''Click to toggle throwbox data.'''</span> | ||
<div class="mw-collapsible mw-collapsed" id="mw-customcollapsible-throw"> | <div class="mw-collapsible mw-collapsed" id="mw-customcollapsible-throw"> | ||
'''Grounded Throw''' | |||
{{STDiagramHeader}} | {{STDiagramHeader}} | ||
{{STDiagramImageCell| 1 | {{STDiagramImageCell| 1| ChunLi_throwb.png}} |{{STDiagramImageCell| 1 | ChunLi_throw.png}} |{{STDiagramImageCell| 1 | ChunLi_throwf.png}} | ||
|} | |} | ||
'''Air Throw''' | |||
{{STDiagramHeader}} | |||
{{STDiagramImageCell| 1| ChunLi_airthrow.png}} | |||
|} | |||
</div> | </div> | ||
--[[User:Raisin|Raisin]] (March 12, 2007), some info courtesy T.Akiba | |||
==Special Moves== | ==Special Moves== | ||
Revision as of 01:13, 24 February 2023
Normal Moves
Disclaimer: To better understand the diagrams, read this.
Standing Normals
cl.lp
| Damage | Dizzy | Dizzy Time | Cancel | Guard | Act. Range |
|---|---|---|---|---|---|
| 18[0] | 0~5 | 40 | Chain, Special, Super | Mid | 0-21 |
| Startup | Active | Recovery | Total | Frame Adv. | Meter |
| 4 | 4 | 4 | 12 | +5 | 2/1 |
|
A quick rapid-fire jab.
| |||||
Click to toggle detailed hitbox data.
frlp
| Damage | Dizzy | Dizzy Time | Cancel | Guard | Act. Range |
|---|---|---|---|---|---|
| 4[0] | 0~5 | 40 | Chain, Special, Super | Mid | 22+ |
| Startup | Active | Recovery | Total | Frame Adv. | Meter |
| 3 | 2 | 8 | 13 | +3 | 2/1 |
|
A rapid-fire slap.
| |||||
Click to toggle detailed hitbox data.
cl.mp
| Damage | Dizzy | Dizzy Time | Cancel | Guard | Act. Range |
|---|---|---|---|---|---|
| 22[1] | 5~11 | 60 | Special, Super | Mid | 0-36 |
| Startup | Active | Recovery | Total | Frame Adv. | Meter |
| 5 | 4 | 4 | 13 | +10 | 4/3 |
|
A punch with huge frame advantage.
| |||||
Click to toggle detailed hitbox data.
frmp
| Damage | Dizzy | Dizzy Time | Cancel | Guard | Act. Range |
|---|---|---|---|---|---|
| 22[0] | 5~11 | 60 | Special, Super | Mid | 37+ |
| Startup | Active | Recovery | Total | Frame Adv. | Meter |
| 5 | 4 | 4 | 13 | +10 | 4/3 |
|
A poke with the same excellent frame advantage as the close version.
| |||||
Click to toggle detailed hitbox data.
clhp
| Damage | Dizzy | Dizzy Time | Cancel | Guard | Act. Range |
|---|---|---|---|---|---|
| 24[1] | 10~16 | 80 | Special, Super | Mid | 0-41 |
| Startup | Active | Recovery | Total | Frame Adv. | Meter |
| 4 | 20 | 11 | 35 | -9 | 5/4 |
|
A double open palmed strike.
| |||||
Click to toggle detailed hitbox data.
frhp
| Damage | Dizzy | Dizzy Time | Cancel | Guard | Act. Range |
|---|---|---|---|---|---|
| 24[0] | 10~16 | 80 | Super | Mid | 42+ |
| Startup | Active | Recovery | Total | Frame Adv. | Meter |
| 6 | 6 | 18 | 30 | -2 | 5/4 |
|
A powered-up high punch.
| |||||
Click to toggle detailed hitbox data.
cllk
| Damage | Dizzy | Dizzy Time | Cancel | Guard | Act. Range |
|---|---|---|---|---|---|
| 20[1] | 0~5 | 40 | Special, Super | Mid | 0-36 |
| Startup | Active | Recovery | Total | Frame Adv. | Meter |
| 4 | 5 | 5 | 14 | +3 | 2/1 |
|
A knee strike.
| |||||
Click to toggle detailed hitbox data.
frlk
| Damage | Dizzy | Dizzy Time | Cancel | Guard | Act. Range |
|---|---|---|---|---|---|
| 20[0] | 0~5 | 40 | None | Mid | 37+ |
| Startup | Active | Recovery | Total | Frame Adv. | Meter |
| 7 | 5 | 5 | 17 | +3 | 2/1 |
|
A straightforward kick.
| |||||
Click to toggle detailed hitbox data.
clmk
| Damage | Dizzy | Dizzy Time | Cancel | Guard | Act. Range |
|---|---|---|---|---|---|
| 24[1] | 5~11 | 60 | Only the first hitbox can be canceled. | Mid | 0-41 |
| Startup | Active | Recovery | Total | Frame Adv. | Meter |
| 4 | 9 (3 / 6) | 8 | 21 | +1 / +4 | 4/3 |
|
A full split kick.
| |||||
Click to toggle detailed hitbox data.
frmk
| Damage | Dizzy | Dizzy Time | Cancel | Guard | Act. Range |
|---|---|---|---|---|---|
| 24[0] | 5~11 | 60 | None | Mid | 42+ |
| Startup | Active | Recovery | Total | Frame Adv. | Meter |
| 7 | 5 | 8 | 20 | +5 | 4/3 |
|
A kick straight to the face.
| |||||
Click to toggle detailed hitbox data.
clhk
| Damage | Dizzy | Dizzy Time | Cancel | Guard | Act. Range |
|---|---|---|---|---|---|
| 28[1] | 10~16 | 80 | None | Mid | 0-56 |
| Startup | Active | Recovery | Total | Frame Adv. | Meter |
| 10 | 6 | 21 | 37 | -5 | 5/4 |
|
Chun's panty-slippin high sidekick.
| |||||
Click to toggle detailed hitbox data.
frhk
| Damage | Dizzy | Dizzy Time | Cancel | Guard | Act. Range |
|---|---|---|---|---|---|
| 28[0] | 10~16 | 80 | None | Mid | 57+ |
| Startup | Active | Recovery | Total | Frame Adv. | Meter |
| 11 | 8 | 14 | 33 | 0 | 5/4 |
|
A heavy kick to the face.
| |||||
Click to toggle detailed hitbox data.
Crouching Normals
crlp
| Damage | Dizzy | Dizzy Time | Cancel | Guard | Act. Range |
|---|---|---|---|---|---|
| 4[1] | 0~5 | 40 | Special, Super | Mid | N/A |
| Startup | Active | Recovery | Total | Frame Adv. | Meter |
| 4 | 4 | 5 | 13 | +4 | 2/1 |
|
A short punch.
| |||||
Click to toggle detailed hitbox data.
crmp
| Damage | Dizzy | Dizzy Time | Cancel | Guard | Act. Range |
|---|---|---|---|---|---|
| 18[1] | 5~11 | 60 | Special, Super | Mid | N/A |
| Startup | Active | Recovery | Total | Frame Adv. | Meter |
| 5 | 4 | 5 | 14 | +9 | 4/3 |
|
Far Standing Strong but crouching.
| |||||
Click to toggle detailed hitbox data.
crhp
| Damage | Dizzy | Dizzy Time | Cancel | Guard | Act. Range |
|---|---|---|---|---|---|
| 22[2] | 10~16 | 80 | None | Mid | N/A |
| Startup | Active | Recovery | Total | Frame Adv. | Meter |
| 7 | 6 | 19 | 32 | -3 | 5/4 |
|
Crouching MP but bigger.
| |||||
Click to toggle detailed hitbox data.</span>
crlk
| Damage | Dizzy | Dizzy Time | Cancel | Guard | Act. Range |
|---|---|---|---|---|---|
| 14[0] | 0~5 | 40 | Special, Super | Low | N/A |
| Startup | Active | Recovery | Total | Frame Adv. | Meter |
| 5 | 4 | 5 | 14 | +4 | 2/1 |
|
A low split kick.
| |||||
Click to toggle detailed hitbox data.
frmk
| Damage | Dizzy | Dizzy Time | Cancel | Guard | Act. Range |
|---|---|---|---|---|---|
| 18[1] | 5~11 | 60 | Special, Super | Low | N/A |
| Startup | Active | Recovery | Total | Frame Adv. | Meter |
| 5 | 5 | 4 | 14 | +9 | 4/3 |
|
Easily one of the best pokes in the game.
| |||||
Click to toggle detailed hitbox data.
crhk
| Damage | Dizzy | Dizzy Time | Cancel | Guard | Act. Range |
|---|---|---|---|---|---|
| 22[2] | 5~11 | 130 | None | Low | N/A |
| Startup | Active | Recovery | Total | Frame Adv. | Meter |
| 7 | 6 | 19 | 32 | -3/Down | 5/4 |
|
Chun's sweep.
| |||||
Click to toggle detailed hitbox data.
Jumping Normals
njlp
| Damage | Dizzy | Dizzy Time | Cancel | Guard | Act. Range |
|---|---|---|---|---|---|
| 18[2] | 1~7(-2) | 40 | None | High | N/A |
| Startup | Active | Recovery | Total | Frame Adv. | Meter |
| 8 | ∞ | N/A | 8+∞ | Dependent | 2/1 |
|
A jumping chop.
| |||||
Click to toggle detailed hitbox data.
djlp
| Damage | Dizzy | Dizzy Time | Cancel | Guard | Act. Range |
|---|---|---|---|---|---|
| 16[2] | 1~7(-2) | 40 | None | High | N/A |
| Startup | Active | Recovery | Total | Frame Adv. | Meter |
| 6 | ∞ | N/A | 6+∞ | Dependent | 2/1 |
|
Like the neutral jump version except it's a punch with worse priority.
| |||||
Click to toggle detailed hitbox data.
njmp
| Damage | Dizzy | Dizzy Time | Cancel | Guard | Act. Range |
|---|---|---|---|---|---|
| 22[2] | 5~11 | 50(+10) | None | High | N/A |
| Startup | Active | Recovery | Total | Frame Adv. | Meter |
| 8 | 16 | ∞ | 24+∞ | Dependent | 4/3 |
|
Another chop.
| |||||
Click to toggle detailed hitbox data.
djmp
| Damage | Dizzy | Dizzy Time | Cancel | Guard | Act. Range |
|---|---|---|---|---|---|
| 20[2] | 5~11 | 50(+10) | None | High | - |
| Startup | Active | Recovery | Total | Frame Adv. | Meter |
| 6 | 8 | ∞ | 14+∞ | Dependent | 4/3 |
|
Another punch.
| |||||
Click to toggle detailed hitbox data.
njhp
| Damage | Dizzy | Dizzy Time | Cancel | Guard | Act. Range |
|---|---|---|---|---|---|
| 26[2] | 11~17(-1) | 60(+20) | None | High | N/A |
| Startup | Active | Recovery | Total | Frame Adv. | Meter |
| 8 | 8 | ∞ | 16+∞ | Dependent | 5/4 |
|
Yet another chop.
| |||||
Click to toggle detailed hitbox data.
djhp
| Damage | Dizzy | Dizzy Time | Cancel | Guard | Act. Range |
|---|---|---|---|---|---|
| 24[2] | 11~17(-1) | 60(+20) | None | High | N/A |
| Startup | Active | Recovery | Total | Frame Adv. | Meter |
| 6 | 8 | ∞ | 14+∞ | Dependent | 5/4 |
|
Yet another punch.
| |||||
Click to toggle detailed hitbox data.
njlk
| Damage | Dizzy | Dizzy Time | Cancel | Guard | Act. Range |
|---|---|---|---|---|---|
| 18[2] | 1~7(-2) | 40 | None | High | N/A |
| Startup | Active | Recovery | Total | Frame Adv. | Meter |
| 6 | ∞ | N/A | 6+∞ | Dependent | 2/1 |
|
A jumping split kick. Don't think too hard about how the hitbox works.
| |||||
Click to toggle detailed hitbox data.
djlk
| Damage | Dizzy | Dizzy Time | Cancel | Guard | Act. Range |
|---|---|---|---|---|---|
| 20[2] | 1~7(-2) | 40 | None | High | N/A |
| Startup | Active | Recovery | Total | Frame Adv. | Meter |
| 6 | ∞ | N/A | 6+∞ | Dependent | 2/1 |
|
A confident jumping kick.
| |||||
Click to toggle detailed hitbox data.
njmk
| Damage | Dizzy | Dizzy Time | Cancel | Guard | Act. Range |
|---|---|---|---|---|---|
| 22[2] | 5~11 | 50(+10) | None | High | N/A |
| Startup | Active | Recovery | Total | Frame Adv. | Meter |
| 6 | 10 | ∞ | 16+∞ | Dependent | 4/3 |
|
Another split kick. Don't think too hard about how the hurtbox works.
| |||||
Click to toggle detailed hitbox data.
djmk
| Damage | Dizzy | Dizzy Time | Cancel | Guard | Act. Range |
|---|---|---|---|---|---|
| 20[2] | 5~11 | 50(+10) | None | High | N/A |
| Startup | Active | Recovery | Total | Frame Adv. | Meter |
| 6 | 16 | ∞ | 22+∞ | Dependent | 4/3 |
|
A stronger version of diagonal LK.
| |||||
Click to toggle detailed hitbox data.
njhk
| Damage | Dizzy | Dizzy Time | Cancel | Guard | Act. Range |
|---|---|---|---|---|---|
| 26[2] | 10~16 | 80 | Special | Mid | N/A |
| Startup | Active | Recovery | Total | Frame Adv. | Meter |
| 3 | 13 (5/4/4) | ∞ | 16+∞ | Dependent Hard Down |
5/4 |
|
Essentially a jumping version of Chun's 3MK command normal.
| |||||
Click to toggle detailed hitbox data.
djhk
| Damage | Dizzy | Dizzy Time | Cancel | Guard | Act. Range |
|---|---|---|---|---|---|
| 24[2] | 11~17(-1) | 60(+20) | None | High | N/A |
| Startup | Active | Recovery | Total | Frame Adv. | Meter |
| 6 | 16 | ∞ | 22+∞ | Dependent | 5/4 |
|
Chun does 2 split kicks in a row. They don't combo.
| |||||
Click to toggle detailed hitbox data.
Command Normals
Sankaku Tobi (Wall Jump)
- The jumping animation is 6 frames long.
- Useful for getting out of the corner or avoiding attacks.
- The jump can be performed during an air normal. You can also do an air attack after wall jumping. You can bounce off someone with her air 2MK normal, then walljump afterwards. You can even air throw, walljump, then attack or air throw again.
- If you're quick enough, you can cancel the jump itself into a Spinning Bird Kick, retaining the directional momentum of your original jump arc.
Click to toggle detailed hitbox data.
Rear Spin Kick
| Damage | Dizzy | Dizzy Time | Cancel | Guard | Act. Range |
|---|---|---|---|---|---|
| 22[0] | 0~5 | 40 | None | Mid | 0-11 |
| Startup | Active | Recovery | Total | Frame Adv. | Meter |
| 7 | 9 (5/4) | 43 | 59 | -39 Down (Second Hitbox) |
2/1 |
|
Chun-Li does a jump off the opponent (or thin air) into a flip.
| |||||
Click to toggle detailed hitbox data.
Kyakukyakuraku
| Damage | Dizzy | Dizzy Time | Cancel | Guard | Act. Range |
|---|---|---|---|---|---|
| 20[0] | 10~16 | 80 | None | Mid/Low | N/A |
| Startup | Active | Recovery | Total | Frame Adv. | Meter |
| 37 | 14 | 0 | 51 | - | 5/4 |
|
Chun-Li flips over her opponent and lands on top with a knee strike.
| |||||
Click to toggle detailed hitbox data.
Flying Sumo Press
| Damage | Dizzy | Dizzy Time | Cancel | Guard | Act. Range |
|---|---|---|---|---|---|
| 20[0] | 2~8 | 60 | Special | High | N/A |
| Startup | Active | Recovery | Total | Frame Adv. | Meter |
| 3 | 16 | ∞ | 19+∞ | Dependent | 4/3 |
|
Chun-Li stomps on her opponent midair.
| |||||
Click to toggle detailed hitbox data.
Throws
Chun-Li can throw with ![]() and
and ![]() . She also has an air throw, performed with the same buttons.
. She also has an air throw, performed with the same buttons.
| Damage | Dizzy | Dizzy Time | Cancel | Guard | Act. Range |
|---|---|---|---|---|---|
| 38 (MP) 32 (HP) |
7~13 | 100 | None | Grab | 48 (from axis) 23 (from throwable box) |
| Startup | Active | Recovery | Total | Frame Adv. | Meter |
| 1 | 1 | Dependent | 2 | N/A | - |
|
Chun-Li's throw.
| |||||
| Damage | Dizzy | Dizzy Time | Cancel | Guard | Act. Range |
|---|---|---|---|---|---|
| 34 | 7~13 | 100 | None | Grab | 58 (from axis) 33 (from throwable box) |
| Startup | Active | Recovery | Total | Frame Adv. | Meter |
| 1 | 1 | Dependent | 2 | N/A | - |
|
Same sprite and basic function as Chun's grounded throw.
| |||||
Click to toggle throwbox data.
--Raisin (March 12, 2007), some info courtesy T.Akiba
Special Moves
Hundred Hand Slap
{{MoveData
| name = Hundred Hand Slap
| input = Press ![]() Repeatedly
Repeatedly
Click to toggle detailed hitbox data.
- Startup:
 |

| |
| Frame Count (Jab) | 2 | 3 |
| Simplified (Jab) | 5 | |
| Frame Count (Strong) | 4 | 4 |
| Simplified (Strong) | 8 | |
| Frame Count (Fierce) | 5 | 6 |
| Simplified (Fierce) | 11 | |
- Active:
 |
 |

| |
| Frame Count (Jab) | 4* | 4 | 4 |
| Frame Count (Strong) | 2* | 2 | 2 |
| Frame Count (Fierce) | 1* | 1 | 1 |
- NOTE: The first hitbox that comes out when performing this move has 1 extra active frame.
 |
 |

| |
| Frame Count (Jab) | 4 | 4 | 4* |
| Frame Count (Strong) | 2 | 2 | 2* |
| Frame Count (Fierce) | 1 | 1 | 1* |
- NOTE 2: The last active frame on some animation cycles are skipped. This depends on the frequency of your button presses.
- Recovery:
 |
 |
 |
 |

| |
| Frame Count (Jab) | 5 | 2 | 3 | 2 | 1 |
| Simplified (Jab) | 13 | ||||
| Frame Count (Strong) | 7 | 2 | 3 | 2 | 1 |
| Simplified (Strong) | 15 | ||||
| Frame Count (Fierce) | 8 | 3 | 4 | 3 | 1 |
| Simplified (Fierce) | 19 | ||||
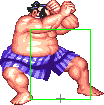
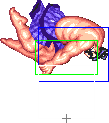
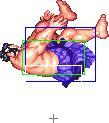
Sumo Headbutt
Click to toggle detailed hitbox data.
- Startup:
| Jab and Strong Only |  |
 |
Strong and Fierce Only | |
 |

| |||
| Frame Count (Jab) | 1 | 3 | 4 | |
| Simplified (Jab) | 8 | |||
| Frame Count (Strong) | 1 | 2 | 6 | 2 |
| Simplified (Strong) | 11 | |||
| Frame Count (Fierce) | 1 | 4 | 1 | |
| Simplified (Fierce) | 6 | |||
- Active:
- Jab Version
 |
 |

| |
| Frame Count | 3 | 3 | 22 |
| Simplified | 6 | 22 | |
- Strong and Fierce Version:
 |

| |
| Frame Count (Strong) | 2 | 25 |
| Frame Count (Fierce) | 1 | 53 |
- Recovery:
 |
 |
 |
 |
 |
 |

| |
| Frame Count | 4 | 4 | 4 | 8/9 | 2 | 2 | 1 |
| Simplified | 25/26 | ||||||
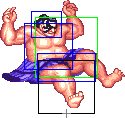
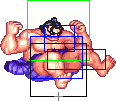
Sumo Smash
Click to toggle detailed hitbox data.
- Startup (Short/Forward):
 |
 |
 |
 |
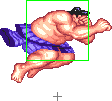 |
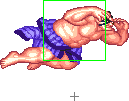
| |
| Frame Count (Short) | 1 | 4 | 5 | 2 | 5 | 4 |
| Simplified (Short) | 21 | |||||
| Frame Count (Forward) | 1 | 3 | 4 | 2 | 5 | 4 |
| Simplified (Forward) | 19 | |||||
- Active + Recovery:
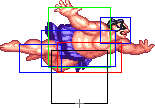 |
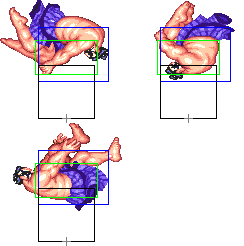 |
 |
 |
 |

| |
| Frame Count (Short) | 9 | 9 (3 + 3 + 3) | 2 | 2 | 10 | 4 |
| Simplified (Short) | 9 | 13 | 10 | 4 | ||
| Frame Count (Forward) | 9 | 9 (3 + 3 + 3) | 2 | 2 | 12 | 5 |
| Simplified (Forward) | 9 | 13 | 12 | 5 | ||
- Startup (Roundhouse):
 |
 |
 |
 |
 |

| |
| Frame Count | 1 | 3 | 4 | 2 | 4 | 4 |
| Simplified | 18... (42) | |||||
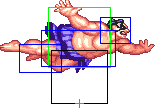 |
 |
 |

| |
| Frame Count | 9 | 9 (3 + 3 + 3) | 2 | 2 |
| Simplified | ...24 (42 | |||
- Active/Recovery:
 |

| |
| Frame Count | 15 | 6 |
Oicho Throw
| Damage | Dizzy | Dizzy Time | Cancel | Guard | Act. Range |
|---|---|---|---|---|---|
| 16[1] + 28[1] (L) 18[1] + 30 [1] (M) 20[1] + 32[1] (H) |
7~13 x 2 | 100 x 2 | None | Grab | N/A |
| Startup | Active | Recovery | Total | Frame Adv. | Meter |
| 0 | 1 | Dependent | 1 | Dependent | 12 |
|
Honda slams his opponent to the ground, then follows up with a buttslam.
| |||||
Click to toggle detailed throwbox data.
Super Combo
| Damage | Dizzy | Dizzy Time | Cancel | Guard | Act. Range |
|---|---|---|---|---|---|
| 20[2] x 4 | 0~4 x 4 | 20 x 4 | None | Mid | N/A |
| Startup | Active | Recovery | Total | Frame Adv. | Meter |
| 6 | 54(7)54 | 25 | 146 | -13 (Second Attack)/ Hard Knockdown* | - |
|
Honda brings out the big guns: One of the worst Super Combos in the game.
General Strategies
| |||||
Click to toggle detailed hitbox data.
 |
 |
 |
 |

| |
| Frame Count | 1 | [18] + 4 | 1 | 1 | 53? |
| Simplified | 6 | 1 | 53? | ||
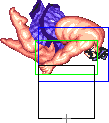 |
 |
 |
 |
 |
 |

| |
| Frame Count | 1 | 1 | 1 | 3 | 1 | 1 | 53? |
| Simplified | 7 | 1 | 53? | ||||
- Recovery/Knockback:
 |
 |
 |
 |
 |
 |

| |
| Frame Count | 4 | 4 | 4 | 8 | 2 | 2 | 1 |
| Simplified | 25 | ||||||
Misc Animations
Jump Animations
- Prejump:
 |
 |

| |
| Frame Count | 2 | 2 | 1 |
| Simplified | 5 | ||
- Neutral/Back Jump, Airborne + Landing:
 |
 |
 |
 |
 |
 |
 |
 |
 |

| |
| Frame Count (Neutral) | 1 | 10 | 5 | 5 | 5 | 5 | 5 | 8 | 1 | 7* |
| Simplified (Neutral) | 1 | 43 | 1 | 7* | ||||||
| Frame Count (Back) | 1 | 10 | 5 | 5 | 5 | 5 | 5 | 8 | 1 | 7* |
| Simplified (Back) | 1 | 43 | 1 | 7* | ||||||
- Forward Jump, Airborne + Landing:
 |
 |
 |
 |
 |
 |
 |
 |

| |
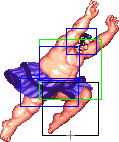
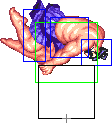
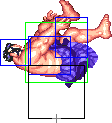
| Frame Count | 1 | 10 | 6 | 4 | 4 | 6 | 12 | 1 | 7* |
| Simplified | 1 | 42 | 1 | 7* | |||||
Honda has the slowest prejump animation on the game. This is part of the reason why he suffers so much to get in vs projectile zoners. With that said, knowing how to jump correctly can make these matchups less annoying.
First of all, you'll be jumping neutrally frequently, since it will not always be possible to jump forward safely. Looking at Honda's Neutral Jump hurtboxes, it's easy to notice that the last 9 frames of the jump animation have the leg hurtbox positioned very low, which will make jumping over projectiles extra hard. To deal with that, it's wise to do a move that reduces Honda's hurtboxes during that time, so you can avoid having big vulnerable hurtboxes. A good option is to press HK as soon as you hit the apex of the jump, that way you'll not only have very small "lower-back" hurtboxes through out the entirety of the jump, but also may trigger the opponents proximity block. This is extra effective with Old Honda, as his Neutral Jumping Roundhouse has amazing priority at the front. New Honda can also control the horizontal movement of the Neutral Jump if he does a Fierce, but keep in mind that Neutral Jumping Fierce have bigger "lower-back" hurtboxes, leaving him more vulnerable to projectiles. It's also optimal to activate Fierce a little before Honda hits the apex of the jump so it's possible to steer the maximum possible.
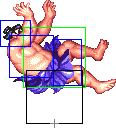
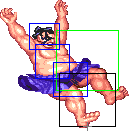
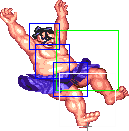
As for forward jumps, an important thing to be aware of is how his hurtboxes are positioned on the last 13 frames of the jump. Take a look at the hitbox images above, did you notice how Honda's hurtboxes are way less vulnerable at his front than if he did a move? Just compare the forward edge of the pushbox (green box) which is the same on all jumping animations, with the edge of the closest hurtbox (blue box) on all diagonal jumping animations (empty jump + diagonal jumping normals). A well spaced empty jump can be usefull if the opponent defaults to non sweep anti airs, as this can make these anti airs simply whiff (e.g. vs a Dee Jay that defaults to Upkick anti air when he has charge). This trick can be just what Honda needs to finally get in and apply his extremelly strong close range pressure. Of course, if the opponent is aware of this, he may counter it appropriately, but then Honda can just jump with one of his good anti-anti-air normals instead, creating a mix-up situation.
The landing recovery has a special property which allows it to be canceled into certain actions. At the first landing frame, you can perform throws (including command throws), and on the second landing frame, you can start another jump, attack with a normal or special move, or block. Blocking not being until the second landing frame, as well as hitbox-hurtbox interactions having priority over throwbox-throw hurtbox is why sweeps work as anti airs in this game.
Things are different when jumping over your opponent, however. In that situation it's possible to walk back/forward, to jump again or to even block on the first landing frame! Strangely, if a throw is timed on the first landing frame of a jump that crosses over, a throwbox will never come out, even though that input will result in a normal coming out 2 frames later (like it normally would). Anyway, being able to block on the first landing frame can help a little bit on some safe jump crossup setups, or maybe in other situations as well if your character has a huge jump arc.
