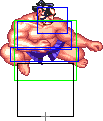
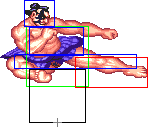
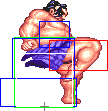
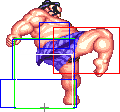
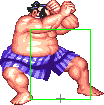
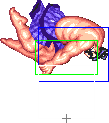
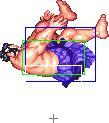
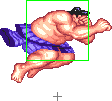
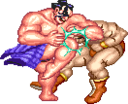
User:ReckyDaGuy/sandbox: Difference between revisions

From SuperCombo Wiki
No edit summary
No edit summary
Line 1,599: Line 1,599:
{{MoveData
{{MoveData
| name    = Hundred Hand Slap
| name    = Hundred Hand Slap
| input    = Press {{Icon-Capcom|p}} Repeatedly
| input    = {{tooltip|text=Press {{Icon-Capcom|p}} Repeatedly|hovertext=Detailed Input: Pressing a Punch button increases an invisible counter. If the button is not pressed again within 15/12/9f (Jab/Strong/Fierce) of the last press, it resets back to 0. Pressing P while the counter equals 4 or 5 during a state where the move can come out will start the move. The move will continue as long as you keep pressing the button or until the move's cycle limit is reached.
| subtitle = HHS
| subtitle = HHS
| image    = EHonda_hhs3.png
| image    = EHonda_hhs3.png
Line 1,781: Line 1,781:
  |actrange = N/A
  |actrange = N/A
  |meter = 9
  |meter = 9
  |description= Honda shouts a sumo battle cry and flies forward.
  |description= Invincible on Frames 1-11.
*Your main defensive too. Invincible on frames 1-11 with excellent vertical and horizontal range, making ojumping or getting in on Honda nearly impossible when he has charge.
*Learn to time this move properly and matches against non-fireballers become way easier.


  }}
  }}
Line 1,800: Line 1,798:
  |actrange = N/A
  |actrange = N/A
  |meter = 9
  |meter = 9
  |description= *This version should only really be used for positioning. An example being if you know your opponent is going to jump backwards at round start, using MP Headbutt lands you right next to them, close to the corner.
  |description= Invincible on Frames 1-11.


  }}
  }}
Line 1,818: Line 1,815:
  |actrange = N/A
  |actrange = N/A
  |meter = 9
  |meter = 9
  |description= *This version is very fast, making it a great tool to safely pressure and punish mid-range mistakes (such as whiffs or opponents falling down from a jumping attack).
  |description=  
*Much better horitontal hitbox than the Jab version, making for a better anti air if your opponent is jumping in front of you rather than above you.
Honda shouts a sumo battle cry and flies forward.
*While you may trade with this version, you'll almost always come out on top positioning wise.
*Damage and speed increase with strength.
*Avoid using this from full screen, especially if your opponent is near the corner. They can jump it on reaction and punish.
*Honda will keep going until he hits the opponent or the maximum active frames are hit.
 
*The HP version is invincible on Frames 1-6.
 
'''General Strategies'''
 
*LP Headbutt is your main defensive tool. The invincibility combines well with the excellent vertical and horizontal range, making jumping or getting in on Honda nearly impossible when he has charge.
*Learn to time this move properly and matches against non-fireballers become way easier.
 
*The MP version should only really be used for positioning. An example being if you know your opponent is going to jump backwards at round start, using MP Headbutt lands you right next to them, close to the corner.
 
*The HP version is very fast, making it a great tool to safely pressure and punish mid-range mistakes (such as whiffs or opponents falling down from a jumping attack).
*It also has a much better horitontal hitbox than the Jab version, making for a better anti air if your opponent is jumping in front of you rather than above you.
*While you may trade with the HP version, you'll almost always come out on top positioning wise.
*Avoid using the HP version  from full screen, especially if your opponent is near the corner. They can jump it on reaction and punish.


Line 1,947: Line 1,958:
  |meter = 9
  |meter = 9
  |description= Honda leaps into the air and comes crashing down with the weight of a piano.
  |description= Honda leaps into the air and comes crashing down with the weight of a piano.
*HK version is invincible on frames 1-21.
*Short and Forward have a rising hitbox, while Roundhouse does not.
*Rising part hits mid, while the falling part hits high. Not that this move hits most crouching opponents anyway.
*HK version is invincible on frames 1-21.


'''General Strategies'''
Line 2,106: Line 2,118:
*Can go through projectiles.
*Will not knock down if the first hit results in a "gut reel" hitstun animation. This is obviously a downside in most cases, but it can be an occasional upside since you're right in Oicho range.
**'''NOTE:''' The Input Storing Glitch was fixed in Hyper Street Fighter 2. An alternate version of Honda with the glitch restored can be selected by holding Start and selecting the Super Turbo/Super X version of Honda.


'''General Strategies'''

Revision as of 21:02, 9 February 2023

E. Honda
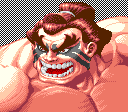
E. Honda's portrait in Super Turbo.
Character Data
Forward Walk Speed 38
Backwards Walk Speed 26
Pre-Jump Frames 5
Forwards Jump Duration 44
Backwards Jump Duration 45
Landing Frames 7*
Jump Height Apex 71
Forwards Jump Distance 121
Backwards Jump Distance 129
Soft Knockdown Recovery 37
Hard Knockdown Recovery 72


Normal Moves

Disclaimer: To better understand the diagrams, read this.

Standing Normals

cl.lp
Close Jab
Close Light Punch
5LP / cl.Lp.png
EHonda stcljab3 stclstrng3.png
Damage Dizzy Dizzy Time Cancel Guard Act. Range
20[1] 0~5 40 Special, Super Mid 0-32
Startup Active Recovery Total Frame Adv. Meter
4 2 3 9 +8 2/1

A quick palm thrust.

  • Good as a tick and for some combos.
  • Useful for mixing up your tick throws alongside close Strong.

Click to toggle detailed hitbox data.

EHonda stcljab1&6 stfarjab1&5 stclstrng1&6 stfarstrng1&7 stclfrc1&9 stfarfrc1 stclshrt1&8 stfarshrt1 stclfrwrd1&8 stfarfrwrdt1 stclrh1&9 stfarrh1&9.png EHonda stcljab2&5 stclstrng2&5 stfarstrng2&6.png EHonda stcljab3 stclstrng3.png EHonda stcljab4 stclstrng4.png EHonda stcljab2&5 stclstrng2&5 stfarstrng2&6.png EHonda stcljab1&6 stfarjab1&5 stclstrng1&6 stfarstrng1&7 stclfrc1&9 stfarfrc1 stclshrt1&8 stfarshrt1 stclfrwrd1&8 stfarfrwrdt1 stclrh1&9 stfarrh1&9.png
Frame Count 1 + 1 2 2 1 1 1
Simplified 4 2 3

frlp

Far Jab
Far Light Punch
5LP / cl.Lp.png
EHonda stfarjab3.png
Damage Dizzy Dizzy Time Cancel Guard Act. Range
20[1] 0~5 40 None Mid 33+
Startup Active Recovery Total Frame Adv. Meter
6 4 5 15 +4 2/1

A far-reaching thrust.

  • Good priority makes it a great way to deal with "rushing" moves (Blanka Rolls, Hawk Dives, Honda Headbutts, etc.
  • Also a decent anti-air.
  • Beats most pokes.
  • The best attack to start a Fierce HHS from due to the startup, but this adds to the move's execution.
  • Hits every crouching opponent except Blanka, so it can be used as a safe meaty on most knockdowns.
  • Especially handy against Shoto wakeup jab Shoryuukens (Harder to do against Ken since his Shoryuken has more horizontal range than Ryu's).

Click to toggle detailed hitbox data.

EHonda stcljab1&6 stfarjab1&5 stclstrng1&6 stfarstrng1&7 stclfrc1&9 stfarfrc1 stclshrt1&8 stfarshrt1 stclfrwrd1&8 stfarfrwrdt1 stclrh1&9 stfarrh1&9.png EHonda stfarjab2&4.png EHonda stfarjab3.png EHonda stfarjab2&4.png EHonda stcljab1&6 stfarjab1&5 stclstrng1&6 stfarstrng1&7 stclfrc1&9 stfarfrc1 stclshrt1&8 stfarshrt1 stclfrwrd1&8 stfarfrwrdt1 stclrh1&9 stfarrh1&9.png
Frame Count 1 + 2 3 4 4 1
Simplified 6 4 5


cl.mp

Close Strong
Close Medium Punch
5MP / cl.Mp.png
EHonda stcljab3 stclstrng3.png
Damage Dizzy Dizzy Time Cancel Guard Act. Range
24[1] 5~11 60 Super Mid 0-32
Startup Active Recovery Total Frame Adv. Meter
5 2 5 12 +11 4/3

Another palm strike.

  • Gives immense frame advantage, allowing you to link into most normal moves for some decent combos.
  • Can also be used as an unexpected tick into Oicho: Since Honda players usually use normals with low blockstun (usually crouching Jab) when tick throwing, having a move with medium blockstun can mixup your opponent.
  • When using this as a tick, keep in mind you'll need to walk forward a little before you Oicho on everyone except Zangief.
  • Can also be mixed in with close Jab for a different blockstun time.

Click to toggle detailed hitbox data.

EHonda stcljab1&6 stfarjab1&5 stclstrng1&6 stfarstrng1&7 stclfrc1&9 stfarfrc1 stclshrt1&8 stfarshrt1 stclfrwrd1&8 stfarfrwrdt1 stclrh1&9 stfarrh1&9.png EHonda stcljab2&5 stclstrng2&5 stfarstrng2&6.png EHonda stcljab3 stclstrng3.png EHonda stcljab4 stclstrng4.png EHonda stcljab2&5 stclstrng2&5 stfarstrng2&6.png EHonda stcljab1&6 stfarjab1&5 stclstrng1&6 stfarstrng1&7 stclfrc1&9 stfarfrc1 stclshrt1&8 stfarshrt1 stclfrwrd1&8 stfarfrwrdt1 stclrh1&9 stfarrh1&9.png
Frame Count 1 + 2 2 2 2 2 1
Simplified 5 2 5

frmp

Far Strong
Far Medium Punch
5MP / fr.Mp.png
EHonda stfarstrng4.png
Damage Dizzy Dizzy Time Cancel Guard Act. Range
24[1] 5~11 60 None Mid 33+
Startup Active Recovery Total Frame Adv. Meter
7 4 6 17 +8 4/3

Similar to far st.jab with more range.

  • Another great way to mask a Fierce HHS.
  • Can be used to stuff/trade with the startup of projectiles.

Click to toggle detailed hitbox data.

EHonda stcljab1&6 stfarjab1&5 stclstrng1&6 stfarstrng1&7 stclfrc1&9 stfarfrc1 stclshrt1&8 stfarshrt1 stclfrwrd1&8 stfarfrwrdt1 stclrh1&9 stfarrh1&9.png EHonda stcljab2&5 stclstrng2&5 stfarstrng2&6.png EHonda stfarstrng3&5.png EHonda stfarstrng4.png EHonda stfarstrng3&5.png EHonda stcljab2&5 stclstrng2&5 stfarstrng2&6.png EHonda stcljab1&6 stfarjab1&5 stclstrng1&6 stfarstrng1&7 stclfrc1&9 stfarfrc1 stclshrt1&8 stfarshrt1 stclfrwrd1&8 stfarfrwrdt1 stclrh1&9 stfarrh1&9.png
Frame Count 1 + 2 2 2 4 3 2 1
Simplified 7 4 6


clhp

Close Fierce
Close Heavy Punch
5HP / cl.Hp.png
EHonda stclfrc3.png
First Hitbox
EHonda stclfrc4.png
Second Hitbox.
Damage Dizzy Dizzy Time Cancel Guard Act. Range
30[2] 10~16 80 None Mid 0-48
Startup Active Recovery Total Frame Adv. Meter
7 7 (5/2) 18 32 -3/+2 5/4

A chop with a huge arc.

  • Anti-airs attacks directly above you (Such as when Claw wall dives you in the corner)
  • Main weakness is the strict activation range.
  • The huge startup makes it one of Honda's lesser used attacks.

Click to toggle detailed hitbox data.


  • Startup/Active:
EHonda stcljab1&6 stfarjab1&5 stclstrng1&6 stfarstrng1&7 stclfrc1&9 stfarfrc1 stclshrt1&8 stfarshrt1 stclfrwrd1&8 stfarfrwrdt1 stclrh1&9 stfarrh1&9.png EHonda stclfrc2&8.png EHonda stclfrc3.png EHonda stclfrc4.png
Frame Count 1 + 3 3 5 2
Simplified 7 7


  • Recovery:
EHonda stclfrc5.png EHonda stclfrc6.png EHonda stclfrc7.png EHonda stclfrc2&8.png EHonda stcljab1&6 stfarjab1&5 stclstrng1&6 stfarstrng1&7 stclfrc1&9 stfarfrc1 stclshrt1&8 stfarshrt1 stclfrwrd1&8 stfarfrwrdt1 stclrh1&9 stfarrh1&9.png
Frame Count 7 5 3 2 1
Simplified 18

frhp

Far Fierce
Far Heavy Punch
5HP / fr.Hp.png
EHonda stfarfrc3.png
This isn't a sweep, more like a light dusting.
Damage Dizzy Dizzy Time Cancel Guard Act. Range
30[2] 10~16 80 None Mid 49+
Startup Active Recovery Total Frame Adv. Meter
8 4 18 30 0 5/4

A low punch that doesn't hit low.

  • Usually what you get for mistiming close Fierce or incorrectly mashing out a Fierce HHS.
  • Severely nerfed from his Old version, where it hit low, was faster, and could be Special canceled.
  • Tends to leave you wide open
  • Not very useful outside of a particular combo.

Click to toggle detailed hitbox data.

  • Startup/Active
EHonda stcljab1&6 stfarjab1&5 stclstrng1&6 stfarstrng1&7 stclfrc1&9 stfarfrc1 stclshrt1&8 stfarshrt1 stclfrwrd1&8 stfarfrwrdt1 stclrh1&9 stfarrh1&9.png EHonda stfarfrc2.png EHonda stfarfrc3.png
Frame Count 1 + 3 4 4
Simplified 8 4


  • Recovery
EHonda stfarfrc4&6.png EHonda stfarfrc5.png EHonda stfarfrc4&6.png EHonda stfarfrc7.png EHonda stfarfrc8.png EHonda stfarfrc9 stfarshrt7 stfarfrwrd7.png
Frame Count 4 6 4 2 1 1
Simplified 18


cllk

Close Short
Close Light Kick
5LK / cl.Lk.png
EHonda stclshrt4 stclfrwrd4.png
Damage Dizzy Dizzy Time Cancel Guard Act. Range
18[1] 0~5 40 Special, Super Mid 0-11
Startup Active Recovery Total Frame Adv. Meter
4 3 5 12 +5 2/1

A knee strike.

  • Outprioritized by close Standing Jab.
  • Impossible to use against some characters (unless they jump over you) since the maximum activation range isn't close enough to activate the move even when point blank.
  • Avoid like the plague.

Click to toggle detailed hitbox data.

EHonda stcljab1&6 stfarjab1&5 stclstrng1&6 stfarstrng1&7 stclfrc1&9 stfarfrc1 stclshrt1&8 stfarshrt1 stclfrwrd1&8 stfarfrwrdt1 stclrh1&9 stfarrh1&9.png EHonda stclshrt2&7 stclfrwrd2&7 stclrh2&8 stfarrh2&8.png EHonda stclshrt3&6 stclfrwrd3&6 stclrh3&7 stfarrh3&7.png EHonda stclshrt4 stclfrwrd4.png EHonda stclshrt5 stclfrwrd5.png EHonda stclshrt3&6 stclfrwrd3&6 stclrh3&7 stfarrh3&7.png EHonda stclshrt2&7 stclfrwrd2&7 stclrh2&8 stfarrh2&8.png EHonda stcljab1&6 stfarjab1&5 stclstrng1&6 stfarstrng1&7 stclfrc1&9 stfarfrc1 stclshrt1&8 stfarshrt1 stclfrwrd1&8 stfarfrwrdt1 stclrh1&9 stfarrh1&9.png
Frame Count 1 + 1 1 1 3 2 1 1 1
Simplified 4 3 5

frlk

Far Short
Far Light Kick
5LK / fr.Lk.png
EHonda stfarshrt4.png
Fun fact: Kicks above the kneecap are an illegal move in sumo wrestling and will result in an immediate loss.
Damage Dizzy Dizzy Time Cancel Guard Act. Range
18[1] 0~5 40 - Low 12+
Startup Active Recovery Total Frame Adv. Meter
10 3 7 20 +3 2/1

A strange, high-ish kick.

  • Actually slower than far Forward in terms of startup, believe it or not.
  • It does have less recovery frames overall but why.
  • Nigh useless.

Click to toggle detailed hitbox data.

EHonda stcljab1&6 stfarjab1&5 stclstrng1&6 stfarstrng1&7 stclfrc1&9 stfarfrc1 stclshrt1&8 stfarshrt1 stclfrwrd1&8 stfarfrwrdt1 stclrh1&9 stfarrh1&9.png EHonda stfarshrt2&6 stfarfrwrd2&6.png EHonda stfarshrt3&5 stfarfrwrd5.png EHonda stfarshrt4.png EHonda stfarshrt3&5 stfarfrwrd5.png EHonda stfarshrt2&6 stfarfrwrd2&6.png EHonda stfarfrc9 stfarshrt7 stfarfrwrd7.png
Frame Count 1 + 3 3 3 3 3 3 1
Simplified 10 3 7


clmk

Close Forward
Close Medium Kick
5MK / cl.Mk.png
EHonda stclshrt4 stclfrwrd4.png
Damage Dizzy Dizzy Time Cancel Guard Act. Range
22[1] 5~11 60 None Mid 0-11
Startup Active Recovery Total Frame Adv. Meter
6 3 7 16 +8 4/3

Close Short except you can't cancel it and it's slower.

  • Outprioritized again by close Strong.
  • Can't use while charging since it overlaps with the Knees command normal.
  • Impossible to use against some characters (unless they jump over you) since the maximum activation range isn't close enough to activate the move even when point blank.
  • Avoid like the plague (again).

Click to toggle detailed hitbox data.

EHonda stcljab1&6 stfarjab1&5 stclstrng1&6 stfarstrng1&7 stclfrc1&9 stfarfrc1 stclshrt1&8 stfarshrt1 stclfrwrd1&8 stfarfrwrdt1 stclrh1&9 stfarrh1&9.png EHonda stclshrt2&7 stclfrwrd2&7 stclrh2&8 stfarrh2&8.png EHonda stclshrt3&6 stclfrwrd3&6 stclrh3&7 stfarrh3&7.png EHonda stclshrt4 stclfrwrd4.png EHonda stclshrt5 stclfrwrd5.png EHonda stclshrt3&6 stclfrwrd3&6 stclrh3&7 stfarrh3&7.png EHonda stclshrt2&7 stclfrwrd2&7 stclrh2&8 stfarrh2&8.png EHonda stcljab1&6 stfarjab1&5 stclstrng1&6 stfarstrng1&7 stclfrc1&9 stfarfrc1 stclshrt1&8 stfarshrt1 stclfrwrd1&8 stfarfrwrdt1 stclrh1&9 stfarrh1&9.png
Frame Count 1 + 1 2 2 3 2 2 2 1
Simplified 6 3 7

frmk

Far Forward
Far Medium Kick
5MK / fr.Mk.png
EHonda stfarfrwrd3.png
First Hit
EHonda stfarfrwrd4.png
Second Hit
Damage Dizzy Dizzy Time Cancel Guard Act. Range
4[1] ~ 24[1] 5~11 x 2 60 x 2 None Mid 12+
Startup Active Recovery Total Frame Adv. Meter
7 9 (3 ~ 6) 10 26 -1 ~ +2(+1) 4/3

Another weird high-ish kick.

  • Can be used as a counter pokea gainst Dhalsim's standing kicks, Boxer's standing Fierce, and Claw's standing Strong.
  • The second hitbox isn't as good as Old Honda's crouching Forward, but it does have better leg hurtboxes which allow it to whiff against some low normals.
  • Still, not a very good tool to use in neutral.

Click to toggle detailed hitbox data.

EHonda stcljab1&6 stfarjab1&5 stclstrng1&6 stfarstrng1&7 stclfrc1&9 stfarfrc1 stclshrt1&8 stfarshrt1 stclfrwrd1&8 stfarfrwrdt1 stclrh1&9 stfarrh1&9.png EHonda stfarshrt2&6 stfarfrwrd2&6.png EHonda stfarfrwrd3.png EHonda stfarfrwrd4.png EHonda stfarshrt3&5 stfarfrwrd5.png EHonda stfarshrt2&6 stfarfrwrd2&6.png EHonda stfarfrc9 stfarshrt7 stfarfrwrd7.png
Frame Count 1 + 3 3 3 6 5 4 1
Simplified 7 3 6 10


frhk

Roundhouse
Standing Heavy Kick
5HK / Hk.png
EHonda stclrh4 stfarrh4.png
First Hit.
EHonda stclrh5 stfarrh5.png
Second Hit.
Damage Dizzy Dizzy Time Cancel Guard Act. Range
4[2] ~ 30[0] 3~9 > 10~16 40 ~ 80 None Mid N/A
Startup Active Recovery Total Frame Adv. Meter
8 8 (3 ~ 5) 18 34 -4 ~ -1(-2) 5/4

An actual roundhouse kick.

  • Good damage and stun, but no follow ups.
  • Works as a simple 2-hitter, but it's safer to just use your Double Knee command forward instead since it does more damage and actually has frame advantage.
  • Can be used as an anti-air, but Honda has better options.
  • Can't be used while charging back (Overlaps with command sweep)

Click to toggle detailed hitbox data.

  • Startup/Active:
EHonda stcljab1&6 stfarjab1&5 stclstrng1&6 stfarstrng1&7 stclfrc1&9 stfarfrc1 stclshrt1&8 stfarshrt1 stclfrwrd1&8 stfarfrwrdt1 stclrh1&9 stfarrh1&9.png EHonda stclshrt2&7 stclfrwrd2&7 stclrh2&8 stfarrh2&8.png EHonda stclshrt3&6 stclfrwrd3&6 stclrh3&7 stfarrh3&7.png EHonda stclrh4 stfarrh4.png EHonda stclrh5 stfarrh5.png
Frame Count 1 + 2 2 3 3 5
Simplified 8 3 5
  • Recovery:


EHonda stclrh6 stfarrh6.png EHonda stclshrt3&6 stclfrwrd3&6 stclrh3&7 stfarrh3&7.png EHonda stclshrt2&7 stclfrwrd2&7 stclrh2&8 stfarrh2&8.png EHonda stcljab1&6 stfarjab1&5 stclstrng1&6 stfarstrng1&7 stclfrc1&9 stfarfrc1 stclshrt1&8 stfarshrt1 stclfrwrd1&8 stfarfrwrdt1 stclrh1&9 stfarrh1&9.png
Frame Count 8 6 3 1
Simplified 18

Crouching Normals

crlp

Crouching Jab
Crouching Light Punch
2LP / D.png+Lp.png
EHonda crjab3 crfrc3.png
Strikes to the groin are another illegal move in sumo wrestling.
Damage Dizzy Dizzy Time Cancel Guard Act. Range
20[1] 0~5 40 Super Mid N/A
Startup Active Recovery Total Frame Adv. Meter
5 8 3 16 +2 2/1

A crouching palm thrust.

  • Good poke that trades Standing Jab's priority for better range and less vulnerability against lows.
  • Great for buffering Fierce HHS due to its long active time.
  • Also a great meaty to start ticks.

Click to toggle detailed hitbox data.

EHonda crjab1&5 crstrng1&7 crfrc1&10 crshrt1&5 crfrwrd1&5 crrh1&7.png EHonda crjab2&4 crfrc2&4.png EHonda crjab3 crfrc3.png EHonda crjab2&4 crfrc2&4.png EHonda crjab1&5 crstrng1&7 crfrc1&10 crshrt1&5 crfrwrd1&5 crrh1&7.png
Frame Count 1 + 2 2 8 2 1
Simplified 5 84 3


crmp

Crouching Strong
Crouching Medium Punch
2MP / D.png+Mp.png
EHonda crstrng4.png
Damage Dizzy Dizzy Time Cancel Guard Act. Range
24[1] 5~11 60 None Mid N/A
Startup Active Recovery Total Frame Adv. Meter
7 8 11 26 -1 4/3

A palm strike, now right handed.

  • Hitbox makes it great for beating some key crouching attacks, like Guile and Chun's Crouching Forwards.
  • Still slow.

Click to toggle detailed hitbox data.

EHonda crjab1&5 crstrng1&7 crfrc1&10 crshrt1&5 crfrwrd1&5 crrh1&7.png EHonda crstrng2&6 crfrc5&9.png EHonda crstrng3&5 crfrc6&8.png EHonda crstrng4.png EHonda crstrng3&5 crfrc6&8.png EHonda crstrng2&6 crfrc5&9.png EHonda crjab1&5 crstrng1&7 crfrc1&10 crshrt1&5 crfrwrd1&5 crrh1&7.png
Frame Count 1 + 2 2 2 8 6 4 1
Simplified 7 8 11


crhp

Crouching Fierce
Crouching Heavy Punch
2HP / D.png+Hp.png
EHonda crjab3 crfrc3.png
First Hit
EHonda crfrc7.png
Second Hit.
Damage Dizzy Dizzy Time Cancel Guard Act. Range
16[2] x 2 1~7 x 2 70 x 2 Super/None Mid N/A
Startup Active Recovery Total Frame Adv. Meter
5 4(6)8 11 34 -6 ~ +3(+2) 5/4

Two palm strikes, one left, one right.

  • Not very useful outside of a few combos.
  • Can be used to deter Boxer's low punches.
  • Usually seen when you mess up an Oicho Throw.

Click to toggle detailed hitbox data.</span>

EHonda crjab1&5 crstrng1&7 crfrc1&10 crshrt1&5 crfrwrd1&5 crrh1&7.png EHonda crjab2&4 crfrc2&4.png EHonda crjab3 crfrc3.png EHonda crjab2&4 crfrc2&4.png EHonda crstrng2&6 crfrc5&9.png EHonda crstrng3&5 crfrc6&8.png
Frame Count 1 + 2 2 4 2 2 2
Simplified 5 4 6


| EHonda crfrc7.png EHonda crstrng3&5 crfrc6&8.png EHonda crstrng2&6 crfrc5&9.png EHonda crjab1&5 crstrng1&7 crfrc1&10 crshrt1&5 crfrwrd1&5 crrh1&7.png
Frame Count 8 6 4 1
Simplified 8 11


crlk
Crouching Short
Crouching Light Kick
2LK / D.png+Lk.png
EHonda crshrt3.png
Damage Dizzy Dizzy Time Cancel Guard Act. Range
18[1] 0~5 40 Special, Super Low N/A
Startup Active Recovery Total Frame Adv. Meter
4 3 4 11 +6 2/1

An excellent low kick.

  • Cancelable, and good for tick throwing.
  • Experienced Hondas can cancel this normal into any strength HHS for a nasty frame trap, but it takes serious button mashing skills to do (especially the Strong and Fierce versions).
  • You're almost always in range for an Oicho if you cancel this into a Strong or Fierce HHS.

Click to toggle detailed hitbox data.

EHonda crjab1&5 crstrng1&7 crfrc1&10 crshrt1&5 crfrwrd1&5 crrh1&7.png EHonda crshrt2&4 crfrwrd2&4.png EHonda crshrt3.png EHonda crshrt2&4 crfrwrd2&4.png EHonda crjab1&5 crstrng1&7 crfrc1&10 crshrt1&5 crfrwrd1&5 crrh1&7.png
Frame Count 1 + 1 2 3 3 1
Simplified 4 3 4


frmk
Crouching Forward
Crouching Medium Kick
2MK / D.png+Mk.png
EHonda crfrwrd3.png
Damage Dizzy Dizzy Time Cancel Guard Act. Range
22[1] 5~11 60 None Low N/A
Startup Active Recovery Total Frame Adv. Meter
7 5 8 20 +5 4/3

A low kick that looks the exact same as crouching Short but it's different.

  • Can be used to buffer Strong or Fierce HHS on block.
  • The timing of the buffered HHS coming out from this move can be awkward for an opponent to deal with, making it good for surprises.
  • Works great as a counter-poke against certain other character's pokes, like Guile's crouching Forward.

Click to toggle detailed hitbox data.

EHonda crjab1&5 crstrng1&7 crfrc1&10 crshrt1&5 crfrwrd1&5 crrh1&7.png EHonda crshrt2&4 crfrwrd2&4.png EHonda crfrwrd3.png EHonda crshrt2&4 crfrwrd2&4.png EHonda crjab1&5 crstrng1&7 crfrc1&10 crshrt1&5 crfrwrd1&5 crrh1&7.png
Frame Count 1 + 3 3 5 7 1
Simplified 7 5 8


crhk
Crouching Roundhouse
Crouching Heavy Kick
2HK / D.png+Hk.png
EHonda crrh3.png
First hitbox.
EHonda crrh5.png
Second hitbox. In case someone sneaks up on you.
Damage Dizzy Dizzy Time Cancel Guard Act. Range
32[2] 5~11 130 None Low N/A
Startup Active Recovery Total Frame Adv. Meter
8 6/(4)/8 7 33 -3/+7/Hard Down 5/4

Honda's fully rotating sweep.

  • Has a bit faster startup than his 6HK sweep.
  • Much more useful in the corner, as it allows several shenanigans such as walking under a throw and then hiting your opponent with its backwards hitbox or timing it early so it whiffs and then using a negative edge Oicho as you recover.
  • You can use this move in the corner after a Fierce Hold to crossup. This works on everyone BUT Sagat, Chun-Li, and Claw.
    • The secret to timing this is to walk forward until your opponent gets released from the hold, then hit 2HK as soon as they hit the wall. This sequence is cool, but it's not fool-proof since you can get hit with a reversal throw/special (though this is VERY risky) and it's easy to anticipate once you know how to defend against it (but it does give you frame advantage).
  • Can also be used as a safe meaty against horizontal-based reversals (Shoryukens, Chun-Li's Tenshokyaku upkicks, etc.). By hitting this move on the last few active frames on these characters (like Ryu, for example), if you're outside of their throw range they'll either whiff a Shoryuken, whiff a normal, or block.
    • A harder variation involves purposely missing the meaty timing by a very small amount while in Oicho range to get an Oicho coming right out of the recovery.
  • Sets up a built in safe jump against Sagat and Claw. Just hold up-forward after a successful knockdown, and you'll get a guaranteed safe jump unless they touch the corner or hit a breakable object.

Click to toggle detailed hitbox data.

EHonda crjab1&5 crstrng1&7 crfrc1&10 crshrt1&5 crfrwrd1&5 crrh1&7.png EHonda crrh2.png EHonda crrh3.png EHonda crrh4.png EHonda crrh5.png EHonda crrh6.png EHonda crjab1&5 crstrng1&7 crfrc1&10 crshrt1&5 crfrwrd1&5 crrh1&7.png
Frame Count 1 + 3 4 6 4 8 6 1
Simplified 8 6 4 8 7

Jumping Normals

njlp
Neutral Jumping Jab
Neutral Jumping Light Punch
8LP / U.png+Lp.png
EHonda njjab4.png
Damage Dizzy Dizzy Time Cancel Guard Act. Range
20[1] 1~7(-2) 40 None High N/A
Startup Active Recovery Total Frame Adv. Meter
8 30 38+∞ Dependent 2/1

A jumping chop.

  • Not particularly useful, but has decent reach.

Click to toggle detailed hitbox data.

EHonda njjab1 djjab1&9 njstrng1 djstrng9 njfrc1&7 djfrc1&7 djfrwrd9 djrh9.png EHonda njjab2 djjab2&8 njstrng2&8 djstrng2&8.png EHonda njjab3 djjab3&7 njstrng7 djstrng7.png EHonda njjab4.png EHonda njjab5 djjab5 njstrng5 djstrng5.png
Frame Count 2 3 3 30
Simplified 8 30
djlp
Diagonal Jumping Jab
Diagonal Jumping Light Punch
7 or 9 LP
Ub.png or Uf.png+Lp.png
EHonda djjab4.png
Damage Dizzy Dizzy Time Cancel Guard Act. Range
12[0] 1~7(-2) 40 Special High N/A
Startup Active Recovery Total Frame Adv. Meter
2 N/A 2+∞ Dependent 2/1

A jumping chop.

  • Good air-to-air move thanks to the long horizontal hitbox.
  • Can trade or beat touch jump ins like Chun-Li's LK/MK if you've got good reflexes.
  • Excellent for tick throws and safe jumps.
  • Dictator and Blanka can duck under this move and punish you for using it.

Click to toggle detailed hitbox data.

  • Startup/Active:
EHonda njjab1 djjab1&9 njstrng1 djstrng9 njfrc1&7 djfrc1&7 djfrwrd9 djrh9.png EHonda njjab2 djjab2&8 njstrng2&8 djstrng2&8.png EHonda njjab3 djjab3&7 njstrng7 djstrng7.png EHonda djjab4.png
Frame Count 1 2 2 12
  • Recovery:
EHonda njjab5 djjab5 njstrng5 djstrng5.png EHonda djjab6 njstrng6 djstrng6.png EHonda njjab3 djjab3&7 njstrng7 djstrng7.png EHonda njjab2 djjab2&8 njstrng2&8 djstrng2&8.png EHonda njjab1 djjab1&9 njstrng1 djstrng9 njfrc1&7 djfrc1&7 djfrwrd9 djrh9.png
Frame Count 8 4 4 4


njmp
Neutral Jumping Strong
Neutral Jumping Medium Punch
8MP / U.png+Mp.png
EHonda njstrng3 djstrng3.png
First Hitbox.
EHonda njstrng4.png
Second Hitbox.
Damage Dizzy Dizzy Time Cancel Guard Act. Range
22[1] 5~11 50(+10) None High N/A
Startup Active Recovery Total Frame Adv. Meter
7 16 (4/12) 33+∞ Dependent 4/3

Another chop, this time with windback.

  • First part has great priority, second part not so much.
  • Still a decent air to air/walldive counter.

Click to toggle detailed hitbox data.

  • Startup/Active:
EHonda njjab1 djjab1&9 njstrng1 djstrng9 njfrc1&7 djfrc1&7 djfrwrd9 djrh9.png EHonda njjab2 djjab2&8 njstrng2&8 djstrng2&8.png EHonda njstrng3 djstrng3.png EHonda njstrng4.png
Frame Count 3 4 4 12
Simplified 7 16
  • Recovery
EHonda njjab5 djjab5 njstrng5 djstrng5.png EHonda njjab2 djjab2&8 njstrng2&8 djstrng2&8.png EHonda njjab3 djjab3&7 njstrng7 djstrng7.png EHonda njjab2 djjab2&8 njstrng2&8 djstrng2&8.png
Frame Count 8 4 4
Simplified
djmp
Diagonal Jumping Strong
Diagonal Jumping Medium Punch
7 or 9 MP
Ub.png or Uf.png+Mp.png
EHonda njstrng3 djstrng3.png
Damage Dizzy Dizzy Time Cancel Guard Act. Range
22[2] 5~11 50 None High N/A
Startup Active Recovery Total Frame Adv. Meter
7 8 15+∞ Dependent 4/3

Another chop. The downwards motion doesn't have a hitbox for some reason.

  • Useful against Claw's walldives while jumping back.
  • One of your only reliable moves with a hitbox above you, which can save you in a pinch when you don't have a charge for jab Headbutt.

Click to toggle detailed hitbox data.

  • Startup/Active:
EHonda djstrng1.png EHonda njjab2 djjab2&8 njstrng2&8 djstrng2&8.png EHonda njstrng3 djstrng3.png
Frame Count 3 4 8
Simplified 7 8
  • Recovery:
EHonda djstrng4.png EHonda njjab5 djjab5 njstrng5 djstrng5.png EHonda djjab6 njstrng6 djstrng6.png EHonda njjab3 djjab3&7 njstrng7 djstrng7.png EHonda njjab2 djjab2&8 njstrng2&8 djstrng2&8.png EHonda njjab1 djjab1&9 njstrng1 djstrng9 njfrc1&7 djfrc1&7 djfrwrd9 djrh9.png
Frame Count 6 8 4 4 4
Simplified


njhp
Neutral Jumping Fierce
Neutral Jumping Heavy Punch
8HP / U.png+Hp.png
EHonda njfrc3 djfrc3.png
Can be steered midair. In case of fireballs, break glass.
Damage Dizzy Dizzy Time Cancel Guard Act. Range
32[2] 11~17(-1) 60(+20) None High N/A
Startup Active Recovery Total Frame Adv. Meter
7 6 13+∞ Dependent 5/4

Honda does a curved slap.

  • This move can be steered in midair, allowing for slight movement after you've left the ground.
  • Steering allows safe jumping over projectiles, making it an invaluable tool in his kit.

Click to toggle detailed hitbox data.

EHonda njjab1 djjab1&9 njstrng1 djstrng9 njfrc1&7 djfrc1&7 djfrwrd9 djrh9.png EHonda njfrc2&6 djfrc2&6.png EHonda njfrc3 djfrc3.png EHonda njfrc4 djfrc4.png EHonda njfrc5 djfrc5.png EHonda njfrc2&6 djfrc2&6.png EHonda njjab1 djjab1&9 njstrng1 djstrng9 njfrc1&7 djfrc1&7 djfrwrd9 djrh9.png
Frame Count 3 4 6 8 4 4
Simplified 7 6
djhp
Diagonal Jumping Fierce
Diagonal Jumping Heavy Punch
7 or 9 HP
Ub.png or Uf.png+Hp.png
EHonda njfrc3 djfrc3.png
Damage Dizzy Dizzy Time Cancel Guard Act. Range
30[2] 3~9 40 None High N/A
Startup Active Recovery Total Frame Adv. Meter
7 8 15+∞ Dependent 5/4

A sweeping slap. The diagonal version can't be steered.

  • Some players prefer to use this instead of diagonal Forward as their main jump-in for the extra damage.
  • Slightly less vertical priority than dj.mk but more horizontal priority. Also slightly less reach. Use what feels more comfortable.

Click to toggle detailed hitbox data.

EHonda njjab1 djjab1&9 njstrng1 djstrng9 njfrc1&7 djfrc1&7 djfrwrd9 djrh9.png EHonda njfrc2&6 djfrc2&6.png EHonda njfrc3 djfrc3.png EHonda njfrc4 djfrc4.png EHonda njfrc5 djfrc5.png EHonda njfrc2&6 djfrc2&6.png EHonda njjab1 djjab1&9 njstrng1 djstrng9 njfrc1&7 djfrc1&7 djfrwrd9 djrh9.png
Frame Count 3 4 6 8 4 4
Simplified 7 6


njlk
Neutral Jumping Short
Neutral Jumping Light Kick
8LK / U.png+Lk.png
EHonda njshrt3.png
Damage Dizzy Dizzy Time Cancel Guard Act. Range
16[1] 1~7(-2) 40 None High N/A
Startup Active Recovery Total Frame Adv. Meter
7 30 37+∞ Dependent 2/1

A jumping kick.

  • Landing this move as a tick will push you out of most characters throw ranges and leave you in Oicho range for an unexpected and hard to deal with tick.
    • Ticking with this move is circumstantial however, likely requiring a knockdown in the corner.
  • Otherwise this move is hot garbage.

Click to toggle detailed hitbox data.

EHonda njshrt1&5 djfrwrd1&5 djrh1&5.png EHonda njshrt2&4 djfrwrd2&4 djrh2&4.png EHonda njshrt3.png EHonda njshrt2&4 djfrwrd2&4 djrh2&4.png EHonda njshrt1&5 djfrwrd1&5 djrh1&5.png
Frame Count 7 4 30 4
Simplified 7 30
djlk
Diagonal Jumping Short
Diagonal Jumping Light Kick
7 or 9 LK
Ub.png or Uf.png+Lk.png
EHonda djshrt3.png
Damage Dizzy Dizzy Time Cancel Guard Act. Range
16[1] 1~7(-2) 40 None High N/A
Startup Active Recovery Total Frame Adv. Meter
7 N/A 7+∞ Dependent 2/1

A quick jumping buttslam makes an important move move for Honda.

  • Small hurtbox helps with jumping over projectiles.
  • The hitbox has decent vertical priority and hits low to the ground, which makes it good for stuffing slides and poorly spaced anti-air sweeps.

Click to toggle detailed hitbox data.

EHonda djshrt1.png EHonda djshrt2.png EHonda djshrt3.png
Frame Count 3 4
Simplified 7


njmk
Jumping Forward
Neutral Jumping Medium Kick
8MK / U.png+Mk.png
EHonda njfrwrd3.png
Neutral Jump version
EHonda djfrwrd3.png
Diagonal Jump version
Damage Dizzy Dizzy Time Cancel Guard Act. Range
22[1] 5~11 50(+10) None High N/A
Startup Active Recovery Total Frame Adv. Meter
7 12 19+∞ Dependent 4/3

Your best frontal jump-in.

  • The diagonal jump version has a much more vulnerable upper body hurtbox, other than that the neutral jump version behaves the exact same.
  • Very good vertical priority, letting you stuff a lot of anti-air normals if spaced properly.
  • Ok in neutral jumps as you come down, but nj.HP is often favored as it can be steered.

Click to toggle detailed hitbox data.

Neutral Jump Version

EHonda njfrwrd1&5 njrh1&5.png EHonda njfrwrd2&4 njrh2&4.png EHonda njfrwrd3.png EHonda njfrwrd2&4 njrh2&4.png EHonda njfrwrd1&5 njrh1&5.png EHonda njfrwrd6 njrh6.png EHonda njfrwrd7 njrh7.png EHonda njfrwrd8 njrh8.png EHonda njfrwrd9 njrh9.png
Frame Count 3 4 12 4 4 4 4 4
Simplified 7 12


Diagonal Jump Version

EHonda njshrt1&5 djfrwrd1&5 djrh1&5.png EHonda njshrt2&4 djfrwrd2&4 djrh2&4.png EHonda djfrwrd3.png EHonda njshrt2&4 djfrwrd2&4 djrh2&4.png EHonda njshrt1&5 djfrwrd1&5 djrh1&5.png EHonda djfrwrd6 djrh6.png EHonda djfrwrd7 djrh7.png EHonda djfrwrd8 djrh8.png EHonda njjab1 djjab1&9 njstrng1 djstrng9 njfrc1&7 djfrc1&7 djfrwrd9 djrh9.png
Frame Count 3 4 12 4 4 4 4 4
Simplified 7 12


njhk
Neutral Jumping Roundhouse
Neutral Jumping Heavy Kick
8HK / U.png+Hk.png
EHonda njrh3.png
Damage Dizzy Dizzy Time Cancel Guard Act. Range
30[2] 11~17(-1) 60(+20) None High N/A
Startup Active Recovery Total Frame Adv. Meter
7 6 13+∞ Dependent 5/4

Yet another jumping kick.

  • Trades nj.mk's better priority for better damage.
  • Some Honda plsyers use this over his sterrable nj.HP because of its truncated hurtboxes for jumping over projectiles. Try both and see what works best for your playstyle. -x64

Click to toggle detailed hitbox data.

EHonda njfrwrd1&5 njrh1&5.png EHonda njfrwrd2&4 njrh2&4.png EHonda njrh3.png EHonda njfrwrd2&4 njrh2&4.png EHonda njfrwrd1&5 njrh1&5.png EHonda njfrwrd6 njrh6.png EHonda njfrwrd7 njrh7.png EHonda njfrwrd8 njrh8.png EHonda njfrwrd9 njrh9.png
Frame Count 3 4 6 4 4 4 4 4
Simplified 7 6


djhk
Diagonal Jumping Roundhouse
Diagonal Jumping Heavy Kick
7 or 9 HK
Ub.png or Uf.png+Hk.png
EHonda djrh3.png
The developers got a lot of mileage out of this sprite.
Damage Dizzy Dizzy Time Cancel Guard Act. Range
30[2] 3~9 40 None High N/A
Startup Active Recovery Total Frame Adv. Meter
7 10 17+∞ Dependent 5/4

One last jumping kick for the road.

  • A great crossup, usually harder to counter than a dj.mk crossup.
  • A critical crossup against Chun-Li, since Tenshokyaku will whiff if you space this correctly. -x64

Click to toggle detailed hitbox data.

EHonda njshrt1&5 djfrwrd1&5 djrh1&5.png EHonda njshrt2&4 djfrwrd2&4 djrh2&4.png EHonda djrh3.png EHonda njshrt2&4 djfrwrd2&4 djrh2&4.png EHonda njshrt1&5 djfrwrd1&5 djrh1&5.png EHonda djfrwrd6 djrh6.png EHonda djfrwrd7 djrh7.png EHonda djfrwrd8 djrh8.png EHonda njjab1 djjab1&9 njstrng1 djstrng9 njfrc1&7 djfrc1&7 djfrwrd9 djrh9.png
Frame Count 3 4 10 4 4 4 4 4
Simplified 7 10


Command Normals

Knee Strike
Knee Strike
Hiza Geri
cl. 4 or 6MK
cl.B.png or F.png+Mk.png
EHonda knee4.png
First Hit
EHonda knee5.png
Second Hit
Damage Dizzy Dizzy Time Cancel Guard Act. Range
26[1] ~ 16[1] 5~11 x 2 60 x 2 None Mid 0-11
Startup Active Recovery Total Frame Adv. Meter
10 6 (3 ~ 3) 7 23 +5 ~ +8(+7) 4/3 x 2

A two hit knee attack.

  • Somewhat slow.
  • This can be linked after a crossup if it hits very deep.
  • Not much use since you can't do much afterwards, and Honda has better tick options.

Click to toggle detailed hitbox data.

  • Startup/Active
EHonda knee1&9.png EHonda knee2&8.png EHonda knee3&7.png EHonda knee4.png EHonda knee5.png
Frame Count 1 + 3 3 3 3 3
Simplified 10 3 3
  • Recovery
EHonda knee6.png EHonda knee3&7.png EHonda knee2&8.png EHonda knee1&9.png
Frame Count 2 2 2 1
Simplified 7


Sweep Kick
Sweep Kick
Harai Geri
4 or 6HK
B.png or F.png+Hk.png
EHonda sweep4.png
Damage Dizzy Dizzy Time Cancel Guard Act. Range
28[2] 5~11 130 None Low N/A
Startup Active Recovery Total Frame Adv. Meter
10 6 19 35 -3/Soft Knockdown 5/4

Honda's command sweep, and his longest ranged normal.

  • You'll be using this a lot against projectile characters. Using this from max range to stop/trade with projectile attempts allows you to keep the initiative with a knockdown and get a chance to get in close.
  • Honda's hurtbox shifts out when the leg is extended, making it harder to use as an anti-air.
  • Hitting this will create a built in safe jump against Sagat and Claw, as long as they don't hit the corner or a breakable object.

Click to toggle detailed hitbox data.


EHonda sweep1&7.png EHonda sweep2&6.png EHonda sweep3&5.png EHonda sweep4.png EHonda sweep3&5.png EHonda sweep2&6.png EHonda sweep1&7.png
Frame Count 1 + 3 3 3 6 8 10 1
Simplified 10 6 19


Flying Sumo Press
Flying Sumo Press
2MK during diagonal jump
D.png+Mk.png during diagonal jump.
EHonda sumo3.png
Damage Dizzy Dizzy Time Cancel Guard Act. Range
24[2] 5~11 50(+10) None High N/A
Startup Active Recovery Total Frame Adv. Meter
7 N/A 7+∞ Dependent 4/3

A full body slam.

  • Good crossup. Not much priority for frontal jumps though. -x64

Click to toggle detailed hitbox data.


EHonda sumo1.png EHonda sumo2.png EHonda sumo3.png
Frame Count 3 4
Simplified 7


Throws

E.Honda can throw with Mp.png, Hp.png, and Hk.png. He has the longest normal throw range in the game, as well as some nasty throw loops off his Fierce and Roundhouse throws.

Rice Bale Throw
Tawara Nage
cl. 4 or 6MP
cl. B.png or F.png+Mp.png
Ssf2t ehonda pthrow.png
Damage Dizzy Dizzy Time Cancel Guard Act. Range
32 7~13 100 None Grab 64 (from axis) 36 (from throwable box)
Startup Active Recovery Total Frame Adv. Meter
1 1 Dependent 2 N/A -

Honda's one and only normal Throw.

  • The direction you're holding determines the direction you'll throw in.
  • Useful to throw characters at a corner
  • Can't softlock the game like Old Honda's version can.


Saba Ori
cl. 4 or 6HP
cl.B.png or F.png+Hp.png
Ssf2t honda phold.png
Hug the life out of them.
Damage Dizzy Dizzy Time Cancel Guard Act. Range
26 + 4*n 0 0 None Grab 64 (from axis) 36 (from throwable box)
Startup Active Recovery Total Frame Adv. Meter
1 1 Dependent 2 N/A -

Honda's "bear hug" hold. You'll be using this one the most.

  • Amount of hits is set at 8, then added/subtracted through mashing.
  • Untechable (like all holds), does nice damage, and sets up crossup/walk under/tick shenanigans.
  • In the corner, you can walk under > cr.hk for a crossup, crossup with dj.mk, cr.lp into Oicho, etc.
  • Some characters (Boxer, Cammy, Dee Jay, Claw, and Fei Long) can only be walked under at the corner.
  • This grab sets up a built-in safejump/crossup against most characters. This won't work on Ryu/Ken, Sagat, and Blanka. This won't crossup against Dee Jay, Claw, and Boxer.
  • Both this and Honda's HK hold loops will whiff if the opponent is close to the corner.

-x64


Sekkan Keri
cl. 4 or 6HK
cl.B.png orF.png+Hk.png
Ssf2t honda khold.png
Damage Dizzy Dizzy Time Cancel Guard Act. Range
26 + 4*n 0 0 None Grab 64 (from axis) 36 (from throwable box)
Startup Active Recovery Total Frame Adv. Meter
1 1 Dependent 2 N/A -

Honda's Heavy Kick hold.

  • Amount of hits is set at 7, then added/subtracted through mashing.
  • You can start a loop against any character with this grab (unless they recover against the corner or hit a breakable object). After a successful grab, jump in with an attack (such as dj.mk) right as the grab ends, and you'll be able to repeat the tick.
  • This loop is not safe on any character with a 3 frame or less reversal, so don't use this against Ken/Chun-Li/Sagat/Blanka unless you know their reversal timing isn't great.
  • May not be a safejump against Ryu depending on how he mashes out.

-x64

Click to toggle throwbox data.

Special Moves

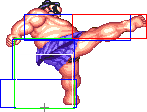
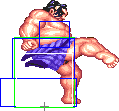
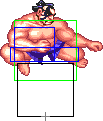
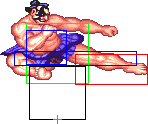
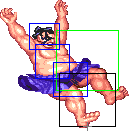
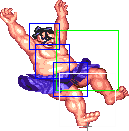
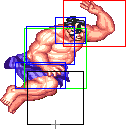
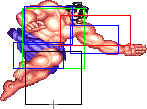
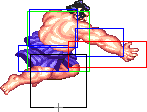
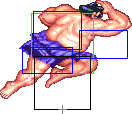
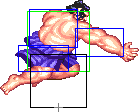
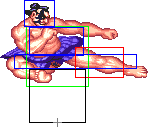
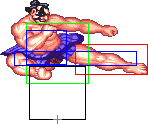
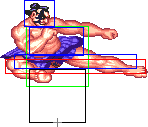
Hundred Hand Slap

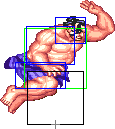
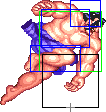
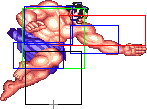
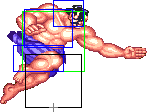
{{MoveData | name = Hundred Hand Slap | input = Press P.png Repeatedly

Click to toggle detailed hitbox data.

  • Startup:
EHonda hhs1&13.png EHonda hhs2&9.png
Frame Count (Jab) 2 3
Simplified (Jab) 5
Frame Count (Strong) 4 4
Simplified (Strong) 8
Frame Count (Fierce) 5 6
Simplified (Fierce) 11
  • Active:
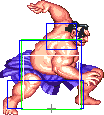
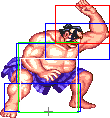
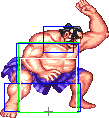
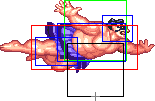
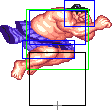
EHonda hhs3.png EHonda hhs4.png EHonda hhs5.png
Frame Count (Jab) 4* 4 4
Frame Count (Strong) 2* 2 2
Frame Count (Fierce) 1* 1 1
  • NOTE: The first hitbox that comes out when performing this move has 1 extra active frame.
EHonda hhs6.png EHonda hhs7.png EHonda hhs8.png
Frame Count (Jab) 4 4 4*
Frame Count (Strong) 2 2 2*
Frame Count (Fierce) 1 1 1*
  • NOTE 2: The last active frame on some animation cycles are skipped. This depends on the frequency of your button presses.
  • Recovery:
EHonda hhs2&9.png EHonda hhs10&12.png EHonda hhs11.png EHonda hhs10&12.png EHonda hhs1&13.png
Frame Count (Jab) 5 2 3 2 1
Simplified (Jab) 13
Frame Count (Strong) 7 2 3 2 1
Simplified (Strong) 15
Frame Count (Fierce) 8 3 4 3 1
Simplified (Fierce) 19


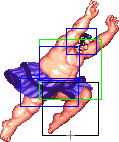
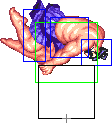
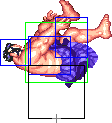
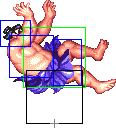
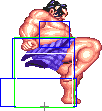
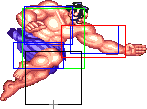
Sumo Headbutt

Sumo Headbutt
Headbutt
[4]6P / Cb.pngF.png+P.png
EHonda hb3jab.png
EHonda hb4jab.png
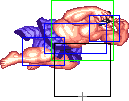
EHonda hb5.png
Jab version depicted. Dosu-koi!
Lp.png Damage Dizzy Dizzy Time Cancel Guard Act. Range
28[1]/28[2] 9~15 100 None Mid N/A
Startup Active Recovery Total Frame Adv. Meter
8 28 (6/22) 25/26 61/62 -7 (Blocked)/Hard Knockdown 9

Invincible on Frames 1-11.

Mp.png Damage Dizzy Dizzy Time Cancel Guard Act. Range
30[2]/30[3] 9~15 100 None Mid N/A
Startup Active Recovery Total Frame Adv. Meter
11 27 (2/25) 25/26 63/64 -7 (Blocked)/Hard Knockdown 9

Invincible on Frames 1-11.

Hp.png Damage Dizzy Dizzy Time Cancel Guard Act. Range
32[3]/32[4] 9~15 100 None Mid N/A
Startup Active Recovery Total Frame Adv. Meter
6 54 (1/53) 25/26 85/86 -7 (Blocked)/Hard Knockdown 9

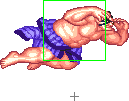
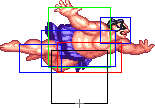
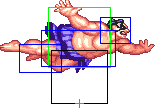
Honda shouts a sumo battle cry and flies forward.

  • Damage and speed increase with strength.
  • Honda will keep going until he hits the opponent or the maximum active frames are hit.
  • The HP version is invincible on Frames 1-6.

General Strategies

  • LP Headbutt is your main defensive tool. The invincibility combines well with the excellent vertical and horizontal range, making jumping or getting in on Honda nearly impossible when he has charge.
  • Learn to time this move properly and matches against non-fireballers become way easier.
  • The MP version should only really be used for positioning. An example being if you know your opponent is going to jump backwards at round start, using MP Headbutt lands you right next to them, close to the corner.
  • The HP version is very fast, making it a great tool to safely pressure and punish mid-range mistakes (such as whiffs or opponents falling down from a jumping attack).
  • It also has a much better horitontal hitbox than the Jab version, making for a better anti air if your opponent is jumping in front of you rather than above you.
  • While you may trade with the HP version, you'll almost always come out on top positioning wise.
  • Avoid using the HP version from full screen, especially if your opponent is near the corner. They can jump it on reaction and punish.

Click to toggle detailed hitbox data.

  • Startup:
Jab and Strong Only EHonda hb1.png EHonda hb2.png Strong and Fierce Only
EHonda hb0jab&strng.png EHonda hb3.png
Frame Count (Jab) 1 3 4
Simplified (Jab) 8
Frame Count (Strong) 1 2 6 2
Simplified (Strong) 11
Frame Count (Fierce) 1 4 1
Simplified (Fierce) 6
  • Active:
  • Jab Version
EHonda hb3jab.png EHonda hb4jab.png EHonda hb5.png
Frame Count 3 3 22
Simplified 6 22


  • Strong and Fierce Version:
EHonda hb4.png EHonda hb5.png
Frame Count (Strong) 2 25
Frame Count (Fierce) 1 53
  • Recovery:
EHonda hblands1.png EHonda hblands2.png EHonda hblands3.png EHonda hblands4.png EHonda hblands5.png EHonda hblands6.png EHonda hblands7.png
Frame Count 4 4 4 8/9 2 2 1
Simplified 25/26

Sumo Smash

Sumo Smash
Buttslam
[2]8K / Cd.pngU.png+K.png
EHonda bdrop7.png
Rising Hitbox (Short and Forward Only)
EHonda bdrop13.png
Falling Hitbox.
Lk.png Damage Dizzy Dizzy Time Cancel Guard Act. Range
24[2] 9~15 100 None Mid/High N/A
Startup Active Recovery Total Frame Adv. Meter
19 9(13)12 5 58 Dependent 9
  • Invincible on frames 1-21.
Mk.png Damage Dizzy Dizzy Time Cancel Guard Act. Range
28[2] 9~15 100 None Mid/High N/A
Startup Active Recovery Total Frame Adv. Meter
19 9(13)12 5 58 Dependent 9
  • Invincible on frames 1-19.
Hk.png Damage Dizzy Dizzy Time Cancel Guard Act. Range
32[2] 9~15 100 None High N/A
Startup Active Recovery Total Frame Adv. Meter
42 15 6 63 Dependent 9

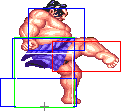
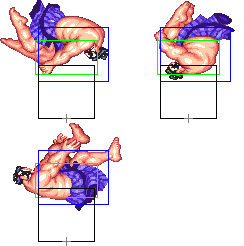
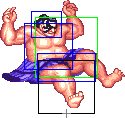
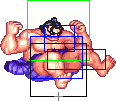
Honda leaps into the air and comes crashing down with the weight of a piano.

  • Short and Forward have a rising hitbox, while Roundhouse does not.
  • Rising part hits mid, while the falling part hits high. Not that this move hits most crouching opponents anyway.
  • HK version is invincible on frames 1-21.

General Strategies

  • cr.lk > Smash is a good pressure/mixup tool. Just make sure to vary your strengths and mix in some ticks.
  • The LK version serves as both a decent anti-air and is useful to get over projectiles from far away.
  • Also a good mixup for Oicho setups.
  • The MK version can be used to stuff projectile attempts at the right distance.
  • It also doubles as a risky way to get over projectiles. (It can be punished by Shoto sweeps and Guile/Dee Jay's jumping attacks.)
  • Be careful about using both Short and Forward as anti-airs. The long startup frames give your opponent time to block the rising hit when standing, and leaves an opportunity for them to punish as you fall down.
  • The HK version is mainly for crossups, mixups, and setting ticks rather than as a way to avoid projectiles, since it's very easily punishable.

Click to toggle detailed hitbox data.

  • Startup (Short/Forward):
EHonda bdrop1.png EHonda bdrop2.png EHonda bdrop3.png EHonda bdrop4.png EHonda bdrop5.png EHonda bdrop6.png
Frame Count (Short) 1 4 5 2 5 4
Simplified (Short) 21
Frame Count (Forward) 1 3 4 2 5 4
Simplified (Forward) 19
  • Active + Recovery:
EHonda bdrop7.png EHonda bdrop8to10anm.gif EHonda bdrop11.png EHonda bdrop12.png EHonda bdrop13.png EHonda bdrop14.png
Frame Count (Short) 9 9 (3 + 3 + 3) 2 2 10 4
Simplified (Short) 9 13 10 4
Frame Count (Forward) 9 9 (3 + 3 + 3) 2 2 12 5
Simplified (Forward) 9 13 12 5


  • Startup (Roundhouse):
EHonda bdrop1.png EHonda bdrop2.png EHonda bdrop3.png EHonda bdrop4.png EHonda bdrop5.png EHonda bdrop6.png
Frame Count 1 3 4 2 4 4
Simplified 18... (42)
EHonda bdrop7rh.png EHonda bdrop8to10anm.gif EHonda bdrop11.png EHonda bdrop12.png
Frame Count 9 9 (3 + 3 + 3) 2 2
Simplified ...24 (42
  • Active/Recovery:
EHonda bdrop13.png EHonda bdrop14.png
Frame Count 15 6

Oicho Throw

Oicho Throw
6324P
Qcfd.pngB.png + P.png
Ssf2t honda oicho.png
Who needs shading with mixups like these?
Damage Dizzy Dizzy Time Cancel Guard Act. Range
16[1] + 28[1] (L)
18[1] + 30 [1] (M)
20[1] + 32[1] (H)
7~13 x 2 100 x 2 None Grab N/A
Startup Active Recovery Total Frame Adv. Meter
0 1 Dependent 1 Dependent 12

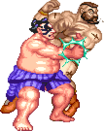
Honda slams his opponent to the ground, then follows up with a buttslam.

  • Honda's main offensive weapon. Easy to tick into, great damage, high dizzy.
  • Affected by the Input Storing Glitch. 4 can be held as long as you want before performing the move.
  • The Input Storing Glitch allows this move to be a powerful defensive tool as well. (See Strategies for more info.)
  • You can Negative Edge this move to create a command grab with essentially 0 recovery frames.
  • NOTE: The Input Storing Glitch was fixed in Hyper Street Fighter 2. An alternate version of Honda with the glitch restored can be selected by holding Start and selecting the Super Turbo/Super X version of Honda.

Click to toggle detailed throwbox data.


EHonda oicho.png EHonda oichocr.png

Super Combo

Super Killer Head Ram
[4]646P
Cb.pngF.pngB.pngF.png + P.png
EHonda super4.png
EHonda super5.png
EHonda super11.png
EHonda super12.png
It's Super Killer, but you're the one who's probably getting killed.
Damage Dizzy Dizzy Time Cancel Guard Act. Range
20[2] x 4 0~4 x 4 20 x 4 None Mid N/A
Startup Active Recovery Total Frame Adv. Meter
6 54(7)54 25 146 -13 (Second Attack)/ Hard Knockdown* -

Honda brings out the big guns: One of the worst Super Combos in the game.

  • Affected by the Input Storing glitch. The second Forward can be held as long as you need before performing the move.
  • Invincible on frames 1-7. Honda only has 1 invincible hitbox frame, compared to the 3 on his jab Headbutt.
  • Extremely unsafe on block (Some characters can DP after blocking the first hit, others can punish after blocking both).
  • If used at point blank range, this move will occasionally shoot straight through your opponent.
  • The second hit will occasionally miss, seemingly at random.
  • Can go through projectiles.
  • Will not knock down if the first hit results in a "gut reel" hitstun animation. This is obviously a downside in most cases, but it can be an occasional upside since you're right in Oicho range.
    • NOTE: The Input Storing Glitch was fixed in Hyper Street Fighter 2. An alternate version of Honda with the glitch restored can be selected by holding Start and selecting the Super Turbo/Super X version of Honda.

General Strategies

  • You can store the super motion to use as a walking anti-air. This one frame is still a lot larger than Jab Headbutt's hitbox, letting you catch several things that a regular Jab Headbutt can't catch.

Click to toggle detailed hitbox data.

EHonda super1.png EHonda super2.png EHonda super3.png EHonda super4.png EHonda super5.png
Frame Count 1 [18] + 4 1 1 53?
Simplified 6 1 53?


EHonda super6&13 superlands1.png EHonda super7&14 superlands2.png EHonda super8&15 superlands3.png EHonda super9.png EHonda super10.png EHonda super11.png EHonda super12.png
Frame Count 1 1 1 3 1 1 53?
Simplified 7 1 53?
  • Recovery/Knockback:
EHonda super6&13 superlands1.png EHonda super7&14 superlands2.png EHonda super8&15 superlands3.png EHonda super16 superlands4.png EHonda super17 superlands5.png EHonda super18 superlands6.png EHonda super19 superlands7.png
Frame Count 4 4 4 8 2 2 1
Simplified 25

Misc Animations

Jump Animations

  • Prejump:
EHonda bj1 nj1 fj1.png EHonda bj2 nj2 fj2.png EHonda bj3 nj3 fj3.png
Frame Count 2 2 1
Simplified 5
  • Neutral/Back Jump, Airborne + Landing:
EHonda bj4 nj4 fj4.png EHonda bj5&11 nj5&11.png EHonda bj6&10 nj6&10.png EHonda bj7&9 nj7&9.png EHonda bj8 nj8.png EHonda bj7&9 nj7&9.png EHonda bj6&10 nj6&10.png EHonda bj5&11 nj5&11.png EHonda bj12 nj12.png EHonda bj13 nj13 fj12.png
Frame Count (Neutral) 1 10 5 5 5 5 5 8 1 7*
Simplified (Neutral) 1 43 1 7*
Frame Count (Back) 1 10 5 5 5 5 5 8 1 7*
Simplified (Back) 1 43 1 7*
  • Forward Jump, Airborne + Landing:
EHonda bj4 nj4 fj4.png EHonda fj5.png EHonda fj6.png EHonda fj7.png EHonda fj8.png EHonda fj9.png EHonda fj10.png EHonda fj11.png EHonda bj13 nj13 fj12.png
Frame Count 1 10 6 4 4 6 12 1 7*
Simplified 1 42 1 7*

Honda has the slowest prejump animation on the game. This is part of the reason why he suffers so much to get in vs projectile zoners. With that said, knowing how to jump correctly can make these matchups less annoying.
First of all, you'll be jumping neutrally frequently, since it will not always be possible to jump forward safely. Looking at Honda's Neutral Jump hurtboxes, it's easy to notice that the last 9 frames of the jump animation have the leg hurtbox positioned very low, which will make jumping over projectiles extra hard. To deal with that, it's wise to do a move that reduces Honda's hurtboxes during that time, so you can avoid having big vulnerable hurtboxes. A good option is to press HK as soon as you hit the apex of the jump, that way you'll not only have very small "lower-back" hurtboxes through out the entirety of the jump, but also may trigger the opponents proximity block. This is extra effective with Old Honda, as his Neutral Jumping Roundhouse has amazing priority at the front. New Honda can also control the horizontal movement of the Neutral Jump if he does a Fierce, but keep in mind that Neutral Jumping Fierce have bigger "lower-back" hurtboxes, leaving him more vulnerable to projectiles. It's also optimal to activate Fierce a little before Honda hits the apex of the jump so it's possible to steer the maximum possible.
As for forward jumps, an important thing to be aware of is how his hurtboxes are positioned on the last 13 frames of the jump. Take a look at the hitbox images above, did you notice how Honda's hurtboxes are way less vulnerable at his front than if he did a move? Just compare the forward edge of the pushbox (green box) which is the same on all jumping animations, with the edge of the closest hurtbox (blue box) on all diagonal jumping animations (empty jump + diagonal jumping normals). A well spaced empty jump can be usefull if the opponent defaults to non sweep anti airs, as this can make these anti airs simply whiff (e.g. vs a Dee Jay that defaults to Upkick anti air when he has charge). This trick can be just what Honda needs to finally get in and apply his extremelly strong close range pressure. Of course, if the opponent is aware of this, he may counter it appropriately, but then Honda can just jump with one of his good anti-anti-air normals instead, creating a mix-up situation.

The landing recovery has a special property which allows it to be canceled into certain actions. At the first landing frame, you can perform throws (including command throws), and on the second landing frame, you can start another jump, attack with a normal or special move, or block. Blocking not being until the second landing frame, as well as hitbox-hurtbox interactions having priority over throwbox-throw hurtbox is why sweeps work as anti airs in this game.
Things are different when jumping over your opponent, however. In that situation it's possible to walk back/forward, to jump again or to even block on the first landing frame! Strangely, if a throw is timed on the first landing frame of a jump that crosses over, a throwbox will never come out, even though that input will result in a normal coming out 2 frames later (like it normally would). Anyway, being able to block on the first landing frame can help a little bit on some safe jump crossup setups, or maybe in other situations as well if your character has a huge jump arc.
Game Navigation

General
Controls and Notation
System
HUD
FAQ
New Characters
Balrog
Blanka
Cammy
Chun-Li
Dee Jay
Dhalsim
E. Honda
Fei Long
Guile
Ken
M. Bison
Ryu
Sagat
T. Hawk
Vega
Zangief
Akuma
Old Characters
O. Balrog
O. Blanka
O. Cammy
O. Chun-Li
O. Dee Jay
O. Dhalsim
O. E. Honda
O. Fei Long
O. Guile
O. Ken
O. M. Bison
O. Ryu
O. Sagat
O. T. Hawk
O. Vega
O. Zangief