No edit summary |
TheLoudCat (talk | contribs) (Added descriptions on the special moves, to better explain their usage. Added a desc on throws. Added a small amount to introductions.) |
||
| Line 3: | Line 3: | ||
She | She has a balanced moveset and lightweight character based on rushdown strategies, your main weakness is that a lot of specials have a long recovery and can be unsafe on block. | ||
Low-tier character. | Low-mid tier character, I recommend using Advanced mode for her. | ||
===Colors=== | ===Colors=== | ||
| Line 241: | Line 241: | ||
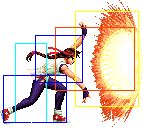
|valign="bottom" rowspan="2" colspan="3" style="border-left:0px;"| [[image:Yuri98_qcfP2.png|center]] | |valign="bottom" rowspan="2" colspan="3" style="border-left:0px;"| [[image:Yuri98_qcfP2.png|center]] | ||
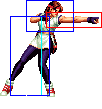
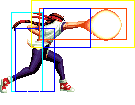
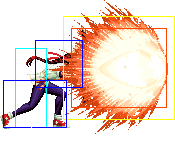
|rowspan="2"|'''Ko'ou Ken (qcf + P)''' | |rowspan="2"|'''Ko'ou Ken (qcf + P)''' | ||
Decent poke tool. | |||
|- | |- | ||
! qcf + [[image:snkc.gif]] | ! qcf + [[image:snkc.gif]] | ||
| Line 255: | Line 256: | ||
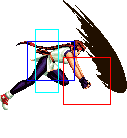
|rowspan="2" colspan="5"| [[image:Yuri98_qcfK.png|center]] | |rowspan="2" colspan="5"| [[image:Yuri98_qcfK.png|center]] | ||
|rowspan="2"|'''Raiou Ken (qcf + K)''' | |rowspan="2"|'''Raiou Ken (qcf + K)''' | ||
Good move to punish projectile spammers, B travels short, while D travels a longer | |||
distance. Needs timing to use effectively. | |||
|- | |- | ||
! qcf + [[image:snkd.gif]] | ! qcf + [[image:snkd.gif]] | ||
| Line 270: | Line 273: | ||
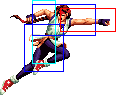
|valign="bottom" colspan="3" style="border-left:0px;"| [[image:Yuri98_dpA2.png|center]] | |valign="bottom" colspan="3" style="border-left:0px;"| [[image:Yuri98_dpA2.png|center]] | ||
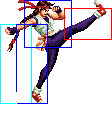
|rowspan="2"|'''Yuri Chou Upper (dp + P)''' | |rowspan="2"|'''Yuri Chou Upper (dp + P)''' | ||
A version has some invincibility, but it goes a short distance, | |||
C Version will be your main combo ender. Beware, if both | |||
versions are whiffed/blocked, they are highly unsafe. | |||
|- | |- | ||
! dp + [[image:snkc.gif]] | ! dp + [[image:snkc.gif]] | ||
| Line 287: | Line 293: | ||
|valign="bottom" colspan="3" style="border-left:0px;"| [[image:Yuri98_dpCdp2.png|center]] | |valign="bottom" colspan="3" style="border-left:0px;"| [[image:Yuri98_dpCdp2.png|center]] | ||
|'''Double Yuri Chou Upper (dp +P after dp + C)''' | |'''Double Yuri Chou Upper (dp +P after dp + C)''' | ||
Always do this after using dp C, it's extra damage, and you can | |||
sometimes catch the enemy off-guard when they try to punish you. | |||
Highly unsafe on whiff/block. Best meterless combo ender. | |||
|- | |- | ||
! qcb + [[image:snka.gif]] | ! qcb + [[image:snka.gif]] | ||
| Line 295: | Line 304: | ||
|rowspan="2" colspan="5"| [[image:Yuri98_qcbP.png|center]] | |rowspan="2" colspan="5"| [[image:Yuri98_qcbP.png|center]] | ||
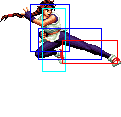
|rowspan="2"|'''Yuri Chou Knuckle (qcb + P)''' | |rowspan="2"|'''Yuri Chou Knuckle (qcb + P)''' | ||
Doesn't hit crouchers. A is faster but goes a short distance, | |||
C is slower but goes a longer distance, unsafe move | |||
regardless of the version you use. Use this move very sparingly. | |||
|- | |- | ||
! qcb + [[image:snkc.gif]] | ! qcb + [[image:snkc.gif]] | ||
| Line 310: | Line 322: | ||
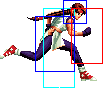
|valign="bottom" rowspan="2" colspan="3" style="border-left:0px;"| [[image:Yuri98_qcbK2.png|center]] | |valign="bottom" rowspan="2" colspan="3" style="border-left:0px;"| [[image:Yuri98_qcbK2.png|center]] | ||
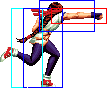
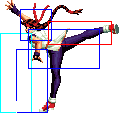
|rowspan="2"|'''Yuri Chou Mawashi Geri (qcb + K)''' | |rowspan="2"|'''Yuri Chou Mawashi Geri (qcb + K)''' | ||
A standard spin kick move. Doesn't knockdown, B is faster, D is slower but | |||
travels a longer distance. Good move for corner carry. | |||
|- | |- | ||
! qcb + [[image:snkd.gif]] | ! qcb + [[image:snkd.gif]] | ||
| Line 326: | Line 340: | ||
|rowspan="4" colspan="5"| [[image:Yuri98_qcfhcbK.png|center]] | |rowspan="4" colspan="5"| [[image:Yuri98_qcfhcbK.png|center]] | ||
|rowspan="4"|'''Hien Hou'ou Kyaku (qcf hcb + K)''' | |rowspan="4"|'''Hien Hou'ou Kyaku (qcf hcb + K)''' | ||
Does a lot of damage, best meter combo ender. | |||
|- | |- | ||
! qcf hcb + [[image:snkd.gif]] | ! qcf hcb + [[image:snkd.gif]] | ||
| Line 356: | Line 371: | ||
|valign="bottom" rowspan="3" style="border-left:0px;"| [[image:Yuri98_qcfx2P5.png|center]] | |valign="bottom" rowspan="3" style="border-left:0px;"| [[image:Yuri98_qcfx2P5.png|center]] | ||
|rowspan="3"|'''Hien Rekkou (qcf qfc + P)''' | |rowspan="3"|'''Hien Rekkou (qcf qfc + P)''' | ||
Good meter combo ender, do this if qfc,hcb + K won't land. | |||
Has invinicibility. | |||
|- | |- | ||
! qcf qcf + [[image:snkc.gif]] | ! qcf qcf + [[image:snkc.gif]] | ||
| Line 376: | Line 393: | ||
|rowspan="2" colspan="5"| [[image:Yuri98_fhcfP.png|center]] | |rowspan="2" colspan="5"| [[image:Yuri98_fhcfP.png|center]] | ||
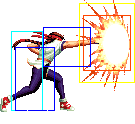
|rowspan="3"|'''Haou Shoukou Ken (f hcf + P)''' | |rowspan="3"|'''Haou Shoukou Ken (f hcf + P)''' | ||
A fast projectile super, a good punish move. | |||
|- | |- | ||
! f hcf + [[image:snkc.gif]] | ! f hcf + [[image:snkc.gif]] | ||
| Line 398: | Line 416: | ||
* '''b or f + D''' - | * '''b or f + D''' - | ||
Breakable. They are average throws. | |||
* '''In air, b / d / f + C / D''' - | * '''In air, b / d / f + C / D''' - | ||
Revision as of 03:50, 22 March 2022
Introduction
She has a balanced moveset and lightweight character based on rushdown strategies, your main weakness is that a lot of specials have a long recovery and can be unsafe on block.
Low-mid tier character, I recommend using Advanced mode for her.
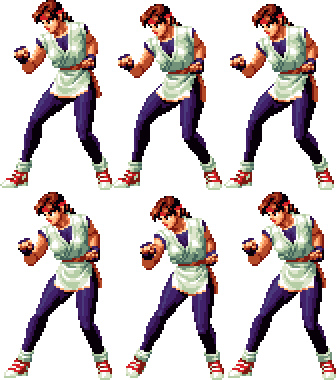
Colors

|

|

|

|
Gameplay Overview
In-depth Analysis
Movelist
Normal Throws
- b or f + C -
- b or f + D -
Breakable. They are average throws.
- In air, b / d / f + C / D -
Fastest Attacks
- 0F: C throw; D throw
- 1F: -
- 2F: cr.C; dp + A
- 3F: cl.A; cl.C; cl.D; st.A; cr.A; cr.B
- 4F: cl.B
- 5F: st.B; DM qcf qcf + A
- 6F: st.C
- 7F: cr.D; qcb + B
- 8F: (S)DM qcf hcb + K
- 9F: -
- 10F: dp + C
Combos
- Best jump-ins:
- j.C
- j.D (Can crossup.)
- cr.B, cr.A, st.A >
- dp + C > dp + C
- qcb + B (Second hit may whiff on some crouchers.)
- cr.B, cr.A >
- (S)DM qcf hcb + K
- DM qcf qcf + A
- dp + C > dp + C
- qcb + B (Second hit may whiff on some crouchers.)
- (cr.B, cr.C) / cl.D / cl.C >
- (S)DM qcf hcb + K
- DM qcf qcf + A (Close.)
- dp + C > dp + C
- qcb + D (Second hit may whiff on some crouchers.)
- qcf + A
- qcb + B (Second hit may whiff on some crouchers.)
- Simple buffers:
- cr.B, st.A / cl.A / cl.B > (S)DM qcf hcf + K
- cr.B, qcf + A/B > hcb + K (As cr.B is not cancelable, qcf + A/B will chain into a normal attack.)
- cr.B, st.A / cl.A / cl.B > (S)DM qcf hcf + K
Strategy Corner
- MAX: cl.D >
 + C >
+ C >  + C
+ C
deals ??? than
- cl.D >

 + K
+ K
Keep this in mind, when you need to decide whether to trigger MAX or keep meter for a DM.
