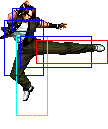
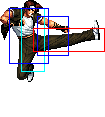
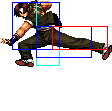
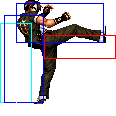
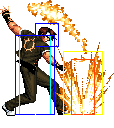
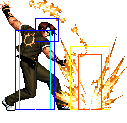
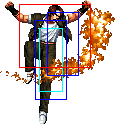
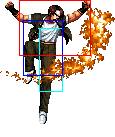
The King of Fighters '98/EX Kyo

From SuperCombo Wiki
Kyo98 stance.gif

Introduction

KOF98 kyo small.png

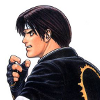
Kyo with his style from KOF '95.

In a nutshell

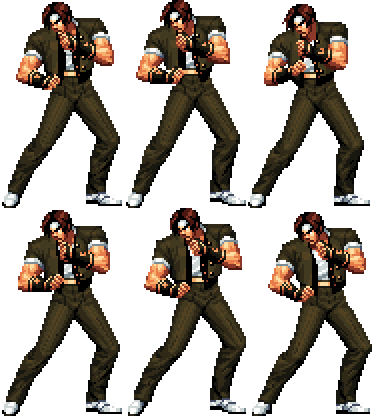
Essentially is style of Kyo is a mesh between Iori's zoning ability and Kyo's moveset. Kyo makes his best use of pressuring from far and mid-far screen using fireballs in a similar manner Iori does to zone and then controls approaches with hop Jumping D and Jumping B. 95-Era Kyo has a similar close game compared to default Kyo but lacks 114 Shiki: Aragami (default Kyo's Qcf.png + A) to control the ground and hop space effectively for pressure. 95-Era Kyo has 108 Shiki: Yami Barai (qcf + P) in lieu of 114 Shiki: Aragami and is very similar to Iori's fireball; but in application within the close range, it works like Iori's fireball in the sense it's a secondary Sweep.png and is susceptible to escapes via hops and jumps.

Overall, this is a weaker version of Kyo that excels in a more defensive neutral game than default Kyo but lacks the damage-output default Kyo is capable of from a low-hitting hitconfirm combo as well as the great rushdown that makes default Kyo one of the best characters in the game. Not only does 95-Era Kyo lack the damage-output from Low.png attacks in comparison but lacks the ability to get as much damage from a jump-in attack on an opponent from mid-screen. The amount of pluses that 95-Era Kyo have is incomparable to default Kyo, but nonetheless as a character, 95-Era Kyo is still a decent character and is still viable. It's just that Iori has a similar fireball game that 95-Era Kyo has but has better damage output and overall zoning combined with better mid-screen and corner pressure, options, and damage.

Colors

Snka.gif Snkb.gif Snkc.gif Snkd.gif
Kyo98 colorA.png Kyo98 colorB.png Kyo98 colorC.png Kyo98 colorD.png

Movelist

Frames Advantage Cancel Block Hitbox Notes
Standing Close
Snka.gif 3/4/5 +3/+1 HL
Kyo98 clA.png
Like most cl.A attacks, this hits mid and is cancelable. Can't really pressure or do much with this move due to the small activation range. Mainly this or st.A will combo after a cr.B and is used to hit-confirm into Final Showdown
Snkb.gif 5/4/8 0/-2 L
Kyo98 clB.png
Note that this is low and cancelable. Combos into cr.B and cr.A.
Snkc.gif 2/3+9/9 -1/-3 HL
Kyo98 clC1.png
Kyo98 clC2.png
The best close-range poke in KOF98. Not only is it extremely fast, but it activates from very far away for a 'close' attack. This makes Kyo very hard to stop when he runs in, because he can usually attack earlier than most characters
Snkd.gif 4/3/22 -5/-7 HL
Kyo98 clD.png
Not nearly as useful or as fast as cl.C. Used more in specific frame-trap situations but overall not a frequently used move by any means
Standing Far
Snka.gif 3/4/5 +3/+1 HL
Kyo98 stA.png
Great anti-air against short hop, and cancelable
Snkb.gif 7/3/13 -5/-7 HL
Kyo98 stB.png
Great long range poke
Snkc.gif 12/2/17 +1/-1 HL
Kyo98 stC.png
A slower version of far Standing A, not that useful as the risk isn't worth the reward but if need be this move could anti-air a hop and is cancelable
Snkd.gif 14/5/12 +3/+1 HL
Kyo98 stD.png
Can go over lows, but the range/hitbox speed is not what it is in CvS2, so don't think about using it like you would in that game. Still could be used in a block string such as cl.C > st.D > qcf + A
Snkc.gif+Snkd.gif 19/4/16 KD/+2 HL
Kyo98 stCD.png
Crouching
Snka.gif 3/4/5 +3/+1 HL
Kyo98 crA.png
Standard cr.A attack. Mainly used to after a cr.B to cancel into Final Showdown or a command normal/special attack/command normal canceled into a special attack for block-stringing
Snkb.gif 3/4/5 +3/+1 L
Kyo98 crB.png
One of the best 'footsie' moves in the game. Beats a lot of moves at its max range. Use this when running in. Links into cl.C and can combo into C Rekka series or block string with qcf + A or f + B into qcf + A / qcf + C
Snkc.gif 4/3+3/20 -6/-8 HL
Kyo98 crC1.png
Kyo98 crC2.png
One of the best normal anti-airs in the game (notice a trend?). Cancelable on the first part (when his arm isn't fully extended). Very fast and high-priority. Beware as it lacks much horizontal range compared to cl.C
Snkd.gif 11/3/19 KD/-4 L
Kyo98 crD.png
Slow, but easily whiff cancelable (preferably into qcf + A) if someone short hops it. Makes his hitbox shrink vertically, and he can use it to 'duck' under Takuma/old characters (O.Robert/O.Ryo/O.Yuri) fireballs completely
Jump
Snka.gif 5/8/- -/- H
Kyo98 jA.png
An air-to-air attack but is greatly overshadowed by Kyo's other jumping normals
Snkb.gif 5/9/- -/- H
Kyo98 jB.png
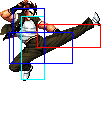
The best jump-in in the game. Cuts through almost ever normal anti-air like a knife through something that can't stop a knife. Stays out long enough to do it relatively early (not XI early you scrub) and reaches low enough to be one of the harder to block short hop attacks around. Crosses up
Snkc.gif 6/4/- -/- H
Kyo98 jC.png
Usually no reason to use this over j.B, but it does cross up, mostly on bigger characters. Problem is that this move has a higher hitbox and tends to whiff where j.B wouldn't
Snkd.gif 9/5/- -/- H
Kyo98 jD.png
Long range and very good priority for air-to-air or long range air-to-ground. For example neutral h.D can beat Ralf's st.C clean from range. Great in conjunction with qcf + A in a blockstring.
Snkc.gif+Snkd.gif 17/4/- KD/- HL
Kyo98 jCD.png
Not bad, a lot of blockstun like all jumping CDs. Has pretty good priority even when messing up a safe-jump set up as it will eat most attacks
Neutral Jump
Snka.gif 5/8/- -/- S H
Kyo98 jA.png
Snkb.gif 5/9/- -/- H
Kyo98 juB.png
Snkc.gif 6/4/- -/- H
Kyo98 jC.png
Snkd.gif 7/8/- -/- H
Kyo98 juD.png
Command Normals

f + Snkb.gif

11/7(3)7/18 -5/-7 HL,H
Kyo98 fB1.png
Kyo98 fB2.png
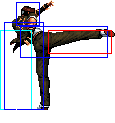
Ge Shiki: Goufu You - (f + B) - 2 hits, second hit is overhead if done alone. 2nd hit is not overhead but cancelable when chained from a normal, but will only fully combo if you're close enough for both hits to connect. The canceled into version is great for staggered blockstrings from Close C or Crouching A and frametraps relatively well and confirm into rekkas/fireball for a combo if staggered from light attacks
f + Snkb.gif
(cancel)
11/7(3)7/18 -5/-7 S,Su HL
df + Snkd.gif 2/3(12)4/24 -8/-10 L
Kyo98 dfD1.png
Kyo98 dfD2.png
88 Shiki - (df + D) - There are certain moves this thing can hit, like Ralf's st.C. Otherwise only use it in a combo
air d + Snkc.gif 6/5/- -/- H
Kyo98 jdC.png
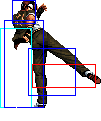
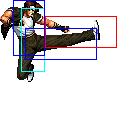
Ge Shiki: Naraku Otoshi - (air d + C) - A very good jump-in. Has long hit stun, so it can be performed early and still combo into things. Great as a crossup. Slams when used air-to-air. Since it is a command move, you can use it during a backdash and you will travel much further as well as decrease recovery. In Extra mode it can be done during a front dash, and can be comboed into itself this way as an infinite. If done on a crouching opponent or late, it will combo at best into a cr.A rather than be able to do a cr.B into cr.A and cl.C will whiff most of the time due to push back. This move tends to whiff on characters that could shrink their hitboxes by crouching or doing a crouching attack so keep that in mind
Special Moves
qcf + Snka.gif 10/36 HL
ExKyo98 qcfA.png
108 Shiki: Yami Barai - (qcf + P)
qcf + Snkc.gif 11/36 HL
ExKyo98 qcfC.png
dp + Snka.gif 5/4+13/27 HL
ExKyo98 dpA1.png
ExKyo98 dpA2.png
100 Shiki: Oni Yaki - (dp + P)
dp + Snkc.gif 5/4+22/27 HL
ExKyo98 dpC1.png
ExKyo98 dpC2.png
rdp + Snkb.gif 9/7/30 HL
ExKyo98 rdpB.png
101 Shiki: Oboru Guruma - (rdp + K)
rdp + Snkd.gif 11/42/33 HL
ExKyo98 rdpD1.png
ExKyo98 rdpD2.png
hcb + Snkb.gif HL
ExKyo98 hcbK.png
212 Shiki: Koto Tsuki-Yō - (hcb + K)
hcb + Snkd.gif HL
qcf + Snkb.gif HL
ExKyo98 qcfK.png
75 Shiki Kai - (qcf + K > K)
qcf + Snkd.gif HL
> Snkb.gif HL
ExKyo98 qcfKK.png
> Snkd.gif HL
DM

qcb hcf + Snka.gif

20/16/28 KD/-15 HL
Kyo98 qcbhcfP.png
Ura 108 Shiki: Orochi Nagi - qcb hcf + P
  • 28 frames of blockstun.

qcb hcf + Snkc.gif

18/16/32 KD/-19 HL

qcb hcf + Punch.gif

2+0~90+17/36/16 KD/-15 HL
Kyo98 qcbhcfP SDM1.png
Kyo98 qcbhcfP SDM2.png

Combos

  • cl.C / cr.C
    • DM qcb hcf + C
    • rdp + D
    • qcf + D > D, [junggler] (Very close)
    • hcb + D
    • df + D


  • cr.B, cr.A / cl.A / cl.B / st.A >
    • rdp + D (??)
    • df + D
    • dp + A (Close)


  • ... qcf + D > D,
    • SDM qcb hcf + P (Corner. Miss one hit. Timming required),
      • dp + C (Timming required.)
    • (S)DM qcb hcf + P
    • rdp + B, dp + C (Corner. Timming required)
    • rdp + D
    • hcf + D (Timming required)
    • j.CD
    • air d + C
    • j.C (Reset)


  • cl.C > f + B (2 hits) >
    • DM qcb hcf + C
    • rdp + D
    • hcb + D

The f + B will only combo on some characters, normally only on the bigger/larger ones, but will work un some specific thin characters. Will work on Shermie.


  • st. C >
    • DM qcb hcf + C
    • rdp + D (??)
    • hcb + B (if not too far)


  • Point blank: cr.C / cl.C / cr.A / cl.B > SDM qcb hcf + P

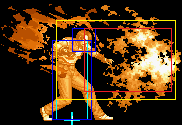
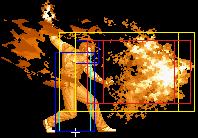
Holp P to burn opponent while charging (otherwise it will not combo), then release to hit launched opponent in the air with the second part. Out of the corner the charging will do only one hit, and you need to release the charge immediately after hit, on the corner the charge can do 2-3 hits and you have to wait a few frames to release to get the full 3 hits of the second part. Does a lot of damage, specially in the corner.


Note that you can link close C from cr.B. It is a 1-frame link, but more if you perform the cr.B meaty.


Strategy Corner

  • MAX: cl.C > Rdp.png + D

deals ??? than

  • cl.C > Qcb.png Hcf.png + C

Keep this in mind, when you need to decide whether to trigger MAX or keep meter for a DM.
Links

Game Navigation

General
Controls
Notation
HUD
Gameplay Overview
System
FAQ
Normal Characters
Andy
Athena
Benimaru
Billy
Blue Mary
Brian
Chang
Chin
Chizuru
Choi
Chris
Clark
Daimon
Heidern
Heavy D!
Iori
Joe
Kensou
Kim
King
Kyo
Leona
Lucky
Mai
Mature
Ralf
Robert
Rugal
Ryo
Saisyu
Shermie
Shingo
Takuma
Terry
Vice
Yamazaki
Yashiro
Yuri
EX Characters
EX Andy
EX Billy
EX Joe
EX Kyo
EX Mai
Orochi Chris
Orochi Shermie
Orochi Yashiro
EX Robert
EX Ryo
EX Terry
EX Yuri
Omega Rugal