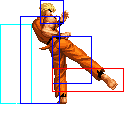
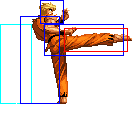
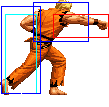
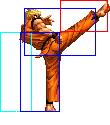
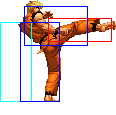
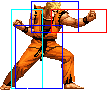
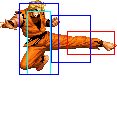
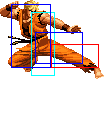
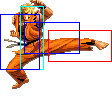
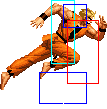
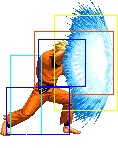
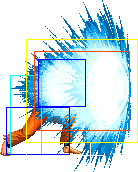
|
|
Frames
|
Advantage
|
Cancel
|
Block
|
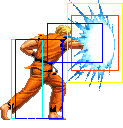
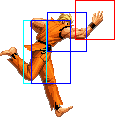
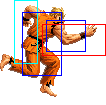
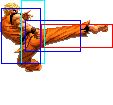
Hitbox
|
Notes
|
| Standing Close
|

|
3/4/9
|
-1/-3
|
C
|
HL
|
|
Can be used as combo filler instead of cr.A/B
|

|
3/7/8
|
-4/-6
|
C
|
HL
|
|
Can be used as combo filler instead of cr.A/B
|

|
2/10/13
|
-3/-5
|
C
|
HL
|
|
Very fast, extremely useful as a meaty attack. One of his best normals.
|

|
4/9/16
|
-7/-9
|
C
|
HL
|
|
Cancelable. cl.C is better
|
| Standing Far
|

|
3/3/8
|
+1/-1
|
C
|
HL
|
|
A great, versatile normal. Very good priority (can trade favorably with Yashiro's s.B, for example), decent range, can be cancelled into a hcb + K. Good to combo from cr.B.
|

|
5/2/12
|
-2/-4
|
-
|
HL
|
|
Really good long ranged poke. Even when it's not on the godly level of Yashiro's standing B, it's still a great normal move and you should abuse it to keep your opponent from getting too close / apply pressure safely.
|

|
7/6/24
|
-11/-13
|
-
|
HL
|
|
Nice damage, fast and long ranged. Watch out for the recovery.
|

|
12/4+4/16
|
-5/-7
|
-
|
HL
|
|
|
long poke. anti-air on 1st hit
|
 + +
|
9/8/18
|
KD/-5
|
S
|
HL
|
|
One of the best standing CDs in the game. Fast, very nice range, cancellable. Can surprise opponents running at you and beats lots of stuff.
|
| Crouching
|

|
3/5/5
|
+2/0
|
C
|
HL
|
|
Standard crouching A, cancelable.
|

|
3/5/5
|
+2/0
|
-
|
L
|
|
Your main combo starter. Comes out fast and has nice range, good for footsies.
|

|
1/2+3/23
|
-8/-10
|
C (1st part)
|
HL
|
|
|
Extremely fast for ground-to-ground situations. A great pressure tool; you will be cancelling it into qcf + P a lot. Links from cr.B / cr.A. Works very well as an anti-air too.
|

|
7/5/18
|
KD/-5
|
C
|
L
|
|
sweep attack. cancelable
|
| Jump
|

|
6/7/-
|
-/-
|
-
|
H
|
|
|

|
3/7/-
|
-/-
|
-
|
H
|
|
Very fast. Great jump-in. Will beat lots of stuff in an air-to-air clash.
|

|
6/4/-
|
|
-
|
H
|
|
Ryo's main cross-up. Good jump-in (better than j.D) .
|

|
5/4/-
|
-/-
|
-
|
H
|
|
Good jump-in. Weird cross-up properties.
|
 + +
|
15/4/-
|
KD/-
|
-
|
HL
|
|
Jump-in.
|
| Command Normals
|
f + 
|
17/9/11
|
-/-
|
-
|
H
|
|
Overhead, excellent used as a meaty attack.
|
f + 
(cancel)
|
-/-/-
|
-/-
|
-
|
HL
|
| Special Moves
|
qcf + 
|
13/3+6/27
|
|
|
HL
|
|
|
Ko ou Ken (qcf + P)
|
qcf + 
|
19/3+6/29
|
|
|
HL
|
|
|
dp+
|
2/3+12/21
|
|
|
HL
|
|
|
Kohou (dp+P)
|
dp+
|
4/3+17/28
|
|
|
HL
|
|
|
qcf + 
|
25/6/17
|
KD/-4
|
|
H
|
|
|
Mouko Raijin Setsu (qcf + K)
|
qcf + 
|
27/6/21
|
KD/-6
|
|
H
|
qcb + 
|
12/2+6/32
|
-5/-7
|
|
HL
|
|
|
Mouko Raijin Gou (qcb + P)
|
qcb + 
|
16/3+6/35
|
|
|
HL
|
|
|
hcb + 
|
6/3+6/30
|
|
|
HL
|
|
|
Hien Shippuu Kyaku (hcb + K)
- Both versions are unsafe and easily punishable when blocked, so use them mainly in combos. The B version can sometimes be useful to catch jumping enemies that are outside the range of your DP. Still, be careful when using it.
|
hcb + 
|
9/4+5+9+6/27
|
|
|
HL
|
|
|
|
hcf + 
|
7/39/14
|
|
|
-
|
|
Kyokugen-ryuu Renbu Ken (hcf + P)
|
| DMs
|
qcf hcb + 
|
1+10/13/32
|
|
|
HL
|
|
Ryuuko Ranbu (qcf,hcb + P)
A multi hit DM. If blocked, Ryo will keep pulling attacks as if it connected, but omitting his finishing DP. This is mostly bad, as it will leave you open for a long time after it finishes, and your opponent can just Guard Cancel Roll and punish you if he has a free stock. Still, if your opponent has no stock and very little bar left, a blocked Ryuuko Ranbu (after a blocked cl.C for example) can finish him off thanks to the chip damage it deals.
- Useful mainly in combos.
- A version comes out faster and covers less distance, C version is the opposite. MAX version does more hits.
|
qcf hcb + 
|
1+12/26/36
|
|
|
HL
|
qcf hcb + 
(SDM)
|
1+14/13(or26)/38
|
|
|
HL
|
f hcf + 
|
1+12/52
|
|
|
HL
|
|
Haou Shoukou Ken (f,hcf + P)
A bigger, more damaging Ko ou Ken. Goes through normal projectiles. A version is slower, and is sometimes difficult to evade if your opponent doesn't guess which version you are doing. An early roll or jump expecting a C version will fall directly into it.
- C version travels faster, and is sometimes good to use it as a counter to normal projectiles. Just be aware of its startup, so fast projectiles could hit you before you pull it.
- Both versions can be good to catch jumping opponents.
- MAX versions are bigger and deal more damage / hits. The A version has the same speed as the C version.
|
f hcf + 
|
1+17/55
|
|
|
HL
|
f hcf + 
(SDM)
|
1+17/57
|
|
|
HL
|
|
qcf qcf + 
|
1+8/9/34
|
|
|
HL
|
|
Tenchi Haou Ken (qcf,qcf + P)
DM version does little damage (roughly like a standing C) normally, but does around half a bar if you get a counter. Obviously, getting a counter with this move is quite difficult. You can try to trade it with any move you see coming with anticipation, but those situations will be rare.
The SDM version is quite more interesting. It deals slightly more damage than the DM version (even if you get a counter hit), but instantly dizzies your opponent. You can do c.B, c.A/s.A, SDM Tenchi Haou Ken and then follow up with anything you want (j.C, cl.C > Kyokugen-ryuu Renbu Ken (hcf + P) / D Hien Shippuu Kyaku (hcb + D) if you have no stocks, j.D, cl.C > A DM Ryuuko Ranbu if you have one stock, or, if you have two, a SDM R. Ranbu or a combo into a second SDM Tenchi Haou Ken), which makes Ryo a very scary character when in MAX mode and with a stock.
|
qcf qcf + 
|
1+12/9/37
|
|
|
HL
|
qcf qcf + 
(SDM)
|
1+6/9/39
|
|
|
HL
|
|


 + P, j.CD
 + P
+ P