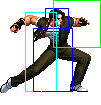
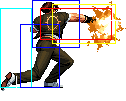
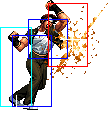
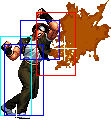
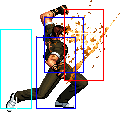
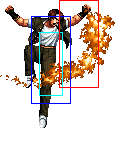
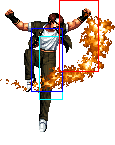
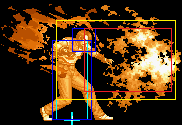
The King of Fighters '98/Kyo

From SuperCombo Wiki
Don't hate me because I'm beautiful

Kyo Kusanagi

KOF98 kyo small.png

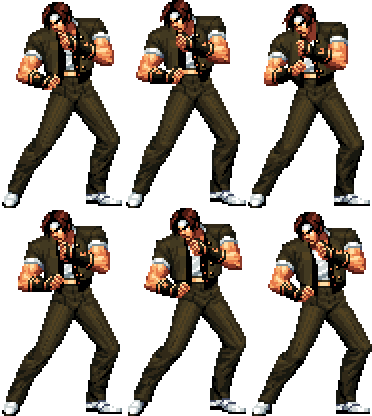
Kyo is a cool guy. He is a professional male model, and his sexy looks and money get him all the popular chicks. This makes him a top tier player. But like P. Diddy say, mo money mo problems!

In a nutshell

Kyo is top-tier character in Extra.png mode but up mid-tier in advanced mode, focusing around mid/close range poking and rushdown. He does not have a command throw, but his mixups are good enough thanks to High.png priority on his air (j.B, air D.png + C) and ground moves (close C, crouching B, Qcf.png + A). His meterless combos do a lot of damage and dizzy quickly, and can do around 50% easily with meter. He requires a medium level of execution; mostly dealing with hit-checking into Qcf.png Qcf.png + A consistently, and being very familiar with doing short/hyper hops in execution and recognizing the appropriate range and situations to use them in.

Colors

Snka.gif Snkb.gif Snkc.gif Snkd.gif
Kyo98 colorA.png Kyo98 colorB.png Kyo98 colorC.png Kyo98 colorD.png

Movelist

Frames Advantage Cancel Block Hitbox Notes
Standing Close
Snka.gif 3/4/5 +3/+1 C HL
Kyo98 clA.png
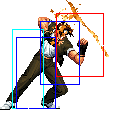
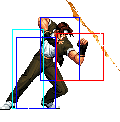
Like most cl.A attacks, this hits mid and is cancelable. Can't really pressure or do much with this move due to the small activation range. Mainly this or st.A will combo after a cr.B and is used to hit-confirm into Final Showdown

Chain: repeatable

Snkb.gif 5/4/8 0/-2 C L
Kyo98 clB.png
Note that this is low and cancelable. Combos into cr.B and cr.A.

Chain: repeatable

Snkc.gif 2/3+9/9 -1/-3 C (1st part) HL
Kyo98 clC1.png
Kyo98 clC2.png
main close poke. Not only is it extremely fast, but it activates from very far away for a 'close' attack. This makes Kyo very hard to stop when he runs in, because he can usually attack earlier than most characters
Snkd.gif 4/3/22 -5/-7 C HL
Kyo98 clD.png
Not nearly as useful or as fast as cl.C. Used more in specific frame-trap situations but overall not a frequently used move by any means
Standing Far
Snka.gif 3/4/5 +3/+1 C HL
Kyo98 stA.png
anti-air vs short hop and cancelable

Chain: repeatable

Snkb.gif 7/3/13 -5/-7 - HL
Kyo98 stB.png
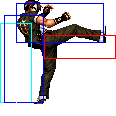
long range poke

Chain: -

Snkc.gif 12/2/17 +1/-1 C HL
Kyo98 stC.png
A slower version of far Standing A, not that useful as the risk isn't worth the reward but if need be this move could anti-air a hop and is cancelable
Snkd.gif 14/5/12 +3/+1 - HL
Kyo98 stD.png
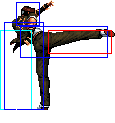
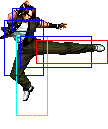
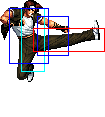
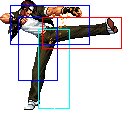
Can go over lows, but the range/hitbox speed is not what it is in CvS2, so don't think about using it like you would in that game. Still could be used in a block string such as cl.C > st.D > qcf + A
Snkc.gif+Snkd.gif 19/4/16 KD/+2 S HL
Kyo98 stCD.png
Crouching
Snka.gif 3/4/5 +3/+1 C HL
Kyo98 crA.png
Standard cr.A attack. Mainly used to after a cr.B to cancel into Final Showdown or a command normal/special attack/command normal canceled into a special attack for block-stringing

Chain: repeatable

Snkb.gif 3/4/5 +3/+1 - L
Kyo98 crB.png
'footsie' moves. main combo starter. Links into cl.C and can combo into C Rekka series or block string with qcf + A or f + B into qcf + A / qcf + C

Chain: repeatable

Snkc.gif 4/3+3/20 -6/-8 C (1st part) HL
Kyo98 crC1.png
Kyo98 crC2.png
One of the best normal anti-airs in the game (notice a trend?). Cancelable on the first part (when his arm isn't fully extended). Very fast and high-priority. Beware as it lacks much horizontal range compared to cl.C.
Snkd.gif 11/3/19 KD/-4 C L
Kyo98 crD.png
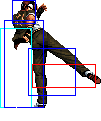
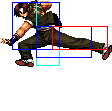
Slow, but easily whiff cancelable (preferably into qcf + A) if someone short hops it. Makes his hitbox shrink vertically, and he can use it to 'duck' under Takuma/old characters (O.Robert/O.Ryo/O.Yuri) fireballs completely
Jump
Snka.gif 5/8/- -/- - H
Kyo98 jA.png
An air-to-air attack but is greatly overshadowed by Kyo's other jumping normals
Snkb.gif 5/9/- -/- - H
Kyo98 jB.png
main jump-in. Cuts through almost ever normal anti-air like a knife through something that can't stop a knife. Stays out long enough to do it relatively early (not XI early you scrub) and reaches low enough to be one of the harder to block short hop attacks around. Crosses up
Snkc.gif 6/4/- -/- - H
Kyo98 jC.png
other jump-in,can cross-up mostly on bigger characters.
Snkd.gif 9/5/- -/- - H
Kyo98 jD.png
Long range air-to-air and long range air-to-ground. For example neutral h.D can beat Ralf's st.C clean from range. Great in conjunction with qcf + A in a blockstring.
Snkc.gif+Snkd.gif 17/4/- KD/- - HL
Kyo98 jCD.png
Not bad, a lot of blockstun like all jumping CDs. Has pretty good priority even when messing up a safe-jump set up as it will eat most attacks
Neutral Jump
Snka.gif 5/8/- -/- - H
Kyo98 jA.png
Snkb.gif 5/9/- -/- - H
Kyo98 juB.png
Snkc.gif 6/4/- -/- - H
Kyo98 jC.png
Snkd.gif 7/8/- -/- - H
Kyo98 juD.png
air-to-air move.
Command Normals

f + Snkb.gif

11/7(3)7/18 -5/-7 -/- HL/H
Kyo98 fB1.png
Kyo98 fB2.png
Ge Shiki: Goufu You - (f + B) - 2 hits, second hit is overhead if done alone. 2nd hit is not overhead but cancelable when chained from a normal, but will only fully combo if you're close enough for both hits to connect. The canceled into version is great for staggered blockstrings from Close C or Crouching A and frametraps relatively well and confirm into rekkas/fireball for a combo if staggered from light attacks
f + Snkb.gif
(cancel)
11/7(3)7/18 -5/-7 -/S HL/HL
df + Snkd.gif 2/3(12)4/24 -8/-10 -/- L/L
Kyo98 dfD1.png
Kyo98 dfD2.png
88 Shiki - (df + D) - There are certain moves this thing can hit, like Ralf's st.C. Otherwise only use it in a combo
air d + Snkc.gif 6/5/- -/- - H
Kyo98 jdC.png
Ge Shiki: Naraku Otoshi - (air d + C) - A very good jump-in. Has long hit stun, so it can be performed early and still combo into things. Great as a crossup. Slams when used air-to-air. Since it is a command move, you can use it during a backdash and you will travel much further as well as decrease recovery. In Extra mode it can be done during a front dash, and can be comboed into itself this way as an infinite. If done on a crouching opponent or late, it will combo at best into a cr.A rather than be able to do a cr.B into cr.A and cl.C will whiff most of the time due to push back. This move tends to whiff on characters that could shrink their hitboxes by crouching or doing a crouching attack so keep that in mind
Special Moves
qcf + Snka.gif 11/8/20 HL
BODY GA
AMAZING
114 Shiki: Aragami - (qcf + A)
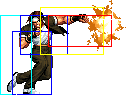
  • One of the best mid-range pokes in the game. Has auto-guard, fast startup, fast recovery, good damage.
> qcf + Punch.gif 7/8/28 HL
A ROOSTER'S EGG
A ROOSTER'S EGG
128 Shiki: Kono Kizu - (qcf + P after qcf + A)
  • You can use this as an anti-air if someone jumps over your qcf + A. This is really cheap and your opponent will probably want to murder you and your entire family if you hit them with this as an anti-air. No I'm joking it's awesome. Mainly unsafe on block and could be hit in between this and the next move mentioned.
>> Punch.gif 10/3/27 H
Kyo98 qcfAqcfPP.png
Ge Shiki: Migiri Ugachi - (P after qcf + A > qcf + P)
  • It's overhead and not too bad on block but you can get punish like by Iori's rekka's or Chris's f + A etc. and shit like that.
>> Kick.gif 14/6/20 HL
Kyo98 qcfAqcfPK.png
125 Shiki: Nanase - (K after qcf + A > qcf + P / hcb + P)
  • If the first rekka hits deeply, this is the preferred sequence of rekkas for damage and knockdown. Doing this kick move on block is punishable 100% by a full combo so doing this is not recommended. Could follow up qcf + A > hcb + P but you have to be extremely high to ever think of doing such a thing.
> hcb + Punch.gif 21/4/30 H
CRACK DASÉ
127 Shiki: Yano Sabi - (hcb + P after qcf + A)
  • An overhead follow up that's not really fast or safe at all. Mainly used after D Version Hop Kicks to hard knockdown the opponent and do Kyo's most damaging, meterless hopkick follow up.
>> Punch.gif 21/14/17 L
Kyo98 qcfAhcbPP1.png
Kyo98 qcfAhcbPP2.png
Light rekka ground punch (P after qcf + A > hcb + P)
  • Hits low and shouldn't be used in a blockstring. Mainly used as an OTG finisher for Kyo's most damaging, meterless hopkick follow up. Hard Knockdown.
qcf + Snkc.gif 17/6/17 HL
WICKED
CHEW
115 Shiki: Dokugami - (qcf + C)
  • Not safe on block (punishable by fast moves), and be careful canceling into it on block; it can be hit by an invincible move or rolled out of between close C and the qcf + C. If it does get blocked, it is an okay setup for qcb + P. You can also poke with faster moves against opponents who are not fast to attack back. One setup I've seen Dakou use is qcf + C (blocked), cr.A > Final Showdown. Risky! It's generally safer on block if spaced by the tip of the move. Otherwise if this move is blocked in deep it's really punishable unless you do a gimmicky follow up frame-trap. Use this after a jump-in attack > close C at mid screen and do the follow ups for Kyo's best mid-screen bnb.
> hcb + Punch.gif 10/3/34 HL
Kyo98 qcfChcbP.png
401 Shiki: Tsumi Yomi - (hcb + P after qcf + C)
>> f + Punch.gif 10/5/39 HL
Kyo98 qcfChcbPfP.png
402 Shiki: Batsu Yomi - (f + P after qcf + C > hcb + P)
dp + Snka.gif 5/4+13/27 HL
Kyo98 dpA1.png
Kyo98 dpA2.png
Kyo98 dpA3.png
100 Shiki: Oniyaki - (dp + P)
  • It's a DP! Light version has no auto-guard and will at best trade with meaties as it is not fully invincible. C version has full auto-guard, but it is 2 hits and doesn't knock down on the first, so it is anti-air (or extremely deep hit but not recommended) only.
dp + Snkc.gif 5/4+16/35 HL
Kyo98 dpC1.png
Kyo98 dpC2.png
Kyo98 dpC3.png
qcf + Snkb.gif 13/5/27 HL
Kyo98 qcfK.png
75 Shiki Kai - (qcf + K > K)
  • D version preferred since you can combo off of it. Advantage on block, so it's not bad for pressure. Used for combos mostly. In the corner, you could delay the second hit on block to do a safe block string into Close C and do the blockstring
qcf + Snkd.gif 17/5/27 HL
> Snkb.gif 7/9/14 HL
Kyo98 qcfKK.png
> Snkd.gif 7/9/14 HL
hcb + Snkb.gif 5/16/12 HL
Kyo98 hcbK.png
114 Shiki: Aragami - (hcb + K)
  • Can combo off his qcf + D > D but there's way better options. Punishable but not as badly punishable as it looks. It looks cool. Sometimes if the opponent is knocked far away, this move may be used on whiff and the elbow follow up will not come out and Kyo will run quickly across the screen even faster than his normal running speed.
hcb + Snkd.gif 5/24/12 HL
rdp + Snkb.gif 16/2+2+2/18 HL
Kyo98 rdpK.png
R.E.D. Kick - rdp + K
  • Not overhead like in some games you might be familiar with. Instead it is very fast and very safe on block (perhaps advantage?). It can be crouched under by many characters though. Used mostly as a combo ender that does a lot of stun damage, but is also a very very good preventative anti-air since is also very nice on block.
rdp + Snkd.gif 26/3+2+2+2/17 HL
DM

qcb hcf + Snka.gif

20/16/28 KD/-15 HL
Kyo98 qcbhcfP.png
Ura 108 Shiki: Orochi Nagi - qcb hcf + P
  • 28 frames of blockstun.

qcb hcf + Snkc.gif

18/16/32 KD/-19 HL

qcb hcf + Punch.gif

2+0~90+17/36/16 KD/-15 HL
Kyo98 qcbhcfP SDM1.png
Kyo98 qcbhcfP SDM2.png

qcf qcf + Snka.gif

7/15+16+31/45 KD/-15 HL
Kyo98 qcfqcfP.png
- qcf qcf + P

qcf qcf + Snkc.gif

9/15+16+31/48 KD/-19 HL

qcf qcf + Punch.gif

9/87/45 KD/-19 HL

Throws

  • b or f + C - Breakable, forward knockdown, face forward, rollable.


  • b or f + D - Breakable, reverse knockdown, back turned, un-rollable.


D throw preferable unless you have them in the corner for better wakeups.

Special Moves

  • qcf + C
    • hcf + P
      • f + P

See description on Movelist section.


  • qcf + A
    • qcf + P
      • P
      • K
    • hcf + P
      • P
      • K

See description on Movelist section.


  • dp + P

See description on Movelist section.


  • Counter/Uppercut Thing (qcb + P) - Not really used for the uppercut, but can catch moves if they connect right after it starts up. This is actually not a bad move, and you'll find a ton of setups for it if you experiment. Here's one I already mentioned: qcf + C (blocked), qcb + A.


  • qcf + K > K

See description on Movelist section.


  • hcb + K

See description on Movelist section.


  • rdp + K

See description on Movelist section.

Desperation Moves

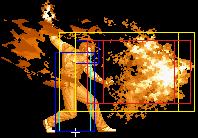
  • Orochinagi (qcb hcf + P) - A version is slower and has lower-body invincibility, C version is faster and has upper-body invincibility. C version can combo from Kyo's hard attacks or a chained f + B. It can connect after qcf + D > D for max damage. Can be charged. The MAX version surrounds him in flame, and has a reduced hitbox size (you're probably going to run into flames before you hit him).


  • Final Showdown (qcf qcf + P) - C version has a tiny bit more invincibility. Creates a huge hitbox in front of his feet spanning about 1.5 character spaces. Comboable off lights (which means comboable off a low cr.B,cr.A, etc.), and is Kyo's scariest source of damage, as it does quite a chunk more than the average DM. Since it's so fast, it serves as a punisher for many laggy moves, like Iori's 1/3 or 2/3 rekka's, or Iori's sweep. Can be used as an anti-air as well. MAX version does more damage.

Fastest Attacks

Ground

  • 0F: C throw; D throw
  • 1F: -
  • 2F: cl.C; df + D
  • 3F: cl.A; st.A; cr.A; cr.B
  • 4F: cl.D; cr.C
  • 5F: cl.B; dp +P
  • 6F: -
  • 7F: st.B; DM qcf qcf + A; SDM qcf qcf + P
  • 8F: -
  • 9F: DM qcf qcf + C
  • 10F: -


Air

  • 0F: -
  • 1F: -
  • 2F: -
  • 3F: -
  • 4F: -
  • 5F: j.A; j.B; nj.A; nj.B
  • 6F: j.C; nj.C; air d + C
  • 7F: nj.D
  • 8F: -
  • 9F: j.D
  • 10F: -

Combos

  • Best jump-ins:
    • j.B (Can crossup.)
    • air d + C (As a crossup, because of the extra push back.)


  • cl.C / cr.C
    • (S)DM qcf qcf + P
    • DM qcb hcf + C
    • qcf + A > qcf +P > K (Point blank.)
    • qcf + D > D, [junggler] (Very close.)
    • qcf + C > hcb + C > f + C (Close.)
    • hcb + D
    • rdp + B (For stun. Corner or not very close. Only on characters where C > f + B works.)
    • df + D


  • cr.B, cr.A / cl.A / cl.B / st.A >
    • (S)DM qcf qcf + P (PRACTICE this and get as consistent as you can with it to play an effective Kyo; Sometimes you can get st.A / st.B depending of your distance, so cr.A is the safest, but hardest option, and is the one you should practice the most.)
    • df + D
    • dp + A (Close.)


  • ... qcf + D > D,
    • SDM qcb hcf + P (Corner. Miss one hit. Timming required.),
      • qcf + A > hcf + P > P (Timming required. Last hit will be an OTG.)
    • (S)DM qcb hcf + P
    • DM qcf qcf + P (Timming required. First hit will miss and the second part connect. Easier out of corner. Does just slight more than the combo below. Show off only, as DM qcb hcf + P is easier and does considerable more damage. SDM will miss the third part.)
    • qcf + A, qcf + A > hcf + P > P (Corner & MAX. Timming required. Last hit will be an OTG.) Video
    • qcf + A > hcf + P > P (Corner. Timming required. Max damaging metterless combo. Last hit will be an OTG.)
    • run, qcf + A > qcf + P > P (Timming required. Midscreen, not too far from the corner, as opponent must reach corner after qcf + P) Video
    • hcf + D (Timming required.)
    • rdp + B (For stun.)
    • j.CD
    • air d + C
    • j.C (Reset.)


  • cl.C > f + B (2 hits) >
    • (S)DM qcf qcf + P (Corner. Point blank.)
    • DM qcb hcf + C
    • hcb + D
    • rdp + B (For stun.)

The f + B will only combo on some characters, normally only on the bigger/larger ones, but will work on some specific thin characters. Will work on Shermie.


  • st. C >
    • DM qcb hcf + C
    • hcf + D (Close.)
    • hcb + B (If not too far.)
    • rdp + B (For stun. Only on characters where C > f + B works)


  • Point blank: cr.C / cl.C / cr.A / cl.B > SDM qcb hcf + (P)

Holp P to burn opponent while charging (otherwise it will not combo), then release to hit launched opponent in the air with the second part. Out of the corner the charging will do only one hit, and you need to release the charge immediately after hit, on the corner the charge can do 2-3 hits and you have to wait a few frames to release to get the full 3 hits of the second part.


The second part of SDM qcb hcf + P will deal less damage than SDM qcf qcf + P. But if you hit the first part (while holding P), SDM qcb hcf + P wil deal the same damage as SDM qcf qcf + P if you burn for 1 hit, and more damage than it if you burn for 2-3 hits (only possible in the corner).


  • Simple buffers:
    • cr.B, st.A / cl.A / cl.B > (S)DM qcf qcf + P
      • cr.B, qcf + A/B > qcf + P (As cr.B is not cancelable, qcf + A/B will chain into a normal attack.)
    • cl.D > DM qcb hcf + C
      • qcb + D > hcf + C
    • cl.D / cl.B > SDM qcb hcf + (P)
      • qcb + D/B > hcf + (P)


Note that you can link close C from cr.B. It is a 1-frame link, but more if you perform the cr.B meaty.


Strategy Corner

  • MAX: cl.C > Qcf.png + C > Hcb.png + C > F.png + C

deals ??? than

  • cl.C > Qcf.png Qcf.png + C

Keep this in mind, when you need to decide whether to trigger MAX or keep meter for a DM.
Links

Game Navigation

General
Controls
Notation
HUD
Gameplay Overview
System
FAQ
Normal Characters
Andy
Athena
Benimaru
Billy
Blue Mary
Brian
Chang
Chin
Chizuru
Choi
Chris
Clark
Daimon
Heidern
Heavy D!
Iori
Joe
Kensou
Kim
King
Kyo
Leona
Lucky
Mai
Mature
Ralf
Robert
Rugal
Ryo
Saisyu
Shermie
Shingo
Takuma
Terry
Vice
Yamazaki
Yashiro
Yuri
EX Characters
EX Andy
EX Billy
EX Joe
EX Kyo
EX Mai
Orochi Chris
Orochi Shermie
Orochi Yashiro
EX Robert
EX Ryo
EX Terry
EX Yuri
Omega Rugal