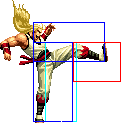
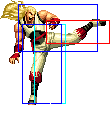
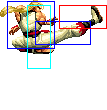
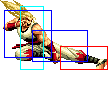
m (→Movelist) |
|||
| Line 180: | Line 180: | ||
|align="center"| HL | |align="center"| HL | ||
|colspan="2"| [[image:Andy98_jCD.png|center]] | |colspan="2"| [[image:Andy98_jCD.png|center]] | ||
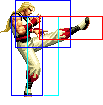
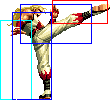
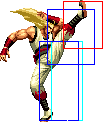
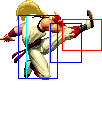
| | |Andrew Bogard does a whimsical pose, just to make sure you don't forget he's a down to earth guy before his leg connects with someone's skull and gives them a concussion. Does soft knockdown on hit like all CDs do. | ||
|- | |- | ||
|colspan="8" align="center"| '''Neutral Jump''' | |colspan="8" align="center"| '''Neutral Jump''' | ||
Revision as of 01:34, 24 February 2021
Introduction
Andrew Bogard, adopted son of Jeffrey Bogard, dreamed as a child of being a decent-ish character in some sort of combat based video game. Unfortunately, SNK hates orphans, and so decided to smash his kneecaps in, so his dreams wouldn't come true for at least another year.
Colors

|

|

|

|
Gameplay Overview
In-depth Analysis
Movelist
Special Moves
- Hishou Ken (qcb + P) - Andy shoots some energy from his palm, short range.
- Zan'ei Ken (db f + P) - Andy performs a dashing attack forward. The db f + A comes out faster than db f + C. The db f + A goes less than half screen distance, while db f + C goes full screen. An alternate motion for this move is to just do hcf + P, if you are not in throw range or opponent is not is a throwable state, this move will come out instead of the hcf + P proximity unblockable. On whiff, this move recovers extremely fast, though it is very punishable if it hits or is blocked, can be followed up with qcf + P on hit or block.
- Gadan Kou (Zan'ei Ken hits/block, then qcf + P - This is a Zan-ei Ken finisher, and is a must for safety reasons. The moves comes from RB2 Fatal Fury, although the motion is different, and he even performs it better!
- Shouryuu Dan (dp + P) - Andy performs a rising uppercut attack with good startup priority, dp + A doesn't rise as high and has much better recovery than dp + C, though technically both are punishable
- Kuuha Dan (hcf + K) - Andy performs a very high priority spiraling kick that travels in a parabolic motion. The arc on hcf + D is bigger than hcf + B, only sometimes punishable on block by throws or fast normals but can be rolled behind and punished easily. It is also possible for the move to go over the opponent, allowing them to just run behind and combo you in the back.
- Gekiheki Haisui Shou (close hcf + P) - a proximity unblockable attack that only comes out if Andy is in throw range and opponent is not in blockstun. Otherwise, a Zan'ei Ken (db f + P) comes out instead.
Last hit knocks the opponent into the air where they can be juggled
- Gen'ei Shiranui (air qcf + K > P / K) - Andy performs a diagonal "dive" downwards which has a very large hitbox
- P follow up - Andy performs a crouching punch that comes out fairly quick and has good recovery if blocked.
- K follow up - Andy does a hop kick that comes out fairly quick though not as fast as the P followup, has horrible recovery time if blocked, so it's a risk to use it. It's an overhead.
Desperation Moves
- Chou Reppa Dan (qcb db f + K) - A powered up version of the Kuuha Dan, the DM version its useful only on midscreen, but the SDM version its a nice corner combo ender from a Gekiheki Haisui Shou and cheap damage maker, in mid screen use both version as an anti air, but it have a bad recovery.
- Hishou Ryuusei Ken (qcf qcf + P) - Andy does a series of chops and then a power palm (Hisho Ken) in his opponent's chest, its a better combo ender for midscreen.
Fastest Attacks
- 0F: C throw; D throw
- 1F: -
- 2F: cl.C
- 3F: cl.A; cl.B; cr.A
- 4F: cr.B
- 5F: st.A; st.B; cr.C
- 6F: -
- 7F: st.C; df + A
- 8F: cl.D
- 9F: cr.D
- 10F: -
Combos
- Best jump-ins:
- j.D
- cr.A / cr.B x 2 > df + A (2 hits) >
- db f + C > qcf + P (Close. Cancel immediately.)
- db f + A > qcf + P
- qcb + A
- cl.B / cr.A / cr.B > hcb + P, [junggler]
- cr.C / df + A (2 hits) / cl.C (1 hit) >
- (S)DM qcf qcf + P (From cr.C or df +A (2 hits) only very close.)
- hcf + P, [junggler] (From cr.C or df +A (2 hits) only very close.)
- f + B > air qcf + K > P, cl.C (Corner)
- db f + C > qcf + P (Close. Cancel immediately.)
- db f + A > qcf + P
- qcb + A
- (cl.C (1 hit) / cr.C > df + A (2 hits)) / cl.C (2 hit) >
- db f + C > qcf + P (Close. Cancel immediately.)
- db f + A > qcf + P
- qcb + A
- ... hcf + P,
- air qcf + K (miss) > P, dp + P, j.CD / j.C (Corner) (MAX only) (Timming required)
- SDM qcb hcf + K (Timming required. Out of corner use immediately. In the corner wait just a little. If done too early or too late may do just a few hits and will do very little damage.)
- DM qcb hcf + K (Corner. Timming required, harder than SDM. Delay a little to hit on the way up. If done too early or too late may do just a few hits and will do very little damage. Out of the corner it always does few hits so don't use it.)
- run, df + A (2 hits),
- sj.CD (Timming required.)
- j.C (Reset. Timming required.)
- hcf + D (Must cancel from previous move.)
- run, dp + C (Hit close and in a low heigth for max hit/damage.)
- j.CD
- vertical jump C (Corner. Reset. Does a tittle more damage than diagonal jump.)
- hcf + D
- j.C (Reset.)
- qcb + C
You may cancel j.CD into air qcf + K just to gain a little meter.
- Simple buffers:
- cl.C (1 hit) > (S)DM qcf qcf + P
- qcf + C > qcf + P
- cl.C (1 hit) > (S)DM qcf qcf + P
Strategy Corner
- MAX: cl.C (1 hit) >
 + P,
+ P,  + A, j.CD
deals just a tiny more damage (~ cl.A) than
- cr.C >

 + P
+ P
Keep this in mind, when you need to decide whether to trigger MAX or keep meter for a DM.
