m (Scanman moved page Joe 02 to The King of Fighters 2002/Joe: moving 2002 Joe page to be a subpage) |
|||
| (31 intermediate revisions by 2 users not shown) | |||
| Line 2: | Line 2: | ||
==General Info== | ==General Info== | ||
Crouch height: Low<br> | Crouch height: Low<br> | ||
Jump: | Jump: 5/38/1<br> | ||
Hop: | Hop: 5/29/1<br> | ||
Dash: 3/10~∞/3<br> | Dash: 3/10~∞/3<br> | ||
Backdash: 3/ | Backdash: 3/21/3<br> | ||
Wakeup: | Wakeup: 20 frames<br> | ||
Recovery roll: | Recovery roll: 25 frames<br> | ||
{| | {| | ||
| Line 113: | Line 113: | ||
| | | | ||
|- | |- | ||
! [[image:snkc.gif]]+[[image:snkd.gif]] | ! [[image:snkc.gif]] + [[image:snkd.gif]] | ||
|align="center"| 20/2/22 | |align="center"| 20/2/22 | ||
|align="center"| KD/-2 | |align="center"| KD/-2 | ||
| Line 189: | Line 189: | ||
| | | | ||
|- | |- | ||
! [[image:snkc.gif]]+[[image:snkd.gif]] | ! [[image:snkc.gif]] + [[image:snkd.gif]] | ||
|align="center"| 10/6/- | |align="center"| 10/6/- | ||
|align="center"| KD/- | |align="center"| KD/- | ||
| Line 265: | Line 265: | ||
| | | | ||
|- | |- | ||
! [[image:snkc.gif]]+[[image:snkd.gif]] | ! [[image:snkc.gif]] + [[image:snkd.gif]] | ||
|align="center"| 7/4/- | |align="center"| 7/4/- | ||
|align="center"| KD/- | |align="center"| KD/- | ||
| Line 275: | Line 275: | ||
|colspan="8" align="center"| '''Command Normals''' | |colspan="8" align="center"| '''Command Normals''' | ||
|- | |- | ||
! f+[[image:snkb.gif]] | ! f + [[image:snkb.gif]] | ||
|align="center"| 13/2/25 | |align="center"| 13/2/25 | ||
|align="center"| -7/-9 | |align="center"| -7/-9 | ||
| Line 283: | Line 283: | ||
|Does a good amount of guard crush, making it very useful in cancelling into, especially when opponent has no stock to guard roll/cd counter | |Does a good amount of guard crush, making it very useful in cancelling into, especially when opponent has no stock to guard roll/cd counter | ||
|- | |- | ||
! df+[[image:snkb.gif]] | ! df + [[image:snkb.gif]] | ||
|align="center"| 13/10/19 | |align="center"| 13/10/19 | ||
|align="center"| -9/-11 | |align="center"| -9/-11 | ||
|align="center"| | |align="center"| Mash P | ||
|align="center"| L | |align="center"| L | ||
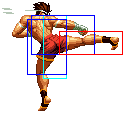
|colspan="2" | [[image:Joe02_dfB.png|center]] | |colspan="2" rowspan="2" | [[image:Joe02_dfB.png|center]] | ||
|Can be cancelled into mash punch | |rowspan="2" | Can be cancelled into mash punch | ||
|- | |||
! df + [[image:snkb.gif]]<br>(Cancel) | |||
|align="center"| | |||
|align="center"| | |||
|align="center"| Mash P | |||
|align="center"| HL | |||
|- | |- | ||
|colspan="8" align="center"| '''Special Moves''' | |colspan="8" align="center"| '''Special Moves''' | ||
|- | |- | ||
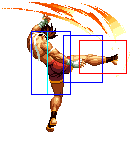
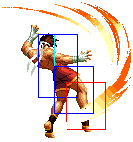
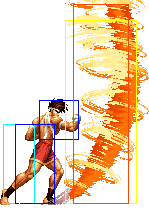
! hcf+[[image:snka.gif]] | ! hcf + [[image:snka.gif]] | ||
|align="center"| 13/-/36 | |align="center"| 13/-/36 | ||
|align="center"| -4/-6 | |align="center"| -4/-6 | ||
| Line 299: | Line 305: | ||
|align="center"| HL | |align="center"| HL | ||
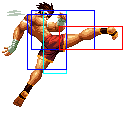
|colspan="2" | [[image:Joe02_hcfA.png|center]] | |colspan="2" | [[image:Joe02_hcfA.png|center]] | ||
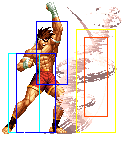
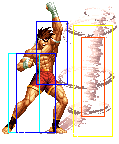
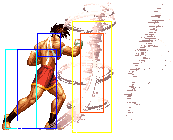
|rowspan="2"|'''Hurricane Upper - hcf+P''' | |rowspan="2"|'''Hurricane Upper - hcf + P''' | ||
* Joe releases one or two hurricane projectiles (depending on the button used) | * Joe releases one or two hurricane projectiles (depending on the button used) | ||
* hcf+A sends out one projectile, while hcf+C sends out two | * hcf + A sends out one projectile, while hcf + C sends out two | ||
* the projectiles are tall and cannot be jumped by most characters. It's difficult to punish hcf+A but hcf+C is easy to punish by rolling the second projectile | * the projectiles are tall and cannot be jumped by most characters. It's difficult to punish hcf + A but hcf + C is easy to punish by rolling the second projectile | ||
* hcf+A fireball stays active for 19 frames. both hcf+C fireballs stay active for 11 frames. | * hcf + A fireball stays active for 19 frames. both hcf + C fireballs stay active for 11 frames. | ||
|- | |- | ||
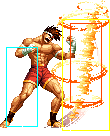
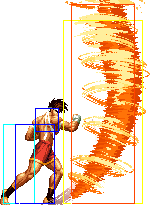
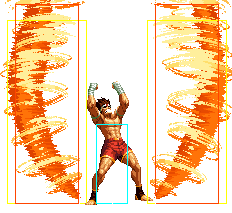
! hcf+[[image:snkc.gif]] | ! hcf + [[image:snkc.gif]] | ||
|align="center"| 19/-(22)-/36 | |align="center"| 19/-(22)-/36 | ||
|align="center"| KD/-6 | |align="center"| KD/-6 | ||
| Line 313: | Line 319: | ||
|valign="bottom" style="border-left:0px;"| [[image:Joe02_hcfC2.png|center]] | |valign="bottom" style="border-left:0px;"| [[image:Joe02_hcfC2.png|center]] | ||
|- | |- | ||
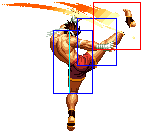
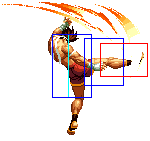
! hcf+[[image:snkb.gif]] | ! hcf + [[image:snkb.gif]] | ||
|align="center"| 14/4/4+22 | |align="center"| 14/4/4+22 | ||
|align="center"| KD/-12 | |align="center"| KD/-12 | ||
| Line 319: | Line 325: | ||
|align="center"| HL | |align="center"| HL | ||
|colspan="2" | [[image:Joe02_hcfB.png|center]] | |colspan="2" | [[image:Joe02_hcfB.png|center]] | ||
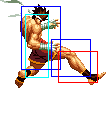
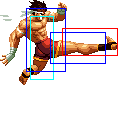
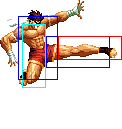
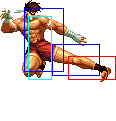
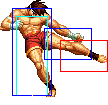
|rowspan="2"|'''Slash Kick - hcf+K''' | |rowspan="2"|'''Slash Kick - hcf + K''' | ||
* Joe performs a horizontal kick moving across the screen, which does good damage | * Joe performs a horizontal kick moving across the screen, which does good damage | ||
* hcf+B version goes about 1/3 screen length while hcf+D goes 3/4 length | * hcf + B version goes about 1/3 screen length while hcf + D goes 3/4 length | ||
* has some recovery time if blocked, though if done from far away it's usually difficult to punish on block | * has some recovery time if blocked, though if done from far away it's usually difficult to punish on block | ||
* Depending on the distance, the startup of the D version is longer. The longer the startup, the shorter the recovery. | * Depending on the distance, the startup of the D version is longer. The longer the startup, the shorter the recovery. | ||
* free cancellable into | * free cancellable into | ||
|- | |- | ||
! hcf+[[image:snkd.gif]] | ! hcf + [[image:snkd.gif]] | ||
|align="center"| 14+0~5/7/4~9+24 | |align="center"| 14+0~5/7/4~9+24 | ||
|align="center"| KD/-22 | |align="center"| KD/-22 | ||
| Line 333: | Line 339: | ||
|colspan="2" | [[image:Joe02_hcfD.png|center]] | |colspan="2" | [[image:Joe02_hcfD.png|center]] | ||
|- | |- | ||
! dp+[[image:snkb.gif]] | ! dp + [[image:snkb.gif]] | ||
|align="center"| 5/3*18/17+13 | |align="center"| 5/3*18/17+13 | ||
|align="center"| KD/-30 | |align="center"| KD/-30 | ||
| Line 340: | Line 346: | ||
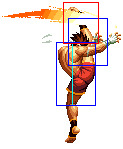
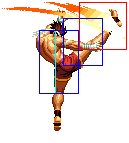
|valign="bottom" style="border-right:0px;"| [[image:Joe02_dpB1.png|center]] | |valign="bottom" style="border-right:0px;"| [[image:Joe02_dpB1.png|center]] | ||
|valign="bottom" style="border-left:0px;"| [[image:Joe02_dpB2.png|center]] | |valign="bottom" style="border-left:0px;"| [[image:Joe02_dpB2.png|center]] | ||
|rowspan="2"|'''Tiger Kick - dp+K''' | |rowspan="2"|'''Tiger Kick - dp + K''' | ||
* Joe does a very fast rising kick attack that does two hits | * Joe does a very fast rising kick attack that does two hits | ||
* dp+B does more damage than dp+D but has less priority | * dp + B does more damage than dp + D but has less priority | ||
* Invincible: B: Complete startup, D: Complete startup and first active period. Upper body invincible: First active period fo B version. | * Invincible: B: Complete startup, D: Complete startup and first active period. Upper body invincible: First active period fo B version. | ||
* supercancellable on the first hit | * supercancellable on the first hit | ||
| Line 348: | Line 354: | ||
* free cancellable out of on the first hit | * free cancellable out of on the first hit | ||
|- | |- | ||
! dp+[[image:snkd.gif]] | ! dp + [[image:snkd.gif]] | ||
|align="center"| 5/3*22/21+13 | |align="center"| 5/3*22/21+13 | ||
|align="center"| KD/-38 | |align="center"| KD/-38 | ||
| Line 356: | Line 362: | ||
|valign="bottom" style="border-left:0px;"| [[image:Joe02_dpD2.png|center]] | |valign="bottom" style="border-left:0px;"| [[image:Joe02_dpD2.png|center]] | ||
|- | |- | ||
!rowspan="2"| qcb+[[image:snkb.gif]] | !rowspan="2"| qcb + [[image:snkb.gif]] | ||
|align="center" rowspan="2"|9+3/3*3*2*2/5+14 | |align="center" rowspan="2"|9+3/3*3*2*2/5+14 | ||
|align="center" rowspan="2"| -1/-3 | |align="center" rowspan="2"| -1/-3 | ||
| Line 363: | Line 369: | ||
|valign="bottom" style="border-right:0px; border-bottom:0px;"| [[image:Joe02_qcbB1.png|center]] | |valign="bottom" style="border-right:0px; border-bottom:0px;"| [[image:Joe02_qcbB1.png|center]] | ||
|valign="bottom" style="border-left:0px; border-bottom:0px;"| [[image:Joe02_qcbB2.png|center]] | |valign="bottom" style="border-left:0px; border-bottom:0px;"| [[image:Joe02_qcbB2.png|center]] | ||
|rowspan="4"|'''Ougon no Kakato - qcb+K''' | |rowspan="4"|'''Ougon no Kakato - qcb + K''' | ||
* Joe executes a jumping spinning kick that does two hits and has very good recovery, usually being unpunishable | * Joe executes a jumping spinning kick that does two hits and has very good recovery, usually being unpunishable | ||
* the move takes some time to come out but has a large hitbox that will almost always catch the opponent out of the air | * the move takes some time to come out but has a large hitbox that will almost always catch the opponent out of the air | ||
| Line 372: | Line 378: | ||
|valign="bottom" style="border-left:0px; border-top:0px;"| [[image:Joe02_qcbB4.png|center]] | |valign="bottom" style="border-left:0px; border-top:0px;"| [[image:Joe02_qcbB4.png|center]] | ||
|- | |- | ||
!rowspan="2"| qcb+[[image:snkd.gif]] | !rowspan="2"| qcb + [[image:snkd.gif]] | ||
|align="center" rowspan="2"| 11+5/3*2*2*2/5+16 | |align="center" rowspan="2"| 11+5/3*2*2*2/5+16 | ||
|align="center" rowspan="2"| -3/-5 | |align="center" rowspan="2"| -3/-5 | ||
| Line 387: | Line 393: | ||
|align="center"| 9/2(7)2(9)2(10)1(11)2(6)1(16)2(7)2(8)2(10)1(11)2(5)1/28 | |align="center"| 9/2(7)2(9)2(10)1(11)2(6)1(16)2(7)2(8)2(10)1(11)2(5)1/28 | ||
|align="center"| variable | |align="center"| variable | ||
|align="center"| >qcf+A, >qcf+C, Fo | |align="center"| >qcf + A, >qcf + C, Fo | ||
|align="center"| HL | |align="center"| HL | ||
|colspan="2" style="border-bottom:0px;"| [[image:Joe02_MashP1-3.png|center]] | |colspan="2" style="border-bottom:0px;"| [[image:Joe02_MashP1-3.png|center]] | ||
| Line 395: | Line 401: | ||
* each of those punches have a large hitbox, making it difficult to counter, though can be easily guard rolled and punished from behind | * each of those punches have a large hitbox, making it difficult to counter, though can be easily guard rolled and punished from behind | ||
* it's possible to juggle the opponent if this move hits them airborne | * it's possible to juggle the opponent if this move hits them airborne | ||
* can be followed up by qcf+A or qcf+C after any punch, whether that punch connected or whiffed | * can be followed up by qcf + A or qcf + C after any punch, whether that punch connected or whiffed | ||
* free cancellable out of | * free cancellable out of | ||
|- | |- | ||
| Line 401: | Line 407: | ||
|align="center"| 11/2(7)2(9)1(10)1(11)2(6)1(18)2(7)2(9)1(10)1(11)2(6)1/30 | |align="center"| 11/2(7)2(9)1(10)1(11)2(6)1(18)2(7)2(9)1(10)1(11)2(6)1/30 | ||
|align="center"| variable | |align="center"| variable | ||
|align="center"| >qcf+A, >qcf+C, Fo | |align="center"| >qcf + A, >qcf + C, Fo | ||
|align="center"| HL | |align="center"| HL | ||
|colspan="2" style="border-top:0px;" align="center"| [[image:Joe02_MashP4-6.png|center]]<br>entire sequence repeats once | |colspan="2" style="border-top:0px;" align="center"| [[image:Joe02_MashP4-6.png|center]]<br>entire sequence repeats once | ||
|- | |- | ||
! > qcf+[[image:snka.gif]] | ! > qcf + [[image:snka.gif]] | ||
|align="center"| 20/3/28 | |align="center"| 20/3/28 | ||
|align="center"| -11/-13 | |align="center"| -11/-13 | ||
| Line 411: | Line 417: | ||
|align="center"| H | |align="center"| H | ||
|colspan="2" | [[image:Joe02_mashPqcfA.png|center]] | |colspan="2" | [[image:Joe02_mashPqcfA.png|center]] | ||
|'''Bakuretsu Finish - qcf+A''' | |'''Bakuretsu Finish - qcf + A''' | ||
* Joe performs an overhead punch that deals good damage and is safe on block | * Joe performs an overhead punch that deals good damage and is safe on block | ||
* overhead | * overhead | ||
| Line 417: | Line 423: | ||
* free cancellable out of | * free cancellable out of | ||
|- | |- | ||
! > qcf+[[image:snkc.gif]] | ! > qcf + [[image:snkc.gif]] | ||
|align="center"| 14/12/24 | |align="center"| 14/12/24 | ||
|align="center"| KD/-18 | |align="center"| KD/-18 | ||
| Line 423: | Line 429: | ||
|align="center"| L | |align="center"| L | ||
|colspan="2" | [[image:Joe02_mashPqcfC.png|center]] | |colspan="2" | [[image:Joe02_mashPqcfC.png|center]] | ||
|'''Shijou Saikyou no Low Kick - qcf+C''' | |'''Shijou Saikyou no Low Kick - qcf + C''' | ||
* Joe does a kick similar to his f+B, except that he slides forward a good distance (about 1/3 screen) while doing it | * Joe does a kick similar to his f + B, except that he slides forward a good distance (about 1/3 screen) while doing it | ||
* the recovery on this move isn't good, it's riskier to do it as opposed to the qcf+A followup | * the recovery on this move isn't good, it's riskier to do it as opposed to the qcf + A followup | ||
* hits low | * hits low | ||
|- | |- | ||
|colspan="8" align="center"| '''DMs''' | |colspan="8" align="center"| '''DMs''' | ||
|- | |- | ||
!rowspan="2"| qcf,uf+[[image:kick.gif]] | !rowspan="2"| qcf,uf + [[image:kick.gif]] | ||
|rowspan="2" align="center"| 10/3(1)1*1*1*1*1*1*1*1*1/14+28 | |rowspan="2" align="center"| 10/3(1)1*1*1*1*1*1*1*1*1/14+28 | ||
|rowspan="2" align="center"| KD/-26 | |rowspan="2" align="center"| KD/-26 | ||
| Line 437: | Line 443: | ||
|valign="bottom" style="border-right:0px; border-bottom:0px;"| [[image:Joe02_tkK1.png|center]] | |valign="bottom" style="border-right:0px; border-bottom:0px;"| [[image:Joe02_tkK1.png|center]] | ||
|valign="bottom" style="border-left:0px; border-bottom:0px;"| [[image:Joe02_tkK2.png|center]] | |valign="bottom" style="border-left:0px; border-bottom:0px;"| [[image:Joe02_tkK2.png|center]] | ||
|rowspan="2"| '''Ougon no Tiger Kick - qcf uf+K''' | |rowspan="2"| '''Ougon no Tiger Kick - qcf uf + K''' | ||
* Joe does a fast flying knee attack, going about half screen horizontally | * Joe does a fast flying knee attack, going about half screen horizontally | ||
* the first hit does much more damage than the other hits. If done too far away from the opponent, the other hits will still combo but the first hit which does the most damage, won't connect | * the first hit does much more damage than the other hits. If done too far away from the opponent, the other hits will still combo but the first hit which does the most damage, won't connect | ||
| Line 444: | Line 450: | ||
|colspan="2" style="border-top:0px;"| [[image:Joe02_tkK3.png|center]] | |colspan="2" style="border-top:0px;"| [[image:Joe02_tkK3.png|center]] | ||
|- | |- | ||
! <br>qcf,hcb+[[image:snka.gif]]<br><br> | ! <br>qcf,hcb + [[image:snka.gif]]<br><br> | ||
|align="center"| 2/2(5)2(5)2(9)2(7)2(3)2(14)-(19)-(16)4*8(12)3/17+18 | |align="center"| 2/2(5)2(5)2(9)2(7)2(3)2(14)-(19)-(16)4*8(12)3/17+18 | ||
|align="center"| KD/-40 | |align="center"| KD/-40 | ||
| Line 450: | Line 456: | ||
|align="center"| HL | |align="center"| HL | ||
|align="center" rowspan="2" colspan="2" | [[image:Joe02_qcfhcbP.png|center]]<br>etc. | |align="center" rowspan="2" colspan="2" | [[image:Joe02_qcfhcbP.png|center]]<br>etc. | ||
|rowspan="2" | '''Bakuretsu Hurricane Tiger Kakato - qcf hcb+P''' | |rowspan="2" | '''Bakuretsu Hurricane Tiger Kakato - qcf hcb + P''' | ||
* Joe dashes forward with a series of punches and tornados, followed with a rising attack | * Joe dashes forward with a series of punches and tornados, followed with a rising attack | ||
* this DM comes out very fast, so it can be comboed into easily and used to punish things like blocked cd counters | * this DM comes out very fast, so it can be comboed into easily and used to punish things like blocked cd counters | ||
| Line 458: | Line 464: | ||
* Invincible: Complete startup. | * Invincible: Complete startup. | ||
|- | |- | ||
! qcf,hcb+[[image:snkc.gif]] | ! qcf,hcb + [[image:snkc.gif]] | ||
|align="center"| 2/2(5)2(5)2(9)2(7)2(3)2(14)-(19)-(16)4*8(12)3/17+20 | |align="center"| 2/2(5)2(5)2(9)2(7)2(3)2(14)-(19)-(16)4*8(12)3/17+20 | ||
|align="center"| KD/-42 | |align="center"| KD/-42 | ||
| Line 485: | Line 491: | ||
|colspan="8" align="center"| '''SDM''' | |colspan="8" align="center"| '''SDM''' | ||
|- | |- | ||
! qcfx2+[[image:snka.gif]]+[[image:snkc.gif]] | ! qcfx2+[[image:snka.gif]] + [[image:snkc.gif]] | ||
|align="center"| 8/-(24)-/88 | |align="center"| 8/-(24)-/88 | ||
|align="center"| KD/-39 | |align="center"| KD/-39 | ||
| Line 498: | Line 504: | ||
|colspan="8" align="center"| '''HSDM''' | |colspan="8" align="center"| '''HSDM''' | ||
|- | |- | ||
! qcfx2+[[image:snkb.gif]]+[[image:snkd.gif]] | ! qcfx2+[[image:snkb.gif]] + [[image:snkd.gif]] | ||
|align="center"| 33/-/100 | |align="center"| 33/-/100 | ||
|align="center"| KD/-33 | |align="center"| KD/-33 | ||
| Line 509: | Line 515: | ||
* Invincibility: Frame 1-36 | * Invincibility: Frame 1-36 | ||
|} | |} | ||
* | ==Short Movelist== | ||
* C | |||
* f + B | |||
* df + B (Low if not cancelled into.) | |||
** Mash P (Same move as Mash P.) | |||
* hcf + P | |||
* Mash P | |||
** qcf + A (Overhead.) | |||
** qcf + C (Low.) | |||
* hcf + K | |||
* dp + K | |||
* qcb + K | |||
* DM qcf hcb + P | |||
* DM qcf qcf + P | |||
* DM qcf uf + K | |||
* SDM qcf qcf + AC | |||
* HSDM qcf qcf + BD | |||
== | ==Notes== | ||
===Cancellable moves=== | |||
* Close: A, B, C, D | |||
* Far: B | |||
* Crouch: A, C, D | |||
* CD is cancellable into specials and DMs. | |||
* CD counter is cancellable into mash P. | |||
* f + B is cancellable. | |||
===Super cancellable moves=== | |||
* Mash P > qcf + A | |||
* dp + K (1) | |||
===Free cancellable into moves=== | |||
* hcf + K | |||
* '''dp + K''' | |||
* qcb + K | |||
* '''Mash P''' | |||
=== Free cancellable out-of moves=== | |||
* df + B | |||
* '''dp + K (1)''' | |||
* '''Mash P''' | |||
* '''Mash P > qcf + A''' | |||
=== | ===Moves with Invincibility=== | ||
* cr.C (Full: recovery (last part).) | |||
* dp + B (Full: startup. Upper: active (1st part).) | |||
* dp + D (Full: startup & active (1st part).) | |||
* DM qcf uf + K (Full: startup. Upper: active (1st part).) | |||
* DM qcf hcb + P (Full: startup.) | |||
* DM qcf qcf + P (Full: startup (1st part).) | |||
* SDM qcf qcf + AC (Full: startup & active (1st part).) | |||
* HSDM qcf qcf + BD (Full: startup & active (1st part).) | |||
=== Moves with autoguard=== | |||
(none) | |||
===Other Notes=== | |||
* C throw is mashable. | |||
* D throw is a backturned hard knockdown. | |||
* Mash P deals more hit stun than a regular special move (21f instead of 19f). It's enough for the qcf + A followup to combo (20f of startup), but not enough to make it a block string. | |||
==Combos== | |||
===Basic Combos=== | |||
* cr.C / cl.C / cl.D > | |||
** f + B | |||
*** '''DM qcf hcb + P {1 stock}''' | |||
*** hcb + D (May miss some crouchers or if not very close.) | |||
*** '''hcb + B''' | |||
** Mash P > (Close.) | |||
*** qcf + C | |||
*** qcf + A >> | |||
**** DM qcf hcb + P {67%} {2 stocks} | |||
**** SDM qcf qcf + AC {Max Mode + 2 stocks} | |||
** df + B > | |||
*** Mash P > ...(Only against ???) | |||
** dp + D | |||
* cr.A / cr.B, cr.A x 2 > | |||
** '''DM qcf hcb + P {1 stock}''' | |||
** dp + D | |||
* st.B > | |||
** DM qcf hcb + P {1 stock} | |||
** dp + D | |||
* cr.A / cr.B, cr.A > | |||
** Mash P > ... | |||
=== | === Max Mode === | ||
* cr.C > df + B >> BC, run, cr.C > df + B > mash P > qcf + A >> SDM qcf qcf + AC | |||
===Combos Notes=== | |||
* cl.C/cr.C/cl.D > f + B > hcf + B / hcf + D | |||
Easy and damaging combo that is generally used for punishing moves with bad recovery. Note that to land hcf + D, your character must be very close to the opponent when starting the combo. If you aren't (either because you couldn't run up all the way or you started the combo with a jump attack), then replace hcf + D with hcf + B. | |||
* cl.C / cr.C / cl.D > f + B > DM qcf hcb + P | |||
More damaging version of the above combo. At some distances (which is only really an issue if you are trying to hit with crouch C as opposed to close C or close D), the DM will not combo. | |||
==Strategies== | ==Strategies== | ||
Latest revision as of 22:33, 23 July 2020
General Info
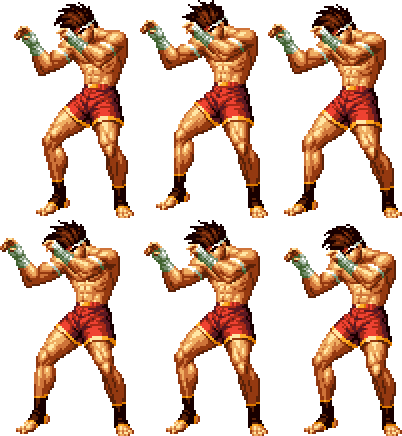
Crouch height: Low
Jump: 5/38/1
Hop: 5/29/1
Dash: 3/10~∞/3
Backdash: 3/21/3
Wakeup: 20 frames
Recovery roll: 25 frames
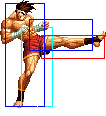
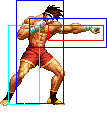
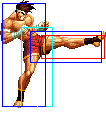
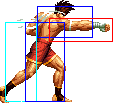
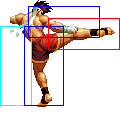
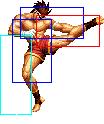
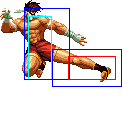
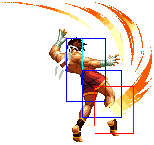
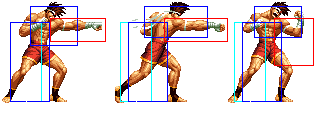
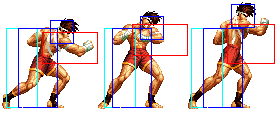
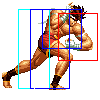
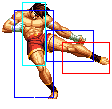
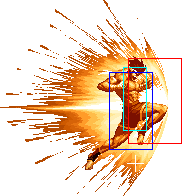
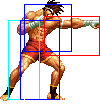
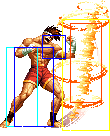
| Stand | Crouch | Jump | Grab | Run |
|---|---|---|---|---|

|

|

|

|
Colors

|

|

|

|
Movelist
Short Movelist
- f + B
- df + B (Low if not cancelled into.)
- Mash P (Same move as Mash P.)
- hcf + P
- Mash P
- qcf + A (Overhead.)
- qcf + C (Low.)
- hcf + K
- dp + K
- qcb + K
- DM qcf hcb + P
- DM qcf qcf + P
- DM qcf uf + K
- SDM qcf qcf + AC
- HSDM qcf qcf + BD
Notes
Cancellable moves
- Close: A, B, C, D
- Far: B
- Crouch: A, C, D
- CD is cancellable into specials and DMs.
- CD counter is cancellable into mash P.
- f + B is cancellable.
Super cancellable moves
- Mash P > qcf + A
- dp + K (1)
Free cancellable into moves
- hcf + K
- dp + K
- qcb + K
- Mash P
Free cancellable out-of moves
- df + B
- dp + K (1)
- Mash P
- Mash P > qcf + A
Moves with Invincibility
- cr.C (Full: recovery (last part).)
- dp + B (Full: startup. Upper: active (1st part).)
- dp + D (Full: startup & active (1st part).)
- DM qcf uf + K (Full: startup. Upper: active (1st part).)
- DM qcf hcb + P (Full: startup.)
- DM qcf qcf + P (Full: startup (1st part).)
- SDM qcf qcf + AC (Full: startup & active (1st part).)
- HSDM qcf qcf + BD (Full: startup & active (1st part).)
Moves with autoguard
(none)
Other Notes
- C throw is mashable.
- D throw is a backturned hard knockdown.
- Mash P deals more hit stun than a regular special move (21f instead of 19f). It's enough for the qcf + A followup to combo (20f of startup), but not enough to make it a block string.
Combos
Basic Combos
- cr.C / cl.C / cl.D >
- f + B
- DM qcf hcb + P {1 stock}
- hcb + D (May miss some crouchers or if not very close.)
- hcb + B
- Mash P > (Close.)
- qcf + C
- qcf + A >>
- DM qcf hcb + P {67%} {2 stocks}
- SDM qcf qcf + AC {Max Mode + 2 stocks}
- df + B >
- Mash P > ...(Only against ???)
- dp + D
- f + B
- cr.A / cr.B, cr.A x 2 >
- DM qcf hcb + P {1 stock}
- dp + D
- st.B >
- DM qcf hcb + P {1 stock}
- dp + D
- cr.A / cr.B, cr.A >
- Mash P > ...
Max Mode
- cr.C > df + B >> BC, run, cr.C > df + B > mash P > qcf + A >> SDM qcf qcf + AC
Combos Notes
- cl.C/cr.C/cl.D > f + B > hcf + B / hcf + D
Easy and damaging combo that is generally used for punishing moves with bad recovery. Note that to land hcf + D, your character must be very close to the opponent when starting the combo. If you aren't (either because you couldn't run up all the way or you started the combo with a jump attack), then replace hcf + D with hcf + B.
- cl.C / cr.C / cl.D > f + B > DM qcf hcb + P
More damaging version of the above combo. At some distances (which is only really an issue if you are trying to hit with crouch C as opposed to close C or close D), the DM will not combo.
