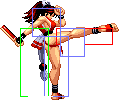
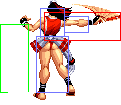
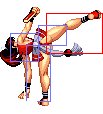
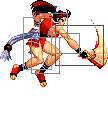
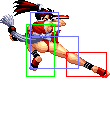
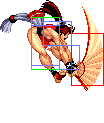
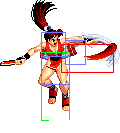
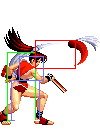
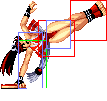
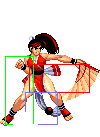
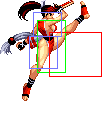
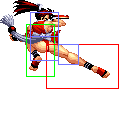
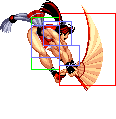
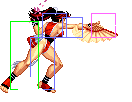
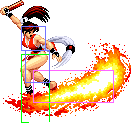
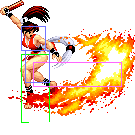
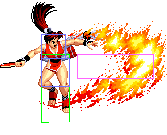
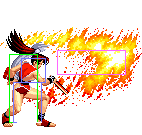
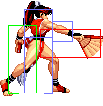
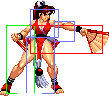
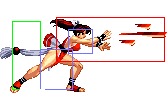
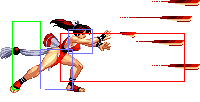
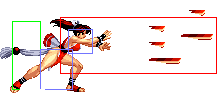
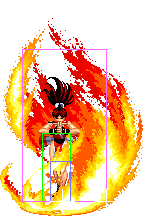
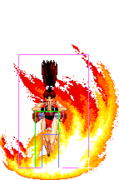
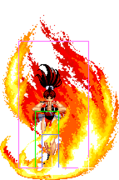
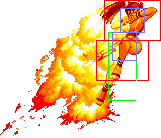
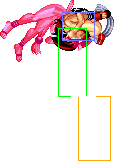
Like that old DOA ad goes, "She kicks high..." This is not only a reliable combo starter, but its hitbox is great for catching opponents jumping out up close. Like most close normals, this is not a reactive anti-air by any means.
Introduction
Mai is a consistent top pick in her home series, but RBS is one of her strongest outings yet. Not only is she extremely well-rounded, sporting both strong pokes, a good fireball and effective rushdown tools, but her pressure is as obnoxious as it is rewarding. In addition to being one of her best neutral tools and combo enders, Ryuu Enbu is +5 on block at the very worst, and Mai's long-ranged, chain-starting lights are fast enough to pick up from it in the corner. Fortunately, corner carry is one of Mai's strengths; RBS saw the introduction of her rekkas, which not only push her and her opponent over a screen forward, but deal so many rapid hits she can destroy a wall from full health with just one basic chain into them. When cornered, the opponent is at the full mercy of her pressure, where they have to deal with lows, hops, an unblockable if she times it right and all of these confirming easily into her S.Power, all while holding her plus frames for days. In summary, you shouldn't pick Mai for any of these reasons, as that would make you a nerd; instead, you should pick her because... you know... uh huh huh huh...
Colors

|

|
Movelist
Command Normals
(Air) ![]() near wall - Pythagorean Kick
near wall - Pythagorean Kick
Special Moves
S.Power
P.Power
Normals
Close Normals
cl.A
| Damage | Guard | Meter | Cancel | Startup | Active | Recovery | Total | Hit Adv | Block Adv | Properties | Invulnerability | |||
|---|---|---|---|---|---|---|---|---|---|---|---|---|---|---|
| 6 | Mid | 3 | Chain, Special | 4 | 2 | 10 | 15 | +2 | 0 | - | - | |||
|
Mai uses st.A a lot, but she gets this if she's close. This doesn't matter much, considering the frame data is the exact same. Unlike most cl.As in the game, however, this cannot chain into itself repeatedly. | ||||||||||||||
cl.B
| Damage | Guard | Meter | Cancel | Startup | Active | Recovery | Total | Hit Adv | Block Adv | Properties | Invulnerability | |||
|---|---|---|---|---|---|---|---|---|---|---|---|---|---|---|
| 8 | Mid | 3 | Chain, Special | 5 | 1 | 14 | 19 | -1 | -3 | - | - | |||
|
This move and its far version are interchangeable, but both serve a great purpose in Mai's pressure. They will both hit crouching opponents despite their looks, have great range and are fast. Although Mai has cr.B which hits low, this catches opponents trying to jump out, which is useful when Mai is pushed too far out during her corner pressure. | ||||||||||||||
cl.C
Standing Normals
st.A
| Damage | Guard | Meter | Cancel | Startup | Active | Recovery | Total | Hit Adv | Block Adv | Properties | Invulnerability | |||
|---|---|---|---|---|---|---|---|---|---|---|---|---|---|---|
| 6 | Mid | 3 | Chain, Special | 4 | 2 | 10 | 15 | +2 | 0 | - | - | |||
|
A fast poke with great priority and range. In addition to being a solid poke, this move is excellent for gluing Mai's pressure together. | ||||||||||||||
st.B
| Damage | Guard | Meter | Cancel | Startup | Active | Recovery | Total | Hit Adv | Block Adv | Properties | Invulnerability | |||
|---|---|---|---|---|---|---|---|---|---|---|---|---|---|---|
| 8 | Mid | 3 | Chain, Special | 5 | 1 | 14 | 19 | -1 | -3 | - | - | |||
|
This move is geared towards picking up punishes and combos from jump-ins. st.A is overall superior for poking and for pressure. | ||||||||||||||
st.C
| Damage | Guard | Meter | Cancel | Startup | Active | Recovery | Total | Hit Adv | Block Adv | Properties | Invulnerability | |||
|---|---|---|---|---|---|---|---|---|---|---|---|---|---|---|
| 24(13+13) | Mid | 3+3 | - | 7 | 3 | 20 | 29 | -7 | -9 | - | - | |||
|
Not essential for Mai's gameplan. The fact she returns to where she was afterwards is nice, but Mai has more reliable pokes. | ||||||||||||||
Crouching Normals
cr.A
| Damage | Guard | Meter | Cancel | Startup | Active | Recovery | Total | Hit Adv | Block Adv | Properties | Invulnerability | |||
|---|---|---|---|---|---|---|---|---|---|---|---|---|---|---|
| 6 | Mid | 3 | Chain, Special | 4 | 5 | 7 | 15 | +2 | 0 | - | - | |||
|
Mai's only move which chains into itself. Mai doesn't often fight at this range, but it's nice to know she can chain up to six hits with this thing. | ||||||||||||||
cr.B
| Damage | Guard | Meter | Cancel | Startup | Active | Recovery | Total | Hit Adv | Block Adv | Properties | Invulnerability | |||
|---|---|---|---|---|---|---|---|---|---|---|---|---|---|---|
| 8 | Low | 3 | Chain, Special | 5 | 6 | 9 | 19 | -1 | -3 | - | - | |||
|
Mai's low chains are easy, considering she can go into a standing ender like 6C 4C even if the middle hit was a low. To crack opponents open, Mai relies on lacing hop C and this move into her pressure, both of which create gaps. After a blocked 214A, it is much easier to keep opponents stuck with 5B, which hits higher and further; however, that move is a mid, and you can still get your true blocksting with 214A, cr.B if the former was blocked close enough. Overall, cr.B occupies an important spot in Mai's kit as a mixup option; one which, thanks to her combo-friendly S.Power and other good specials, can lead to explosive damage at a moment's notice. | ||||||||||||||
cr.C
| Damage | Guard | Meter | Cancel | Startup | Active | Recovery | Total | Hit Adv | Block Adv | Properties | Invulnerability | |||
|---|---|---|---|---|---|---|---|---|---|---|---|---|---|---|
| 24 | Low | 5 | Special | 8 | 3 | 23 | 33 | KD | -2 | SKD | - | |||
|
Safe sweep. Mai has better options to keep pressure going, especially given how much pushback this move has on block. | ||||||||||||||
Line Attacks
line.A
line.B
| Damage | Guard | Meter | Cancel | Startup | Active | Recovery | Total | Hit Adv | Block Adv | Properties | Invulnerability | |||
|---|---|---|---|---|---|---|---|---|---|---|---|---|---|---|
| 16 | High | 5 | - | 13/9 | 8/2+10 | 18 | 38 | -2 | -4 | - | - | |||
line.C
linecr.C
Jumping Attacks
j.A
| Damage | Guard | Meter | Cancel | Startup | Active | Recovery | Total | Hit Adv | Block Adv | Properties | Invulnerability | |||
|---|---|---|---|---|---|---|---|---|---|---|---|---|---|---|
| 6 | High | 3 | Chain, Special | 4 | 6 | - | - | - | - | - | - | |||
|
Not used much since her C attacks are similarly effective as air-to-airs while being much more rewarding on hit. | ||||||||||||||
j.B
| Damage | Guard | Meter | Cancel | Startup | Active | Recovery | Total | Hit Adv | Block Adv | Properties | Invulnerability | |||
|---|---|---|---|---|---|---|---|---|---|---|---|---|---|---|
| 8 | High | 3 | Chain, Special | 5 | 7 | - | - | - | - | - | - | |||
|
This move hits deep and its hitbox isn't very high, which leads to shenanigans. While it's not Mai's main choice for jumping in, this move's hitbox will evade the opponent's high guardbox if timed perfectly, effectively making the move unblockable. However, the key word here is 'perfectly'; Mai has a one-frame window to land this unblockable, although at that depth she is guaranteed to link a standard chain combo afterwards. Mai is solid enough that she doesn't need this in her kit, but if you can nail the timing consistently, then... | ||||||||||||||
j.C
| Damage | Guard | Meter | Cancel | Startup | Active | Recovery | Total | Hit Adv | Block Adv | Properties | Invulnerability | |||
|---|---|---|---|---|---|---|---|---|---|---|---|---|---|---|
| 24 | High | 5 | Special | 7 | 8 | - | - | - | - | - | - | |||
|
All-purpose air normal. Pick up combos with 5B afterwards. | ||||||||||||||
nj.C
| Damage | Guard | Meter | Cancel | Startup | Active | Recovery | Total | Hit Adv | Block Adv | Properties | Invulnerability | |||
|---|---|---|---|---|---|---|---|---|---|---|---|---|---|---|
| 24 | High | 5 | Special | 7 | 6 | - | - | - | - | - | - | |||
|
The priority isn't great for an air-to-air? Mai is usually moving the game towards the corner, so she doesn't use this much. | ||||||||||||||
h.A
| Damage | Guard | Meter | Cancel | Startup | Active | Recovery | Total | Hit Adv | Block Adv | Properties | Invulnerability |
|---|---|---|---|---|---|---|---|---|---|---|---|
| 6 | High | 3 | - | 4 | ∞ | - | - | - | - | - | - |
h.B
| Damage | Guard | Meter | Cancel | Startup | Active | Recovery | Total | Hit Adv | Block Adv | Properties | Invulnerability |
|---|---|---|---|---|---|---|---|---|---|---|---|
| 8 | High | 3 | - | 5 | ∞ | - | - | - | - | - | - |
h.C
| Damage | Guard | Meter | Cancel | Startup | Active | Recovery | Total | Hit Adv | Block Adv | Properties | Invulnerability | |||
|---|---|---|---|---|---|---|---|---|---|---|---|---|---|---|
| 24 | High | 5 | - | 7 | 8 | - | - | - | - | - | - | |||
|
Premier bullying tool and one of the many ways Mai can push her opponents to the corner. Its tall hitbox gives it some utility on defense as well. | ||||||||||||||
nh.C
| Damage | Guard | Meter | Cancel | Startup | Active | Recovery | Total | Hit Adv | Block Adv | Properties | Invulnerability |
|---|---|---|---|---|---|---|---|---|---|---|---|
| 24 | High | 5 | - | 7 | 8 | - | - | - | - | - | - |
Command Normals
Pythagorean Kick
| Damage | Guard | Meter | Cancel | Startup | Active | Recovery | Total | Hit Adv | Block Adv | Properties | Invulnerability | |||
|---|---|---|---|---|---|---|---|---|---|---|---|---|---|---|
| - | - | - | - | 1 | 9 | - | 9 | - | - | - | - | |||
|
a² + b² = triangle jump. Mai is the only character in the game with a tool like this, which can be great for escaping the corner and stalling, but it comes with a few caveats. First, as a command normal by technicality, this move will not come out if the opponent is on or shifting to the other line. Next, Mai can only perform it from a full jump — not a hop — and she cannot do it if she has air turned or performed some other action even once. Finally, this move has a quirk where if you neutral jump and then leap off the wall, Mai will be facing the other way; this can be corrected with an air turn, but if she's trying to stall then it's convenient if you're trying to run away with j.AB. | ||||||||||||||
Slide Fan
| Damage | Guard | Meter | Cancel | Startup | Active | Recovery | Total | Hit Adv | Block Adv | Properties | Invulnerability | |||
|---|---|---|---|---|---|---|---|---|---|---|---|---|---|---|
| 6 | Mid | 3 | Special | 4 | 2 | 11 | 16 | +2 | 0 | - | - | |||
|
No ability to chain and no petal effect from her fan. Hard sell! It's still st.A, though, and the forward movement here can be useful. You're better off just running and doing st.A proper, though. Or walking. | ||||||||||||||
Slide Back Kick
| Damage | Guard | Meter | Cancel | Startup | Active | Recovery | Total | Hit Adv | Block Adv | Properties | Invulnerability | |||
|---|---|---|---|---|---|---|---|---|---|---|---|---|---|---|
| 8 | Mid | 3 | Special | 5 | 1 | 14 | 19 | -1 | -3 | - | - | |||
|
Running forward and doing st.B on its own is usually enough for Mai, especially because this version locks you out of chains. | ||||||||||||||
Dragon Dance
| Damage | Guard | Meter | Cancel | Startup | Active | Recovery | Total | Hit Adv | Block Adv | Properties | Invulnerability | |||
|---|---|---|---|---|---|---|---|---|---|---|---|---|---|---|
| 16 | Mid | 5 | - | 12 | 3+4 | 16 | 32 | +1 | -1 | - | Lower: 4-14 | |||
|
This move knocks the opponent to the other plane if it hits, which isn't that useful. Mai has fast plane checks, sure, but she isn't exactly stripped for options when it comes to pressure; furthermore, it doesn't give her enough advantage to use line.B as an overhead without getting line checked. The move is designed to crush lows, but RBS isn't a game about ground-based footsies, and Mai already has hop C. To make matters worse, it doesn't even raise her Attack and Speed by one stage. Overall, Mai doesn't use this much. | ||||||||||||||
Flying Kick
| Damage | Guard | Meter | Cancel | Startup | Active | Recovery | Total | Hit Adv | Block Adv | Properties | Invulnerability | |||
|---|---|---|---|---|---|---|---|---|---|---|---|---|---|---|
| 24 | Mid | 5 | - | 13 | 8 | 20 | 40 | KD | -6 | SKD | Full: 1-16 | |||
|
This move is really annoying because it's a safe way for Mai to deny her opponents many ways to pressure her after a knockdown. However, this move has a perennial counter in switching to the other line, which RBS encourages for its mixup game. Still, if you see the opponent hopping in or something then let it rip. | ||||||||||||||
Defensive Attack
Feint Butterfly Fan
| Damage | Guard | Meter | Cancel | Startup | Active | Recovery | Total | Hit Adv | Block Adv | Properties | Invulnerability | |||
|---|---|---|---|---|---|---|---|---|---|---|---|---|---|---|
| - | - | - | - | 1 | - | 24 | 24 | - | - | - | - | |||
|
Mai doesn't get much from her fireball feint, given she isn't a hard zoner and her anti-airs aren't amazing. Still, it's there. | ||||||||||||||
Chain Normals
(1) (2) 6C
| Damage | Guard | Meter | Cancel | Startup | Active | Recovery | Total | Hit Adv | Block Adv | Properties | Invulnerability | |||
|---|---|---|---|---|---|---|---|---|---|---|---|---|---|---|
| 14 | Mid | 3 | Chain | 7/8 | 3/3+4 | 20/16 | 29/30 | +1 | -1 | - | - | |||
(1) (2) 6C 4C
(1) (2) 5C
| Damage | Guard | Meter | Cancel | Startup | Active | Recovery | Total | Hit Adv | Block Adv | Properties | Invulnerability | |||
|---|---|---|---|---|---|---|---|---|---|---|---|---|---|---|
| 22 | Mid | 3 | Special | 7 | 3+3 | 20 | 32 | KD | -4 | SKD | - | |||
(1) (2) 2C
| Damage | Guard | Meter | Cancel | Startup | Active | Recovery | Total | Hit Adv | Block Adv | Properties | Invulnerability | |||
|---|---|---|---|---|---|---|---|---|---|---|---|---|---|---|
| 32 | Low | 5 | - | 6 | 3 | 23 | 32 | KD | -4 | SKD | - | |||
|
Pushes you way too far to get punished. Isn't really useful for Mai's gameplan. | ||||||||||||||
cr.A 2C
| Damage | Guard | Meter | Cancel | Startup | Active | Recovery | Total | Hit Adv | Block Adv | Properties | Invulnerability | |||
|---|---|---|---|---|---|---|---|---|---|---|---|---|---|---|
| 19 | Mid | 3 | Special | 7 | 6 | 20 | 32 | -2 | -4 | - | - | |||
|
One of Mai's more distinct normals. Here, it's a special chain you get from mashing cr.A, but it's outclassed by just pressing 5B and going into 6C 4C as far as damage goes. It doesn't see much use. | ||||||||||||||
cl.C 5C
| Damage | Guard | Meter | Cancel | Startup | Active | Recovery | Total | Hit Adv | Block Adv | Properties | Invulnerability | |||
|---|---|---|---|---|---|---|---|---|---|---|---|---|---|---|
| 10 | Mid | 3 | Chain, Special | 7 | 6+2 | 38 | 52 | KD | -24 | SKD | Air: 5-47 | |||
|
Mai can cancel either of cl.C's hits into this command jump, which launches the opponent. She can cancel any of the normals in this sequence into j.2AB, but as explored in the combo section this isn't advised. Given how j.2AB doesn't have amazing frame advantage, it's not particularly useful for pressure either. This chain doesn't have much use and will often only come out by mistake. | ||||||||||||||
cl.C 5C 5C
| Damage | Guard | Meter | Cancel | Startup | Active | Recovery | Total | Hit Adv | Block Adv | Properties | Invulnerability | |||
|---|---|---|---|---|---|---|---|---|---|---|---|---|---|---|
| 11 | Mid | 3 | Chain, Special | 7 | 5 | - | - | KD | -20 | SKD | - | |||
|
Mai can combo into j.2AB after this move, but the next move in this chain is much preferred. | ||||||||||||||
cl.C 5C 5C 2C
| Damage | Guard | Meter | Cancel | Startup | Active | Recovery | Total | Hit Adv | Block Adv | Properties | Invulnerability | |||
|---|---|---|---|---|---|---|---|---|---|---|---|---|---|---|
| 22 | Mid | 3 | Special | 7 | 8 | - | - | -11/KD | -13 | SKD | - | |||
|
Causes a ground splat on aerial opponents, but if you hit a grounded opponent it will count as a regular hit. You get a little bit of advantage after this chain for a line mixup, but Mai has more dependable ways to procure a knockdown for this purpose. | ||||||||||||||
Normal Throws
Windmill Breaker
| Damage | Guard | Meter | Cancel | Startup | Active | Recovery | Total | Hit Adv | Block Adv | Properties | Invulnerability | |||
|---|---|---|---|---|---|---|---|---|---|---|---|---|---|---|
| 22 | - | - | - | 1 | 1 | - | 1 | KD | - | HKD | - | |||
|
A back throw like many others, but Mai can actually juggle from this! The timing is tight, though, and only moves with juggle properties can achieve this. | ||||||||||||||
Dreamy Cherry Blossoms
| Damage | Guard | Meter | Cancel | Startup | Active | Recovery | Total | Hit Adv | Block Adv | Properties | Invulnerability | |||
|---|---|---|---|---|---|---|---|---|---|---|---|---|---|---|
| 20 | - | - | - | 1 | 1 | - | 1 | KD | - | HKD | - | |||
|
Leaves Mai too far away for a mixup, but she can still walk up and pressure. | ||||||||||||||
Special Moves
Butterfly Fan
| Damage | Guard | Meter | Cancel | Startup | Active | Recovery | Total | Hit Adv | Block Adv | Properties | Invulnerability | |||
|---|---|---|---|---|---|---|---|---|---|---|---|---|---|---|
| 16 | Mid | 5 | - | 15 | - | 41 | 55 | -7 | -9 | - | - | |||
|
Mai's classic fireball, with fast startup and a hitbox which sails over Power Waves. Mai is mainly about pressure, but this gives her a presence from fullscreen. | ||||||||||||||
Dragon Flame Fandango
Riotous Butterfly Fan
| Damage | Guard | Meter | Cancel | Startup | Active | Recovery | Total | Hit Adv | Block Adv | Properties | Invulnerability | |||
|---|---|---|---|---|---|---|---|---|---|---|---|---|---|---|
| 7 | Mid | 7 | 214C | 5 | 2 | 44 | 50 | -20 | -22 | - | - | |||
|
RBS is one of the few games where Mai has rekkas, and it's also where they debuted. They aren't really useful for staggering, considering there is no reason to end on any of the middle hits when the last hit is safe on block. Regardless, you should still consider changing the timing on block to counter Break Shots. All of these will move her forward a good amount, which ties into her gameplan of corner pressure rather nicely.
| ||||||||||||||
| Damage | Guard | Meter | Cancel | Startup | Active | Recovery | Total | Hit Adv | Block Adv | Properties | Invulnerability | |||
|---|---|---|---|---|---|---|---|---|---|---|---|---|---|---|
| 18(7+6+5) | Mid | 0 | - | 13 | 8+8+4 | 24 | 56 | -2 | -4 | - | - | |||
|
Mai's most damaging combo ender while meterless. This move leaves Mai far away, but with the forward movement of the three rekkas before this and now this, she's pushed them a long way towards the corner. The move's huge hitbox and repeated hits makes it great for breaking the wall behind them, or at least searing a good amount of their health off via chip damage. Mai isn't particularly bothered by being at fullscreen, considering 236A is a very good fireball and she has great pokes, so ending her combo with this move is a net positive. | ||||||||||||||
Deadly Ninja Bees
| Damage | Guard | Meter | Cancel | Startup | Active | Recovery | Total | Hit Adv | Block Adv | Properties | Invulnerability | |||
|---|---|---|---|---|---|---|---|---|---|---|---|---|---|---|
| 38(18+23) | Mid | 7 | - | 12 | 3+3+(11)+26 | 16 | 70 | KD | 0 | SKD, Juggle | - | |||
|
When it comes to corner carry, this move is usually outclassed by 214C rekkas, which deals more damage, chips more on block and leaves Mai at a spot where she invariably has an advantage: at fullscreen. This move is annoyingly safe on block, but it has less forward movement and Mai can't alter the hit timing to mess with Break Shots. Regardless, it still causes a knockdown; one which Mai can take advantage of with line abuse. | ||||||||||||||
Squirrel Dance
| Damage | Guard | Meter | Cancel | Startup | Active | Recovery | Total | Hit Adv | Block Adv | Properties | Invulnerability | |||
|---|---|---|---|---|---|---|---|---|---|---|---|---|---|---|
| 33(18+15) | Mid | 5 | - | 18 | Up to 37 | 20 | Up to 74 | +1 | -1 | - | - | |||
|
Mai's divekick is more for movement than attacking, considering it doesn't knock down and the advantage afterwards isn't great. It travels 45° downward at a steady pace, but it's not that fast. Mai can use it to help get out of the corner by combining it with her triangle jump and can run away by air turning to perform this move backwards. Other than that, her divekick isn't too essential to her gameplan. | ||||||||||||||
Sun Flash Flamengo
| Damage | Guard | Meter | Cancel | Startup | Active | Recovery | Total | Hit Adv | Block Adv | Properties | Invulnerability | |||
|---|---|---|---|---|---|---|---|---|---|---|---|---|---|---|
| 38 | Mid | 7 | - | 16 | 1+6+3 | 34 | 60 | - | -8 | SKD | Strike: 2-15, Upper: 16-32 | |||
|
Mai's pseudo-reversal is weird. Its startup invincibility is a frame off instant and, like some KOF reversals, toggles off once the active period starts. Being a massive beam of fire, it features projectile properties; it will eat other fireballs, but the fact it can be air blocked means its high damage as an anti-air isn't guaranteed. Mai will be left at a disadvantage even when the move is blocked at its peak, but she won't be punished for it. Overall, it's effective enough as a counter-attack, even if it is slow to start. | ||||||||||||||
S.Power
Super Deadly Ninja Bees
| Damage | Guard | Meter | Cancel | Startup | Active | Recovery | Total | Hit Adv | Block Adv | Properties | Invulnerability | |||
|---|---|---|---|---|---|---|---|---|---|---|---|---|---|---|
| 86(15+15+19+19+40) or 75(40+40) | Mid | - | - | 7 | 3+3+(3)+3+3+22 | 52 | 95 | KD | -46 | HKD, Juggle | - | |||
|
Someone must have noticed how annoying this move was to deal with in RB1, so they tweaked it to have an upward angle. This makes it really, really unsafe to just throw out; however, Mai never has to do this. Instead, Mai uses her S.Power as a high-damage combo ender, as she has many easy ways to confirm into it. If the damage doesn't kill your opponent dead, the line mixup they can't tech out of is likely to. This move is never used as an anti-air, considering how long it takes before Mai starts flying. | ||||||||||||||
P.Power
Moonlight-Erupting Peony
| Damage | Guard | Meter | Cancel | Startup | Active | Recovery | Total | Hit Adv | Block Adv | Properties | Invulnerability | |||
|---|---|---|---|---|---|---|---|---|---|---|---|---|---|---|
| 112 | - | - | - | 41 | 12 | 34 | 86 | KD | - | HKD | - | |||
|
41 frames startup? Geez. This is a leaping command grab which almost reaches fullscreen and is most likely meant to tie Mai's pressure together as another mixup option she can throw into it. However, its lengthy startup is further telegraphed by its distinct sound cue and the pink shadows trailing behind Mai as she sails at a high, already-distinct arc. This move is a huge risk on a character who doesn't have to take risks to succeed, so it is almost never seen. If you break the wall and you have P.Power you can shoot for it; though a simple chain into S.Power will outdamage it most of the time, its multiple hits are prone to getting weakened by the guts system, while this move isn't thanks to having just one hit. Otherwise, it's just for fun. | ||||||||||||||
Chains
(0) - cr.A
(1) - cl.A, st.A, cr.A
(2) - 5B, 2B
(3) - 6C 4C, 5C, 2C
Special - A 5A (3), (0) 2C, cl.C 5C 5C 2C, j.A j.B, j.A/j.B j.C
Chain paths courtesy of Goh_Billy:
st.A -----> 5A -----> 6C -----> 4C
cl.A        5B        5C
cr.A        2B        2C

st.B -----> 5B -----> 6C -----> 4C
cl.B        2B        5C
cr.B                  2C

cr.A -----> 2C

cl.C -----> 5C -----> 5C -----> 2C

j.A ------> j.B

j.A/j.B --> j.C
Combos
(1) (2) 6C 4C 214A / 214C×4 / 41236C / 616BC (53/71/66/116 damage) - Mai's combos are simple but effective. Unlike most characters, she can go into her standing (3)s even from 2B, so she can hit confirm with two lows. 214A is plus on block and gives Mai plenty of time to position herself if it hits. 214C×4 is safe on block and Mai doesn't mind being sent to fullscreen, given she has the tools to dictate neutral. It's also great at breaking walls, even though the first 214C will always whiff from a line tag. 41236C provides corner carry and leaves Mai close enough for a line mixup. Finally, 616BC is what Mai goes for if she has meter or she's at half health. Mai can use all of these from cl.C or line.C as well, so her combos are really straightforward. On some stages' walls (e.g. USA's left wall), 4C will cause Mai's inputs to cross up, so keep that in mind.
cl.C [1] 214A (43 damage) vs. cl.C [2] 214A (41 damage) - 214A's first hit only connects if you're close enough, but it deals more damage than cl.C's second hit.
cl.C 5C 5C 2C (55 damage) vs. cl.C 5C 5C j.2AB (52 damage) - Mai's cl.C chain is special cancellable, but ending combos with j.2AB isn't advised; not only because of the lesser damage, but because j.2AB doesn't even knock down. Cancelling into it after 2C will give you less advantage than if you didn't. If Mai cancels cl.C early into its first hit, the chain will switch sides at the cost of ten points less damage.
(0)×6 5B 6C 4C 214C×4 (89 damage) - Mai usually isn't confirming with cr.A, but this combo goes to show how many she can chain even away from the corner.
(0)×6 2C 616BC (101 damage) vs. (0)×6 5B 6C 4C 616BC (107 damage) - cr.A 2C deals less damage and is a redundant chain all things considered.
4/6C, 41236C / 616BC (60/76 damage) - Throw combos. The followup needs to come out ASAP. These moves only work because of their juggle properties, meaning nothing else will do.
(1) (2) 5C 41236C / 616BC (53/76 damage) - Same principle here, although these combos aren't optimal.
Strategy
Mai has tools to both control neutral and navigate her way through it. Her fireball isn't geared for spam, but it is fast to come out, travels at a good speed and is often favored to win against other fireballs. It's designed to help give her an in. Aside from this, Mai has effective approach tools in h.C and j.C, while a lot of the ranged tools she uses for pressure such as st.A, st.B and 214A are also strong pokes in their own right. Additionally, Mai is both small and fast, which helps her dodge attacks on her way in; her forward dash, for instance, goes right under Yamazaki's 214B while closing the gap between them.
Mai's win condition is her corner pressure, and one of her key ways of achieving it is through her rekkas. A full sequence will take Mai and her opponent a screen's length forward, and although it leaves Mai a fair distance away from them, she is safe regardless. Mai can secure this by connecting a chain into it on hit or block. Alternatively, Mai can use 41236C or 214A, which deal less damage but score knockdowns on hit. She can take advantage of these with line crossups, which may be counterintuitive to this gameplan, or she can settle for mixing up high/low with line.B and linecr.C if she can hit the former meaty enough. Mai isn't as good at line abuse as characters like Duck, but she can use it to fish for good damage just the same; in some cases, a line crossup may be a lot more worth it than the corner.
Once the opponent is cornered, though, Mai is off to the races. 214A's frame advantage is abused to full effect by high-hitting moves like st.B and mainly st.A, which — when timed right — can lock her opponents from jumping out. She can do this for many reps before she's pushed out. However, Mai needs mixups to crack her opponent open, and those put her at risk; cr.B requires her to move in for it to connect and risks the opponent jumping out, while h.C loses to reversals which are often angled to stuff hops. If Mai can nail its 1f timing then her unblockable h.B (or j.B, same dif) becomes an option, but it shares the same weaknesses as h.C while also being prone to abare, which Mai's pressure often dissuades. Make no mistake, though; Mai's corner game is weighed heavily in her favour, and any good opening can lead to a devastating chain into S.Power.
Mai has a clear goal and the tools to achieve it, but she's flexible as well. Learn her pressure, get out there and prove which country is number one.


