Lichmassacre (talk | contribs) m (Navbox added.) |
Lichmassacre (talk | contribs) mNo edit summary |
||
| (9 intermediate revisions by 2 users not shown) | |||
| Line 1: | Line 1: | ||
{{TOClimit|3}} | |||
{| class="wikitable" style="float:right; margin-left: 10px;" | |||
|- | |||
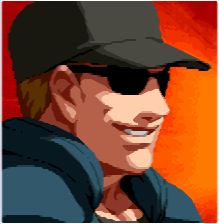
! align="center" colspan="2" | タフ & クール,Tough & Cool | |||
|- | |||
! align="center" colspan="2" | [[Image:KoF2003Portrait15-Clark.png|center]] | |||
|- | |||
| '''Tier Placement''' || B | |||
|- | |||
| '''Ratio Cost (Sarsen)''' || 3 Points (4 Points Leader) of 15 | |||
|- | |||
| '''Ratio Cost (China)''' || 6 Points of 20 | |||
|- | |||
| '''Best Position''' || Solo | |||
|- | |||
| '''Good LDM?''' || Great | |||
|- | |||
| '''Crouch Height''' || Medium | |||
|- | |||
| '''Wakeup Speed''' || 26 Frames | |||
|- | |||
| '''Stun Value''' || 900 | |||
|- | |||
|} | |||
==Introduction== | |||
=Introduction= | |||
'''''「 Clark Steel 」''''' | '''''「 Clark Steel 」''''' | ||
{{ ProConTable | |||
| pros= | |||
* placeholder | |||
| cons= | |||
* placeholder | |||
}} | |||
===Colors=== | ===Colors=== | ||
'''UNDER CONSTRUCTION''' | '''UNDER CONSTRUCTION''' | ||
==Movelist== | ==Movelist== | ||
=== Normals === | === Normals === | ||
==== Far Normals ==== | ==== Far Normals ==== | ||
===== <span class="invisible-header"></span> ===== | |||
<font style="visibility:hidden" size="0"></font> | |||
{{MoveData | {{MoveData | ||
|image=03Clark st.A.jpg | |image=03Clark st.A.jpg | ||
| Line 41: | Line 65: | ||
}} | }} | ||
===== <span class="invisible-header"></span> ===== | |||
<font style="visibility:hidden" size="0"></font> | |||
{{MoveData | {{MoveData | ||
|image=03Clark st.B.jpg | |image=03Clark st.B.jpg | ||
| Line 65: | Line 90: | ||
}} | }} | ||
===== <span class="invisible-header"></span> ===== | |||
<font style="visibility:hidden" size="0"></font> | |||
{{MoveData | {{MoveData | ||
|image=03Clark st.C.jpg | |image=03Clark st.C.jpg | ||
| Line 89: | Line 115: | ||
}} | }} | ||
===== <span class="invisible-header"></span> ===== | |||
<font style="visibility:hidden" size="0"></font> | |||
{{MoveData | {{MoveData | ||
|image=03Clark st.D.jpg | |image=03Clark st.D.jpg | ||
| Line 115: | Line 142: | ||
==== Close Range Normals ==== | ==== Close Range Normals ==== | ||
===== <span class="invisible-header"></span> ===== | |||
<font style="visibility:hidden" size="0"></font> | |||
{{MoveData | {{MoveData | ||
|image=03Clark cl.A.jpg | |image=03Clark cl.A.jpg | ||
| Line 140: | Line 167: | ||
}} | }} | ||
===== <span class="invisible-header"></span> ===== | |||
<font style="visibility:hidden" size="0"></font> | |||
{{MoveData | {{MoveData | ||
|image=03Clark cl.B.jpg | |image=03Clark cl.B.jpg | ||
| Line 164: | Line 192: | ||
}} | }} | ||
===== <span class="invisible-header"></span> ===== | |||
<font style="visibility:hidden" size="0"></font> | |||
{{MoveData | {{MoveData | ||
|image=03Clark cl.C.jpg | |image=03Clark cl.C.jpg | ||
| Line 189: | Line 218: | ||
}} | }} | ||
===== <span class="invisible-header"></span> ===== | |||
<font style="visibility:hidden" size="0"></font> | |||
{{MoveData | {{MoveData | ||
|image=03Clark cl.D.jpg | |image=03Clark cl.D.jpg | ||
| Line 215: | Line 245: | ||
==== Crouching Normals ==== | ==== Crouching Normals ==== | ||
===== <span class="invisible-header"></span> ===== | |||
<font style="visibility:hidden" size="0"></font> | |||
{{MoveData | {{MoveData | ||
|image=03Clark cr.A.jpg | |image=03Clark cr.A.jpg | ||
| Line 239: | Line 270: | ||
}} | }} | ||
===== <span class="invisible-header"></span> ===== | |||
<font style="visibility:hidden" size="0"></font> | |||
{{MoveData | {{MoveData | ||
|image=03Clark cr.B.jpg | |image=03Clark cr.B.jpg | ||
| Line 263: | Line 295: | ||
}} | }} | ||
===== <span class="invisible-header"></span> ===== | |||
<font style="visibility:hidden" size="0"></font> | |||
{{MoveData | {{MoveData | ||
|image=03Clark cr.C.jpg | |image=03Clark cr.C.jpg | ||
| Line 287: | Line 320: | ||
}} | }} | ||
===== <span class="invisible-header"></span> ===== | |||
<font style="visibility:hidden" size="0"></font> | |||
{{MoveData | {{MoveData | ||
|image=03Clark cr.D.jpg | |image=03Clark cr.D.jpg | ||
| Line 313: | Line 347: | ||
==== Neutral Jumping Normals ==== | ==== Neutral Jumping Normals ==== | ||
===== <span class="invisible-header"></span> ===== | |||
<font style="visibility:hidden" size="0"></font> | |||
{{MoveData | {{MoveData | ||
|image=03Clark nj.A.jpg | |image=03Clark nj.A.jpg | ||
| Line 337: | Line 372: | ||
}} | }} | ||
===== <span class="invisible-header"></span> ===== | |||
<font style="visibility:hidden" size="0"></font> | |||
{{MoveData | {{MoveData | ||
|image=03Clark nj.B.jpg | |image=03Clark nj.B.jpg | ||
| Line 361: | Line 397: | ||
}} | }} | ||
===== <span class="invisible-header"></span> ===== | |||
<font style="visibility:hidden" size="0"></font> | |||
{{MoveData | {{MoveData | ||
|image=03Clark j.C.jpg | |image=03Clark j.C.jpg | ||
| Line 385: | Line 422: | ||
}} | }} | ||
===== <span class="invisible-header"></span> ===== | |||
<font style="visibility:hidden" size="0"></font> | |||
{{MoveData | {{MoveData | ||
|image=03Clark nj.D.jpg | |image=03Clark nj.D.jpg | ||
| Line 410: | Line 448: | ||
==== Diagonal Jump Normals ==== | ==== Diagonal Jump Normals ==== | ||
===== <span class="invisible-header"></span> ===== | |||
<font style="visibility:hidden" size="0"></font> | |||
{{MoveData | {{MoveData | ||
|image=03Clark dj.A.jpg | |image=03Clark dj.A.jpg | ||
| Line 434: | Line 473: | ||
}} | }} | ||
===== <span class="invisible-header"></span> ===== | |||
<font style="visibility:hidden" size="0"></font> | |||
{{MoveData | {{MoveData | ||
|image=03Clark dj.B.jpg | |image=03Clark dj.B.jpg | ||
| Line 458: | Line 498: | ||
}} | }} | ||
===== <span class="invisible-header"></span> ===== | |||
<font style="visibility:hidden" size="0"></font> | |||
{{MoveData | {{MoveData | ||
|image=03Clark dj.D.jpg | |image=03Clark dj.D.jpg | ||
| Line 482: | Line 523: | ||
}} | }} | ||
=== Throws === | ===Throws=== | ||
===== <span class="invisible-header"></span> ===== | |||
<font style="visibility:hidden" size="0"></font> | |||
{{MoveData | {{MoveData | ||
|image= | |image= | ||
| Line 507: | Line 549: | ||
}} | }} | ||
===== <span class="invisible-header"></span> ===== | |||
<font style="visibility:hidden" size="0"></font> | |||
{{MoveData | {{MoveData | ||
|image= | |image= | ||
| Line 533: | Line 576: | ||
=== MSA === | === MSA === | ||
===== <span class="invisible-header"></span> ===== | |||
<font style="visibility:hidden" size="0"></font> | |||
{{MoveData | {{MoveData | ||
|image=03Clark MSA.jpg | |image=03Clark MSA.jpg | ||
| Line 557: | Line 601: | ||
}} | }} | ||
===== <span class="invisible-header"></span> ===== | |||
<font style="visibility:hidden" size="0"></font> | |||
{{MoveData | {{MoveData | ||
|image=03Clark MSA (2).jpg | |image=03Clark MSA (2).jpg | ||
| Line 582: | Line 628: | ||
=== Command Normals === | === Command Normals === | ||
===== <span class="invisible-header"></span> ===== | |||
<font style="visibility:hidden" size="0"></font> | |||
{{MoveData | {{MoveData | ||
|image=03Clark Stomp.jpg | |image=03Clark Stomp.jpg | ||
| Line 608: | Line 654: | ||
=== Special Moves === | === Special Moves === | ||
===== <span class="invisible-header"></span> ===== | |||
<font style="visibility:hidden" size="0"></font> | |||
{{MoveData | {{MoveData | ||
|image=03Clark SAB.jpg | |image=03Clark SAB.jpg | ||
| Line 632: | Line 679: | ||
}} | }} | ||
===== <span class="invisible-header"></span> ===== | |||
<font style="visibility:hidden" size="0"></font> | |||
{{MoveData | {{MoveData | ||
|image=03Clark Frankensteiner.jpg | |image=03Clark Frankensteiner.jpg | ||
| Line 672: | Line 720: | ||
}} | }} | ||
===== <span class="invisible-header"></span> ===== | |||
<font style="visibility:hidden" size="0"></font> | |||
{{MoveData | {{MoveData | ||
|image=03Clark Napalm.jpg | |image=03Clark Napalm.jpg | ||
| Line 696: | Line 745: | ||
}} | }} | ||
===== <span class="invisible-header"></span> ===== | |||
<font style="visibility:hidden" size="0"></font> | |||
===== <span class="invisible-header"></span> ===== | |||
<font style="visibility:hidden" size="0"></font> | |||
{{MoveData | {{MoveData | ||
|image=03Clark Tackle.jpg | |image=03Clark Tackle.jpg | ||
| Line 789: | Line 841: | ||
}} | }} | ||
===== <span class="invisible-header"></span> ===== | |||
<font style="visibility:hidden" size="0"></font> | |||
{{MoveData | {{MoveData | ||
|image= | |image= | ||
| Line 813: | Line 866: | ||
}} | }} | ||
===== <span class="invisible-header"></span> ===== | |||
<font style="visibility:hidden" size="0"></font> | |||
{{MoveData | {{MoveData | ||
|image=03Clark Elbow.jpg | |image=03Clark Elbow.jpg | ||
| Line 839: | Line 893: | ||
=== Super Moves === | === Super Moves === | ||
===== <span class="invisible-header"></span> ===== | |||
<font style="visibility:hidden" size="0"></font> | |||
{{MoveData | {{MoveData | ||
|image=03Clark UAB.jpg | |image=03Clark UAB.jpg | ||
| Line 859: | Line 914: | ||
|advBlock= | |advBlock= | ||
|invul=- | |invul=- | ||
|description= Command grab super. Not an instant command grab anymore, the opponent can jump during the superfreeze to punish. Swaps sides. More damaging than his Running Three. | |description=* Command grab super. Not an instant command grab anymore, the opponent can jump during the superfreeze to punish. Swaps sides. More damaging than his Running Three. | ||
* Compare his hitboxes of his UAB to the hitboxes of his SAB; you'll note that his Ultra Argentine Backbreakers (both the DM and LDM versions) have less range than his Super Argentine Backbreakers. This means that you may find yourselves in situations where a SAB will connect, but a UAB will whiff (for example, dj.A -> st.C -> SAB will combo, but dj.A -> st.C -> UAB will whiff). | |||
Compare his hitboxes of his UAB to the hitboxes of his SAB; you'll note that his Ultra Argentine Backbreakers (both the DM and LDM versions) have less range than his Super Argentine Backbreakers. This means that you may find yourselves in situations where a SAB will connect, but a UAB will whiff (for example, dj.A -> st.C -> SAB will combo, but dj.A -> st.C -> UAB will whiff). | |||
}} | }} | ||
}} | }} | ||
===== <span class="invisible-header"></span> ===== | |||
<font style="visibility:hidden" size="0"></font> | |||
{{MoveData | {{MoveData | ||
|image=03Clark R3.jpg | |image=03Clark R3.jpg | ||
| Line 889: | Line 945: | ||
=== LDM === | === LDM === | ||
{{MoveData | {{MoveData | ||
|image=03Clark UAB.jpg | |image=03Clark UAB.jpg | ||
|caption=he does a handstand it's pretty cool | |caption=he does a handstand it's pretty cool | ||
|name=Ultra Argentine Backbreaker | |name=MAX Ultra Argentine Backbreaker | ||
|input={{Motion|63214}}{{Motion|63214}}+{{Icon-SNK|a}}{{Icon-SNK|c}} | |input={{Motion|63214}}{{Motion|63214}}+{{Icon-SNK|a}}{{Icon-SNK|c}} | ||
|data= | |data= | ||
| Line 913: | Line 968: | ||
}} | }} | ||
==Combos== | |||
= | |||
= | |||
'''UNDER CONSTRUCTION''' | '''UNDER CONSTRUCTION''' | ||
=Strategy= | ==Strategy== | ||
'''UNDER CONSTRUCTION''' | '''UNDER CONSTRUCTION''' | ||
=Match Up= | ===Match Up=== | ||
'''UNDER CONSTRUCTION''' | '''UNDER CONSTRUCTION''' | ||
Latest revision as of 23:44, 12 August 2022
| タフ & クール,Tough & Cool | |
|---|---|
| Tier Placement | B |
| Ratio Cost (Sarsen) | 3 Points (4 Points Leader) of 15 |
| Ratio Cost (China) | 6 Points of 20 |
| Best Position | Solo |
| Good LDM? | Great |
| Crouch Height | Medium |
| Wakeup Speed | 26 Frames |
| Stun Value | 900 |
Introduction
「 Clark Steel 」
| Strengths | Weaknesses |
|---|---|
|
|
Colors
UNDER CONSTRUCTION
Movelist
Normals
Far Normals
| Damage | Counter Dmg | Guard | Guard Damage | Damage Scaling | Stun | CH Stun | Meter | Cancel Properties | Startup | Active | Recovery | Total | Hit Advantage | Block Advantage | Invulnerability |
|---|---|---|---|---|---|---|---|---|---|---|---|---|---|---|---|
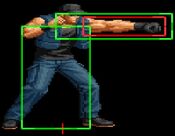
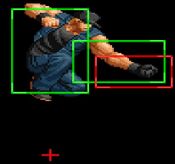
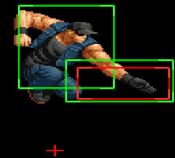
| - | - | Mid | - | - | - | - | - | None | 5 | 5 | 4 | 14 | +2 | 0 | - |
Simple jab. | |||||||||||||||
| Damage | Counter Dmg | Guard | Guard Damage | Damage Scaling | Stun | CH Stun | Meter | Cancel Properties | Startup | Active | Recovery | Total | Hit Advantage | Block Advantage | Invulnerability |
|---|---|---|---|---|---|---|---|---|---|---|---|---|---|---|---|
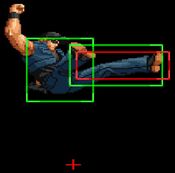
| - | - | Mid | - | - | - | - | - | None | 4 | 4 | 5 | 13 | +4 | +1 | - |
Far Kick. | |||||||||||||||
| Damage | Counter Dmg | Guard | Guard Damage | Damage Scaling | Stun | CH Stun | Meter | Cancel Properties | Startup | Active | Recovery | Total | Hit Advantage | Block Advantage | Invulnerability |
|---|---|---|---|---|---|---|---|---|---|---|---|---|---|---|---|
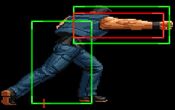
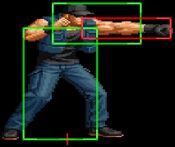
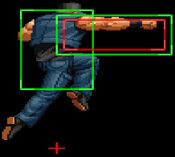
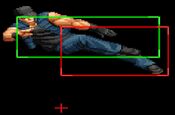
| - | - | Mid | - | - | - | - | - | None | 10 | 7 | -18 | 35 | -3 | -7 | - |
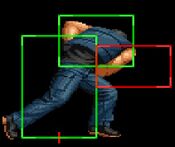
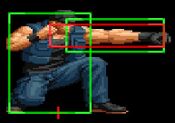
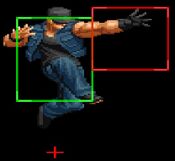
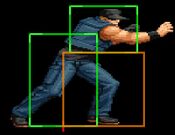
Big muscley straight punch to the face. Safer if you space it right but you don't want to get caught hitting this button up close. | |||||||||||||||
| Damage | Counter Dmg | Guard | Guard Damage | Damage Scaling | Stun | CH Stun | Meter | Cancel Properties | Startup | Active | Recovery | Total | Hit Advantage | Block Advantage | Invulnerability |
|---|---|---|---|---|---|---|---|---|---|---|---|---|---|---|---|
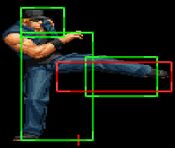
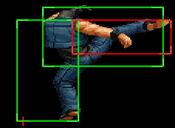
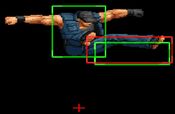
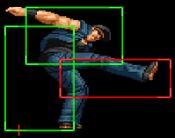
| - | - | Mid | - | - | - | - | - | None | 13 | 4 | 25 | 42 | -8 | -12 | - |
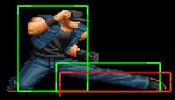
Roundhouse. Longest-range attack Clark has, but it's pretty negative on hit so you don't want to aim this close at all. | |||||||||||||||
Close Range Normals
| Damage | Counter Dmg | Guard | Guard Damage | Damage Scaling | Stun | CH Stun | Meter | Cancel Properties | Startup | Active | Recovery | Total | Hit Advantage | Block Advantage | Invulnerability |
|---|---|---|---|---|---|---|---|---|---|---|---|---|---|---|---|
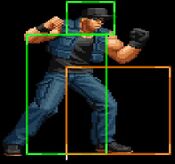
| - | - | Mid | - | - | - | - | - | None | 5 | 5 | 4 | 14 | +2 | 0 | - |
Same jab, different boxes. | |||||||||||||||
| Damage | Counter Dmg | Guard | Guard Damage | Damage Scaling | Stun | CH Stun | Meter | Cancel Properties | Startup | Active | Recovery | Total | Hit Advantage | Block Advantage | Invulnerability |
|---|---|---|---|---|---|---|---|---|---|---|---|---|---|---|---|
| - | - | Mid | - | - | - | - | - | CMD/Special/Super | 4 | 5 | 5 | 14 | +3 | +1 | - |
Cancellable. On some characters like Ash, there can be an annoying deadzone where you're too close for st.B to come out, but too far for cl.B to hit. | |||||||||||||||
| Damage | Counter Dmg | Guard | Guard Damage | Damage Scaling | Stun | CH Stun | Meter | Cancel Properties | Startup | Active | Recovery | Total | Hit Advantage | Block Advantage | Invulnerability |
|---|---|---|---|---|---|---|---|---|---|---|---|---|---|---|---|
| - | - | Mid | - | - | - | - | - | CMD/Special/Super | 4 | 4,7 | 16 | 31 | -2 | +6 | - |
As fast as his cl.B. Cancellable on the first hit only, but even then it does more damage than cl.B. Combos into 6B, and is a true blockstring, but pushes the opponent too far to combo into anything other than Shining Wizard. | |||||||||||||||
| Damage | Counter Dmg | Guard | Guard Damage | Damage Scaling | Stun | CH Stun | Meter | Cancel Properties | Startup | Active | Recovery | Total | Hit Advantage | Block Advantage | Invulnerability |
|---|---|---|---|---|---|---|---|---|---|---|---|---|---|---|---|
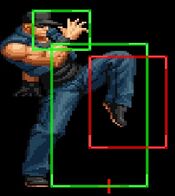
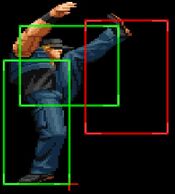
| - | - | Mid | - | - | - | - | - | None | 12 | 3 | 28 | 43 | -10 | -14 | Low |
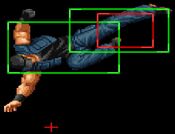
Dropkick. Uncancellable move with a lengthy startup and a lengthy punish window...on hit. Duckable as well for extra pain. This move can hop over low attacks, but the recovery is horrible so you're gonna get punished anyway. | |||||||||||||||
Crouching Normals
| Damage | Counter Dmg | Guard | Guard Damage | Damage Scaling | Stun | CH Stun | Meter | Cancel Properties | Startup | Active | Recovery | Total | Hit Advantage | Block Advantage | Invulnerability |
|---|---|---|---|---|---|---|---|---|---|---|---|---|---|---|---|
| - | - | Mid | - | - | - | - | - | CMD/Special/Super | 5 | 6 | 4 | 15 | +2 | 0 | - |
Cancellable jab. Only cancellable crouch move Clark has. | |||||||||||||||
| Damage | Counter Dmg | Guard | Guard Damage | Damage Scaling | Stun | CH Stun | Meter | Cancel Properties | Startup | Active | Recovery | Total | Hit Advantage | Block Advantage | Invulnerability |
|---|---|---|---|---|---|---|---|---|---|---|---|---|---|---|---|
| - | - | Low | - | - | - | - | - | None | 5 | 5 | 9 | 19 | -1 | -3 | - |
Quick low. Can't combo into anything, not cancellable so Clark doesn't get much from lows. | |||||||||||||||
| Damage | Counter Dmg | Guard | Guard Damage | Damage Scaling | Stun | CH Stun | Meter | Cancel Properties | Startup | Active | Recovery | Total | Hit Advantage | Block Advantage | Invulnerability |
|---|---|---|---|---|---|---|---|---|---|---|---|---|---|---|---|
| - | - | Mid | - | - | - | - | - | None | 9 | 7 | 15 | 31 | -1 | -5 | - |
Big low punch | |||||||||||||||
| Damage | Counter Dmg | Guard | Guard Damage | Damage Scaling | Stun | CH Stun | Meter | Cancel Properties | Startup | Active | Recovery | Total | Hit Advantage | Block Advantage | Invulnerability |
|---|---|---|---|---|---|---|---|---|---|---|---|---|---|---|---|
| - | - | Low | - | - | - | - | - | None | 11 | 7 | 19 | 37 | KD | -10 | - |
Sweep | |||||||||||||||
Neutral Jumping Normals
| Damage | Counter Dmg | Guard | Guard Damage | Damage Scaling | Stun | CH Stun | Meter | Cancel Properties | Startup | Active | Recovery | Total | Hit Advantage | Block Advantage | Invulnerability |
|---|---|---|---|---|---|---|---|---|---|---|---|---|---|---|---|
| - | - | Overhead | - | - | - | - | - | - | 4 | 4 | - | 8 | - | - | - |
| Damage | Counter Dmg | Guard | Guard Damage | Damage Scaling | Stun | CH Stun | Meter | Cancel Properties | Startup | Active | Recovery | Total | Hit Advantage | Block Advantage | Invulnerability |
|---|---|---|---|---|---|---|---|---|---|---|---|---|---|---|---|
| - | - | Overhead | - | - | - | - | - | - | 4 | 5 | - | 9 | - | - | - |
| Damage | Counter Dmg | Guard | Guard Damage | Damage Scaling | Stun | CH Stun | Meter | Cancel Properties | Startup | Active | Recovery | Total | Hit Advantage | Block Advantage | Invulnerability |
|---|---|---|---|---|---|---|---|---|---|---|---|---|---|---|---|
| - | - | Overhead | - | - | - | - | - | - | 6 | 5 | - | 11 | - | - | - |
| Damage | Counter Dmg | Guard | Guard Damage | Damage Scaling | Stun | CH Stun | Meter | Cancel Properties | Startup | Active | Recovery | Total | Hit Advantage | Block Advantage | Invulnerability |
|---|---|---|---|---|---|---|---|---|---|---|---|---|---|---|---|
| - | - | Overhead | - | - | - | - | - | - | 11 | 6 | - | 17 | - | - | - |
Diagonal Jump Normals
| Damage | Counter Dmg | Guard | Guard Damage | Damage Scaling | Stun | CH Stun | Meter | Cancel Properties | Startup | Active | Recovery | Total | Hit Advantage | Block Advantage | Invulnerability |
|---|---|---|---|---|---|---|---|---|---|---|---|---|---|---|---|
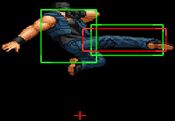
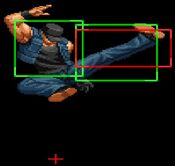
| - | - | Overhead | - | - | - | - | - | - | 4 | 9 | - | 13 | - | - | - |
Longest lasting air normal for Clark. This is Clark's best normal for air-to-ground situations, since it can confirm cl.C xx SAB easily. | |||||||||||||||
| Damage | Counter Dmg | Guard | Guard Damage | Damage Scaling | Stun | CH Stun | Meter | Cancel Properties | Startup | Active | Recovery | Total | Hit Advantage | Block Advantage | Invulnerability |
|---|---|---|---|---|---|---|---|---|---|---|---|---|---|---|---|
| - | - | Overhead | - | - | - | - | - | - | 4 | 4 | - | 8 | - | - | - |
This normal is mostly used for air-to-air. Not particularly usefull. | |||||||||||||||
| Damage | Counter Dmg | Guard | Guard Damage | Damage Scaling | Stun | CH Stun | Meter | Cancel Properties | Startup | Active | Recovery | Total | Hit Advantage | Block Advantage | Invulnerability |
|---|---|---|---|---|---|---|---|---|---|---|---|---|---|---|---|
| - | - | Overhead | - | - | - | - | - | - | 4 | 7 | - | 11 | - | - | - |
Same uses as j.B but kinda better overall. | |||||||||||||||
Throws
| Damage | Counter Dmg | Guard | Guard Damage | Damage Scaling | Stun | CH Stun | Meter | Cancel Properties | Startup | Active | Recovery | Total | Hit Advantage | Block Advantage | Invulnerability |
|---|---|---|---|---|---|---|---|---|---|---|---|---|---|---|---|
| - | - | Throw | - | - | - | - | - | - | - | - | - | - | - | - | - |
German Suplex. C version throws the opponent forward, D version swaps sides. Techable and rollable before the opponent hits the ground. If rolled, Clark is extremely negative, but is strike/projectile invul until recovery. You can still punish with a throw, especially in the corner. | |||||||||||||||
| Damage | Counter Dmg | Guard | Guard Damage | Damage Scaling | Stun | CH Stun | Meter | Cancel Properties | Startup | Active | Recovery | Total | Hit Advantage | Block Advantage | Invulnerability |
|---|---|---|---|---|---|---|---|---|---|---|---|---|---|---|---|
| - | - | Throw | - | - | - | - | - | - | - | - | - | - | - | - | - |
Air throw where Clark tosses his opponent to the ground. | |||||||||||||||
MSA
| Damage | Counter Dmg | Guard | Guard Damage | Damage Scaling | Stun | CH Stun | Meter | Cancel Properties | Startup | Active | Recovery | Total | Hit Advantage | Block Advantage | Invulnerability |
|---|---|---|---|---|---|---|---|---|---|---|---|---|---|---|---|
| - | - | Mid | - | - | - | - | - | - | 13 | 5 | 12 (until character change) | 30 | - | - | Strike/Projectile |
Second slowest MSA in the game at 13 frames. Has strike/projectile invincibility for startup, but can be beat with a throw/command grab. | |||||||||||||||
| Damage | Counter Dmg | Guard | Guard Damage | Damage Scaling | Stun | CH Stun | Meter | Cancel Properties | Startup | Active | Recovery | Total | Hit Advantage | Block Advantage | Invulnerability |
|---|---|---|---|---|---|---|---|---|---|---|---|---|---|---|---|
| - | - | Mid | - | - | - | - | - | - | - | - | - | - | - | - | - |
Command Normals
| Damage | Counter Dmg | Guard | Guard Damage | Damage Scaling | Stun | CH Stun | Meter | Cancel Properties | Startup | Active | Recovery | Total | Hit Advantage | Block Advantage | Invulnerability |
|---|---|---|---|---|---|---|---|---|---|---|---|---|---|---|---|
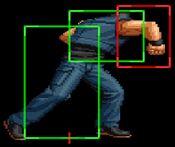
| - | - | Mid | - | - | - | - | - | Special/Super | 14 | 4 | 22 | 30 | -2 | -6 | - |
Clark kicks the opponent in the legs. Cancellable into a special/super, and pushes the opponent out back a bit. Can only be combo'd from his cl.C, but leaves the opponent too far apart to do anything except Shining Wizard. Up close, you can combo into either a Mount Tackle or a Backbreaker. With meter, you can combo into a Ultra Argentine Backbreaker (DM or LDM) , but the range is shorter than the regular SAB. | |||||||||||||||
Special Moves
| Damage | Counter Dmg | Guard | Guard Damage | Damage Scaling | Stun | CH Stun | Meter | Cancel Properties | Startup | Active | Recovery | Total | Hit Advantage | Block Advantage | Invulnerability |
|---|---|---|---|---|---|---|---|---|---|---|---|---|---|---|---|
| - | - | Throw | - | - | - | - | - | Flashing Elbow | 1 | - | - | - | - | - | - |
Clark's signature 1F command grab. More dangerous than ever with the removal of alternate guarding. Swaps sides with the opponent on connect, and can be followed up on with Flashing Elbow | |||||||||||||||
| Version | Damage | Counter Dmg | Guard | Guard Damage | Damage Scaling | Stun | CH Stun | Meter | Cancel Properties | Startup | Active | Recovery | Total | Hit Advantage | Block Advantage | Invulnerability |
|---|---|---|---|---|---|---|---|---|---|---|---|---|---|---|---|---|
| LK | - | - | Throw | - | - | - | - | - | Flashing Elbow | 9 | - | - | - | - | - | - |
| Version | Damage | Counter Dmg | Guard | Guard Damage | Damage Scaling | Stun | CH Stun | Meter | Cancel Properties | Startup | Active | Recovery | Total | Hit Advantage | Block Advantage | Invulnerability |
| HK | - | - | Throw | - | - | - | - | - | Flashing Elbow | 14 | - | - | - | - | - | - |
Delayed, invincible command grab. You can use the Frankensteiner as GCA-bait for a few characters (like Tizoc and Maxima), but more often then not you'll get stuffed. Swaps sides if it connects, can follow up with Flashing Elbow. B version has less startup than D version. | ||||||||||||||||
| Damage | Counter Dmg | Guard | Guard Damage | Damage Scaling | Stun | CH Stun | Meter | Cancel Properties | Startup | Active | Recovery | Total | Hit Advantage | Block Advantage | Invulnerability |
|---|---|---|---|---|---|---|---|---|---|---|---|---|---|---|---|
| - | - | Mid | - | - | - | - | - | Flashing Elbow | 10 | 13 | 35 | 58 | - | - | - |
Anti-air attack where Clark jumps forward. If his body touches the opponent's, he'll roll them down. Can only hit in the air (except for Mukai, who is tall enough that Clark can hit him standing up). Can follow up with Flashing Elbow. | |||||||||||||||
| Damage | Counter Dmg | Guard | Guard Damage | Damage Scaling | Stun | CH Stun | Meter | Cancel Properties | Startup | Active | Recovery | Total | Hit Advantage | Block Advantage | Invulnerability |
|---|---|---|---|---|---|---|---|---|---|---|---|---|---|---|---|
| - | - | Mid | - | - | - | - | - | - | 12+ | 4 | 58 | 74+ | - | - | - |
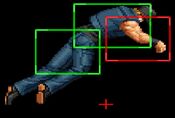
Clark does a run. If in range, he performs a tackle. The tackle itself does no damage initially. If this move hits, Clark can perform one of four followups; 22A, 22B, 22C and 22D. The opponent can "break" the tackle by inputting the same followup that Clark inputs, before any of the followups are performed. (for example, if the opponent was to break 22A, then he and Clark would need to input 22A). Unlike throws, you cannot OS a guaranteed tackle break by inputting 22ABCD, this is a true 25/25/25/25 mixup. Light version has Clark run 3/4th of the screen, Heavy version goes fullscreen and Clark runs faster. | |||||||||||||||
| Damage | Counter Dmg | Guard | Guard Damage | Damage Scaling | Stun | CH Stun | Meter | Cancel Properties | Startup | Active | Recovery | Total | Hit Advantage | Block Advantage | Invulnerability |
|---|---|---|---|---|---|---|---|---|---|---|---|---|---|---|---|
| - | - | - | - | - | - | - | - | - | - | - | - | - | 21 | - | - |
Followup to Mount Tackle. Swaps sides, leaves the opponent fullscreen. Probably his worst followup because of its bad Oki positioning. | |||||||||||||||
| Damage | Counter Dmg | Guard | Guard Damage | Damage Scaling | Stun | CH Stun | Meter | Cancel Properties | Startup | Active | Recovery | Total | Hit Advantage | Block Advantage | Invulnerability |
|---|---|---|---|---|---|---|---|---|---|---|---|---|---|---|---|
| - | - | - | - | - | - | - | - | - | - | - | - | - | 21 | - | - |
Followup option to Mount Tackle. Swaps sides. Leaves the opponent very close to Clark, and can be followed up on with Flashing Elbow. Even without doing the Flashing Elbow, this is Clarks's most damaging followup | |||||||||||||||
| Damage | Counter Dmg | Guard | Guard Damage | Damage Scaling | Stun | CH Stun | Meter | Cancel Properties | Startup | Active | Recovery | Total | Hit Advantage | Block Advantage | Invulnerability |
|---|---|---|---|---|---|---|---|---|---|---|---|---|---|---|---|
| - | - | Throw | - | - | - | - | - | - | - | - | - | - | 39 | - | - |
Followup option to Mount Tackle. Swaps sides. Worst damage, but has amazing stage carry potential; if this hits midscreen (or slightly further than midscreen), you can send your opponent to the corner. There's no difference between which version you pick, other than which button the defender has to break with (so, for example, if you perform 22B, then your opponent needs to break with 22B, not with 22D, and vice versa). | |||||||||||||||
| Damage | Counter Dmg | Guard | Guard Damage | Damage Scaling | Stun | CH Stun | Meter | Cancel Properties | Startup | Active | Recovery | Total | Hit Advantage | Block Advantage | Invulnerability |
|---|---|---|---|---|---|---|---|---|---|---|---|---|---|---|---|
| - | - | Unblockable | - | - | - | - | - | - | 1 | - | - | - | 15 | - | - |
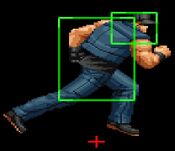
Clark runs up to his opponent. If the opponent is crouching, Clark will do a Shining Wizard and kick them in the head. If not, Clark stops running and is punishable. Unblockable, but it'll whiff the opponent is in blockstun. Runs faster than Mount Tackle, allowing some combos to connect with Wizard that otherwise wouldn't with Tackle, such as cl.C -> 6K -> 63214P or 2A -> 63214P. | |||||||||||||||
| Damage | Counter Dmg | Guard | Guard Damage | Damage Scaling | Stun | CH Stun | Meter | Cancel Properties | Startup | Active | Recovery | Total | Hit Advantage | Block Advantage | Invulnerability |
|---|---|---|---|---|---|---|---|---|---|---|---|---|---|---|---|
| - | - | - | - | - | - | - | - | - | - | - | - | - | 16 | - | - |
Universal followup option from either his SAB, Frankensteiner, Napalm Stretch or Lift DDT. Clark runs up to the opponent and drops the elbow on them. Guaranteed followup from nearly all scenarios (with the only exception possibly being landing Napalm Stretch in the corner. Hits OTG. | |||||||||||||||
Super Moves
| Damage | Counter Dmg | Guard | Guard Damage | Damage Scaling | Stun | CH Stun | Meter | Cancel Properties | Startup | Active | Recovery | Total | Hit Advantage | Block Advantage | Invulnerability |
|---|---|---|---|---|---|---|---|---|---|---|---|---|---|---|---|
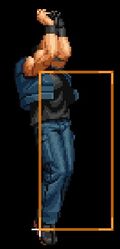
| - | - | Throw | - | - | - | - | - | - | 2 | - | - | - | - | - | - |
| |||||||||||||||
| Damage | Counter Dmg | Guard | Guard Damage | Damage Scaling | Stun | CH Stun | Meter | Cancel Properties | Startup | Active | Recovery | Total | Hit Advantage | Block Advantage | Invulnerability |
|---|---|---|---|---|---|---|---|---|---|---|---|---|---|---|---|
| - | - | Throw | - | - | - | - | - | - | 20 | - | - | - | - | - | - |
Running command grab super. Swaps sides. Has invincibility before the superfreeze. | |||||||||||||||
LDM
| Damage | Counter Dmg | Guard | Guard Damage | Damage Scaling | Stun | CH Stun | Meter | Cancel Properties | Startup | Active | Recovery | Total | Hit Advantage | Block Advantage | Invulnerability |
|---|---|---|---|---|---|---|---|---|---|---|---|---|---|---|---|
| - | - | Throw | - | - | - | - | - | - | 2 | - | - | - | - | - | - |
More damaging version of his Ultra Argentine Backbreaker DM. Doesn't swap sides. Same hitboxes, but Clark does a cool handstand so pick Clark as your leader if you want a cool super. | |||||||||||||||
Combos
UNDER CONSTRUCTION
Strategy
UNDER CONSTRUCTION
Match Up
UNDER CONSTRUCTION
| - Ash:
| - Duo Lon:
| - Shen:
| - Terry:
| - Joe:
| - Tizoc:
| - Ryo:
| - Robert:
| - Yuri:
| - Kim:
| - Chang:
| - Jhun:
| - Leona:
| - Ralf:
| - Clark:
| - Gato:
| - Billy:
| - Yamazaki:
| - King:
| - Mai:
| - Mary:
| - Benimaru:
| - Shingo:
| - Daimon:
| - Athena:
| - Hinako:
| - Malin:
| - K':
| - Maxima:
| - Whip:
| - Kyo:
| - Chizuru:
| - KUSANAGI:
| - Maki:
| - Adelheid:
| - Mukai:
