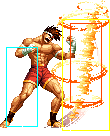
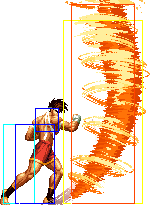
The King of Fighters '98/Joe

From SuperCombo Wiki
< The King of Fighters '98
Revision as of 00:36, 9 December 2020 by Shiburizu (talk | contribs) (fix motion tags)
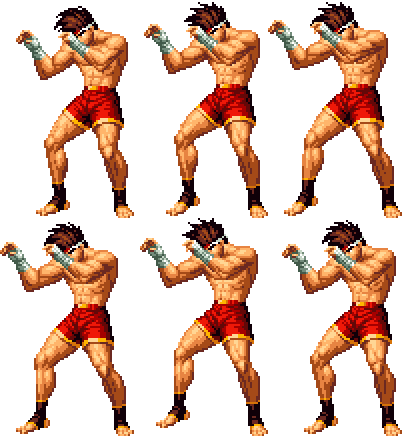
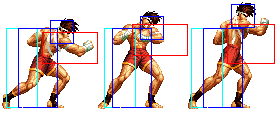
Joe98 stance.gif

Introduction

<GINGA_JOE> joes just boring ol joe he doesnt have a story

Colors

Snka.gif Snkb.gif Snkc.gif Snkd.gif
Joe98 colorA.png Joe98 colorB.png Joe98 colorC.png Joe98 colorD.png

Gameplay Overview

Joe is a high-mid tier character based on zoning/poking with some decent combo damage and mixup/pressure options. He requires a bit of execution for hit-confirming into super, but he is still a good solid character for a beginner to use.

In-depth analysis

Movelist

Frames Advantage Cancel Block Hitbox Notes
Standing Close
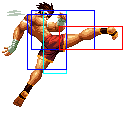
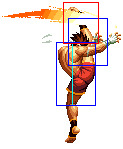
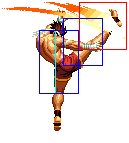
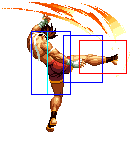
Snka.gif 3/3/9 -/- C HL
Joe98 clA.png
Hits crouchers, cancelable. Can be used as combo filler.

Chain: ender

Snkb.gif 7/3/7 -/- C HL
Joe98 clB.png
Maybe Joe's best close poke. Cancelable (can combo with dp.K).

Chain: -

Snkc.gif 2/2/20 -/- C HL
Joe98 clC.png
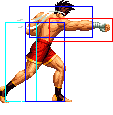
Fast and cancelable, one of the main hard hit combo starters.
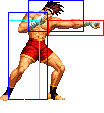
Snkd.gif 6/3/28 -/- - HL
Joe98 clD.png
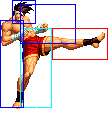
Joe's best long range poke. Good priority.
Standing Far
Snka.gif 3/2/8 -/- S HL
Joe98 stA.png
Not a bad standing A. Not the best range but hits most characters crouching and is cancelable. Can be anti-air vs short hop.

Chain: ender

Snkb.gif 7/3/7 -/- C HL
Joe98 stB.png
Nice front poke. A little slow, but good reach/hitbox and cancelable.

Chain: -

Snkc.gif 7/2/16 -/- - HL
Joe98 stC.png
Decent range/speed mid poke that hits all characters crouching other than Chin/Choi, but standing D is usually almost always better.
Snkd.gif 6/3/28 -/- - HL
Joe98 stD.png
Longer range, bigger hitbox, and slightly faster than standing C. Great long range poke.
Snkc.gif+Snkd.gif 20/2/25 -/- S HL
Joe98 stCD.png
Crouching
Snka.gif 3/3/6 -/- C HL
Joe98 crA.png
Standard low A, cancelable.

Chain: repeatable

Snkb.gif 3/3/7 -/- - L
Joe98 crB.png
Good range for a low B, main combo starter in-close. Great meaty as well.

Chain: repeatable

Snkc.gif 4/3/19 -/- C HL
Joe98 crC.png
Fast and cancelable, good for when you are too far for cl.C.
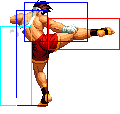
Snkd.gif 8/4/9+14 -/- C L
Joe98 crD.png
Nice range cancelable sweep. Good as a meaty.
Jump
Snka.gif 3/7/- -/- - H
Joe98 jA.png
Snkb.gif 6/12/- -/- - H
Joe98 jB.png
Good air-to-air since it does stay out for a moment.
Snkc.gif 4/9/- -/- - H
Joe98 jC.png
Snkd.gif 4/12/- -/- - H
Joe98 jD.png
Your main jump-in and also good air-to-air from range, jumping back. Has a nice big hitbox and can be used as an instant overhead effectively. Can cross-up if done very close to their head as well.
Snkc.gif+Snkd.gif 11/5/- KD/- - HL
Joe98 jCD.png
Good air-to-air.
Command Normals
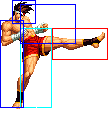
f + Snkb.gif 13/2/25 -/- S HL
Joe98 fB.png
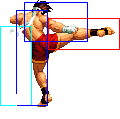
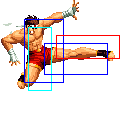
Always the same speed and cancelable. not only your combo filler from hard hits, but it's actually a really good long-range poke. It has the longest range of any of his normals, and his entire lower leg up to the knee is invincible.
df + Snkb.gif 13/4/24 KD/- - L
Joe98 dfB.png
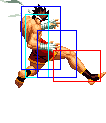
Low slide kick. Crappy recovery, but you can use it to go under all non-ground fireballs.
df + Snkb.gif
(cancel)
13/4/24 KD/- - HL
Special Moves
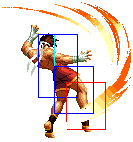
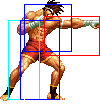
hcf + Snka.gif 13/-/36 -4/-6 HL
Joe02 hcfA.png
Hurricane Upper - hcf + P
  • Joe releases one or two hurricane projectiles (depending on the button used)
  • hcf + A sends out one projectile, while hcf + C sends out two
  • the projectiles are tall and cannot be jumped by most characters. It's difficult to punish hcf + A but hcf + C is easy to punish by rolling the second projectile
  • hcf + A fireball stays active for 19 frames. both hcf + C fireballs stay active for 11 frames.
hcf + Snkc.gif 19/-(22)-/36 KD/-6 HL
Joe02 hcfC1.png
Joe02 hcfC2.png
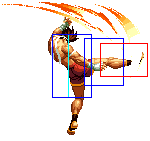
hcf + Snkb.gif 14/4/4+22 KD/-12 HL
Joe02 hcfB.png
Slash Kick - hcf + K
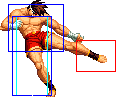
  • Joe performs a horizontal kick moving across the screen, which does good damage
  • hcf + B version goes about 1/3 screen length while hcf + D goes 3/4 length
  • has some recovery time if blocked, though if done from far away it's usually difficult to punish on block
  • Depending on the distance, the startup of the D version is longer. The longer the startup, the shorter the recovery.
hcf + Snkd.gif 14+0~5/7/4~9+24 KD/-22 HL
Joe02 hcfD.png
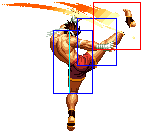
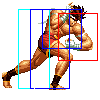
dp + Snkb.gif 5/3*18/17+13 KD/-30 HL
Joe02 dpB1.png
Joe02 dpB2.png
Tiger Kick - dp + K
  • Joe does a very fast rising kick attack that does two hits
  • Invincible: B: Complete startup, D: Complete startup and first active period. Upper body invincible: First active period fo B version.
dp + Snkd.gif 5/3*22/21+13 KD/-38 HL
Joe02 dpD1.png
Joe02 dpD2.png
qcb + Snkb.gif 9+3/3*3*2*2/5+14 -1/-3 HL
Joe02 qcbB1.png
Joe02 qcbB2.png
Ougon no Kakato - qcb + K
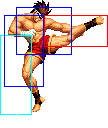
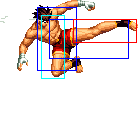
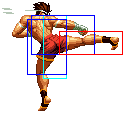
  • Joe executes a jumping spinning kick that does two hits and has very good recovery, usually being unpunishable
  • the move takes some time to come out but has a large hitbox that will almost always catch the opponent out of the air
  • it's possible to juggle the opponent if this move hits them airborne
Joe02 qcbB3.png
Joe02 qcbB4.png
qcb + Snkd.gif 11+5/3*2*2*2/5+16 -3/-5 HL
Joe02 qcbD1.png
Joe02 qcbD2.png
Joe02 qcbD3.png
Joe02 qcbD4.png
Snka.gif rapidly 9/2(7)2(9)2(10)1(11)2(6)1(16)2(7)2(8)2(10)1(11)2(5)1/28 variable > qcf + A, > qcf + C HL
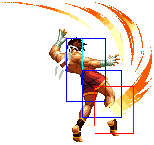
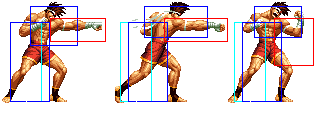
Joe02 MashP1-3.png
Bakuretsu Ken - P rapidly
  • Joe performs a series of punches while moving forward slightly during the move
  • he'll do about 10 punches, though after about 5 hits, Joe will be out of range and the next hits will not combo
  • each of those punches have a large hitbox, making it difficult to counter, though can be easily guard rolled and punished from behind
  • it's possible to juggle the opponent if this move hits them airborne
  • can be followed up by qcf + A or qcf + C after any punch, whether that punch connected or whiffed
Snkc.gif rapidly 11/2(7)2(9)1(10)1(11)2(6)1(18)2(7)2(9)1(10)1(11)2(6)1/30 variable > qcf + A, > qcf + C HL
Joe02 MashP4-6.png

entire sequence repeats once
> qcf + Snka.gif 20/3/28 -11/-13 H
Joe02 mashPqcfA.png
Bakuretsu Finish (A) - qcf + A
  • Joe performs an overhead elbow attack that deals good damage and is safe on block
  • overhead
> qcf + Snkc.gif 14/12/24 KD/-18 HL Bakuretsu Finish (C) - qcf + C
  • Joe slides forward and does a high knockdown kick.
  • the recovery on this move isn't good, it's riskier to do it as opposed to the qcf + A followup
DMs

qcf hcb + Snka.gif

2/2(5)2(5)2(9)2(7)2(3)2(14)-(19)-(16)4*8(12)3/17+18 KD/-40 HL
Joe02 qcfhcbP.png

etc.
Bakuretsu Hurricane Tiger Kakato - qcf hcb + P
  • Joe dashes forward with a series of punches and tornados, followed with a rising attack
  • this DM comes out very fast, so it can be comboed into easily and used to punish things like blocked cd counters
  • Joe will perform the entire move regardless of whether it hits, gets blocked or whiffs. This makes it extremely punishable if it doesn't hit
  • the final hit does a hard knockdown
  • Fireballs stay active for 18 frames.
  • Invincible: Complete startup.
qcf hcb + Snkc.gif 2/2(5)2(5)2(9)2(7)2(3)2(14)-(19)-(16)4*8(12)3/17+20 KD/-42 HL

qcf qcf + Snka.gif

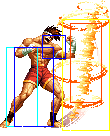
8/-(24)-/67 KD/+9 HL
Joe02 qcfx2P1.png
Joe02 qcfx2P2.png
Screw Upper - qcf qcf + P
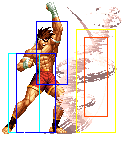
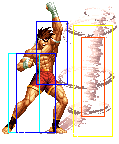
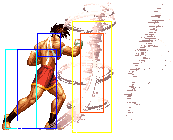
  • Joe creates a vertical wall of tornados that moves forward a slight bit, maybe 1/3 screen
  • can be rolled easily and punished
  • Invincible: A: Frame 1-7, C: Frame: 9-14.
  • First fireball is active for 24 frames. Second fireball is active for 48 frames and hits multiple times.
qcf qcf + Snkc.gif 15/-(24)-/71 KD/+5 HL
SDM

MAX: qcf hcb + Punch.gif

KD/?? HL
Joe02 qcfhcbP.png

etc.
Bakuretsu Hurricane Tiger Kakato - MAX: qcf hcb + P
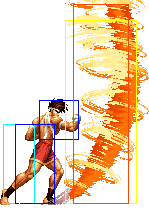
MAX: qcf qcf + Punch.gif 8/-(24)-/88 KD/-39 HL
Joe02 qcfx2AC1.png
Joe02 qcfx2AC2.png
Screw Upper - MAX: qcf qcf + P
  • Joe sends out a vertical wall of tornados similar to the DM version, except doing much more damage and traveling all the way across the screen
  • Invincibility: Frame 1-18.

Normal Throws

  • b or f + C - Unbreakable (mashable), front knockdown, face forward, rollable.


  • b or f + D - Breakable, reverse knockdown, back turned, un-rollable.


C throw preferred of course because it's unbreakable!

Special Moves

  • Hurricane Upper (hcf + P) - A version is best most of the time, since it covers a lot of space quickly and has great recovery. The C version can hit angles where someone would try to get past an A version and get tagged by the 2nd one. Of course a great thing to cancel into this when your hits get blocked.


  • Exploding Fist (P rapidly > qcf + P) - You can only cancel it by performing qcf + P after it starts. The qcf + A is an overhead, and the qcf + C can be blocked either way but knocks down and combos more easily. You can get a lot of hits from this on a back-turned opponent. Generally I would stay away from it because of guard cancel roll.


  • Slash Kick aka Slushy Kick (hcf + K) - B version preferred and safe from most things, D version is slower/more damage/goes further/whiffs on smaller crouchers. Still, don't cancel into it if your hits get blocked, that's silly. Can be used as a whiff punisher.


  • Golden Heel (qcb + K) - B version preferred, though the D version goes longer if you need it (and has longer recovery). You can also only juggle off the B version if it hits your opponent in the air (doesn't require a counter-hit). I listed the best damage combos above. If done close against a crouching opponent, it will cross up and give some advantage on hit (though nothing combos). The B version goes far enough to crossup after even 2 crouching As done at point blank range. This is a pretty good pressure/preventative anti-air move (like Terry's crack shoot but better on block), and it's a good move to cancel into, along with hcf + A.


  • Tiger Knee (dp+K) - D version preferred because it has full invincibility on startup. One of the better dp style anti-airs in terms of priority, but beware of hitting grounded opponents from long range (especially crouching), as the 2nd hit can whiff and not knock down.

Desperation Moves

  • Screw Upper (qcf qcf + P) - Projectile-like super that is safe on block (beware of guard cancel roll). MAX version does more damage, travels full-screen, and has control-able speed using A or C. It's also punishable.


  • Exploding Hurricane Tiger Heel (qcf hcb + P) - Rush super that has invincibility on startup. Ridiculously unsafe, good for combos. Also, if you roll/guard cancel roll past it and run toward Joe's back, the Tiger Knee part will hit you from behind! Cool!


Fastest Attacks

  • 0F: C throw; D throw
  • 1F: -
  • 2F: cl.C; (S)DM qcf hcb + P
  • 3F: cl.A; st.A; cr.A; cr.B
  • 4F: cr.C
  • 5F: dp + K
  • 6F: cl.D; st.D
  • 7F: cl.B; st.B; st.C
  • 8F: cr.D; DM qcf qcf + A; SDM qcf qcf + P
  • 9F: A rapidly
  • 10F: -

Combos

  • Best jump-ins:
    • j.D (Can crossup.)


  • cl.C / cr.C >
    • f + B >
      • (S)DM Hurricane Tiger (qcf hcb + P)
      • D Slash Kick (hcf + D) (Whiffs on some crouchers.)
      • B Slash Kick (hcf + B)
    • (S)DM Hurricane Tiger (qcf hcb + C)
    • (S)DM qcf qcf + C
    • D Slash Kick (hcf + D) (Whiffs on some crouchers.)
    • B Slash Kick (hcf + B)


  • cr.B x 2, cr.A / st.A >
    • (S)DM Exploding Hurricane Tiger Heel (qcf hcb + P)
    • dp + D
    • dp + B (If not too far.)


  • cr.B, cr.A >
    • (S)DM Exploding Hurricane Tiger Heel (qcf hcb + P)
    • DM qcf qcf + A
    • dp + D
    • dp + B (If not too far.)


  • st.B >
    • (S)DM Exploding Hurricane Tiger Heel (qcf hcb + P)
    • dp + D
    • dp + B (If not too far.)


  • Anti-air: B Golden Heel (qcb + B),
    • hcf + D
    • D Tiger Knee (dp + D) (Corner)
    • st.D (Corner)


  • cr.A / cl.A / cr.C / cl.C > Exploding Fist (P rapidly > qcf + C)

Not recommended, doesn't work properly on some crouchers.


  • cr.A / cr.B (meaty), cl.C > f + B >
    • (S)DM Hurricane Tiger (qcf hcb + P)
    • D Slash Kick (hcf + D) (Whiffs on some crouchers.)
    • B Slash Kick (hcf + B)


  • Simple buffers:
    • f + B > (S)DM qcf hcb + P
      • qcf + B > hcb + P
    • st.A / cl.A / cl.C > (S)DM qcf hcb + P
      • qcf + A/C > hcb + P
    • cl.A > DM qcf qcf + A
      • qcf + A > qcf + A
    • cl.C > (S)DM qcf qcf + C
      • qcf + C > qcf + C


Strategy Corner

  • MAX: cl.C > F.png + B > Hcf.png + D

deals considerable less damage (~ cl.C + cl.A) than

  • cl.C > F.png + B > Qcf.png Hcb.png + P

Keep this in mind, when you need to decide whether to trigger MAX or keep meter for a DM.

Attack Info and Frame Data

Command Hits Damage Scaling Startup Active Recovery Damage Counter Damage Dizzy Guard Damage Meter Increase (Whiff / Hit)
Standing A 1 - 3 2 8 5 7 3 7 0/3
Standing B 1 - 7 3 7 7 8 4 8 0/3
Standing C 1 - 7 2 16 11 21 17 24 0/6
Standing D 1 - 6 3 28 13 16 14 29 0/6
Close A 1 - 3 3 9 4 6 3 7 0/3
Close B 1 - 7 3 7 7 8 4 8 0/3
Close C 1 - 2 2 20 10 15 14 18 0/6
Close D 1 - 6 3 28 11 16 13 20 0/6
Crouching A 1 - 3 3 6 4 6 3 6 0/3
Crouching B 1 - 3 3 7 6 7 3 7 0/3
Crouching C 1 - 4 3 19 10 15 13 16 0/6
Crouching D 1 - 8 4 9 + 14 15 17 13 18 0/6
Neutral Jumping A 1 - 3 7 - 7 9 5 8 0/3
Forward Jumping A 1 - 3 7 - 6 8 4 8 0/3
Backwards Jumping A 1 - 3 7 - 6 7 3 7 0/3
Neutral Jumping B 1 - 6 12 - 8 9 6 9 0/3
Forward Jumping B 1 - 6 12 - 9 10 5 9 0/3
Backwards Jumping B 1 - 6 12 - 6 7 4 8 0/3
Neutral Jumping C 1 - 4 9 - 14 18 18 17 0/6
Forward Jumping C 1 - 4 9 - 11 15 16 17 0/6
Backwards Jumping C 1 - 4 9 - 11 15 15 16 0/6
Neutral Jumping D 1 - 4 12 - 15 18 15 18 0/6
Forward Jumping D 1 - 4 12 - 13 17 13 18 0/6
Backwards Jumping D 1 - 4 12 - 15 17 13 18 0/6
CD 1 - 20 2 25 16 20 18 24 0/8
Jumping CD 1 - 11 5 - 16 20 16 21 0/8
f + B 1 - 13 2 25 10 16 22 24 0/7
df + B 1 - 13 4 24 12 16 18 24 0/5
df + B (in a combo) 1 - 13 4 24 9 9 8 - 0/5


Links

< Andy Bogard | Joe Higashi (KoF '94-Era) | Ryo Sakazaki >