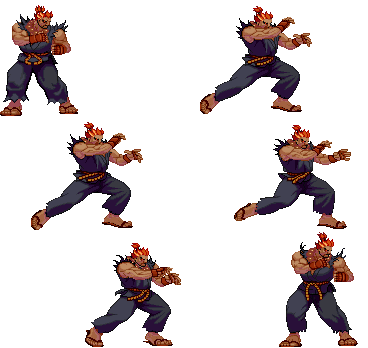
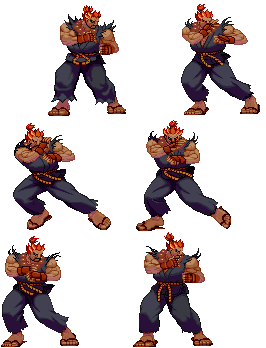
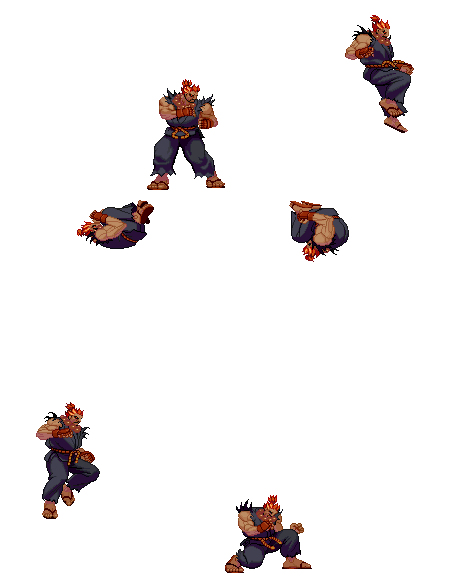
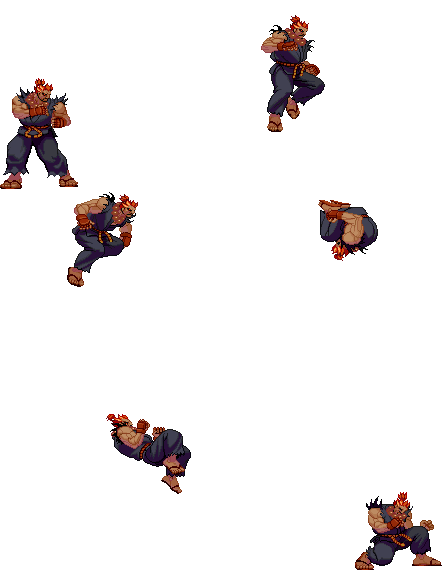
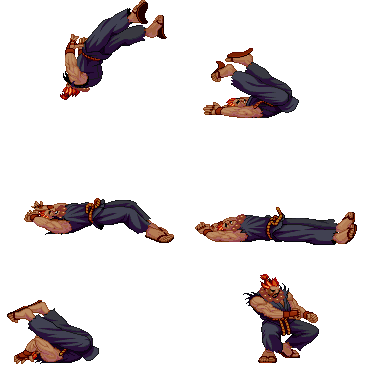
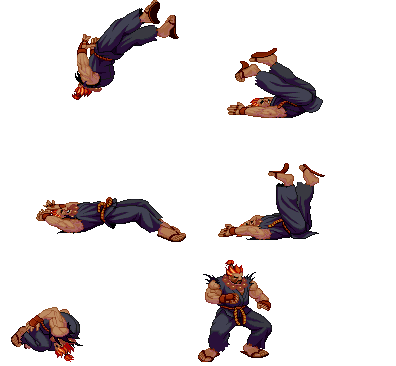
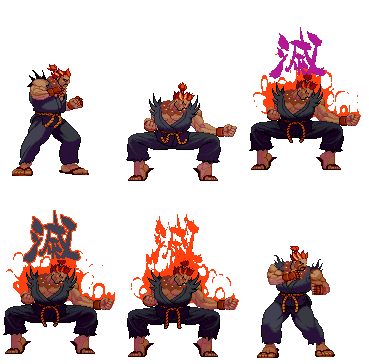
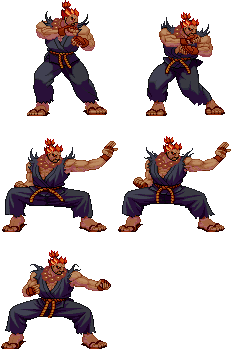
mNo edit summary |
Scatteraxis (talk | contribs) |
||
| (306 intermediate revisions by 24 users not shown) | |||
| Line 1: | Line 1: | ||
[[Image:Akuma3sport.gif|frame|right|Akuma's Character Select Portrait]] | |||
[[Image:Akuma3s-stance.gif|frame|right|Akuma's Neutral Stance]] | [[Image:Akuma3s-stance.gif|frame|right|Akuma's Neutral Stance]] | ||
==Updated version available!== | |||
You're reading the old version of this page. [https://srk.shib.live/w/Street_Fighter_3:_3rd_Strike/Akuma Click here] to read the (in-progress) updated version! | |||
==Introduction== | ==Introduction== | ||
When playing Akuma the basic goal is to use his | When playing Akuma, the basic goal is either to use his zoning ability to control your opponent’s options, minimizing the risk of getting hit yourself, or to simply go on total offense and decimate the opponent as quickly as possible, as they can take him out just about as quickly. | ||
It is very important to note | It is very important to note that Akuma has the absolute worst defense rating of all the characters in 3S, and is tied with Remy for having the smallest stun bar. One should also note that Akuma's supers are all the same length, and that he has no EX moves. All this was done to counter balance his incredible offense and mixups. | ||
{{ ProConTable | |||
| pros= | |||
* Versatile tools, allowing Akuma to play either a very offensive rushdown game or a low risk, zoning game. | |||
* High damage output and corner carry, even without access to EX moves | |||
* Solid and versatile mobility with great dashes, good walk speed, air tatsus, fireballs and demon flip followups. | |||
* Solid mixup game with his different air options, good tick throw options, unique reset routes, and decent overhead | |||
| cons= | |||
* No EX moves and all super bars are the same size. | |||
* Worst overall defense in the game means he dies quickly. | |||
}} | |||
==Specific Character Information== | |||
*Stamina: 985 | |||
*Stun Bar Length (in pixels): 56 (Short) | |||
*Stun Bar Recovery (frames it takes to recover 1 pixel): 23 | |||
*Taunt: Increases damage for the next hit/combo by 43.8% and increases stun damage for the next hit/combo by 28.1%. One taunt is the maximum. | |||
*Best Kara-Throw: Zugai Hasatsu ([[File:F.png]]+[[File:Mp.png]]) | |||
*Moves where Akuma is unthrowable: Zugai Hasatsu ([[File:F.png]]+[[File:Mp.png]]) | |||
==Colors== | === Character Colors === | ||
[[Image: | [[Image:(acolor).gif|center]] | ||
= Moves List = | |||
==Throws== | |||
{| border="1em | {| border="1em" cellspacing="0" width="45%" style="border: 1px solid #999; background: none;"|- | ||
| Seoi Nage || [[File:Lp.png]]+[[File:Lk.png]] | |||
|- | |- | ||
| | | Tomoe Nage || [[File:B.png]]+[[File:Lp.png]]+[[File:Lk.png]] | ||
|} | |||
==Command Moves== | |||
{| border="1em" cellspacing="0" width="45%" style="border: 1px solid #999; background: none;"|- | |||
| Zugai Hassatsu || [[File:F.png]]+[[File:Mp.png]] | |||
|- | |- | ||
| | | Tenma Kuujin Kyaku || Air forward[[File:D.png]]+[[File:Mk.png]] | ||
|} | |||
==Special Moves== | |||
{| border="1em" cellspacing="0" width="45%" style="border: 1px solid #999; background: none;"|- | |||
| Gou Hadou Ken || [[File:Qcf.png]]+[[File:P.png]] SC | |||
|- | |- | ||
| | | Zankuu Hadou Ken || Air [[File:Qcf.png]]+[[File:P.png]] SC | ||
|- | |- | ||
| | | Shakunetsu Hadou Ken || [[File:Hcb.png]]+[[File:P.png]] SC | ||
|- | |- | ||
| | | Gou Shouryuu Ken || [[File:Dp.png]]+[[File:P.png]] SC | ||
|- | |- | ||
| | | `SC on 1st/2nd hit | ||
|- | |- | ||
| | | Tatsumaki Zankuu Kyaku || (Air)[[File:Qcb.png]]+[[File:K.png]] SC | ||
|- | |- | ||
| | | `SC on air version | ||
|- | |- | ||
| | | Ashura Senkuu-right || [[File:Dp.png]]+[[File:P.png]] [[File:P.png]] / [[File:K.png]] [[File:K.png]] ] | ||
|- | |- | ||
| | | Ashura Senkuu-left || [[File:Rdp.png]]+[[File:P.png]] [[File:P.png]] / [[File:K.png]] [[File:K.png]] ] | ||
|- | |- | ||
| | | Hyakki Shuu || [[File:Dp.png]]+[[File:K.png]] | ||
|- | |- | ||
| | | └Hyakki Gou Zan || N | ||
|- | |- | ||
| | | └Hyakki Gou Shou || [[File:P.png]] | ||
|- | |- | ||
| | | └Hyakki Gou Sen || [[File:K.png]] | ||
|- | |- | ||
| | | └Hyakki Gou Sai || Close [[File:Lp.png]]+[[File:Lk.png]] | ||
|} | |||
==Super Arts== | |||
{| border="1em" cellspacing="0" width="45%" style="border: 1px solid #999; background: none;"|- | |||
| I || Messatsu Gou Hadou || [[File:Qcf.png]][[File:Qcf.png]]+[[File:P.png]] || 112 Gauge Dots || 2 Stocks || no EX moves | |||
|- | |- | ||
| | | I || Tenma Gou Zankuu || Air [[File:Qcf.png]][[File:Qcf.png]]+[[File:P.png]] || 112 Gauge Dots || 2 Stocks || no EX moves | ||
|- | |- | ||
| | | II || Messatsu Gou Shouryuu || [[File:Qcf.png]][[File:Qcf.png]]+[[File:P.png]] || 112 Gauge Dots || 2 Stocks || no EX moves | ||
|- | |- | ||
| | | III || Messatsu Gou Rasen || [[File:Qcf.png]][[File:Qcf.png]]+[[File:K.png]] || 112 Gauge Dots || 2 Stocks || no EX moves | ||
|- | |- | ||
| | | III || Messatsu Gou Senpuu || Air [[File:Qcf.png]][[File:Qcf.png]]+[[File:K.png]] || 112 Gauge Dots || 2 Stocks || no EX moves | ||
|- | |- | ||
| | | any || Shun Goku Satsu || (MAX)[[File:Lp.png]][[File:Lp.png]][[File:F.png]][[File:Lk.png]][[File:Hp.png]] | ||
|- | |- | ||
| | | any || Kongou Kokuretsu Zan || (MAX)[[File:D.png]][[File:D.png]][[File:D.png]]+[[File:P.png]] [[File:P.png]] | ||
|} | |||
==Target Combo== | |||
{| border="1em" cellspacing="0" width="45%" style="border: 1px solid #999; background: none;"|- | |||
| [[File:Mp.png]]c[[File:Hp.png]] | |||
|} | |||
= Move Analysis = | |||
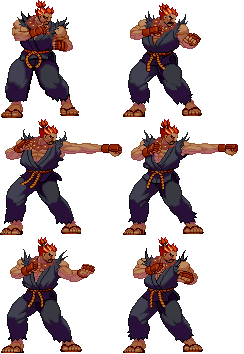
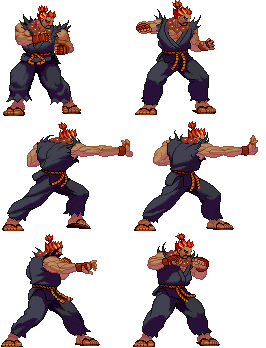
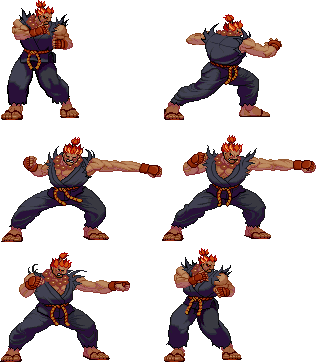
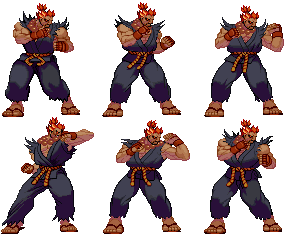
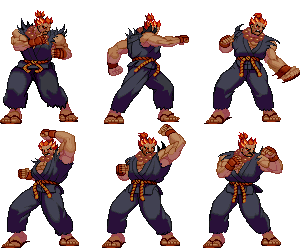
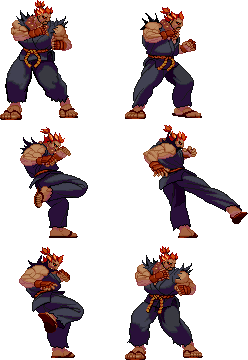
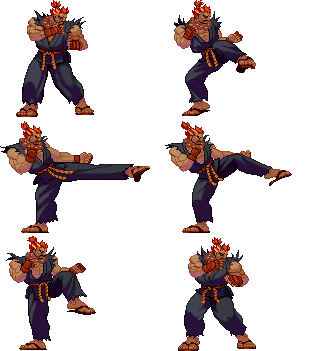
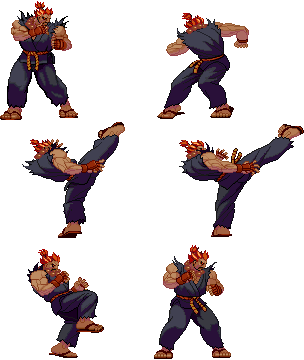
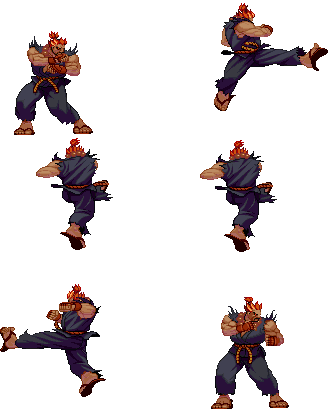
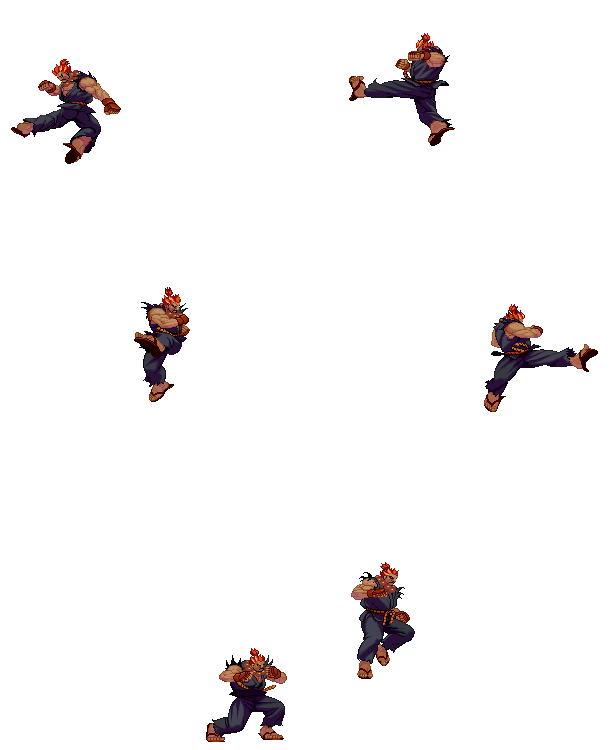
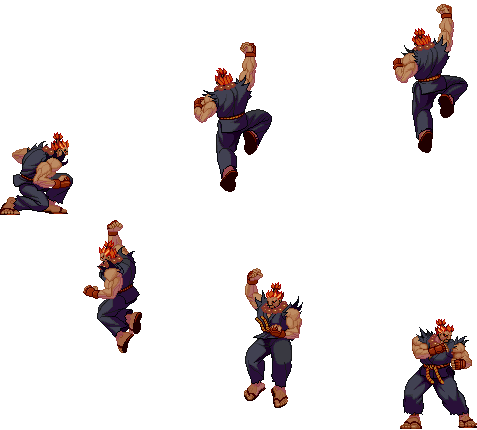
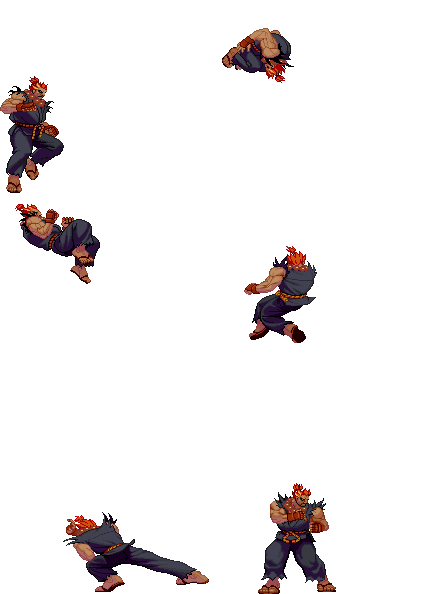
*All those sprites are taken from the site https://www.justnopoint.com/zweifuss/ | |||
*All Framedata in "Move Analysis" section are taken from [http://gr.qee.jp/01_3rd/index.html Game Restaurant] , this means the Framedata isn't from the Dreamcast version like Karathrow site, it's from Arcade version. | |||
General | |||
*'''Move''': Move name | |||
*'''Motion''': What you must do to execute the move | |||
*'''Damage''': Damage it does (in pixels) | |||
*'''Stun Damage''': Stun Damage it does (in pixels) | |||
*'''Chains into itself''': If you can combo into the same movement | |||
*'''Special Cancel''': If you can cancel the move into a Special Move | |||
*'''Super Cancel''': If you can cancel the move into a Super Art | |||
*'''Throw Range''': Range of the throw (in pixels) | |||
*'''Num.''': Super Art number | |||
*'''Super Art''': Super Art name | |||
*'''Super Art Stock''': Number of Gauge Bars the Super Art have, also the length of each bar (in pixels) | |||
Frame Data | |||
*'''Startup''': Number of frames it takes to start the move | |||
*'''Hit''': Number of frames that can hit the opponent | |||
*'''Recovery''': Number of frames it takes to recover from the move | |||
*'''Blocked Advantage''': Number of frames you are in advantage/disadvantage after opponent have been blocked the hit | |||
*'''Hit Advantage''': Number of frames you are in advantage/disadvantage after opponent have been take the hit | |||
*'''Crouching Hit Advantage''': Number of frames you are in advantage/disadvantage after opponent have been take the hit while he's crouching | |||
* + # : You have # frames of advantage | |||
* - # : You have # frames of disadvantage | |||
* # ~ # : Advantage/disadvantage can vary from # to # | |||
*Down: Enemy gets knocked down | |||
*'''Guard''': How opponent must guard the move, High (H), Low (L) or both (HL) | |||
*'''Parry''': How opponent must parry the move, High (H), Low (L) or both (HL) | |||
Gauge Increase | |||
*'''Miss''': Gauge you gain if you miss the move (in pixels) | |||
*'''Blocked''': Gauge you gain if the move gets blocked (in pixels) | |||
*'''Hit''': Gauge you gain if you hit the opponent with the move (in pixels) | |||
*'''Parry''': Gauge opponent gains when he parry the move (in pixels) | |||
=== Basic Moves === | |||
[[Image:(akumadf).gif|none]] | |||
{| border="1em" cellspacing="0" width="25%" style="border: 1px solid #999; background: none;" | |||
|- | |- | ||
| | ! align="center" | Move | ||
! align="center" | Total frames | |||
|- | |- | ||
| | | align="center" | Dash Forward | ||
| align="center" | 13 | |||
|} | |||
''Comments here'' | |||
[[Image:(akumadb).gif|none]] | |||
{| border="1em" cellspacing="0" width="25%" style="border: 1px solid #999; background: none;" | |||
|- | |- | ||
| | ! align="center" | Move | ||
! align="center" | Total frames | |||
|- | |- | ||
| | | align="center" | Dash Backwards | ||
| align="center" | 13 | |||
|} | |||
''Comments here'' | |||
[[Image:(akumabjump).gif|none]] | |||
[[Image:(akumajump).gif|none]] | |||
[[Image:(akumafjump).gif|none]] | |||
{| border="1em" cellspacing="0" width="30%" style="border: 1px solid #999; background: none;" | |||
|- | |- | ||
| | | align="center" | '''Move''' || align="center" | '''Motion''' || align="center" | '''Startup Frames''' | ||
|- | |- | ||
| | | align="center" | Jump || align="center" | BU or U or FU || align="center" | 3 | ||
| | |} | ||
| | ''Comments here'' | ||
{| border="1em" cellspacing="0" width="30%" style="border: 1px solid #999; background: none;" | |||
|- | |- | ||
| | | align="center" | '''Move''' || align="center" | '''Motion''' || align="center" | '''Startup Frames''' | ||
|- | |- | ||
| | | align="center" | Super Jump || align="center" | DBU or DU or DFU || align="center" | 5 | ||
|} | |} | ||
''Comments here'' | |||
[[Image:(akumaw).gif|none]] | |||
{| border="1em | {| border="1em" cellspacing="0" width="30%" style="border: 1px solid #999; background: none;" | ||
|- | |- | ||
| '''Move''' || '''Motion''' | | align="center" | '''Move''' || align="center" | '''Motion''' || align="center" | '''Frames''' | ||
|- | |- | ||
| | | align="center" | Normal Wakeup || align="center" | - || align="center" | 77 | ||
|} | |||
''Comments here'' | |||
[[Image:(akumatw).gif|none]] | |||
{| border="1em" cellspacing="0" width="30%" style="border: 1px solid #999; background: none;" | |||
|- | |- | ||
| | | align="center" | '''Move''' || align="center" | '''Motion''' || align="center" | '''Frames''' | ||
|- | |- | ||
| | | align="center" | Quick Stand || align="center" | Tap D when hitting the ground || align="center" | 50 | ||
|} | |||
''Comments here'' | |||
[[Image:(akumat).gif|none]] | |||
{| border="1em" cellspacing="0" width="40%" style="border: 1px solid #999; background: none;" | |||
|- | |- | ||
| | | align="center" | '''Move''' || align="center" | '''Motion''' || align="center" | '''Frames''' || align="center" | '''Gauge Increase''' | ||
|- | |- | ||
| | | align="center" | Taunt || align="center" | HP+HK || align="center" | 66 || align="center" | 4(6) | ||
|} | |||
Increases the damage and stun of his next hit or combo. Done often after a hard tatsu combo, quick enough to sometimes be done in neutral (maybe). | |||
[[Image:(akumahparry).gif|none]] | |||
[[Image:(akumalparry).gif|none]] | |||
{| border="1em" cellspacing="0" width="35%" style="border: 1px solid #999; background: none;" | |||
|- | |- | ||
| | | align="center" | '''Move''' || align="center" | '''Motion''' | ||
|- | |- | ||
| | | align="center" | Parry (High) || align="center" | Tap F when about taking a hit | ||
|- | |- | ||
| | | align="center" | Parry (Low) || align="center" | Tap D when about taking a hit | ||
|- | |- | ||
| | | align="center" | Parry (Air) || align="center" | Tap F in air when about taking a hit | ||
|} | |||
'''Frame Data''' | |||
{| border="1em" cellspacing="0" width="95%" style="border: 1px solid #999; background: none;" | |||
|- | |- | ||
| | | align="center" | '''Move''' || align="center" | '''Frames you're frozen''' || align="center" | '''Frames opponent is frozen''' || align="center" | '''Frame Advantage when parry is successful''' || align="center" | '''Frames before you can try another parry''' | ||
|- | |- | ||
| | | align="center" | Parry (High) || align="center" | 16 || align="center" | 16 || align="center" | +4(LP/LK) +3(MP/MK) +2( HP/HK) 0(Special/Super) -16(Fireball) || align="center" | 24(19 when attack comes from the air)*,** | ||
|- | |- | ||
| | | align="center" | Parry (Low) || align="center" | 16 || align="center" | 16 || align="center" | +4(LP/LK) +3(MP/MK) +2( HP/HK) 0(Special/Super) -16(Fireball) || align="center" | 24(19 when attack comes from the air)*,** | ||
|- | |- | ||
| | | align="center" | Parry (Air) || align="center" | 16 || align="center" | 16 || align="center" | +4(LP/LK) +3(MP/MK) +2( HP/HK) 0(Special/Super) -16(Fireball) || align="center" | 21(19 when attack comes from the air)*,** | ||
|} | |||
{| border="1em" cellspacing="0" width="70%" style="border: 1px solid #999; background: none;" | |||
|- | |- | ||
| | |* (If a parry attempt is successful, the 19/21/24 frame restriction is taken away and you can attempt another parry immediately) | ||
|- | |- | ||
| | |** (If another attack connects within 2 frames of your parry, it will automatically be parried) | ||
|} | |||
'''Gauge Increase''' | |||
{| border="1em" cellspacing="0" width="30%" style="border: 1px solid #999; background: none;" | |||
|- | |- | ||
| | | align="center" | '''Move''' || align="center" | '''Gauge Increase''' | ||
|- | |- | ||
| | | align="center" | Parry (High) || align="center" | 4*** | ||
|- | |- | ||
| | | align="center" | Parry (Low) || align="center" | 4*** | ||
|- | |- | ||
| | | align="center" | Parry (Air) || align="center" | 4*** | ||
|} | |||
{| border="1em" cellspacing="0" width="57%" style="border: 1px solid #999; background: none;" | |||
|- | |- | ||
| | |*** (You gain 4 of gauge for whatever attack parried, and for whatever hit you parry during multihit attack) | ||
|} | |||
You can buffer any motion during High or Low parry, but NOT during Air parry, also parry resets the juggle count (and thus resets all scaling). | |||
*'''Parry information is taken from Shoryuken Forums, more exactly, from user JinraiPVC. Thanks for this information dude''' | |||
=== Normal Moves === | |||
Please note that the images show in this section are for the 1st frame it hits, so this means the opponent is taking the hit in the image shown on the move. I use the 1st frame of every move (except 2nd throw image sprites) because you will see the maximum range of every attack (mostly of the attacks). Note also that those images are ACCURATE, they are exactly the first frame it hits, so enemy takes damage but they still dont make the "pain" frame. | |||
==== Standing Normals ==== | |||
[[Image:(akumalp).gif|none]] | |||
{| border="1em" cellspacing="0" width="60%" style="border: 1px solid #999; background: none;" | |||
|- | |- | ||
| | | align="center" | '''Move''' || align="center" | '''Motion''' || align="center" | '''Damage''' || align="center" | '''Stun Damage''' || align="center" | '''Chains into itself''' || align="center" | '''Special Cancel''' || align="center" | '''Super Cancel''' || align="center" | '''Juggle Value''' | ||
|- | |- | ||
| | | align="center" | Far Jab || align="center" | LP || align="center" | 20(3 life points) || align="center" | 3 || align="center" | Yes || align="center" | Yes || align="center" | Yes | ||
|} | |} | ||
'''Frame Data''' | |||
{| border="1em" cellspacing="0" width="60%" style="border: 1px solid #999; background: none;" | |||
{| border="1em | |||
|- | |- | ||
| ''' | | align="center" | '''Startup''' || align="center" | '''Hit''' || align="center" | '''Recovery''' || align="center" | '''Blocked Advantage''' || align="center" | '''Hit Advantage''' || align="center" | '''Crouching Hit Advantage''' || align="center" | '''Guard''' || align="center" | '''Parry''' | ||
|- | |- | ||
| | | align="center" | 4 || align="center" | 3 || align="center" | 4 || align="center" | +4 || align="center" | +4 || align="center" | +4 || align="center" | HL || align="center" | HL | ||
|} | |||
'''Gauge Increase''' | |||
{| border="1em" cellspacing="0" width="30%" style="border: 1px solid #999; background: none;" | |||
|- | |- | ||
| | | align="center" | '''Miss''' || align="center" | '''Blocked''' || align="center" | '''Hit''' || align="center" | '''Parry (Gauge for opponent)''' | ||
|- | |- | ||
| align="center" | 0 || align="center" | 1 || align="center" | 2 || align="center" | 4 | |||
|} | |} | ||
''Comments here'' | |||
{| border="1em | [[Image:(akumamp).gif|none]] | ||
{| border="1em" cellspacing="0" width="60%" style="border: 1px solid #999; background: none;" | |||
|- | |- | ||
| '''Move | | align="center" | '''Move''' || align="center" | '''Motion''' || align="center" | '''Damage''' || align="center" | '''Stun Damage''' || align="center" | '''Chains into itself''' || align="center" | '''Special Cancel''' || align="center" | '''Super Cancel''' || align="center" | '''Juggle Value''' | ||
|- | |- | ||
| | | align="center" | Far Strong || align="center" | MP || align="center" | 105(18 life points) || align="center" | 11 || align="center" | No || align="center" | Yes || align="center" | Yes | ||
|} | |||
'''Frame Data''' | |||
{| border="1em" cellspacing="0" width="60%" style="border: 1px solid #999; background: none;" | |||
|- | |- | ||
| Crouching | | align="center" | '''Startup''' || align="center" | '''Hit''' || align="center" | '''Recovery''' || align="center" | '''Blocked Advantage''' || align="center" | '''Hit Advantage''' || align="center" | '''Crouching Hit Advantage''' || align="center" | '''Guard''' || align="center" | '''Parry''' | ||
|- | |- | ||
| | | align="center" | 5 || align="center" | 4 || align="center" | 9 || align="center" | +4 || align="center" | +5 || align="center" | +5 || align="center" | HL || align="center" | H | ||
|} | |||
'''Gauge Increase''' | |||
{| border="1em" cellspacing="0" width="30%" style="border: 1px solid #999; background: none;" | |||
|- | |- | ||
| | | align="center" | '''Miss''' || align="center" | '''Blocked''' || align="center" | '''Hit''' || align="center" | '''Parry (Gauge for opponent)''' | ||
|- | |- | ||
| | | align="center" | 2 || align="center" | 4 || align="center" | 8 || align="center" | 4 | ||
|} | |||
''Comments here'' | |||
[[Image:(akumahp).gif|none]] | |||
{| border="1em" cellspacing="0" width="60%" style="border: 1px solid #999; background: none;" | |||
|- | |- | ||
| | | align="center" | '''Move''' || align="center" | '''Motion''' || align="center" | '''Damage''' || align="center" | '''Stun Damage''' || align="center" | '''Chains into itself''' || align="center" | '''Special Cancel''' || align="center" | '''Super Cancel''' || align="center" | '''Juggle Value''' | ||
|- | |- | ||
| | | align="center" | Far Fierce || align="center" | HP || align="center" | 140(24 life points) || align="center" | 15 || align="center" | No || align="center" | No || align="center" | No | ||
| | |||
| | |||
|} | |} | ||
'''Frame Data''' | |||
{| border="1em" cellspacing="0" width="60%" style="border: 1px solid #999; background: none;" | |||
{| border="1em | |||
|- | |- | ||
| ''' | | align="center" | '''Startup''' || align="center" | '''Hit''' || align="center" | '''Recovery''' || align="center" | '''Blocked Advantage''' || align="center" | '''Hit Advantage''' || align="center" | '''Crouching Hit Advantage''' || align="center" | '''Guard''' || align="center" | '''Parry''' | ||
|- | |- | ||
| | | align="center" | 8 || align="center" | 5 || align="center" | 22 || align="center" | -6 || align="center" | -4 || align="center" | -2 || align="center" | HL || align="center" | H | ||
|} | |||
'''Gauge Increase''' | |||
{| border="1em" cellspacing="0" width="30%" style="border: 1px solid #999; background: none;" | |||
|- | |- | ||
| | | align="center" | '''Miss''' || align="center" | '''Blocked''' || align="center" | '''Hit''' || align="center" | '''Parry (Gauge for opponent)''' | ||
|- | |- | ||
| | | align="center" | 3 || align="center" | 6 || align="center" | 14 || align="center" | 4 | ||
|} | |||
''Comments here'' | |||
[[Image:(akumacloselp).gif|none]] | |||
{| border="1em" cellspacing="0" width="60%" style="border: 1px solid #999; background: none;" | |||
|- | |- | ||
| | | align="center" | '''Move''' || align="center" | '''Motion''' || align="center" | '''Damage''' || align="center" | '''Stun Damage''' || align="center" | '''Chains into itself''' || align="center" | '''Special Cancel''' || align="center" | '''Super Cancel''' || align="center" | '''Juggle Value''' | ||
|- | |- | ||
| | | align="center" | Close Jab || align="center" | (Close to opponent)LP || align="center" | 30(5 life points) || align="center" | 3 || align="center" | No || align="center" | Yes || align="center" | Yes | ||
|} | |||
'''Frame Data''' | |||
{| border="1em" cellspacing="0" width="60%" style="border: 1px solid #999; background: none;" | |||
|- | |- | ||
| | | align="center" | '''Startup''' || align="center" | '''Hit''' || align="center" | '''Recovery''' || align="center" | '''Blocked Advantage''' || align="center" | '''Hit Advantage''' || align="center" | '''Crouching Hit Advantage''' || align="center" | '''Guard''' || align="center" | '''Parry''' | ||
|- | |- | ||
| | | align="center" | 3 || align="center" | 3 || align="center" | 5 || align="center" | +3 || align="center" | +3 || align="center" | +3 || align="center" | HL || align="center" | HL | ||
|} | |||
'''Gauge Increase''' | |||
{| border="1em" cellspacing="0" width="30%" style="border: 1px solid #999; background: none;" | |||
|- | |- | ||
| | | align="center" | '''Miss''' || align="center" | '''Blocked''' || align="center" | '''Hit''' || align="center" | '''Parry (Gauge for opponent)''' | ||
|- | |- | ||
| | | align="center" | 0 || align="center" | 1 || align="center" | 2 || align="center" | 4 | ||
|} | |||
''Comments here'' | |||
[[Image:(akumaclosemp).gif|none]] | |||
{| border="1em" cellspacing="0" width="65%" style="border: 1px solid #999; background: none;" | |||
|- | |- | ||
| | | align="center" | '''Move''' || align="center" | '''Motion''' || align="center" | '''Damage''' || align="center" | '''Stun Damage''' || align="center" | '''Chains into itself''' || align="center" | '''Special Cancel''' || align="center" | '''Super Cancel''' || align="center" | '''Juggle Value''' | ||
|- | |- | ||
| | | align="center" | Close Strong || align="center" | (Close to opponent)MP || align="center" | 115(20 life points) || align="center" | 7 || align="center" | No || align="center" | Yes || align="center" | Yes | ||
|} | |||
'''Frame Data''' | |||
{| border="1em" cellspacing="0" width="60%" style="border: 1px solid #999; background: none;" | |||
|- | |- | ||
| | | align="center" | '''Startup''' || align="center" | '''Hit''' || align="center" | '''Recovery''' || align="center" | '''Blocked Advantage''' || align="center" | '''Hit Advantage''' || align="center" | '''Crouching Hit Advantage''' || align="center" | '''Guard''' || align="center" | '''Parry''' | ||
|- | |- | ||
| | | align="center" | 5 || align="center" | 4 || align="center" | 10 || align="center" | +1 || align="center" | +2 || align="center" | +3 || align="center" | HL || align="center" | H | ||
|} | |||
'''Gauge Increase''' | |||
{| border="1em" cellspacing="0" width="30%" style="border: 1px solid #999; background: none;" | |||
|- | |- | ||
| | | align="center" | '''Miss''' || align="center" | '''Blocked''' || align="center" | '''Hit''' || align="center" | '''Parry (Gauge for opponent)''' | ||
|- | |- | ||
| | | align="center" | 2 || align="center" | 4 || align="center" | 8 || align="center" | 4 | ||
|} | |} | ||
''Comments here'' | |||
[[Image:(akumaclosehp).gif|none]] | |||
{| border="1em" cellspacing="0" width="65%" style="border: 1px solid #999; background: none;" | |||
{| border="1em | |||
|- | |- | ||
| ''' | | align="center" | '''Move''' || align="center" | '''Motion''' || align="center" | '''Damage''' || align="center" | '''Stun Damage''' || align="center" | '''Chains into itself''' || align="center" | '''Special Cancel''' || align="center" | '''Super Cancel''' || align="center" | '''Juggle Value''' | ||
|- | |- | ||
| | | align="center" | Close Fierce || align="center" | (Close to opponent) HP || align="center" | 135(24 life points) || align="center" | 15 || align="center" | No || align="center" | Yes || align="center" | Yes | ||
|} | |||
'''Frame Data''' | |||
{| border="1em" cellspacing="0" width="60%" style="border: 1px solid #999; background: none;" | |||
|- | |- | ||
| | | align="center" | '''Startup''' || align="center" | '''Hit''' || align="center" | '''Recovery''' || align="center" | '''Blocked Advantage''' || align="center" | '''Hit Advantage''' || align="center" | '''Crouching Hit Advantage''' || align="center" | '''Guard''' || align="center" | '''Parry''' | ||
|- | |- | ||
| | | align="center" | 4 || align="center" | 4 || align="center" | 17 || align="center" | -4 || align="center" | -2 || align="center" | 0 || align="center" | HL || align="center" | H | ||
|- | |} | ||
| | '''Gauge Increase''' | ||
| | {| border="1em" cellspacing="0" width="30%" style="border: 1px solid #999; background: none;" | ||
| | |||
|- | |- | ||
| | | align="center" | '''Miss''' || align="center" | '''Blocked''' || align="center" | '''Hit''' || align="center" | '''Parry (Gauge for opponent)''' | ||
|- | |- | ||
| | | align="center" | 3 || align="center" | 6 || align="center" | 14 || align="center" | 4 | ||
|} | |} | ||
''Comments here'' | |||
[[Image:( | [[Image:(akumalk).gif|none]] | ||
{| border="1em | {| border="1em" cellspacing="0" width="65%" style="border: 1px solid #999; background: none;" | ||
|- | |- | ||
| align="center" | '''Move''' || align="center" | '''Motion''' || align="center" | '''Damage''' || align="center" | '''Stun Damage''' | | align="center" | '''Move''' || align="center" | '''Motion''' || align="center" | '''Damage''' || align="center" | '''Stun Damage''' || align="center" | '''Chains into itself''' || align="center" | '''Special Cancel''' || align="center" | '''Super Cancel''' || align="center" | '''Juggle Value''' | ||
|- | |- | ||
| align="center" | | | align="center" | Short || align="center" | LK || align="center" | 40(7 life points) || align="center" | 3 || align="center" | No || align="center" | No || align="center" | No | ||
|} | |} | ||
'' | '''Frame Data''' | ||
{| border="1em" cellspacing="0" width="60%" style="border: 1px solid #999; background: none;" | |||
{| border="1em | |||
|- | |- | ||
| align="center" | ''' | | align="center" | '''Startup''' || align="center" | '''Hit''' || align="center" | '''Recovery''' || align="center" | '''Blocked Advantage''' || align="center" | '''Hit Advantage''' || align="center" | '''Crouching Hit Advantage''' || align="center" | '''Guard''' || align="center" | '''Parry''' | ||
|- | |- | ||
| align="center" | | | align="center" | 4 || align="center" | 4 || align="center" | 7 || align="center" | +2 || align="center" | +2 || align="center" | +2 || align="center" | HL || align="center" | HL | ||
|} | |} | ||
'' | '''Gauge Increase''' | ||
{| border="1em" cellspacing="0" width="30%" style="border: 1px solid #999; background: none;" | |||
{| border="1em | |||
|- | |- | ||
| align="center" | ''' | | align="center" | '''Miss''' || align="center" | '''Blocked''' || align="center" | '''Hit''' || align="center" | '''Parry (Gauge for opponent)''' | ||
|- | |- | ||
| align="center" | | | align="center" | 0 || align="center" | 1 || align="center" | 2 || align="center" | 4 | ||
|} | |} | ||
''Comments here'' | ''Comments here'' | ||
[[Image:( | [[Image:(akumamk).gif|none]] | ||
{| border="1em | {| border="1em" cellspacing="0" width="65%" style="border: 1px solid #999; background: none;" | ||
|- | |- | ||
| align="center" | '''Move''' || align="center" | '''Motion''' || align="center" | '''Damage''' || align="center" | '''Stun Damage''' | | align="center" | '''Move''' || align="center" | '''Motion''' || align="center" | '''Damage''' || align="center" | '''Stun Damage''' || align="center" | '''Chains into itself''' || align="center" | '''Special Cancel''' || align="center" | '''Super Cancel''' || align="center" | '''Juggle Value''' | ||
|- | |- | ||
| align="center" | | | align="center" | Far Forward || align="center" | MK || align="center" | 95(16 life points) || align="center" | 7 || align="center" | No || align="center" | No || align="center" | No | ||
|} | |} | ||
'' | '''Frame Data''' | ||
{| border="1em" cellspacing="0" width="60%" style="border: 1px solid #999; background: none;" | |||
{| border="1em | |||
|- | |- | ||
| align="center" | ''' | | align="center" | '''Startup''' || align="center" | '''Hit''' || align="center" | '''Recovery''' || align="center" | '''Blocked Advantage''' || align="center" | '''Hit Advantage''' || align="center" | '''Crouching Hit Advantage''' || align="center" | '''Guard''' || align="center" | '''Parry''' | ||
|- | |- | ||
| align="center" | | | align="center" | 5 || align="center" | 5 || align="center" | 17 || align="center" | -7 || align="center" | -6 || align="center" | -5 || align="center" | HL || align="center" | H | ||
|} | |} | ||
'' | '''Gauge Increase''' | ||
{| border="1em" cellspacing="0" width="30%" style="border: 1px solid #999; background: none;" | |||
{| border="1em | |||
|- | |- | ||
| align="center" | ''' | | align="center" | '''Miss''' || align="center" | '''Blocked''' || align="center" | '''Hit''' || align="center" | '''Parry (Gauge for opponent)''' | ||
|- | |- | ||
| align="center" | | | align="center" | 2 || align="center" | 4 || align="center" | 8 || align="center" | 4 | ||
|} | |} | ||
''Comments here'' | ''Comments here'' | ||
[[Image:( | [[Image:(akumahk).gif|none]] | ||
{| border="1em | {| border="1em" cellspacing="0" width="65%" style="border: 1px solid #999; background: none;" | ||
|- | |- | ||
| align="center" | '''Move''' || align="center" | '''Motion''' || align="center" | '''Damage''' || align="center" | '''Stun Damage''' | | align="center" | '''Move''' || align="center" | '''Motion''' || align="center" | '''Damage''' || align="center" | '''Stun Damage''' || align="center" | '''Chains into itself''' || align="center" | '''Special Cancel''' || align="center" | '''Super Cancel''' || align="center" | '''Juggle Value''' | ||
|- | |- | ||
| align="center" | | | align="center" | Far Roundhouse || align="center" | HK || align="center" | 145(25 life points) || align="center" | 11 || align="center" | No || align="center" | No || align="center" | No | ||
|} | |} | ||
'' | '''Frame Data''' | ||
{| border="1em" cellspacing="0" width="60%" style="border: 1px solid #999; background: none;" | |||
{| border="1em | |||
|- | |- | ||
| align="center" | ''' | | align="center" | '''Startup''' || align="center" | '''Hit''' || align="center" | '''Recovery''' || align="center" | '''Blocked Advantage''' || align="center" | '''Hit Advantage''' || align="center" | '''Crouching Hit Advantage''' || align="center" | '''Guard''' || align="center" | '''Parry''' | ||
|- | |- | ||
| align="center" | | | align="center" | 9 || align="center" | 5 || align="center" | 20 || align="center" | -7 || align="center" | -5 || align="center" | -3 || align="center" | HL || align="center" | H | ||
|} | |} | ||
'' | '''Gauge Increase''' | ||
{| border="1em" cellspacing="0" width="30%" style="border: 1px solid #999; background: none;" | |||
{| border="1em | |||
|- | |- | ||
| align="center" | ''' | | align="center" | '''Miss''' || align="center" | '''Blocked''' || align="center" | '''Hit''' || align="center" | '''Parry (Gauge for opponent)''' | ||
|- | |- | ||
| align="center" | | | align="center" | 3 || align="center" | 6 || align="center" | 14 || align="center" | 4 | ||
|} | |} | ||
''Comments here'' | ''Comments here'' | ||
| Line 326: | Line 481: | ||
[[Image:(akumaclosemk).gif|none]] | [[Image:(akumaclosemk).gif|none]] | ||
{| border="1em" | {| border="1em" cellspacing="0" width="65%" style="border: 1px solid #999; background: none;" | ||
|- | |||
| align="center" | '''Move''' || align="center" | '''Motion''' || align="center" | '''Damage''' || align="center" | '''Stun Damage''' || align="center" | '''Chains into itself''' || align="center" | '''Special Cancel''' || align="center" | '''Super Cancel''' || align="center" | '''Juggle Value''' | |||
|- | |||
| align="center" | Close Forward || align="center" | (Close to opponent) MK || align="center" | 115(20 life points) || align="center" | 9 || align="center" | No || align="center" | Yes || align="center" | Yes | |||
|} | |||
'''Frame Data''' | |||
{| border="1em" cellspacing="0" width="60%" style="border: 1px solid #999; background: none;" | |||
|- | |- | ||
| align="center" | ''' | | align="center" | '''Startup''' || align="center" | '''Hit''' || align="center" | '''Recovery''' || align="center" | '''Blocked Advantage''' || align="center" | '''Hit Advantage''' || align="center" | '''Crouching Hit Advantage''' || align="center" | '''Guard''' || align="center" | '''Parry''' | ||
|- | |- | ||
| align="center" | | | align="center" | 4 || align="center" | 5 || align="center" | 11 || align="center" | +2 || align="center" | +4 || align="center" | +6 || align="center" | HL || align="center" | H | ||
|} | |||
'''Gauge Increase''' | |||
{| border="1em" cellspacing="0" width="30%" style="border: 1px solid #999; background: none;" | |||
|- | |||
| align="center" | '''Miss''' || align="center" | '''Blocked''' || align="center" | '''Hit''' || align="center" | '''Parry (Gauge for opponent)''' | |||
|- | |||
| align="center" | 2 || align="center" | 4 || align="center" | 8 || align="center" | 4 | |||
|} | |} | ||
''Comments here'' | ''Comments here'' | ||
| Line 336: | Line 505: | ||
[[Image:(akumaclosehk).gif|none]] | [[Image:(akumaclosehk).gif|none]] | ||
{| border="1em | {| border="1em" cellspacing="0" width="70%" style="border: 1px solid #999; background: none;" | ||
|- | |- | ||
| align="center" | '''Move''' || align="center" | '''Motion''' || align="center" | '''Damage''' || align="center" | '''Stun Damage''' | | align="center" | '''Move''' || align="center" | '''Motion''' || align="center" | '''Damage''' || align="center" | '''Stun Damage''' || align="center" | '''Chains into itself''' || align="center" | '''Special Cancel''' || align="center" | '''Super Cancel''' || align="center" | '''Juggle Value''' | ||
|- | |- | ||
| align="center" | Close Roundhouse || align="center" | (Close to opponent) HK || align="center" | 120 || align="center" | 13 | | align="center" | Close Roundhouse || align="center" | (Close to opponent) HK || align="center" | 120+80(40)(33 life points) || align="center" | 13+11(7) || align="center" | No || align="center" | No || align="center" | No | ||
|} | |||
'''Frame Data''' | |||
{| border="1em" cellspacing="0" width="60%" style="border: 1px solid #999; background: none;" | |||
|- | |- | ||
| align="center" | ( | | align="center" | '''Startup''' || align="center" | '''Hit''' || align="center" | '''Recovery''' || align="center" | '''Blocked Advantage''' || align="center" | '''Hit Advantage''' || align="center" | '''Crouching Hit Advantage''' || align="center" | '''Guard''' || align="center" | '''Parry''' | ||
|- | |||
| align="center" | 5/7 || align="center" | 3/5 || align="center" | 19 || align="center" | -6 || align="center" | -4 || align="center" | -2 || align="center" | H/L || align="center" | H/L | |||
|} | |||
'''Gauge Increase''' | |||
{| border="1em" cellspacing="0" width="30%" style="border: 1px solid #999; background: none;" | |||
|- | |||
| align="center" | '''Miss''' || align="center" | '''Blocked''' || align="center" | '''Hit''' || align="center" | '''Parry (Gauge for opponent)''' | |||
|- | |||
| align="center" | 4 || align="center" | 8 || align="center" | 16 || align="center" | 8(4+4) | |||
|} | |} | ||
''Comments here'' | ''Comments here'' | ||
==== Jumping Normals ==== | |||
[[Image:(akumajlp).gif|none]] | [[Image:(akumajlp).gif|none]] | ||
{| border="1em | {| border="1em" cellspacing="0" width="65%" style="border: 1px solid #999; background: none;" | ||
|- | |- | ||
| align="center" | '''Move''' || align="center" | '''Motion''' || align="center" | '''Damage''' || align="center" | '''Stun Damage''' | | align="center" | '''Move''' || align="center" | '''Motion''' || align="center" | '''Damage''' || align="center" | '''Stun Damage''' || align="center" | '''Chains into itself''' || align="center" | '''Special Cancel''' || align="center" | '''Super Cancel''' || align="center" | '''Juggle Value''' | ||
|- | |- | ||
| align="center" | | | align="center" | Jump Jab || align="center" | (Air)LP || align="center" | 40(7 life points)(50 if neutral jump) || align="center" | 7 || align="center" | No || align="center" | No || align="center" | No | ||
|} | |||
'''Frame Data''' | |||
{| border="1em" cellspacing="0" width="65%" style="border: 1px solid #999; background: none;" | |||
|- | |||
| align="center" | '''Startup''' || align="center" | '''Hit''' || align="center" | '''Recovery''' || align="center" | '''Blocked Advantage''' || align="center" | '''Hit Advantage''' || align="center" | '''Crouching Hit Advantage''' || align="center" | '''Guard''' || align="center" | '''Parry''' | |||
|- | |||
| align="center" | 4 || align="center" | Until landing || align="center" | - || align="center" | -5~+7 || align="center" | -5~+7 || align="center" | +4~+7 || align="center" | H || align="center" | H | |||
|} | |||
'''Gauge Increase''' | |||
{| border="1em" cellspacing="0" width="30%" style="border: 1px solid #999; background: none;" | |||
|- | |||
| align="center" | '''Miss''' || align="center" | '''Blocked''' || align="center" | '''Hit''' || align="center" | '''Parry (Gauge for opponent)''' | |||
|- | |||
| align="center" | 0 || align="center" | 1 || align="center" | 2 || align="center" | 4 | |||
|} | |} | ||
''Comments here'' | ''Comments here'' | ||
| Line 358: | Line 555: | ||
[[Image:(akumajmp).gif|none]] | [[Image:(akumajmp).gif|none]] | ||
{| border="1em" | {| border="1em" cellspacing="0" width="60%" style="border: 1px solid #999; background: none;" | ||
|- | |||
| align="center" | '''Move''' || align="center" | '''Motion''' || align="center" | '''Damage''' || align="center" | '''Stun Damage''' || align="center" | '''Chains into itself''' || align="center" | '''Special Cancel''' || align="center" | '''Super Cancel''' || align="center" | '''Juggle Value''' | |||
|- | |||
| align="center" | Jump Strong || align="center" | (Air)MP || align="center" | 90(16 life points) || align="center" | 9 || align="center" | No || align="center" | No || align="center" | No | |||
|} | |||
'''Frame Data''' | |||
{| border="1em" cellspacing="0" width="65%" style="border: 1px solid #999; background: none;" | |||
|- | |- | ||
| align="center" | ''' | | align="center" | '''Startup''' || align="center" | '''Hit''' || align="center" | '''Recovery''' || align="center" | '''Blocked Advantage''' || align="center" | '''Hit Advantage''' || align="center" | '''Crouching Hit Advantage''' || align="center" | '''Guard''' || align="center" | '''Parry''' | ||
|- | |- | ||
| align="center" | | | align="center" | 5 || align="center" | 5 || align="center" | - || align="center" | -2~+10 || align="center" | -2~+10 || align="center" | +7~+10 || align="center" | H || align="center" | H | ||
|} | |||
'''Gauge Increase''' | |||
{| border="1em" cellspacing="0" width="30%" style="border: 1px solid #999; background: none;" | |||
|- | |||
| align="center" | '''Miss''' || align="center" | '''Blocked''' || align="center" | '''Hit''' || align="center" | '''Parry (Gauge for opponent)''' | |||
|- | |||
| align="center" | 2 || align="center" | 6 || align="center" | 11 || align="center" | 4 | |||
|} | |} | ||
''Comments here'' | ''Comments here'' | ||
[[Image:( | [[Image:(akumajhp).gif|none]] | ||
{| border="1em" | {| border="1em" cellspacing="0" width="60%" style="border: 1px solid #999; background: none;" | ||
|- | |||
| align="center" | '''Move''' || align="center" | '''Motion''' || align="center" | '''Damage''' || align="center" | '''Stun Damage''' || align="center" | '''Chains into itself''' || align="center" | '''Special Cancel''' || align="center" | '''Super Cancel''' || align="center" | '''Juggle Value''' | |||
|- | |||
| align="center" | Jump Fierce || align="center" | (Air) HP || align="center" | 130(23 life points) || align="center" | 13 || align="center" | No || align="center" | No || align="center" | No | |||
|} | |||
'''Frame Data''' | |||
{| border="1em" cellspacing="0" width="65%" style="border: 1px solid #999; background: none;" | |||
|- | |||
| align="center" | '''Startup''' || align="center" | '''Hit''' || align="center" | '''Recovery''' || align="center" | '''Blocked Advantage''' || align="center" | '''Hit Advantage''' || align="center" | '''Crouching Hit Advantage''' || align="center" | '''Guard''' || align="center" | '''Parry''' | |||
|- | |||
| align="center" | 6 || align="center" | 4 || align="center" | - || align="center" | +3~+13 || align="center" | +3~+13 || align="center" | +10~+13 || align="center" | H || align="center" | H | |||
|} | |||
'''Gauge Increase''' | |||
{| border="1em" cellspacing="0" width="30%" style="border: 1px solid #999; background: none;" | |||
|- | |- | ||
| align="center" | ''' | | align="center" | '''Miss''' || align="center" | '''Blocked''' || align="center" | '''Hit''' || align="center" | '''Parry (Gauge for opponent)''' | ||
|- | |- | ||
| align="center" | | | align="center" | 3 || align="center" | 10 || align="center" | 19 || align="center" | 4 | ||
|} | |} | ||
''Comments here'' | ''Comments here'' | ||
| Line 378: | Line 603: | ||
[[Image:(akumanjhp).gif|none]] | [[Image:(akumanjhp).gif|none]] | ||
{| border="1em" | {| border="1em" cellspacing="0" width="60%" style="border: 1px solid #999; background: none;" | ||
|- | |||
| align="center" | '''Move''' || align="center" | '''Motion''' || align="center" | '''Damage''' || align="center" | '''Stun Damage''' || align="center" | '''Chains into itself''' || align="center" | '''Special Cancel''' || align="center" | '''Super Cancel''' || align="center" | '''Juggle Value''' | |||
|- | |||
| align="center" | Neutral Jump Fierce || align="center" | (Air) HP || align="center" | 130(23 life points) || align="center" | 13 || align="center" | No || align="center" | No || align="center" | No | |||
|} | |||
'''Frame Data''' | |||
{| border="1em" cellspacing="0" width="65%" style="border: 1px solid #999; background: none;" | |||
|- | |||
| align="center" | '''Startup''' || align="center" | '''Hit''' || align="center" | '''Recovery''' || align="center" | '''Blocked Advantage''' || align="center" | '''Hit Advantage''' || align="center" | '''Crouching Hit Advantage''' || align="center" | '''Guard''' || align="center" | '''Parry''' | |||
|- | |||
| align="center" | 6 || align="center" | 3 || align="center" | - || align="center" | +6~+13 || align="center" | +6~+13 || align="center" | +12~+13 || align="center" | H || align="center" | H | |||
|} | |||
'''Gauge Increase''' | |||
{| border="1em" cellspacing="0" width="30%" style="border: 1px solid #999; background: none;" | |||
|- | |- | ||
| align="center" | ''' | | align="center" | '''Miss''' || align="center" | '''Blocked''' || align="center" | '''Hit''' || align="center" | '''Parry (Gauge for opponent)''' | ||
|- | |- | ||
| align="center" | | | align="center" | 3 || align="center" | 10 || align="center" | 19 || align="center" | 4 | ||
|} | |} | ||
''Comments here'' | ''Comments here'' | ||
| Line 388: | Line 627: | ||
[[Image:(akumajlk).gif|none]] | [[Image:(akumajlk).gif|none]] | ||
{| border="1em | {| border="1em" cellspacing="0" width="60%" style="border: 1px solid #999; background: none;" | ||
|- | |- | ||
| align="center" | '''Move''' || align="center" | '''Motion''' || align="center" | '''Damage''' || align="center" | '''Stun Damage''' | | align="center" | '''Move''' || align="center" | '''Motion''' || align="center" | '''Damage''' || align="center" | '''Stun Damage''' || align="center" | '''Chains into itself''' || align="center" | '''Special Cancel''' || align="center" | '''Super Cancel''' || align="center" | '''Juggle Value''' | ||
|- | |- | ||
| align="center" | | | align="center" | Jump Short || align="center" | (Air) LK || align="center" | 40(7 life points) || align="center" | 5 || align="center" | No || align="center" | No || align="center" | No | ||
|} | |||
'''Frame Data''' | |||
{| border="1em" cellspacing="0" width="70%" style="border: 1px solid #999; background: none;" | |||
|- | |||
| align="center" | '''Startup''' || align="center" | '''Hit''' || align="center" | '''Recovery''' || align="center" | '''Blocked Advantage''' || align="center" | '''Hit Advantage''' || align="center" | '''Crouching Hit Advantage''' || align="center" | '''Guard''' || align="center" | '''Parry''' | |||
|- | |||
| align="center" | 4 || align="center" | 10(19 if neutral jump) || align="center" | - || align="center" | -6~+7 || align="center" | -6~+7 || align="center" | 0~+7 || align="center" | H || align="center" | H | |||
|} | |||
'''Gauge Increase''' | |||
{| border="1em" cellspacing="0" width="30%" style="border: 1px solid #999; background: none;" | |||
|- | |||
| align="center" | '''Miss''' || align="center" | '''Blocked''' || align="center" | '''Hit''' || align="center" | '''Parry (Gauge for opponent)''' | |||
|- | |||
| align="center" | 0 || align="center" | 1 || align="center" | 2 || align="center" | 4 | |||
|} | |} | ||
''Comments here'' | ''Comments here'' | ||
| Line 398: | Line 651: | ||
[[Image:(akumajmk).gif|none]] | [[Image:(akumajmk).gif|none]] | ||
{| border="1em" | {| border="1em" cellspacing="0" width="60%" style="border: 1px solid #999; background: none;" | ||
|- | |||
| align="center" | '''Move''' || align="center" | '''Motion''' || align="center" | '''Damage''' || align="center" | '''Stun Damage''' || align="center" | '''Chains into itself''' || align="center" | '''Special Cancel''' || align="center" | '''Super Cancel''' || align="center" | '''Juggle Value''' | |||
|- | |||
| align="center" | Jump Forward || align="center" | (Air) MK || align="center" | 80(14 life points) || align="center" | 7 || align="center" | No || align="center" | No || align="center" | No | |||
|} | |||
'''Frame Data''' | |||
{| border="1em" cellspacing="0" width="65%" style="border: 1px solid #999; background: none;" | |||
|- | |- | ||
| align="center" | ''' | | align="center" | '''Startup''' || align="center" | '''Hit''' || align="center" | '''Recovery''' || align="center" | '''Blocked Advantage''' || align="center" | '''Hit Advantage''' || align="center" | '''Crouching Hit Advantage''' || align="center" | '''Guard''' || align="center" | '''Parry''' | ||
|- | |- | ||
| align="center" | | | align="center" | 5 || align="center" | 6 || align="center" | - || align="center" | -2~+10 || align="center" | -2~+10 || align="center" | +6~+10 || align="center" | H || align="center" | H | ||
|} | |||
'''Gauge Increase''' | |||
{| border="1em" cellspacing="0" width="30%" style="border: 1px solid #999; background: none;" | |||
|- | |||
| align="center" | '''Miss''' || align="center" | '''Blocked''' || align="center" | '''Hit''' || align="center" | '''Parry (Gauge for opponent)''' | |||
|- | |||
| align="center" | 2 || align="center" | 6 || align="center" | 11 || align="center" | 4 | |||
|} | |} | ||
''Comments here'' | ''Comments here'' | ||
| Line 408: | Line 675: | ||
[[Image:(akumanjmk).gif|none]] | [[Image:(akumanjmk).gif|none]] | ||
{| border="1em" | {| border="1em" cellspacing="0" width="60%" style="border: 1px solid #999; background: none;" | ||
|- | |||
| align="center" | '''Move''' || align="center" | '''Motion''' || align="center" | '''Damage''' || align="center" | '''Stun Damage''' || align="center" | '''Chains into itself''' || align="center" | '''Special Cancel''' || align="center" | '''Super Cancel''' || align="center" | '''Juggle Value''' | |||
|- | |||
| align="center" | Neutral Jump Forward || align="center" | (Air) MK || align="center" | 80(14 life points) || align="center" | 7 || align="center" | No || align="center" | No || align="center" | No | |||
|} | |||
'''Frame Data''' | |||
{| border="1em" cellspacing="0" width="65%" style="border: 1px solid #999; background: none;" | |||
|- | |- | ||
| align="center" | ''' | | align="center" | '''Startup''' || align="center" | '''Hit''' || align="center" | '''Recovery''' || align="center" | '''Blocked Advantage''' || align="center" | '''Hit Advantage''' || align="center" | '''Crouching Hit Advantage''' || align="center" | '''Guard''' || align="center" | '''Parry''' | ||
|- | |- | ||
| align="center" | | | align="center" | 5 || align="center" | 6 || align="center" | - || align="center" | -2~+10 || align="center" | -2~+10 || align="center" | +6~+10 || align="center" | H || align="center" | H | ||
|} | |||
'''Gauge Increase''' | |||
{| border="1em" cellspacing="0" width="30%" style="border: 1px solid #999; background: none;" | |||
|- | |||
| align="center" | '''Miss''' || align="center" | '''Blocked''' || align="center" | '''Hit''' || align="center" | '''Parry (Gauge for opponent)''' | |||
|- | |||
| align="center" | 2 || align="center" | 6 || align="center" | 11 || align="center" | 4 | |||
|} | |} | ||
''Comments here'' | ''Comments here'' | ||
[[Image:( | [[Image:(akumajhk).gif|none]] | ||
{| border="1em" | {| border="1em" cellspacing="0" width="60%" style="border: 1px solid #999; background: none;" | ||
|- | |||
| align="center" | '''Move''' || align="center" | '''Motion''' || align="center" | '''Damage''' || align="center" | '''Stun Damage''' || align="center" | '''Chains into itself''' || align="center" | '''Special Cancel''' || align="center" | '''Super Cancel''' || align="center" | '''Juggle Value''' | |||
|- | |||
| align="center" | Jump Roundhouse || align="center" | (Air) HK || align="center" | 120(21 life points) || align="center" | 11 || align="center" | No || align="center" | No || align="center" | No | |||
|} | |||
'''Frame Data''' | |||
{| border="1em" cellspacing="0" width="65%" style="border: 1px solid #999; background: none;" | |||
|- | |||
| align="center" | '''Startup''' || align="center" | '''Hit''' || align="center" | '''Recovery''' || align="center" | '''Blocked Advantage''' || align="center" | '''Hit Advantage''' || align="center" | '''Crouching Hit Advantage''' || align="center" | '''Guard''' || align="center" | '''Parry''' | |||
|- | |||
| align="center" | 6 || align="center" | 4 || align="center" | - || align="center" | +2~+13 || align="center" | +2~+13 || align="center" | +8~+13 || align="center" | H || align="center" | H | |||
|} | |||
'''Gauge Increase''' | |||
{| border="1em" cellspacing="0" width="30%" style="border: 1px solid #999; background: none;" | |||
|- | |- | ||
| align="center" | ''' | | align="center" | '''Miss''' || align="center" | '''Blocked''' || align="center" | '''Hit''' || align="center" | '''Parry (Gauge for opponent)''' | ||
|- | |- | ||
| align="center" | | | align="center" | 3 || align="center" | 10 || align="center" | 19 || align="center" | 4 | ||
|} | |} | ||
''Comments here'' | ''Comments here'' | ||
| Line 428: | Line 723: | ||
[[Image:(akumanjhk).gif|none]] | [[Image:(akumanjhk).gif|none]] | ||
{| border="1em" | {| border="1em" cellspacing="0" width="65%" style="border: 1px solid #999; background: none;" | ||
|- | |||
| align="center" | '''Move''' || align="center" | '''Motion''' || align="center" | '''Damage''' || align="center" | '''Stun Damage''' || align="center" | '''Chains into itself''' || align="center" | '''Special Cancel''' || align="center" | '''Super Cancel''' || align="center" | '''Juggle Value''' | |||
|- | |||
| align="center" | Neutral Jump Roundhouse || align="center" | (Air) HK || align="center" | 120(21 life points) || align="center" | 11 || align="center" | No || align="center" | No || align="center" | No | |||
|} | |||
'''Frame Data''' | |||
{| border="1em" cellspacing="0" width="65%" style="border: 1px solid #999; background: none;" | |||
|- | |||
| align="center" | '''Startup''' || align="center" | '''Hit''' || align="center" | '''Recovery''' || align="center" | '''Blocked Advantage''' || align="center" | '''Hit Advantage''' || align="center" | '''Crouching Hit Advantage''' || align="center" | '''Guard''' || align="center" | '''Parry''' | |||
|- | |||
| align="center" | 6 || align="center" | 5 || align="center" | - || align="center" | +2~+13 || align="center" | +2~+13 || align="center" | +10~+13 || align="center" | H || align="center" | H | |||
|} | |||
'''Gauge Increase''' | |||
{| border="1em" cellspacing="0" width="30%" style="border: 1px solid #999; background: none;" | |||
|- | |- | ||
| align="center" | ''' | | align="center" | '''Miss''' || align="center" | '''Blocked''' || align="center" | '''Hit''' || align="center" | '''Parry (Gauge for opponent)''' | ||
|- | |- | ||
| align="center" | | | align="center" | 3 || align="center" | 10 || align="center" | 19 || align="center" | 4 | ||
|} | |} | ||
''Comments here'' | ''Comments here'' | ||
| Line 438: | Line 747: | ||
[[Image:(akumaoh).gif|none]] | [[Image:(akumaoh).gif|none]] | ||
{| border="1em" | {| border="1em" cellspacing="0" width="60%" style="border: 1px solid #999; background: none;" | ||
|- | |||
| align="center" | '''Move''' || align="center" | '''Motion''' || align="center" | '''Damage''' || align="center" | '''Stun Damage''' || align="center" | '''Chains into itself''' || align="center" | '''Special Cancel''' || align="center" | '''Super Cancel''' || align="center" | '''Juggle Value''' | |||
|- | |||
| align="center" | Universal Overhead || align="center" |MP+MK || align="center" | 40(7 life points) || align="center" | 3 || align="center" | No || align="center" | No || align="center" | No | |||
|} | |||
'''Frame Data''' | |||
{| border="1em" cellspacing="0" width="65%" style="border: 1px solid #999; background: none;" | |||
|- | |- | ||
| align="center" | ''' | | align="center" | '''Startup''' || align="center" | '''Hit''' || align="center" | '''Recovery''' || align="center" | '''Blocked Advantage''' || align="center" | '''Hit Advantage''' || align="center" | '''Crouching Hit Advantage''' || align="center" | '''Guard''' || align="center" | '''Parry''' | ||
|- | |- | ||
| align="center" | | | align="center" | 15 || align="center" | 8 || align="center" | 7 || align="center" | -5~+7 || align="center" | 0~+8 || align="center" | +1~+9 || align="center" | H || align="center" | H | ||
|} | |||
'''Gauge Increase''' | |||
{| border="1em" cellspacing="0" width="30%" style="border: 1px solid #999; background: none;" | |||
|- | |||
| align="center" | '''Miss''' || align="center" | '''Blocked''' || align="center" | '''Hit''' || align="center" | '''Parry (Gauge for opponent)''' | |||
|- | |||
| align="center" | 0 || align="center" | 1 || align="center" | 2 || align="center" | 4 | |||
|} | |} | ||
''Comments here'' | ''Comments here'' | ||
==== Throws ==== | ==== Throws ==== | ||
[[Image:(akumasn).gif|none]] | [[Image:(akumasn).gif|none]] | ||
{| border="1em | {| border="1em" cellspacing="0" width="65%" style="border: 1px solid #999; background: none;" | ||
|- | |- | ||
| align="center" | '''Move''' || align="center" | '''Motion''' || align="center" | '''Damage''' || align="center" | '''Stun Damage'''|| align="center" | '''Throw Range''' | | align="center" | '''Move''' || align="center" | '''Motion''' || align="center" | '''Damage''' || align="center" | '''Stun Damage''' || align="center" | '''Throw Range''' || align="center" | '''Kara-Throw''' || align="center" | '''Kara-Throw Range''' | ||
|- | |- | ||
| align="center" | Seoi Nage || align="center" | LP LK or F LP LK || align="center" | 110 || align="center" | 9 || align="center" | 24 | | align="center" | Seoi Nage || align="center" |LP+LK or F+LP+LK || align="center" | 110(19 life points) || align="center" | 9 || align="center" | 24 || align="center" | F+MP/C+MK/C+HK || align="center" | 44/37/37 | ||
|} | |||
'''Frame Data''' | |||
{| border="1em" cellspacing="0" width="65%" style="border: 1px solid #999; background: none;" | |||
|- | |||
| align="center" | '''Startup''' || align="center" | '''Hit''' || align="center" | '''Recovery''' || align="center" | '''Blocked Advantage''' || align="center" | '''Hit Advantage''' || align="center" | '''Crouching Hit Advantage''' || align="center" | '''Guard''' || align="center" | '''Parry''' | |||
|- | |||
| align="center" | 2 || align="center" | 1 || align="center" | 21 || align="center" | - || align="center" | - || align="center" | - || align="center" |LP+LK || align="center" | - | |||
|} | |||
'''Gauge Increase''' | |||
{| border="1em" cellspacing="0" width="25%" style="border: 1px solid #999; background: none;" | |||
|- | |||
| align="center" | '''Miss''' || align="center" | '''Blocked''' || align="center" | '''Hit''' | |||
|- | |||
| align="center" | 0 || align="center" | 7 (for the player who blocked) || align="center" | 7 | |||
|} | |} | ||
''Comments here'' | ''Comments here'' | ||
| Line 460: | Line 796: | ||
[[Image:(akumatn).gif|none]] | [[Image:(akumatn).gif|none]] | ||
{| border="1em | {| border="1em" cellspacing="0" width="65%" style="border: 1px solid #999; background: none;" | ||
|- | |- | ||
| align="center" | '''Move''' || align="center" | '''Motion''' || align="center" | '''Damage''' || align="center" | '''Stun Damage'''|| align="center" | '''Throw Range''' | | align="center" | '''Move''' || align="center" | '''Motion''' || align="center" | '''Damage''' || align="center" | '''Stun Damage''' || align="center" | '''Throw Range''' || align="center" | '''Kara-Throw''' || align="center" | '''Kara-Throw Range''' | ||
|- | |- | ||
| align="center" | Tomoe Nage || align="center" | B LP LK || align="center" | 110 || align="center" | 15 || align="center" | 24 | | align="center" | Tomoe Nage || align="center" | B+LP+LK || align="center" | 110(19 life points) || align="center" | 15 || align="center" | 24 || align="center" | F+MP/C+MK/C+HK || align="center" | 44/37/37 | ||
|} | |} | ||
'' | '''Frame Data''' | ||
{| border="1em" cellspacing="0" width="65%" style="border: 1px solid #999; background: none;" | |||
{| border="1em | |||
|- | |- | ||
| align="center" | ''' | | align="center" | '''Startup''' || align="center" | '''Hit''' || align="center" | '''Recovery''' || align="center" | '''Blocked Advantage''' || align="center" | '''Hit Advantage''' || align="center" | '''Crouching Hit Advantage''' || align="center" | '''Guard''' || align="center" | '''Parry''' | ||
|- | |- | ||
| align="center" | | | align="center" | 2 || align="center" | 1 || align="center" | 21 || align="center" | - || align="center" | - || align="center" | - || align="center" |LP+LK || align="center" | - | ||
|} | |||
'''Gauge Increase''' | |||
{| border="1em" cellspacing="0" width="25%" style="border: 1px solid #999; background: none;" | |||
|- | |- | ||
| align="center" | | | align="center" | '''Miss''' || align="center" | '''Blocked''' || align="center" | '''Hit''' | ||
|- | |||
| align="center" | 0 || align="center" | 7 (for the player who blocked) || align="center" | 7 | |||
|} | |} | ||
''Comments here'' | ''Comments here'' | ||
====Crouching Normals==== | |||
[[Image:(akumaclp).gif|none]] | [[Image:(akumaclp).gif|none]] | ||
{| border="1em" | {| border="1em" cellspacing="0" width="60%" style="border: 1px solid #999; background: none;" | ||
|- | |||
| align="center" | '''Move''' || align="center" | '''Motion''' || align="center" | '''Damage''' || align="center" | '''Stun Damage''' || align="center" | '''Chains into itself''' || align="center" | '''Special Cancel''' || align="center" | '''Super Cancel''' || align="center" | '''Juggle Value''' | |||
|- | |||
| align="center" | Crouch Jab || align="center" | D+LP || align="center" | 20(3 life points) || align="center" | 3 || align="center" | Yes || align="center" | Yes || align="center" | Yes | |||
|} | |||
'''Frame Data''' | |||
{| border="1em" cellspacing="0" width="65%" style="border: 1px solid #999; background: none;" | |||
|- | |||
| align="center" | '''Startup''' || align="center" | '''Hit''' || align="center" | '''Recovery''' || align="center" | '''Blocked Advantage''' || align="center" | '''Hit Advantage''' || align="center" | '''Crouching Hit Advantage''' || align="center" | '''Guard''' || align="center" | '''Parry''' | |||
|- | |||
| align="center" | 4 || align="center" | 3 || align="center" | 4 || align="center" | +4 || align="center" | +4 || align="center" | +4 || align="center" | HL || align="center" | HL | |||
|} | |||
'''Gauge Increase''' | |||
{| border="1em" cellspacing="0" width="30%" style="border: 1px solid #999; background: none;" | |||
|- | |- | ||
| align="center" | ''' | | align="center" | '''Miss''' || align="center" | '''Blocked''' || align="center" | '''Hit''' || align="center" | '''Parry (Gauge for opponent)''' | ||
|- | |- | ||
| align="center" | | | align="center" | 0 || align="center" | 1 || align="center" | 2 || align="center" | 4 | ||
|} | |} | ||
''Comments here'' | ''Comments here'' | ||
| Line 493: | Line 845: | ||
[[Image:(akumacmp).gif|none]] | [[Image:(akumacmp).gif|none]] | ||
{| border="1em" | {| border="1em" cellspacing="0" width="60%" style="border: 1px solid #999; background: none;" | ||
|- | |||
| align="center" | '''Move''' || align="center" | '''Motion''' || align="center" | '''Damage''' || align="center" | '''Stun Damage''' || align="center" | '''Chains into itself''' || align="center" | '''Special Cancel''' || align="center" | '''Super Cancel''' || align="center" | '''Juggle Value''' | |||
|- | |||
| align="center" | Crouch Strong || align="center" | D+MP || align="center" | 95(16 lifepoints) || align="center" | 7 || align="center" | No || align="center" | Yes || align="center" | Yes | |||
|} | |||
'''Frame Data''' | |||
{| border="1em" cellspacing="0" width="65%" style="border: 1px solid #999; background: none;" | |||
|- | |||
| align="center" | '''Startup''' || align="center" | '''Hit''' || align="center" | '''Recovery''' || align="center" | '''Blocked Advantage''' || align="center" | '''Hit Advantage''' || align="center" | '''Crouching Hit Advantage''' || align="center" | '''Guard''' || align="center" | '''Parry''' | |||
|- | |||
| align="center" | 5 || align="center" | 4 || align="center" | 7 || align="center" | +3 || align="center" | +4 || align="center" | +5 || align="center" | HL || align="center" | HL | |||
|} | |||
'''Gauge Increase''' | |||
{| border="1em" cellspacing="0" width="30%" style="border: 1px solid #999; background: none;" | |||
|- | |- | ||
| align="center" | ''' | | align="center" | '''Miss''' || align="center" | '''Blocked''' || align="center" | '''Hit''' || align="center" | '''Parry (Gauge for opponent)''' | ||
|- | |- | ||
| align="center" | | | align="center" | 2 || align="center" | 4 || align="center" | 8 || align="center" | 4 | ||
|} | |} | ||
''Comments here'' | ''Comments here'' | ||
| Line 503: | Line 869: | ||
[[Image:(akumachp).gif|none]] | [[Image:(akumachp).gif|none]] | ||
{| border="1em" | {| border="1em" cellspacing="0" width="60%" style="border: 1px solid #999; background: none;" | ||
|- | |||
| align="center" | '''Move''' || align="center" | '''Motion''' || align="center" | '''Damage''' || align="center" | '''Stun Damage''' || align="center" | '''Chains into itself''' || align="center" | '''Special Cancel''' || align="center" | '''Super Cancel''' || align="center" | '''Juggle Value''' | |||
|- | |||
| align="center" | Crouch Fierce || align="center" | D+HP || align="center" | 135(24 life points) || align="center" | 11 || align="center" | No || align="center" | Yes || align="center" | Yes | |||
|} | |||
'''Frame Data''' | |||
{| border="1em" cellspacing="0" width="65%" style="border: 1px solid #999; background: none;" | |||
|- | |- | ||
| align="center" | ''' | | align="center" | '''Startup''' || align="center" | '''Hit''' || align="center" | '''Recovery''' || align="center" | '''Blocked Advantage''' || align="center" | '''Hit Advantage''' || align="center" | '''Crouching Hit Advantage''' || align="center" | '''Guard''' || align="center" | '''Parry''' | ||
|- | |- | ||
| align="center" | | | align="center" | 5 || align="center" | 5 || align="center" | 19 || align="center" | -8 || align="center" | -6 || align="center" | -4 || align="center" | HL || align="center" | HL | ||
|} | |||
'''Gauge Increase''' | |||
{| border="1em" cellspacing="0" width="30%" style="border: 1px solid #999; background: none;" | |||
|- | |||
| align="center" | '''Miss''' || align="center" | '''Blocked''' || align="center" | '''Hit''' || align="center" | '''Parry (Gauge for opponent)''' | |||
|- | |||
| align="center" | 3 || align="center" | 6 || align="center" | 14 || align="center" | 4 | |||
|} | |} | ||
''Comments here'' | ''Comments here'' | ||
| Line 513: | Line 893: | ||
[[Image:(akumaclk).gif|none]] | [[Image:(akumaclk).gif|none]] | ||
{| border="1em | {| border="1em" cellspacing="0" width="60%" style="border: 1px solid #999; background: none;" | ||
|- | |- | ||
| align="center" | '''Move''' || align="center" | '''Motion''' || align="center" | '''Damage''' || align="center" | '''Stun Damage''' | | align="center" | '''Move''' || align="center" | '''Motion''' || align="center" | '''Damage''' || align="center" | '''Stun Damage''' || align="center" | '''Chains into itself''' || align="center" | '''Special Cancel''' || align="center" | '''Super Cancel''' || align="center" | '''Juggle Value''' | ||
|- | |- | ||
| align="center" | | | align="center" | Crouch Short || align="center" | D+LK || align="center" | 20(3 life points) || align="center" | 3 || align="center" | Yes || align="center" | Yes || align="center" | Yes | ||
|} | |} | ||
'' | '''Frame Data''' | ||
{| border="1em" cellspacing="0" width="65%" style="border: 1px solid #999; background: none;" | |||
{| border="1em | |||
|- | |- | ||
| align="center" | ''' | | align="center" | '''Startup''' || align="center" | '''Hit''' || align="center" | '''Recovery''' || align="center" | '''Blocked Advantage''' || align="center" | '''Hit Advantage''' || align="center" | '''Crouching Hit Advantage''' || align="center" | '''Guard''' || align="center" | '''Parry''' | ||
|- | |- | ||
| align="center" | | | align="center" | 5 || align="center" | 3 || align="center" | 7 || align="center" | +1 || align="center" | +1 || align="center" | +1 || align="center" | L || align="center" | L | ||
|} | |} | ||
'' | '''Gauge Increase''' | ||
{| border="1em" cellspacing="0" width="30%" style="border: 1px solid #999; background: none;" | |||
{| border="1em | |||
|- | |- | ||
| align="center" | ''' | | align="center" | '''Miss''' || align="center" | '''Blocked''' || align="center" | '''Hit''' || align="center" | '''Parry (Gauge for opponent)''' | ||
|- | |- | ||
| align="center" | | | align="center" | 0 || align="center" | 1 || align="center" | 2 || align="center" | 4 | ||
|} | |} | ||
''Comments here'' | ''Comments here'' | ||
[[Image:( | [[Image:(akumacmk).gif|none]] | ||
{| border="1em | {| border="1em" cellspacing="0" width="60%" style="border: 1px solid #999; background: none;" | ||
|- | |- | ||
| align="center" | '''Move''' || align="center" | '''Motion''' || align="center" | '''Damage''' || align="center" | '''Stun Damage''' | | align="center" | '''Move''' || align="center" | '''Motion''' || align="center" | '''Damage''' || align="center" | '''Stun Damage''' || align="center" | '''Chains into itself''' || align="center" | '''Special Cancel''' || align="center" | '''Super Cancel''' || align="center" | '''Juggle Value''' | ||
|- | |- | ||
| align="center" | | | align="center" | Crouch Forward || align="center" | D+MK || align="center" | 90(16 life points) || align="center" | 3 || align="center" | No || align="center" | Yes || align="center" | Yes | ||
|} | |} | ||
'' | '''Frame Data''' | ||
{| border="1em" cellspacing="0" width="65%" style="border: 1px solid #999; background: none;" | |||
{| border="1em | |||
|- | |- | ||
| align="center" | ''' | | align="center" | '''Startup''' || align="center" | '''Hit''' || align="center" | '''Recovery''' || align="center" | '''Blocked Advantage''' || align="center" | '''Hit Advantage''' || align="center" | '''Crouching Hit Advantage''' || align="center" | '''Guard''' || align="center" | '''Parry''' | ||
|- | |- | ||
| align="center" | | | align="center" | 6 || align="center" | 5 || align="center" | 16 || align="center" | -3 || align="center" | -2 || align="center" | -1 || align="center" | L || align="center" | L | ||
|} | |||
'''Gauge Increase''' | |||
{| border="1em" cellspacing="0" width="30%" style="border: 1px solid #999; background: none;" | |||
|- | |- | ||
| align="center" | | | align="center" | '''Miss''' || align="center" | '''Blocked''' || align="center" | '''Hit''' || align="center" | '''Parry (Gauge for opponent)''' | ||
|- | |- | ||
| align="center" | | | align="center" | 2 || align="center" | 4 || align="center" | 8 || align="center" | 4 | ||
|} | |} | ||
''Comments here'' | ''Comments here'' | ||
[[Image:( | [[Image:(akumachk).gif|none]] | ||
{| border="1em" | {| border="1em" cellspacing="0" width="60%" style="border: 1px solid #999; background: none;" | ||
|- | |||
| align="center" | '''Move''' || align="center" | '''Motion''' || align="center" | '''Damage''' || align="center" | '''Stun Damage''' || align="center" | '''Chains into itself''' || align="center" | '''Special Cancel''' || align="center" | '''Super Cancel''' || align="center" | '''Juggle Value''' | |||
|- | |||
| align="center" | Crouch Roundhouse || align="center" | D+HK || align="center" | 135(24 life points) || align="center" | 3 || align="center" | No || align="center" | No || align="center" | No | |||
|} | |||
'''Frame Data''' | |||
{| border="1em" cellspacing="0" width="65%" style="border: 1px solid #999; background: none;" | |||
|- | |- | ||
| align="center" | ''' | | align="center" | '''Startup''' || align="center" | '''Hit''' || align="center" | '''Recovery''' || align="center" | '''Blocked Advantage''' || align="center" | '''Hit Advantage''' || align="center" | '''Crouching Hit Advantage''' || align="center" | '''Guard''' || align="center" | '''Parry''' | ||
|- | |- | ||
| align="center" | | | align="center" | 7 || align="center" | 5 || align="center" | 25 || align="center" | -15 || align="center" | Down || align="center" | Down || align="center" | L || align="center" | L | ||
|} | |||
'''Gauge Increase''' | |||
{| border="1em" cellspacing="0" width="30%" style="border: 1px solid #999; background: none;" | |||
|- | |- | ||
| align="center" | | | align="center" | '''Miss''' || align="center" | '''Blocked''' || align="center" | '''Hit''' || align="center" | '''Parry (Gauge for opponent)''' | ||
|- | |- | ||
| align="center" | | | align="center" | 3 || align="center" | 6 || align="center" | 14 || align="center" | 4 | ||
|} | |} | ||
''Comments here'' | ''Comments here'' | ||
==== Command Normals ==== | |||
[[Image:( | [[Image:(akumafmp).gif|none]] | ||
{| border="1em | {| border="1em" cellspacing="0" width="60%" style="border: 1px solid #999; background: none;" | ||
|- | |- | ||
| align="center" | '''Move''' || align="center" | '''Motion''' || align="center" | '''Damage''' || align="center" | '''Stun Damage''' || align="center" | ''' | | align="center" | '''Move''' || align="center" | '''Motion''' || align="center" | '''Damage''' || align="center" | '''Stun Damage''' || align="center" | '''Chains into itself''' || align="center" | '''Special Cancel''' || align="center" | '''Super Cancel''' || align="center" | '''Juggle Value''' | ||
|- | |- | ||
| align="center" | | | align="center" | Zugai Hasatsu || align="center" | F+MP || align="center" | 40+50(18 life points) || align="center" | 9+7 || align="center" | No || align="center" | No || align="center" | No | ||
|} | |||
'''Frame Data''' | |||
{| border="1em" cellspacing="0" width="65%" style="border: 1px solid #999; background: none;" | |||
|- | |- | ||
| align="center" | | | align="center" | '''Startup''' || align="center" | '''Hit''' || align="center" | '''Recovery''' || align="center" | '''Blocked Advantage''' || align="center" | '''Hit Advantage''' || align="center" | '''Crouching Hit Advantage''' || align="center" | '''Guard''' || align="center" | '''Parry''' | ||
|- | |- | ||
| align="center" | | | align="center" | 14 || align="center" | 1 || align="center" | 22 || align="center" | -1 || align="center" | +1 || align="center" | +3 || align="center" | H/H || align="center" | H/H | ||
| | |} | ||
| align="center" | | '''Gauge Increase''' | ||
{| border="1em" cellspacing="0" width="30%" style="border: 1px solid #999; background: none;" | |||
|- | |- | ||
| align="center" | | | align="center" | '''Miss''' || align="center" | '''Blocked''' || align="center" | '''Hit''' || align="center" | '''Parry (Gauge for opponent)''' | ||
|- | |- | ||
| align="center" | | | align="center" | 2+0 || align="center" | 2+1 || align="center" | 7+2 || align="center" | 4+4 | ||
|} | |} | ||
This move is crucial for advance Akuma gameplay. First of all, this is the common Kara-Demon move, also this is the move that you can become unthrowable by normal grabs, also Gigas Breaker (even caught from behind). | |||
[[Image:( | [[Image:(akumajdmk).gif|none]] | ||
{| border="1em | {| border="1em" cellspacing="0" width="60%" style="border: 1px solid #999; background: none;" | ||
|- | |- | ||
| align="center" | '''Move''' || align="center" | '''Motion''' || align="center" | '''Damage''' || align="center" | '''Stun Damage''' | | align="center" | '''Move''' || align="center" | '''Motion''' || align="center" | '''Damage''' || align="center" | '''Stun Damage''' || align="center" | '''Chains into itself''' || align="center" | '''Special Cancel''' || align="center" | '''Super Cancel''' || align="center" | '''Juggle Value''' | ||
|- | |- | ||
| align="center" | | | align="center" | Tenma Kuujin Kyaku || align="center" | (Air) D+MK || align="center" | 90(16 life points) || align="center" | 11 || align="center" | No || align="center" | No || align="center" | No | ||
|} | |||
'''Frame Data''' | |||
{| border="1em" cellspacing="0" width="65%" style="border: 1px solid #999; background: none;" | |||
|- | |- | ||
| align="center" | | | align="center" | '''Startup''' || align="center" | '''Hit''' || align="center" | '''Recovery''' || align="center" | '''Blocked Advantage''' || align="center" | '''Hit Advantage''' || align="center" | '''Crouching Hit Advantage''' || align="center" | '''Guard''' || align="center" | '''Parry''' | ||
|- | |- | ||
| align="center" | | | align="center" | 8 || align="center" | Until landing || align="center" | 3 || align="center" | - || align="center" | - || align="center" | - || align="center" | H || align="center" | H | ||
|} | |||
'''Gauge Increase''' | |||
{| border="1em" cellspacing="0" width="30%" style="border: 1px solid #999; background: none;" | |||
|- | |- | ||
| align="center" | | | align="center" | '''Miss''' || align="center" | '''Blocked''' || align="center" | '''Hit''' || align="center" | '''Parry (Gauge for opponent)''' | ||
|- | |- | ||
| align="center" | | | align="center" | 2 || align="center" | 4 || align="center" | 8 || align="center" | 4 | ||
|} | |} | ||
''Comments here'' | ''Comments here'' | ||
=== Target Combo === | |||
{| border="1em" cellspacing="0" width="70%" style="border: 1px solid #999; background: none;" | |||
{| border="1em | |||
|- | |- | ||
| align="center" | '''Move''' || align="center" | '''Motion''' || align="center" | '''Damage''' || align="center" | '''Stun Damage''' | | align="center" | '''Move''' || align="center" | '''Motion''' || align="center" | '''Damage''' || align="center" | '''Stun Damage''' || align="center" | '''Chains into itself''' || align="center" | '''Special Cancel''' || align="center" | '''Super Cancel''' || align="center" | '''Juggle Value''' | ||
|- | |- | ||
| align="center" | | | align="center" | Target Combo || align="center" | Closemp -> Close HP || align="center" | 115+80 || align="center" | 7+3 || align="center" | No/No || align="center" | Yes/No || align="center" | Yes/No | ||
|} | |||
'''Frame Data''' | |||
{| border="1em" cellspacing="0" width="65%" style="border: 1px solid #999; background: none;" | |||
|- | |- | ||
| align="center" | | | align="center" | '''Startup''' || align="center" | '''Hit''' || align="center" | '''Recovery''' || align="center" | '''Blocked Advantage''' || align="center" | '''Hit Advantage''' || align="center" | '''Crouching Hit Advantage''' || align="center" | '''Guard''' || align="center" | '''Parry''' | ||
|- | |- | ||
| align="center" | | | align="center" | 5 || align="center" | - || align="center" | - || align="center" | -12 || align="center" | -10 || align="center" | -8 || align="center" | HL/HL || align="center" | H/H | ||
|} | |||
'''Gauge Increase''' | |||
{| border="1em" cellspacing="0" width="30%" style="border: 1px solid #999; background: none;" | |||
|- | |- | ||
| align="center" | | | align="center" | '''Miss''' || align="center" | '''Blocked''' || align="center" | '''Hit''' || align="center" | '''Parry (Gauge for opponent)''' | ||
|- | |- | ||
| align="center" | | align="center" | - || align="center" | 4+1 || align="center" | 8+1 || align="center" | 4+4 | ||
|- | |||
|} | |} | ||
''Comments here'' | ''Comments here'' | ||
=== Special Moves === | |||
Please note that in this section you will see mainly 3 images for the special moves, this means the image on the left its done withLP (or LK), the image on the center its done withMP (or MK), and the image on the right its done with HP (or HK). Also its the same "rule" as the sections above, its the 1rst frame it hits for every of the moves. | |||
[[Image:( | [[Image:(akumahdk).gif|none]] | ||
{| border="1em | {| border="1em" cellspacing="0" width="60%" style="border: 1px solid #999; background: none;" | ||
|- | |- | ||
| align="center" | '''Move''' || align="center" | '''Motion''' || align="center" | '''Damage''' || align="center" | '''Stun Damage''' | | align="center" | '''Move''' || align="center" | '''Motion''' || align="center" | '''Damage''' || align="center" | '''Blocked Damage''' || align="center" | '''Stun Damage''' || align="center" | '''Super Cancel''' || align="center" | '''Juggle Value''' | ||
|- | |- | ||
| align="center" | Gou | | align="center" | Gou Hadouken || align="center" | QCF+P || align="center" | 60(17 life points) || align="center" | 4 || align="center" | 3 || align="center" | Yes | ||
|} | |||
'''Frame Data''' | |||
{| border="1em" cellspacing="0" width="65%" style="border: 1px solid #999; background: none;" | |||
|- | |- | ||
| align="center" | | | align="center" | '''Startup''' || align="center" | '''Hit''' || align="center" | '''Recovery''' || align="center" | '''Blocked Advantage''' || align="center" | '''Hit Advantage''' || align="center" | '''Crouching Hit Advantage''' || align="center" | '''Guard''' || align="center" | '''Parry''' | ||
|- | |- | ||
| align="center" | | | align="center" | 7 || align="center" | 1 || align="center" | 38 || align="center" | -11 || align="center" | -10 || align="center" | -10 || align="center" | HL || align="center" | H | ||
| | |} | ||
| align="center" | | '''Gauge Increase''' | ||
{| border="1em" cellspacing="0" width="30%" style="border: 1px solid #999; background: none;" | |||
|- | |- | ||
| align="center" | | | align="center" | '''Miss''' || align="center" | '''Blocked''' || align="center" | '''Hit''' || align="center" | '''Parry (Gauge for opponent)''' | ||
|- | |- | ||
| align="center" | | | align="center" | 0 || align="center" | 1 || align="center" | 1 || align="center" | 4 | ||
|} | |} | ||
''Comments here'' | ''Comments here'' | ||
[[Image:( | [[Image:(akumazhdk).gif|none]] | ||
{| border="1em | {| border="1em" cellspacing="0" width="60%" style="border: 1px solid #999; background: none;" | ||
|- | |- | ||
| align="center" | '''Move''' || align="center" | '''Motion''' || align="center" | '''Damage''' || align="center" | '''Stun Damage''' | | align="center" | '''Move''' || align="center" | '''Motion''' || align="center" | '''Damage''' || align="center" | '''Blocked Damage''' || align="center" | '''Stun Damage''' || align="center" | '''Super Cancel''' || align="center" | '''Juggle Value''' | ||
|- | |- | ||
| align="center" | | | align="center" | Zankuu Hadouken || align="center" | (Air) QCF+P || align="center" | 60(10 life points) || align="center" | 4 || align="center" | 3 || align="center" | Yes | ||
|} | |} | ||
'' | '''Frame Data''' | ||
{| border="1em" cellspacing="0" width="65%" style="border: 1px solid #999; background: none;" | |||
{| border="1em | |||
|- | |- | ||
| align="center" | ''' | | align="center" | '''Startup''' || align="center" | '''Hit''' || align="center" | '''Recovery''' || align="center" | '''Blocked Advantage''' || align="center" | '''Hit Advantage''' || align="center" | '''Crouching Hit Advantage''' || align="center" | '''Guard''' || align="center" | '''Parry''' | ||
|- | |- | ||
| align="center" | | | align="center" | 11 || align="center" | 1 || align="center" | 7 || align="center" | - || align="center" | - || align="center" | - || align="center" | HL || align="center" | H | ||
|} | |} | ||
'' | '''Gauge Increase''' | ||
{| border="1em" cellspacing="0" width="30%" style="border: 1px solid #999; background: none;" | |||
{| border="1em | |||
|- | |- | ||
| align="center" | ''' | | align="center" | '''Miss''' || align="center" | '''Blocked''' || align="center" | '''Hit''' || align="center" | '''Parry (Gauge for opponent)''' | ||
|- | |- | ||
| align="center" | | | align="center" | 0 || align="center" | 1 || align="center" | 1 || align="center" | 4 | ||
|} | |} | ||
''Comments here'' | ''Comments here'' | ||
[[Image:( | [[Image:(akumashdk).gif|none]] | ||
{| border="1em | {| border="1em" cellspacing="0" width="65%" style="border: 1px solid #999; background: none;" | ||
|- | |||
| align="center" | '''Move''' || align="center" | '''Motion''' || align="center" | '''Damage''' || align="center" | '''Blocked Damage''' || align="center" | '''Stun Damage''' || align="center" | '''Super Cancel''' || align="center" | '''Juggle Value''' | |||
|- | |||
| align="center" | Shakunetsu Hadouken (Jab) || align="center" | HCB+LP || align="center" | 50(8 life points) || align="center" | 3 || align="center" | 3 || align="center" | Yes | |||
|- | |- | ||
| align="center" | | | align="center" | Shakunetsu Hadouken (Strong) || align="center" | HCB+MP || align="center" | 100(50+50)(16 life points) || align="center" | 3+3 || align="center" | 3+3 || align="center" | Yes | ||
|- | |- | ||
| align="center" | | | align="center" | Shakunetsu Hadouken (Fierce) || align="center" | HCB+HP || align="center" | 150(50+50+50)(24 life points) || align="center" | 3+3+3 || align="center" | 3+3+3 || align="center" | Yes | ||
|} | |} | ||
'' | '''Frame Data''' | ||
{| border="1em" cellspacing="0" width="80%" style="border: 1px solid #999; background: none;" | |||
|- | |||
| align="center" | '''Move''' || align="center" | '''Startup''' || align="center" | '''Hit''' || align="center" | '''Recovery''' || align="center" | '''Blocked Advantage''' || align="center" | '''Hit Advantage''' || align="center" | '''Crouching Hit Advantage''' || align="center" | '''Guard''' || align="center" | '''Parry''' | |||
{| border="1em | |||
|- | |- | ||
| align="center" | | | align="center" | Shakunetsu Hadouken (Jab) || align="center" | 13 || align="center" | 1 || align="center" | 42 || align="center" | -23 || align="center" | Down || align="center" | Down || align="center" | HL || align="center" | H | ||
|- | |- | ||
| align="center" | | | align="center" | Shakunetsu Hadouken (Strong) || align="center" | 17 || align="center" | 1 || align="center" | 43 || align="center" | -18 || align="center" | Down || align="center" | Down || align="center" | HL/HL || align="center" | H/H | ||
|- | |- | ||
| align="center" | - || align="center" | | | align="center" | Shakunetsu Hadouken (Fierce) || align="center" | 21 || align="center" | 1 || align="center" | 44 || align="center" | -15 || align="center" | Down || align="center" | Down || align="center" | HL/HL/HL || align="center" | H/H/H | ||
|} | |||
'''Gauge Increase''' | |||
{| border="1em" cellspacing="0" width="50%" style="border: 1px solid #999; background: none;" | |||
|- | |- | ||
| align="center" | | | align="center" | '''Move''' || align="center" | '''Miss''' || align="center" | '''Blocked''' || align="center" | '''Hit''' || align="center" | '''Parry (Gauge for opponent)''' | ||
|- | |- | ||
| align="center" | | | align="center" | Shakunetsu Hadouken (Jab) || align="center" | 0 || align="center" | 1 || align="center" | 1 || align="center" | 4 | ||
|- | |- | ||
| align="center" | | | align="center" | Shakunetsu Hadouken (Strong) || align="center" | 0 || align="center" | 2(1+1) || align="center" | 2(1+1) || align="center" | 8(4+4) | ||
|- | |- | ||
| align="center" | | | align="center" | Shakunetsu Hadouken (Fierce) || align="center" | 0 || align="center" | 3(1+1+1) || align="center" | 3(1+1+1) || align="center" | 12(4+4+4) | ||
|} | |} | ||
''Comments here'' | ''Comments here'' | ||
[[Image:( | [[Image:(akumatzk).gif|none]] | ||
{| border="1em" | {| border="1em" cellspacing="0" width="65%" style="border: 1px solid #999; background: none;" | ||
|- | |||
| align="center" | '''Move''' || align="center" | '''Motion''' || align="center" | '''Damage''' || align="center" | '''Blocked Damage''' || align="center" | '''Stun Damage''' || align="center" | '''Super Cancel''' || align="center" | '''Juggle Value''' | |||
|- | |||
| align="center" | Tatsumaki Zankuukyaku (Short) || align="center" | QCB+LK || align="center" | 100(17 life points) || align="center" | 6 || align="center" | 7 || align="center" | Yes | |||
|- | |||
| align="center" | Tatsumaki Zankuukyaku (Forward) || align="center" | QCB+MK || align="center" | 120(90+30)(21 life points) || align="center" | 15(11+2) || align="center" | 10(7+3) || align="center" | Yes/No | |||
|- | |||
| align="center" | Tatsumaki Zankuukyaku (Roundhouse) || align="center" | QCB+HK || align="center" | 150(90+30+30)(25 life points) || align="center" | 17(11+2+2) || align="center" | 13(7+3+3) || align="center" | Yes/No/No | |||
|} | |||
'''Frame Data''' | |||
{| border="1em" cellspacing="0" width="80%" style="border: 1px solid #999; background: none;" | |||
|- | |||
| align="center" | '''Move''' || align="center" | '''Startup''' || align="center" | '''Hit''' || align="center" | '''Recovery''' || align="center" | '''Blocked Advantage''' || align="center" | '''Hit Advantage''' || align="center" | '''Crouching Hit Advantage''' || align="center" | '''Guard''' || align="center" | '''Parry''' | |||
|- | |- | ||
| align="center" | | | align="center" | Tatsumaki Zankuukyaku (Short) || align="center" | 11・(14) || align="center" | 2・(2) || align="center" | 17 || align="center" | -12 || align="center" | Down || align="center" | Down || align="center" | HL || align="center" | H | ||
|- | |- | ||
| align="center" | | | align="center" | Tatsumaki Zankuukyaku (Forward) || align="center" | 2・11・(14)・18・(21) || align="center" | 2・2・(2)・2・(2) || align="center" | 16 || align="center" | -8 || align="center" | Down || align="center" | Down || align="center" | HL || align="center" | H | ||
|- | |- | ||
| align="center" | - || align="center" | | | align="center" | Tatsumaki Zankuukyaku (Roundhouse) || align="center" | 2・11・(14)・18・(21)・25・(28)・32・(35) || align="center" | 2・2・(2)・2・(2)・2・(2)・2・(2) || align="center" | 10 || align="center" | -5 || align="center" | Down || align="center" | Down || align="center" | HL || align="center" | H | ||
|} | |||
'''Gauge Increase''' | |||
{| border="1em" cellspacing="0" width="60%" style="border: 1px solid #999; background: none;" | |||
|- | |- | ||
| align="center" | | | align="center" | '''Move''' || align="center" | '''Miss''' || align="center" | '''Blocked''' || align="center" | '''Hit''' || align="center" | '''Parry (Gauge for opponent)''' | ||
|- | |- | ||
| align="center" | | | align="center" | Tatsumaki Zankuukyaku (Short) || align="center" | 3 || align="center" | 8 || align="center" | 13 || align="center" | 4 | ||
|- | |- | ||
| align="center" | | | align="center" | Tatsumaki Zankuukyaku (Forward) || align="center" | 3 || align="center" | 9(8+1) || align="center" | 15(13+2) || align="center" | 8(4+4) | ||
|- | |- | ||
| align="center" | | | align="center" | Tatsumaki Zankuukyaku (Roundhouse) || align="center" | 3 || align="center" | 10(8+1+1) || align="center" | 17(13+2+2) || align="center" | 12(4+4+4) | ||
|} | |} | ||
With MK version of Tatsumaki, if you hit the opponent with the knee (before you raise into the air) Akuma will spin only 1 time into the air. Also with HK version, Akuma will spin only 2 times in the air if the knee hits. | |||
[[Image:( | [[Image:(akumaatzk).gif|none]] | ||
{| border="1em" | {| border="1em" cellspacing="0" width="70%" style="border: 1px solid #999; background: none;" | ||
|- | |||
| align="center" | '''Move''' || align="center" | '''Motion''' || align="center" | '''Damage''' || align="center" | '''Blocked Damage''' || align="center" | '''Stun Damage''' || align="center" | '''Super Cancel''' || align="center" | '''Juggle Value''' | |||
|- | |||
| align="center" | Air Tatsumaki Zankuukyaku (Short) || align="center" | (Air) QCB+LK || align="center" | 80(14 life points) || align="center" | 5 || align="center" | 3 || align="center" | Yes | |||
|- | |||
| align="center" | Air Tatsumaki Zankuukyaku (Forward) || align="center" | (Air) QCB+MK || align="center" | 160(80+80)(27 life points) || align="center" | 5* || align="center" | 8(3+5) || align="center" | Yes | |||
|- | |||
| align="center" | Air Tatsumaki Zankuukyaku (Roundhouse) || align="center" | (Air) QCB+HK || align="center" | 240(80+80+80)(40 life points) || align="center" | 5* || align="center" | 11(3+5+3) || align="center" | Yes | |||
|} | |||
{| border="1em" cellspacing="0" width="40%" style="border: 1px solid #999; background: none;" | |||
|- | |||
|(*) Blocked damage is for 1 hit only, its not possible to block more hits | |||
|} | |||
'''Frame Data''' | |||
{| border="1em" cellspacing="0" width="80%" style="border: 1px solid #999; background: none;" | |||
|- | |||
| align="center" | '''Move''' || align="center" | '''Startup''' || align="center" | '''Hit''' || align="center" | '''Recovery''' || align="center" | '''Blocked Advantage''' || align="center" | '''Hit Advantage''' || align="center" | '''Crouching Hit Advantage''' || align="center" | '''Guard''' || align="center" | '''Parry''' | |||
|- | |- | ||
| align="center" | | | align="center" | Air Tatsumaki Zankuukyaku (Short) || align="center" | 5・9 || align="center" | 2・1 || align="center" | 9 || align="center" | - || align="center" | Down || align="center" | Down || align="center" | HL || align="center" | H | ||
|- | |- | ||
| align="center" | | | align="center" | Air Tatsumaki Zankuukyaku (Forward) || align="center" | 5・9・12・16 || align="center" | 2・1・2・1 || align="center" | 9 || align="center" | - || align="center" | Down || align="center" | Down || align="center" | HL || align="center" | H | ||
|- | |- | ||
| align="center" | - || align="center" | | | align="center" | Air Tatsumaki Zankuukyaku (Roundhouse) || align="center" | 5・9・12・16・19・23・26・30 || align="center" | 2・1・2・1・2・1・2・1 || align="center" | 9 || align="center" | - || align="center" | Down || align="center" | Down || align="center" | HL || align="center" | H | ||
|} | |||
'''Gauge Increase''' | |||
{| border="1em" cellspacing="0" width="60%" style="border: 1px solid #999; background: none;" | |||
|- | |- | ||
| align="center" | | | align="center" | '''Move''' || align="center" | '''Miss''' || align="center" | '''Blocked''' || align="center" | '''Hit''' || align="center" | '''Parry (Gauge for opponent)''' | ||
|- | |- | ||
| align="center" | | | align="center" | Air Tatsumaki Zankuukyaku (Short) || align="center" | 1 || align="center" | 1 || align="center" | 7 || align="center" | 4 | ||
|- | |- | ||
| align="center" | | | align="center" | Air Tatsumaki Zankuukyaku (Forward) || align="center" | 2 || align="center" | 1* || align="center" | 9(7+2) || align="center" | 8(4+4) | ||
|- | |- | ||
| align="center" | | | align="center" | Air Tatsumaki Zankuukyaku (Roundhouse) || align="center" | 4 || align="center" | 1* || align="center" | 16(7+2+7) || align="center" | 12(4+4+4) | ||
|} | |||
{| border="1em" cellspacing="0" width="50%" style="border: 1px solid #999; background: none;" | |||
|- | |- | ||
| | |(*) Gauge increase for blocked hit is for 1 hit only, its not possible to block more hits | ||
|} | |} | ||
''Comments here'' | ''Comments here'' | ||
[[Image:( | [[Image:(akumasrk).gif|none]] | ||
{| border="1em | {| border="1em" cellspacing="0" width="65%" style="border: 1px solid #999; background: none;" | ||
|- | |- | ||
| align="center" | ''' | | align="center" | '''Move''' || align="center" | '''Motion''' || align="center" | '''Damage''' || align="center" | '''Blocked Damage''' || align="center" | '''Stun Damage''' || align="center" | '''Super Cancel''' || align="center" | '''Juggle Value''' | ||
|- | |- | ||
| align="center" | | | align="center" | Gou Shoryuken (Jab) || align="center" | F, D, DF+LP || align="center" | 130(100(23 life points)) || align="center" | 16(13) || align="center" | 11(9) || align="center" | Yes | ||
|- | |- | ||
| align="center" | | | align="center" | Gou Shoryuken (Strong) || align="center" | F, D, DF+MP || align="center" | 150(100+50)(25 life points) || align="center" | 19(13+6) || align="center" | 14(11+3) || align="center" | Yes/No | ||
|- | |- | ||
| align="center" | | | align="center" | Gou Shoryuken (Fierce) || align="center" | F, D, DF+HP || align="center" | 180(60x3)(29 life points) || align="center" | 24(8x3) || align="center" | 15(11+3+3) || align="center" | Yes/Yes/No | ||
|} | |||
'''Frame Data''' | |||
{| border="1em" cellspacing="0" width="85%" style="border: 1px solid #999; background: none;" | |||
|- | |- | ||
| align="center" | | | align="center" | '''Move''' || align="center" | '''Startup''' || align="center" | '''Hit''' || align="center" | '''Recovery''' || align="center" | '''Blocked Advantage''' || align="center" | '''Hit Advantage''' || align="center" | '''Crouching Hit Advantage''' || align="center" | '''Guard''' || align="center" | '''Parry''' | ||
|- | |- | ||
| align="center" | - || align="center" | | | align="center" | Gou Shoryuken (Jab) || align="center" | 3 || align="center" | 14 || align="center" | 26 || align="center" | -24 || align="center" | Down || align="center" | Down || align="center" | HL || align="center" | HL | ||
|- | |- | ||
| align="center" | - || align="center" | | | align="center" | Gou Shoryuken (Strong) || align="center" | 2 || align="center" | 2/5 || align="center" | 41 || align="center" | -30 || align="center" | Down || align="center" | Down || align="center" | HL/HL || align="center" | HL/HL | ||
|- | |- | ||
| align="center" | | | align="center" | Gou Shoryuken (Fierce) || align="center" | 1 || align="center" | 2/2/19 || align="center" | 35 || align="center" | -34 || align="center" | Down || align="center" | Down || align="center" | HL/HL/HL || align="center" | HL/HL/HL | ||
| | |} | ||
| align="center" | | '''Gauge Increase''' | ||
{| border="1em" cellspacing="0" width="50%" style="border: 1px solid #999; background: none;" | |||
|- | |- | ||
| align="center" | | | align="center" | '''Move''' || align="center" | '''Miss''' || align="center" | '''Blocked''' || align="center" | '''Hit''' || align="center" | '''Parry (Gauge for opponent)''' | ||
|- | |- | ||
| align="center" | | | align="center" | Gou Shoryuken (Jab) || align="center" | 3 || align="center" | 10 || align="center" | 15 || align="center" | 4 | ||
|- | |- | ||
| align="center" | | | align="center" | Gou Shoryuken (Strong) || align="center" | 3 || align="center" | 11(10+1) || align="center" | 17(15+2) || align="center" | 8(4+4) | ||
|- | |- | ||
| align="center" | | | align="center" | Gou Shoryuken (Fierce) || align="center" | 3 || align="center" | 12(10+1+1) || align="center" | 19(15+2+2) || align="center" | 12(4+4+4) | ||
|} | |} | ||
''Comments here'' | ''Comments here'' | ||
[[Image:( | [[Image:(akumahs).gif|none]] | ||
{| border="1em | {| border="1em" cellspacing="0" width="60%" style="border: 1px solid #999; background: none;" | ||
|- | |||
| align="center" | '''Move''' || align="center" | '''Motion''' || align="center" | '''Damage''' || align="center" | '''Blocked Damage''' || align="center" | '''Stun Damage''' || align="center" | '''Super Cancel''' || align="center" | '''Juggle Value''' | |||
|- | |- | ||
| align="center" | | | align="center" | Hyakki Shuu || align="center" | F, D, DF+K || align="center" | - || align="center" | - || align="center" | - || align="center" | No | ||
|} | |||
'''Frame Data''' | |||
{| border="1em" cellspacing="0" width="65%" style="border: 1px solid #999; background: none;" | |||
|- | |- | ||
| align="center" | | | align="center" | '''Startup''' || align="center" | '''Hit''' || align="center" | '''Recovery''' || align="center" | '''Blocked Advantage''' || align="center" | '''Hit Advantage''' || align="center" | '''Crouching Hit Advantage''' || align="center" | '''Guard''' || align="center" | '''Parry''' | ||
|- | |- | ||
| align="center" | - || align="center" | | | align="center" | - || align="center" | 36 || align="center" | - || align="center" | - || align="center" | - || align="center" | - || align="center" | - || align="center" | - | ||
|} | |||
'''Gauge Increase''' | |||
{| border="1em" cellspacing="0" width="30%" style="border: 1px solid #999; background: none;" | |||
|- | |- | ||
| align="center" | | | align="center" | '''Miss''' || align="center" | '''Blocked''' || align="center" | '''Hit''' || align="center" | '''Parry (Gauge for opponent)''' | ||
|- | |- | ||
| align="center" | - || align="center" | | | align="center" | - || align="center" | - || align="center" | - || align="center" | - | ||
|} | |||
''Comments here'' | |||
[[Image:(akumahgouzan).gif|none]] | |||
{| border="1em" cellspacing="0" width="60%" style="border: 1px solid #999; background: none;" | |||
|- | |- | ||
| align="center" | | | align="center" | '''Move''' || align="center" | '''Motion''' || align="center" | '''Damage''' || align="center" | '''Blocked Damage''' || align="center" | '''Stun Damage''' || align="center" | '''Super Cancel''' || align="center" | '''Juggle Value''' | ||
|- | |- | ||
| align="center" | | | align="center" | Hyakki Gouzan || align="center" | During F, D, DF+K (No Input) || align="center" | 100 (17 life points)|| align="center" | 13 || align="center" | 3 || align="center" | No | ||
|} | |||
'''Frame Data''' | |||
{| border="1em" cellspacing="0" width="65%" style="border: 1px solid #999; background: none;" | |||
|- | |- | ||
| align="center" | | | align="center" | '''Startup''' || align="center" | '''Hit''' || align="center" | '''Recovery''' || align="center" | '''Blocked Advantage''' || align="center" | '''Hit Advantage''' || align="center" | '''Crouching Hit Advantage''' || align="center" | '''Guard''' || align="center" | '''Parry''' | ||
|- | |- | ||
| align="center" | - || align="center" | | | align="center" | 41 || align="center" | 15 || align="center" | 13 || align="center" | -11 || align="center" | Down || align="center" | Down || align="center" | L || align="center" | L | ||
|} | |||
'''Gauge Increase''' | |||
{| border="1em" cellspacing="0" width="30%" style="border: 1px solid #999; background: none;" | |||
|- | |- | ||
| align="center" | | | align="center" | '''Miss''' || align="center" | '''Blocked''' || align="center" | '''Hit''' || align="center" | '''Parry (Gauge for opponent)''' | ||
|- | |- | ||
| align="center" | | | align="center" | 3 || align="center" | 6 || align="center" | 14 || align="center" | 4 | ||
|} | |} | ||
''Comments here'' | ''Comments here'' | ||
[[Image:( | [[Image:(akumahgoushou).gif|none]] | ||
{| border="1em" | {| border="1em" cellspacing="0" width="60%" style="border: 1px solid #999; background: none;" | ||
|- | |||
| align="center" | '''Move''' || align="center" | '''Motion''' || align="center" | '''Damage''' || align="center" | '''Blocked Damage''' || align="center" | '''Stun Damage''' || align="center" | '''Super Cancel''' || align="center" | '''Juggle Value''' | |||
|- | |||
| align="center" | Hyakki Goushou || align="center" | During F, D, DF+K press P || align="center" | 130(23 life points) || align="center" | 16 || align="center" | 13 || align="center" | No | |||
|} | |||
'''Frame Data''' | |||
{| border="1em" cellspacing="0" width="65%" style="border: 1px solid #999; background: none;" | |||
|- | |||
| align="center" | '''Startup''' || align="center" | '''Hit''' || align="center" | '''Recovery''' || align="center" | '''Blocked Advantage''' || align="center" | '''Hit Advantage''' || align="center" | '''Crouching Hit Advantage''' || align="center" | '''Guard''' || align="center" | '''Parry''' | |||
|- | |||
| align="center" | 10 || align="center" | 3 || align="center" | 17 || align="center" | - || align="center" | Down || align="center" | Down || align="center" | H || align="center" | H | |||
|} | |||
'''Gauge Increase''' | |||
{| border="1em" cellspacing="0" width="30%" style="border: 1px solid #999; background: none;" | |||
|- | |- | ||
| align="center" | ''' | | align="center" | '''Miss''' || align="center" | '''Blocked''' || align="center" | '''Hit''' || align="center" | '''Parry (Gauge for opponent)''' | ||
|- | |- | ||
| align="center" | | | align="center" | 3 || align="center" | 6 || align="center" | 14 || align="center" | 4 | ||
|} | |} | ||
''Comments here'' | ''Comments here'' | ||
{| border="1em" | [[Image:(akumahgoujin).gif|none]] | ||
{| border="1em" cellspacing="0" width="60%" style="border: 1px solid #999; background: none;" | |||
|- | |||
| align="center" | '''Move''' || align="center" | '''Motion''' || align="center" | '''Damage''' || align="center" | '''Blocked Damage''' || align="center" | '''Stun Damage''' || align="center" | '''Super Cancel''' || align="center" | '''Juggle Value''' | |||
|- | |||
| align="center" | Hyakki Goujin || align="center" | During F, D, DF+K press K || align="center" | 100(17 life points) || align="center" | 13 || align="center" | 11 || align="center" | No | |||
|} | |||
'''Frame Data''' | |||
{| border="1em" cellspacing="0" width="65%" style="border: 1px solid #999; background: none;" | |||
|- | |- | ||
| align="center" | ''' | | align="center" | '''Startup''' || align="center" | '''Hit''' || align="center" | '''Recovery''' || align="center" | '''Blocked Advantage''' || align="center" | '''Hit Advantage''' || align="center" | '''Crouching Hit Advantage''' || align="center" | '''Guard''' || align="center" | '''Parry''' | ||
|- | |- | ||
| align="center" | | | align="center" | 9 || align="center" | Until landing || align="center" | 3 || align="center" | - || align="center" | - || align="center" | - || align="center" | HL || align="center" | H | ||
|} | |||
'''Gauge Increase''' | |||
{| border="1em" cellspacing="0" width="30%" style="border: 1px solid #999; background: none;" | |||
|- | |- | ||
| align="center" | | | align="center" | '''Miss''' || align="center" | '''Blocked''' || align="center" | '''Hit''' || align="center" | '''Parry (Gauge for opponent)''' | ||
|- | |- | ||
| align="center" | | | align="center" | 3 || align="center" | 6 || align="center" | 14 || align="center" | 4 | ||
|} | |||
''Comments here'' | |||
[[Image:(akumahgousai).gif|none]] | |||
{| border="1em" cellspacing="0" width="60%" style="border: 1px solid #999; background: none;" | |||
|- | |- | ||
| align="center" | | | align="center" | '''Move''' || align="center" | '''Motion''' || align="center" | '''Damage''' || align="center" | '''Blocked Damage''' || align="center" | '''Stun Damage''' || align="center" | '''Super Cancel''' || align="center" | '''Juggle Value''' | ||
|- | |- | ||
| align="center" | | | align="center" | Hyakki Gousai || align="center" | During F, D, DF+K press LP+LK || align="center" | 110(19 life points) || align="center" | - || align="center" | 15 || align="center" | No | ||
|} | |||
'''Frame Data''' | |||
{| border="1em" cellspacing="0" width="65%" style="border: 1px solid #999; background: none;" | |||
|- | |- | ||
| align="center" | | | align="center" | '''Startup''' || align="center" | '''Hit''' || align="center" | '''Recovery''' || align="center" | '''Blocked Advantage''' || align="center" | '''Hit Advantage''' || align="center" | '''Crouching Hit Advantage''' || align="center" | '''Guard''' || align="center" | '''Parry''' | ||
|- | |- | ||
| align="center" | - || align="center" | | | align="center" | 3 || align="center" | 2 || align="center" | 17 || align="center" | - || align="center" | Down || align="center" | Down || align="center" | Impossible || align="center" | Impossible | ||
|} | |||
'''Gauge Increase''' | |||
{| border="1em" cellspacing="0" width="30%" style="border: 1px solid #999; background: none;" | |||
|- | |- | ||
| align="center" | | | align="center" | '''Miss''' || align="center" | '''Blocked''' || align="center" | '''Hit''' || align="center" | '''Parry (Gauge for opponent)''' | ||
|- | |- | ||
| align="center" | | | align="center" | 0 || align="center" | - || align="center" | 7 || align="center" | - | ||
|} | |} | ||
''Comments here'' | ''Comments here'' | ||
[[Image:(akumaasf).gif|none]] | |||
{| border="1em" cellspacing="0" width="60%" style="border: 1px solid #999; background: none;" | |||
|- | |||
| align="center" | '''Move''' || align="center" | '''Motion''' || align="center" | '''Damage''' || align="center" | '''Blocked Damage''' || align="center" | '''Stun Damage''' || align="center" | '''Super Cancel''' | |||
|- | |||
| align="center" | Ashura Senkuu (Forward) (PP) || align="center" | F, D, DF+PP || align="center" | - || align="center" | - || align="center" | - || align="center" | No | |||
|- | |||
| align="center" | Ashura Senkuu (Forward) (KK) || align="center" | F, D, DF+KK || align="center" | - || align="center" | - || align="center" | - || align="center" | No | |||
{| border=" | |||
| | |||
| | |||
| align="center" | | |||
| align="center" | | |||
| align="center" | | |||
| align="center" | | |||
| align="center" | | |||
| align="center" | | |||
| align="center" | | |||
| align="center" | | |||
| align="center" | | |||
| | |||
| | |||
| | |||
|- | |- | ||
| | | align="center" | Ashura Senkuu (Backwards) (PP) || align="center" | B, D, DB+PP || align="center" | - || align="center" | - || align="center" | - || align="center" | No | ||
| | |||
| align="center" | |||
| | |||
| align="center | |||
| | |||
| align="center | |||
| | |||
| align="center | |||
| | |||
|- | |- | ||
| | | align="center" | Ashura Senkuu (Backwards) (KK) || align="center" | B, D, DB+KK || align="center" | - || align="center" | - || align="center" | - || align="center" | No | ||
| align="center" | | |} | ||
| align="center" | | '''Frame Data''' | ||
| | {| border="1em" cellspacing="0" width="80%" style="border: 1px solid #999; background: none;" | ||
| align="center" | - | |||
| align="center" | - | |||
| align="center" | | |||
| | |||
| | |||
|- | |- | ||
| | | align="center" | '''Move''' || align="center" | '''Startup''' || align="center" | '''Hit''' || align="center" | '''Recovery''' || align="center" | '''Blocked Advantage''' || align="center" | '''Hit Advantage''' || align="center" | '''Crouching Hit Advantage''' || align="center" | '''Guard''' || align="center" | '''Parry''' | ||
| align="center" | |||
| align="center" | |||
| align="center" | |||
| align="center | |||
| | |||
| align="center | |||
| | |||
| align="center | |||
| | |||
| | |||
|- | |- | ||
| | | align="center" | Ashura Senkuu (Forward) (PP) || align="center" | 20 || align="center" | 46 || align="center" | 9 || align="center" | - || align="center" | - || align="center" | - || align="center" | - || align="center" | - | ||
| align="center" | | |||
| align="center" | | |||
| align="center" | 9 | |||
| align="center" | | |||
| align="center" | | |||
| align="center" | | |||
| | |||
| | |||
|- | |- | ||
| | | align="center" | Ashura Senkuu (Forward) (KK) || align="center" | 20 || align="center" | 30 || align="center" | 9 || align="center" | - || align="center" | - || align="center" | - || align="center" | - || align="center" | - | ||
| align="center" | |||
| align="center" | |||
| align="center" | |||
| align="center | |||
| align="center | |||
| | |||
| align="center | |||
| | |||
| | |||
| | |||
|- | |- | ||
| | | align="center" | Ashura Senkuu (Backwards) (PP) || align="center" | 20 || align="center" | 46 || align="center" | 9 || align="center" | - || align="center" | - || align="center" | - || align="center" | - || align="center" | - | ||
| align="center" | | |||
| align="center" | | |||
| align="center" | | |||
| align="center" | | |||
| align="center" | | |||
| align="center" | | |||
| | |||
| | |||
|- | |- | ||
| | | align="center" | Ashura Senkuu (Backwards) (KK) || align="center" | 20 || align="center" | 30 || align="center" | 9 || align="center" | - || align="center" | - || align="center" | - || align="center" | - || align="center" | - | ||
| align="center" | |||
| align="center" | |} | ||
| align="center" | '''Gauge Increase''' | ||
| align="center" | {| border="1em" cellspacing="0" width="50%" style="border: 1px solid #999; background: none;" | ||
| align="center" | |||
| align="center" | |||
| align="center" | |||
| align="center" | |||
| | |||
|- | |- | ||
| | | align="center" | '''Move''' || align="center" | '''Miss''' || align="center" | '''Blocked''' || align="center" | '''Hit''' || align="center" | '''Parry (Gauge for opponent)''' | ||
| align="center" | | |||
| | |||
| align="center" | | |||
| | |||
| align="center" | | |||
| align="center" | | |||
|- | |- | ||
| | | align="center" | Ashura Senkuu (Forward) (PP) || align="center" | - || align="center" | - || align="center" | - || align="center" | - | ||
| align="center" | |||
| | |||
| align="center | |||
| | |||
| align="center | |||
| | |||
|- | |- | ||
| | | align="center" | Ashura Senkuu (Forward) (KK) || align="center" | - || align="center" | - || align="center" | - || align="center" | - | ||
| | |||
| align="center" | | |||
| align="center" | - | |||
| align="center" | - | |||
| | |||
| align="center" | | |||
|- | |- | ||
| | | align="center" | Ashura Senkuu (Backwards) (PP) || align="center" | - || align="center" | - || align="center" | - || align="center" | - | ||
| align="center | |||
| | |||
| align="center | |||
| | |||
| align="center | |||
| align="center | |||
|- | |- | ||
| | | align="center" | Ashura Senkuu (Backwards) (KK) || align="center" | - || align="center" | - || align="center" | - || align="center" | - | ||
| | |||
| align="center" | | |||
| align="center" | - | |||
| align="center" | | |||
| | |||
| align="center" | | |||
|} | |} | ||
Teleport move, and as you can see it in the "Frame Data", (PP) travels further than (KK). Some Super Arts can caught Akuma from this move those Super Arts are: | |||
Hugo SA1, Ken SA3, | |||
=== | === Super Arts === | ||
{| border=" | [[Image:(akumamgh).gif|none]] | ||
{| border="1em" cellspacing="0" width="75%" style="border: 1px solid #999; background: none;" | |||
|- | |||
| align="center" | '''Super Art''' || align="center" | '''Super Art Name''' || align="center" | '''Super Art Stock''' || align="center" | '''Motion''' || align="center" | '''Damage''' || align="center" | '''Blocked Damage''' || align="center" | '''Stun Damage''' || align="center" | '''Damage/Gauge''' | |||
|- | |||
| align="center" | I || align="center" | Messatsu Gou Hadou || align="center" | 2 bars (112 each bar) || align="center" | QCF QCF+P || align="center" | 290*(47 life points) || align="center" | 19** || align="center" | 0 || align="center" | 2,59(x2) | |||
|} | |||
{| border="1em" cellspacing="0" width="25%" style="border: 1px solid #999; background: none;" | |||
|- | |||
|* (55x5)+60 Damage is when all hits connect. | |||
|- | |||
|** (3x5)+4 Damage is when all hits connect. | |||
|} | |||
'''Frame Data''' | |||
{| border="1em" cellspacing="0" width="65%" style="border: 1px solid #999; background: none;" | |||
|- | |- | ||
| | | align="center" | '''Startup''' || align="center" | '''Hit''' || align="center" | '''Recovery''' || align="center" | '''Blocked Advantage''' || align="center" | '''Hit Advantage''' || align="center" | '''Crouching Hit Advantage''' || align="center" | '''Guard''' || align="center" | '''Parry''' | ||
| align="center" | | |||
| align="center" | | |||
| align="center" | | |||
| align="center" | | |||
| | |||
| align="center" | | |||
| | |||
| | |||
|- | |- | ||
| | | align="center" | 2 || align="center" | 1 || align="center" | 49 || align="center" | -13 || align="center" | Down || align="center" | Down || align="center" | HLx6 || align="center" | Hx6 | ||
| | |||
| align="center | |||
| align="center" | |||
| align="center | |||
| align="center | |||
| | |||
| align="center | |||
| | |||
| | |||
|} | |} | ||
''Comments here'' | |||
{| border=" | [[Image:(akumatgz).gif|none]] | ||
{| border="1em" cellspacing="0" width="75%" style="border: 1px solid #999; background: none;" | |||
|- | |- | ||
| | | align="center" | '''Super Art''' || align="center" | '''Super Art Name''' || align="center" | '''Super Art Stock''' || align="center" | '''Motion''' || align="center" | '''Damage''' || align="center" | '''Blocked Damage''' || align="center" | '''Stun Damage''' || align="center" | '''Damage/Gauge''' | ||
| align="center" | | |||
| align="center" | | |||
| align="center" | | |||
| align="center" | | |||
| align="center" | | |||
| | |||
| | |||
|- | |- | ||
| | | align="center" | I || align="center" | Tenma Gou Zankuu || align="center" | 2 bars (112 each bar) || align="center" | (Air) QCF QCF+P || align="center" | 320*(53 life points) || align="center" | 25** || align="center" | 0 || align="center" | 2,85(x2) | ||
| align="center" | |} | ||
| align="center" | {| border="1em" cellspacing="0" width="26%" style="border: 1px solid #999; background: none;" | ||
| align="center" | |||
| align="center" | |||
| align="center" | |||
| align="center" | |||
| align="center | |||
| | |||
| | |||
|- | |- | ||
| | |* (60x5)+80 Damage is when all hits connect. | ||
|- | |- | ||
| | |** (4x5)+5 Damage is when all hits connect. | ||
| | |} | ||
'''Frame Data''' | |||
{| border="1em" cellspacing="0" width="65%" style="border: 1px solid #999; background: none;" | |||
|- | |- | ||
| | | align="center" | '''Startup''' || align="center" | '''Hit''' || align="center" | '''Recovery''' || align="center" | '''Blocked Advantage''' || align="center" | '''Hit Advantage''' || align="center" | '''Crouching Hit Advantage''' || align="center" | '''Guard''' || align="center" | '''Parry''' | ||
| align="center" | | |||
| align="center" | | |||
| | |||
| align="center" | | |||
| | |||
| align="center" | | |||
| align="center" | | |||
| | |||
| | |||
|- | |- | ||
| | | align="center" | 7 || align="center" | 1 || align="center" | 13 || align="center" | -49 || align="center" | Down || align="center" | Down || align="center" | HLx6 || align="center" | Hx6 | ||
| align="center" | |} | ||
| align="center" | ''Comments here'' | ||
| align="center | |||
| align="center" | |||
| align="center" | [[Image:(akumamgs).gif|none]] | ||
| align="center" | {| border="1em" cellspacing="0" width="75%" style="border: 1px solid #999; background: none;" | ||
| align="center | |||
| | |||
| | |||
|- | |- | ||
| | | align="center" | '''Super Art''' || align="center" | '''Super Art Name''' || align="center" | '''Super Art Stock''' || align="center" | '''Motion''' || align="center" | '''Damage''' || align="center" | '''Blocked Damage''' || align="center" | '''Stun Damage''' || align="center" | '''Damage/Gauge''' | ||
| align="center" | | |||
| align="center" | | |||
| | |||
| align="center" | | |||
| | |||
| align="center" | | |||
| align="center" | | |||
| | |||
| | |||
|- | |- | ||
| | | align="center" | II || align="center" | Messatsu Gou Shoryu || align="center" | 2 bars (112 each bar) || align="center" | QCF QCF+P || align="center" | 390*(66 life points) || align="center" | 44** || align="center" | 14*** || align="center" | 3,48(x2) | ||
| align="center" | |} | ||
| align="center" | {| border="1em" cellspacing="0" width="35%" style="border: 1px solid #999; background: none;" | ||
| align="center" | |||
| align="center" | |||
| align="center" | |||
| align="center" | |||
| align="center | |||
| | |||
| | |||
|- | |- | ||
| | |* (40x3)+50+120+110+100 Damage is when all hits connect. | ||
|- | |- | ||
| | |** (5+3)x2+15+7+6 Damage is when all hits connect. | ||
|- | |- | ||
| | |*** (0+3)x2+9+5+5 Damage is when all hits connect. | ||
| | |} | ||
'''Frame Data''' | |||
{| border="1em" cellspacing="0" width="65%" style="border: 1px solid #999; background: none;" | |||
|- | |- | ||
| | | align="center" | '''Startup''' || align="center" | '''Hit''' || align="center" | '''Recovery''' || align="center" | '''Blocked Advantage''' || align="center" | '''Hit Advantage''' || align="center" | '''Crouching Hit Advantage''' || align="center" | '''Guard''' || align="center" | '''Parry''' | ||
| align="center" | |||
| align="center | |||
| align="center | |||
| | |||
| align="center | |||
| | |||
| align="center | |||
| | |||
| | |||
|- | |- | ||
| | | align="center" | 1 || align="center" | 2 || align="center" | 37 || align="center" | -25 || align="center" | Down || align="center" | Down || align="center" | HLx7 || align="center" | HLx7 | ||
| align="center" | | |} | ||
| align="center" | | ''Comments here'' | ||
| align="center" | 25 | |||
| align="center" | | |||
| align="center" | | [[Image:(akumamgr).gif|none]] | ||
| align="center" | | {| border="1em" cellspacing="0" width="75%" style="border: 1px solid #999; background: none;" | ||
| align="center" | | |||
| | |||
| | |||
|- | |- | ||
| | | align="center" | '''Super Art''' || align="center" | '''Super Art Name''' || align="center" | '''Super Art Stock''' || align="center" | '''Motion''' || align="center" | '''Damage''' || align="center" | '''Blocked Damage''' || align="center" | '''Stun Damage''' || align="center" | '''Damage/Gauge''' | ||
| align="center" | |||
| align="center | |||
| | |||
| align="center | |||
| align="center | |||
| align="center | |||
| | |||
| | |||
|- | |- | ||
| | | align="center" | III || align="center" | Messatsu Gou Rasen || align="center" | 2 bars (112 each bar) || align="center" | QCF QCF+K || align="center" | 390*(65 life points) || align="center" | 15** || align="center" | 0 || align="center" | 3,48(x2) | ||
| align="center" | | |} | ||
| align="center" | | {| border="1em" cellspacing="0" width="80%" style="border: 1px solid #999; background: none;" | ||
| align="center" | | |||
| align="center" | | |||
| align="center" | | |||
| align="center" | | |||
| align="center" | | |||
| | |||
| | |||
|- | |- | ||
| | |* 70+(40x9)+130 Damage is when all hits connect. | ||
|- | |- | ||
| | |** This damage is when only 3 hits are blocked. Full blocked damage is 9+(3x9)+8 but its not possible to block more than 3 hits of this Super Art. | ||
| | |} | ||
'''Frame Data''' | |||
{| border="1em" cellspacing="0" width="65%" style="border: 1px solid #999; background: none;" | |||
|- | |- | ||
| | | align="center" | '''Startup''' || align="center" | '''Hit''' || align="center" | '''Recovery''' || align="center" | '''Blocked Advantage''' || align="center" | '''Hit Advantage''' || align="center" | '''Crouching Hit Advantage''' || align="center" | '''Guard''' || align="center" | '''Parry''' | ||
| align="center" | |||
| align="center | |||
| | |||
| align="center | |||
| align="center | |||
| align="center | |||
| | |||
| | |||
|- | |- | ||
| align="center" | 4 || align="center" | 2 || align="center" | 51 || align="center" | -35 || align="center" | Down || align="center" | Down || align="center" | HLx1~4 || align="center" | Hx1~11 | |||
| align="center" | | |||
| align="center" | | |||
| | |||
| | |||
| | |||
|- | |||
| align="center | |||
| | |||
| align="center | |||
| | |||
| align="center" | |||
| | |||
| align="center | |||
|} | |} | ||
''Comments here'' | |||
{| border=" | [[Image:(akumamgsenpuu).gif|none]] | ||
{| border="1em" cellspacing="0" width="75%" style="border: 1px solid #999; background: none;" | |||
|- | |- | ||
| | | align="center" | '''Super Art''' || align="center" | '''Super Art Name''' || align="center" | '''Super Art Stock''' || align="center" | '''Motion''' || align="center" | '''Damage''' || align="center" | '''Blocked Damage''' || align="center" | '''Stun Damage''' || align="center" | '''Damage/Gauge''' | ||
| align="center" | | |||
| align="center" | | |||
| align="center" | | |||
| align="center" | | |||
| align="center" | | |||
| align="center" | | |||
| | |||
|- | |- | ||
| | | align="center" | III || align="center" | Messatsu Gou Senpuu || align="center" | 2 bars (112 each) || align="center" | (Air) QCF QCF+K || align="center" | 405*(67 life points) || align="center" | 15** || align="center" | 0 || align="center" | 3,61(x2) | ||
| align="center" | |} | ||
| align="center" | {| border="1em" cellspacing="0" width="85%" style="border: 1px solid #999; background: none;" | ||
| align="center" | |||
| align="center" | |||
| align="center" | |||
| | |||
|- | |- | ||
| | |* 60+(55x3)+70+(40x4)+130 Damage is when all hits connect. | ||
|- | |- | ||
| | |** This damage is only when 2 hits are blocked. Full blocked damage is 8+(7x3)+9+(3x4)+8 but its not possible to block more than 2 hits of this Super Art. | ||
| | |} | ||
'''Frame Data''' | |||
{| border="1em" cellspacing="0" width="65%" style="border: 1px solid #999; background: none;" | |||
|- | |- | ||
| | | align="center" | '''Startup''' || align="center" | '''Hit''' || align="center" | '''Recovery''' || align="center" | '''Blocked Advantage''' || align="center" | '''Hit Advantage''' || align="center" | '''Crouching Hit Advantage''' || align="center" | '''Guard''' || align="center" | '''Parry''' | ||
| align="center" | | |||
| align="center" | | |||
| align="center" | | |||
| align="center" | | |||
| align="center" | | |||
| align="center" | | |||
| | |||
|- | |- | ||
| | | align="center" | 9 || align="center" | 1 || align="center" | 51 || align="center" | -35 || align="center" | Down || align="center" | Down || align="center" | HLx1~3 || align="center" | Hx1~10 | ||
| align="center" | |} | ||
| align="center" | ''Comments here'' | ||
| align="center" | |||
| align="center" | |||
| align="center" | [[Image:(akumasgs).gif|none]] | ||
| | {| border="1em" cellspacing="0" width="90%" style="border: 1px solid #999; background: none;" | ||
|- | |- | ||
| | | align="center" | '''Super Art''' || align="center" | '''Super Art Name''' || align="center" | '''Super Art Stock''' || align="center" | '''Motion''' || align="center" | '''Damage''' || align="center" | '''Blocked Damage''' || align="center" | '''Stun Damage''' || align="center" | '''Throw Range''' || align="center" | '''Damage/Gauge''' | ||
| align="center" | | |||
| align="center" | | |||
| align="center" | | |||
| align="center" | | |||
| align="center" | | |||
| align="center" | | |||
| align="center" | | |||
| | |||
|- | |- | ||
| | | align="center" | any || align="center" | Shun Goku Satsu || align="center" | Requieres MAX gauge (2 full bars/224) || align="center" |LP LP F LK HP || align="center" | 490(87 life points) || align="center" | - || align="center" | 0 || align="center" | 12 || align="center" | 2,18 | ||
| align="center" | |} | ||
| align="center" | '''Frame Data''' | ||
| align="center" | {| border="1em" cellspacing="0" width="65%" style="border: 1px solid #999; background: none;" | ||
| align="center" | |||
| align="center | |||
| | |||
|- | |- | ||
| | | align="center" | '''Startup''' || align="center" | '''Hit''' || align="center" | '''Recovery''' || align="center" | '''Blocked Advantage''' || align="center" | '''Hit Advantage''' || align="center" | '''Crouching Hit Advantage''' || align="center" | '''Guard''' || align="center" | '''Parry''' | ||
| align="center" | | |||
| align="center" | | |||
| align="center" | | |||
| align="center" | | |||
| align="center" | | |||
| align="center" | | |||
| | |||
|- | |- | ||
| | | align="center" | 1 || align="center" | 38 || align="center" | 2 || align="center" | - || align="center" | Down || align="center" | Down || align="center" | Impossible || align="center" | Impossible | ||
| align="center | |} | ||
| align="center" | Akuma's grab Super Art, and it have aprox. 5 frames of invincibility at startup. Shun Goku Satsu it's the only Super Art in the game that can be supercanceled from ANY ground move. Yes, you can "pull off" a Shun Goku Satsu during ANY POINT of ANY GROUND MOVE, like after the first hit of the close Roundhouse, or during a Shakunetsu Hadouken. This is not as good as it sounds, because you cannot grab the opponent during blockstun or hitstun (with the exception of far HK), but you can "bait" the opponent to counter or punish some poke or move (a sweep for example), and during the recovery of your sweep perform the Shun Goku Satsu and grab him while he's in the middle of his punish move (remember that Shun Goku Satsu it's invincible during some frames of the startup) | ||
| align="center" | |||
| align="center | |||
| | [[Image:(akumakkz).gif|none]] | ||
| | {| border="1em" cellspacing="0" width="85%" style="border: 1px solid #999; background: none;" | ||
|- | |- | ||
| align="center" | ''' | | align="center" | '''Super Art''' || align="center" | '''Super Art Name''' || align="center" | '''Super Art Stock''' || align="center" | '''Motion''' || align="center" | '''Damage''' || align="center" | '''Blocked Damage''' || align="center" | '''Stun Damage''' || align="center" | '''Damage/Gauge''' | ||
| align="center" | | |||
| align="center" | | |||
| align="center" | | |||
| align="center" | | |||
| align="center" | | |||
| align="center" | | |||
| | |||
|- | |- | ||
| | | align="center" | any || align="center" | Kongou Kokuretsu Zan || align="center" | Requieres MAX gauge (2 full bars/224) || align="center" | D,D,D+PPP || align="center" | 640*(107 life points) || align="center" | 126** || align="center" | 26*** || align="center" | 2,85 | ||
| align="center | |} | ||
| align="center" | {| border="1em" cellspacing="0" width="50%" style="border: 1px solid #999; background: none;" | ||
| align="center" | |- | ||
| align="center" | |* 370(300)+(55x2)+40+(55x2)+(40x4) Damage is when all hits connect. | ||
| align="center" | |- | ||
| | |** This damage is only when 6 hits are blocked. Full damage is ¿(7x2)+5+(7x2)+(5x4)? | ||
| | |||
|- | |- | ||
| | |*** 15(15)+(3x9) Damage is when all hits connect. | ||
| | |} | ||
'''Frame Data''' | |||
{| border="1em" cellspacing="0" width="65%" style="border: 1px solid #999; background: none;" | |||
|- | |- | ||
| | | align="center" | '''Startup''' || align="center" | '''Hit''' || align="center" | '''Recovery''' || align="center" | '''Blocked Advantage''' || align="center" | '''Hit Advantage''' || align="center" | '''Crouching Hit Advantage''' || align="center" | '''Guard''' || align="center" | '''Parry''' | ||
| align="center" | |||
| align="center" | |||
| align="center" | |||
| align="center" | |||
| align="center" | |||
| align="center | |||
| | |||
|- | |- | ||
| | | align="center" | 16 || align="center" | 6 || align="center" | 58 || align="center" | -26 || align="center" | Down || align="center" | Down || align="center" | HLx9 || align="center" | Impossible/HLx8 | ||
| align="center" | | |} | ||
| align="center" | | Kongou Kokuretzu Zan is the Super Art that does the most damage in the game, but it has such a long startup that it's very hard to use it during combat (the opponent can just jump away when the screen freezes, and all of the hits of KKZ will miss), however, it does a great amount of chip damage, and this move can guarantee a win when the opponent have low health and he is in wakeup status. The first hit of this move is a huge bolt of lightning from Akuma that goes vertically, dealing damage which cannot be parried | ||
| align="center" | | |||
| align="center" | | |||
| align="center" | | '''Meaties:''' | ||
| align="center" | | |||
| align="center" | ( | *S.MK | ||
| style="background: | |||
*S.MP | |||
*C.LK | |||
*UOH | |||
*F+MP | |||
*Air Hadouken | |||
= Combos = | |||
=== Midscreen === | |||
You may add some moves such as; Dive Kick, J+[[File:Hp.png]], J+Tatsu, J+Hadou, etc. before these combos for more damage/hits. | |||
==== Everyone ==== | |||
{| border="1em" cellspacing="0" width="80%" style="border: 1px solid #999; background: none;" | |||
|- | |- | ||
| | | align="center" | '''1st Move''' || align="center" | '''2nd Move''' || align="center" | '''3rd Move''' || align="center" | '''4th Move''' || align="center" | '''Damage''' || align="center" | '''Stun Damage''' | ||
| align="center" | |||
| align="center | |||
| | |||
| align="center | |||
| | |||
| align="center | |||
| | |||
|- | |- | ||
| | | align="center" | Crouch [[File:Mk.png]] || align="center" | Gou Shoryuken ([[File:Hp.png]]) || align="center" | - || align="center" | - || align="center" | 253 (22%) || align="center" | 17 | ||
| align="center" | | |||
| align="center" | | |||
| align="center" | - | |||
| | |||
| align="center" | | |||
| | |||
| | |||
|- | |- | ||
| | | align="center" | Close[[File:Hp.png]] || align="center" | Tatsumaki Zankuukyaku ([[File:Hk.png]]) || align="center" | - || align="center" | - || align="center" | 265 (23%) || align="center" | 22 | ||
| align="center" | |||
| align="center" | |||
| align="center | |||
| | |||
| align="center | |||
| | |||
|- | |- | ||
| | | align="center" | Close[[File:Hp.png]] || align="center" | Gou Shoryuken ([[File:Hp.png]]) || align="center" | - || align="center" | - || align="center" | 288 (25%) || align="center" | 28 | ||
| align="center" | | |||
| align="center" | - | |||
| | |||
| align="center" | - | |||
| align="center" | | |||
| | |||
| | |||
|- | |- | ||
| | | align="center" | Crouch [[File:Mk.png]] || align="center" | Tatsumaki Zankuukyaku ([[File:Lk.png]]) || align="center" | Close[[File:Lp.png]] || align="center" | Tatsumaki Zankuukyaku ([[File:Hk.png]]) || align="center" | 311 (27%) || align="center" | 13 | ||
| align="center" | |||
| align="center" | |||
| align="center" | |||
| | |||
| align="center" | |||
| | |||
| | |||
|- | |- | ||
| | | align="center" | Crouch [[File:Mk.png]] || align="center" | Tatsumaki Zankuukyaku ([[File:Lk.png]]) || align="center" | Gou Shoryuken ([[File:Hp.png]]) || align="center" | - || align="center" | 345 (30%) || align="center" | 20 | ||
| align="center" | | |||
| align="center" | | |||
| | |||
| align="center" | - | |||
| align="center" | | |||
| | |||
|} | |} | ||
*[[File:Mp.png]][[File:Hp.png]] (Target Combo) | |||
*S+[[File:Hp.png]], [[File:Lk.png]]-Tatsu, Shoryu | |||
==== Specific to: ==== | |||
Chun-Li, Makoto, Q, Alex, Necro, Twelve, and Elena | |||
{| border="1em" cellspacing="0" width="80%" style="border: 1px solid #999; background: none;" | |||
|- | |- | ||
| | | align="center" | '''1st Move''' || align="center" | '''2nd Move''' || align="center" | '''3rd Move''' || align="center" | '''4th Move''' || align="center" | '''Damage''' || align="center" | '''Stun Damage''' | ||
| align="center" | | |||
| align="center" | | |||
| align="center" | | |||
| align="center" | | |||
| align="center" | | |||
|- | |- | ||
| | | align="center" | Tatsumaki Zankuukyaku ([[File:Mk.png]]) || align="center" | Gou Shoryuken ([[File:Hp.png]]) || align="center" | - || align="center" | - || align="center" | ??? (??%) || align="center" | ?? | ||
| align="center" | |} | ||
| align="center" | |||
| align="center" | Akuma, Urien, Necro, Sean, Alex, Yun, Remy, Q, Chun-Li, Makoto, Twelve, Yang, Ryu, Dudley, Elena and Ken | ||
| align="center" | {| border="1em" cellspacing="0" width="80%" style="border: 1px solid #999; background: none;" | ||
| | |||
|- | |- | ||
| | | align="center" | '''1st Move''' || align="center" | '''2nd Move''' || align="center" | '''3rd Move''' || align="center" | '''4th Move''' || align="center" | '''Damage''' || align="center" | '''Stun Damage''' | ||
| align="center" | | |||
| align="center" | | |||
| align="center" | | |||
| align="center" | | |||
| align="center" | | |||
|- | |- | ||
| align="center" | | | align="center" | Tatsumaki Zankuukyaku ([[File:Mk.png]]) || align="center" | Gou Shoryuken ([[File:Mp.png]]) || align="center" | - || align="center" | - || align="center" | ??? (??%) || align="center" | ?? | ||
| align="center" | |} | ||
| align="center" | |||
| align="center | === Hit Confirms === | ||
| align="center" | |||
| | ==== Everyone ==== | ||
| | |||
{| border="1em" cellspacing="0" width="80%" style="border: 1px solid #999; background: none;" | |||
|- | |- | ||
| align="center" | ''' | | align="center" | '''1st Move''' || align="center" | '''2nd Move''' || align="center" | '''3rd Move''' || align="center" | '''4th Move''' || align="center" | '''Damage''' || align="center" | '''Stun Damage''' | ||
| align="center" | | |||
| align="center" | | |||
| align="center" | | |||
| align="center" | | |||
| align="center" | | |||
|- | |- | ||
| align="center" | | | align="center" | Crouch [[File:Lk.png]] || align="center" | Crouch [[File:Lk.png]] || align="center" | - || align="center" | - || align="center" | ??? (??%) || align="center" | ?? | ||
| align="center" | |} | ||
| align="center" | |||
| align="center | ==== Specific to: ==== | ||
| align="center" | Yun, Akuma, Oro, Remy, Dudley, Elena, Chun-Li, Ibuki, Hugo, Makoto, Alex and Yang | ||
| | {| border="1em" cellspacing="0" width="80%" style="border: 1px solid #999; background: none;" | ||
| | |||
|- | |- | ||
| align="center" | ''' | | align="center" | '''1st Move''' || align="center" | '''2nd Move''' || align="center" | '''3rd Move''' || align="center" | '''4th Move''' || align="center" | '''Damage''' || align="center" | '''Stun Damage''' | ||
| align="center" | | |||
| align="center" | | |||
| align="center" | | |||
| align="center" | | |||
| align="center" | | |||
|- | |- | ||
| align="center" | | | align="center" | Crouch [[File:Lk.png]] || align="center" | Crouch [[File:Lk.png]] || align="center" | Crouch [[File:Lk.png]] || align="center" | - || align="center" | ??? (??%) || align="center" | ?? | ||
| align="center" | |} | ||
| align="center" | |||
| align="center | Ryu, Yun, Akuma, Oro, Remy, Dudley, Elena, Chun-Li, Ibuki, Hugo, Makoto, Sean, Ken, Twelve, Alex and Yang | ||
| align="center" | {| border="1em" cellspacing="0" width="80%" style="border: 1px solid #999; background: none;" | ||
| | |||
|- | |- | ||
| align="center" | ''' | | align="center" | '''1st Move''' || align="center" | '''2nd Move''' || align="center" | '''3rd Move''' || align="center" | '''4th Move''' || align="center" | '''Damage''' || align="center" | '''Stun Damage''' | ||
| align="center" | | |||
| align="center" | | |||
| align="center" | | |||
| align="center" | | |||
| | |||
| align="center" | | |||
|- | |- | ||
| | | align="center" | Crouch [[File:Lk.png]] || align="center" | Crouch[[File:Lp.png]] || align="center" | Crouch [[File:Lk.png]] || align="center" | - || align="center" | ??? (??%) || align="center" | ?? | ||
| align="center" | |} | ||
| align="center" | |||
| align="center | === Super Art 1 === | ||
| align="center" | ==== Everyone ==== | ||
| | {| border="1em" cellspacing="0" width="80%" style="border: 1px solid #999; background: none;" | ||
| | |||
|- | |- | ||
| align="center" | ''' | | align="center" | '''1st Move''' || align="center" | '''2nd Move''' || align="center" | '''3rd Move''' || align="center" | '''4th Move''' || align="center" | '''Damage''' || align="center" | '''Stun Damage''' | ||
| align="center" | | |||
| align="center" | | |||
| align="center" | | |||
| align="center" | | |||
| align="center" | | |||
|- | |- | ||
| align="center" | | | align="center" | Gou Shoryuken ([[File:Hp.png]]) (2hits) || align="center" | Super Art 1 (Ground) || align="center" | - || align="center" | - || align="center" | 265 (23%) || align="center" | 12 | ||
| align="center | |||
| align="center | |||
| align="center | |||
| align="center | |||
| | |||
| align="center | |||
|- | |- | ||
| align="center" | | | align="center" | Crouch [[File:Lk.png]] || align="center" | Crouch [[File:Lk.png]] || align="center" | Super Art 1 (Ground) || align="center" | - || align="center" | 322 (28%) || align="center" | 3 | ||
| align="center" | | |||
| align="center" | 1 | |||
| align="center" | - | |||
| | |||
| align="center" | | |||
| align="center" | | |||
|- | |- | ||
| | | align="center" | Crouch [[File:Mk.png]] || align="center" | Super Art 1 (Ground) || align="center" | - || align="center" | - || align="center" | 357 (31%) || align="center" | 3 | ||
| align="center | |||
| align="center | |||
| align="center | |||
| align="center | |||
| align="center | |||
|- | |- | ||
| align="center" | | | align="center" | Close [[File:Mk.png]] || align="center" | Super Art 1 (Ground) || align="center" | - || align="center" | - || align="center" | 380 (33%) || align="center" | 8 | ||
| align="center" | | |||
| | |||
| align="center" | - | |||
| align="center" | - | |||
| align="center" | | |||
| align="center" | | |||
|- | |- | ||
| align="center" | | | align="center" | Crouch [[File:Mk.png]] || align="center" | Gou Shoryuken ([[File:Lp.png]]) || align="center" | Super Art 1 (Ground) || align="center" | - || align="center" | ??? (??%) || align="center" | ?? | ||
| align="center" | |||
| align="center | |||
| align="center | |||
| align="center | |||
| | |||
| align="center | |||
|- | |- | ||
| align="center" | | | align="center" | Close[[File:Hp.png]] || align="center" | Gou Shoryuken ([[File:Lp.png]]) || align="center" | Super Art 1 (Ground) || align="center" | - || align="center" | ??? (??%) || align="center" | ?? | ||
| align="center" | | |||
| align="center" | | |||
| align="center" | - | |||
| align="center" | | |||
| align="center" | | |||
|- | |- | ||
| align="center" | | | align="center" | Crouch [[File:Mk.png]] || align="center" | Tatsumaki Zankuukyaku ([[File:Lk.png]]) || align="center" | Gou Shoryuken ([[File:Lp.png]]) || align="center" | Super Art 1 (Ground) || align="center" | 449 (39%) || align="center" | 15 | ||
|} | |||
| align="center" | It does more damage if you Super Cancel an early Shoryuken[[File:Lp.png]] into SA1 than Super Cancel with a Shoruyken[[File:Hp.png]] | ||
| align="center" | |||
| align="center" | === Super Art 2 === | ||
| align="center" | ==== Everyone ==== | ||
| align="center | {| border="1em" cellspacing="0" width="80%" style="border: 1px solid #999; background: none;" | ||
| | |||
| | |||
|- | |- | ||
| align="center" | ''' | | align="center" | '''1st Move''' || align="center" | '''2nd Move''' || align="center" | '''3rd Move''' || align="center" | '''4th Move''' || align="center" | '''Damage''' || align="center" | '''Stun Damage''' | ||
| align="center" | |||
| align="center" | |||
| align="center | |||
| | |||
| align="center | |||
| | |||
| align="center | |||
|- | |- | ||
| align="center" | | | align="center" | Gou Shoryuken ([[File:Hp.png]]) || align="center" | Super Art 2 || align="center" | - || align="center" | - || align="center" | 334 (29%) || align="center" | 22 | ||
| | |||
| align="center" | 2 | |||
| align="center" | | |||
| align="center" | - | |||
| align="center" | | |||
| align="center" | | |||
|- | |- | ||
| | | align="center" | Crouch [[File:Lk.png]] || align="center" | Crouch [[File:Lk.png]] || align="center" | Super Art 2 || align="center" | - || align="center" | 414 (36%) || align="center" | 14 | ||
| align="center" | |||
| align="center | |||
| align="center | |||
| align="center | |||
| | |||
| align="center | |||
|- | |- | ||
| | | align="center" | Crouch [[File:Mk.png]] || align="center" | Super Art 2 || align="center" | - || align="center" | - || align="center" | 449 (39%) || align="center" | 14 | ||
| align="center" | | |||
| align="center" | | |||
| align="center" | - | |||
| align="center" | | |||
| | |||
| align="center" | | |||
|- | |- | ||
| align="center" | | | align="center" | Closemp || align="center" | Super Art 2 || align="center" | - || align="center" | - || align="center" | 460 (40%) || align="center" | 18 | ||
| align="center" | |||
| | |||
| align="center | |||
| align="center | |||
| align="center | |||
| align="center | |||
|- | |- | ||
| align="center" | | | align="center" | Crouch[[File:Hp.png]] || align="center" | Gou Shoryuken ([[File:Mp.png]]) || align="center" | Super Art 2 || align="center" | - || align="center" | ??? (??%) || align="center" | ?? | ||
| align="center" | | |||
| align="center" | | |||
| align="center" | - | |||
| align="center" | | |||
| align="center" | | |||
|- | |- | ||
| align="center" | | | align="center" | Crouch [[File:Mk.png]] || align="center" | Gou Shoryuken ([[File:Mp.png]]) || align="center" | Super Art 2 || align="center" | - || align="center" | ??? (??%) || align="center" | ?? | ||
| align="center" | |||
| align="center" | |||
| align="center | |||
| align="center | |||
| align="center | |||
|} | |} | ||
=== | === Super Art 3 === | ||
==== Everyone ==== | |||
{| border=" | {| border="1em" cellspacing="0" width="80%" style="border: 1px solid #999; background: none;" | ||
|- | |- | ||
| align="center" | '''1st Move''' || align="center" | '''2nd Move''' || align="center" | '''3rd Move''' || align="center" | '''4th Move''' || align="center" | '''Damage''' || align="center" | '''Stun Damage''' | |||
|- | |- | ||
| | | align="center" | Crouch [[File:Mk.png]] || align="center" | Super Art 3 (Ground) || align="center" | - || align="center" | - || align="center" | ??? (??%) || align="center" | ? | ||
| | |- | ||
| | | align="center" | Crouch [[File:Lk.png]] || align="center" | Crouch [[File:Lk.png]] || align="center" | Super Art 3 (Ground) || align="center" | - || align="center" | ??? (??%) || align="center" | ? | ||
| | |- | ||
| align="center" | | align="center" | Crouch [[File:Mk.png]] || align="center" | Tatsumaki Zankuukyaku ([[File:Lk.png]]) || align="center" | Super Art 3 (Ground) || align="center" | - || align="center" | 449 (39%) || align="center" | 5 | ||
|- | |||
| align="center" | Crouch [[File:Mk.png]] || align="center" | Gou Shoryuken ([[File:Mp.png]]) (1hit) || align="center" | Super Art 3 (Ground) || align="center" | - || align="center" | ??? (??%) || align="center" | ? | |||
|- | |||
| align="center" | Close[[File:Hp.png]] || align="center" | Gou Shoryuken ([[File:Mp.png]]) (1hit) || align="center" | Super Art 3 (Ground) || align="center" | - || align="center" | ??? (??%) || align="center" | ? | |||
|} | |} | ||
=== Shun Goku Satsu === | |||
==== Specific to: ==== | |||
{| border=" | Yun, Akuma, Remy, Ryu, Q, Oro, Necro, Chun-Li, Dudley, Ibuki, Makoto, Sean, Twelve, Hugo, Alex, Yun and Ken | ||
{| border="1em" cellspacing="0" width="80%" style="border: 1px solid #999; background: none;" | |||
|- | |- | ||
| align="center" | '''1st Move''' || align="center" | '''2nd Move''' || align="center" | '''3rd Move''' || align="center" | '''4th Move''' || align="center" | '''Damage''' || align="center" | '''Stun Damage''' | |||
|- | |- | ||
| | | align="center" | Far [[File:Hk.png]] || align="center" | Shun Goku Satsu || align="center" | - || align="center" | - || align="center" | 598 (52%) || align="center" | 5 | ||
| | |||
| | |||
| | |||
| align="center | |||
|} | |} | ||
=== Kongou Kokuretzu Zan === | |||
=== | ==== Everyone ==== | ||
{| border="1em" cellspacing="0" width="80%" style="border: 1px solid #999; background: none;" | |||
{| border=" | |||
|- | |- | ||
| | | align="center" | '''1st Move''' || align="center" | '''2nd Move''' || align="center" | '''3rd Move''' || align="center" | '''4th Move''' || align="center" | '''Damage''' || align="center" | '''Stun Damage''' | ||
| align="center" | | |||
|- | |- | ||
| | | align="center" | Tatsumaki Zankuukyaku ([[File:Lk.png]]) || align="center" | Close[[File:Lp.png]] || align="center" | Kongou Kokuretzu Zan || align="center" | - || align="center" | ??? (??%) || align="center" | ? | ||
| align="center" | |||
|- | |- | ||
| | | align="center" | Crouch [[File:Mk.png]] || align="center" | Tatsumaki Zankuukyaku ([[File:Lk.png]]) || align="center" | Close[[File:Lp.png]] || align="center" | Kongou Kokuretzu Zan || align="center" | ??? (??%) || align="center" | ? | ||
| align="center" | | |||
|} | |} | ||
== Strategies | === Corner === | ||
You can add Akuma's dive kick or a J+[[File:Hp.png]] before these combos for more damage. | |||
*C+[[File:Mk.png]], Tatsu, Shoryu xx SA1, Shoryu | |||
*C+[[File:Mk.png]], Tatsu, Shoryu xx SA1, SA1, Shoryu | |||
= Strategies = | |||
Due to Akuma's naturally disadvantageous life and stun bars, high level Akuma play consists of seamless, unpredictable, safe offense and few mistakes. Should your opponent unleash their offense on you, you can lose a lot of life quickly. Obviously it is also very important to have a strong defense because of how much damage Akuma takes. Learn to block low and tech throws, and use Akuma's wakeup options wisely. | Due to Akuma's naturally disadvantageous life and stun bars, high level Akuma play consists of seamless, unpredictable, safe offense and few mistakes. Should your opponent unleash their offense on you, you can lose a lot of life quickly. Obviously it is also very important to have a strong defense because of how much damage Akuma takes. Learn to block low and tech throws, and use Akuma's wakeup options wisely. | ||
| Line 2,020: | Line 1,748: | ||
- Tatsumaki, land SA1/3. | - Tatsumaki, land SA1/3. | ||
- | -[[File:Lp.png]],[[File:Lk.png]] (air reset, not very useful) | ||
| Line 2,029: | Line 1,757: | ||
- s.hp xx tatsumaki, SRK. | - s.hp xx tatsumaki, SRK. | ||
- s. | - s.[[File:Hk.png]] xx SA1/2/3 | ||
- s.hp xx SRK xx SA1/2 | - s.hp xx SRK xx SA1/2 | ||
| Line 2,038: | Line 1,766: | ||
Low Parry: | Low Parry: | ||
- c. | - c.[[File:Mk.png]] xx SA1/2/3 | ||
- c. | - c.[[File:Lk.png]], c.[[File:Lp.png]], c.[[File:Lk.png]] xx SA1 (works only on some characters) | ||
- CORNER: c. | - CORNER: c.[[File:Mk.png]], tatsumaki, xx shoryuken xx Sa1 | ||
| Line 2,056: | Line 1,784: | ||
- Hurricane | - Hurricane | ||
- Lp srk xx sa1 | -[[File:Lp.png]] srk xx sa1 | ||
- | -[[File:Hp.png]] srk | ||
- The best by far: Block! | - The best by far: Block! | ||
| Line 2,068: | Line 1,796: | ||
- after knockdown- c. | - after knockdown- c.[[File:Lk.png]], c.[[File:Lp.png]], c.[[File:Lk.png]], c.[[File:Mk.png]] (into fireball/flip/tatsu) | ||
- after flip - s. | - after flip - s.[[File:Mk.png]], s.[[File:Mk.png]] | ||
- cl | - cl [[File:Mk.png]], cr. [[File:Lk.png]] x demon flip | ||
- cl | - cl [[File:Mk.png]], cr [[File:Mk.png]] x [[File:Mk.png]] demon flip dive kick | ||
- cr, | - cr, [[File:Lk.png]], cl [[File:Mk.png]] x [[File:Mk.png]] demon flip dive kick | ||
- cr. | - cr.[[File:Lk.png]], s.hp, x demon flip kick | ||
'''Raging Demon Set-ups''' | '''Raging Demon Set-ups''' | ||
- Kara Demon: Twds | - Kara Demon: Twds +[[File:Mp.png]],[[File:Lp.png]],[[File:Lp.png]], down forward, [[File:Lk.png]],[[File:Hp.png]]! | ||
(if done right, then the raging demon will come out before the first hit of | (if done right, then the raging demon will come out before the first hit of[[File:Mp.png]]) | ||
- | - [[File:Hk.png]]: i actually tried this a couple of time and it seems pretty useful. | ||
- Cl. | - Cl. [[File:Mk.png]], (walk up) cr. rh kara demon. | ||
- Cl. | - Cl.[[File:Mp.png]], Kara Demon | ||
- Cr. | - Cr. [[File:Lk.png]], Kara Demon (while pressing [[File:Lk.png]], press[[File:Lp.png]] twice and hold another | ||
button--hp or | button--hp or[[File:Mp.png]] will do fine--to keep the jabs from coming out. | ||
- Divekick (does not matter which or if the divekick even connects), | - Divekick (does not matter which or if the divekick even connects), | ||
| Line 2,102: | Line 1,830: | ||
- UOH Rh. Kara demon | - UOH Rh. Kara demon | ||
- Cr. | - Cr. [[File:Lk.png]], st. cl.[[File:Lp.png]], Kara Demon | ||
- If you do a fireball late enough, nothin will come out (of you time it just right, | - If you do a fireball late enough, nothin will come out (of you time it just right, | ||
| Line 2,125: | Line 1,853: | ||
Shun Goku Satsu (Raging Demon) - Akuma's signature special art, requires 2 full meters (all of his super arts are the same length.) Does loads of damage and is a grab super (therefore, unblockable), but is ordinarily hard to connect with since the jabs usually give the super away, and it's fairly easy to jump after the super flash if it's not kara'ed. Techniques such as kara-ing it with toward | Shun Goku Satsu (Raging Demon) - Akuma's signature special art, requires 2 full meters (all of his super arts are the same length.) Does loads of damage and is a grab super (therefore, unblockable), but is ordinarily hard to connect with since the jabs usually give the super away, and it's fairly easy to jump after the super flash if it's not kara'ed. Techniques such as kara-ing it with toward[[File:Mp.png]] or hiding the jabs by dashing eliminate these problems and make it a much more lethal super, however. And a final word, if you cannot kara-demon, buffer this move from a dash (and landing at point blank) or to counter an air attack, or combo into far [[File:Hk.png]], the Shun Goku Satsu will be useless for you, and you will waste all your gauge. The throw range its completely ridiculous, and you will be only able to connect it in random situation like when the opponent is trying some hit-confirm something or some other thing. Also note that you will be doing more damage if you connect any SA twice than with Shun Goku Satsu. | ||
Kongou Kokuretsu Zan: Akuma's new special art, channels his energy into a shockwave, requires 2 full meters again. Even more damaging than the raging demon (provided all of the hits connect), and has potential for extra with taunt and/or crouching damage. Good for countering | Kongou Kokuretsu Zan: Akuma's new special art, channels his energy into a shockwave, requires 2 full meters again. Even more damaging than the raging demon and is the more damaging Super Art in the game (provided all of the hits connect), and has potential for extra with taunt and/or crouching damage. Good for countering early jump-ins and cross-ups, but is somewhat slow to come out and does severely reduced damage if the first hit misses. His most common combo with this super involves a jab reset into the KKZ (after a [[File:Lk.png]] Tatsumaki Zankuukyaku) This is also the ultimate chip out super - if you get a knockdown with 2 full stocks and your opponent having only a few pixels of life, this super guarantees the win, provided you time it right. This is since the first hit is unparriable; therefore, it must be blocked, and does good chip on its own. If, by some ridiculous chance, your opponent survives the first hit and starts red-parrying out of it, you still have a good 6 or 7 parries worth of time to screw them up (about the same as his SAI). | ||
=== Kara-Techniques === | === Kara-Techniques === | ||
Kara Demon - f | Kara Demon - f [[File:Mp.png]],[[File:Lp.png]],[[File:Lp.png]], down-forward, [[File:Lk.png]],[[File:Hp.png]] | ||
Kara Throw - f | Kara Throw - f [[File:Mp.png]],[[File:Lp.png]] [[File:Lk.png]] | ||
Kara UOH - Hold forward while doing UOH. | Kara UOH - Hold forward while doing UOH. | ||
| Line 2,170: | Line 1,898: | ||
Ok, so you're in the flip...now what? | Ok, so you're in the flip...now what? | ||
Like I said, the kick is your main option, so lets talk about that. Its tempting to always late cancel the flip so you can combo. The first thing you learn in Mixup 101 is always doing one thing in a situation = death, so you have to early cancel this thing too. Once people start getting knocked by the early cancel, they wont be so tempted to try to AA you everytime, or parry, and an early cancel kick can lead to RD setups or kara throws or more flips. Its a good sign if they just start blocking the kicks, because you are getting close to locking them down, and you have them unprepared for throws. The blocked kicks should be followed up pretty much the same way as an early cancel kick. Either land, normal > demon flip, kara throws, or if you can, an RD. I also like going for the f mp overhead after blocked or early canceled kicks. | Like I said, the kick is your main option, so lets talk about that. Its tempting to always late cancel the flip so you can combo. The first thing you learn in Mixup 101 is always doing one thing in a situation = death, so you have to early cancel this thing too. Once people start getting knocked by the early cancel, they wont be so tempted to try to AA you everytime, or parry, and an early cancel kick can lead to RD setups or kara throws or more flips. Its a good sign if they just start blocking the kicks, because you are getting close to locking them down, and you have them unprepared for throws. The blocked kicks should be followed up pretty much the same way as an early cancel kick. Either land, normal > demon flip, kara throws, or if you can, an RD. I also like going for the f+mp overhead after blocked or early canceled kicks. | ||
You also have the cross up kick. I'm just starting to use this thing, but its really great because its ambigous. What sucks though is you really need to know what situations it will cross people up on. Most of the time, a cl. | You also have the cross up kick. I'm just starting to use this thing, but its really great because its ambigous. What sucks though is you really need to know what situations it will cross people up on. Most of the time, a cl.[[File:Mk.png]] > [[File:Mk.png]] flip, and early cancel the kick will lead to a crossup. If anyone can give some insight on crossups with demon flips that would be great. | ||
Unlike the dive kick, after a parried flip kick, you land at the same speed, so you should be able to go right into demon. Other than that, don't get parried. I also will throw out rh and | Unlike the dive kick, after a parried flip kick, you land at the same speed, so you should be able to go right into demon. Other than that, don't get parried. I also will throw out rh and [[File:Mk.png]] tatsus after parried flip kicks from time to time. | ||
Time to start using the throw. Not much to know here, except make sure you are putting yourself in range for this. You really need to be right on top of them. So you are either do c. | Time to start using the throw. Not much to know here, except make sure you are putting yourself in range for this. You really need to be right on top of them. So you are either do c.[[File:Mk.png]] > [[File:Mk.png]] flip, cl.[[File:Mk.png]] > [[File:Lk.png]] flip, cl.fp > [[File:Mk.png]] flip. Just know your ranges because whiffing this thing is a free combo for your opponent On characters like Q, if you go for a psuedo meaty flip, and just go for the throw right away, there is relatively nothing they can do to counter it. | ||
The slide kick really allows the normal kicks and throws to work well. I follow up my fp juggles with this one a lot! Although, once you get this thing blocked or parried, its time to hold off on it for a while, because you have pretty bad recovery on this one. I very rarely dont land this one, but you do need to be very careful with it. | The slide kick really allows the normal kicks and throws to work well. I follow up my fp juggles with this one a lot! Although, once you get this thing blocked or parried, its time to hold off on it for a while, because you have pretty bad recovery on this one. I very rarely dont land this one, but you do need to be very careful with it. | ||
| Line 2,216: | Line 1,944: | ||
For offense purposes, you want to use Akuma's air fireballs as a safe window to get in on opponents and begin guessing games. When using an air fireball on someone who is standing always, and I mean ALWAYS option select parry before throwing the fireball. Akuma cannot attack after the fireball has been thrown so you want to do it as late as possible. This ensures that if you throw an air fireball at a standing opponent, they can't counter hit you even if they parry. In this way Akuma becomes very safe after a late air fireball even if it's parried, you only need to watch out for things like reversal Shippus or Hugo/Alex SA1 as moves with 1-2 frame start up will still be able to get you. The option select parry is purely there to protect you from any early anti air attempts. If the parry is successful you can do a meaty fierce in the air and link a standing fierce into either short, or roundhouse Tatsu depending on if they are standing or crouching (short Tatsu whiffs on almost everyone crouching). | For offense purposes, you want to use Akuma's air fireballs as a safe window to get in on opponents and begin guessing games. When using an air fireball on someone who is standing always, and I mean ALWAYS option select parry before throwing the fireball. Akuma cannot attack after the fireball has been thrown so you want to do it as late as possible. This ensures that if you throw an air fireball at a standing opponent, they can't counter hit you even if they parry. In this way Akuma becomes very safe after a late air fireball even if it's parried, you only need to watch out for things like reversal Shippus or Hugo/Alex SA1 as moves with 1-2 frame start up will still be able to get you. The option select parry is purely there to protect you from any early anti air attempts. If the parry is successful you can do a meaty fierce in the air and link a standing fierce into either short, or roundhouse Tatsu depending on if they are standing or crouching (short Tatsu whiffs on almost everyone crouching). | ||
Another offensive option from mid range in order to get close is to cancel hit or blocked low forwards into Akuma's | Another offensive option from mid range in order to get close is to cancel hit or blocked low forwards into Akuma's demon flip. Akuma has a fairly good mix-up game from this that can work well as long as it's not used more than a few times in a match, if you become predictable with it, your opponent may be able to punish you. The input for this is (F > D > [[File:Mk.png]] > [[File:Df.png]] and any kick ([[File:Lk.png]]/[[File:Mk.png]]/[[File:Hk.png]])). The kick pressed determines the distance of Akuma’s flips. Use the short kick to keep the pressure on with dive kicks, and use the other two for his throw. | ||
Once Akuma scores a knockdown he becomes extremely dangerous. He can hit confirm his close standing forward into his B&B juggle. He can also confirm marginal damage starting low without a super with this combo (c.[[File:Lk.png]] > c.[[File:Lp.png]] x RH Tatsu. If in the corner, cancel into [[File:Lk.png]] Tatsu and juggle with an extremely early[[File:Mp.png]] Shoryuken. This can additionally be canceled off the first hit into Messatsu go Hadou if you have built enough meter). If you have super, Akuma is usually better off starting low with c.[[File:Lk.png]] > c.[[File:Lk.png]] x Super. | |||
*A note on Akuma's B&B juggles. If you hit a close standing [[File:Lk.png]] do not immediately cancel into Messatsu go Hadou, instead, cancel into [[File:Lk.png]] Tatsu if your opponent is not crouching when hit. Akuma's s.[[File:Lp.png]] reset into Messatsu go Hadou is much better. Despite the fact it can be parried, Akuma will recover well before his opponent has finished parrying all 6 hits, and can dash in and attack to screw up their timing. This almost always does more damage than his link (additional things to consider; it is wise to link the close standing forward into Messatsu go Hadou only if they are crouching or if it will win you the round). | |||
*Another juggle that people often over look and deem as "too hard" to be practical, is his[[File:Lp.png]] reset into Kongou Kokuretsu Zan . This is his BEST combo. It does an insane amount of damage and is inescapable after the first hit of the combo connects. This reset cannot be parried and this super usually does more damage than a demon. An important thing to do is to activate the jab as early as possible, as it often determines whether or not there is enough time to link the super. In my opinion, this combo really only needs to be practiced for about a week before it becomes second nature. | |||
If you don’t have meter, Akuma’s best option is usually to juggle with a semi late fierce Shoryuken. You can also try to reset them with a standing fierce, and cancel that into his forward demon flip and continue the pressure. If you have already tried canceling into forward demon flip, try cancelling the fierce into the short demon flip and just let it finish into the sweep. Akuma is usually safe after this sweep, and from the right range, that set-up puts you in the right place to block a counter attack from most characters, again, watch out for supers with quick start ups before executing this attack. | |||
Another one of Akuma’s great strengths that absolutely needs to be mastered is his Asura Senkuu or his teleport. This move completely ruins the game plans of characters like Denjin-Ryu (Use it to go through meaty Denjins), Urien (Escape Aegis unblockables), and Hugo. It can also be used as a way to run away from Genei-jin, although when doing this you must be extremely careful. Reversal teleport is mandatory for high level Akuma play, as it allows him one way to get around his terrible stamina. | |||
The last important tactic for an Akuma player to know is also his most infamous: His demons. Akuma’s raging demon puts Akuma’s mix up game on the same level as Makoto’s, and almost as good as Dudley’s. It is important to only use this super in much the same way Hugo uses his Gigas breaker super. Only use this super at point blank range or as Kara. If it is not done at point blank range, any scrub will know enough to jump and avoid it. Performed correctly however, if it is done point blank (like all grab supers need to be); they cannot escape by that method. In fact it can help to ignore that the demon travels any sort of distance at all. Be careful when Kara canceling the demon though because during those first few frames that gain extra range Akuma is not considered in the demon animation therefore he will not pass through opponents attacks. Only regular demons are reliable for there invincibility frames. | |||
Akuma has a few basic ways to land his demon. These setups are: | |||
*Dash-demon | |||
*Dash-Kara demon | |||
*Tick Kara-demon | |||
*Empty cancel demon flip into Kara demon | |||
And even | |||
*Wake-up demon. | |||
Dash demon is performed by buffering two jabs in the dash then simply finishing the command. Kara demon is the same as his Kara throw (F +[[File:Mp.png]]) but finishing the command instead. (Props to Jiro/Harmonaz for showing this final demon set up). This is by far the best use of a demon I have ever seen. | |||
To perform the Walk UP KARA-DEAMON you simply need to be fast enough to input the raging demon command within the same time window that you Kara cancel Akuma’s F + [[File:Mk.png]] for a Kara throw. The input for this is [ [[File:Lp.png]] >[[File:Lp.png]] > F > [[File:Lk.png]] >[[File:Hp.png]]]. This way Akuma will do his famous Kara throw grunt and move forward then cancelling it into a demon. Obviously this is extremely hard to do, but there are a few ways you can practice and learn this. I learnt that hitting[[File:Lp.png]] and F at the same time for the first[[File:Lp.png]] helps cut time off. Then you need to train your hands to hit[[File:Lp.png]] > [[File:Lk.png]] >[[File:Hp.png]] afterwards. The hardest part I found was getting the tap correct. Remember the timing for the input is really strict but the demon input itself isn't so much in 3S. Don't worry if you can't do it right away, Harmonaz said it took him 25 min just to learn it in his video, in perspective it took me several hours. Even Japanese players like Jiro and Match don't get it all the time, just watch their matches where they whiff in front of their opponent with max meter, that just goes to show how hard this setup is. | |||
*Akuma has a couple of not-so-hot setups for demons that should be avoided. I sometimes see beginners use these setups, but they aren’t safe. They are his c.[[File:Hk.png]] blocked canceled into demon, and his juggle[[File:Hp.png]] reset, whiff [[File:Lk.png]] Tatsu while hiding two[[File:Lp.png]] in the Tatsu then finishing the command at point blank. The reason these setups don’t work is that they are easy to see coming for an experienced player. Most experienced players will jump back when they see these set-ups done by an Akuma with maxed super. | |||
(''Lately I have been experimenting with a very good, but extremely difficult demon setup that, when done correctly, can really add to Akuma’s demon mix up. It is very possible, although very difficult, to hide two[[File:Lp.png]] inputs inside the two c.[[File:Lk.png]] inputs in a blocked version of Akuma’s c.[[File:Lk.png]] hit confirm. If the c.[[File:Lk.png]] > c.[[File:Lk.png]] is blocked, Akuma can then cancel into an immediate Kara demon if the inputs were done correctly. It must be Kara demon as the two [[File:Lk.png]]s push Akuma too far out of point blank range on block. The command for this is to hit c.[[File:Lk.png]] then immediately hit c.[[File:Lp.png]] during the short animation and hold then hit c.[[File:Lk.png]] to get the second [[File:Lk.png]], and almost simultaneously negative edge the second[[File:Lp.png]] by releasing[[File:Lp.png]], then cancel into Kara demon. If done correctly Akuma will release two c.[[File:Lk.png]]s without releasing a c.[[File:Lp.png]]. The timing for the button presses is similar to Kara canceling Yun's standing short into[[File:Lp.png]] dash punch if you have any experience with Yun’s juggles.'') | |||
=Match-ups= | |||
===Serious Advantage Match-ups=== | |||
''Akuma has no match-ups where he is at a serious advantage'' | |||
===Advantage Match-ups=== | |||
*Dudley | |||
*Urien - ''Can be a very frustrating matchup for Urien, given Akuma can teleport out of reflectors, and his [[File:Mk.png]] tatsumaki is completely safe, as long as it's not parried.'' | |||
*Elena | |||
*Necro | |||
*Alex | |||
*Remy | |||
*Q | |||
*Hugo | |||
*Twelve | |||
*Sean | |||
===Fair Match-ups=== | |||
*Akuma | |||
*Ibuki | |||
===Disadvantage Match-ups=== | |||
*Yun | |||
*Chun-Li | |||
*Ken | |||
*Makoto - ''This matchup really depends on the quality of the Makoto and Akuma players. Akuma must avoid being stun-grabbed at nearly all costs, considering Makoto has one of the easiest 100% stun combos (out of her SAII) on him in the game. If Makoto gets that one stun-grab on her half of the screen with meter, the round is basically over.'' | |||
*Ryu | |||
*Oro | |||
*Yang | |||
===Serious Disadvantage Match-ups=== | |||
''Akuma has no match-ups where he is at a serious disadvantage'' | |||
==Discussion== | |||
[http://forums.shoryuken.com/forumdisplay.php?f=80 SRK Forums - 3rd Strike - Akuma] | |||
{{Template:3rd Strike}} | |||
[[Category: Street Fighter 3: 3rd Strike]] | |||
Latest revision as of 17:11, 23 June 2024
Updated version available!
You're reading the old version of this page. Click here to read the (in-progress) updated version!
Introduction
When playing Akuma, the basic goal is either to use his zoning ability to control your opponent’s options, minimizing the risk of getting hit yourself, or to simply go on total offense and decimate the opponent as quickly as possible, as they can take him out just about as quickly.
It is very important to note that Akuma has the absolute worst defense rating of all the characters in 3S, and is tied with Remy for having the smallest stun bar. One should also note that Akuma's supers are all the same length, and that he has no EX moves. All this was done to counter balance his incredible offense and mixups.
| Strengths | Weaknesses |
|---|---|
|
|
Specific Character Information
- Stamina: 985
- Stun Bar Length (in pixels): 56 (Short)
- Stun Bar Recovery (frames it takes to recover 1 pixel): 23
- Taunt: Increases damage for the next hit/combo by 43.8% and increases stun damage for the next hit/combo by 28.1%. One taunt is the maximum.
- Best Kara-Throw: Zugai Hasatsu (
 +
+ )
) - Moves where Akuma is unthrowable: Zugai Hasatsu (
 +
+ )
)
Character Colors
Moves List
Throws
| Seoi Nage | |
| Tomoe Nage |
Command Moves
| Zugai Hassatsu | |
| Tenma Kuujin Kyaku | Air forward |
Special Moves
Super Arts
Target Combo
Move Analysis
- All those sprites are taken from the site https://www.justnopoint.com/zweifuss/
- All Framedata in "Move Analysis" section are taken from Game Restaurant , this means the Framedata isn't from the Dreamcast version like Karathrow site, it's from Arcade version.
General
- Move: Move name
- Motion: What you must do to execute the move
- Damage: Damage it does (in pixels)
- Stun Damage: Stun Damage it does (in pixels)
- Chains into itself: If you can combo into the same movement
- Special Cancel: If you can cancel the move into a Special Move
- Super Cancel: If you can cancel the move into a Super Art
- Throw Range: Range of the throw (in pixels)
- Num.: Super Art number
- Super Art: Super Art name
- Super Art Stock: Number of Gauge Bars the Super Art have, also the length of each bar (in pixels)
Frame Data
- Startup: Number of frames it takes to start the move
- Hit: Number of frames that can hit the opponent
- Recovery: Number of frames it takes to recover from the move
- Blocked Advantage: Number of frames you are in advantage/disadvantage after opponent have been blocked the hit
- Hit Advantage: Number of frames you are in advantage/disadvantage after opponent have been take the hit
- Crouching Hit Advantage: Number of frames you are in advantage/disadvantage after opponent have been take the hit while he's crouching
- + # : You have # frames of advantage
- - # : You have # frames of disadvantage
- # ~ # : Advantage/disadvantage can vary from # to #
- Down: Enemy gets knocked down
- Guard: How opponent must guard the move, High (H), Low (L) or both (HL)
- Parry: How opponent must parry the move, High (H), Low (L) or both (HL)
Gauge Increase
- Miss: Gauge you gain if you miss the move (in pixels)
- Blocked: Gauge you gain if the move gets blocked (in pixels)
- Hit: Gauge you gain if you hit the opponent with the move (in pixels)
- Parry: Gauge opponent gains when he parry the move (in pixels)
Basic Moves
| Move | Total frames |
|---|---|
| Dash Forward | 13 |
Comments here
| Move | Total frames |
|---|---|
| Dash Backwards | 13 |
Comments here
| Move | Motion | Startup Frames |
| Jump | BU or U or FU | 3 |
Comments here
| Move | Motion | Startup Frames |
| Super Jump | DBU or DU or DFU | 5 |
Comments here
| Move | Motion | Frames |
| Normal Wakeup | - | 77 |
Comments here
| Move | Motion | Frames |
| Quick Stand | Tap D when hitting the ground | 50 |
Comments here
| Move | Motion | Frames | Gauge Increase |
| Taunt | HP+HK | 66 | 4(6) |
Increases the damage and stun of his next hit or combo. Done often after a hard tatsu combo, quick enough to sometimes be done in neutral (maybe).
| Move | Motion |
| Parry (High) | Tap F when about taking a hit |
| Parry (Low) | Tap D when about taking a hit |
| Parry (Air) | Tap F in air when about taking a hit |
Frame Data
| Move | Frames you're frozen | Frames opponent is frozen | Frame Advantage when parry is successful | Frames before you can try another parry |
| Parry (High) | 16 | 16 | +4(LP/LK) +3(MP/MK) +2( HP/HK) 0(Special/Super) -16(Fireball) | 24(19 when attack comes from the air)*,** |
| Parry (Low) | 16 | 16 | +4(LP/LK) +3(MP/MK) +2( HP/HK) 0(Special/Super) -16(Fireball) | 24(19 when attack comes from the air)*,** |
| Parry (Air) | 16 | 16 | +4(LP/LK) +3(MP/MK) +2( HP/HK) 0(Special/Super) -16(Fireball) | 21(19 when attack comes from the air)*,** |
| * (If a parry attempt is successful, the 19/21/24 frame restriction is taken away and you can attempt another parry immediately) |
| ** (If another attack connects within 2 frames of your parry, it will automatically be parried) |
Gauge Increase
| Move | Gauge Increase |
| Parry (High) | 4*** |
| Parry (Low) | 4*** |
| Parry (Air) | 4*** |
| *** (You gain 4 of gauge for whatever attack parried, and for whatever hit you parry during multihit attack) |
You can buffer any motion during High or Low parry, but NOT during Air parry, also parry resets the juggle count (and thus resets all scaling).
- Parry information is taken from Shoryuken Forums, more exactly, from user JinraiPVC. Thanks for this information dude
Normal Moves
Please note that the images show in this section are for the 1st frame it hits, so this means the opponent is taking the hit in the image shown on the move. I use the 1st frame of every move (except 2nd throw image sprites) because you will see the maximum range of every attack (mostly of the attacks). Note also that those images are ACCURATE, they are exactly the first frame it hits, so enemy takes damage but they still dont make the "pain" frame.
Standing Normals
| Move | Motion | Damage | Stun Damage | Chains into itself | Special Cancel | Super Cancel | Juggle Value |
| Far Jab | LP | 20(3 life points) | 3 | Yes | Yes | Yes |
Frame Data
| Startup | Hit | Recovery | Blocked Advantage | Hit Advantage | Crouching Hit Advantage | Guard | Parry |
| 4 | 3 | 4 | +4 | +4 | +4 | HL | HL |
Gauge Increase
| Miss | Blocked | Hit | Parry (Gauge for opponent) |
| 0 | 1 | 2 | 4 |
Comments here
| Move | Motion | Damage | Stun Damage | Chains into itself | Special Cancel | Super Cancel | Juggle Value |
| Far Strong | MP | 105(18 life points) | 11 | No | Yes | Yes |
Frame Data
| Startup | Hit | Recovery | Blocked Advantage | Hit Advantage | Crouching Hit Advantage | Guard | Parry |
| 5 | 4 | 9 | +4 | +5 | +5 | HL | H |
Gauge Increase
| Miss | Blocked | Hit | Parry (Gauge for opponent) |
| 2 | 4 | 8 | 4 |
Comments here
| Move | Motion | Damage | Stun Damage | Chains into itself | Special Cancel | Super Cancel | Juggle Value |
| Far Fierce | HP | 140(24 life points) | 15 | No | No | No |
Frame Data
| Startup | Hit | Recovery | Blocked Advantage | Hit Advantage | Crouching Hit Advantage | Guard | Parry |
| 8 | 5 | 22 | -6 | -4 | -2 | HL | H |
Gauge Increase
| Miss | Blocked | Hit | Parry (Gauge for opponent) |
| 3 | 6 | 14 | 4 |
Comments here
| Move | Motion | Damage | Stun Damage | Chains into itself | Special Cancel | Super Cancel | Juggle Value |
| Close Jab | (Close to opponent)LP | 30(5 life points) | 3 | No | Yes | Yes |
Frame Data
| Startup | Hit | Recovery | Blocked Advantage | Hit Advantage | Crouching Hit Advantage | Guard | Parry |
| 3 | 3 | 5 | +3 | +3 | +3 | HL | HL |
Gauge Increase
| Miss | Blocked | Hit | Parry (Gauge for opponent) |
| 0 | 1 | 2 | 4 |
Comments here
| Move | Motion | Damage | Stun Damage | Chains into itself | Special Cancel | Super Cancel | Juggle Value |
| Close Strong | (Close to opponent)MP | 115(20 life points) | 7 | No | Yes | Yes |
Frame Data
| Startup | Hit | Recovery | Blocked Advantage | Hit Advantage | Crouching Hit Advantage | Guard | Parry |
| 5 | 4 | 10 | +1 | +2 | +3 | HL | H |
Gauge Increase
| Miss | Blocked | Hit | Parry (Gauge for opponent) |
| 2 | 4 | 8 | 4 |
Comments here
| Move | Motion | Damage | Stun Damage | Chains into itself | Special Cancel | Super Cancel | Juggle Value |
| Close Fierce | (Close to opponent) HP | 135(24 life points) | 15 | No | Yes | Yes |
Frame Data
| Startup | Hit | Recovery | Blocked Advantage | Hit Advantage | Crouching Hit Advantage | Guard | Parry |
| 4 | 4 | 17 | -4 | -2 | 0 | HL | H |
Gauge Increase
| Miss | Blocked | Hit | Parry (Gauge for opponent) |
| 3 | 6 | 14 | 4 |
Comments here
| Move | Motion | Damage | Stun Damage | Chains into itself | Special Cancel | Super Cancel | Juggle Value |
| Short | LK | 40(7 life points) | 3 | No | No | No |
Frame Data
| Startup | Hit | Recovery | Blocked Advantage | Hit Advantage | Crouching Hit Advantage | Guard | Parry |
| 4 | 4 | 7 | +2 | +2 | +2 | HL | HL |
Gauge Increase
| Miss | Blocked | Hit | Parry (Gauge for opponent) |
| 0 | 1 | 2 | 4 |
Comments here
| Move | Motion | Damage | Stun Damage | Chains into itself | Special Cancel | Super Cancel | Juggle Value |
| Far Forward | MK | 95(16 life points) | 7 | No | No | No |
Frame Data
| Startup | Hit | Recovery | Blocked Advantage | Hit Advantage | Crouching Hit Advantage | Guard | Parry |
| 5 | 5 | 17 | -7 | -6 | -5 | HL | H |
Gauge Increase
| Miss | Blocked | Hit | Parry (Gauge for opponent) |
| 2 | 4 | 8 | 4 |
Comments here
| Move | Motion | Damage | Stun Damage | Chains into itself | Special Cancel | Super Cancel | Juggle Value |
| Far Roundhouse | HK | 145(25 life points) | 11 | No | No | No |
Frame Data
| Startup | Hit | Recovery | Blocked Advantage | Hit Advantage | Crouching Hit Advantage | Guard | Parry |
| 9 | 5 | 20 | -7 | -5 | -3 | HL | H |
Gauge Increase
| Miss | Blocked | Hit | Parry (Gauge for opponent) |
| 3 | 6 | 14 | 4 |
Comments here
| Move | Motion | Damage | Stun Damage | Chains into itself | Special Cancel | Super Cancel | Juggle Value |
| Close Forward | (Close to opponent) MK | 115(20 life points) | 9 | No | Yes | Yes |
Frame Data
| Startup | Hit | Recovery | Blocked Advantage | Hit Advantage | Crouching Hit Advantage | Guard | Parry |
| 4 | 5 | 11 | +2 | +4 | +6 | HL | H |
Gauge Increase
| Miss | Blocked | Hit | Parry (Gauge for opponent) |
| 2 | 4 | 8 | 4 |
Comments here
| Move | Motion | Damage | Stun Damage | Chains into itself | Special Cancel | Super Cancel | Juggle Value |
| Close Roundhouse | (Close to opponent) HK | 120+80(40)(33 life points) | 13+11(7) | No | No | No |
Frame Data
| Startup | Hit | Recovery | Blocked Advantage | Hit Advantage | Crouching Hit Advantage | Guard | Parry |
| 5/7 | 3/5 | 19 | -6 | -4 | -2 | H/L | H/L |
Gauge Increase
| Miss | Blocked | Hit | Parry (Gauge for opponent) |
| 4 | 8 | 16 | 8(4+4) |
Comments here
Jumping Normals
| Move | Motion | Damage | Stun Damage | Chains into itself | Special Cancel | Super Cancel | Juggle Value |
| Jump Jab | (Air)LP | 40(7 life points)(50 if neutral jump) | 7 | No | No | No |
Frame Data
| Startup | Hit | Recovery | Blocked Advantage | Hit Advantage | Crouching Hit Advantage | Guard | Parry |
| 4 | Until landing | - | -5~+7 | -5~+7 | +4~+7 | H | H |
Gauge Increase
| Miss | Blocked | Hit | Parry (Gauge for opponent) |
| 0 | 1 | 2 | 4 |
Comments here
| Move | Motion | Damage | Stun Damage | Chains into itself | Special Cancel | Super Cancel | Juggle Value |
| Jump Strong | (Air)MP | 90(16 life points) | 9 | No | No | No |
Frame Data
| Startup | Hit | Recovery | Blocked Advantage | Hit Advantage | Crouching Hit Advantage | Guard | Parry |
| 5 | 5 | - | -2~+10 | -2~+10 | +7~+10 | H | H |
Gauge Increase
| Miss | Blocked | Hit | Parry (Gauge for opponent) |
| 2 | 6 | 11 | 4 |
Comments here
| Move | Motion | Damage | Stun Damage | Chains into itself | Special Cancel | Super Cancel | Juggle Value |
| Jump Fierce | (Air) HP | 130(23 life points) | 13 | No | No | No |
Frame Data
| Startup | Hit | Recovery | Blocked Advantage | Hit Advantage | Crouching Hit Advantage | Guard | Parry |
| 6 | 4 | - | +3~+13 | +3~+13 | +10~+13 | H | H |
Gauge Increase
| Miss | Blocked | Hit | Parry (Gauge for opponent) |
| 3 | 10 | 19 | 4 |
Comments here
| Move | Motion | Damage | Stun Damage | Chains into itself | Special Cancel | Super Cancel | Juggle Value |
| Neutral Jump Fierce | (Air) HP | 130(23 life points) | 13 | No | No | No |
Frame Data
| Startup | Hit | Recovery | Blocked Advantage | Hit Advantage | Crouching Hit Advantage | Guard | Parry |
| 6 | 3 | - | +6~+13 | +6~+13 | +12~+13 | H | H |
Gauge Increase
| Miss | Blocked | Hit | Parry (Gauge for opponent) |
| 3 | 10 | 19 | 4 |
Comments here
| Move | Motion | Damage | Stun Damage | Chains into itself | Special Cancel | Super Cancel | Juggle Value |
| Jump Short | (Air) LK | 40(7 life points) | 5 | No | No | No |
Frame Data
| Startup | Hit | Recovery | Blocked Advantage | Hit Advantage | Crouching Hit Advantage | Guard | Parry |
| 4 | 10(19 if neutral jump) | - | -6~+7 | -6~+7 | 0~+7 | H | H |
Gauge Increase
| Miss | Blocked | Hit | Parry (Gauge for opponent) |
| 0 | 1 | 2 | 4 |
Comments here
| Move | Motion | Damage | Stun Damage | Chains into itself | Special Cancel | Super Cancel | Juggle Value |
| Jump Forward | (Air) MK | 80(14 life points) | 7 | No | No | No |
Frame Data
| Startup | Hit | Recovery | Blocked Advantage | Hit Advantage | Crouching Hit Advantage | Guard | Parry |
| 5 | 6 | - | -2~+10 | -2~+10 | +6~+10 | H | H |
Gauge Increase
| Miss | Blocked | Hit | Parry (Gauge for opponent) |
| 2 | 6 | 11 | 4 |
Comments here
| Move | Motion | Damage | Stun Damage | Chains into itself | Special Cancel | Super Cancel | Juggle Value |
| Neutral Jump Forward | (Air) MK | 80(14 life points) | 7 | No | No | No |
Frame Data
| Startup | Hit | Recovery | Blocked Advantage | Hit Advantage | Crouching Hit Advantage | Guard | Parry |
| 5 | 6 | - | -2~+10 | -2~+10 | +6~+10 | H | H |
Gauge Increase
| Miss | Blocked | Hit | Parry (Gauge for opponent) |
| 2 | 6 | 11 | 4 |
Comments here
| Move | Motion | Damage | Stun Damage | Chains into itself | Special Cancel | Super Cancel | Juggle Value |
| Jump Roundhouse | (Air) HK | 120(21 life points) | 11 | No | No | No |
Frame Data
| Startup | Hit | Recovery | Blocked Advantage | Hit Advantage | Crouching Hit Advantage | Guard | Parry |
| 6 | 4 | - | +2~+13 | +2~+13 | +8~+13 | H | H |
Gauge Increase
| Miss | Blocked | Hit | Parry (Gauge for opponent) |
| 3 | 10 | 19 | 4 |
Comments here
| Move | Motion | Damage | Stun Damage | Chains into itself | Special Cancel | Super Cancel | Juggle Value |
| Neutral Jump Roundhouse | (Air) HK | 120(21 life points) | 11 | No | No | No |
Frame Data
| Startup | Hit | Recovery | Blocked Advantage | Hit Advantage | Crouching Hit Advantage | Guard | Parry |
| 6 | 5 | - | +2~+13 | +2~+13 | +10~+13 | H | H |
Gauge Increase
| Miss | Blocked | Hit | Parry (Gauge for opponent) |
| 3 | 10 | 19 | 4 |
Comments here
| Move | Motion | Damage | Stun Damage | Chains into itself | Special Cancel | Super Cancel | Juggle Value |
| Universal Overhead | MP+MK | 40(7 life points) | 3 | No | No | No |
Frame Data
| Startup | Hit | Recovery | Blocked Advantage | Hit Advantage | Crouching Hit Advantage | Guard | Parry |
| 15 | 8 | 7 | -5~+7 | 0~+8 | +1~+9 | H | H |
Gauge Increase
| Miss | Blocked | Hit | Parry (Gauge for opponent) |
| 0 | 1 | 2 | 4 |
Comments here
Throws
| Move | Motion | Damage | Stun Damage | Throw Range | Kara-Throw | Kara-Throw Range |
| Seoi Nage | LP+LK or F+LP+LK | 110(19 life points) | 9 | 24 | F+MP/C+MK/C+HK | 44/37/37 |
Frame Data
| Startup | Hit | Recovery | Blocked Advantage | Hit Advantage | Crouching Hit Advantage | Guard | Parry |
| 2 | 1 | 21 | - | - | - | LP+LK | - |
Gauge Increase
| Miss | Blocked | Hit |
| 0 | 7 (for the player who blocked) | 7 |
Comments here
| Move | Motion | Damage | Stun Damage | Throw Range | Kara-Throw | Kara-Throw Range |
| Tomoe Nage | B+LP+LK | 110(19 life points) | 15 | 24 | F+MP/C+MK/C+HK | 44/37/37 |
Frame Data
| Startup | Hit | Recovery | Blocked Advantage | Hit Advantage | Crouching Hit Advantage | Guard | Parry |
| 2 | 1 | 21 | - | - | - | LP+LK | - |
Gauge Increase
| Miss | Blocked | Hit |
| 0 | 7 (for the player who blocked) | 7 |
Comments here
Crouching Normals
| Move | Motion | Damage | Stun Damage | Chains into itself | Special Cancel | Super Cancel | Juggle Value |
| Crouch Jab | D+LP | 20(3 life points) | 3 | Yes | Yes | Yes |
Frame Data
| Startup | Hit | Recovery | Blocked Advantage | Hit Advantage | Crouching Hit Advantage | Guard | Parry |
| 4 | 3 | 4 | +4 | +4 | +4 | HL | HL |
Gauge Increase
| Miss | Blocked | Hit | Parry (Gauge for opponent) |
| 0 | 1 | 2 | 4 |
Comments here
| Move | Motion | Damage | Stun Damage | Chains into itself | Special Cancel | Super Cancel | Juggle Value |
| Crouch Strong | D+MP | 95(16 lifepoints) | 7 | No | Yes | Yes |
Frame Data
| Startup | Hit | Recovery | Blocked Advantage | Hit Advantage | Crouching Hit Advantage | Guard | Parry |
| 5 | 4 | 7 | +3 | +4 | +5 | HL | HL |
Gauge Increase
| Miss | Blocked | Hit | Parry (Gauge for opponent) |
| 2 | 4 | 8 | 4 |
Comments here
| Move | Motion | Damage | Stun Damage | Chains into itself | Special Cancel | Super Cancel | Juggle Value |
| Crouch Fierce | D+HP | 135(24 life points) | 11 | No | Yes | Yes |
Frame Data
| Startup | Hit | Recovery | Blocked Advantage | Hit Advantage | Crouching Hit Advantage | Guard | Parry |
| 5 | 5 | 19 | -8 | -6 | -4 | HL | HL |
Gauge Increase
| Miss | Blocked | Hit | Parry (Gauge for opponent) |
| 3 | 6 | 14 | 4 |
Comments here
| Move | Motion | Damage | Stun Damage | Chains into itself | Special Cancel | Super Cancel | Juggle Value |
| Crouch Short | D+LK | 20(3 life points) | 3 | Yes | Yes | Yes |
Frame Data
| Startup | Hit | Recovery | Blocked Advantage | Hit Advantage | Crouching Hit Advantage | Guard | Parry |
| 5 | 3 | 7 | +1 | +1 | +1 | L | L |
Gauge Increase
| Miss | Blocked | Hit | Parry (Gauge for opponent) |
| 0 | 1 | 2 | 4 |
Comments here
| Move | Motion | Damage | Stun Damage | Chains into itself | Special Cancel | Super Cancel | Juggle Value |
| Crouch Forward | D+MK | 90(16 life points) | 3 | No | Yes | Yes |
Frame Data
| Startup | Hit | Recovery | Blocked Advantage | Hit Advantage | Crouching Hit Advantage | Guard | Parry |
| 6 | 5 | 16 | -3 | -2 | -1 | L | L |
Gauge Increase
| Miss | Blocked | Hit | Parry (Gauge for opponent) |
| 2 | 4 | 8 | 4 |
Comments here
| Move | Motion | Damage | Stun Damage | Chains into itself | Special Cancel | Super Cancel | Juggle Value |
| Crouch Roundhouse | D+HK | 135(24 life points) | 3 | No | No | No |
Frame Data
| Startup | Hit | Recovery | Blocked Advantage | Hit Advantage | Crouching Hit Advantage | Guard | Parry |
| 7 | 5 | 25 | -15 | Down | Down | L | L |
Gauge Increase
| Miss | Blocked | Hit | Parry (Gauge for opponent) |
| 3 | 6 | 14 | 4 |
Comments here
Command Normals
| Move | Motion | Damage | Stun Damage | Chains into itself | Special Cancel | Super Cancel | Juggle Value |
| Zugai Hasatsu | F+MP | 40+50(18 life points) | 9+7 | No | No | No |
Frame Data
| Startup | Hit | Recovery | Blocked Advantage | Hit Advantage | Crouching Hit Advantage | Guard | Parry |
| 14 | 1 | 22 | -1 | +1 | +3 | H/H | H/H |
Gauge Increase
| Miss | Blocked | Hit | Parry (Gauge for opponent) |
| 2+0 | 2+1 | 7+2 | 4+4 |
This move is crucial for advance Akuma gameplay. First of all, this is the common Kara-Demon move, also this is the move that you can become unthrowable by normal grabs, also Gigas Breaker (even caught from behind).
| Move | Motion | Damage | Stun Damage | Chains into itself | Special Cancel | Super Cancel | Juggle Value |
| Tenma Kuujin Kyaku | (Air) D+MK | 90(16 life points) | 11 | No | No | No |
Frame Data
| Startup | Hit | Recovery | Blocked Advantage | Hit Advantage | Crouching Hit Advantage | Guard | Parry |
| 8 | Until landing | 3 | - | - | - | H | H |
Gauge Increase
| Miss | Blocked | Hit | Parry (Gauge for opponent) |
| 2 | 4 | 8 | 4 |
Comments here
Target Combo
| Move | Motion | Damage | Stun Damage | Chains into itself | Special Cancel | Super Cancel | Juggle Value |
| Target Combo | Closemp -> Close HP | 115+80 | 7+3 | No/No | Yes/No | Yes/No |
Frame Data
| Startup | Hit | Recovery | Blocked Advantage | Hit Advantage | Crouching Hit Advantage | Guard | Parry |
| 5 | - | - | -12 | -10 | -8 | HL/HL | H/H |
Gauge Increase
| Miss | Blocked | Hit | Parry (Gauge for opponent) |
| - | 4+1 | 8+1 | 4+4 |
Comments here
Special Moves
Please note that in this section you will see mainly 3 images for the special moves, this means the image on the left its done withLP (or LK), the image on the center its done withMP (or MK), and the image on the right its done with HP (or HK). Also its the same "rule" as the sections above, its the 1rst frame it hits for every of the moves.
| Move | Motion | Damage | Blocked Damage | Stun Damage | Super Cancel | Juggle Value |
| Gou Hadouken | QCF+P | 60(17 life points) | 4 | 3 | Yes |
Frame Data
| Startup | Hit | Recovery | Blocked Advantage | Hit Advantage | Crouching Hit Advantage | Guard | Parry |
| 7 | 1 | 38 | -11 | -10 | -10 | HL | H |
Gauge Increase
| Miss | Blocked | Hit | Parry (Gauge for opponent) |
| 0 | 1 | 1 | 4 |
Comments here
| Move | Motion | Damage | Blocked Damage | Stun Damage | Super Cancel | Juggle Value |
| Zankuu Hadouken | (Air) QCF+P | 60(10 life points) | 4 | 3 | Yes |
Frame Data
| Startup | Hit | Recovery | Blocked Advantage | Hit Advantage | Crouching Hit Advantage | Guard | Parry |
| 11 | 1 | 7 | - | - | - | HL | H |
Gauge Increase
| Miss | Blocked | Hit | Parry (Gauge for opponent) |
| 0 | 1 | 1 | 4 |
Comments here
| Move | Motion | Damage | Blocked Damage | Stun Damage | Super Cancel | Juggle Value |
| Shakunetsu Hadouken (Jab) | HCB+LP | 50(8 life points) | 3 | 3 | Yes | |
| Shakunetsu Hadouken (Strong) | HCB+MP | 100(50+50)(16 life points) | 3+3 | 3+3 | Yes | |
| Shakunetsu Hadouken (Fierce) | HCB+HP | 150(50+50+50)(24 life points) | 3+3+3 | 3+3+3 | Yes |
Frame Data
| Move | Startup | Hit | Recovery | Blocked Advantage | Hit Advantage | Crouching Hit Advantage | Guard | Parry |
| Shakunetsu Hadouken (Jab) | 13 | 1 | 42 | -23 | Down | Down | HL | H |
| Shakunetsu Hadouken (Strong) | 17 | 1 | 43 | -18 | Down | Down | HL/HL | H/H |
| Shakunetsu Hadouken (Fierce) | 21 | 1 | 44 | -15 | Down | Down | HL/HL/HL | H/H/H |
Gauge Increase
| Move | Miss | Blocked | Hit | Parry (Gauge for opponent) |
| Shakunetsu Hadouken (Jab) | 0 | 1 | 1 | 4 |
| Shakunetsu Hadouken (Strong) | 0 | 2(1+1) | 2(1+1) | 8(4+4) |
| Shakunetsu Hadouken (Fierce) | 0 | 3(1+1+1) | 3(1+1+1) | 12(4+4+4) |
Comments here
| Move | Motion | Damage | Blocked Damage | Stun Damage | Super Cancel | Juggle Value |
| Tatsumaki Zankuukyaku (Short) | QCB+LK | 100(17 life points) | 6 | 7 | Yes | |
| Tatsumaki Zankuukyaku (Forward) | QCB+MK | 120(90+30)(21 life points) | 15(11+2) | 10(7+3) | Yes/No | |
| Tatsumaki Zankuukyaku (Roundhouse) | QCB+HK | 150(90+30+30)(25 life points) | 17(11+2+2) | 13(7+3+3) | Yes/No/No |
Frame Data
| Move | Startup | Hit | Recovery | Blocked Advantage | Hit Advantage | Crouching Hit Advantage | Guard | Parry |
| Tatsumaki Zankuukyaku (Short) | 11・(14) | 2・(2) | 17 | -12 | Down | Down | HL | H |
| Tatsumaki Zankuukyaku (Forward) | 2・11・(14)・18・(21) | 2・2・(2)・2・(2) | 16 | -8 | Down | Down | HL | H |
| Tatsumaki Zankuukyaku (Roundhouse) | 2・11・(14)・18・(21)・25・(28)・32・(35) | 2・2・(2)・2・(2)・2・(2)・2・(2) | 10 | -5 | Down | Down | HL | H |
Gauge Increase
| Move | Miss | Blocked | Hit | Parry (Gauge for opponent) |
| Tatsumaki Zankuukyaku (Short) | 3 | 8 | 13 | 4 |
| Tatsumaki Zankuukyaku (Forward) | 3 | 9(8+1) | 15(13+2) | 8(4+4) |
| Tatsumaki Zankuukyaku (Roundhouse) | 3 | 10(8+1+1) | 17(13+2+2) | 12(4+4+4) |
With MK version of Tatsumaki, if you hit the opponent with the knee (before you raise into the air) Akuma will spin only 1 time into the air. Also with HK version, Akuma will spin only 2 times in the air if the knee hits.
| Move | Motion | Damage | Blocked Damage | Stun Damage | Super Cancel | Juggle Value |
| Air Tatsumaki Zankuukyaku (Short) | (Air) QCB+LK | 80(14 life points) | 5 | 3 | Yes | |
| Air Tatsumaki Zankuukyaku (Forward) | (Air) QCB+MK | 160(80+80)(27 life points) | 5* | 8(3+5) | Yes | |
| Air Tatsumaki Zankuukyaku (Roundhouse) | (Air) QCB+HK | 240(80+80+80)(40 life points) | 5* | 11(3+5+3) | Yes |
| (*) Blocked damage is for 1 hit only, its not possible to block more hits |
Frame Data
| Move | Startup | Hit | Recovery | Blocked Advantage | Hit Advantage | Crouching Hit Advantage | Guard | Parry |
| Air Tatsumaki Zankuukyaku (Short) | 5・9 | 2・1 | 9 | - | Down | Down | HL | H |
| Air Tatsumaki Zankuukyaku (Forward) | 5・9・12・16 | 2・1・2・1 | 9 | - | Down | Down | HL | H |
| Air Tatsumaki Zankuukyaku (Roundhouse) | 5・9・12・16・19・23・26・30 | 2・1・2・1・2・1・2・1 | 9 | - | Down | Down | HL | H |
Gauge Increase
| Move | Miss | Blocked | Hit | Parry (Gauge for opponent) |
| Air Tatsumaki Zankuukyaku (Short) | 1 | 1 | 7 | 4 |
| Air Tatsumaki Zankuukyaku (Forward) | 2 | 1* | 9(7+2) | 8(4+4) |
| Air Tatsumaki Zankuukyaku (Roundhouse) | 4 | 1* | 16(7+2+7) | 12(4+4+4) |
| (*) Gauge increase for blocked hit is for 1 hit only, its not possible to block more hits |
Comments here
| Move | Motion | Damage | Blocked Damage | Stun Damage | Super Cancel | Juggle Value |
| Gou Shoryuken (Jab) | F, D, DF+LP | 130(100(23 life points)) | 16(13) | 11(9) | Yes | |
| Gou Shoryuken (Strong) | F, D, DF+MP | 150(100+50)(25 life points) | 19(13+6) | 14(11+3) | Yes/No | |
| Gou Shoryuken (Fierce) | F, D, DF+HP | 180(60x3)(29 life points) | 24(8x3) | 15(11+3+3) | Yes/Yes/No |
Frame Data
| Move | Startup | Hit | Recovery | Blocked Advantage | Hit Advantage | Crouching Hit Advantage | Guard | Parry |
| Gou Shoryuken (Jab) | 3 | 14 | 26 | -24 | Down | Down | HL | HL |
| Gou Shoryuken (Strong) | 2 | 2/5 | 41 | -30 | Down | Down | HL/HL | HL/HL |
| Gou Shoryuken (Fierce) | 1 | 2/2/19 | 35 | -34 | Down | Down | HL/HL/HL | HL/HL/HL |
Gauge Increase
| Move | Miss | Blocked | Hit | Parry (Gauge for opponent) |
| Gou Shoryuken (Jab) | 3 | 10 | 15 | 4 |
| Gou Shoryuken (Strong) | 3 | 11(10+1) | 17(15+2) | 8(4+4) |
| Gou Shoryuken (Fierce) | 3 | 12(10+1+1) | 19(15+2+2) | 12(4+4+4) |
Comments here
| Move | Motion | Damage | Blocked Damage | Stun Damage | Super Cancel | Juggle Value |
| Hyakki Shuu | F, D, DF+K | - | - | - | No |
Frame Data
| Startup | Hit | Recovery | Blocked Advantage | Hit Advantage | Crouching Hit Advantage | Guard | Parry |
| - | 36 | - | - | - | - | - | - |
Gauge Increase
| Miss | Blocked | Hit | Parry (Gauge for opponent) |
| - | - | - | - |
Comments here
| Move | Motion | Damage | Blocked Damage | Stun Damage | Super Cancel | Juggle Value |
| Hyakki Gouzan | During F, D, DF+K (No Input) | 100 (17 life points) | 13 | 3 | No |
Frame Data
| Startup | Hit | Recovery | Blocked Advantage | Hit Advantage | Crouching Hit Advantage | Guard | Parry |
| 41 | 15 | 13 | -11 | Down | Down | L | L |
Gauge Increase
| Miss | Blocked | Hit | Parry (Gauge for opponent) |
| 3 | 6 | 14 | 4 |
Comments here
| Move | Motion | Damage | Blocked Damage | Stun Damage | Super Cancel | Juggle Value |
| Hyakki Goushou | During F, D, DF+K press P | 130(23 life points) | 16 | 13 | No |
Frame Data
| Startup | Hit | Recovery | Blocked Advantage | Hit Advantage | Crouching Hit Advantage | Guard | Parry |
| 10 | 3 | 17 | - | Down | Down | H | H |
Gauge Increase
| Miss | Blocked | Hit | Parry (Gauge for opponent) |
| 3 | 6 | 14 | 4 |
Comments here
| Move | Motion | Damage | Blocked Damage | Stun Damage | Super Cancel | Juggle Value |
| Hyakki Goujin | During F, D, DF+K press K | 100(17 life points) | 13 | 11 | No |
Frame Data
| Startup | Hit | Recovery | Blocked Advantage | Hit Advantage | Crouching Hit Advantage | Guard | Parry |
| 9 | Until landing | 3 | - | - | - | HL | H |
Gauge Increase
| Miss | Blocked | Hit | Parry (Gauge for opponent) |
| 3 | 6 | 14 | 4 |
Comments here
| Move | Motion | Damage | Blocked Damage | Stun Damage | Super Cancel | Juggle Value |
| Hyakki Gousai | During F, D, DF+K press LP+LK | 110(19 life points) | - | 15 | No |
Frame Data
| Startup | Hit | Recovery | Blocked Advantage | Hit Advantage | Crouching Hit Advantage | Guard | Parry |
| 3 | 2 | 17 | - | Down | Down | Impossible | Impossible |
Gauge Increase
| Miss | Blocked | Hit | Parry (Gauge for opponent) |
| 0 | - | 7 | - |
Comments here
| Move | Motion | Damage | Blocked Damage | Stun Damage | Super Cancel |
| Ashura Senkuu (Forward) (PP) | F, D, DF+PP | - | - | - | No |
| Ashura Senkuu (Forward) (KK) | F, D, DF+KK | - | - | - | No |
| Ashura Senkuu (Backwards) (PP) | B, D, DB+PP | - | - | - | No |
| Ashura Senkuu (Backwards) (KK) | B, D, DB+KK | - | - | - | No |
Frame Data
| Move | Startup | Hit | Recovery | Blocked Advantage | Hit Advantage | Crouching Hit Advantage | Guard | Parry |
| Ashura Senkuu (Forward) (PP) | 20 | 46 | 9 | - | - | - | - | - |
| Ashura Senkuu (Forward) (KK) | 20 | 30 | 9 | - | - | - | - | - |
| Ashura Senkuu (Backwards) (PP) | 20 | 46 | 9 | - | - | - | - | - |
| Ashura Senkuu (Backwards) (KK) | 20 | 30 | 9 | - | - | - | - | - |
Gauge Increase
| Move | Miss | Blocked | Hit | Parry (Gauge for opponent) |
| Ashura Senkuu (Forward) (PP) | - | - | - | - |
| Ashura Senkuu (Forward) (KK) | - | - | - | - |
| Ashura Senkuu (Backwards) (PP) | - | - | - | - |
| Ashura Senkuu (Backwards) (KK) | - | - | - | - |
Teleport move, and as you can see it in the "Frame Data", (PP) travels further than (KK). Some Super Arts can caught Akuma from this move those Super Arts are: Hugo SA1, Ken SA3,
Super Arts
| Super Art | Super Art Name | Super Art Stock | Motion | Damage | Blocked Damage | Stun Damage | Damage/Gauge |
| I | Messatsu Gou Hadou | 2 bars (112 each bar) | QCF QCF+P | 290*(47 life points) | 19** | 0 | 2,59(x2) |
| * (55x5)+60 Damage is when all hits connect. |
| ** (3x5)+4 Damage is when all hits connect. |
Frame Data
| Startup | Hit | Recovery | Blocked Advantage | Hit Advantage | Crouching Hit Advantage | Guard | Parry |
| 2 | 1 | 49 | -13 | Down | Down | HLx6 | Hx6 |
Comments here
| Super Art | Super Art Name | Super Art Stock | Motion | Damage | Blocked Damage | Stun Damage | Damage/Gauge |
| I | Tenma Gou Zankuu | 2 bars (112 each bar) | (Air) QCF QCF+P | 320*(53 life points) | 25** | 0 | 2,85(x2) |
| * (60x5)+80 Damage is when all hits connect. |
| ** (4x5)+5 Damage is when all hits connect. |
Frame Data
| Startup | Hit | Recovery | Blocked Advantage | Hit Advantage | Crouching Hit Advantage | Guard | Parry |
| 7 | 1 | 13 | -49 | Down | Down | HLx6 | Hx6 |
Comments here
| Super Art | Super Art Name | Super Art Stock | Motion | Damage | Blocked Damage | Stun Damage | Damage/Gauge |
| II | Messatsu Gou Shoryu | 2 bars (112 each bar) | QCF QCF+P | 390*(66 life points) | 44** | 14*** | 3,48(x2) |
| * (40x3)+50+120+110+100 Damage is when all hits connect. |
| ** (5+3)x2+15+7+6 Damage is when all hits connect. |
| *** (0+3)x2+9+5+5 Damage is when all hits connect. |
Frame Data
| Startup | Hit | Recovery | Blocked Advantage | Hit Advantage | Crouching Hit Advantage | Guard | Parry |
| 1 | 2 | 37 | -25 | Down | Down | HLx7 | HLx7 |
Comments here
| Super Art | Super Art Name | Super Art Stock | Motion | Damage | Blocked Damage | Stun Damage | Damage/Gauge |
| III | Messatsu Gou Rasen | 2 bars (112 each bar) | QCF QCF+K | 390*(65 life points) | 15** | 0 | 3,48(x2) |
| * 70+(40x9)+130 Damage is when all hits connect. |
| ** This damage is when only 3 hits are blocked. Full blocked damage is 9+(3x9)+8 but its not possible to block more than 3 hits of this Super Art. |
Frame Data
| Startup | Hit | Recovery | Blocked Advantage | Hit Advantage | Crouching Hit Advantage | Guard | Parry |
| 4 | 2 | 51 | -35 | Down | Down | HLx1~4 | Hx1~11 |
Comments here
| Super Art | Super Art Name | Super Art Stock | Motion | Damage | Blocked Damage | Stun Damage | Damage/Gauge |
| III | Messatsu Gou Senpuu | 2 bars (112 each) | (Air) QCF QCF+K | 405*(67 life points) | 15** | 0 | 3,61(x2) |
| * 60+(55x3)+70+(40x4)+130 Damage is when all hits connect. |
| ** This damage is only when 2 hits are blocked. Full blocked damage is 8+(7x3)+9+(3x4)+8 but its not possible to block more than 2 hits of this Super Art. |
Frame Data
| Startup | Hit | Recovery | Blocked Advantage | Hit Advantage | Crouching Hit Advantage | Guard | Parry |
| 9 | 1 | 51 | -35 | Down | Down | HLx1~3 | Hx1~10 |
Comments here
| Super Art | Super Art Name | Super Art Stock | Motion | Damage | Blocked Damage | Stun Damage | Throw Range | Damage/Gauge |
| any | Shun Goku Satsu | Requieres MAX gauge (2 full bars/224) | LP LP F LK HP | 490(87 life points) | - | 0 | 12 | 2,18 |
Frame Data
| Startup | Hit | Recovery | Blocked Advantage | Hit Advantage | Crouching Hit Advantage | Guard | Parry |
| 1 | 38 | 2 | - | Down | Down | Impossible | Impossible |
Akuma's grab Super Art, and it have aprox. 5 frames of invincibility at startup. Shun Goku Satsu it's the only Super Art in the game that can be supercanceled from ANY ground move. Yes, you can "pull off" a Shun Goku Satsu during ANY POINT of ANY GROUND MOVE, like after the first hit of the close Roundhouse, or during a Shakunetsu Hadouken. This is not as good as it sounds, because you cannot grab the opponent during blockstun or hitstun (with the exception of far HK), but you can "bait" the opponent to counter or punish some poke or move (a sweep for example), and during the recovery of your sweep perform the Shun Goku Satsu and grab him while he's in the middle of his punish move (remember that Shun Goku Satsu it's invincible during some frames of the startup)
| Super Art | Super Art Name | Super Art Stock | Motion | Damage | Blocked Damage | Stun Damage | Damage/Gauge |
| any | Kongou Kokuretsu Zan | Requieres MAX gauge (2 full bars/224) | D,D,D+PPP | 640*(107 life points) | 126** | 26*** | 2,85 |
| * 370(300)+(55x2)+40+(55x2)+(40x4) Damage is when all hits connect. |
| ** This damage is only when 6 hits are blocked. Full damage is ¿(7x2)+5+(7x2)+(5x4)? |
| *** 15(15)+(3x9) Damage is when all hits connect. |
Frame Data
| Startup | Hit | Recovery | Blocked Advantage | Hit Advantage | Crouching Hit Advantage | Guard | Parry |
| 16 | 6 | 58 | -26 | Down | Down | HLx9 | Impossible/HLx8 |
Kongou Kokuretzu Zan is the Super Art that does the most damage in the game, but it has such a long startup that it's very hard to use it during combat (the opponent can just jump away when the screen freezes, and all of the hits of KKZ will miss), however, it does a great amount of chip damage, and this move can guarantee a win when the opponent have low health and he is in wakeup status. The first hit of this move is a huge bolt of lightning from Akuma that goes vertically, dealing damage which cannot be parried
Meaties:
- S.MK
- S.MP
- C.LK
- UOH
- F+MP
- Air Hadouken
Combos
Midscreen
You may add some moves such as; Dive Kick, J+![]() , J+Tatsu, J+Hadou, etc. before these combos for more damage/hits.
, J+Tatsu, J+Hadou, etc. before these combos for more damage/hits.
Everyone
Specific to:
Chun-Li, Makoto, Q, Alex, Necro, Twelve, and Elena
| 1st Move | 2nd Move | 3rd Move | 4th Move | Damage | Stun Damage |
| Tatsumaki Zankuukyaku ( |
Gou Shoryuken ( |
- | - | ??? (??%) | ?? |
Akuma, Urien, Necro, Sean, Alex, Yun, Remy, Q, Chun-Li, Makoto, Twelve, Yang, Ryu, Dudley, Elena and Ken
| 1st Move | 2nd Move | 3rd Move | 4th Move | Damage | Stun Damage |
| Tatsumaki Zankuukyaku ( |
Gou Shoryuken ( |
- | - | ??? (??%) | ?? |
Hit Confirms
Everyone
| 1st Move | 2nd Move | 3rd Move | 4th Move | Damage | Stun Damage |
| Crouch |
Crouch |
- | - | ??? (??%) | ?? |
Specific to:
Yun, Akuma, Oro, Remy, Dudley, Elena, Chun-Li, Ibuki, Hugo, Makoto, Alex and Yang
| 1st Move | 2nd Move | 3rd Move | 4th Move | Damage | Stun Damage |
| Crouch |
Crouch |
Crouch |
- | ??? (??%) | ?? |
Ryu, Yun, Akuma, Oro, Remy, Dudley, Elena, Chun-Li, Ibuki, Hugo, Makoto, Sean, Ken, Twelve, Alex and Yang
| 1st Move | 2nd Move | 3rd Move | 4th Move | Damage | Stun Damage |
| Crouch |
Crouch |
Crouch |
- | ??? (??%) | ?? |
Super Art 1
Everyone
It does more damage if you Super Cancel an early Shoryuken![]() into SA1 than Super Cancel with a Shoruyken
into SA1 than Super Cancel with a Shoruyken![]()
Super Art 2
Everyone
Super Art 3
Everyone
Shun Goku Satsu
Specific to:
Yun, Akuma, Remy, Ryu, Q, Oro, Necro, Chun-Li, Dudley, Ibuki, Makoto, Sean, Twelve, Hugo, Alex, Yun and Ken
| 1st Move | 2nd Move | 3rd Move | 4th Move | Damage | Stun Damage |
| Far |
Shun Goku Satsu | - | - | 598 (52%) | 5 |
Kongou Kokuretzu Zan
Everyone
| 1st Move | 2nd Move | 3rd Move | 4th Move | Damage | Stun Damage |
| Tatsumaki Zankuukyaku ( |
Close |
Kongou Kokuretzu Zan | - | ??? (??%) | ? |
| Crouch |
Tatsumaki Zankuukyaku ( |
Close |
Kongou Kokuretzu Zan | ??? (??%) | ? |
Corner
You can add Akuma's dive kick or a J+![]() before these combos for more damage.
before these combos for more damage.
Strategies
Due to Akuma's naturally disadvantageous life and stun bars, high level Akuma play consists of seamless, unpredictable, safe offense and few mistakes. Should your opponent unleash their offense on you, you can lose a lot of life quickly. Obviously it is also very important to have a strong defense because of how much damage Akuma takes. Learn to block low and tech throws, and use Akuma's wakeup options wisely.
Overview
Punish after Parrying:
Air Parry:
- Air Hadouken
- Tatsumaki, land, SRK (very precise)
- Tatsumaki, land SA1/3.
-![]() ,
,![]() (air reset, not very useful)
(air reset, not very useful)
Normal Parry:
- Raging Demon (requires fast reflexes)
- s.hp xx tatsumaki, SRK.
- s.hp xx SRK xx SA1/2
- CORNER: s.hp xx tatsumaki, SRK, SA1
Low Parry:
- c.![]() , c.
, c.![]() , c.
, c.![]() xx SA1 (works only on some characters)
xx SA1 (works only on some characters)
- CORNER: c.![]() , tatsumaki, xx shoryuken xx Sa1
, tatsumaki, xx shoryuken xx Sa1
Wake-Up Moves:
- Demon flip
- Teleport
- Hurricane
- The best by far: Block!
Blockstrings
- after knockdown- c.![]() , c.
, c.![]() , c.
, c.![]() , c.
, c.![]() (into fireball/flip/tatsu)
(into fireball/flip/tatsu)
- cl ![]() , cr
, cr ![]() x
x ![]() demon flip dive kick
demon flip dive kick
- cr, ![]() , cl
, cl ![]() x
x ![]() demon flip dive kick
demon flip dive kick
- cr.![]() , s.hp, x demon flip kick
, s.hp, x demon flip kick
Raging Demon Set-ups
- Kara Demon: Twds +![]() ,
,![]() ,
,![]() , down forward,
, down forward, ![]() ,
,![]() !
(if done right, then the raging demon will come out before the first hit of
!
(if done right, then the raging demon will come out before the first hit of![]() )
)
- ![]() : i actually tried this a couple of time and it seems pretty useful.
: i actually tried this a couple of time and it seems pretty useful.
- Cl. ![]() , (walk up) cr. rh kara demon.
, (walk up) cr. rh kara demon.
- Cr. ![]() , Kara Demon (while pressing
, Kara Demon (while pressing ![]() , press
, press![]() twice and hold another
button--hp or
twice and hold another
button--hp or![]() will do fine--to keep the jabs from coming out.
will do fine--to keep the jabs from coming out.
- Divekick (does not matter which or if the divekick even connects), pause then Kara Demon.
- Dash up (kara) Demon. (quickly press the jabs while dashing)
- UOH Rh. Kara demon
- If you do a fireball late enough, nothin will come out (of you time it just right, Gouki will still say "gou zanku") just like Demon Flip Kick. You can use this to jump in on an opponent, do a fake fireball, buffer the jabs and then do a Kara Demon.
- Parry into demon (you have to be fast)
- Raging demon on wakeup (if your opponent won't back off)
Basics
Super Art Selection
SAI (Messatsu Gouhadou) - Akuma's fireball super, and his super art of choice, for a variety of reasons. It's easily the safest of his supers, which makes it hard to punish unless it's blocked at close range. It can be confirmed or cancelled out of a variety of moves, including cr. short x 2, cr. forward, any of his uppercuts, etc. It also does good chip damage, especially when preceded by a fireball or red fireball. The main thing going against it is its fairly low damage, but it's still respectable, especially against the weaker characters.
SAII (Messatsu Goushoryu) - Akuma's uppercut super, similar to Ken's SAI. Does better damage than SAI, and has many of the same confirms and cancels as SAI. On the other hand, this super is much more than SAI unsafe if missed, and basically gives the opponent a free combo. Also has less chip potential, since the last 3 hits are easily parried. Not a bad super, but SAI is preferrable.
SAIII (Messatsu Gourasen) - Akuma's hurricane kick super, goes straight up. Does the most damage out of all of his supers, but has the worst recovery and chip damage by far. Also lacks range and lead-in combos, making it hard to easily integrate into his ground pressure/offensive. Probably his worst super.
Shun Goku Satsu (Raging Demon) - Akuma's signature special art, requires 2 full meters (all of his super arts are the same length.) Does loads of damage and is a grab super (therefore, unblockable), but is ordinarily hard to connect with since the jabs usually give the super away, and it's fairly easy to jump after the super flash if it's not kara'ed. Techniques such as kara-ing it with toward![]() or hiding the jabs by dashing eliminate these problems and make it a much more lethal super, however. And a final word, if you cannot kara-demon, buffer this move from a dash (and landing at point blank) or to counter an air attack, or combo into far
or hiding the jabs by dashing eliminate these problems and make it a much more lethal super, however. And a final word, if you cannot kara-demon, buffer this move from a dash (and landing at point blank) or to counter an air attack, or combo into far ![]() , the Shun Goku Satsu will be useless for you, and you will waste all your gauge. The throw range its completely ridiculous, and you will be only able to connect it in random situation like when the opponent is trying some hit-confirm something or some other thing. Also note that you will be doing more damage if you connect any SA twice than with Shun Goku Satsu.
, the Shun Goku Satsu will be useless for you, and you will waste all your gauge. The throw range its completely ridiculous, and you will be only able to connect it in random situation like when the opponent is trying some hit-confirm something or some other thing. Also note that you will be doing more damage if you connect any SA twice than with Shun Goku Satsu.
Kongou Kokuretsu Zan: Akuma's new special art, channels his energy into a shockwave, requires 2 full meters again. Even more damaging than the raging demon and is the more damaging Super Art in the game (provided all of the hits connect), and has potential for extra with taunt and/or crouching damage. Good for countering early jump-ins and cross-ups, but is somewhat slow to come out and does severely reduced damage if the first hit misses. His most common combo with this super involves a jab reset into the KKZ (after a ![]() Tatsumaki Zankuukyaku) This is also the ultimate chip out super - if you get a knockdown with 2 full stocks and your opponent having only a few pixels of life, this super guarantees the win, provided you time it right. This is since the first hit is unparriable; therefore, it must be blocked, and does good chip on its own. If, by some ridiculous chance, your opponent survives the first hit and starts red-parrying out of it, you still have a good 6 or 7 parries worth of time to screw them up (about the same as his SAI).
Tatsumaki Zankuukyaku) This is also the ultimate chip out super - if you get a knockdown with 2 full stocks and your opponent having only a few pixels of life, this super guarantees the win, provided you time it right. This is since the first hit is unparriable; therefore, it must be blocked, and does good chip on its own. If, by some ridiculous chance, your opponent survives the first hit and starts red-parrying out of it, you still have a good 6 or 7 parries worth of time to screw them up (about the same as his SAI).
Kara-Techniques
Kara Demon - f ![]() ,
,![]() ,
,![]() , down-forward,
, down-forward, ![]() ,
,![]()
Kara UOH - Hold forward while doing UOH.
Zoning
Mixups
Demon Flip Mixups!:
The demon flip really gives you lots of options. The kick should be your main tool, since its the safest. With this, you can late cancel to try to combo, early cancel to stuff potential counters, or go for the cross up. If you are close enough, you have the throw option, which works really well against tall characters. To keep the kicks unexpected, you have either the slide kick, or an empty demon flip, which I generally follow up with a throw, or I sometimes just go straight into another demon flip. Anyway, lets talk about setups.
fp juggle into demon flip
This is either an air tatsu juggle into fp, or bnb ending in fp instead of srk. This attack string can really put pressure on the opponent, and is a good tool against characters without uppercuts. You won't ever be in range for the throw with this one.
just a standing normal into demon flip
You see JR use these a lot. This is your primary way of connecting the throw, which I use nearly as much as the kick, sometimes more than the kick depending on the opponent.
meaty demon flip
I don't use this often, but its a good setup because you stand a better chance against uppercuts, and have really great combo potential.
air fb, land, demon flip
This is a setup I've been experimenting with against makoto mainly. You don't have to worry so much about a dash under or anything.
Ok, so you're in the flip...now what?
Like I said, the kick is your main option, so lets talk about that. Its tempting to always late cancel the flip so you can combo. The first thing you learn in Mixup 101 is always doing one thing in a situation = death, so you have to early cancel this thing too. Once people start getting knocked by the early cancel, they wont be so tempted to try to AA you everytime, or parry, and an early cancel kick can lead to RD setups or kara throws or more flips. Its a good sign if they just start blocking the kicks, because you are getting close to locking them down, and you have them unprepared for throws. The blocked kicks should be followed up pretty much the same way as an early cancel kick. Either land, normal > demon flip, kara throws, or if you can, an RD. I also like going for the f+mp overhead after blocked or early canceled kicks.
You also have the cross up kick. I'm just starting to use this thing, but its really great because its ambigous. What sucks though is you really need to know what situations it will cross people up on. Most of the time, a cl.![]() >
> ![]() flip, and early cancel the kick will lead to a crossup. If anyone can give some insight on crossups with demon flips that would be great.
flip, and early cancel the kick will lead to a crossup. If anyone can give some insight on crossups with demon flips that would be great.
Unlike the dive kick, after a parried flip kick, you land at the same speed, so you should be able to go right into demon. Other than that, don't get parried. I also will throw out rh and ![]() tatsus after parried flip kicks from time to time.
tatsus after parried flip kicks from time to time.
Time to start using the throw. Not much to know here, except make sure you are putting yourself in range for this. You really need to be right on top of them. So you are either do c.![]() >
> ![]() flip, cl.
flip, cl.![]() >
> ![]() flip, cl.fp >
flip, cl.fp > ![]() flip. Just know your ranges because whiffing this thing is a free combo for your opponent On characters like Q, if you go for a psuedo meaty flip, and just go for the throw right away, there is relatively nothing they can do to counter it.
flip. Just know your ranges because whiffing this thing is a free combo for your opponent On characters like Q, if you go for a psuedo meaty flip, and just go for the throw right away, there is relatively nothing they can do to counter it.
The slide kick really allows the normal kicks and throws to work well. I follow up my fp juggles with this one a lot! Although, once you get this thing blocked or parried, its time to hold off on it for a while, because you have pretty bad recovery on this one. I very rarely dont land this one, but you do need to be very careful with it.
Lastly, there is the empty flips, and like I said, you should mostly go for kara throws, because if someone didn't try to AA you, they are probably blocking.
Don't really ever use this punch. No real reason. Bad recovery. It sucks.
Hope this is useful I don't want to sound like an expert, because I'm not. I'm still learning the demon flip, but I think its not discussed enough here.
How to Counter different reactions to Demon Flips
Opponent is AAing you out - Early flip kick Opponent is standing blocking - Slide kick, empty flip throw, flip throw Opponent is crouching blocking - Flip punch, empty flip throw, flip throw Opponent is parrying - Vary flip strengths/kick timing (super late cancel works well), empty flip throw, flip throw Opponent trying to go under flip - Early flip kick
Additional Notes
- Personal Action: Attack up, Stun Damage up for the next non-throw attack/combo.
A Review by Chaosofdante
Introduction
When playing Akuma the basic goal is to use his superior zoning ability in order to control your opponent’s options, and at the same time, minimizing the risk of getting hit yourself.
It is very important to note (if you haven't noticed already) that Akuma has THE WORST defense rating of the characters in 3S. He is also tied with Remy for having the smallest stun bar of all of the characters 3S.
You should also note that Akuma's supers are all the same length, and that he has no EX moves. All this was done to counter balance his incredible offense and mix-up. Many people are turned away from Akuma because they see him as being too inconsistent due to his stamina, but I hope to reassure you that by making smart decisions during the match, Akuma has no holes at all in his game.
Beginning the Offense
Akuma has the basic Shoto mix-ups that allow him to confuse and knock down his opponent repeatedly. If you're not sure on what these mix ups are (tick throw, high/low, Kara throwing, etc.) please consult the Ryu section for examples.
For offense purposes, you want to use Akuma's air fireballs as a safe window to get in on opponents and begin guessing games. When using an air fireball on someone who is standing always, and I mean ALWAYS option select parry before throwing the fireball. Akuma cannot attack after the fireball has been thrown so you want to do it as late as possible. This ensures that if you throw an air fireball at a standing opponent, they can't counter hit you even if they parry. In this way Akuma becomes very safe after a late air fireball even if it's parried, you only need to watch out for things like reversal Shippus or Hugo/Alex SA1 as moves with 1-2 frame start up will still be able to get you. The option select parry is purely there to protect you from any early anti air attempts. If the parry is successful you can do a meaty fierce in the air and link a standing fierce into either short, or roundhouse Tatsu depending on if they are standing or crouching (short Tatsu whiffs on almost everyone crouching).
Another offensive option from mid range in order to get close is to cancel hit or blocked low forwards into Akuma's demon flip. Akuma has a fairly good mix-up game from this that can work well as long as it's not used more than a few times in a match, if you become predictable with it, your opponent may be able to punish you. The input for this is (F > D > ![]() >
> ![]() and any kick (
and any kick (![]() /
/![]() /
/![]() )). The kick pressed determines the distance of Akuma’s flips. Use the short kick to keep the pressure on with dive kicks, and use the other two for his throw.
)). The kick pressed determines the distance of Akuma’s flips. Use the short kick to keep the pressure on with dive kicks, and use the other two for his throw.
Once Akuma scores a knockdown he becomes extremely dangerous. He can hit confirm his close standing forward into his B&B juggle. He can also confirm marginal damage starting low without a super with this combo (c.![]() > c.
> c.![]() x RH Tatsu. If in the corner, cancel into
x RH Tatsu. If in the corner, cancel into ![]() Tatsu and juggle with an extremely early
Tatsu and juggle with an extremely early![]() Shoryuken. This can additionally be canceled off the first hit into Messatsu go Hadou if you have built enough meter). If you have super, Akuma is usually better off starting low with c.
Shoryuken. This can additionally be canceled off the first hit into Messatsu go Hadou if you have built enough meter). If you have super, Akuma is usually better off starting low with c.![]() > c.
> c.![]() x Super.
x Super.
- A note on Akuma's B&B juggles. If you hit a close standing
 do not immediately cancel into Messatsu go Hadou, instead, cancel into
  Tatsu if your opponent is not crouching when hit. Akuma's s.
 reset into Messatsu go Hadou is much better. Despite the fact it can be parried, Akuma will recover well before his opponent has finished parrying all 6 hits, and can dash in and attack to screw up their timing. This almost always does more damage than his link (additional things to consider; it is wise to link the close standing forward into Messatsu go Hadou only if they are crouching or if it will win you the round).
- Another juggle that people often over look and deem as "too hard" to be practical, is his
 reset into Kongou Kokuretsu Zan . This is his BEST combo. It does an insane amount of damage and is inescapable after the first hit of the combo connects. This reset cannot be parried and this super usually does more damage than a demon. An important thing to do is to activate the jab as early as possible, as it often determines whether or not there is enough time to link the super. In my opinion, this combo really only needs to be practiced for about a week before it becomes second nature.
If you don’t have meter, Akuma’s best option is usually to juggle with a semi late fierce Shoryuken. You can also try to reset them with a standing fierce, and cancel that into his forward demon flip and continue the pressure. If you have already tried canceling into forward demon flip, try cancelling the fierce into the short demon flip and just let it finish into the sweep. Akuma is usually safe after this sweep, and from the right range, that set-up puts you in the right place to block a counter attack from most characters, again, watch out for supers with quick start ups before executing this attack.
Another one of Akuma’s great strengths that absolutely needs to be mastered is his Asura Senkuu or his teleport. This move completely ruins the game plans of characters like Denjin-Ryu (Use it to go through meaty Denjins), Urien (Escape Aegis unblockables), and Hugo. It can also be used as a way to run away from Genei-jin, although when doing this you must be extremely careful. Reversal teleport is mandatory for high level Akuma play, as it allows him one way to get around his terrible stamina.
The last important tactic for an Akuma player to know is also his most infamous: His demons. Akuma’s raging demon puts Akuma’s mix up game on the same level as Makoto’s, and almost as good as Dudley’s. It is important to only use this super in much the same way Hugo uses his Gigas breaker super. Only use this super at point blank range or as Kara. If it is not done at point blank range, any scrub will know enough to jump and avoid it. Performed correctly however, if it is done point blank (like all grab supers need to be); they cannot escape by that method. In fact it can help to ignore that the demon travels any sort of distance at all. Be careful when Kara canceling the demon though because during those first few frames that gain extra range Akuma is not considered in the demon animation therefore he will not pass through opponents attacks. Only regular demons are reliable for there invincibility frames.
Akuma has a few basic ways to land his demon. These setups are:
- Dash-demon
- Dash-Kara demon
- Tick Kara-demon
- Empty cancel demon flip into Kara demon
And even
- Wake-up demon.
Dash demon is performed by buffering two jabs in the dash then simply finishing the command. Kara demon is the same as his Kara throw (F +![]() ) but finishing the command instead. (Props to Jiro/Harmonaz for showing this final demon set up). This is by far the best use of a demon I have ever seen.
) but finishing the command instead. (Props to Jiro/Harmonaz for showing this final demon set up). This is by far the best use of a demon I have ever seen.
To perform the Walk UP KARA-DEAMON you simply need to be fast enough to input the raging demon command within the same time window that you Kara cancel Akuma’s F + ![]() for a Kara throw. The input for this is [
for a Kara throw. The input for this is [ ![]() >
>![]() > F >
> F > ![]() >
>![]() ]. This way Akuma will do his famous Kara throw grunt and move forward then cancelling it into a demon. Obviously this is extremely hard to do, but there are a few ways you can practice and learn this. I learnt that hitting
]. This way Akuma will do his famous Kara throw grunt and move forward then cancelling it into a demon. Obviously this is extremely hard to do, but there are a few ways you can practice and learn this. I learnt that hitting![]() and F at the same time for the first
and F at the same time for the first![]() helps cut time off. Then you need to train your hands to hit
helps cut time off. Then you need to train your hands to hit![]() >
> ![]() >
>![]() afterwards. The hardest part I found was getting the tap correct. Remember the timing for the input is really strict but the demon input itself isn't so much in 3S. Don't worry if you can't do it right away, Harmonaz said it took him 25 min just to learn it in his video, in perspective it took me several hours. Even Japanese players like Jiro and Match don't get it all the time, just watch their matches where they whiff in front of their opponent with max meter, that just goes to show how hard this setup is.
afterwards. The hardest part I found was getting the tap correct. Remember the timing for the input is really strict but the demon input itself isn't so much in 3S. Don't worry if you can't do it right away, Harmonaz said it took him 25 min just to learn it in his video, in perspective it took me several hours. Even Japanese players like Jiro and Match don't get it all the time, just watch their matches where they whiff in front of their opponent with max meter, that just goes to show how hard this setup is.
- Akuma has a couple of not-so-hot setups for demons that should be avoided. I sometimes see beginners use these setups, but they aren’t safe. They are his c.
 blocked canceled into demon, and his juggle
 reset, whiff
  Tatsu while hiding two
 in the Tatsu then finishing the command at point blank. The reason these setups don’t work is that they are easy to see coming for an experienced player. Most experienced players will jump back when they see these set-ups done by an Akuma with maxed super.
(Lately I have been experimenting with a very good, but extremely difficult demon setup that, when done correctly, can really add to Akuma’s demon mix up. It is very possible, although very difficult, to hide two![]() inputs inside the two c.
inputs inside the two c.![]() inputs in a blocked version of Akuma’s c.
inputs in a blocked version of Akuma’s c.![]() hit confirm. If the c.
hit confirm. If the c.![]() > c.
> c.![]() is blocked, Akuma can then cancel into an immediate Kara demon if the inputs were done correctly. It must be Kara demon as the two
is blocked, Akuma can then cancel into an immediate Kara demon if the inputs were done correctly. It must be Kara demon as the two ![]() s push Akuma too far out of point blank range on block. The command for this is to hit c.
s push Akuma too far out of point blank range on block. The command for this is to hit c.![]() then immediately hit c.
then immediately hit c.![]() during the short animation and hold then hit c.
during the short animation and hold then hit c.![]() to get the second
to get the second ![]() , and almost simultaneously negative edge the second
, and almost simultaneously negative edge the second![]() by releasing
by releasing![]() , then cancel into Kara demon. If done correctly Akuma will release two c.
, then cancel into Kara demon. If done correctly Akuma will release two c.![]() s without releasing a c.
s without releasing a c.![]() . The timing for the button presses is similar to Kara canceling Yun's standing short into
. The timing for the button presses is similar to Kara canceling Yun's standing short into![]() dash punch if you have any experience with Yun’s juggles.)
dash punch if you have any experience with Yun’s juggles.)
Match-ups
Serious Advantage Match-ups
Akuma has no match-ups where he is at a serious advantage
Advantage Match-ups
- Dudley
- Urien - Can be a very frustrating matchup for Urien, given Akuma can teleport out of reflectors, and his
 tatsumaki is completely safe, as long as it's not parried.
 - Elena
- Necro
- Alex
- Remy
- Q
- Hugo
- Twelve
- Sean
Fair Match-ups
- Akuma
- Ibuki
Disadvantage Match-ups
- Yun
- Chun-Li
- Ken
- Makoto - This matchup really depends on the quality of the Makoto and Akuma players. Akuma must avoid being stun-grabbed at nearly all costs, considering Makoto has one of the easiest 100% stun combos (out of her SAII) on him in the game. If Makoto gets that one stun-grab on her half of the screen with meter, the round is basically over.
- Ryu
- Oro
- Yang
Serious Disadvantage Match-ups
Akuma has no match-ups where he is at a serious disadvantage


