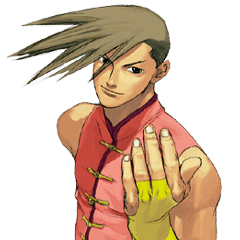
Introduction
| Strengths | Weaknesses |
|---|---|
|
|
Specific Character Information
- Stamina: 1020
- Stun Bar Length (pixels): 64 (Normal)
- Stun Bar Recovery (frames it takes to recover 1 pixel): 24th frame
- Taunt: Increases damage for the next hit/combo by 31.3% and increases damage for the next throw by 6.3%. One taunt is the maximum.
- Best Kara-Throw: (Roundhouse) HK
- Standard Throw Range (pixels): 18
- Kara-Throw Range (pixels): 31
- Dash Forward (frames) / Moving Distance: 23 / 2
- Dash Backward (frames) / Moving Distance: 27 / 2/5
- Normal Wake up (frames): 57
- Quick Stand (frames): 41
Character Colors
- Jab: Default
- Strong: Blue
- Fierce: Orange
- Short: White and Red
- Forward: Silver
- Roundhouse: Violet
- Jab + Forward + Fierce: Black
Moves List
Throws
| Hiza Geri | |
| Youhon Shiun | |
| Monkey Flip |
Command Moves
| Koushu | Close |
| Senpuu Kyaku | |
| Raigeki Shuu | Air |
Special Moves
| Tourou Zan | EX | |
| EX Version can hit up to 5 times | ||
| Senkyuutai | EX | |
| Byakko Soushouda | SC | |
| Byakko Soushouda-fake | ||
| Zenpou Tenshin | Close | |
| Kaihou |
Super Arts
| I | Raishin Mahhaken | 120 Gauge Dots | 1 Stock | 3.0 EX Uses | |
| II | Tenshin Senkyuutai | 104 Gauge Dots | 2 Stocks | 5.2 EX Uses | |
| III | Sei'ei Enbu | 64 Gauge Dots | 1 Stock | 1.6 EX Uses |
Target Combos
| Air forward |
Move Analysis
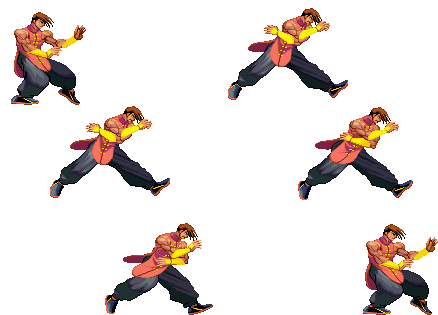
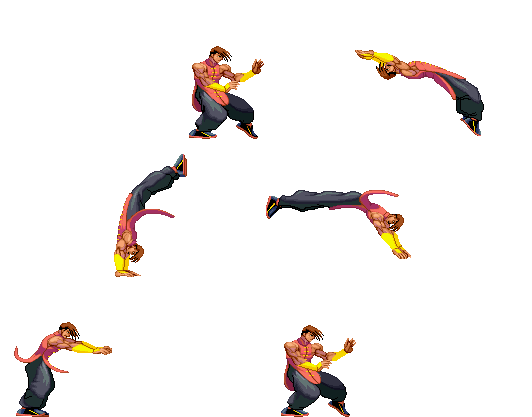
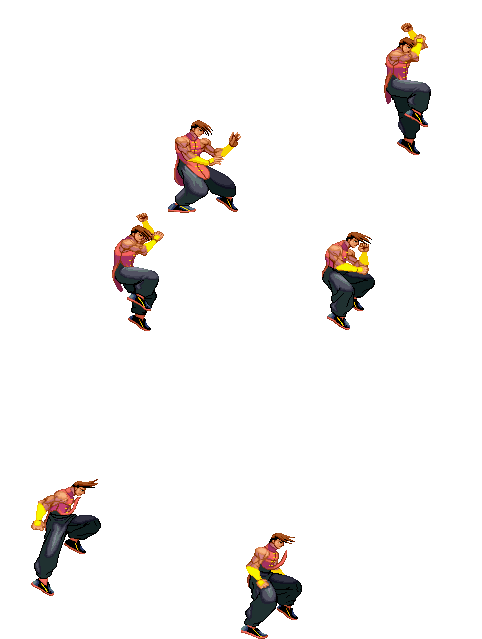
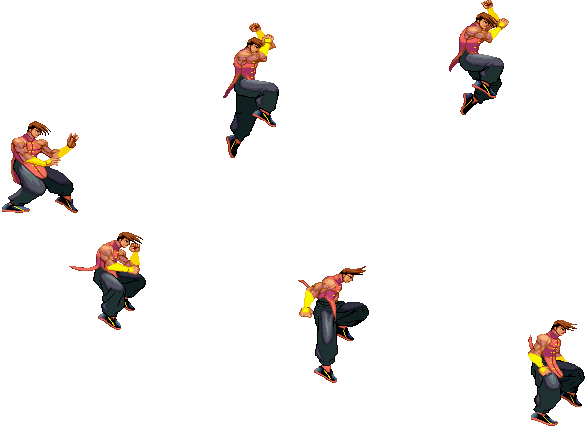
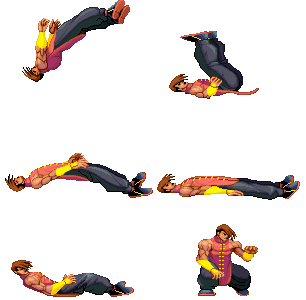
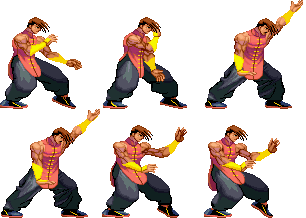
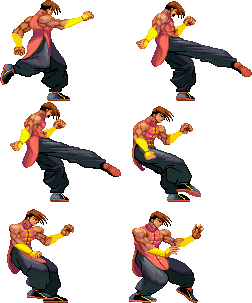
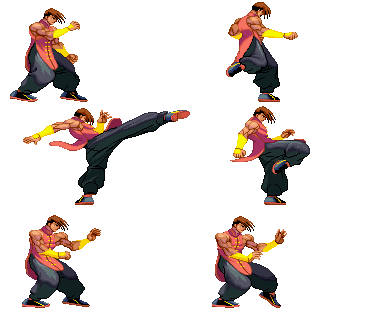
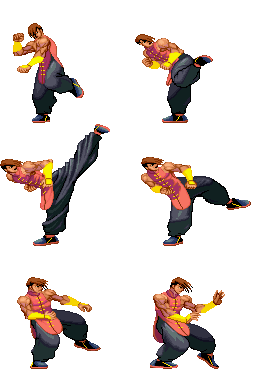
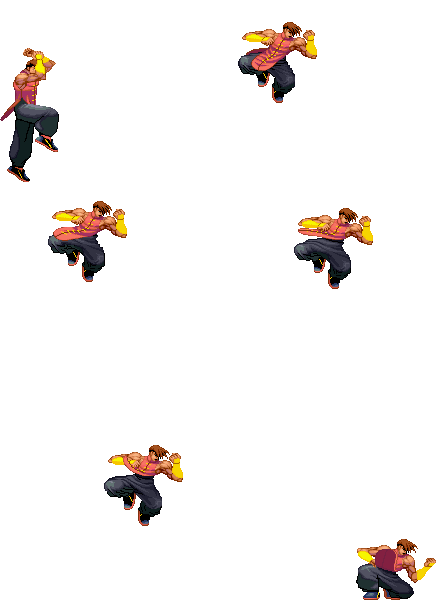
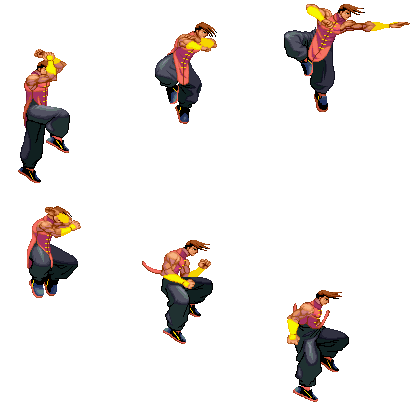
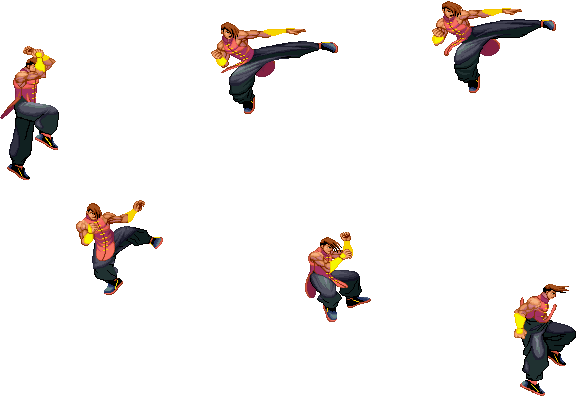
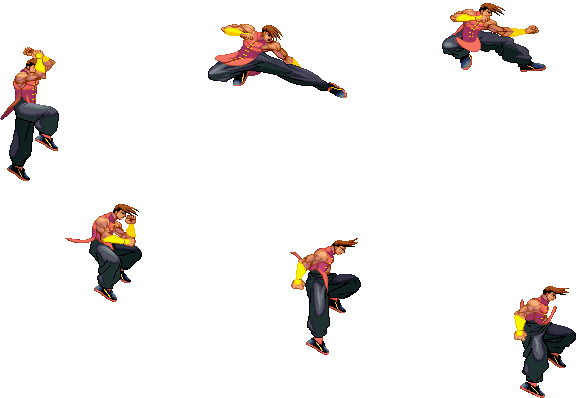
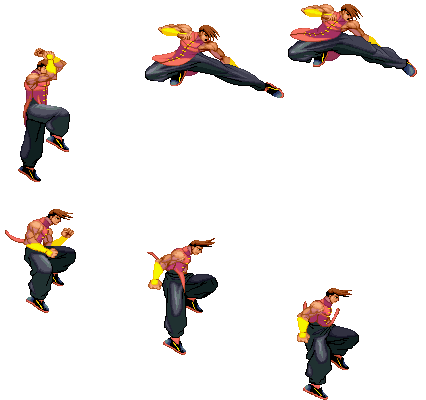
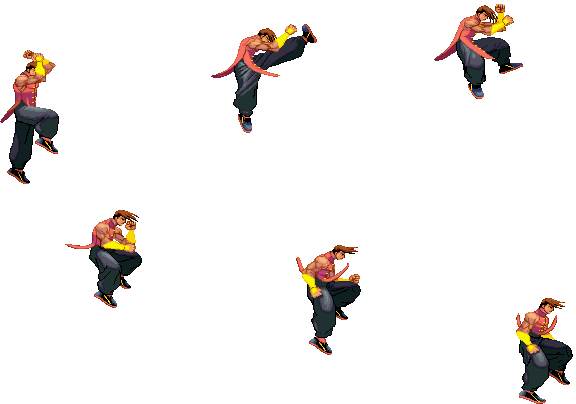
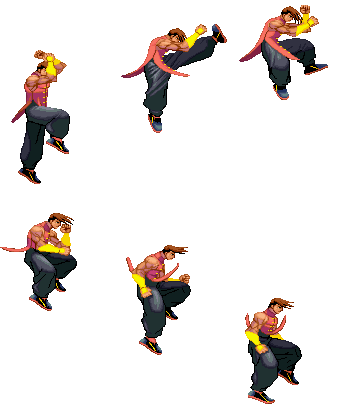
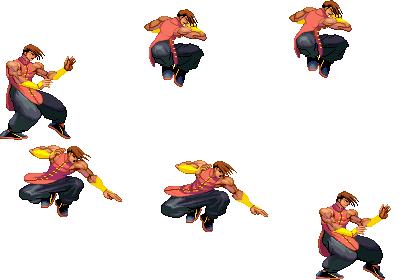
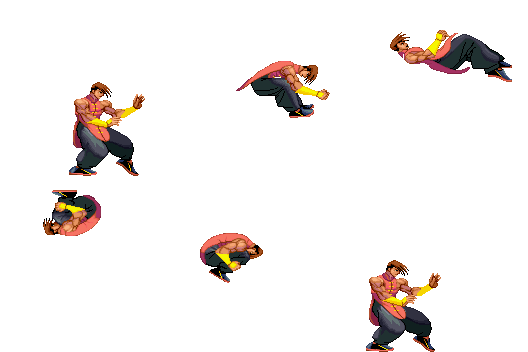
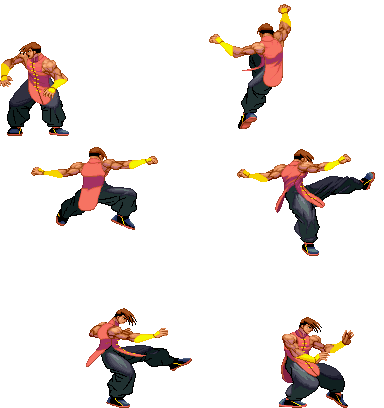
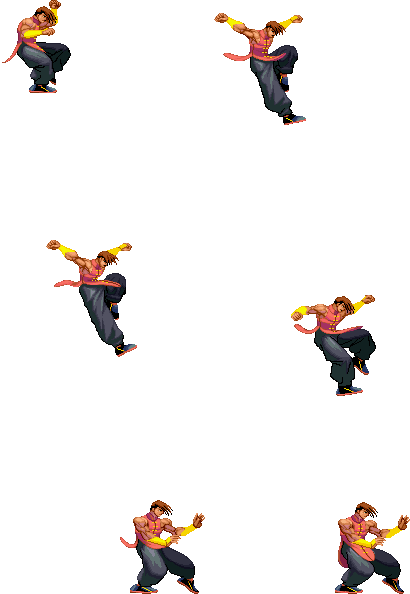
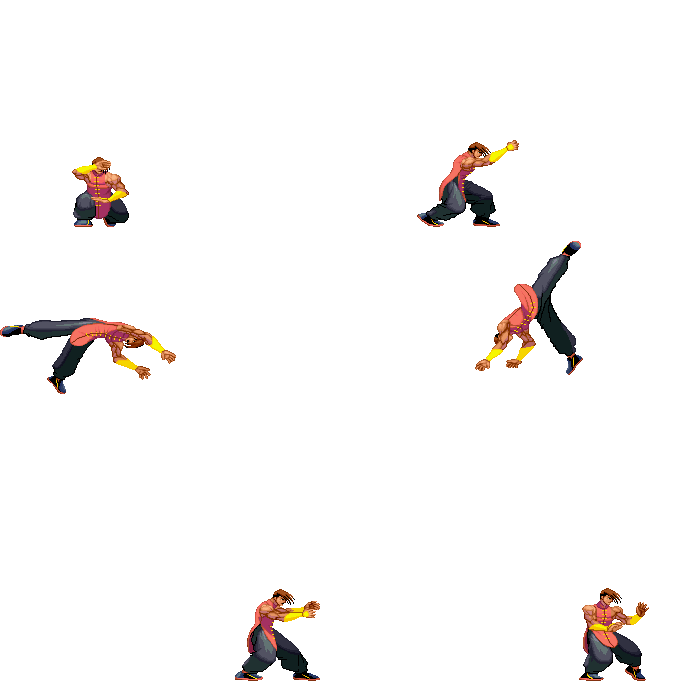
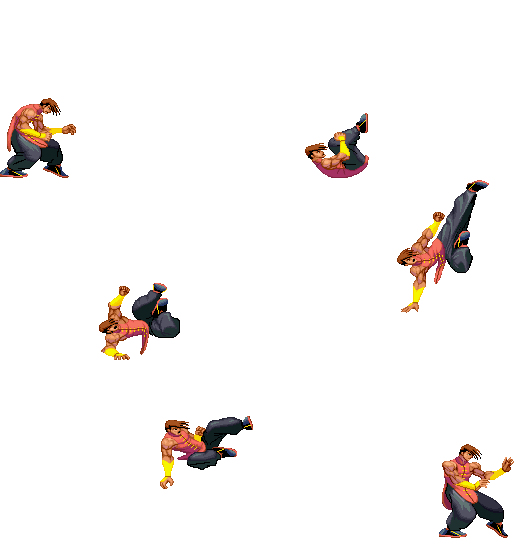
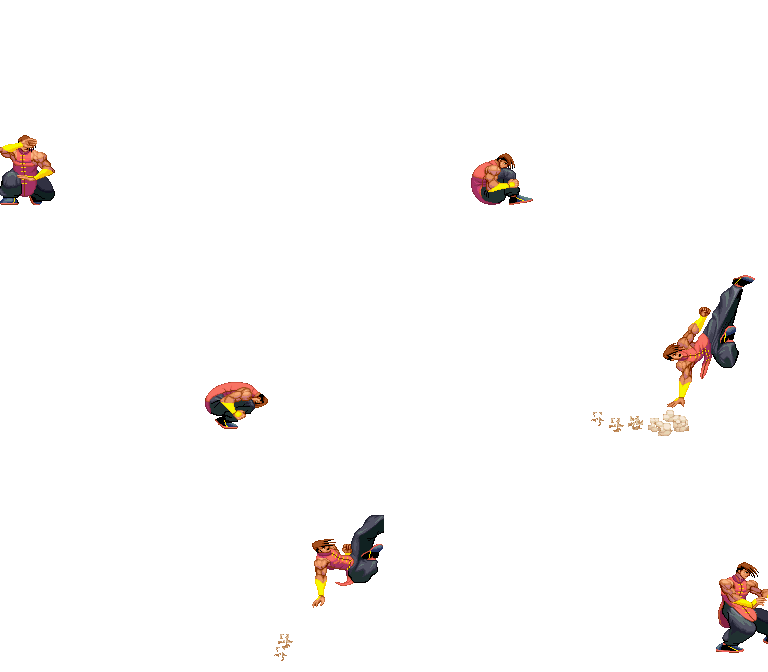
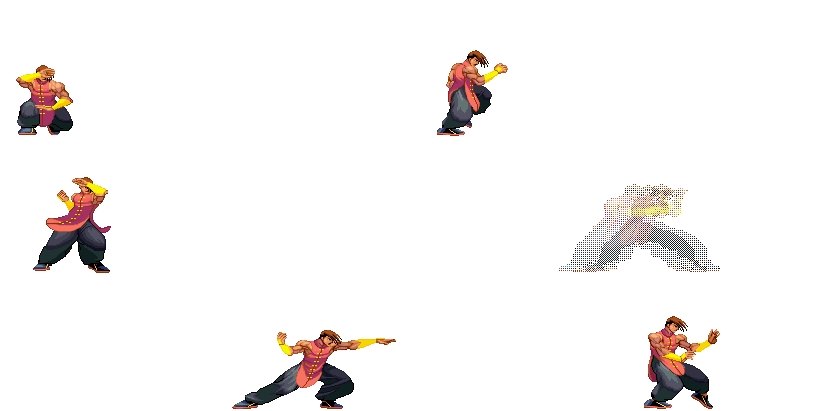
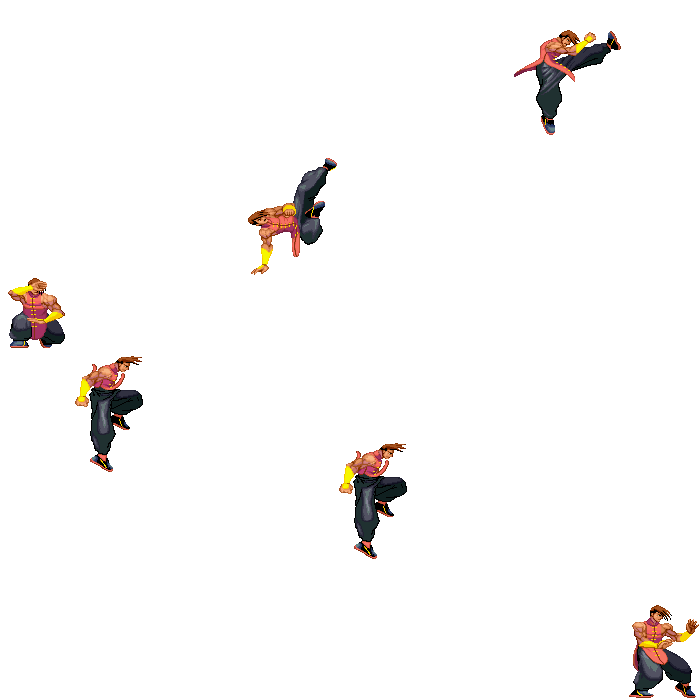
- All those sprites are taken from the site https://www.justnopoint.com/zweifuss/
- All Framedatas in "Move Analisys" section are taken from Game Restaurant , this means the Framedata isn't from the Dreamcast version like Karathrow site, it's from Arcade version.
Please note that the images show in this section are for the 1st frame it hits, so this means the opponent is taking the hit in the image shown on the move. I use the 1st frame of every move (except taunt, dash, jump, wakeup and 2nd throw image sprites) because you will see the maximum range of every attack (mostly of the attacks). Note also that those images are ACCURATE, they are exactly the first frame it hits, so enemy takes damage but they still dont make the "pain" frame.
General
- Move: Move name
- Motion: What you must do to execute the move
- Damage: Damage it does (in pixels)
- Stun Damage: Stun Damage it does (in pixels)
- Chains into itself: If you can combo into the same movement
- Special Cancel: If you can cancel the move into a Special Move
- Super Cancel: If you can cancel the move into a Super Art
- Juggle Value: Amount of JP the move adds in aerial juggles
- 0: JP is reset
- Juggle or Reset: If the move knocks down on air connect or air resets
- Throw Range: Range of the throw (in pixels)
- Num.: Super Art number
- Super Art: Super Art name
- Super Art Stock: Number of Gauge Bars the Super Art have, also the lenght of each bar (in pixels)
Frame Data
- Startup: Number of frames it takes to start the move
- Hit: Number of frames that can hit the opponent
- Recovery: Number of frames it takes to recover from the move
- Blocked Advantage: Number of frames you are in advantage/disadvantage after opponent have been blocked the hit
- Hit Advantage: Number of frames you are in advantage/disadvantage after opponent have been take the hit
- Crouching Hit Advantage: Number of frames you are in advantage/disadvantage after opponent have been take the hit while he's crouching
- + # : You have # frames of advantage
- - # : You have # frames of disadvantage
- # ~ # : Advantage/disadvantage can vary from # to #
- Down: Enemy gets knocked down
- Guard: How opponent must guard the move, High (H), Low (L) or both (HL)
- Parry: How opponent must parry the move, High (H), Low (L) or both (HL)
Gauge Increase
- Miss: Gauge you gain if you miss the move (in pixels)
- Blocked: Gauge you gain if the move gets blocked (in pixels)
- Hit: Gauge you gain if you hit the opponent with the move (in pixels)
- Parry: Gauge opponent gains when he parry the move (in pixels)
Basic Moves
| Move | Start-up frames | In ground frames | In air frames | Recovery frames | Total frames |
|---|---|---|---|---|---|
| Dash Forward | 3 | 8? | - | 6? | 23 |
Yang's dash is awkward and slow, meaning it has little applications in neutral. Used to close the distance after a knockdown at ranges where command dash would side switch.
| Move | Start-up frames | In ground frames | In air frames | Recovery frames | Total frames |
|---|---|---|---|---|---|
| Dash Backwards | 2,5 | 4? | - | 6? | 27 |
This backdash goes insanely far, which is usually detrimental to Yang's game plan. It really gives up too much ground to be worth it most of the time.
| Move | Motion | Startup Frames |
| Jump | BU or U or FU | 3 |
Comments here
| Move | Motion | Startup Frames |
| Super Jump | DBU or DU or DFU | 5 |
Comments here
| Move | Motion | Frames |
| Normal Wakeup | - | 57 |
Comments here
| Move | Motion | Frames |
| Quick Stand | Tap D when hitting the ground | 41 |
Comments here
| Move | Motion | Damage | Stun Damage | Chains into itself | Special Cancel | Super Cancel | Juggle Value |
| Taunt | HP+HK | 5 | 0 | No | No | No |
Frame Data
| Startup | Hit | Recovery | Blocked Advantage | Hit Advantage | Crouching Hit Advantage | Guard | Parry |
| 21 | 10 | 27 | ? | ? | ? | HL | HL |
Gauge Increase
| Miss | Blocked | Hit | Parry (Gauge for opponent) |
| 4(6) | ? | ? | 4 |
Adds some damage onto your next combo. Only used after stuns (which Yang can get quite easily) or after a hard knockdown from Super 2.
| Move | Motion |
| Parry (High) | Tap F when about taking a hit |
| Parry (Low) | Tap D when about taking a hit |
| Parry (Air) | Tap F in air when about taking a hit |
Frame Data
| Move | Frames you're frozen | Frames opponent is frozen | Frame Advantage when parry is successful | Frames before you can try another parry |
| Parry (High) | 16 | 16 | +4(LP/LK) +3(MP/MK) +2(HP/HK) 0(Special/Super) -16(Fireball) | 24(19 when attack comes from the air)*,** |
| Parry (Low) | 16 | 16 | +4(LP/LK) +3(MP/MK) +2(HP/HK) 0(Special/Super) -16(Fireball) | 24(19 when attack comes from the air)*,** |
| Parry (Air) | 16 | 16 | +4(LP/LK) +3(MP/MK) +2(HP/HK) 0(Special/Super) -16(Fireball) | 21(19 when attack comes from the air)*,** |
| * (If a parry attempt is successful, the 19/21/24 frame restriction is taken away and you can attempt another parry immediately) |
| ** (If another attack connects within 2 frames of your parry, it will automatically be parried) |
Gauge Increase
| Move | Gauge Increase |
| Parry (High) | 4*** |
| Parry (Low) | 4*** |
| Parry (Air) | 4*** |
| *** (You gain 4 of gauge for whatever attack parried, and for whatever hit you parry during multihit attack) |
You can buffer any motion during High or Low parry, but NOT during Air parry, also parry resets the juggle count (and thus resets all scaling).
- Parry information is taken from Shoryuken Forums, more exactly, from user JinraiPVC. Thanks for this information dude
Normal Moves
Standing Normals
| Move | Motion | Damage | Stun Damage | Chains into itself | Special Cancel | Super Cancel | Juggle Value | Reset or Juggle |
| Far Jab | LP | 20(3 life points) | 3 | Yes | Yes | Yes | 15 | Reset |
Frame Data
| Startup | Hit | Recovery | Blocked Advantage | Hit Advantage | Crouching Hit Advantage | Guard | Parry |
| 3 | 2 | 6 | +4 | +4 | +4 | HL | HL |
Gauge Increase
| Miss | Blocked | Hit | Parry (Gauge for opponent) |
| 0 | 1 | 2 | 4 |
Used as a tick into a throw or command grab or as a low-commitment anti-air. Since it chains into itself, Yang can keep pressing Jab as an anti-air to force the opponent to parry endlessly until they fail. This has a high success rate, but is weak. Generally outclassed by crouch Jab since it can be crouched by most characters.
| Move | Motion | Damage | Stun Damage | Chains into itself | Special Cancel | Super Cancel | Juggle Value | Reset or Juggle |
| Far Strong | MP | 50(8 life points) | 5 | No | No | No | 15 | Reset |
Frame Data
| Startup | Hit | Recovery | Blocked Advantage | Hit Advantage | Crouching Hit Advantage | Guard | Parry |
| 5 | 4 | 12 | -2 | -1 | 0 | HL | H |
Gauge Increase
| Miss | Blocked | Hit | Parry (Gauge for opponent) |
| 2 | 5 | 10 | 4 |
A lackluster poke. His strong -> fierce -> b+fierce TC is a good conversion, but will fall out if the MP connects from too far out. Yang has better pokes than this, so it doesn't see much use.
| Move | Motion | Damage | Stun Damage | Chains into itself | Special Cancel | Super Cancel | Juggle Value | Reset or Juggle |
| Far Fierce | HP | 120(16 life points) | 15 | No | No | No | 7 | Reset |
Frame Data
| Startup | Hit | Recovery | Blocked Advantage | Hit Advantage | Crouching Hit Advantage | Guard | Parry |
| 9 | 6 | 12 | -5 | -3 | -1 | HL | H |
Gauge Increase
| Miss | Blocked | Hit | Parry (Gauge for opponent) |
| 3 | 9 | 18 | 4 |
A poke with nice range. It also serves as a clean, if predictable, anti-air. Be careful with it as parries make it very punishable.
| Move | Motion | Damage | Stun Damage | Chains into itself | Special Cancel | Super Cancel | Juggle Value | Reset or Juggle |
| Close Strong | (Close to opponent) MP | 55(9 life points) | 5 | No | Yes | Yes | 15 | Reset |
Frame Data
| Startup | Hit | Recovery | Blocked Advantage | Hit Advantage | Crouching Hit Advantage | Guard | Parry |
| 4 | 3 | 7 | +6 | +7 | +8 | HL | H |
Gauge Increase
| Miss | Blocked | Hit | Parry (Gauge for opponent) |
| 2 | 5 | 10 | 4 |
A good confirming tool with great frame advantage. Also Yang's max damage cancel, meaning it's his go-to punish for close-range punishes. This is Yang's reason to make the opponent think about high parries on wakeup.
| Move | Motion | Damage | Stun Damage | Chains into itself | Special Cancel | Super Cancel | Juggle Value | Reset or Juggle |
| Close Fierce | (Close to opponent) HP | 100(21 life points) | 14 | No | Yes | No | 15/3 | Reset/Reset |
Frame Data
| Startup | Hit | Recovery | Blocked Advantage | Hit Advantage | Crouching Hit Advantage | Guard | Parry |
| 5 | 3 | 13 | -2 | -1 | 0 | HL | H |
Gauge Increase
| Miss | Blocked | Hit | Parry (Gauge for opponent) |
| 3 | 8 | 17 | 4 |
Hits twice. The first hit cancels, and builds more meter than close Strong, so it's used in meter build combos. It does less damage, however, so use close MP for everything else. It can also be used as an anti-air or in pressure to punish opponents for only attempting one parry.
| Move | Motion | Damage | Stun Damage | Chains into itself | Special Cancel | Super Cancel | Juggle Value | Reset or Juggle |
| Short | LK | 30(5 life points) | 3 | No | Yes | Yes | 15 | Reset |
Frame Data
| Startup | Hit | Recovery | Blocked Advantage | Hit Advantage | Crouching Hit Advantage | Guard | Parry |
| 3 | 3 | 6 | +2 | +2 | +2 | HL | HL |
Gauge Increase
| Miss | Blocked | Hit | Parry (Gauge for opponent) |
| 0 | 1 | 2 | 4 |
Goes very far very fast, which makes it ideal for punishes and after jump-ins as a cancel to EX rekkas. Unfortunately Yang doesn't have much better to go for after jump-ins since his low cancels are either too slow or stubby and his high cancels are all close normals.
| Move | Motion | Damage | Stun Damage | Chains into itself | Special Cancel | Super Cancel | Juggle Value | Reset or Juggle |
| Forward | MK | 80(14 life points) | 9 | No | No | No | 3 | Reset |
Frame Data
| Startup | Hit | Recovery | Blocked Advantage | Hit Advantage | Crouching Hit Advantage | Guard | Parry |
| 9 | 3 | 15 | -4 | -3 | -2 | HL | H |
Gauge Increase
| Miss | Blocked | Hit | Parry (Gauge for opponent) |
| 2 | 5 | 10 | 4 |
Great poke and OK anti-air. This is Yang's main way of poking.
| Move | Motion | Damage | Stun Damage | Chains into itself | Special Cancel | Super Cancel | Juggle Value | Reset or Juggle |
| Roundhouse | HK | 100(17 life points) | 11 | No | No | No | 3 | Reset |
Frame Data
| Startup | Hit | Recovery | Blocked Advantage | Hit Advantage | Crouching Hit Advantage | Guard | Parry |
| 14 | 3 | 22 | -8 | -6 | -4 | HL | H |
Gauge Increase
| Miss | Blocked | Hit | Parry (Gauge for opponent) |
| 3 | 9 | 18 | 4 |
Slow startup and redundancy with Fierce make this move pretty bad.
| Move | Motion | Damage | Stun Damage | Chains into itself | Special Cancel | Super Cancel | Juggle Value | Reset or Juggle |
| Close Forward | (Close to opponent) MK | 80(14 life points) | 9 | No | Yes | Yes | 3 | Juggle |
Frame Data
| Startup | Hit | Recovery | Blocked Advantage | Hit Advantage | Crouching Hit Advantage | Guard | Parry |
| 7 | 3 | 15 | -2 | Down | Down | HL | H |
Gauge Increase
| Miss | Blocked | Hit | Parry (Gauge for opponent) |
| 2 | 5 | 10 | 4 |
Yang's launcher. You can super jump cancel it for a reset into a mixup opportunity, or you can combo a MK roll afterwards for more damage and a knockdown. After the MK roll in the corner you can juggle an SA2, which is a tight juggle (1-2 frame window) and rarely worth it. Also in the corner, you can juggle a hard rekka series for big damage. Since it's safe on block and covers such a high angle, it makes for a very nasty tool in the corner - if they jump, they get caught, and if they sit on the ground, they have to parry or respect it.
Jumping Normals
| Move | Motion | Damage | Stun Damage | Chains into itself | Special Cancel | Super Cancel | Juggle Value | Reset or Juggle |
| Jump Jab | (Air) LP | 40(7 life points) | 7 | No | No | No | 3 | Reset |
Frame Data
| Startup | Hit | Recovery | Blocked Advantage | Hit Advantage | Crouching Hit Advantage | Guard | Parry |
| 2 | Until landing | - | -4~+7 | -4~+7 | +2~+7 | H | H |
Gauge Increase
| Miss | Blocked | Hit | Parry (Gauge for opponent) |
| 0 | 1 | 2 | 4 |
Yang has no need for this normal. Divekick does everything it does and way more.
| Move | Motion | Damage | Stun Damage | Chains into itself | Special Cancel | Super Cancel | Juggle Value | Reset or Juggle |
| Jump Strong | (Air) MP | 80(14 life points) | 9(11 if neutral jump) | No | No | No | 3 | Reset |
Frame Data
| Startup | Hit | Recovery | Blocked Advantage | Hit Advantage | Crouching Hit Advantage | Guard | Parry |
| 3 | 6(7 if neutral jump) | - | -2~+10 | +5/+6~+10 | +5/+6~+10 | H | H |
Gauge Increase
| Miss | Blocked | Hit | Parry (Gauge for opponent) |
| 2 | 5 | 10 | 4 |
Insert jumping Jab here.
| Move | Motion | Damage | Stun Damage | Chains into itself | Special Cancel | Super Cancel | Juggle Value | Reset or Juggle |
| Jump Fierce | (Air) HP | 100(17 life points) | 13 | No | No | No | 3 | Reset |
Frame Data
| Startup | Hit | Recovery | Blocked Advantage | Hit Advantage | Crouching Hit Advantage | Guard | Parry |
| 5 | 4 | - | -2~+10 | -2~+10 | +5~+10 | H | H |
Gauge Increase
| Miss | Blocked | Hit | Parry (Gauge for opponent) |
| 3 | 9 | 18 | 4 |
Does less damage than jump roundhouse, so use that. It has a more conventional attack angle, so it might be more consistent on crouching characters.
| Move | Motion | Damage | Stun Damage | Chains into itself | Special Cancel | Super Cancel | Juggle Value | Reset or Juggle |
| Neutral Jump Fierce | (Air) HP | 120(21 life points) | 15 | No | No | No | 3 | Reset |
Frame Data
| Startup | Hit | Recovery | Blocked Advantage | Hit Advantage | Crouching Hit Advantage | Guard | Parry |
| 8 | 5 | - | +4~+10 | +4~+10 | +9~+10 | H | H |
Gauge Increase
| Miss | Blocked | Hit | Parry (Gauge for opponent) |
| 3 | 9 | 18 | 4 |
Does the most damage out of all of Yang's aerial normals. It has more pushback than roundhouse, unfortunately, so it is less common. You can combo into close MK for bigger damage, but this is a difficult link.
| Move | Motion | Damage | Stun Damage | Chains into itself | Special Cancel | Super Cancel | Juggle Value | Reset or Juggle |
| Jump Short | (Air) LK | 40(7 life points) | 5 | No | No | No | 3 | Reset |
Frame Data
| Startup | Hit | Recovery | Blocked Advantage | Hit Advantage | Crouching Hit Advantage | Guard | Parry |
| 3(4 if neutral jump) | 12 | +1~+7 | +1~+7 | +6~+7/+7 | - | H | H |
Gauge Increase
| Miss | Blocked | Hit | Parry (Gauge for opponent) |
| 0 | 1 | 2 | 4 |
Insert jumping Jab here.
| Move | Motion | Damage | Stun Damage | Chains into itself | Special Cancel | Super Cancel | Juggle Value | Reset or Juggle |
| Jump Forward | (Air) MK | 70(12 life points) | 9 | No | No | No | 3 | Reset |
Frame Data
| Startup | Hit | Recovery | Blocked Advantage | Hit Advantage | Crouching Hit Advantage | Guard | Parry |
| 6 | 7 | - | -3~+10 | -3~+10 | +5~+10 | H | H |
Gauge Increase
| Miss | Blocked | Hit | Parry (Gauge for opponent) |
| 2 | 5 | 10 | 4 |
Goes the farthest of the jump attacks, but has a bit less hitstun than his heavies. It does a decent job for air-to-airs. His target combo from it can dissuade anti-air parries.
| Move | Motion | Damage | Stun Damage | Chains into itself | Special Cancel | Super Cancel | Juggle Value | Reset or Juggle |
| Neutral Jump Forward | (Air) MK | 70(12 life points) | 9 | No | No | No | 3 | Reset |
Frame Data
| Startup | Hit | Recovery | Blocked Advantage | Hit Advantage | Crouching Hit Advantage | Guard | Parry |
| 6 | 7 | - | -3~+10 | -3~+10 | +5~+10 | H | H |
Gauge Increase
| Miss | Blocked | Hit | Parry (Gauge for opponent) |
| 2 | 5 | 10 | 4 |
Functionally identical to his diagonal jump MK.
| Move | Motion | Damage | Stun Damage | Chains into itself | Special Cancel | Super Cancel | Juggle Value | Reset or Juggle |
| Jump Roundhouse | (Air) HK | 110(19 life points) | 13 | No | No | No | 3 | Reset |
Frame Data
| Startup | Hit | Recovery | Blocked Advantage | Hit Advantage | Crouching Hit Advantage | Guard | Parry |
| 5 | 5 | - | 0~+10 | 0~+10 | +5~+10 | H | H |
Gauge Increase
| Miss | Blocked | Hit | Parry (Gauge for opponent) |
| 3 | 9 | 18 | 4 |
Great air-to-air hitbox and does the most damage from a diagonal jump, but its high hitbox means it is a bit finicky on grounded opponents (especially if they crouch). Still useful as Yang's general purpose jump-in normal.
| Move | Motion | Damage | Stun Damage | Chains into itself | Special Cancel | Super Cancel | Juggle Value | Reset or Juggle |
| Neutral Jump Roundhouse | (Air) HK | 110(19 life points) | 13 | No | No | No | 3 | Reset |
Frame Data
| Startup | Hit | Recovery | Blocked Advantage | Hit Advantage | Crouching Hit Advantage | Guard | Parry |
| 5 | 5 | - | -1~+10 | -1~+10 | +4~+10 | H | H |
Gauge Increase
| Miss | Blocked | Hit | Parry (Gauge for opponent) |
| 3 | 9 | 18 | 4 |
Identical to his diagonal jump HK.
| Move | Motion | Damage | Stun Damage | Chains into itself | Special Cancel | Super Cancel | Juggle Value | Reset or Juggle |
| Universal Overhead | MP+MK | 40(7 life points) | 3 | No | No | No | 1 | Reset |
Frame Data
| Startup | Hit | Recovery | Blocked Advantage | Hit Advantage | Crouching Hit Advantage | Guard | Parry |
| 15 | 10 | 5 | -5~+7 | 0~+8 | +1~+9 | H | H |
Gauge Increase
| Miss | Blocked | Hit | Parry (Gauge for opponent) |
| 0 | 1 | 2 | 4 |
Yang can get some decent mileage out of his UOH, since meaty or spaced ones can combo to stand Short and then to EX rekkas. However, meaty or spaced UOHs are somewhat reactable and weak to parries, and Yang has another overhead he can throw into the mix, so use it wisely. It folds in nicely with his other wakeup options.
Throws
| Move | Motion | Damage | Stun Damage | Throw Range | Kara-Throw | Kara-Throw Range |
| Hiza Geri | LP+LK | 160(40x6)(27 life points) | 18(3x6) | 18 | S.HK / S.LK / F.MK / Far S.HP / Close F.HP | 31 / 28 / 26 / 22 / 22 |
Frame Data
| Startup | Hit | Recovery | Blocked Advantage | Hit Advantage | Crouching Hit Advantage | Guard | Parry |
| 2 | 1 | 21 | - | - | - | LP+LK | - |
Gauge Increase
| Miss | Blocked | Hit |
| 0 | 7 (for the player who blocked) | 12(6x2) |
Comments here
| Move | Motion | Damage | Stun Damage | Throw Range | Kara-Throw | Kara-Throw Range |
| Youhon Shiun | F+LP+LK | 120(21 life points) | 11 | 18 | S.HK / S.LK / F.MK / Far S.HP / Close F.HP | 31 / 28 / 26 / 22 / 22 |
Frame Data
| Startup | Hit | Recovery | Blocked Advantage | Hit Advantage | Crouching Hit Advantage | Guard | Parry |
| 2 | 1 | 21 | - | - | - | F+LP+LK | - |
Gauge Increase
| Miss | Blocked | Hit |
| 0 | 7 (for the player who blocked) | 7 |
Comments here
| Move | Motion | Damage | Stun Damage | Throw Range | Kara-Throw | Kara-Throw Range |
| Monkey Flip | B+LP+LK | 120(21 life points) | 11 | 18 | S.HK / S.LK / F.MK / Far S.HP / Close F.HP | 31 / 28 / 26 / 22 / 22 |
Frame Data
| Startup | Hit | Recovery | Blocked Advantage | Hit Advantage | Crouching Hit Advantage | Guard | Parry |
| 2 | 1 | 21 | - | - | - | B+LP+LK | - |
Gauge Increase
| Miss | Blocked | Hit |
| 0 | 7 (for the player who blocked) | 7 |
Comments here
Crouching Normals
| Move | Motion | Damage | Stun Damage | Chains into itself | Special Cancel | Super Cancel | Juggle Value | Reset or Juggle |
| Crouch Jab | D+LP | 20(3 life points) | 3 | Yes | Yes | Yes | 15 | Reset |
Frame Data
| Startup | Hit | Recovery | Blocked Advantage | Hit Advantage | Crouching Hit Advantage | Guard | Parry |
| 3 | 2 | 6 | +4 | +4 | +4 | HL | HL |
Gauge Increase
| Miss | Blocked | Hit | Parry (Gauge for opponent) |
| 0 | 1 | 2 | 4 |
Quick, but can be parried in both directions, and in most situations where you would use a quick move (moderately high divekicks, ticks, etc.) Yang usually has something better to use. This move is overshadowed by his low Short as a confirm as well.
| Move | Motion | Damage | Stun Damage | Chains into itself | Special Cancel | Super Cancel | Juggle Value | Reset or Juggle |
| Crouch Strong | D+MP | 70(12 life points) | 5 | No | No | No | 1 | Reset |
Frame Data
| Startup | Hit | Recovery | Blocked Advantage | Hit Advantage | Crouching Hit Advantage | Guard | Parry |
| 5 | 2 | 11 | +2 | +3 | +4 | HL | HL |
Gauge Increase
| Miss | Blocked | Hit | Parry (Gauge for opponent) |
| 2 | 5 | 10 | 4 |
This is a weird move. Unlike most crouching punches in SF3, it must be parried and blocked low and does not cancel. Besides occasional use as a tick into Zenpou Tenshin, you would think this move has very little utility, if not for a specific setup with Sei-ei Enbu, which is covered later.
| Move | Motion | Damage | Stun Damage | Chains into itself | Special Cancel | Super Cancel | Juggle Value | Reset or Juggle |
| Crouch Fierce | D+HP | 110(17 life points) | 8(2 hits) | No | No | No | 15/15 | Reset/Reset |
Frame Data
| Startup | Hit | Recovery | Blocked Advantage | Hit Advantage | Crouching Hit Advantage | Guard | Parry |
| 8 | 7 | 12 | 0 | +1 | +2 | HL | HL |
Gauge Increase
| Miss | Blocked | Hit | Parry (Gauge for opponent) |
| 3 | 8 | 17 | 8(4+4) |
Very good anti-air. Hits twice and has very little hurtbox.
| Move | Motion | Damage | Stun Damage | Chains into itself | Special Cancel | Super Cancel | Juggle Value | Reset or Juggle |
| Crouch Short | D+LK | 30(5 life points) | 3 | Yes | Yes | Yes | 15 | Reset |
Frame Data
| Startup | Hit | Recovery | Blocked Advantage | Hit Advantage | Crouching Hit Advantage | Guard | Parry |
| 4 | 1 | 8 | +2 | +2 | +2 | L | L |
Gauge Increase
| Miss | Blocked | Hit | Parry (Gauge for opponent) |
| 0 | 1 | 2 | 4 |
Yang uses this move as a low confirm. low Short -> low Short -> EX rekkas is a valuable tool in Yang's kit to make the opponent block their toes. On some characters like Makoto you can do 3 low shorts if you are point blank.
| Move | Motion | Damage | Stun Damage | Chains into itself | Special Cancel | Super Cancel | Juggle Value | Reset or Juggle |
| Crouch Forward | D+MK | 50(8 life points) | 3 | No | Yes | Yes | 1 | Reset |
Frame Data
| Startup | Hit | Recovery | Blocked Advantage | Hit Advantage | Crouching Hit Advantage | Guard | Parry |
| 7 | 2 | 13 | -1 | 0 | +1 | L | L |
Gauge Increase
| Miss | Blocked | Hit | Parry (Gauge for opponent) |
| 2 | 5 | 10 | 4 |
Yang's farthest range cancel, meaning it's your general punish tool after grounded parries and Zenpou Tenshin.
| Move | Motion | Damage | Stun Damage | Chains into itself | Special Cancel | Super Cancel | Juggle Value | Reset or Juggle |
| Crouch Roundhouse | D+HK | 90(16 life points) | 3 | No | No | No | 1 | Juggle |
Frame Data
| Startup | Hit | Recovery | Blocked Advantage | Hit Advantage | Crouching Hit Advantage | Guard | Parry |
| 10 | 3 | 20 | -7 | Down | Down | L | L |
Gauge Increase
| Miss | Blocked | Hit | Parry (Gauge for opponent) |
| 3 | 9 | 18 | 4 |
As far as sweeps go, Yang's sweep is only moderately unsafe with a good amount of pushback, making it surprisingly hard to punish. Makes for a more threatening low poke that has the potential for a knockdown and okizeme.
Command Normals
| Move | Motion | Damage | Stun Damage | Chains into itself | Special Cancel | Super Cancel | Juggle Value | Reset or Juggle |
| Senpuu Kyaku | F+MK | 80(14 life points) | 11 | No | No | No | 15 | Reset |
Frame Data
| Startup | Hit | Recovery | Blocked Advantage | Hit Advantage | Crouching Hit Advantage | Guard | Parry |
| 19 | 6 | 8 | -1 | 0 | +1 | HL | H |
Gauge Increase
| Miss | Blocked | Hit | Parry (Gauge for opponent) |
| 2 | 3 | 7 | 4 |
A safe overhead with no comboability whatsoever. Very nice as a high poke and counter poke that hops over lows.
| Move | Motion | Damage | Stun Damage | Chains into itself | Special Cancel | Super Cancel | Juggle Value | Reset or Juggle |
| Raigeki Shuu | Air D+MK | 70(12 life points) | 7 | No | No | No | 15 | Reset |
Frame Data
| Startup | Hit | Recovery | Blocked Advantage | Hit Advantage | Crouching Hit Advantage | Guard | Parry |
| 6/6/8 | Until Landing | - | +1 | +2 | +3 | HL | H |
Gauge Increase
| Miss | Blocked | Hit | Parry (Gauge for opponent) |
| 2 | 3 | 7 | 4 |
Divekicks are nice to have in SF3, and Yang's is no exception. The ability to reposition and mix up attack timings or utilize the threat of divekick to land and throw is a huge plus, and a core part of Yang's offense. The higher button strength used, the more forward movement the divekick will have. Be careful! High connect divekicks are unsafe on hit and block, so you must aim for their toes to be effective, or just aim outside them if you are looking to whiff.
| Move | Motion | Damage | Stun Damage | Chains into itself | Special Cancel | Super Cancel | Juggle Value | Reset or Juggle |
| Koushu | F+HP | 120(21 life points) | 15 | No | No | No | 7 | Reset |
Frame Data
| Startup | Hit | Recovery | Blocked Advantage | Hit Advantage | Crouching Hit Advantage | Guard | Parry |
| 9 | 6 | 12 | -5 | -3 | -1 | HL | H |
Gauge Increase
| Miss | Blocked | Hit | Parry (Gauge for opponent) |
| 3 | 5 | 13 | 4 |
Identical to his far Fierce, but you would never want this up close over close Strong.
Target Combo
| Move | Motion | Damage | Stun Damage | Chains into itself | Special Cancel | Super Cancel | Juggle Value | Reset or Juggle |
| Target Combo 1 | Jump MK -> Jump DF+MK | 70+30 | 9+3 | No/No | No/No | No/No | 15/3 | Reset/Reset |
Frame Data
| Startup | Hit | Recovery | Blocked Advantage | Hit Advantage | Crouching Hit Advantage | Guard | Parry |
| - | - | - | - | - | - | HL/HL | H/H |
Gauge Increase
| Miss | Blocked | Hit | Parry (Gauge for opponent) |
| 2+? | 5+1 | 10+1 | 8(4+4) |
As discussed earlier, this TC punishes the opponent for going for only 1 anti-air parry. The divekick is identical in trajectory to MK divekick, and only travels on said path if it whiffs (such as after an air reset).
| Move | Motion | Damage | Stun Damage | Chains into itself | Special Cancel | Super Cancel | Juggle Value | Reset or Juggle |
| Target Combo 2 | Close LK -> Close MK -> Close HK | 30+50+60 | 3+5+9 | No/No/No | Yes/No/No | Yes/No/No | 15/1/1 | Reset/Reset/Reset |
Frame Data
| Startup | Hit | Recovery | Blocked Advantage | Hit Advantage | Crouching Hit Advantage | Guard | Parry |
| 3 | - | - | -4/0 | -3/+1 | -2/+2 | HL/HL/HL | HL/H/H |
Gauge Increase
| Miss | Blocked | Hit | Parry (Gauge for opponent) |
| 0+? | 1+1 | 2+1 | 12(4+4+4) |
Completely useless outside of Sei-ei Enbu because Yang could just use EX rekkas instead for vastly more damage, stun, corner carry, and okizeme.
| Move | Motion | Damage | Stun Damage | Chains into itself | Special Cancel | Super Cancel | Juggle Value | Reset or Juggle |
| Target Combo 3 | MP -> HP -> B+HP | 55(50 Far)+50+60 | 5+5+7 | No/No/No | Yes/No/No(Close) No/No/No(Far) | Yes/No/Yes(Close) No/No/Yes(Far) | 15/1/1 | Reset/Reset/Juggle |
Frame Data
| Startup | Hit | Recovery | Blocked Advantage | Hit Advantage | Crouching Hit Advantage | Guard | Parry |
| 4 | - | - | -5/-2 | -3/Down | -1/Down | HL/HL/HL | H/H/H |
Gauge Increase
| Miss | Blocked | Hit | Parry (Gauge for opponent) |
| 2+? | 5+1 | 10+1 | 8(4+4) |
Useful because it confirms to SA2 and a safe activation of SA3. Outside that, the range is a bit too inconsistent to be reliable as a combo.
Special Moves
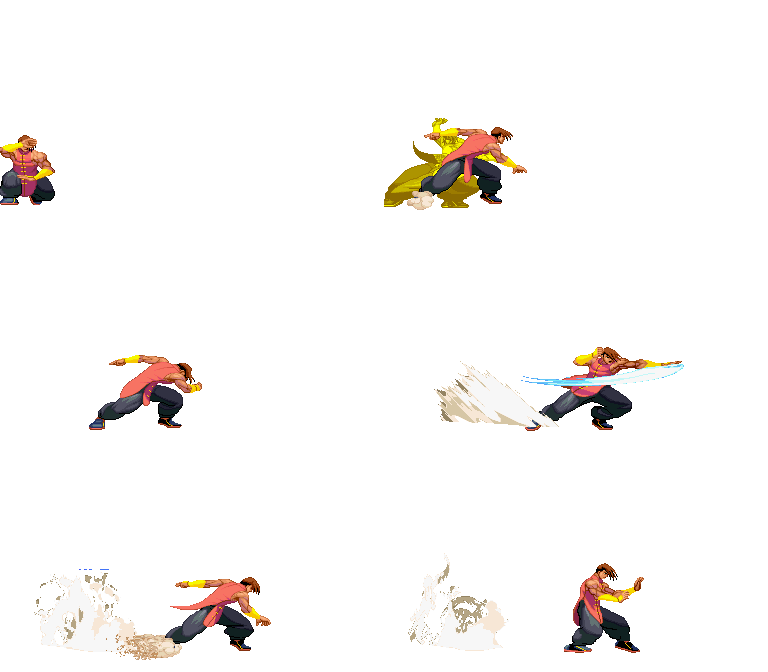
Please note that in this section you will see mainly 3 images for the special moves, this means the image on the left its done with LP (or LK), the image on the center its done with MP (or MK), and the image on the right its done with HP (or HK). Also its the same "rule" as the sections above, its the 1rst frame it hits for every of the moves.
| Move | Motion | Damage | Blocked Damage | Stun Damage | Super Cancel | Juggle Value | Reset or Juggle |
| Byakko-Soushouda | QCB+P | 150(100)(26 life points) | 19(14) | 21(15) | Yes | 1 | Juggle |
Frame Data
| Move | Startup | Hit | Recovery | Blocked Advantage | Hit Advantage | Crouching Hit Advantage | Guard | Parry |
| Byakko-Soushouda | 21 | 13 | 10 | -17 | Down | Down | HL | HL |
Gauge Increase
| Move | Miss | Blocked | Hit | Parry (Gauge for opponent) |
| Byakko-Soushouda | 3 | 7 | 15 | 4 |
The slow startup is unfortunate, but it pulls back before the attack connects and is active for a long time, making it a good counter poke or to potentially bait parries. Since it can be parried somewhat consistently it's not used very often, but in the corner you can juggle into rekkas making it good after stuns to maximize damage.
| Move | Motion | Damage | Blocked Damage | Stun Damage | Super Cancel | Juggle Value | Reset or Juggle |
| Tourou-Zan (Jab) | QCF+LP x 3 | 30+35+90(150 if hits)(5 life points) | 2+2+6 | 5+5+7(13 if hits) | No | 1/1/1 | Juggle/Juggle/Juggle |
| Tourou-Zan (Strong) | QCF+MP x 3 | 35+40+95(170 if hits)(6 life points) | 2+3+6 | 5+5+7(13 if hits) | No | 1/1/1 | Juggle/Juggle/Juggle |
| Tourou-Zan (Fierce) | QCF+HP x 3 | 40+45+100(180 if hits)(7 life points) | 3+3+6 | 5+5+7(13 if hits) | No | 1/1/1 | Juggle/Juggle/Juggle |
Frame Data
| Move | Startup | Hit | Recovery | Blocked Advantage | Hit Advantage | Crouching Hit Advantage | Guard | Parry |
| Tourou-Zan (Jab) | 8/6/7 | 5/5/4 | 22/25/29 | -1/-4/-7 | +1/-2/Down | +3/0/Down | HLx3 | Hx3 |
| Tourou-Zan (Strong) | 8/7/7 | 5/5/5 | 26/29/32 | -5/-8/-11 | -3/-6/Down | +1/-4/Down | HLx3 | Hx3 |
| Tourou-Zan (Fierce) | 8/8/7 | 5/5/6 | 30/33/35 | -9/-12/-15 | -7/-10/Down | -4/-8/Down | HLx3 | Hx3 |
Gauge Increase
| Move | Miss | Blocked | Hit | Parry (Gauge for opponent) |
| Tourou-Zan (Jab) | 3/0/0 | 11/1/1 | 17/1/1 | 12(4+4+4) |
| Tourou-Zan (Strong) | 3/0/0 | 7/1/1 | 12/2/2 | 12(4+4+4) |
| Tourou-Zan (Fierce) | 3/0/0 | 7/1/1 | 12/2/2 | 12(4+4+4) |
Transcision Frames
| Move | Jab -> Strong | Strong -> Fierce |
| Tourou-Zan (Jab) | 20 | 19 |
| Tourou-Zan (Strong) | 19 | 19 |
| Tourou-Zan (Fierce) | 18 | 19 |
The character defining move. Mantis slashes are Yang's general purpose combo tools that add on damage, stun, and have good corner carry. The first LP slash is only -1 (effectively safe) and serves as a confirm into the rest of the rekka series. Higher versions add more damage and range but are more unsafe and have less oki. You can change versions mid combo, which is important in terms of okizeme. The second slash should always be heavy slash since if you're doing a second slash it should have been confirmed already. The third slash should be the Jab version since it allows you to do a MK command dash with enough time to spare to get a proper wakeup option going. They also juggle in corners.
| Move | Motion | Damage | Blocked Damage | Stun Damage | Super Cancel | Juggle Value | Reset or Juggle |
| Kaibou (Short) | F, D ,DF+LK | - | - | - | No | - | - |
| Kaibou (Forward) | F, D ,DF+MK | - | - | - | No | - | - |
| Kaibou (Roundhouse) | F, D ,DF+HK | - | - | - | No | - | - |
Frame Data
| Move | Startup | Hit | Recovery | Blocked Advantage | Hit Advantage | Crouching Hit Advantage | Guard | Parry |
| Kaibou (Short) | 8 | 29 | - | - | - | - | - | - |
| Kaibou (Forward) | 10 | 34 | - | - | - | - | - | - |
| Kaibou (Roundhouse) | 10 | 43 | - | - | - | - | - | - |
Gauge Increase
| Move | Miss | Blocked | Hit | Parry (Gauge for opponent) |
| Kaibou (Short) | - | - | - | - |
| Kaibou (Forward) | - | - | - | - |
| Kaibou (Roundhouse) | - | - | - | - |
All versions of command dash ignore opponents, meaning they shouldn't be used when close. They're all too slow to be used as surprise openings, and while there is some intangibility while Yang vanishes it's well into the startup of the move. The LK version goes the shortest distance but recovers the fastest and is good after short knockdowns like after forward throw or a third heavy slash. The MK version is used after rekkas to leave you point blank with some frames to spare. The HK version is very slow, and is only seldom used as an escape option when cornered.
| Move | Motion | Damage | Blocked Damage | Stun Damage | Throw Range | Super Cancel | Juggle Value | Reset or Juggle |
| Zenpou-Tenshin | HCB+K | - | - | - | 31 | No | - | - |
Frame Data
| Move | Startup | Hit | Recovery | Blocked Advantage | Hit Advantage | Crouching Hit Advantage | Guard | Parry |
| Zenpou-Tenshin | 7 | 2 | 26 | - | +15 | +15 | Impossible | Impossible |
Gauge Increase
| Move | Miss | Blocked | Hit | Parry (Gauge for opponent) |
| Zenpou-Tenshin | 0 | - | 0 | - |
A side-switching command grab that allows combos afterwards. It has more range and startup than his throws. The universal combos afterwards are cr MK. canceled into HP rekka, EX rekkas, SA1, or SA2. On characters with a particularly close reeling animation, you can combo a close MK launcher. This allows Yang to keep offensive momentum while punishing blocks and parries, which is essential to Yang's kit. Obviously since it sideswitches it's worse in corners, but EX rekkas will carry the opponent half screen afterwards, which is worth the downside.
| Move | Motion | Damage | Blocked Damage | Stun Damage | Super Cancel | Juggle Value | Reset or Juggle |
| Senkyuutai (Short) | QCF+LK | 130(80+50(45))(22 life points) | 16(10+6(6)) | 12(7+5(5)) | No | 1+1 | Juggle |
| Senkyuutai (Forward) | QCF+MK | 140(80+60(55))(24 life points) | 18(10+8(7)) | 20(9+11(9)) | No | 1+1 | Juggle |
| Senkyuutai (Roundhouse) | QCF+HK | 150(80+70(65))(25 life points) | 19(10+9(8)) | 16(11+5(3)) | No | 1+1 | Juggle |
Frame Data
| Move | Startup | Hit | Recovery | Blocked Advantage | Hit Advantage | Crouching Hit Advantage | Guard | Parry |
| Senkyuutai (Short) | 8・12 | 4・4 | 34 | -25 | Down | Down | HL/HL | HL/HL |
| Senkyuutai (Forward) | 4~16・8~20 | 4・4 | 28 | -19 | Down | Down | HL/HL | HL/HL |
| Senkyuutai (Roundhouse) | 3~29・5~31・7~33 | 4・4 | 25 | -16 | Down | Down | HL/HL | HL/HL |
Gauge Increase
| Move | Miss | Blocked | Hit | Parry (Gauge for opponent) |
| Senkyuutai (Short) | 3 | 14(13+1) | 20(19+1) | 8(4+4) |
| Senkyuutai (Forward) | 3 | 14(13+1) | 20(19+1) | 8(4+4) |
| Senkyuutai (Roundhouse) | 3 | 14(13+1) | 20(19+1) | 8(4+4) |
Yang's rolls are strange special moves; each one has a very specific use. Higher versions determine range, damage, and recovery. The LK version doesn't travel at all, the MK version goes about 1/3 screen, and the HK version goes around 2/3 of the screen. The traveling versions will stop and attack once they hit an opponent or reach the end of their max range. All of them are massively unsafe on block. The LK version can be used as an occasional anti-air, the MK version combos after close MK, and the HK version is OK as a fireball punish (since throwing fullscreen fireballs is generally a bad idea in 3S you'll rarely use this against a serious opponent). The MK and HK versions are Yang's only meterless combo from light normals, but because the recovery is so bad if blocked and you have to be absolutely point blank it's a non-factor in competitive play. You have enough time to juggle SA2 after MK roll in corners, and you also have time for a Jab/Close Strong to reset the opponent into a mixup after the HK version, but good luck ever landing the HK version anyways. In short: never touch this move unless it's after close MK. It's way too big of a liability 99% of the time.
EX Moves
| Move | Motion | Gauge Needed | Damage | Blocked Damage | Stun Damage | Super Cancel | Juggle Value | Reset or Juggle |
| Tourou Zan (EX) | QCF+PP x5 | 40 | 40++50x4(220 if hits)(7 life points) | 10+13x4 | 9+5x4 | Yes | 1/1/1/1/1 | All hits juggle. |
Frame Data
| Move | Startup | Hit | Recovery | Blocked Advantage | Hit Advantage | Crouching Hit Advantage | Guard | Parry |
| Tourou Zan (EX) | 7/7/5/5/4 | 2/2/2/2/4 | 26/28/30/33/25 | -4/-6/-7/-11/-9 | -2/-4-/-6/-9/Dowm | 0/-2/-4/-7/Down | HL | H |
Gauge Increase
| Move | Miss | Blocked | Hit | Parry (Gauge for opponent) |
| Tourou Zan (EX) | - | - | - | 4 |
EX Rekkas are Yang's best feature, with great stun, damage, corner carry, and okizeme. In just about every way that a special move could be considered good, Yang's EX Tourou Zan is good. They combo from lights, they have great range and thus combo consistency, they can be used after most grounded parries, they are a nice chip KO tool, they can be spaced to be relatively safe, and they even extend a few of Yang's juggles in corners. The only down sides is that it doesn't do too much against aerial opponents, it costs meter, and while it can be spaced to be safe it is still punishable on block by things like Ken SA3 or Chun Li SA2. This means that you want to confirm your EX slashes whenever you can so you don't waste meter and potentially get smacked. Yang can very easily go into EX Rekkas from most of his most common okizeme options, like cr. LK -> cr.LK, close MP -> LK, and Zenpou Tenshin, and since they give you okizeme to work with he can just as easily set up for another one. This gives Yang a remarkable ability to keep momentum going. All you need is a few EX slashes in a row to stun the opponent and eat off chunks of their life. This move alone affects Yang's super art choice so much that most Yang players pick SA2 purely because it stocks the most opportunities for EX Rekkas.
| Move | Motion | Gauge Needed | Damage | Blocked Damage | Stun Damage | Super Cancel | Juggle Value | Reset or Juggle |
| Senkyuutai (EX) | QCF+KK | 40 | 200(90+20+90)(33 life points) | 25(11+3+11) | 19(11+5+3) | No | 1+1+1 | Juggle |
Frame Data
| Move | Startup | Hit | Recovery | Blocked Advantage | Hit Advantage | Crouching Hit Advantage | Guard | Parry |
| Senkyuutai (EX) | 3~29・5~31・7~33 | 2・2・4 | 25 | -16 | Down | Down | HLx3 | HLx3 |
Gauge Increase
| Move | Miss | Blocked | Hit | Parry (Gauge for opponent) |
| Senkyuutai (EX) | - | - | - | 12(4x3) |
EX roll is about as useful as the normal versions. It travels fullscreen and does so faster than HK roll, and all the juggles available after HK roll are available after EX roll as well. The problem is that it doesn't accomplish anything new and Yang has 1 other EX move that's always preferred 99.99999999999999999999% of the time.
Super Arts
| Super Art | Super Art Name | Super Art Stock | Motion | Damage | Blocked Damage | Stun Damage | Damage/Gauge | Juggle Value | Reset or Juggle |
| I | Raishin-Mahhaken | 1 bar (120) | QCF QCF+P | 465*(74 life points) | 43** | 8 | 3,87 | 1 per hit | All hits juggle. |
| * 90+70+50+70+50+70+160 Damage is when all hits connect. |
| ** 16+6+8+4+3+3+(3x6) Damage is when all hits connect. |
Frame Data
| Startup | Hit | Recovery | Blocked Advantage | Hit Advantage | Crouching Hit Advantage | Guard | Parry |
| 7 | 4 | 37/36 | +1 | Down | Down | HLx7~9 | HLx7~9 |
On the surface, this super looks quite strong. It gives Yang very high burst damage, which is an area Yang otherwise is pretty lacking in. It's also safe (+1!) on block. There are 2 main reasons this super is never picked, though. Number 1 is that it costs 3 EX slashes to use, which not only hurts Yang's offensive capabilities if it is used but also means that you have to forgo all those potential EX slashes to use it. Number 2 is that it's relatively slow after superfreeze and is only one parry, so it's pretty easy to just see it's being used in neutral and just tap forward for an easy grounded punish.
| Super Art | Super Art Name | Super Art Stock | Motion | Damage | Blocked Damage | Stun Damage | Damage/Gauge | Juggle Value | Reset or Juggle |
| II | Tenshin-Senkyutai | 2 bar (104 each bar) | QCF QCF+K | 315*(53 life points) | 18** | 0 | 3,03 | 0, 1 for penultimate hit, 15 for final hit | All hits juggle. |
| * 100+20+30+30+100+50+60 Damage is when all hits connect. |
| ** 5+3+0+0+3+3+3 Damage is when all hits connect. |
Frame Data
| Startup | Hit | Recovery | Blocked Advantage | Hit Advantage | Crouching Hit Advantage | Guard | Parry |
| 1 | 3~67 | 37/36 | -69 | Down | Down | HLx3~6 | HLx3~6 |
SA2's main benefit is that it stocks the most meter for EX Rekkas. The super itself is rarely used since it costs a lot of meter unless it's going to kill. It also functions as an invincible reversal, which Yang doesn't normally have, but spending that much bar for something that's full jump-in punishable on block is almost always a bad idea. The damage isn't very good considering the meter it costs, either. In short: SA2 itself isn't worth picking, but the EX slashes it can carry definitely is.
| Super Art | Super Art Name | Super Art Stock | Motion | Damage | Blocked Damage | Stun Damage | Damage/Gauge | Juggle Value | Reset or Juggle |
| III | Sei-ei Enbu | 1 bar (64) | QCF QCF+P | - | - | - | - | - | - |
Frame Data
| Startup | Hit | Recovery | Blocked Advantage | Hit Advantage | Crouching Hit Advantage | Guard | Parry |
| 16 | - | - | - | - | - | - | - |
300 frames (5 seconds) length Seiei Enbu radically alters Yang's game plan, for better and for worse. It's the shortest super bar in the entire game, so it can only carry 1 EX move, which is a big hit against it. So what does it give Yang in return? While active, Yang has 2 shadows that copy all his actions and attack when he attacks with a slight delay. This makes most of his attacks safe on block and gives him a lot of frame advantage to work with. For example, you can combo LK -> HP Rekka and you can link LK out of a 2nd LP Rekka. Yang's pressure while in Seiei Enbu is rather scary and can lead to obnoxious repeating high/low mixups that Yang can easily convert off of. The most prominent thing Seiei Enbu does is give Yang high-low unblockables. The string Cross-up divekick -> cr.MP -> cr.HK causes a divekick shadow (which must be blocked high) and Yang's cr.MP (which must be blocked low) to connect very close together, making the string unblockable by merit of having to block in 2 directions at once. This is covered more in later sections. Seiei Enbu is a very complex super, much like Genei Jin, and perhaps when unlocked to its fullest potential it can outweigh the meter of SA2. There's a lot of character specific tech and complex mixups involved that make it generally the preferred super in only a couple of matchups.
Combos
General
- crouching MK / close MP / close HP (1 hit) xx (EX) Mantis Slashes
- stand LK xx EX Mantis Slashes
- crouching or standing LP x2 / crouching LK x2 xx EX Mantis Slashes
- close MK -> MK Senkyutai -> standing LP
- close MP / close HP (1 hit) xx EX Senkyutai
- EX Senkyutai -> close MP or stand LP
- Rageki Shu -> close MP xx (EX) Mantis Slashes or Target Combo 2
- close MP -> stand LK xx EX Mantis Slashes
Super Art 1
- crouching MK xx Raishin Mahhaken
- crouching LP x2 xx Raishin Mahhaken
Super Art 2
- close MK -> Tenshin Senkyutai
- Byakko Soushouda xx Tenshin Senkyutai
- Target Combo 3 xx Tenshin Senkyutai
- crouching LP x2 xx Tenshin Senkyutai
Super Art 3
[ ] means repeat until time runs out.
Combos Into
-j.HK/j.MKxdiveKick, close MK sjc. SAIII, MK senkyutai
-in corner j.HK/j.MKxdiveKick, close MK sjc. SAIII, HP Mantis Slash
Already Activated
- point blank UOH, [LP slash1]
- far UOH, LK, [HP Slash1, LP Slash2, LK]
- in corner [HP Slash1, LP Slash2, kick chain]
- [hp.slash,lp.slash,low.lk] ,c.MK,3 Slashes
Resets
- knockdown, [crossup divekick, cr.MP, cr.HK]
- knockdown, [crossup divekick, cr.MP, cr.MK, Slashes]
Strategies
Overview
Basics
Notable normals:
- st.lk - yang's furthest range light attack, being 4f it makes for the ideal light normal for punishing
- cr.lk - fast light, great after faking out divekicks or just in general when wanting to catch walk-backs
- cl.mp - fast, converts meterlessly, great advantage on hit ans block. Use whenever you are close enough.
- cr.mk - your main poke, whiff punisher and important neutral tool. longest range out of all normals that can convert meterlessly, and is quite a fast low for a medium button.
- st.mk - ok anti air, has good range and it pretty fast. if its far enough, it can be hard for most characters to punish on a parry, making it a decent poke/anti air, but balanced by not being convertable making its reward low.
- cl.mk - super jump cancelable, so you can juggle into j.hk and get a mixup as you land a bit earlier
- st.hp - long range, very high damage/stun for a normal, making it a decent poke and anti air. It's quite slow, extends your hurbox quite a bit and doesn't convert, tho, so don't use it as much as cr.mk/st.mk
- cr.hk - can be used as a situational poke, as it can be spaced to be safe. don't get to predictable, since if its parried you'll probably lose 30% and get knocked down
- st.hk - bad button, but your best kara throw normal
Super Art Selection
SAI: 7f startup, fully invinsible, single long bar super. It has the same range of yang's st.hp, and deals 465 points of damage (more than 40%), and is +1 on block(!). Aside from the fact this super so slow, you can't combo it easily from light attacks, its a single bar, meaning you have to avoid using EX slashes if you want the super. Not a very good super, but might be a fun reversal super
SAII: minimum 1f startup, invinsible, 2 medium bar super. it deals 315 (around 25%), and has yang rolling the ground, only starting the attack once an opponent is in nearly point blank reach. the super itself is pretty decent - easily combos, can be used as a reversal, allows for an optional free size switch, automatic oki, etc. The real gold of this super is the tons of meter you get, so you are going to be preferring to use ex slashes a lot more, due to how good it is.
SAIII: install super, with a very short bar, about as long as genei jin's. the super's effects are more comparable to Rose's Soul Illusion than Custom Combos - all of yang's moves repeat twice by his backshadows. Unfortunally, this super isn't very good for the most part - ex slashes aside, the damage from this combos scale fast, doesn't give his normals super move properties, doesn't fill meter from landed hit while super is active, not much utility in neutral. This super would be awful, if not for its unblockable setups. if setup is done right, you can divekick the opponent with the shadows hitting meaty, then have a cr.lk hit simultaniously, creating a high-low unblockable. this is only effective against certain characters, with a hitbox tall enough so that they can't escape with only a single parry
Super Art choices tend to be match-up specific in terms of optimal play, varying between SA2 for its abundancy of meter and sa3 for its aggro-abilities. here you'll finda list of the recommended supers in each matchup. note that there are instances of SAIII only players doing with, but it considered less optimal to use it unless more than a few characters.
Alex- SAIII
Chun Li- SAII
Dudley- SAII
Elena- SAII
Gouki/Akuma- SAII
Hugo- SAIII
Ibuki- SAII
Ken- SAII
Makoto- SAIII
Necro- SAIII
Oro- SAII
Q- SAIII
Remy- SAII
Ryu- SAII
Sean- SAII
Twelve- SAII
Urien- SAIII
Yang- SAII
Yun- SAII
Note- Super Arts are honestly personal preference and can be switched interchangeably between the two. Just depends on the player:
SAII- Meter, Stun,for medium and small characters SAIII- unblockables, Damage,for large characters
Kara-Techniques
Zoning
Mixups
Additional Notes
See this video made by DJ-B13.All Yang's setups are there.
SF3 3rd Strike Tricks of the Trade: Yang
- Why you should play Yang
In order to play Yang you have to play very patiently. Look for your openings and punish very well. Yang may seem like a simple character. But he is not simple by any means. He is extremely reactionary. You have to be able to punish whiffs as you see them or you wont be able to play Yang effectively. Yang has really simple combos but has a really hard style to get a grasp to. Knowing combos is only half the battle. But thats where I will start first.
~3s masta
- How to play Yang effectively
If you choose to play yang you must learn several things.
1. Yangs mix up game 2. Reaction(this is very important) 3. Spacing 4. Playing it safe.
These are the keys to playing Yang and playing Yang well. Learning combos and learning strats are all apart of learning your character and your characters weaknesses and strengths. Frame data also helps alot with learning your character because you can learn what is safe and what isnt. Read up on how to read frame data in order to further study Yang or any other character that you wish to play and master.
~ 3s masta
Yang frame data: http://web.archive.org/web/20040415192834/www.karathrow.com/yang.html
This is the site to look at for Character frame data. Study the numbers very very much. It helps win matches in the long run
~ 3s masta
