m (http://geraldinesboutique.com/about/media/2/news-1445-20080616.html) |
|||
| Line 1: | Line 1: | ||
[http://geraldinesboutique.com/about/media/2/news-1445-20080616.html metallica live video downloads] [http://geraldinesboutique.com/about/media/2/index.html http] [http://geraldinesboutique.com/about/media/2/news-638-20080623.html sally mae] [http://geraldinesboutique.com/about/media/2/news-294-20080624.html ringtones for nextel users] [http://geraldinesboutique.com/about/media/2/news-1453-20080615.html radford movie theatre] | |||
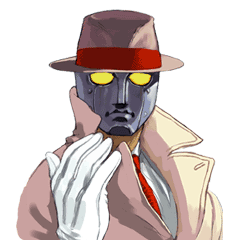
[[Image:Q3sport.gif|frame|right|Q's Character Select Portrait]] | [[Image:Q3sport.gif|frame|right|Q's Character Select Portrait]] | ||
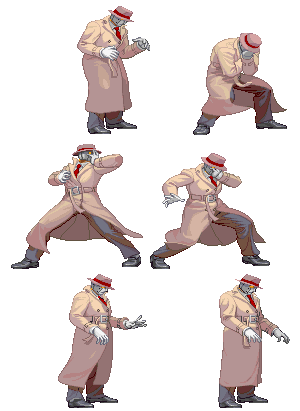
[[Image:Q3s-stance.gif|frame|right|Q's Neutral Stance]] | [[Image:Q3s-stance.gif|frame|right|Q's Neutral Stance]] | ||
| Line 403: | Line 404: | ||
| align="center" | 0 || align="center" | 1 || align="center" | 2 || align="center" | 4 | | align="center" | 0 || align="center" | 1 || align="center" | 2 || align="center" | 4 | ||
|} | |} | ||
This is a decent semi-poke and situational antiair. It comes out pretty fast and has decent range, but its recovery | This is a decent semi-poke and situational antiair. It comes out pretty fast and has decent range, but its recovery isnât as good as it could be and it can be ducked by most characters. Itâs most often used to tick into c&db, to keep certain opponents from dashing in, and to antiair empty jumps. It can be parried high and low, even by characters whose down parries make them crouch under the actual jab. | ||
| Line 427: | Line 428: | ||
| align="center" | 2 || align="center" | 3 || align="center" | 7 || align="center" | 4 | | align="center" | 2 || align="center" | 3 || align="center" | 7 || align="center" | 4 | ||
|} | |} | ||
This move has great range, is safe on block, and actually recovers better if whiffed than | This move has great range, is safe on block, and actually recovers better if whiffed than youâd think. While itâs mainly used in c&db corner resets and to give Q his second-best karathrowing distance, it can also serve as a poke and antiair, although itâs not too useful as a poke against most characters because it can be ducked by most and stood under by lots. It must be parried high. | ||
| Line 451: | Line 452: | ||
| align="center" | 3 || align="center" | 5 || align="center" | 13 || align="center" | 4 | | align="center" | 3 || align="center" | 5 || align="center" | 13 || align="center" | 4 | ||
|} | |} | ||
This move knocks the opponent down for most of its many active hit frames, but at the very end it works as a reset if the opponent is in the air or as just a regular hit if the opponent is on the ground. It can be used as a poke against tall characters and more rarely as a situational antiair. | This move knocks the opponent down for most of its many active hit frames, but at the very end it works as a reset if the opponent is in the air or as just a regular hit if the opponent is on the ground. It can be used as a poke against tall characters and more rarely as a situational antiair. Itâs safe when done from max range, beats most high-level pokes, and has an active hitbox that stays up for a long time, but characters who can duck it can punish it easily. This move can be used to end a c&db or SAII juggle, although there are better options. It has to be parried high. | ||
| Line 475: | Line 476: | ||
| align="center" | 0 || align="center" | 1 || align="center" | 2 || align="center" | 4 | | align="center" | 0 || align="center" | 1 || align="center" | 2 || align="center" | 4 | ||
|} | |} | ||
This comes out and recovers faster than far standing jab and can be canceled into all of | This comes out and recovers faster than far standing jab and can be canceled into all of Qâs command moves, although it only combos into ex slaps and super. Its main uses are as a tick and as an antiair against empty jumps and opponents who jump right in front of you. It can be parried high and low. | ||
| Line 499: | Line 500: | ||
| align="center" | 0 || align="center" | 1 || align="center" | 2 || align="center" | 4 | | align="center" | 0 || align="center" | 1 || align="center" | 2 || align="center" | 4 | ||
|} | |} | ||
This is a nice little poke that comes out and recovers very quickly and is great at keeping the opponent out. | This is a nice little poke that comes out and recovers very quickly and is great at keeping the opponent out. Itâs also used to tick into karathrow or c&db. It can be parried both high and low. | ||
| Line 523: | Line 524: | ||
| align="center" | 2 || align="center" | 3 || align="center" | 7 || align="center" | 4 | | align="center" | 2 || align="center" | 3 || align="center" | 7 || align="center" | 4 | ||
|} | |} | ||
This is an excellent poke that should be used often. It beats lots of stuff, has good range, is safe on block, | This is an excellent poke that should be used often. It beats lots of stuff, has good range, is safe on block, canât be ducked, and is even a decent meaty attack. It must be parried high. | ||
| Line 547: | Line 548: | ||
| align="center" | 3 || align="center" | 5 || align="center" | 13 || align="center" | 4 | | align="center" | 3 || align="center" | 5 || align="center" | 13 || align="center" | 4 | ||
|} | |} | ||
This is safe on block (except against a reversal Chun SA2) and beats just about any non-invincible attack, but if whiffed or parried | This is safe on block (except against a reversal Chun SA2) and beats just about any non-invincible attack, but if whiffed or parried itâs completely unsafe. It can be used for keep-out and spacing, as a meaty attack if you think the opponent will dash back, and in anticipation of a poke from an opponent who canât hurt you much if you miss. That said, however, its main use is as a c&db combo finisher. It has to be parried high. | ||
| Line 571: | Line 572: | ||
| align="center" | 2 || align="center" | 3 || align="center" | 7 || align="center" | 4 | | align="center" | 2 || align="center" | 3 || align="center" | 7 || align="center" | 4 | ||
|} | |} | ||
This is also a very important move because | This is also a very important move because itâs Qâs only (only.) cancelable ground normal that combos into all his comboable specials and supers. It can also be used as a tick into karathrow and an occasional meaty attack; although it canât beat many wakeup attacks, using it to combo into super as the opponent is waking up is an important way to get damage and force the opponent to stay still on wakeup. It can only be parried high. | ||
| Line 619: | Line 620: | ||
| align="center" | 0 || align="center" | 1 || align="center" | 2 || align="center" | 4 | | align="center" | 0 || align="center" | 1 || align="center" | 2 || align="center" | 4 | ||
|} | |} | ||
This comes out almost immediately, has great priority, and lasts the whole jump, so | This comes out almost immediately, has great priority, and lasts the whole jump, so itâs useful as an air-to-air antiair. It must be parried high. | ||
| Line 643: | Line 644: | ||
| align="center" | 2 || align="center" | 3 || align="center" | 7 || align="center" | 4 | | align="center" | 2 || align="center" | 3 || align="center" | 7 || align="center" | 4 | ||
|} | |} | ||
This is good against characters that jump higher than you or are tall enough to get hit by it when standing, but | This is good against characters that jump higher than you or are tall enough to get hit by it when standing, but itâs rarely used because Qâs other jumping attacks are usually better options. It has to be parried high. | ||
| Line 667: | Line 668: | ||
| align="center" | 3 || align="center" | 5 || align="center" | 13 || align="center" | 4 | | align="center" | 3 || align="center" | 5 || align="center" | 13 || align="center" | 4 | ||
|} | |} | ||
This is a great air move that should be used often. | This is a great air move that should be used often. Itâs good for starting combos and beating or trading with air attacks and antiairs, including some moves like dragon punches and headbutts. It can set up a taunt if it knocks the opponent out of the air and can also serve as a tick into c&db. It must be parried high. | ||
| Line 691: | Line 692: | ||
| align="center" | 0 || align="center" | 1 || align="center" | 2 || align="center" | 4 | | align="center" | 0 || align="center" | 1 || align="center" | 2 || align="center" | 4 | ||
|} | |} | ||
This is much like jumping toward jab in that it comes out as fast, lasts as long, and has as good priority, but because its hitbox is lower | This is much like jumping toward jab in that it comes out as fast, lasts as long, and has as good priority, but because its hitbox is lower itâs better for attacking an airborne opponent who is lower in the air than you are. Itâs good at beating air attacks and some antiairs, faking an empty jump, and ticking into karathrow. It must be parried high. | ||
| Line 739: | Line 740: | ||
| align="center" | 3 || align="center" | 5 || align="center" | 13 || align="center" | 4 | | align="center" | 3 || align="center" | 5 || align="center" | 13 || align="center" | 4 | ||
|} | |} | ||
This is another excellent move. It stuffs a lot of things and trades with many of the rest, even some that have invincibility frames because its oddly-shaped hitbox sometimes hits the opponent in an area where he | This is another excellent move. It stuffs a lot of things and trades with many of the rest, even some that have invincibility frames because its oddly-shaped hitbox sometimes hits the opponent in an area where he doesnât have invincibility. Itâs Qâs only jumping attack that knocks the opponent down out of the air instead of resetting them and has deceptively good range and hit stun. It can be used to zone the opponent out, whiff a jump-in to throw, and start Qâs most damaging combos, and it also makes a useful tick and meaty attack. If you do it so that it hits as late as possible, like around the level of the opponentâs feet, it canât be punished if it gets parried. It has to be parried high. | ||
| Line 763: | Line 764: | ||
| align="center" | 0 || align="center" | 1 || align="center" | 2 || align="center" | 4 | | align="center" | 0 || align="center" | 1 || align="center" | 2 || align="center" | 4 | ||
|} | |} | ||
Qâs uoh is slower and floatier than that of most characters, but it also has better range. Itâs a decent poke and can be used to link into super if itâs done at max range or as a deep meaty. If you do it as a deep meaty, you can also link into close standing forward, standing short, and crouching jab. You can also use this for tricky ground crossovers when the opponent is waking up. Other than overhead dash punch, this is Qâs only overhead attack, so make sure you use it. It has to be parried high. | |||
| Line 789: | Line 790: | ||
| align="center" | 0 || align="center" | 7 (for the player who blocked) || align="center" | 7 | | align="center" | 0 || align="center" | 7 (for the player who blocked) || align="center" | 7 | ||
|} | |} | ||
This does less damage than the toward or back throw but also does more stun, so if the opponent is just about to get stunned, use this. It leaves the opponent right next to Q, which is good if you | This does less damage than the toward or back throw but also does more stun, so if the opponent is just about to get stunned, use this. It leaves the opponent right next to Q, which is good if you donât need a taunt or want to play close to the opponent. The regular range is longer than many charactersâ normal throws, but unless youâre trying to tech a throw or otherwise need a throw to come out as soon as possible, you should use the karathrow (same thing with the toward/back throws). | ||
| Line 813: | Line 814: | ||
| align="center" | 0 || align="center" | 7 (for the player who blocked) || align="center" | 7 | | align="center" | 0 || align="center" | 7 (for the player who blocked) || align="center" | 7 | ||
|} | |} | ||
One version throws the opponent a bit ahead of Q and the other a bit behind, but they both do the same damage and stun and both even have the same animation. They do more damage than the neutral throw and leave the opponent farther away, but they also do less stun. Use one of these if you want to do more damage, set up taunts in some situations, or have the opponent some distance away from you. It seems to me that the toward/back throw also has more range than the neutral throw, but unfortunately I | One version throws the opponent a bit ahead of Q and the other a bit behind, but they both do the same damage and stun and both even have the same animation. They do more damage than the neutral throw and leave the opponent farther away, but they also do less stun. Use one of these if you want to do more damage, set up taunts in some situations, or have the opponent some distance away from you. It seems to me that the toward/back throw also has more range than the neutral throw, but unfortunately I canât find any data to make sure. | ||
==== Command Normals ==== | ==== Command Normals ==== | ||
| Line 838: | Line 839: | ||
| align="center" | 0 || align="center" | 1 || align="center" | 2 || align="center" | 4 | | align="center" | 0 || align="center" | 1 || align="center" | 2 || align="center" | 4 | ||
|} | |} | ||
This is a quick little ranged poke | This is a quick little ranged poke thatâs great for keeping the opponent out and beating slower attacks, so it should be used often. It can be parried both high and low. | ||
| Line 862: | Line 863: | ||
| align="center" | 2 || align="center" | 3 || align="center" | 7 || align="center" | 4 | | align="center" | 2 || align="center" | 3 || align="center" | 7 || align="center" | 4 | ||
|} | |} | ||
This is a decent poke and antiair | This is a decent poke and antiair thatâs safe on block and can recover in time if parried by a jumping opponent when youâre more underneath than in front of him. It can be used up close to tick into karathrow or to preemptively stuff an opponentâs wakeup attack or jump. Its main drawback is that it can be parried high and low, which makes it less useful as a meaty attack since the opponent canât guess wrong on a parry. | ||
| Line 886: | Line 887: | ||
| align="center" | 3 || align="center" | 5 || align="center" | 13 || align="center" | 4 | | align="center" | 3 || align="center" | 5 || align="center" | 13 || align="center" | 4 | ||
|} | |} | ||
This is a good meaty that is safe on block and stuffs or trades with most non-invincible wakeup attacks, although its startup is a little slow. Its range extends above and beyond | This is a good meaty that is safe on block and stuffs or trades with most non-invincible wakeup attacks, although its startup is a little slow. Its range extends above and beyond Qâs fist, so it can also be used to stuff long-range low attacks, but thatâs kinda risky because of its long startup and recovery if whiffed. It has to be blocked and parried low. | ||
| Line 910: | Line 911: | ||
| align="center" | 0 || align="center" | 1 || align="center" | 2 || align="center" | 4 | | align="center" | 0 || align="center" | 1 || align="center" | 2 || align="center" | 4 | ||
|} | |} | ||
This is a decent poke that can also work as a meaty attack and a tick into karathrow. Its startup is a little slower than crouching jab and it | This is a decent poke that can also work as a meaty attack and a tick into karathrow. Its startup is a little slower than crouching jab and it doesnât beat as many things, but it does have slightly longer range so itâs better for opponents who are farther out. If done at max range, it can stuff moves like Ibukiâs ex dragon punch. It must be blocked and parried low. | ||
| Line 934: | Line 935: | ||
| align="center" | 2 || align="center" | 3 || align="center" | 7 || align="center" | 4 | | align="center" | 2 || align="center" | 3 || align="center" | 7 || align="center" | 4 | ||
|} | |} | ||
This is a good poke that does more damage than crouching short but is a little slower to come out. It has good range, beats lots of attacks, and makes a great tick into karathrow. | This is a good poke that does more damage than crouching short but is a little slower to come out. It has good range, beats lots of attacks, and makes a great tick into karathrow. Itâs also Qâs best meter-building attack. It has to be blocked and parried low. | ||
| Line 958: | Line 959: | ||
| align="center" | 3 || align="center" | 5 || align="center" | 13 || align="center" | 4 | | align="center" | 3 || align="center" | 5 || align="center" | 13 || align="center" | 4 | ||
|} | |} | ||
This move knocks down on hit, has good range, and is pure active hit frames at | This move knocks down on hit, has good range, and is pure active hit frames at Qâs feet, but if blocked or parried it can be punished by anything. Itâs a fairly good poke against some characters, a pretty good situational antiair, and a decent way to capitalize on parries when the opponent is at max range. Itâs also useful as a meaty because it beats everything except moves with invincible startup frames, like some supers and dragon punches. This move has to be blocked and parried low. | ||
| Line 982: | Line 983: | ||
| align="center" | 2 || align="center" | 3 || align="center" | 7 || align="center" | 4 | | align="center" | 2 || align="center" | 3 || align="center" | 7 || align="center" | 4 | ||
|} | |} | ||
This is very useful as a poke and antiair and gives Q his best karathrow range, so | This is very useful as a poke and antiair and gives Q his best karathrow range, so itâs used a lot. It makes Q move up a bit, and the punch actually extends over and a little behind Qâs head, so you can hit people who are over and a little behind you. Itâs safe on block and has good range, so itâs good for a poke and for making sure the opponent doesnât jump when you have him cornered. Plus, if you use it as an antiair and time it just right, you can recover in time before you can be hit or thrown. This move also gives Q his best distance for karathrowing, although it throws the opponent behind you unless you have crazy enough timing to only press back for the punch and not for the throw. It must be parried high, although it can be difficult to parry for an opponent jumping right over you because the opponent sometimes has to parry what looks like behind himself. | ||
| Line 1,006: | Line 1,007: | ||
| align="center" | 3 || align="center" | 5 || align="center" | 13 || align="center" | 4 | | align="center" | 3 || align="center" | 5 || align="center" | 13 || align="center" | 4 | ||
|} | |} | ||
This is a good poke and antiair | This is a good poke and antiair thatâs best against opponents who are either tall enough to get hit by it when crouching, like Dudley, Urien, Hugo, Alex, and Q, whose air attacks are susceptible to this moveâs weird hitbox, like Twelve, Urien, Makoto, and Dudley, but itâs good against anyone if the opponent is using a high poke or standing up. Itâs safe on block, beats out lots of attacks, and is usually even safe if parried by a jumping opponent if it moves Q under the opponent and past his attacks. Itâs also very important as a reset in c&db corner juggles. It has to be parried high. | ||
| Line 1,030: | Line 1,031: | ||
| align="center" | 3 || align="center" | 5 || align="center" | 13 || align="center" | 4 | | align="center" | 3 || align="center" | 5 || align="center" | 13 || align="center" | 4 | ||
|} | |} | ||
This move is almost great, but just a little too risky. If it touches the opponent early, it has great range and priority, must be blocked low, knocks down on hit, and can be canceled but not comboed into all of | This move is almost great, but just a little too risky. If it touches the opponent early, it has great range and priority, must be blocked low, knocks down on hit, and can be canceled but not comboed into all of Qâs command moves; if it touches the opponent later in its animation, it can be blocked high, doesnât knock down, and canât be canceled. There are three uses for this thing. The main use is as a meaty attack; if you do close back + roundhouse xx slaps or dash punch and the opponent doesnât parry, heâll either get knocked down by back + roundhouse or take some block damage from the specials. It can also be used to beat low pokes, since the early part of its animation eats up every low move in the game. The third use is as a preemptive antiair, for when you think the opponent might jump back on wakeup and youâre a little distance away. One problem, apart from the fact that it doesnât combo, is that this move cancels into other moves fairly slowly, meaning that if you do it too close when the opponent is waking up and try to cancel into slaps, you could get thrown; the solution is to take advantage of the moveâs range and do it from further away. It also has huge recovery time if uncanceled or whiffed, so make sure that that only happens when itâs successfully used as a preemptive antiair. It can be parried both high and low at any stage of its animation. | ||
| Line 1,092: | Line 1,093: | ||
| align="center" | High Speed Barrage (Fierce) || align="center" | 3 || align="center" | 10 || align="center" | 17 || align="center" | 12(4+4+4) | | align="center" | High Speed Barrage (Fierce) || align="center" | 3 || align="center" | 10 || align="center" | 17 || align="center" | 12(4+4+4) | ||
|} | |} | ||
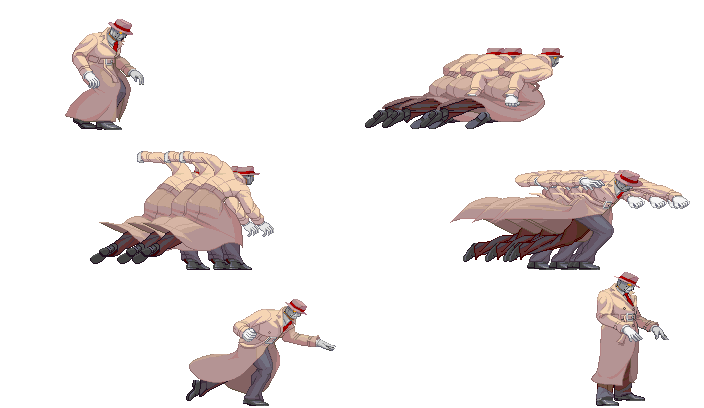
quarter circle back, punch. Can be EXed. This is very useful against lots of characters. The jab version hits everyone even when | quarter circle back, punch. Can be EXed. This is very useful against lots of characters. The jab version hits everyone even when theyâre crouching, although Chun can randomly duck the middle hit. Strong slaps is a good poke and is useful if you parry an air attack, fierce slaps is a decent and situational antiair, and both can be used to keep an opponent from jumping on your wakeup or your opponentâs. The slaps can only be punished by Ken SAIII, Chun SAII, Dudley SAIII, Makoto SAI, Q SAII, reversal-timed Necro SAIII, and Remy SAII, which only hits a couple times and can then be parried or blocked. Against characters who canât punish the slaps, you can use it for poking, antiair, spacing, and chip. EX slaps knocks the opponent down, does great damage, stun, and chip, and is hard to red parry, but itâs easily punished by everyone on block. | ||
| Line 1,128: | Line 1,129: | ||
| align="center" | Dashing Head Attack (Fierce) || align="center" | 3 || align="center" | 9 || align="center" | 14 || align="center" | 4 | | align="center" | Dashing Head Attack (Fierce) || align="center" | 3 || align="center" | 9 || align="center" | 14 || align="center" | 4 | ||
|} | |} | ||
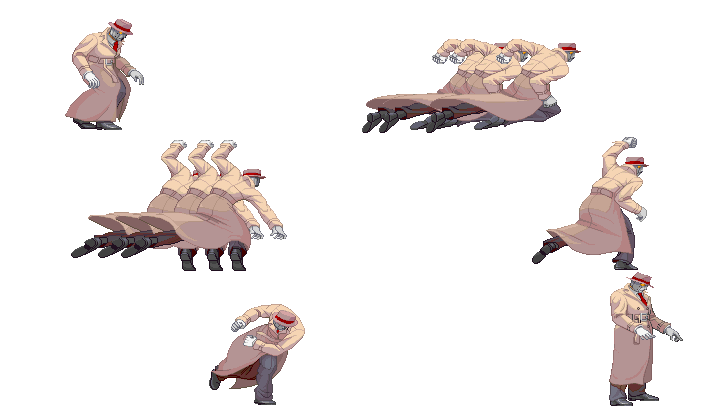
charge back, toward, punch. Can be EXed. The harder the punch, the farther the dash goes. The normal version is always safe on block, with the negligible exception of a fierce version done against a reversal Ken SAIII. Strong or jab dash punch can be comboed into with close standing forward and any version dash punch can be canceled into a super (or other stuff, if | charge back, toward, punch. Can be EXed. The harder the punch, the farther the dash goes. The normal version is always safe on block, with the negligible exception of a fierce version done against a reversal Ken SAIII. Strong or jab dash punch can be comboed into with close standing forward and any version dash punch can be canceled into a super (or other stuff, if itâs the ex version) and used to cover ground quickly. Note that some characters, as mentioned below, can duck/walk/dash under it. The ex version bounces the opponent off the wall and back at you, allowing a juggle. | ||
| Line 1,164: | Line 1,165: | ||
| align="center" | Dashing Head Attack (Overhead) (Fierce) || align="center" | 0 || align="center" | 0 || align="center" | 2 || align="center" | 4 | | align="center" | Dashing Head Attack (Overhead) (Fierce) || align="center" | 0 || align="center" | 0 || align="center" | 2 || align="center" | 4 | ||
|} | |} | ||
charge back, toward, hold punch. | charge back, toward, hold punch. Itâs an overhead, obviously, and it hits a little later than the regular version, so itâs a little harder for the opponent to block or parry if heâs crouching or looking to duck, walk under, or parry a regular dash punch. You can link it to SAII if the opponent is crouching and you hit him within SAIIâs range. This is a little more useful than the low dash punch because some people low-block or try to parry dash punches, and thisâll throw off their timing. It can come out if you tap punch quickly, so heads up for that. Itâs quite punishable on block. | ||
| Line 1,200: | Line 1,201: | ||
| align="center" | Dashing Leg Attack (Roundhouse) || align="center" | 3 || align="center" | 7 || align="center" | 12 || align="center" | 4 | | align="center" | Dashing Leg Attack (Roundhouse) || align="center" | 3 || align="center" | 7 || align="center" | 12 || align="center" | 4 | ||
|} | |} | ||
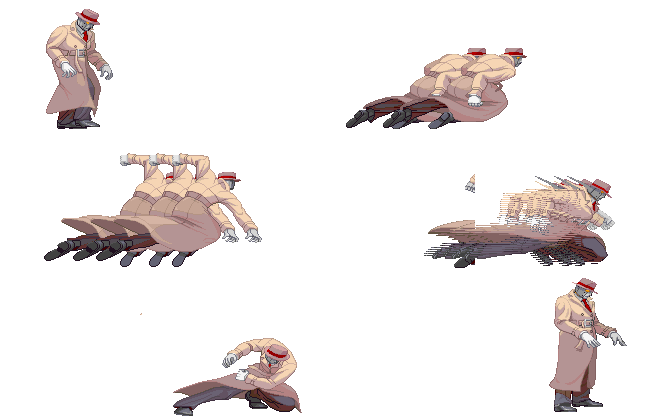
charge back, toward, kick. Can be EXed. This sweeps the opponent, but | charge back, toward, kick. Can be EXed. This sweeps the opponent, but itâs unsafe on block and has a little longer startup than the regular dash punch. Opponents usually have no reason not to block low on a dash punch because every character can either block or duck the regular version that way, so going low isnât useful very often. Itâs mainly used to surprise the opponent or beat an expected toward parry. The ex version combos into SAI, but the damage reduction is huge and itâs easier for the opponent to see coming because its startup is slower; itâs mainly used as a chip kill. | ||
| Line 1,236: | Line 1,237: | ||
| align="center" | Capture and Deadly Blow (Roundhouse) || align="center" | 5 || align="center" | - || align="center" | 22 || align="center" | - | | align="center" | Capture and Deadly Blow (Roundhouse) || align="center" | 5 || align="center" | - || align="center" | 22 || align="center" | - | ||
|} | |} | ||
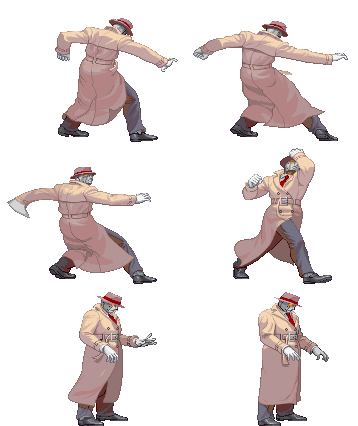
half circle back, kick. A slow command grab with range longer than | half circle back, kick. A slow command grab with range longer than Hugoâs Gigas Breaker that sets up very damaging combos. The stronger the kick button used, the longer the range, but longer the startup, and also the farther the opponent will be launched. Thereâs usually no reason to use any strength other than roundhouse for c&db. Short is used to do short c&db, fierce slaps and forward is used on Remy because some of the juggles donât work on him otherwise; also short, fierce slaps gives a great [[Q_(3S)#Setups|taunt opportunity]]. C&db is very important against certain characters and not so important against others. If you donât follow up with an attack before the opponent lands on the ground, he cannot quick-stand. | ||
| Line 1,391: | Line 1,392: | ||
====Benefits==== | ====Benefits==== | ||
Taunting gives Q great benefits. While he normally takes the second-least damage in the game among playable characters, three taunts give him about 40% damage off what he usually takes and the | Taunting gives Q great benefits. While he normally takes the second-least damage in the game among playable characters, three taunts give him about 40% damage off what he usually takes and the gameâs best defense. You only get bonuses for the first three taunts, and the bonuses only last until the end of that round, so to get full benefits you need to taunt three times early each round. Trading a bit of health for a taunt actually lets you take more total hits without dying than if you hadnât taunted and still had full health; in fact, if you lose a third of your health bar with three taunts, you still have more total damage-taking power than if you had a full health bar and no taunts. That said, you should obviously try to minimize the damage you take when taunting. | ||
====Choosing when and where to taunt==== | ====Choosing when and where to taunt==== | ||
When deciding when and where to taunt, take into account not only your health bar but also your positioning and other opportunities and only taunt if it gives you an advantage overall. For example, taunting in | When deciding when and where to taunt, take into account not only your health bar but also your positioning and other opportunities and only taunt if it gives you an advantage overall. For example, taunting in Kenâs face isnât worth it, but if youâre just gonna get hit by a full screen fireball or if youâre up against a meter-less Chun, fine, do it. For another example, if you land ex dash punch to neutral standing roundhouse about 2/3 of the way to one side of the screen, consider that while you could taunt after, leaving you across the screen from your cornered opponent, you could also do a strong or fierce dash punch to get better positioning. Taunting is not always your most advantageous option. | ||
====Setups==== | ====Setups==== | ||
There are lots of setups for the taunts. In order to find space and time to taunt, you generally have to be a proactive turtle, if that makes sense. You need to either force your opponent away from you by attacking or dictating the pace of the game, or you need to force him to be complicit in being far away from you through conditioning him to let you do so. The most preferable ways to taunt are, obviously, the unpunishable ones. You get one unpunishable taunt after an antiair dash punch or slaps, after any c&db combo that ends in a knockdown, after SAI, and after SAII if you do a follow-up knockdown attack, and you get two unpunishable taunts after SAII if you | There are lots of setups for the taunts. In order to find space and time to taunt, you generally have to be a proactive turtle, if that makes sense. You need to either force your opponent away from you by attacking or dictating the pace of the game, or you need to force him to be complicit in being far away from you through conditioning him to let you do so. The most preferable ways to taunt are, obviously, the unpunishable ones. You get one unpunishable taunt after an antiair dash punch or slaps, after any c&db combo that ends in a knockdown, after SAI, and after SAII if you do a follow-up knockdown attack, and you get two unpunishable taunts after SAII if you donât do a follow-up attack. There are also ways of setting up taunts that guarantee a taunt but donât guarantee that you wonât be punished. Doing short c&db to fierce slaps or close antiair fierce slaps guarantees two taunts, but every character except Hugo can punish the second one, although most characters can only do it if they have a super bar or ex meter ready. Air-to-air jumping fierce, ex slaps, and just being really far away will get you a taunt against characters who canât hurt you fast from a distance, although this can always be punished by half the cast when they have super or ex meter ready. Back + roundhouse canceled into a taunt guarantees a taunt, but itâs completely unsafe and you will get punished for it. Doing a back/toward throw gives you enough time to taunt against certain characters, but itâs also totally punishable. Another way to do it is to take advantage of the opponentâs style of play. If heâs a turtle, use your taunts. This is good because you get a taunt but also because the threat of you taunting and getting magical-level defense is enough to make the opponent not want to turtle, and thatâs good because Q has a hard time dealing with turtles. You can also condition the opponent to let you taunt by doing something a few times in a row to make him expect one thing and then taunt when he expects it again; for example, do something to make him move backward or attack a few times, and then when he expects you to do it again, use that rhythm to taunt, or do a dash punch on his wakeup after SAI to get him used to blocking, parrying, or attacking on wakeup, and then do two taunts after SAI instead when heâs not expecting it. | ||
== Combos == | == Combos == | ||
Revision as of 20:55, 14 August 2008
metallica live video downloads http sally mae ringtones for nextel users radford movie theatre
Introduction
Specific Character Information
- Stamina: 1200, 1400 with 1 taunt, 1705 with 2 taunts, 2050 with 3 taunts.
- Stun Bar Length (in pixels): 72 (Long)
- Stun Bar Recovery (frames it takes to recover 1 pixel): 22
- Taunt: Increases defense for the whole round by 12.5% (maximum 3 taunts, 37.5% bonus). Also increases stun recovery rate for the whole round by 10% (one taunt is the maximum).
- Best Kara-Throw: B+MP
Character Colors
Moves List
Basic Moves
| Move | Convention |
| Forward | F |
| Back | B |
| Crouch | C / D |
| Up | U |
| Jump | J |
| Jump Forward | JF |
| Jump Backwards | JB |
| Super Jump | D-U |
| Super Jump Forward | D-UF |
| Super Jump Backwards | D-UB |
| Dash Forward | FF |
| Dash Backwards | BB |
| Quarter Circle Forward | QCF |
| Quarter Circle Backwards | QCB |
| Half Circle Backwards | HCB |
| Forward, Down, Down-Forward | F, D, DF / DP |
| Back, Down, Down-Backwards | B, D, DB / RDP |
| Guard (High) | B when enemy is attacking |
| Guard (Low) | DB when enemy is attacking |
| Parry (High) | Tap F when about to take a hit |
| Parry (Low) | Tap D when about to take a hit |
| Parry (Air) | Tap F in air when about to take a hit |
| Red Parry | Execute parry after blocking a hit in a combo |
| Punch (Any) | P |
| Kick (Any) | K |
| 2 Punches | PP |
| 2 Kicks | KK |
| 3 Punches | PPP |
| 3 Kicks | KKK |
| Jab | LP |
| Strong | MP |
| Fierce | HP |
| Short | LK |
| Forward | MK |
| Roundhouse | HK |
| Universal Overhead | UOH |
Normal Moves
| Move | Motion |
| Jab | LP |
| Strong | MP |
| Fierce | HP |
| Close Jab | (Close to opponent) LP |
| Short | LK |
| Forward | MK |
| Roundhouse | HK |
| Close Forward | (Close to opponent) MK |
| Jumping Jab | (Air) LP |
| Neutral Jumping Jab | (Air) HP |
| Jumping Strong | (Air) MP |
| Jumping Fierce | (Air) HP |
| Jumping Short | (Air) LK |
| Jumping Forward | (Air) MK |
| Jumping Roundhouse | (Air) HK |
| Overhead | MP+MK |
| Taunt | HP+HK |
Throws
| Move Name | Motion |
| Hokaku Oyobi Touteki ni yoru Daraku Shougeki | F+LP+LK or B+LP+LK |
| Hokaku Oyobi Shippu o Mochi ta Tsuuda | LP+LK |
Command Normals
| Move Name | Motion |
| Crouching Jab | D+LP |
| Crouching Strong | D+MP |
| Crouching Fierce | D+HP |
| Crouching Short | D+LK |
| Crouching Forward | D+MK |
| Crouching Roundhouse | D+HK |
| Toubu ni yaru Jouhou Kougeki (Kari) | B+MP |
| Ryouude ni yaru Zenshin Tsuugeki (Kari) | B+HP |
| Tentou kara no Toubu Tsuugeki (Kari) | B+HK |
| Tentou kara no Kyakubu Tsuugeki (Kari) | DB or FB+HK |
Target Combos
Q has no Target Combos
Special Moves
| Move Name | Motion |
| High Speed Barrage | QCB+P |
| Dashing Head Attack | Charge B, F+P |
| Dashing Head Attack (Overhead) | Charge B, F+P (Hold P) |
| Dashing Leg Attack | Charge B, F+K |
| Capture and Deadly Blow | HCB+K |
EX Moves
| Move Name | Motion |
| High Speed Barrage | QCB+PP |
| Dashing Head Attack | Charge B, F+PP |
| Dashing Leg Attack | Charge B, F+KK |
Super Arts
| Num. | Super Art Name | Motion | Super Bars |
| I | Critical Combo Attack | QCF QCF+P | 2 stocks |
| II | Deadly Double Combination | QCF QCF+P | 1 stock |
| III | Total Destruction | QCF QCF+P then QCF+P or QCF+K | 1 stock |
Move Analisys
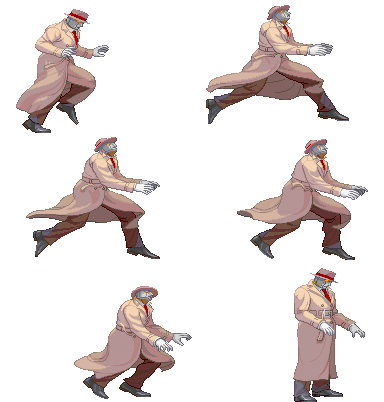
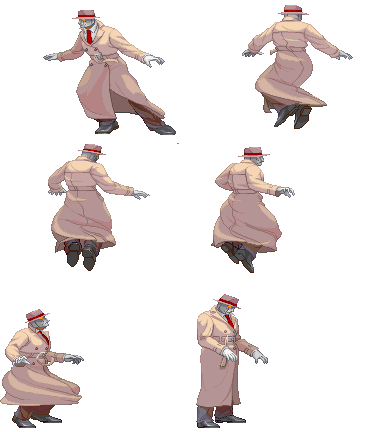
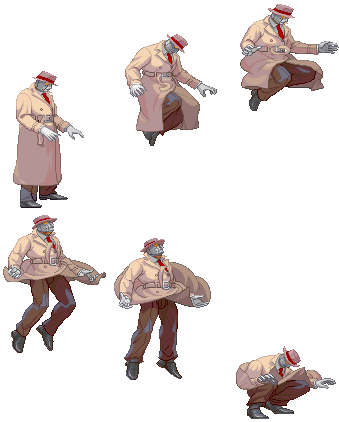
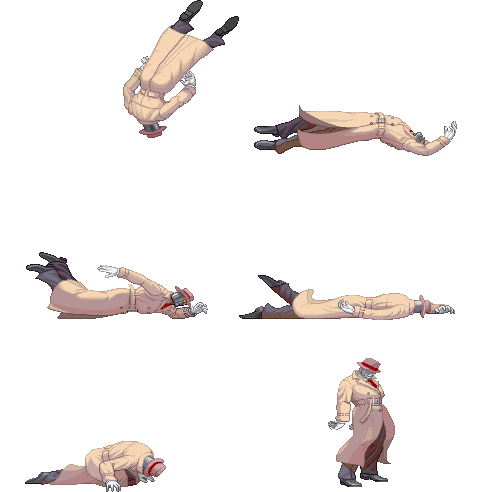
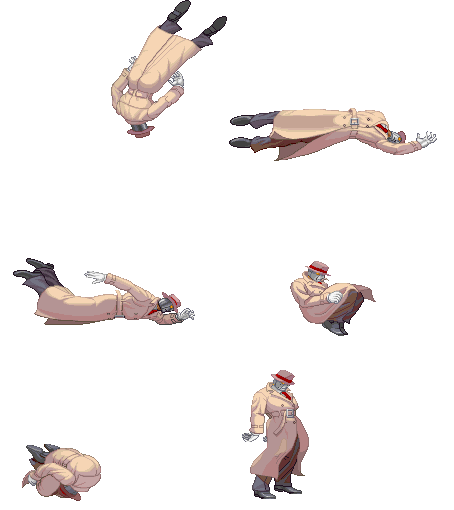
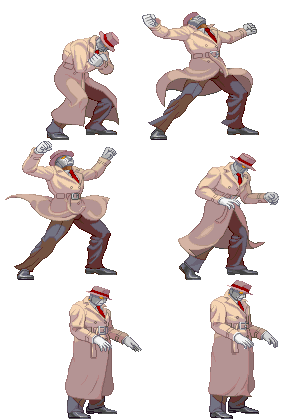
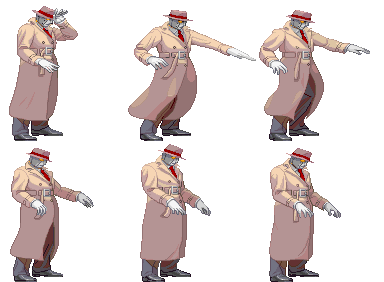
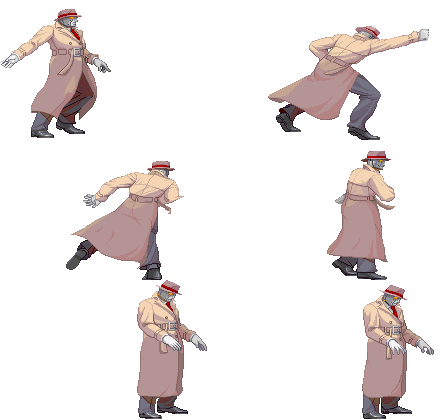
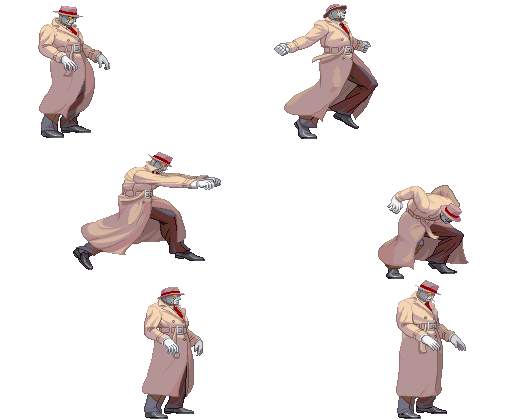
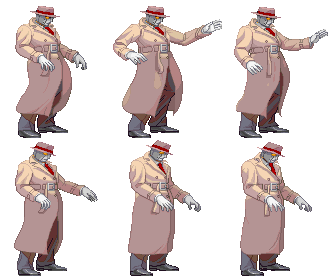
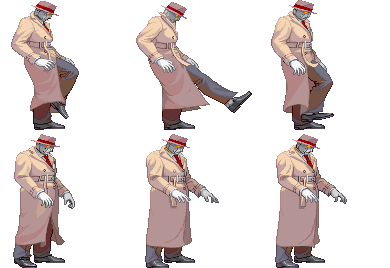
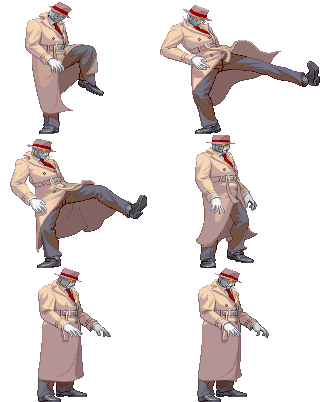
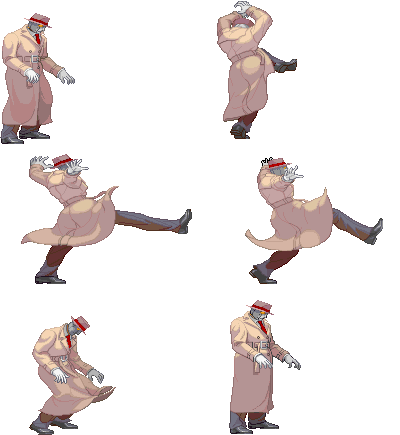
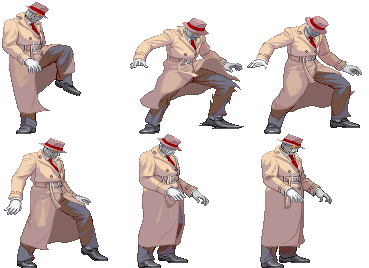
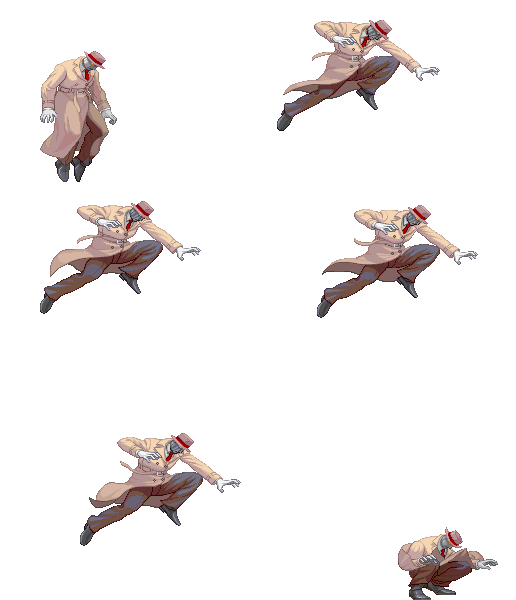
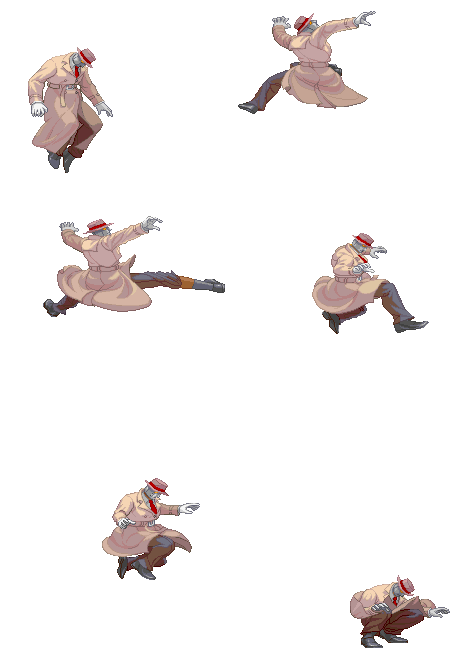
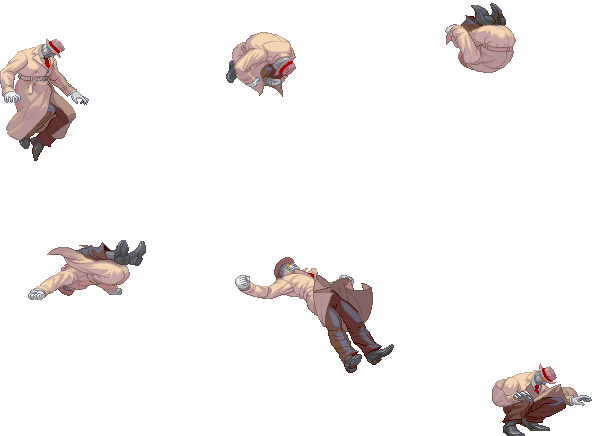
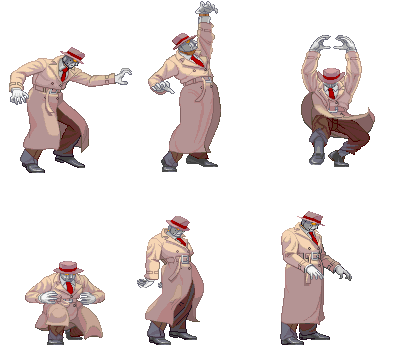
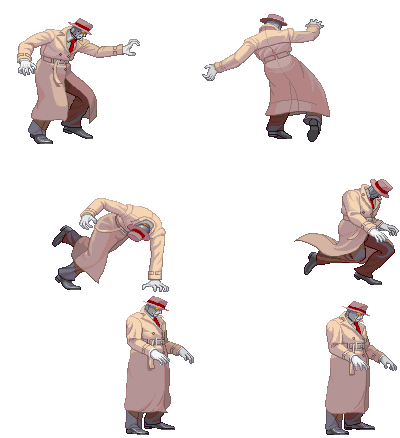
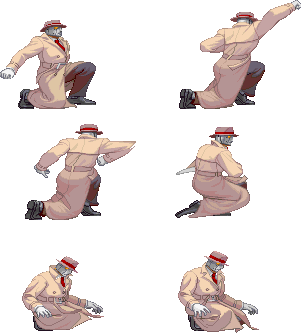
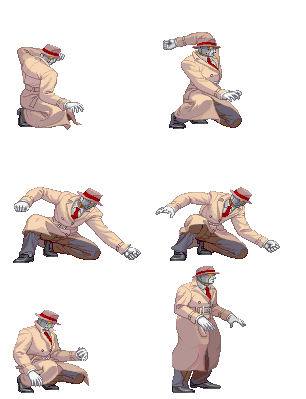
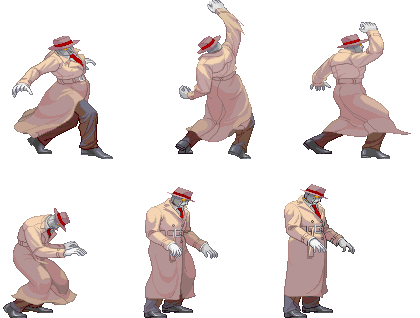
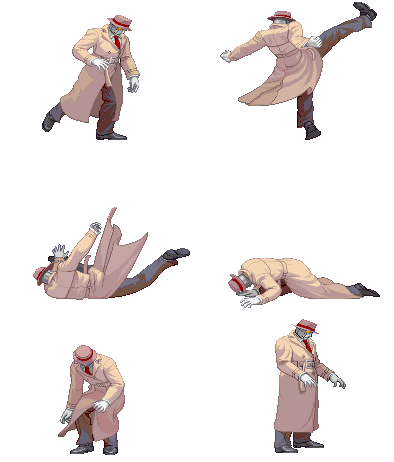
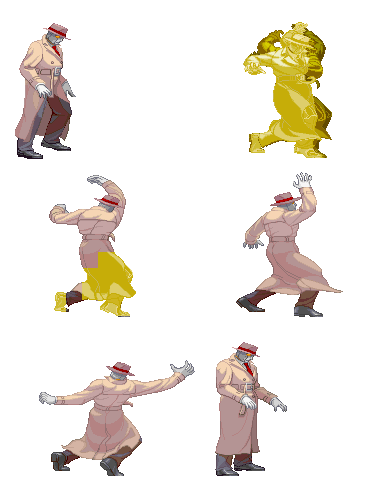
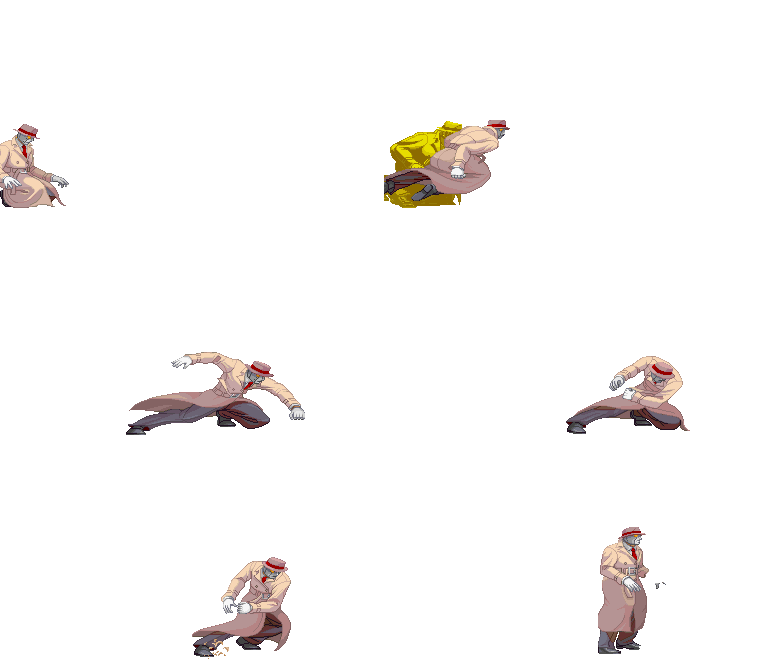
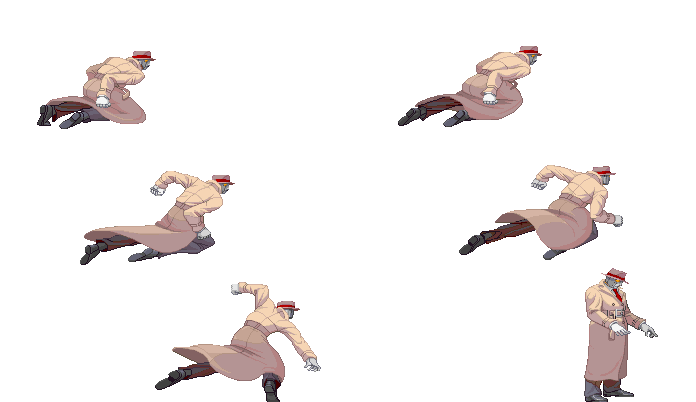
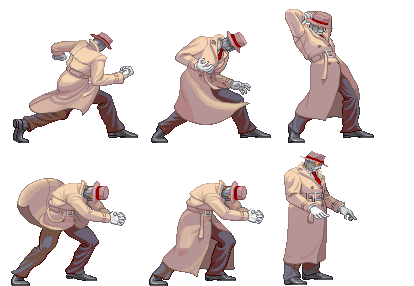
- All those sprites are taken from the site http://www.zweifuss.com/index.htm
- All Framedatas in "Move Analisys" section are taken from Game Restaurant , this means the Framedata isn't from the Dreamcast version like Karathrow site, it's from Arcade version.
General
- Move: Move name
- Motion: What you must do to execute the move
- Damage: Damage it does (in pixels)
- Stun Damage: Stun Damage it does (in pixels)
- Chains into itself: If you can combo into the same movement
- Special Cancel: If you can cancel the move into a Special Move
- Super Cancel: If you can cancel the move into a Super Art
- Throw Range: Range of the throw (in pixels)
- Num.: Super Art number
- Super Art: Super Art name
- Super Art Stock: Number of Gauge Bars the Super Art have, also the lenght of each bar (in pixels)
Frame Data
- Startup: Number of frames it takes to start the move
- Hit: Number of frames that can hit the opponent
- Recovery: Number of frames it takes to recover from the move
- Blocked Advantage: Number of frames you are in advantage/disvantage after opponent have been blocked the hit
- Hit Advantage: Number of frames you are in advantage/disvantage after opponent have been take the hit
- Crouching Hit Advantage: Number of frames you are in advantage/disvantage after opponent have been take the hit while he's crouching
- + # : You have # frames of advantage
- - # : You have # frames of disvantage
- # ~ # : Advantage/disvantage can vary from # to #
- Down: Enemy gets knocked down
- Guard: How opponent must guard the move, High (H), Low (L) or both (HL)
- Parry: How opponent must parry the move, High (H), Low (L) or both (HL)
Gauge Increase
- Miss: Gauge you gain if you miss the move (in pixels)
- Blocked: Gauge you gain if the move gets blocked (in pixels)
- Hit: Gauge you gain if you hit the opponent with the move (in pixels)
- Parry: Gauge opponent gains when he parry the move (in pixels)
Basic Moves
| Move | Total frames |
|---|---|
| Dash Forward | 19 |
Comments here
| Move | Total frames |
|---|---|
| Dash Backwards | 21 |
Comments here
| Move | Motion | Startup Frames |
| Jump | BU or U or FU | 5 |
Comments here
| Move | Motion | Startup Frames |
| Super Jump | DBU or DU or DFU | 6 |
Comments here
| Move | Motion | Frames |
| Normal Wakeup | - | 72 |
Comments here
| Move | Motion | Frames |
| Quick Stand | Tap D when hitting the ground | 46 |
Comments here
| Move | Motion | Frames | Gauge Increase |
| Taunt | HP+HK | ?? | 3 |
Comments here
| Move | Motion |
| Parry (High) | Tap F when about taking a hit |
| Parry (Low) | Tap D when about taking a hit |
| Parry (Air) | Tap F in air when about taking a hit |
Frame Data
| Move | Frames you're frozen | Frames opponent is frozen | Frame Advantage when parry is successful | Frames before you can try another parry |
| Parry (High) | 16 | 16 | +4(LP/LK) +3(MP/MK) +2(HP/HK) 0(Special/Super) -16(Fireball) | 24(19 when attack comes from the air)*,** |
| Parry (Low) | 16 | 16 | +4(LP/LK) +3(MP/MK) +2(HP/HK) 0(Special/Super) -16(Fireball) | 24(19 when attack comes from the air)*,** |
| Parry (Air) | 16 | 16 | +4(LP/LK) +3(MP/MK) +2(HP/HK) 0(Special/Super) -16(Fireball) | 21(19 when attack comes from the air)*,** |
| * (If a parry attempt is successful, the 19/21/24 frame restriction is taken away and you can attempt another parry immediately) |
| ** (If another attack connects within 2 frames of your parry, it will automatically be parried) |
Gauge Increase
| Move | Gauge Increase |
| Parry (High) | 4*** |
| Parry (Low) | 4*** |
| Parry (Air) | 4*** |
| *** (You gain 4 of gauge for whatever attack parried, and for whatever hit you parry during multihit attack) |
You can buffer any motion during High or Low parry, but NOT during Air parry, also parry resets the juggle count (and thus resets all scaling).
- Parry information is taken from Shoryuken Forums, more exactly, from user JinraiPVC. Thanks for this information dude
Normal Moves
Please note that the images show in this section are for the 1st frame it hits, so this means the opponent is taking the hit in the image shown on the move. I use the 1st frame of every move (except 2nd throw image sprites) because you will see the maximum range of every attack (mostly of the attacks). Note also that those images are ACCURATE, they are exactly the first frame it hits, so enemy takes damage but they still dont make the "pain" frame.
| Move | Motion | Damage | Stun Damage | Chains into itself | Special Cancel | Super Cancel |
| Far Jab | LP | 30 | 3 | No | No | No |
Frame Data
| Startup | Hit | Recovery | Blocked Advantage | Hit Advantage | Crouching Hit Advantage | Guard | Parry |
| 6 | 4 | 4 | +4 | +4 | +4 | HL | HL |
Gauge Increase
| Miss | Blocked | Hit | Parry (Gauge for opponent) |
| 0 | 1 | 2 | 4 |
This is a decent semi-poke and situational antiair. It comes out pretty fast and has decent range, but its recovery isnât as good as it could be and it can be ducked by most characters. Itâs most often used to tick into c&db, to keep certain opponents from dashing in, and to antiair empty jumps. It can be parried high and low, even by characters whose down parries make them crouch under the actual jab.
| Move | Motion | Damage | Stun Damage | Chains into itself | Special Cancel | Super Cancel |
| Strong | MP | 90 | 9 | No | No | No |
Frame Data
| Startup | Hit | Recovery | Blocked Advantage | Hit Advantage | Crouching Hit Advantage | Guard | Parry |
| 12 | 5 | 19 | -2 | 0 | +2 | HL | H |
Gauge Increase
| Miss | Blocked | Hit | Parry (Gauge for opponent) |
| 2 | 3 | 7 | 4 |
This move has great range, is safe on block, and actually recovers better if whiffed than youâd think. While itâs mainly used in c&db corner resets and to give Q his second-best karathrowing distance, it can also serve as a poke and antiair, although itâs not too useful as a poke against most characters because it can be ducked by most and stood under by lots. It must be parried high.
| Move | Motion | Damage | Stun Damage | Chains into itself | Special Cancel | Super Cancel |
| Fierce | HP | 130(120) | 15(13) | No | No | No |
Frame Data
| Startup | Hit | Recovery | Blocked Advantage | Hit Advantage | Crouching Hit Advantage | Guard | Parry |
| 18 | 16 | 23 | -23 | Down | Down | HL | H |
Gauge Increase
| Miss | Blocked | Hit | Parry (Gauge for opponent) |
| 3 | 5 | 13 | 4 |
This move knocks the opponent down for most of its many active hit frames, but at the very end it works as a reset if the opponent is in the air or as just a regular hit if the opponent is on the ground. It can be used as a poke against tall characters and more rarely as a situational antiair. Itâs safe when done from max range, beats most high-level pokes, and has an active hitbox that stays up for a long time, but characters who can duck it can punish it easily. This move can be used to end a c&db or SAII juggle, although there are better options. It has to be parried high.
| Move | Motion | Damage | Stun Damage | Chains into itself | Special Cancel | Super Cancel |
| Close Jab | (Close to opponent) LP | 35 | 3 | No | Yes | Yes |
Frame Data
| Startup | Hit | Recovery | Blocked Advantage | Hit Advantage | Crouching Hit Advantage | Guard | Parry |
| 4 | 4 | 6 | +2 | +2 | +2 | HL | HL |
Gauge Increase
| Miss | Blocked | Hit | Parry (Gauge for opponent) |
| 0 | 1 | 2 | 4 |
This comes out and recovers faster than far standing jab and can be canceled into all of Qâs command moves, although it only combos into ex slaps and super. Its main uses are as a tick and as an antiair against empty jumps and opponents who jump right in front of you. It can be parried high and low.
| Move | Motion | Damage | Stun Damage | Chains into itself | Special Cancel | Super Cancel |
| Short | LK | 40 | 3 | No | No | No |
Frame Data
| Startup | Hit | Recovery | Blocked Advantage | Hit Advantage | Crouching Hit Advantage | Guard | Parry |
| 4 | 4 | 8 | +2 | +2 | +2 | HL | HL |
Gauge Increase
| Miss | Blocked | Hit | Parry (Gauge for opponent) |
| 0 | 1 | 2 | 4 |
This is a nice little poke that comes out and recovers very quickly and is great at keeping the opponent out. Itâs also used to tick into karathrow or c&db. It can be parried both high and low.
| Move | Motion | Damage | Stun Damage | Chains into itself | Special Cancel | Super Cancel |
| Far Forward | MK | 110 | 7 | No | No | No |
Frame Data
| Startup | Hit | Recovery | Blocked Advantage | Hit Advantage | Crouching Hit Advantage | Guard | Parry |
| 8 | 5 | 14 | -1 | +1 | +3 | HL | H |
Gauge Increase
| Miss | Blocked | Hit | Parry (Gauge for opponent) |
| 2 | 3 | 7 | 4 |
This is an excellent poke that should be used often. It beats lots of stuff, has good range, is safe on block, canât be ducked, and is even a decent meaty attack. It must be parried high.
| Move | Motion | Damage | Stun Damage | Chains into itself | Special Cancel | Super Cancel |
| Roundhouse | HK | 150 | 9 | No | No | No |
Frame Data
| Startup | Hit | Recovery | Blocked Advantage | Hit Advantage | Crouching Hit Advantage | Guard | Parry |
| 20 | 5 | 28 | -12 | -10 | -8 | HL | H |
Gauge Increase
| Miss | Blocked | Hit | Parry (Gauge for opponent) |
| 3 | 5 | 13 | 4 |
This is safe on block (except against a reversal Chun SA2) and beats just about any non-invincible attack, but if whiffed or parried itâs completely unsafe. It can be used for keep-out and spacing, as a meaty attack if you think the opponent will dash back, and in anticipation of a poke from an opponent who canât hurt you much if you miss. That said, however, its main use is as a c&db combo finisher. It has to be parried high.
| Move | Motion | Damage | Stun Damage | Chains into itself | Special Cancel | Super Cancel |
| Close Forward | (Close to opponent) MK | 100 | 3 | No | Yes | Yes |
Frame Data
| Startup | Hit | Recovery | Blocked Advantage | Hit Advantage | Crouching Hit Advantage | Guard | Parry |
| 7 | 2 | 18 | -2 | 0 | +2 | HL | H |
Gauge Increase
| Miss | Blocked | Hit | Parry (Gauge for opponent) |
| 2 | 3 | 7 | 4 |
This is also a very important move because itâs Qâs only (only.) cancelable ground normal that combos into all his comboable specials and supers. It can also be used as a tick into karathrow and an occasional meaty attack; although it canât beat many wakeup attacks, using it to combo into super as the opponent is waking up is an important way to get damage and force the opponent to stay still on wakeup. It can only be parried high.
| Move | Motion | Damage | Stun Damage | Chains into itself | Special Cancel | Super Cancel |
| Jump Jab | (Air) LP | 40 | 7 | No | No | No |
Frame Data
| Startup | Hit | Recovery | Blocked Advantage | Hit Advantage | Crouching Hit Advantage | Guard | Parry |
| 2 | Until landing | - | - | - | - | H | H |
Gauge Increase
| Miss | Blocked | Hit | Parry (Gauge for opponent) |
| 0 | 1 | 2 | 4 |
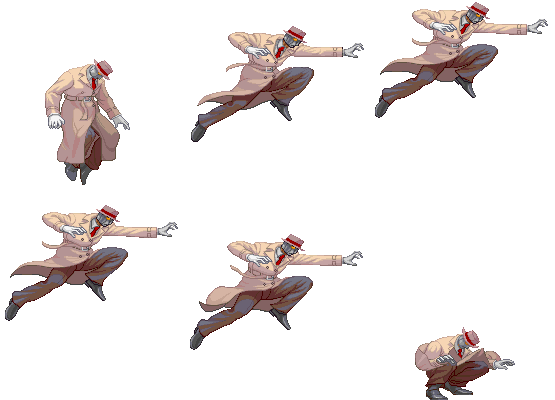
The claw! This move comes out quickly, lasts almost the whole jump, and has great priority. It can be used to beat most air and even antiair attacks, to retaliate with after an air-to-air parry when the opponent is in front of or above you, and to fake an empty jump by attacking at the last second. It has to be parried high.
| Move | Motion | Damage | Stun Damage | Chains into itself | Special Cancel | Super Cancel |
| Neutral Jump Jab | (Air) LP | 40 | 7 | No | No | No |
Frame Data
| Startup | Hit | Recovery | Blocked Advantage | Hit Advantage | Crouching Hit Advantage | Guard | Parry |
| 2 | Until landing | - | - | - | - | H | H |
Gauge Increase
| Miss | Blocked | Hit | Parry (Gauge for opponent) |
| 0 | 1 | 2 | 4 |
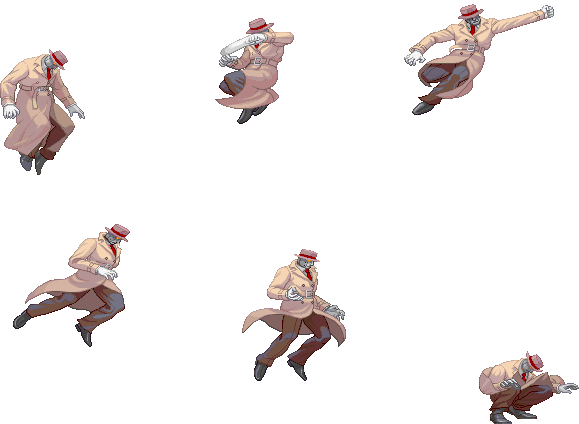
This comes out almost immediately, has great priority, and lasts the whole jump, so itâs useful as an air-to-air antiair. It must be parried high.
| Move | Motion | Damage | Stun Damage | Chains into itself | Special Cancel | Super Cancel |
| Jump Strong | (Air) MP | 100 | 11 | No | No | No |
Frame Data
| Startup | Hit | Recovery | Blocked Advantage | Hit Advantage | Crouching Hit Advantage | Guard | Parry |
| 7 | 6 | - | - | - | - | H | H |
Gauge Increase
| Miss | Blocked | Hit | Parry (Gauge for opponent) |
| 2 | 3 | 7 | 4 |
This is good against characters that jump higher than you or are tall enough to get hit by it when standing, but itâs rarely used because Qâs other jumping attacks are usually better options. It has to be parried high.
| Move | Motion | Damage | Stun Damage | Chains into itself | Special Cancel | Super Cancel |
| Jump Fierce | (Air) HP | 130 | 15 | No | No | No |
Frame Data
| Startup | Hit | Recovery | Blocked Advantage | Hit Advantage | Crouching Hit Advantage | Guard | Parry |
| 10 | 8 | - | - | - | - | H | H |
Gauge Increase
| Miss | Blocked | Hit | Parry (Gauge for opponent) |
| 3 | 5 | 13 | 4 |
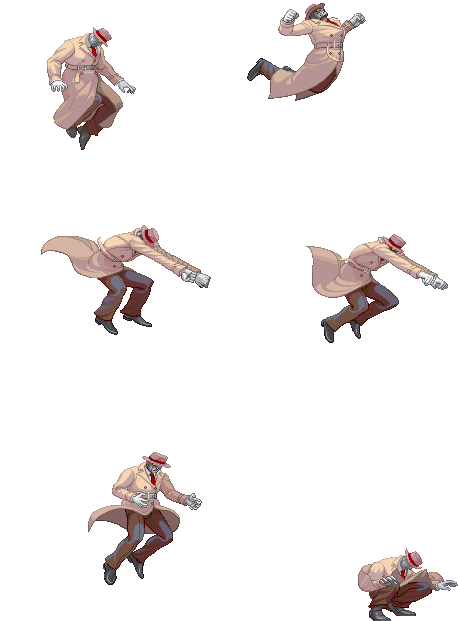
This is a great air move that should be used often. Itâs good for starting combos and beating or trading with air attacks and antiairs, including some moves like dragon punches and headbutts. It can set up a taunt if it knocks the opponent out of the air and can also serve as a tick into c&db. It must be parried high.
| Move | Motion | Damage | Stun Damage | Chains into itself | Special Cancel | Super Cancel |
| Jump Short | (Air) LK | 40 | 7 | No | No | No |
Frame Data
| Startup | Hit | Recovery | Blocked Advantage | Hit Advantage | Crouching Hit Advantage | Guard | Parry |
| 4 | Until landing | - | - | - | - | H | H |
Gauge Increase
| Miss | Blocked | Hit | Parry (Gauge for opponent) |
| 0 | 1 | 2 | 4 |
This is much like jumping toward jab in that it comes out as fast, lasts as long, and has as good priority, but because its hitbox is lower itâs better for attacking an airborne opponent who is lower in the air than you are. Itâs good at beating air attacks and some antiairs, faking an empty jump, and ticking into karathrow. It must be parried high.
| Move | Motion | Damage | Stun Damage | Chains into itself | Special Cancel | Super Cancel |
| Jump Forward | (Air) MK | 90 | 9 | No | No | No |
Frame Data
| Startup | Hit | Recovery | Blocked Advantage | Hit Advantage | Crouching Hit Advantage | Guard | Parry |
| 9 | 8 | - | - | - | - | H | H |
Gauge Increase
| Miss | Blocked | Hit | Parry (Gauge for opponent) |
| 2 | 3 | 7 | 4 |
This is a great move, one of the air moves you should use the most. It has great range, beats lots of stuff, is a useful defensive poke, and is a good spacer. It must be parried high.
| Move | Motion | Damage | Stun Damage | Chains into itself | Special Cancel | Super Cancel |
| Jump Roundhouse | (Air) HK | 145(130) | 13(11) | No | No | No |
Frame Data
| Startup | Hit | Recovery | Blocked Advantage | Hit Advantage | Crouching Hit Advantage | Guard | Parry |
| 17 | 3 | - | - | - | - | H | H |
Gauge Increase
| Miss | Blocked | Hit | Parry (Gauge for opponent) |
| 3 | 5 | 13 | 4 |
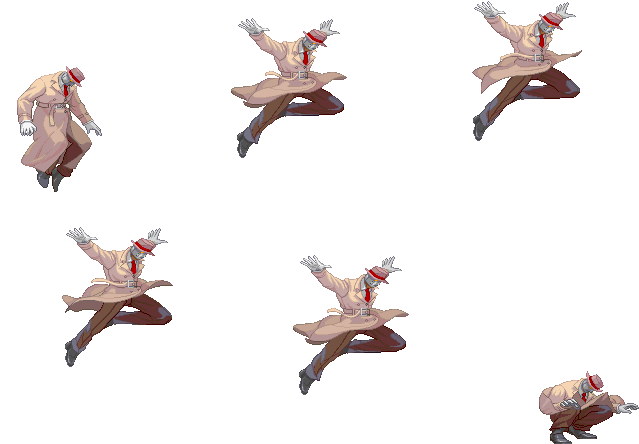
This is another excellent move. It stuffs a lot of things and trades with many of the rest, even some that have invincibility frames because its oddly-shaped hitbox sometimes hits the opponent in an area where he doesnât have invincibility. Itâs Qâs only jumping attack that knocks the opponent down out of the air instead of resetting them and has deceptively good range and hit stun. It can be used to zone the opponent out, whiff a jump-in to throw, and start Qâs most damaging combos, and it also makes a useful tick and meaty attack. If you do it so that it hits as late as possible, like around the level of the opponentâs feet, it canât be punished if it gets parried. It has to be parried high.
| Move | Motion | Damage | Stun Damage | Chains into itself | Special Cancel | Super Cancel |
| Universal Overhead | MP+MK | 40 | 3 | No | No | No |
Frame Data
| Startup | Hit | Recovery | Blocked Advantage | Hit Advantage | Crouching Hit Advantage | Guard | Parry |
| 15 | 10 | 5 | -5~+7 | 0~+8 | +1~+9 | H | H |
Gauge Increase
| Miss | Blocked | Hit | Parry (Gauge for opponent) |
| 0 | 1 | 2 | 4 |
Qâs uoh is slower and floatier than that of most characters, but it also has better range. Itâs a decent poke and can be used to link into super if itâs done at max range or as a deep meaty. If you do it as a deep meaty, you can also link into close standing forward, standing short, and crouching jab. You can also use this for tricky ground crossovers when the opponent is waking up. Other than overhead dash punch, this is Qâs only overhead attack, so make sure you use it. It has to be parried high.
Throws
| Move | Motion | Damage | Stun Damage | Throw Range |
| Hokaku Oyobi Shippu o Mochi ta Tsuuda | LP+LK | 110 | 17 | 24 |
Frame Data
| Startup | Hit | Recovery | Blocked Advantage | Hit Advantage | Crouching Hit Advantage | Guard | Parry |
| 2 | 1 | 21 | - | - | - | LP+LK | - |
Gauge Increase
| Miss | Blocked | Hit |
| 0 | 7 (for the player who blocked) | 7 |
This does less damage than the toward or back throw but also does more stun, so if the opponent is just about to get stunned, use this. It leaves the opponent right next to Q, which is good if you donât need a taunt or want to play close to the opponent. The regular range is longer than many charactersâ normal throws, but unless youâre trying to tech a throw or otherwise need a throw to come out as soon as possible, you should use the karathrow (same thing with the toward/back throws).
| Move | Motion | Damage | Stun Damage | Throw Range | Kara-Throw | Kara-Throw Range |
| Hokaku Oyobi Touteki ni yoru Daraku Shougeki | F+LP+LK or B+LP+LK | 140 | 13 | 24 | B+MP/MP | 58/49 |
Frame Data
| Startup | Hit | Recovery | Blocked Advantage | Hit Advantage | Crouching Hit Advantage | Guard | Parry |
| 2 | 1 | 21 | - | - | - | LP+LK | - |
Gauge Increase
| Miss | Blocked | Hit |
| 0 | 7 (for the player who blocked) | 7 |
One version throws the opponent a bit ahead of Q and the other a bit behind, but they both do the same damage and stun and both even have the same animation. They do more damage than the neutral throw and leave the opponent farther away, but they also do less stun. Use one of these if you want to do more damage, set up taunts in some situations, or have the opponent some distance away from you. It seems to me that the toward/back throw also has more range than the neutral throw, but unfortunately I canât find any data to make sure.
Command Normals
| Move | Motion | Damage | Stun Damage | Chains into itself | Special Cancel | Super Cancel |
| Crouch Jab | D+LP | 20 | 3 | No | No | No |
Frame Data
| Startup | Hit | Recovery | Blocked Advantage | Hit Advantage | Crouching Hit Advantage | Guard | Parry |
| 5 | 4 | 4 | +4 | +4 | +4 | HL | HL |
Gauge Increase
| Miss | Blocked | Hit | Parry (Gauge for opponent) |
| 0 | 1 | 2 | 4 |
This is a quick little ranged poke thatâs great for keeping the opponent out and beating slower attacks, so it should be used often. It can be parried both high and low.
| Move | Motion | Damage | Stun Damage | Chains into itself | Special Cancel | Super Cancel |
| Crouch Strong | D+MP | 90 | 9 | No | No | No |
Frame Data
| Startup | Hit | Recovery | Blocked Advantage | Hit Advantage | Crouching Hit Advantage | Guard | Parry |
| 8 | 5 | 13 | -2 | -1 | 0 | HL | HL |
Gauge Increase
| Miss | Blocked | Hit | Parry (Gauge for opponent) |
| 2 | 3 | 7 | 4 |
This is a decent poke and antiair thatâs safe on block and can recover in time if parried by a jumping opponent when youâre more underneath than in front of him. It can be used up close to tick into karathrow or to preemptively stuff an opponentâs wakeup attack or jump. Its main drawback is that it can be parried high and low, which makes it less useful as a meaty attack since the opponent canât guess wrong on a parry.
| Move | Motion | Damage | Stun Damage | Chains into itself | Special Cancel | Super Cancel |
| Crouch Fierce | D+HP | 120 | 5 | No | No | No |
Frame Data
| Startup | Hit | Recovery | Blocked Advantage | Hit Advantage | Crouching Hit Advantage | Guard | Parry |
| 14 | 1 | 20 | -3 | -1 | +1 | L | L |
Gauge Increase
| Miss | Blocked | Hit | Parry (Gauge for opponent) |
| 3 | 5 | 13 | 4 |
This is a good meaty that is safe on block and stuffs or trades with most non-invincible wakeup attacks, although its startup is a little slow. Its range extends above and beyond Qâs fist, so it can also be used to stuff long-range low attacks, but thatâs kinda risky because of its long startup and recovery if whiffed. It has to be blocked and parried low.
| Move | Motion | Damage | Stun Damage | Chains into itself | Special Cancel | Super Cancel |
| Crouch Short | D+LK | 20 | 3 | No | No | No |
Frame Data
| Startup | Hit | Recovery | Blocked Advantage | Hit Advantage | Crouching Hit Advantage | Guard | Parry |
| 6 | 5 | 8 | -2 | -2 | -2 | L | L |
Gauge Increase
| Miss | Blocked | Hit | Parry (Gauge for opponent) |
| 0 | 1 | 2 | 4 |
This is a decent poke that can also work as a meaty attack and a tick into karathrow. Its startup is a little slower than crouching jab and it doesnât beat as many things, but it does have slightly longer range so itâs better for opponents who are farther out. If done at max range, it can stuff moves like Ibukiâs ex dragon punch. It must be blocked and parried low.
| Move | Motion | Damage | Stun Damage | Chains into itself | Special Cancel | Super Cancel |
| Crouch Forward | D+MK | 80 | 3 | No | No | No |
Frame Data
| Startup | Hit | Recovery | Blocked Advantage | Hit Advantage | Crouching Hit Advantage | Guard | Parry |
| 7 | 3 | 14 | -3 | -2 | -1 | L | L |
Gauge Increase
| Miss | Blocked | Hit | Parry (Gauge for opponent) |
| 2 | 3 | 7 | 4 |
This is a good poke that does more damage than crouching short but is a little slower to come out. It has good range, beats lots of attacks, and makes a great tick into karathrow. Itâs also Qâs best meter-building attack. It has to be blocked and parried low.
| Move | Motion | Damage | Stun Damage | Chains into itself | Special Cancel | Super Cancel |
| Crouch Roundhouse | D+HK | 130 | 3 | No | No | No |
Frame Data
| Startup | Hit | Recovery | Blocked Advantage | Hit Advantage | Crouching Hit Advantage | Guard | Parry |
| 12 | 8 | 33 | -25 | Down | Down | L | L |
Gauge Increase
| Miss | Blocked | Hit | Parry (Gauge for opponent) |
| 3 | 5 | 13 | 4 |
This move knocks down on hit, has good range, and is pure active hit frames at Qâs feet, but if blocked or parried it can be punished by anything. Itâs a fairly good poke against some characters, a pretty good situational antiair, and a decent way to capitalize on parries when the opponent is at max range. Itâs also useful as a meaty because it beats everything except moves with invincible startup frames, like some supers and dragon punches. This move has to be blocked and parried low.
| Move | Motion | Damage | Stun Damage | Chains into itself | Special Cancel | Super Cancel |
| Toubu ni yaru Jouhou Kougeki (Kari) | B+MP | 100 | 13 | No | No | No |
Frame Data
| Startup | Hit | Recovery | Blocked Advantage | Hit Advantage | Crouching Hit Advantage | Guard | Parry |
| 8 | 4 | 18 | -2 | 0 | 0 | HL | H |
Gauge Increase
| Miss | Blocked | Hit | Parry (Gauge for opponent) |
| 2 | 3 | 7 | 4 |
This is very useful as a poke and antiair and gives Q his best karathrow range, so itâs used a lot. It makes Q move up a bit, and the punch actually extends over and a little behind Qâs head, so you can hit people who are over and a little behind you. Itâs safe on block and has good range, so itâs good for a poke and for making sure the opponent doesnât jump when you have him cornered. Plus, if you use it as an antiair and time it just right, you can recover in time before you can be hit or thrown. This move also gives Q his best distance for karathrowing, although it throws the opponent behind you unless you have crazy enough timing to only press back for the punch and not for the throw. It must be parried high, although it can be difficult to parry for an opponent jumping right over you because the opponent sometimes has to parry what looks like behind himself.
| Move | Motion | Damage | Stun Damage | Chains into itself | Special Cancel | Super Cancel |
| Ryouude ni yaru Zenshin Tsuugeki (Kari) | B+HP | 120(100) | 15(13) | No | No | No |
Frame Data
| Startup | Hit | Recovery | Blocked Advantage | Hit Advantage | Crouching Hit Advantage | Guard | Parry |
| 13 | 11 | 15 | -1 | +1 | +3 | HL | H |
Gauge Increase
| Miss | Blocked | Hit | Parry (Gauge for opponent) |
| 3 | 5 | 13 | 4 |
This is a good poke and antiair thatâs best against opponents who are either tall enough to get hit by it when crouching, like Dudley, Urien, Hugo, Alex, and Q, whose air attacks are susceptible to this moveâs weird hitbox, like Twelve, Urien, Makoto, and Dudley, but itâs good against anyone if the opponent is using a high poke or standing up. Itâs safe on block, beats out lots of attacks, and is usually even safe if parried by a jumping opponent if it moves Q under the opponent and past his attacks. Itâs also very important as a reset in c&db corner juggles. It has to be parried high.
| Move | Motion | Damage | Stun Damage | Chains into itself | Special Cancel | Super Cancel |
| Ryouude ni yaru Zenshin Tsuugeki (Kari) | B+HK | 140(130) | 3(15) | No | Yes | Yes |
Frame Data
| Startup | Hit | Recovery | Blocked Advantage | Hit Advantage | Crouching Hit Advantage | Guard | Parry |
| 11 | 7 | 35 | -26 | Down | Down | HL | HL |
Gauge Increase
| Miss | Blocked | Hit | Parry (Gauge for opponent) |
| 3 | 5 | 13 | 4 |
This move is almost great, but just a little too risky. If it touches the opponent early, it has great range and priority, must be blocked low, knocks down on hit, and can be canceled but not comboed into all of Qâs command moves; if it touches the opponent later in its animation, it can be blocked high, doesnât knock down, and canât be canceled. There are three uses for this thing. The main use is as a meaty attack; if you do close back + roundhouse xx slaps or dash punch and the opponent doesnât parry, heâll either get knocked down by back + roundhouse or take some block damage from the specials. It can also be used to beat low pokes, since the early part of its animation eats up every low move in the game. The third use is as a preemptive antiair, for when you think the opponent might jump back on wakeup and youâre a little distance away. One problem, apart from the fact that it doesnât combo, is that this move cancels into other moves fairly slowly, meaning that if you do it too close when the opponent is waking up and try to cancel into slaps, you could get thrown; the solution is to take advantage of the moveâs range and do it from further away. It also has huge recovery time if uncanceled or whiffed, so make sure that that only happens when itâs successfully used as a preemptive antiair. It can be parried both high and low at any stage of its animation.
| Move | Motion | Damage | Stun Damage | Chains into itself | Special Cancel | Super Cancel |
| Tentou kara no Kyakubu Tsuugeki (Kari) | DB+HK or FB+HK | 130 | 3 | No | No | No |
Frame Data
| Startup | Hit | Recovery | Blocked Advantage | Hit Advantage | Crouching Hit Advantage | Guard | Parry |
| 12 | 8 | 33 | -25 | Down | Down | L | L |
Gauge Increase
| Miss | Blocked | Hit | Parry (Gauge for opponent) |
| 3 | 5 | 13 | 4 |
Comments here
Special Moves
| Move | Motion | Damage | Blocked Damage | Stun Damage | Super Cancel |
| High Speed Barrage (Jab) | QCB+LP | 150(50x3) | 9 | 9(3+3+3) | No |
| High Speed Barrage (Strong) | QCB+MP | 150(50x3) | 9 | 13(5+3+5) | No |
| High Speed Barrage (Fierce) | QCB+HP | 150(50x3) | 9 | 13(5+3+5) | No |
Frame Data
| Move | Startup | Hit | Recovery | Blocked Advantage | Hit Advantage | Crouching Hit Advantage | Guard | Parry |
| High Speed Barrage (Jab) | 9 | 1 | 26 | -6 | +1 | +3 | HL/HL/HL | H/H/H |
| High Speed Barrage (Strong) | 8 | 1 | 28 | -9 | 0 | +2 | HL/HL/HL | H/H/H |
| High Speed Barrage (Fierce) | 9 | 1 | 28 | -8 | +1 | +1 | HL/HL/HL | H/H/H |
Gauge Increase
| Move | Miss | Blocked | Hit | Parry (Gauge for opponent) |
| High Speed Barrage (Jab) | 3 | 10 | 17 | 12(4+4+4) |
| High Speed Barrage (Strong) | 3 | 10 | 17 | 12(4+4+4) |
| High Speed Barrage (Fierce) | 3 | 10 | 17 | 12(4+4+4) |
quarter circle back, punch. Can be EXed. This is very useful against lots of characters. The jab version hits everyone even when theyâre crouching, although Chun can randomly duck the middle hit. Strong slaps is a good poke and is useful if you parry an air attack, fierce slaps is a decent and situational antiair, and both can be used to keep an opponent from jumping on your wakeup or your opponentâs. The slaps can only be punished by Ken SAIII, Chun SAII, Dudley SAIII, Makoto SAI, Q SAII, reversal-timed Necro SAIII, and Remy SAII, which only hits a couple times and can then be parried or blocked. Against characters who canât punish the slaps, you can use it for poking, antiair, spacing, and chip. EX slaps knocks the opponent down, does great damage, stun, and chip, and is hard to red parry, but itâs easily punished by everyone on block.
| Move | Motion | Damage | Blocked Damage | Stun Damage | Super Cancel |
| Dashing Head Attack (Jab) | Hold B, F+LP | 120 | 8 | 11 | Yes |
| Dashing Head Attack (Strong) | Hold B, F+MP | 140 | 9 | 13 | Yes |
| Dashing Head Attack (Fierce) | Hold B, F+HP | 155 | 10 | 15 | Yes |
Frame Data
| Move | Startup | Hit | Recovery | Blocked Advantage | Hit Advantage | Crouching Hit Advantage | Guard | Parry |
| Dashing Head Attack (Jab) | 13 | 3 | 16 | -2 | 0 | +2 | HL | H |
| Dashing Head Attack (Strong) | 15 | 3 | 16 | -2 | 0 | +2 | HL | H |
| Dashing Head Attack (Fierce) | 19 | 4 | 16 | -3 | -1 | +1 | HL | H |
Gauge Increase
| Move | Miss | Blocked | Hit | Parry (Gauge for opponent) |
| Dashing Head Attack (Jab) | 3 | 9 | 14 | 4 |
| Dashing Head Attack (Strong) | 3 | 9 | 14 | 4 |
| Dashing Head Attack (Fierce) | 3 | 9 | 14 | 4 |
charge back, toward, punch. Can be EXed. The harder the punch, the farther the dash goes. The normal version is always safe on block, with the negligible exception of a fierce version done against a reversal Ken SAIII. Strong or jab dash punch can be comboed into with close standing forward and any version dash punch can be canceled into a super (or other stuff, if itâs the ex version) and used to cover ground quickly. Note that some characters, as mentioned below, can duck/walk/dash under it. The ex version bounces the opponent off the wall and back at you, allowing a juggle.
| Move | Motion | Damage | Blocked Damage | Stun Damage | Super Cancel |
| Dashing Head Attack (Overhead) (Jab) | Hold B, F+LP (Hold LP) | 100 | 6 | 9 | No |
| Dashing Head Attack (Overhead) (Strong) | Hold B, F+MP (Hold MP) | 115 | 7 | 9 | No |
| Dashing Head Attack (Overhead) (Fierce) | Hold B, F+HP (Hold HP) | 130 | 8 | 9 | No |
Frame Data
| Move | Startup | Hit | Recovery | Blocked Advantage | Hit Advantage | Crouching Hit Advantage | Guard | Parry |
| Dashing Head Attack (Overhead) (Jab) | 24 | 3 | 23 | -10 | +2 | +4 | H | H |
| Dashing Head Attack (Overhead) (Strong) | 28 | 3 | 24 | -11 | +2 | +4 | H | H |
| Dashing Head Attack (Overhead) (Fierce) | 32 | 3 | 25 | -12 | +2 | +4 | H | H |
Gauge Increase
| Move | Miss | Blocked | Hit | Parry (Gauge for opponent) |
| Dashing Head Attack (Overhead) (Jab) | 0 | 0 | 2 | 4 |
| Dashing Head Attack (Overhead) (Strong) | 0 | 0 | 2 | 4 |
| Dashing Head Attack (Overhead) (Fierce) | 0 | 0 | 2 | 4 |
charge back, toward, hold punch. Itâs an overhead, obviously, and it hits a little later than the regular version, so itâs a little harder for the opponent to block or parry if heâs crouching or looking to duck, walk under, or parry a regular dash punch. You can link it to SAII if the opponent is crouching and you hit him within SAIIâs range. This is a little more useful than the low dash punch because some people low-block or try to parry dash punches, and thisâll throw off their timing. It can come out if you tap punch quickly, so heads up for that. Itâs quite punishable on block.
| Move | Motion | Damage | Blocked Damage | Stun Damage | Super Cancel |
| Dashing Leg Attack (Short) | Hold B, F+LK | 100 | 6 | 3 | No |
| Dashing Leg Attack (Forward) | Hold B, F+MK | 125 | 8 | 3 | No |
| Dashing Leg Attack (Roundhouse) | Hold B, F+HK | 140 | 9 | 3 | No |
Frame Data
| Move | Startup | Hit | Recovery | Blocked Advantage | Hit Advantage | Crouching Hit Advantage | Guard | Parry |
| Dashing Leg Attack (Short) | 25 | 2 | 29 | -13 | Down | Down | L | L |
| Dashing Leg Attack (Forward) | 28 | 2 | 30 | -14 | Down | Down | L | L |
| Dashing Leg Attack (Roundhouse) | 31 | 2 | 31 | -15 | Down | Down | L | L |
Gauge Increase
| Move | Miss | Blocked | Hit | Parry (Gauge for opponent) |
| Dashing Leg Attack (Short) | 3 | 7 | 12 | 4 |
| Dashing Leg Attack (Forward) | 3 | 7 | 12 | 4 |
| Dashing Leg Attack (Roundhouse) | 3 | 7 | 12 | 4 |
charge back, toward, kick. Can be EXed. This sweeps the opponent, but itâs unsafe on block and has a little longer startup than the regular dash punch. Opponents usually have no reason not to block low on a dash punch because every character can either block or duck the regular version that way, so going low isnât useful very often. Itâs mainly used to surprise the opponent or beat an expected toward parry. The ex version combos into SAI, but the damage reduction is huge and itâs easier for the opponent to see coming because its startup is slower; itâs mainly used as a chip kill.
| Move | Motion | Damage | Blocked Damage | Stun Damage | Throw Range | Super Cancel |
| Capture and Deadly Blow (Short) | HCB+LK | 110 | - | 11 | 85 | No |
| Capture and Deadly Blow (Forward) | HCB+MK | 120 | - | 11 | 87 | No |
| Capture and Deadly Blow (Roundhouse) | HCB+HK | 130 | - | 11 | 89 | No |
Frame Data
| Move | Startup | Hit | Recovery | Blocked Advantage | Hit Advantage | Crouching Hit Advantage | Guard | Parry |
| Capture and Deadly Blow (Short) | 12 | 2 | 42 | - | Down | Down | Impossible | Impossible |
| Capture and Deadly Blow (Forward) | 13 | 2 | 44 | - | Down | Down | Impossible | Impossible |
| Capture and Deadly Blow (Roundhouse) | 14 | 2 | 46 | - | Down | Down | Impossible | Impossible |
Gauge Increase
| Move | Miss | Blocked | Hit | Parry (Gauge for opponent) |
| Capture and Deadly Blow (Short) | 5 | - | 20 | - |
| Capture and Deadly Blow (Forward) | 5 | - | 21 | - |
| Capture and Deadly Blow (Roundhouse) | 5 | - | 22 | - |
half circle back, kick. A slow command grab with range longer than Hugoâs Gigas Breaker that sets up very damaging combos. The stronger the kick button used, the longer the range, but longer the startup, and also the farther the opponent will be launched. Thereâs usually no reason to use any strength other than roundhouse for c&db. Short is used to do short c&db, fierce slaps and forward is used on Remy because some of the juggles donât work on him otherwise; also short, fierce slaps gives a great taunt opportunity. C&db is very important against certain characters and not so important against others. If you donât follow up with an attack before the opponent lands on the ground, he cannot quick-stand.
EX Moves
| Move | Motion | Gauge Needed | Damage | Blocked Damage | Stun Damage | Super Cancel |
| High Speed Barrage (EX) | QCB+PP | 40 | 230*(for 7 hits) | 17 | 25*(for 7 hits) | No |
Frame Data
| Move | Startup | Hit | Recovery | Blocked Advantage | Hit Advantage | Crouching Hit Advantage | Guard | Parry |
| High Speed Barrage (EX) | 6 | 1 | 36 | -23 | Down | Down | HLx7 | Hx7 |
Gauge Increase
| Move | Miss | Blocked | Hit | Parry (Gauge for opponent) |
| High Speed Barrage (EX) | - | - | - | 25(4x7) |
Comments here
| Move | Motion | Gauge Needed | Damage | Blocked Damage | Stun Damage | Super Cancel |
| Dashing Head Attack (EX) | Hold B, F+PP | 40 | 160 | 10 | 9 | Yes |
Frame Data
| Move | Startup | Hit | Recovery | Blocked Advantage | Hit Advantage | Crouching Hit Advantage | Guard | Parry |
| Dashing Head Attack (EX) | 14 | 3 | 36 | -21 | Down | Down | HL | H |
Gauge Increase
| Move | Miss | Blocked | Hit | Parry (Gauge for opponent) |
| Dashing Head Attack (EX) | - | - | - | 4 |
Comments here
| Move | Motion | Gauge Needed | Damage | Blocked Damage | Stun Damage | Super Cancel |
| Dashing Leg Attack (EX) | Hold B, F+KK | 40 | 170(90+80) | 11 | 8(3+5) | Yes/No |
Frame Data
| Move | Startup | Hit | Recovery | Blocked Advantage | Hit Advantage | Crouching Hit Advantage | Guard | Parry |
| Dashing Leg Attack (EX) | 26 | 2 | 34 | -18 | Down | Down | L | L/H |
Gauge Increase
| Move | Miss | Blocked | Hit | Parry (Gauge for opponent) |
| Dashing Leg Attack (EX) | - | - | - | 8(4+4) |
Comments here
Super Arts
| Super Art | Super Art Name | Super Art Stock | Motion | Damage | Blocked Damage | Stun Damage | Damage/Gauge |
| I | Critical Combo Attack | 2 bars (96 each bar) | QCF QCF+P | 380* | 70 | 12** | 3,95(x2) |
| * 75(x3)+70+130 Damage is when all hits connect. |
| ** 3(x3)+3+3 Stun Damage is when all hits connect. |
Frame Data
| Startup | Hit | Recovery | Blocked Advantage | Hit Advantage | Crouching Hit Advantage | Guard | Parry |
| 6 | 3 | 31 | -19 | Down | Down | HL/HL/HL/L/HL | H/H/H/L/H |
Comments here
| Super Art | Super Art Name | Super Art Stock | Motion | Damage | Blocked Damage | Stun Damage | Damage/Gauge |
| II | Deadly Double Combination | 1 bar (120) | QCF QCF+P | 480* | 38 | 20** | 4 |
| * 150+330 Damage is when all hits connect. |
| ** 5+17 Stun Damage is when all hits connect. |
Frame Data
| Startup | Hit | Recovery | Blocked Advantage | Hit Advantage | Crouching Hit Advantage | Guard | Parry |
| 2 | 1 | 38 | -25 | Down | Down | HL/HL | H/H |
Comments here
| Super Art | Super Art Name | Super Art Stock | Motion | Damage | Blocked Damage | Stun Damage | Throw Range | Damage/Gauge |
| III | Total Destruction (Activation) | 1 bar (112) | QCF QCF+P | - | - | - | - | - |
| - | Total Destruction (Punch) | - | (After activation) QCF+P | 350 | 44 | 25 | - | 3,12 |
| - | Total Destruction (Grab) | - | (After activation) QCF+K | 470 | - | 18 | 56 | 4,19 |
Frame Data
| Move | Startup | Hit | Recovery | Blocked Advantage | Hit Advantage | Crouching Hit Advantage | Guard | Parry |
| Total Destruction (Activation) | 19 | - | - | - | - | - | - | - |
| Total Destruction (Punch) | 12 | 1 | 39 | -17 | Down | Down | HL | HL |
| Total Destruction (Grab) | 6 | 3 | 59 | - | Down | Down | Impossible | Impossible |
Comments here
Strategies
The best way to learn Q is to watch the tutorial video called Clawstrophobia. It is available on ComboVideos.com.
Taunt
Benefits
Taunting gives Q great benefits. While he normally takes the second-least damage in the game among playable characters, three taunts give him about 40% damage off what he usually takes and the gameâs best defense. You only get bonuses for the first three taunts, and the bonuses only last until the end of that round, so to get full benefits you need to taunt three times early each round. Trading a bit of health for a taunt actually lets you take more total hits without dying than if you hadnât taunted and still had full health; in fact, if you lose a third of your health bar with three taunts, you still have more total damage-taking power than if you had a full health bar and no taunts. That said, you should obviously try to minimize the damage you take when taunting.
Choosing when and where to taunt
When deciding when and where to taunt, take into account not only your health bar but also your positioning and other opportunities and only taunt if it gives you an advantage overall. For example, taunting in Kenâs face isnât worth it, but if youâre just gonna get hit by a full screen fireball or if youâre up against a meter-less Chun, fine, do it. For another example, if you land ex dash punch to neutral standing roundhouse about 2/3 of the way to one side of the screen, consider that while you could taunt after, leaving you across the screen from your cornered opponent, you could also do a strong or fierce dash punch to get better positioning. Taunting is not always your most advantageous option.
Setups
There are lots of setups for the taunts. In order to find space and time to taunt, you generally have to be a proactive turtle, if that makes sense. You need to either force your opponent away from you by attacking or dictating the pace of the game, or you need to force him to be complicit in being far away from you through conditioning him to let you do so. The most preferable ways to taunt are, obviously, the unpunishable ones. You get one unpunishable taunt after an antiair dash punch or slaps, after any c&db combo that ends in a knockdown, after SAI, and after SAII if you do a follow-up knockdown attack, and you get two unpunishable taunts after SAII if you donât do a follow-up attack. There are also ways of setting up taunts that guarantee a taunt but donât guarantee that you wonât be punished. Doing short c&db to fierce slaps or close antiair fierce slaps guarantees two taunts, but every character except Hugo can punish the second one, although most characters can only do it if they have a super bar or ex meter ready. Air-to-air jumping fierce, ex slaps, and just being really far away will get you a taunt against characters who canât hurt you fast from a distance, although this can always be punished by half the cast when they have super or ex meter ready. Back + roundhouse canceled into a taunt guarantees a taunt, but itâs completely unsafe and you will get punished for it. Doing a back/toward throw gives you enough time to taunt against certain characters, but itâs also totally punishable. Another way to do it is to take advantage of the opponentâs style of play. If heâs a turtle, use your taunts. This is good because you get a taunt but also because the threat of you taunting and getting magical-level defense is enough to make the opponent not want to turtle, and thatâs good because Q has a hard time dealing with turtles. You can also condition the opponent to let you taunt by doing something a few times in a row to make him expect one thing and then taunt when he expects it again; for example, do something to make him move backward or attack a few times, and then when he expects you to do it again, use that rhythm to taunt, or do a dash punch on his wakeup after SAI to get him used to blocking, parrying, or attacking on wakeup, and then do two taunts after SAI instead when heâs not expecting it.
Combos
Capture and Deadly Blow Combos
All information in this section is annotated from Clawstrophobia tutorial video and placed here for ease of memorization.
General Capture and Deadly Blow Combos
- HK C&DB -> MP Dashing Punch
- HK C&DB -> EX Dashing Punch -> HK
- LK C&DB -> HP Slaps
- HK C&DB -> LP Overhead Dashing Punch -> LP Dashing Punch X SAII
Character Specific Combos
Ibuki, Oro, Remy & Twins
- HK C&DB -> EX Dashing Punch -> HK (requires unusual timing compared to everyone else)
- MK C&DB -> EX Dashing Punch -> HK (easier variation of above)
Character Specific Corner Combos
Ibuki, Remy & Twins in corner
- HK C&DB -> HP Dashing Punch -> HP
Alex, Oro, Makoto & Q in corner
- HK C&DB -> MP Dashing Punch -> HP
Everyone else in corner
- HK C&DB -> LP Dashing Punch -> HP
External Links
| UltraDavid's How-To Q Thread
