GolcarJack (talk | contribs) (→Throws) |
MaximumElbow (talk | contribs) m (→Vs. E. Honda:) |
||
| Line 990: | Line 990: | ||
====Vs. E. Honda:==== | ====Vs. E. Honda:==== | ||
*8.5 - 1.5 | *8.5 - 1.5 | ||
In a nutshell: zone Honda to death. Shut down his options, force him to take big risks, and punish him for doing so. If you don't, he gets in, and you die. | |||
===== Basic tech ===== | |||
*Throw fireballs when you think he won't buttslam. | |||
*If you do think Honda will buttslam, hit him with LK upkicks. | |||
**Why LK upkicks? Because it's active and invulnerable for much longer than the MK or HK versions, so it's a safe bet if you're unsure which version of buttslam Honda will do. | |||
**Try to avoid MK upkicks unless the Honda is a scrub who's jumping in from a really vulnerable range to you. Don't get greedy for damage, you already dictate the flow of the match solidly enough. | |||
*Jump LP beats headbutt clean. Make good use of it. This move alone is the reason many people counterpick Honda with DJ. | |||
*If you get a knockdown, don't go for the cross-up, as Honda can simply reversal buttslam to get out of your setup. Instead, safe jump him with jump LP. | |||
===== Advanced tech ===== | |||
*If Honda jumps at the absolute closest range from which LK upkicks will whiff, his jump-in becomes a pretty scary 50/50 mixup (i.e. guess wrong and you die): | |||
**Option 1: | |||
***Honda presses a button, and his hurtbox extends. | |||
***Beats or trades with slide, but loses to LK upkicks. | |||
**Option 2: | |||
***Honda doesn't press a button. | |||
***Beats LK upkicks (by causing it to whiff), but loses slide. | |||
Huge props to Thelo for teaching me about this. | |||
--[[User:MaximumElbow|MaximumElbow]] ([[User talk:MaximumElbow|talk]]) 08:44, 30 October 2018 (MSK) | |||
E. Honda is an easy match for DJ; his best in the game. Just shoot out those FBs. The fatness of both Honda's ass and DJ's max-outs works in favor of DJ. For anti-air, his slide works wonders. Use it against his buttdrops too. Jump RH also works when Honda is on his way up way up. | E. Honda is an easy match for DJ; his best in the game. Just shoot out those FBs. The fatness of both Honda's ass and DJ's max-outs works in favor of DJ. For anti-air, his slide works wonders. Use it against his buttdrops too. Jump RH also works when Honda is on his way up way up. | ||
Revision as of 01:44, 30 October 2018
Introduction
Dee Jay is, and always has been, really, secretly very good in Super Turbo. He has very few seriously disadvantageous matchups and has many that are in his favor. His mixup and pressure games are strong, his zoning pressure is excellent against most characters, and he's overall well-rounded. He's a very dangerous character who has a lot going for him, offensively and defensively. Not to mention he has tons of combos!
--Murderbydeath 01:34, 30 November 2009 (UTC)
Competitive Overview
Strengths & Weaknesses
New & Old Versions Comparison
To select O.Dee Jay, choose Dee Jay and then press ↓ ↓ ↑ ↑ Jab/Fierce, pressing Short simultaneously with the punch button for the alternate color.
Here is the list of differences:
- Obvious stuff: O.Dee Jay can not tech throws, does not have the Jackknife Maximum (upkicks) and Super;
- O.Dee Jay has a slower pre-jump animation by 2 frames;
- O.Dee Jay has some differences in some of his normals:
- Crouching Jab has better priority downward;
- Crouching Strong can be special canceled;
- Far Standing Short has better priority;
- Far Standing Forward second hit has better priority;
- Close Standing Roundhouse has a much fatter hitbox but it has a little less vertical priority as a anti air;
- Diagonal Jumping Strong animates like N.Dee Jay's Diagonal Jumping Fierce with a fatter hitbox but with worse air to ground priority, it also does less stun;
- Diagonal Jumping Fierce animates like N.Dee Jay's Diagonal Jumping Strong, it also does more stun;
- Diagonal Jumping Forward has better air to air priority but significantly worse crossup properties;
- Neutral Jumping Roundhouse has a fatter hitbox but worse priority;
- Diagonal Jumping Roundhouse becomes active 1 frame later, but has an additional 4 frame hitbox while his leg is pointed upward, so it has more active frames;
- O.Dee Jay's Max Outs / Air Slashers have a 3 frame worse recovery, this is bad;
- O.Dee Jay's Rolling Sobats do more stun on the first hit;
- O.Dee Jay's Machine Gun Upper does less damage overall (i.e. the second hit does a lot less damage, and the third uses a lesser random damage table), but has anti aerial properties in its startup, and lacks a hurtbox at his center which allows him to dodge some faster or meaty fireballs;
O.Dee Jay is a waste of time... his go-to crossup and anti air moves are much worse, and he does not receive anything back... Only an MGU that can evade meaty projectiles... And he even has worse Max Outs... Not worthy.
Color Options
| Jab | Strong | Fierce | Start | Old |
 |
 |
 |
 |

|
 |
 |
 |
 |

|
| Short | Forward | Roundhouse | Hold | Old Alternative |
--Born2SPD
Move Analysis
Disclaimer: To better understand the diagrams, read this.
Normal Moves
Ground Normals
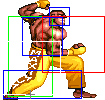
- Close Standing Jab: (Base max activation range: 42)
| Damage | 4[0] |  |
 |

|
| Stun | 0~5 | |||
| Stun Timer | 40 | |||
| Chain Cancel | Yes | |||
| Special Cancel | Yes | |||
| Super Cancel | Yes | |||
| Frame Advantage | +8 | |||
| Frame Count | 3 | 4 | 1 | |
| Simplified | 1 + 3 | 4 | 1 | |
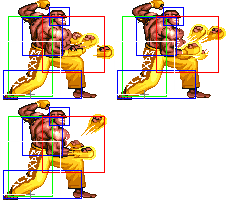
Decent for pressure sometimes as it can be rapid fired, and has only 1 frame of recovery, making it quite safe.
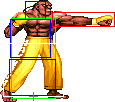
- Far Standing Jab:
| Damage | 4[0] |  |
 |

|
| Stun | 0~5 | |||
| Stun Timer | 40 | |||
| Chain Cancel | Yes | |||
| Special Cancel | Yes | |||
| Super Cancel | Yes | |||
| Frame Advantage | +5 | |||
| Frame Count | 4 | 4 | 4 | |
| Simplified | 1 + 4 | 4 | 4 | |
Can be useful in some cases to beat moves by mashing it, such as Honda headbutts, Blanka balls, scissor kicks from dictator etc.
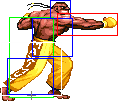
- Crouching Jab:
| Damage | 4[0] |  |
 |

|
| Stun | 0~5 | |||
| Stun Timer | 40 | |||
| Chain Cancel | Yes | |||
| Special Cancel | Yes | |||
| Super Cancel | Yes | |||
| Frame Advantage | +9 | |||
| Frame Count | 2 | 3 | 1 | |
| Simplified | 1 + 2 | 3 | 1 | |
Has very very good recovery, allowing for easy combos. Also good to mash for stopping advancing attacks like Honda headbutt and Blanka ball.
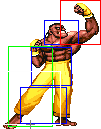
- Close/Far Standing Strong:
| Damage | 22[0] |  |
 |
 |

|
| Stun | 5~11 | ||||
| Stun Timer | 60 | ||||
| Chain Cancel | No | ||||
| Special Cancel | Yes / No | ||||
| Super Cancel | Yes / No | ||||
| Frame Advantage | +9 / +12 | ||||
| Frame Count | 3 | 3 | 5 | 1 | |
| Simplified | 1 + 3 | 8 | 1 | ||
Nice walking anti-air. Especially considering you don't have to worry about it coming out as a close or far normal.
- Crouching Strong:
| Damage | 22[0] |  |
 |
 |

|
| Stun | 5~11 | ||||
| Stun Timer | 60 | ||||
| Chain Cancel | No | ||||
| Special Cancel | No | ||||
| Super Cancel | Yes | ||||
| Frame Advantage | +8 | ||||
| Frame Count | 2 | 3 | 6 | 4 | |
| Simplified | 1 + 5 | 6 | 4 | ||
Very nice hitbox which makes it good to stick out and catch limbs with.
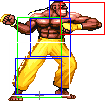
- Close Standing Fierce: (Base max activation range: 40)
| Damage | 28[1] + 4[1] |  |
 |
 |
 |
 |

|
| Stun | 10~16 + 1~7 | ||||||
| Stun Timer | 80 + 70 | ||||||
| Chain Cancel | No | ||||||
| Special Cancel | No | ||||||
| Super Cancel | No | ||||||
| Frame Advantage | +6 / +12(+11) | ||||||
| Frame Count | 3 | 3 | 4 | 2 | 5 | 5 | |
| Simplified | 1 + 6 | 4 | 2 | 5 | 5 | ||
Usually the first hit will combo into the second. Does decent damage and dizzy if both hits connect, but in general this move wants to be avoided due to how slow it is, and DJ has better ways of dealing damage.
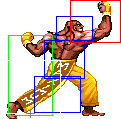
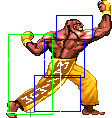
- Far Standing Fierce:
| Damage | 28[1] |  |
 |
 |
 |
 |
 |
 |

|
| Stun | 10~16 | ||||||||
| Stun Timer | 80 | ||||||||
| Chain Cancel | No | ||||||||
| Special Cancel | No | ||||||||
| Super Cancel | No | ||||||||
| Frame Advantage | +5 / +9 | ||||||||
| Frame Count | 2 | 2 | 2 | 4 | 5 | 3 | 4 | 1 | |
| Simplified | 1 + 6 | 9 | 8 | ||||||
This uses the same animation as a max-out fireball, so it doubles as a fake fireball. Very useful.
- Crouching Fierce:
| Damage | 28[1] |  |
 |
 |
 |

|
| Stun | 10~16 | |||||
| Stun Timer | 80 | |||||
| Chain Cancel | No | |||||
| Special Cancel | Yes / No | |||||
| Super Cancel | Yes / No | |||||
| Frame Advantage | +4 / +7 | |||||
| Frame Count | 2 | 2 | 3 | 9 | 6 | |
| Simplified | 1 + 4 | 12 | 6 | |||
Nice move to halt certain advancing moves like Balrog's low rush. Some players like to use this move to cancel into Machine Gun Upper.
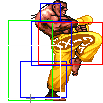
- Close Standing Short: (Base max activation range: 24)
| Damage | 4[0] |  |
 |

|
| Stun | 0~5 | |||
| Stun Timer | 40 | |||
| Chain Cancel | Yes | |||
| Special Cancel | Yes | |||
| Super Cancel | Yes | |||
| Frame Advantage | +8 | |||
| Frame Count | 3 | 4 | 1 | |
| Simplified | 1 + 3 | 4 | 1 | |
Decent tick, cancels into itself and cr lk for mixups/combos. Good move as a meaty since it has only 1 frame of recovery.
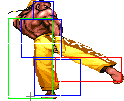
- Far Standing Short:
| Damage | 4[0] |  |
 |

|
| Stun | 0~5 | |||
| Stun Timer | 40 | |||
| Chain Cancel | Yes | |||
| Special Cancel | Yes | |||
| Super Cancel | Yes | |||
| Frame Advantage | +6 | |||
| Frame Count | 4 | 4 | 3 | |
| Simplified | 1 + 4 | 4 | 3 | |
This move usually has to be blocked low, good for ending combos that include crouching short, and ok for ticks.
- Crouching Short:
| Damage | 4[0] |  |
 |

|
| Stun | 0~5 | |||
| Stun Timer | 40 | |||
| Chain Cancel | Yes | |||
| Special Cancel | Yes | |||
| Super Cancel | Yes | |||
| Frame Advantage | +4 | |||
| Frame Count | 4 | 4 | 5 | |
| Simplified | 1 + 4 | 4 | 5 | |
Decent range and priority, but crouch strong and forward are usually better for counters. This is a good move to use after a crossup vs opponents mashing throw/reversal, hit them low and go into a combo.
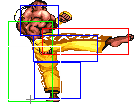
- Close Standing Forward: (Base max activation range: 16)
| Damage | 24[0] |  |
 |
 |
 |

|
| Stun | 5~11 | |||||
| Stun Timer | 60 | |||||
| Chain Cancel | No | |||||
| Special Cancel | No | |||||
| Super Cancel | No | |||||
| Frame Advantage | +11 | |||||
| Frame Count | 2 | 2 | 2 | 6 | 1 | |
| Simplified | 1 + 6 | 6 | 1 | |||
Very low recovery, which makes it a good move for surprise tick throws.
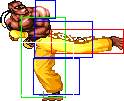
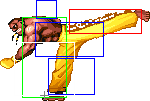
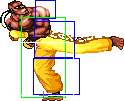
- Far Standing Forward:
| Damage | 24[0] + 4[0] |  |
 |
 |
 |
 |

|
| Stun | 5~11 + 2~8 | ||||||
| Stun Timer | 60 + 60 | ||||||
| Chain Cancel | No | ||||||
| Special Cancel | No | ||||||
| Super Cancel | No | ||||||
| Frame Advantage | +0 / +3(+2) | ||||||
| Frame Count | 3 | 3 | 3 | 8 | 3 | 4 | |
| Simplified | 1 + 6 | 3 | 8 | 7 | |||
Not very useful, the second part makes for an ok anti air in some matchups, but not only do you need time to get it out, and correct spacing. But DJ usually has much better options.
- Crouching Forward:
| Damage | 22[0] |  |
 |
 |
 |

|
| Stun | 5~11 | |||||
| Stun Timer | 130 | |||||
| Chain Cancel | No | |||||
| Special Cancel | No | |||||
| Super Cancel | No | |||||
| Frame Advantage | +6 | |||||
| Frame Count | 3 | 3 | 6 | 3 | 3 | |
| Simplified | 1 + 6 | 6 | 6 | |||
One of the rare non-Roundhouse sweeps. Excellent hitbox. Use this in instances where Deejay's sweep might trade or lose outright. It makes for an excellent anti-air sweep and decent meaty attack.
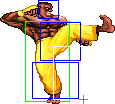
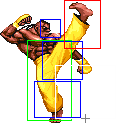
- Close Standing Roundhouse: (Base max activation range: 8)
| Damage | 30[1] |  |
 |
 |
 |
 |

|
| Stun | 10~16 / 1~7 | ||||||
| Stun Timer | 80 / 70 | ||||||
| Chain Cancel | No | ||||||
| Special Cancel | Yes / No | ||||||
| Super Cancel | Yes / No | ||||||
| Frame Advantage | +3 / +9 | ||||||
| Frame Count | 3 | 4 | 2 | 6 | 4 | 3 | |
| Simplified | 1 + 3 | 4 | 2 | 6 | 7 | ||
The strict activation range makes this move difficult to utilize. Quite fast to come out, if they are right above you, and you have time, this can be decent.
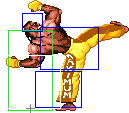
- Far Standing Roundhouse:
| Damage | 30[1] |  |
 |
 |
 |
 |
 |

|
| Stun | 10~16 | |||||||
| Stun Timer | 80 | |||||||
| Chain Cancel | No | |||||||
| Special Cancel | No | |||||||
| Super Cancel | No | |||||||
| Frame Advantage | +4 | |||||||
| Frame Count | 3 | 3 | 3 | 5 | 4 | 4 | 5 | |
| Simplified | 1 + 9 | 5 | 13 | |||||
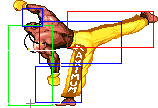
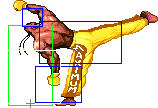
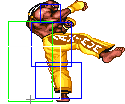
Excellent poke. Hit's mid against most of the cast so you can use it to bludgeon people whether they are crouching or not.
- Crouching Roundhouse:
| Damage | 30[1] |  |
 |
 |
 |

|
| Stun | 5~11 / 10~16 | |||||
| Stun Timer | 130 / 80 | |||||
| Chain Cancel | No | |||||
| Special Cancel | No | |||||
| Super Cancel | No | |||||
| Frame Advantage | +1 / +5 | |||||
| Frame Count | 4 | 4 | 4 | 2 | 15 | |
| Simplified | 1 + 8 | 6 | 15 | |||
Deejay's slide sweep. Probably the worst slide sweep in the game but it still has its uses. Notice how the last active hitbox angles up vertically.
Aerial Normals
- Neutral/Diagonal Jumping Jab:
| Damage | 12[0] |  |
|
| Stun | 1~7(-2) | ||
| Stun Timer | 40 | ||
| Frame Count | 2 | ∞ | |
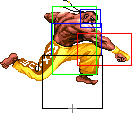
Big fat hitbox. Some characters (like Honda) can't do much of anything against it. Also useful to trade or beat other characters who have strong aerials like Chun-Li.
- Neutral Jumping Strong:
| Damage | 22[0] |  |
 |
 |
 |
 |

|
| Stun | 5~11 | ||||||
| Stun Timer | 50(+10) | ||||||
| Frame Count | 3 | 4 | 14 | 5 | 4 | ∞ | |
| Simplified | 3 | 18 | ∞ | ||||
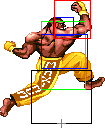
This, and diagonal jump strong, are good for dodging fireballs, as it removes the lower part of DJ's hurtbox.
- Diagonal Jumping Strong:
| Damage | 22[0] |  |
 |
 |
 |
 |
 |

|
| Stun | 11~17(-1) | |||||||
| Stun Timer | 60(+20) | |||||||
| Frame Count | 2 | 4 | 4 | 8 | 5 | 4 | ∞ | |
| Simplified | 6 | 12 | ∞ | |||||
This does an unusually high stun for a Strong move. That probably simply went unnoticed when Capcom switched Diagonal Strong with Diagonal Fierce when updating O.DeeJay into N.DeeJay...
- Neutral Jumping Fierce:
| Damage | 28[0] |  |
 |
 |
 |
 |
 |

|
| Stun | 11~17(-1) | |||||||
| Stun Timer | 60(+20) | |||||||
| Frame Count | 2 | 3 | 6 | 8 | 5 | 4 | ∞ | |
| Simplified | 5 | 6 | ∞ | |||||
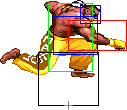
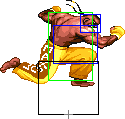
Similar to jumping strong, this is useful for neutral jumping over fireballs as it makes his hurtbox smaller vertically.
- Diagonal Jumping Fierce:
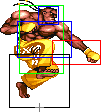
| Damage | 28[1] | 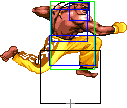 |
 |
 |
 |
 |

|
| Stun | 5~11 | ||||||
| Stun Timer | 50(+10) | ||||||
| Frame Count | 3 | 4 | 14 | 5 | 4 | ∞ | |
| Simplified | 7 | 14 | ∞ | ||||
This does an unusually low stun for a Fierce move. That probably simply went unnoticed when Capcom switched Diagonal Strong with Diagonal Fierce when updating O.DeeJay into N.DeeJay...
- Neutral Jumping Short:
| Damage | 20[0] |  |
|
| Stun | 1~7(-2) | ||
| Stun Timer | 40 | ||
| Frame Count | 2 | ∞ | |
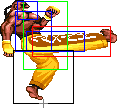
Stays active the whole jump, decent priority, jump jab is usually preferred though.
- Diagonal Jumping Short:
| Damage | 20[0] | 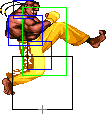 |

|
| Stun | 1~7(-2) | ||
| Stun Timer | 40 | ||
| Frame Count | 2 | ∞ | |
Not very good as a jump in, but ok for air to air in some cases. Can be used vs walldives for instance.
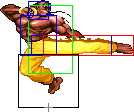
- Neutral Jumping Forward:
| Damage | 24[0] |  |
 |
 |
 |
 |
 |

|
| Stun | 5~11 | |||||||
| Stun Timer | 50(+10) | |||||||
| Frame Count | 2 | 4 | 14 | 5 | 5 | 4 | ∞ | |
| Simplified | 6 | 14 | ∞ | |||||
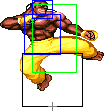
Has good forwards range, but otherwise this move is nothing special.
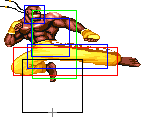
- Diagonal Jumping Forward:
| Damage | 24[0] |  |
 |
 |
 |
 |
 |
 |

|
| Stun | 5~11 | ||||||||
| Stun Timer | 50(+10) | ||||||||
| Frame Count | 2 | 4 | 14 | 5 | 4 | 4 | 4 | ∞ | |
| Simplified | 6 | 14 | ∞ | ||||||
Your go-to crossup. Absolutely integral to DeeJay's game. Lands easy enough with the exception of a stand-blocking Balrog.
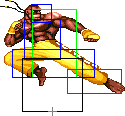
- Neutral Jumping Roundhouse:
| Damage | 28[1] |  |
 |
 |
 |
 |
 |

|
| Stun | 11~17(-1) | |||||||
| Stun Timer | 60(+20) | |||||||
| Frame Count | 3 | 4 | 10 | 6 | 5 | 4 | ∞ | |
| Simplified | 7 | 10 | ∞ | |||||
Can be decent as a defensive attack, to protect yourself from anti air sweeps etc.
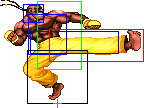
- Diagonal Jumping Roundhouse:
| Damage | 30[1] |  |
 |
 |
 |
 |
 |
 |

|
| Stun | 11~17(-1) | ||||||||
| Stun Timer | 60(+20) | ||||||||
| Frame Count | 1 | 2 | 2 | 8 | 4 | 4 | 4 | ∞ | |
| Simplified | 5 | 8 | ∞ | ||||||
Excellent horizontal hitbox. Similar to Guile's jumping RH. Allows you to stuff nearly anything air-to-air if you stick it out early enough.
Command Normals
- Knee Shot: (Jump diagonally, ↙/↓/↘ + Short)
| Damage | 12[0] |  |
 |

|
| Stun | 1~7(-2) | |||
| Stun Timer | 40 | |||
| Frame Count | 2 | 40 | ∞ | |
Can be used as an ambiguous crossup.
Throws
Dee Jay can throw using Strong, Fierce, Forward and Roundhouse. The direction of the joystick determines the direction the enemy gets thrown at. All his throws have the same range and do 32 points of damage (plus two more if behind in rounds).
- Normal Throws Throwboxes:
| Damage | 32 |  |
 |

| |
| Stun | 7~13 | ||||
| Stun Timer | 100 | ||||
| Range | (from axis) | 48 | |||
| (from throwable box) | 18 | ||||
- Funky Shout Throw: (←/→ + Strong/Fierce)
Seems to have better recovery than kick throw, might be preferred in situations where you want to stay close.
- Monkey Flip: (←/→ + Forward/Roundhouse)
They end up further away than punch throw, especially if not teched, this may be favoured if you want them away from you.
Special Moves
- Max Out / Air Slasher: (Charge ←, →, P)
Detailed Input: (Charge ← for at least 61f, [0~7f] → [0~10/9/7f] Jab/Strong/Fierce. It is needed to wait at least 1 frame after leaving the charge direction to enter with the P button)
- Startup:
 |
 |

| |
| Frame Count | 3 | 2 | 2 |
| Simplified | 7 | ||
- Active:
- Jab Version:
| Damage | 17[1] |  |
 |
 |
|
| Stun | 3~9 | ||||
| Stun Timer | 90 | ||||
| Super Meter | 4 | ||||
| Frame Count | 1 | 3 | 10 | 1... | |
| Simplified | 34 | ||||
- Strong Version:
| Damage | 18[1] |  |
 |
 |
|
| Stun | 3~9 | ||||
| Stun Timer | 90 | ||||
| Super Meter | 4 | ||||
| Frame Count | 1 | 2 | 9 | 1... | |
| Simplified | 34 | ||||
- Fierce Version:
| Damage | 20[1] |  |
 |
 |
|
| Stun | 3~9 | ||||
| Stun Timer | 90 | ||||
| Super Meter | 4 | ||||
| Frame Count | 1 | 1 | 6 | 1... | |
| Simplified | 34 | ||||
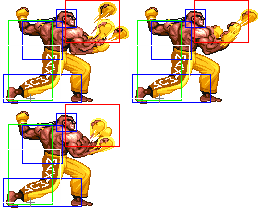
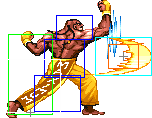
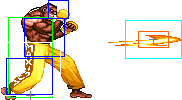
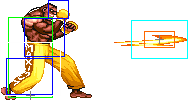
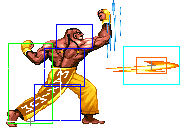
Dee Jay's Projectile. During the first active frames it has a quite fat hitbox, but some frames after it becomes slimmer (allowing Blanka to slide under it). Jab Version's hitbox stays bigger for 14 frames, Strong for 12 and Fierce for 8. Punch strength also determines the speed and damage. O.Dee Jay have 3 frames of additional recovery on this move.
- Double Rolling Sobat: (Charge ←, →, K)
Detailed Input: (Charge ← for at least 61f, [0~7f] → [0~10/9/7f] Short/Forward/Roundhouse. It is needed to wait at least 1 frame after leaving the charge direction to enter with the K button)
- Short Version:
| Damage | 30[2] / 28[2] |  |
 |
 |
 |
 |
 |

|
| Stun | 2~8 | |||||||
| Stun Timer | 90 | |||||||
| Frame Advantage | -14 / -10 | |||||||
| Super Meter | 8 | |||||||
| Frame Count | 4 | 7 | 3 | 1 | 3 | 2 | 4 | |
| Simplified | 14 | 10 | ||||||
 |
 |
 |
 |
 |
 |

| |
| Frame Count | 1 | 3 | 4 | 3 | 6 | 5 | 4 |
| Simplified | 26 | ||||||
- Forward/Roundhouse Versions:
 |
 |
 |
 |

| |
| Frame Count (Forward) | 1 | 1 | 4 | 4 | 3 |
| Simplified (Forward) | 13 | ||||
| Frame Count (Rh) | 1 | 1 | 4 | 4 | 3 |
| Simplified (Rh) | 13 | ||||
 |
 |
 |
 |
 |

| |
| Frame Count (Forward) | 2 | 3 | 1 | 9 | 7 | 9 |
| Simplified (Forward) | 15 | 16 | ||||
| Frame Count (Rh) | 2 | 3 | 1 | 9 | 9 | 9 |
| Simplified (Rh) | 15 | 18 | ||||
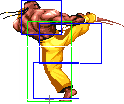
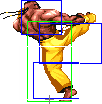
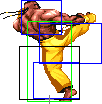
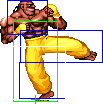
Short version hits once, Forward and Roundhouse versions hit twice. Long startup, which makes it easy to safejump. Forward and Roundhouse versions can actually be interrupted with a reversal in between hits (timing is tight and might not be possible in all situations). Mostly used as a combo ender. Forward/Roundhouse versions sometimes fail to connect the 2nd hit during combos, which prompts some players to use the short version exclusively. Less damage but never fails.
- Machine Gun Upper: (Charge ↓, ↑, P. Press P repeatedly)
Detailed Input: (Charge ↓ for 61f, [0~7f] ↑ [0~10/9/7/2f] Jab/Strong/Fierce/any P if you are at a jumpable state. It is needed to wait at least 1 frame after leaving the charge direction to enter with the P button. The mash part requires a P input every 2f? to combo)
- Full mashing:
- Without mashing:
This move is one of the strangest in the game. Proper technique is required to get the full four hits of the move to combo. Piano tap all three punches until you see the third hit connect, and then STOP.
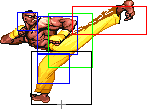
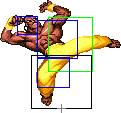
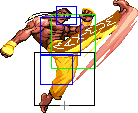
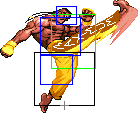
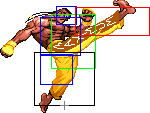
- Jackknife Maximum a.k.a. Up Kicks: (Charge ↓, ↑, K)
Detailed Input: (Charge ↓ for 61f, [0~7f] ↑ [0~10/9/7/2f] Short/Forward/Roundhouse/any K if you are at a jumpable state. It is needed to wait at least 1 frame after leaving the charge direction to enter with the K button)
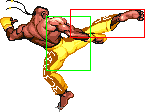
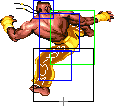
- Short Version:
| Damage | 28[2] |  |
 |
 |
 |
 |
 |
 |
 |

|
| Stun | 0~4 | |||||||||
| Stun Timer | 20 | |||||||||
| Super Meter | 9 | |||||||||
| Frame Count | 2 | 2 | 2 | 6 | 3 | 3 | 19 | 1 | 4 | |
| Simplified | 6 | 6 | 30 | |||||||
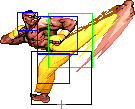
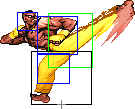
- Forward Version:
| Damage | 14[2] + 14[2] |  |
 |
 |
 |
 |
 |
 |
|
| Stun | 0~4 + 0~4 | ||||||||
| Stun Timer | 20 + 20 | ||||||||
| Super Meter | 9 | ||||||||
| Frame Count | 2 | 2 | 1 | 3 | 4 | 6 | 2 | 2 | |
| Simplified | 5 | 3 | 14 | ||||||
 |
 |
 |
 |
 |

| |
| Frame Count | 4 | 4 | 4 | 11 | 1 | 6 |
| Simplified | 4 | 26 | ||||
- Roundhouse Version:
| Damage | 12[2] + 12[2] + 12[2] |  |
 |
 |
 |
 |
 |
 |

|
| Stun | 0~4 + 0~4 + 0~4 | ||||||||
| Stun Timer | 20 + 20 + 20 | ||||||||
| Super Meter | 9 | ||||||||
| Frame Count | 2 | 1 | 1 | 2 | 2 | 2 | 2 | 2 | |
| Simplified | 4 | 2 | 8 | ||||||
 |
 |
 |
 |
 |
 |
| |
| Frame Count | 4 | 2 | 2 | 2 | 2 | 2 | 6 |
| Simplified | 4 | 10 | 6 | ||||
 |
 |
 |
 |

| |
| Frame Count | 4 | 4 | 13 | 1 | 7 |
| Simplified | 29 | ||||
Forward and Roundhouse versions are juggleable. Short version hits once, Forward version hits twice, Roundhouse version hits three times. Can juggle with super after for two more hits.
Super Move
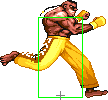
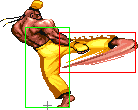
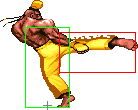
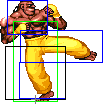
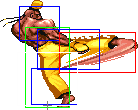
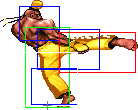
- Sobat Carnival: (Charge ←, → ← → K)
Detailed Input: (Charge ← for at least 60f, [0~6f] → [0~6f] ← [0~6f] → [0~12f] K)
| Damage | 20[2] * 4 |  |
 |
 |
 |
 |
 |
|
| Stun | 0~4 * 4 | |||||||
| Stun Timer | 20 * 4 | |||||||
| Frame Advantage | -2(-3) | |||||||
| Frame Count | 1 + [18] + 1 | 3 | 10 | 1 | 1 | 1 | 1 | |
| Simplified | 15 | 4 | ||||||
 |
 |
 |
 |

| |
| Frame Count | 1 | 1 | 4 | 7 | 2 |
| Simplified | 15 | ||||
 |
 |
 |
 |
 |

| |
| Frame Count | 1 | 1 | 2 | 1 | 1 | 2 |
| Simplified | 4 | 4... (13) | ||||
 |
 |
 |
 |
 |
 |
| |
| Frame Count | 3 | 3 | 3 | 1 | 1 | 1 | 1 |
| Simplified | ...9 (13) | 4 | |||||
 |
 |
 |
 |
 |
 |

| |
| Frame Count | 1 | 1 | 4 | 4 | 3 | 1 | 2 |
| Simplified | 16 | ||||||
 |
 |
 |

| |
| Frame Count | 1 | 9 | 9 | 7 |
| Simplified | 10 | 16 | ||
The Basics
Dee Jay's basic game is one of patience, zoning, and punishing when they try to get in. Keep them at a distance with max outs, and when they try to come at you, have an upkicks ready for their face. Then you go for a cross-up, and from there you have many, many options. The most important things to remember are that Dee Jay has great normals that beat most normals in the game, tons of invulnerability on short upkicks (if you're not confident in your timing of other versions), crossup mixup games will debilitate most opponents if they guess wrong even once, and overall patience.
--Murderbydeath 01:28, 30 November 2009 (UTC)
Advanced Strategy
In terms of "Advanced" strategy, Dee Jay has quite a few tricks up his sleeve, especially off of his crossup game. If your opponent blocks your crossup correctly, that is only the beginning of the guessing game, as you have many options after your j.forward. You can tick into throw off of 1 or 2 jabs, 1 jab 1 short, 1 short, or go for another crossup; you can even fake tick into another crossup. Dee Jay has infinite possibilities for mixup off of his crossup, and this is where his true strength lies, even though it can be very difficult to get in on him (low strong, low forward, standing strong, standing roundhouse, crouching fierce, upkicks, max out--all great at keeping your opponent at a distance). Make your opponent work to get in, and when he does, punish him for doing so, then mix him up until he has no idea what's coming next. A good meaty mixup is close standing forward, low forward. If timed properly it combos (it even combos non-meaty, but is more difficult). Next time, do meaty close standing forward -> tick throw. Next time, walk up standing short -> throw. Then walk up standing short, crossup forward into crossup mixup. The possibilities are endless.
--Murderbydeath 01:32, 30 November 2009 (UTC)
Combos
- Cross-up j.forward, c.jab, c.short xx MGU (all 4 hits, often dizzies, punishes throw mashers)
- Cross-up j.forward, c.fierce xx MGU (all 4 hits, punish combo)
- Cross-up j.forward, c.jab x2, s.strong xx RH sobat (second hit connects randomly; sometimes dizzies)
- Cross-up j.forward, c.short, close st.short, s.strong xx Max out
- Cross-up j.forward, c.jab x2 xx MGU (all 4 hits)
- Cross-up j.forward, c.jab x2, c.short xx max out (creates space)
- Cross-up j.forward, c.jab, c.fierce xx MGU (only works on standing opponents, HUGE damage)
- Cross-up j.forward, c.jab x2, c.short xx RH upkicks -> super (only works on standing opponents)
- Close s.forward, c.forward (great meaty combo, string into low RH to create space or a knockdown or whatever you want, really)
- j.RH, c.fierce, sobat
- j.RH, s.strong, sobat
- j.jab, c.jab, c.short xx max out
- Super, forward/RH upkicks (2 hits)
--Murderbydeath 00:29, 29 November 2009 (UTC)
Match-ups
Matchups classified with this diagram in mind. For the old characters I guessed the positions.
--Born2SPD
Serious Advantage Match-ups
Vs. Blanka:
- 7.5 - 2.5
This match is similar to the Honda match below. It's an easy match unless Blanka is able to cross you up with his godly j.short. Use your max-outs to keep him away; he won't be able to slide under easily like he would against Guile; he can still do it, but it isn't easy. His main option is to jump at you with his far reaching j.RH, which can be beat with DJ's slide. If you block a ball, s.RH will punish it.
Vs. Cammy:
- 8 - 2
Vs. E. Honda:
- 8.5 - 1.5
In a nutshell: zone Honda to death. Shut down his options, force him to take big risks, and punish him for doing so. If you don't, he gets in, and you die.
Basic tech
- Throw fireballs when you think he won't buttslam.
- If you do think Honda will buttslam, hit him with LK upkicks.
- Why LK upkicks? Because it's active and invulnerable for much longer than the MK or HK versions, so it's a safe bet if you're unsure which version of buttslam Honda will do.
- Try to avoid MK upkicks unless the Honda is a scrub who's jumping in from a really vulnerable range to you. Don't get greedy for damage, you already dictate the flow of the match solidly enough.
- Jump LP beats headbutt clean. Make good use of it. This move alone is the reason many people counterpick Honda with DJ.
- If you get a knockdown, don't go for the cross-up, as Honda can simply reversal buttslam to get out of your setup. Instead, safe jump him with jump LP.
Advanced tech
- If Honda jumps at the absolute closest range from which LK upkicks will whiff, his jump-in becomes a pretty scary 50/50 mixup (i.e. guess wrong and you die):
- Option 1:
- Honda presses a button, and his hurtbox extends.
- Beats or trades with slide, but loses to LK upkicks.
- Option 2:
- Honda doesn't press a button.
- Beats LK upkicks (by causing it to whiff), but loses slide.
- Option 1:
Huge props to Thelo for teaching me about this.
--MaximumElbow (talk) 08:44, 30 October 2018 (MSK)
E. Honda is an easy match for DJ; his best in the game. Just shoot out those FBs. The fatness of both Honda's ass and DJ's max-outs works in favor of DJ. For anti-air, his slide works wonders. Use it against his buttdrops too. Jump RH also works when Honda is on his way up way up.
Diagonal jump jab BEATS HIS HEADBUTT! Remember this. You can jump away to safety if he gets in too close. C.fierce also beats the headbutt.
Remember, although you have a major advantage, if he knocks you down in the corner, you are screwed, unless you can pull off a reversal after his tick -> oicho; however, you have to watch out, as many Hondas will mix it up with low short xx buttflop.
Vs. Fei Long:
- 7.5 - 2.5
Vs. T. Hawk:
- 7 - 3
Advantage Match-ups
Vs. M. Bison (dictator):
- 6.5 - 3.5
Vs. O. T. Hawk:
Fair Match-ups
Vs. Dee Jay (self):
Vs. Guile:
- 4.5 - 5.5
This is a good match for DJ; it's slightly in DJ's favor. DJ can counter a lot of Guile's main attacks: slides go under sonic booms, c.strong can beat his c.forward. Keep pressuring him up close using c.strongs, c.shorts and c.RH.
Vs. Ken:
- 5 - 5
See Ryu.
Vs. Sagat:
- 4.5 - 5.5
Vs. Zangief:
- 4.5 - 5.5
Two words: BE CAREFUL. This is a much harder match than it seems; it is very unstable. If he gets in, you are dead. If he stays out, he's dead. Simple enough, eh?
Keep him out with max-outs. Trip his lariats with your slide. If he jumps, use the many AA tools at your disposal. Not much too it, but don't get complacent! You normals do not have the reach of Guile, so the slides much be used wisely. Fire a FB into the lariat before it ends instead of using the slide when you see fit. c.strong can beat some of his low normals and c.fierce can beat his s.forward.
If he is able to get in on you, pray. DJ does not have a reliable reversal other than his super; he may have a sonic boom, but he sure as hell doesn't have a flashkick. He will tick you to death. A short sobat can beat his low normals. Use this to get you out of or avoid this bad situation.
Disadvantage Match-ups
Vs. Chun-Li:
- 3.5 - 6.5
Vs. O. Ken:
Vs. Vega (claw):
- 4 - 6
Serious Disadvantage Match-ups
Vs. Balrog (boxer):
- 3 - 7
Vs. Dhalsim
- 2 - 8
This is a tough match, but it is winnable. Use max-outs to trade with yoga fires. Stay at a distance and beat his limbs with C.strong and c.fierce. You can also try to jump over his fires and kick him with DJ's long reaching j.RH. If he tries to use his drills, s.strong can beat them. If he gets knocked down, you can go for a cross-up or safe jump jab. Dhalsim's only reversal, other than super, is his teleport, so his wakeup defense isn't that great.
Vs. Ryu
- 3 - 7
The shotos can give DJ some problems. You will need to be the aggressor in this match. You will need to use your Max-outs, using slides in between to gain ground. When in place, a j.RH over a FB will kick him right in the face. Make sure to time this. Once you’re in, trip him and then go for a cross-up; if you connect with your j.forward, you have several options (see combos). If not, you also have several options: jab x1, tick throw; jab x2, tick throw; jab, short, tick throw; whiff st.jab tick throw; st.short, cross-up j.forward; st.short, tick throw. This is Dee Jay's basic mixup, and it must be utilized to its full potential when capitalizing on getting in on Ryu. Also, c.strong will beat shoto c.forwards; in fact, it beats nearly all shoto low moves (sans low strong). If you get in a fireball trap, note that his short upkick can go through FIERCE fireballs.
Vs. O. Sagat
Short sobats and short upkicks are good for going over low tigers. After you get in, do what you would do against the shotos.
X-static (Jan 6, 2008)


