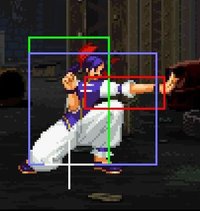
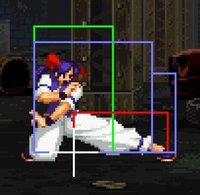
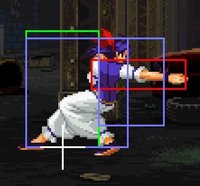
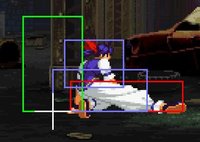
| Line 829: | Line 829: | ||
=Overall Strategy= | =Overall Strategy= | ||
Hotaru has good damage and is very well rounded, however she lacks | Hotaru has good damage and is very well rounded, however she lacks a bit in range, her offense is overall easy to block has low health/guard. | ||
Hotaru's main strategy is keep-away coupled with unpredictable frame-trap oriented rushdown. | |||
===Notable normals :=== | ===Notable normals :=== | ||
| Line 854: | Line 857: | ||
===Zonning with Hotaru :=== | ===Zonning with Hotaru :=== | ||
'''Anti-air :''' Cover the air with air-throw/air-jd, air normals or DP. | '''Anti-air :''' Cover the air with air-throw/air-jd, air normals or DP. | ||
Revision as of 06:19, 15 October 2016
Introduction
To come.
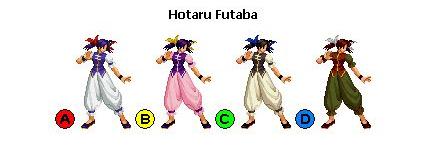
Character Colors
Gameplay Overview
To come.
Move List
Command Normal Moves
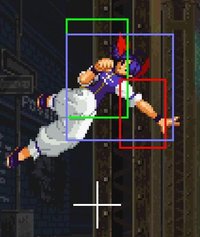
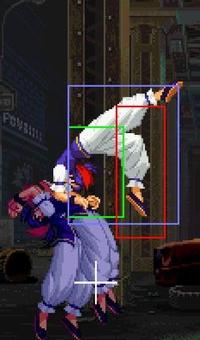
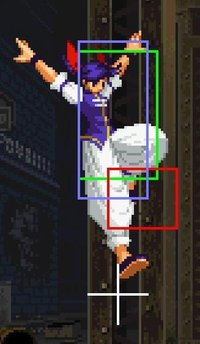
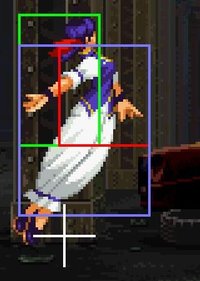
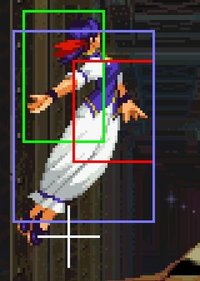
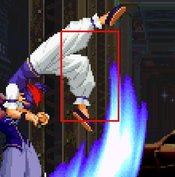
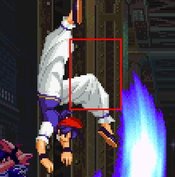
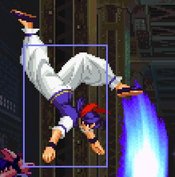
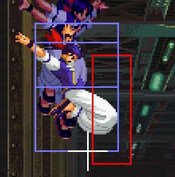
Kou-shuu Da (Needle Kick): Down+B in the air
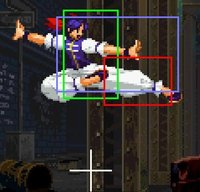
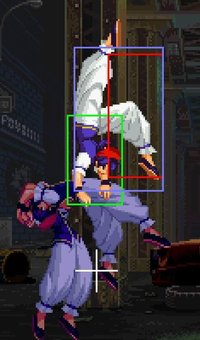
Cross-over: Press CD in the air
Special Command Moves
Frame Data
| Move | Startup | Guard Adv. | Hit Adv. | Guard Crush Value | Cancellation | Remarks |
| Near Standing A | Three | +5 | +5 | Four | Ream / ◯ | |
| Near Standing B | Four | +1 | +1 | Four | ◯ | |
| Near Standing C | Seven | -1 | -1 | Five | ◯ | |
| Near Standing D | Six | -8 | -8 | Five | ◯ | |
| Far Standing A | Five | +2 | +2 | Four | Ream / ◯ | |
| Far Standing B | Six | +2 | +2 | Four | ◯ | The second half has 3F invincible |
| Far Standing C | Nine | +1 | +1 | Five | △ | |
| Far Standing D | Eleven | -2 | -2 | Five | × | |
| Crouched A | Four | +2 | +2 | Four | Ream / ◯ | |
| Crouched B | Four | +2 | +2 | Four | Ream / × | |
| Crouched C | Five | -Five | -Five | Five | ◯ | |
| Crouched D | Seven | -14 | down | Five | × | |
| Upper avoid attack | Eight | +3 | -3 | Six | ▽ | 1 ~ 6F upper body invincible |
| Lower avoid attack | twenty three | +5 | -1 | Six | × | |
| Jump A | Four | Four | ◯ | |||
| Jump B | Three | Four | ◯ | hop : startup 5F | ||
| Jump C | Four | Five | ◯ | hop : startup 6F | ||
| Jump D | Five | Five | ◯ | |||
| High kick-punch | Five | Nine | × |
| Move | Startup | Guard Adv. | Hit Adv. | Guard Crush Value | Remarks |
| Hatsukitenohira (Fireball) | Ten | -Five | -Five | Weak 7, strength 8 | |
| Weak Wren 撃蹴 (Dive) | Ten | -8 Or more | down | 3, 4 | |
| Strong Wren 撃蹴 (Dive) | 13 | -9 More | down | 4,4 | |
| Weak-turned-Sho (dp) | Two | -12 | down | 2,2 | 1 ~ 4F invincible |
| Strong-turned-Sho (dp) | Two | -31 | down | 3 × 5,2 | 1 ~ 4F invincible |
| Weak-SotenohiraSusumu | Ten | -11 | down | 1 × 5 | |
| Strength-SotenohiraSusumu | Eighteen | -1 | down | 2 × 5 | |
| Weak-Toraoashi (reflect) | 13 | -19 (+12) | down | Weak 7, | 8 ~ 13F missile reflection |
| Strength-Toraoashi (reflect) | 13 | -19 (+12) | down | Strength 8 | 8 ~ 17F missile reflection |
| Oblique thigh (command throw) | Nine | down | |||
| Turning swallow (TOP) | Nine | -twenty four | down | twenty five | |
| Sotenohiraten lotus A | Six | -51 | down | 1 × 17 | 1 ~ 8F invincible |
| Sotenohiraten lotus C | Six | -14 | down | 2 × 15,5 | 1 ~ 10F invincible |
| Tensho Ranhime B | 0 | -33 | down | 3 × 3,0 | 1 ~ 2F invincible |
| Tensho Ranhime D | 0 | -32 | down | 5 × 4 | 1F invincible |
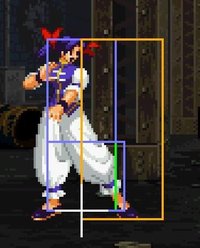
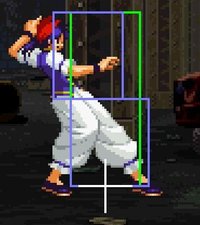
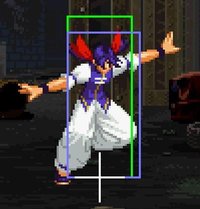
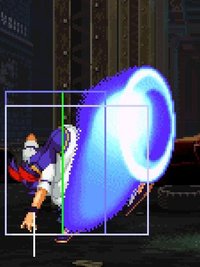
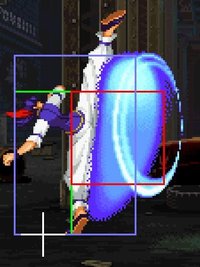
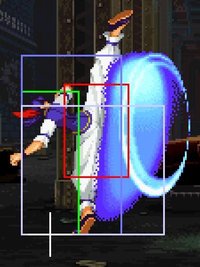
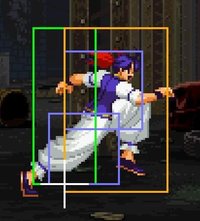
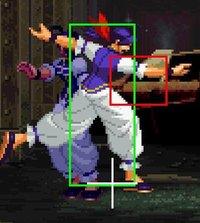
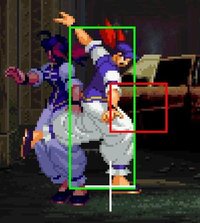
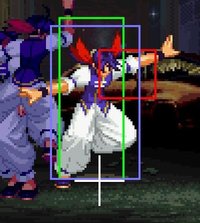
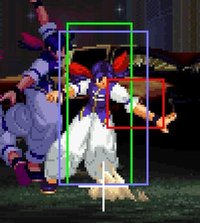
Hit Boxes and Frame Data
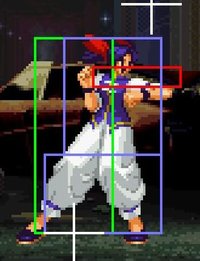
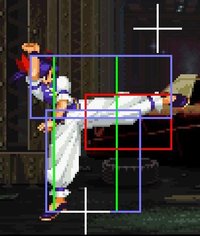
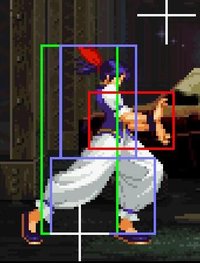
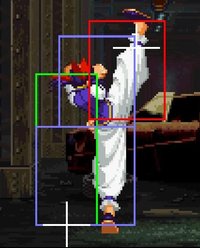
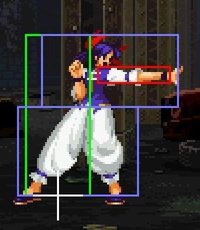
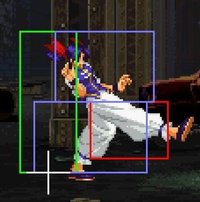
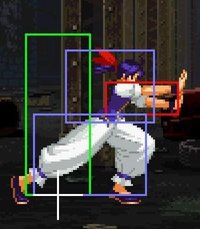
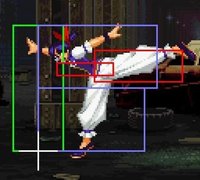
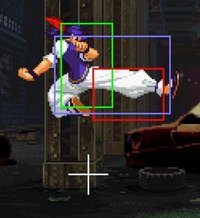
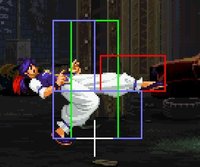
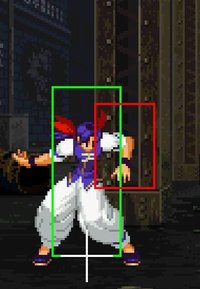
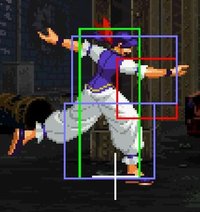
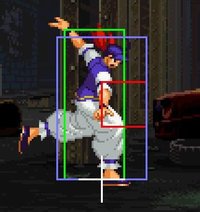
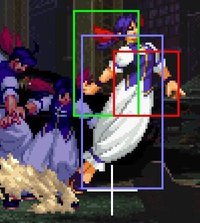
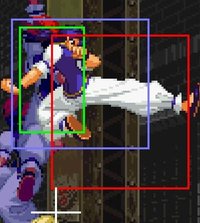
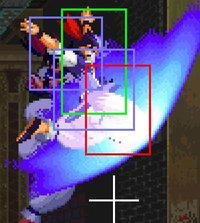
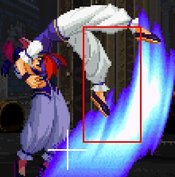
Legend:
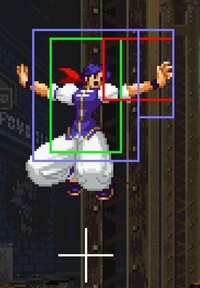
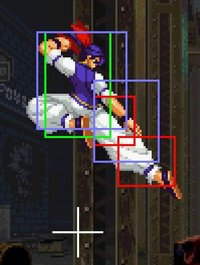
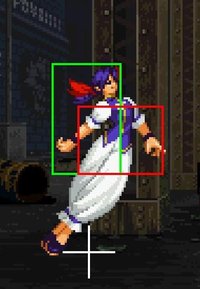
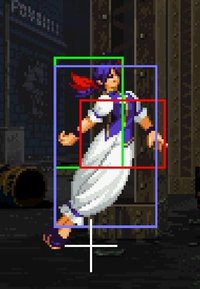
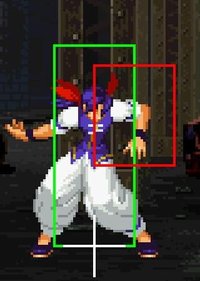
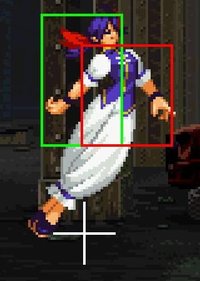
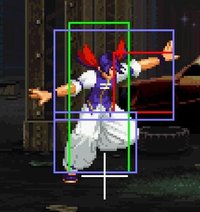
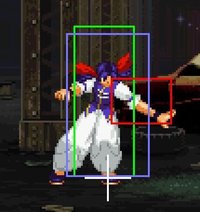
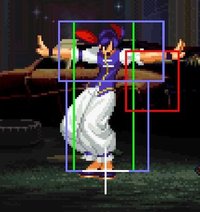
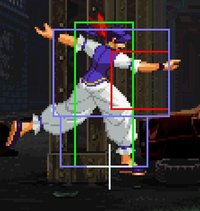
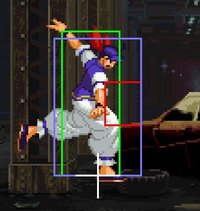
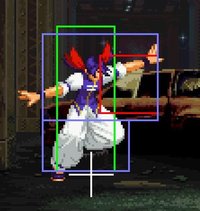
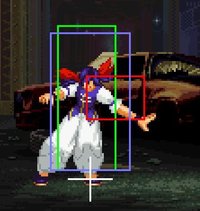
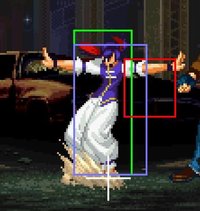
Hit Box: Area that will hit the opponent
Hurt Box: Area where you can get hit. A move is invincible if the Hurt Box is absent.
Throw Box/Range: Active throw frames and range. Your opponent will be thrown in this field if not in block or hit stun.
Projectile Box: Hit box on a projectile attack
Guard/Counter Box: The Guard Box or Counter Box. This appears when blocking or using a counter move.
Push Box: Has no bearing on hurt/hit boxes. Just allows characters to not pass through each other.
Command = the input for the attack.
Start Up = How many start up frames a move/attack has.
Hit = When the attack hits.
Block = When the attack is blocked.
+ signifies how many advantage frames the attacker has.
- signifies how many disadvantage frames the attacker has.
KD means the attack will knock the opponent down.
Grab, Feints, Throw...
Jump
| Command | Total Frames |
| Normal |
35 |
Grab
| Command | Total Frames |
| Close |
9 |
Forward Feint
| Command | Total Frames |
| 10 |
Down Feint
| Command | Total Frames |
| 14 |
Close Standing Attacks
cl.A
| Command | Start Up | Hit | Guard |
| Close |
3 | +5 | +5 |
Hotaru's fastest close normal, with good advantage on block.
cl.B
| Command | Start Up | Hit | Guard |
| Close |
4 | +1 | +1 |
cl.C
| Command | Start Up | Hit | Guard |
| Close |
5 | -5 | -5 |
In case the Throw fails, a 'cl. C' will come out instead. On hit/guard it can combo (via Cancel). However clC doesn't have vertical hitbox, a neutral jump to escape the tick throw will leave Hotaru vulnerable.
cl.D
| Command | Start Up | Hit | Guard |
| Close |
6 | -8 | -8 |
Hotaru's close D has a decent vertical hitbox, used as a frametrap it can prevent people from jumping out. Feint cancel it to avoid punishes.
Far Standing Attack
far A
| Command | Start Up | Hit | Guard |
| Far |
5 | +2 | +2 |
Unlike most characters, Hotaru's far A is quite weak, it extends her hurtbox a lot. Prefer far B to poke on the ground.
far B
| Command | Start Up | Hit | Guard |
| Far |
6 | +2 | +2 |
Her best ground poke, with decent speed/distance/hitbox. If it whiffs be ready to anti-air. Cancel it into fireball for a frametrap. Or forward feint cancel it to start an offense once they respect the fireball frametrap.
far C
| Command | Start Up | Hit | Guard |
| Far |
9 | +1 | +1 |
far D
| Command | Start Up | Hit | Guard |
| Far |
11 | -2 | -2 |
Hotaru's far D is too slow to be used efficiently in the neutral game. Since it has a good range, it can be used as a frametrap, for example with 2C xx 2AC(feint) > far D; but the risk/reward is not really worth it.
Crouching Attacks
cr A
| Command | Start Up | Hit | Guard |
| 4 | +2 | +2 |
When used as meaty it prevents jumps as well as low profile attempts with 2AB
cr B
| Command | Start Up | Hit | Guard |
| 4 | +2 | +2 |
Hotaru is known for having no decent BNB starting with lows. Use this to remind your opponent that he has to block low, even if it doesn't deal much. Follow up with a frametrap for example. It can be combo'ed from if it hits meaty enough, with 2B(meaty)>2A xx reflect break fireball ... Keep in mind that, in MOTW, a meaty 2B can be escaped via wake-up jump.
cr C
| Command | Start Up | Hit | Guard |
| 5 | -5 | -5 |
Amazing startup and range, allowing certain punishes from ranges other characters have trouble with.
far B xx 2AC > 2C is a frametrap that prevents jumping.
cr D
| Command | Start Up | Hit | Guard |
| 7 | KD | -14 |
Jumping Attacks
j.A
| Command | Start Up | Hit | Guard |
| Jumping |
4 | ? | ? |
Has long active frames, can target combo with jA>B or jA>C(whiff on crouchers).
j.B
| Command | Start Up | Hit | Guard |
| Jumping |
3 | ? | ? |
Has the best horizontal reach out of all her air moves, however it doesn't stay active for long.
j.C
| Command | Start Up | Hit | Guard |
| Jumping |
4 | ? | ? |
This is what comes out if you miss your air throw. It whiffs on crouching opponent.
j.D
| Command | Start Up | Hit | Guard |
| Jumping |
5 | ? | ? |
When used deep enough, it can hit people trying to 2AB anti-air.
Command Moves
| Command | Start Up | Hit | Guard |
| 23 | -1 | +5 |
| Command | Start Up | Hit | Guard |
| 8 | -3 | +3 |
| Command | Start Up | Hit | Guard |
| 9 | KD | ? |
| Command | Start Up | Hit | Guard |
| Air |
6 | ? | ? |
Stays active for the full duration of the jump. A very annoying tool (unsafe but hard to punish). Once Hotaru "step" on her opponent, she jumps again, and she is allowed to perform another air attack (or spin with CD before attacking). However she loses the ability to air JD, making her vulnerable to anti-airs.
Special Moves
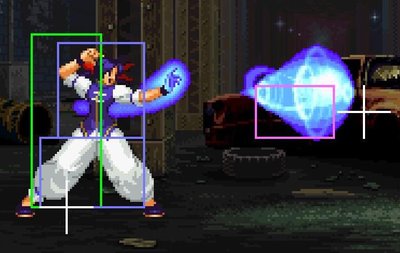
Fireball
| Command | Start Up | Hit | Guard |
| 10 | -5 | -5 |
Hotaru has a good fireball game, the startup is good and the speed is not bad either. Just don't throw them from full screen, that's a free JD for your opponent.
Like any fireball, a jump in can lead to big punish. However Hotaru has her forward feint that does the same motion as her fireball startup, she can mess with her opponent's reflexes.
The C version has more damage so use C for combos.
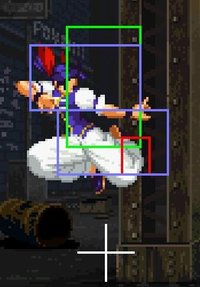
Divekick
| Command | Start Up | Hit | Guard |
| air |
10 | KD | ≥-8 |
| Command | Start Up | Hit | Guard |
| air |
13 | KD | ≥-9 |
Almost always unsafe on block...
Can be used as a nige-tatsu (to run away) via jump CD (spin in the air) > divekick in the opposite direction.
Used in optimised corner combos, after reflect break.
You can use the tigerknee motion 2149B to perform a divekick low to the ground.
DP B
| Command | Start Up | Hit | Guard |
| 2 | KD | -12 |
Can be used as an anti-air but is risky against a full air Just Defend.
A much safer but harder version of this anti-air would be a 623 4 B/D motion, timed so that if they hit you will JD and guard cancel with your DP, but if they try to air JD, your DP will hits them at an height low enough where the JD won't proc.
It has invincible frames so it can be used as a risky "get off me" tool.
DP D
| Command | Start Up | Hit | Guard |
| 2 | KD | -31 |
Similar to DP B with more hits and a better anti-air hitbox.
QCB A
| Command | Start Up | Hit | Guard |
| 10 | KD | -11 |
Unsafe on block. If you combo into this you can probably combo into reflect>fireball for more damage; making this a pretty useless move.
QCB C
| Command | Start Up | Hit | Guard |
| 18 | KD | -1 |
This one is -1 on block, so it is somewhat safe, since only punishable with 0F Supers if you try to block but there is a trick to escape this punish explained here : [[1]]
Being multi-hit, it can prevent random guardcancels on wakeup, but the startup is so slow that good players will react to it with a full JD + GC at the end.
Reflect B
| Command | Start Up | Hit | Guard |
| 13 | KD | -19 | |
| 13 | KD | +12 |
Hotaru's breakable move (always break it). Use the B version whenever you are doing a combo or need the hitbox, because the B version has a greater hitbox.
It gives a huge +12 frame advantage on block, allowing to reapply pressure after a blocked reflect.
Reflect D
| Command | Start Up | Hit | Guard |
| 13 | KD | -19 | |
| 13 | KD | +12 |
This D version is used to reflect fireballs; it has a shorter hitbox, but a greater reflect box. Great meter building tool, use the D version as it gives slightly more meter than the B version.
CommandGrab
| Command | Start Up | Hit | Guard |
| 9 | KD |
Doesn't lead to big damage, but it scores a hard knockdown, allowing for mix-ups. Corner setup showcase : https://www.youtube.com/watch?v=Eycf9BhE0xw
Supers
| Command | Start Up | Hit | Guard |
| 6 | KD | -51 |
| Command | Start Up | Hit | Guard |
| 6 | KD | -14 |
| Command | Start Up | Hit | Guard |
| 0 | KD | -33 |
| Command | Start Up | Hit | Guard |
| 0 | KD | -32 |
Attack Notes
To come.
Combos
Far range
- 2C xx Fireball C
- 2C xx punch super (doesn't work at max 2C range)
Close range
- clD xx reflect break > fireball (max damage, use B version for reflect and C version for the fireball)
- clA xx relfect break > walk > kick super (only work at very close range, input 236236 during the break and hold 6 for the short walk before pressing K)
- stA > far A xx fireball C
- stA > far A xx punch super
Jump-in
- jA>B or jD or jC > run > st A xx reflect > fireball
- from a distance, jB > 2C xx fireball
Hops
- any hop > DP D
- any hop > kick super
Air juggles (for example after a counterhit)
- clA xx DP D
- clA > kick super
Corner
- Anything into xx reflect break > instant divekick > DP D or kick super (max corner damage)
- clD xx 2AC > run > stA xx reflect etc
Misc
- j2B (hit deep) > jD > divekick > kick super (unsafe on block and hard to setup but creates an instant overhead)
- meaty 2B > 2A > reflect > ...
Overall Strategy
Hotaru has good damage and is very well rounded, however she lacks a bit in range, her offense is overall easy to block has low health/guard.
Hotaru's main strategy is keep-away coupled with unpredictable frame-trap oriented rushdown.
Notable normals :
st. a(far/close): close A is great due to his speed and allow punishes, far A is a bit below average.
st. b(far): Your goto footsie tool, had good range, good hitbox and good speed.
st. c(close): Slow and no horizontal hitbox, don't try to throw people on wakeup too much jump baits will easily punish you.
st. d(close): close D can prevent attempts to jump out, and it can be feint cancelled to confirm into a combo.
cr. a: Good to prevent 2AB mashing.
cr. c: A very good tool, most of the cast don't reach nearly as far, cr C cancelled into fireball is good safe damage (for this range), or you can feint cancel it into run in to maintain pressure.
j. b: Air to air poke, has the most horizontal range.
j. d: Air to ground poke, beats 2AB anti-airs.
j. a: has the most active frames and target cancellable with A to prevent most guard cancels.
j. down + b: Very annoying, has amazing priority and allows you to run away efficiently with escape divekicks.
Zonning with Hotaru :
Anti-air : Cover the air with air-throw/air-jd, air normals or DP.
Full screen : You can charge meter with her reflect, D version builds more meter while B version has a greater hitbox. Toss fireballs at a range where jumpins won't reach you, not too many since they will give health+meter via Just Defend.
Mid screen : You can run/stop to get in far B range and poke with it. If you whiff it be ready to react to a jump. If it connects, buffer it with a fireball or forward+AC feint.
Close range : 2A if you fear someone mashing 2AB, clD can prevent escape jumps, mix in command grab from time to time.
Matchup Notes
Rock
Hotaru's 2C goes under Rock's far A
Jenet
If above a Jenet Divekick, it is possible to punish it with jD on the way down into kick super. It will combo on the airborne Jenet (only works on Jenet)
Terry
If you JD his dp break, he is punishable via close A.
Without jd, if close enough, his dp break is punishable with the 0F super.
Dong
His DP break is always punishable via 2C regardless of spacing.
Hotaru (mirror)
You can play tennis with fireball + reflect.
