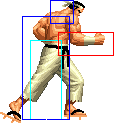
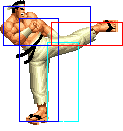
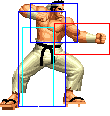
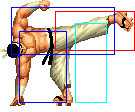
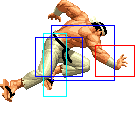
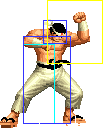
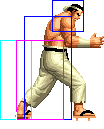
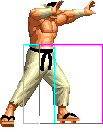
No edit summary |
|||
| Line 43: | Line 43: | ||
|align="center"| | |align="center"| | ||
|align="center"| HL | |align="center"| HL | ||
|colspan="2" | [[image: | |colspan="2" | [[image:Daimon98_clA.png|center]] | ||
| | | | ||
|- | |- | ||
| Line 51: | Line 51: | ||
|align="center"| | |align="center"| | ||
|align="center"| HL | |align="center"| HL | ||
|colspan="2" | [[image: | |colspan="2" | [[image:Daimon98_clB.png|center]] | ||
| | | | ||
|- | |- | ||
| Line 59: | Line 59: | ||
|align="center"| | |align="center"| | ||
|align="center"| HL | |align="center"| HL | ||
|colspan="2" | [[image: | |colspan="2" | [[image:Daimon98_clC.png|center]] | ||
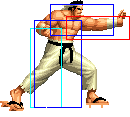
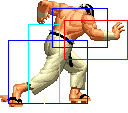
| Fast, cancelable, great as a meaty. More range than close D, so you can use cr.A, cl.C as a block string. | | Fast, cancelable, great as a meaty. More range than close D, so you can use cr.A, cl.C as a block string. | ||
|- | |- | ||
| Line 67: | Line 67: | ||
|align="center"| | |align="center"| | ||
|align="center"| HL | |align="center"| HL | ||
|colspan="2"| [[image: | |colspan="2"| [[image:Daimon98_clD.png|center]] | ||
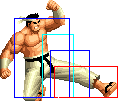
| Best meaty, and if not too meaty or out in the open, you actually have a good amount of time to hit-check hcb,f+P off of it. Same speed as close C, cancelable. | | Best meaty, and if not too meaty or out in the open, you actually have a good amount of time to hit-check hcb,f+P off of it. Same speed as close C, cancelable. | ||
|- | |- | ||
| Line 77: | Line 77: | ||
|align="center"| | |align="center"| | ||
|align="center"| HL | |align="center"| HL | ||
|colspan="2" | [[image: | |colspan="2" | [[image:Daimon98_stA.png|center]] | ||
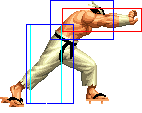
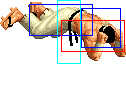
| Fast, really good anti-air against short hop. | | Fast, really good anti-air against short hop. | ||
|- | |- | ||
| Line 93: | Line 93: | ||
| | | | ||
|align="center"| HL | |align="center"| HL | ||
|colspan="2" | [[image: | |colspan="2" | [[image:Daimon98_stC.png|center]] | ||
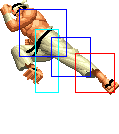
| Nice and big, stays out a long time. Can stop short hops. | | Nice and big, stays out a long time. Can stop short hops. | ||
|- | |- | ||
| Line 101: | Line 101: | ||
| | | | ||
|align="center"| HL | |align="center"| HL | ||
|colspan="2"| [[image: | |colspan="2"| [[image:Daimon98_stD.png|center]] | ||
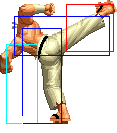
| Fast, high priority, one of the best anti-air normals in the game. It can also punish things like incompleted Iori rekkas. It will whiff over crouching characters, so watch that. | | Fast, high priority, one of the best anti-air normals in the game. It can also punish things like incompleted Iori rekkas. It will whiff over crouching characters, so watch that. | ||
|- | |- | ||
| Line 109: | Line 109: | ||
|align="center"| S,Su | |align="center"| S,Su | ||
|align="center"| HL | |align="center"| HL | ||
|colspan="2"| [[image: | |colspan="2"| [[image:Daimon98_stCD.png|center]] | ||
| Big ass cancelable move. often used to cancel into his qcf+K counter and bait CD counters. | | Big ass cancelable move. often used to cancel into his qcf+K counter and bait CD counters. | ||
|- | |- | ||
| Line 119: | Line 119: | ||
|align="center"| | |align="center"| | ||
|align="center"| HL | |align="center"| HL | ||
|colspan="2" | [[image: | |colspan="2" | [[image:Daimon98_crA.png|center]] | ||
| #1 poke if you're too close for standing B. Cancelable. | | #1 poke if you're too close for standing B. Cancelable. | ||
|- | |- | ||
| Line 127: | Line 127: | ||
| | | | ||
|align="center"| L | |align="center"| L | ||
|colspan="2" | [[image: | |colspan="2" | [[image:Daimon98_crB.png|center]] | ||
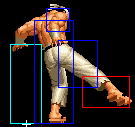
| Good poke if you're too close for standing B as well. Links into super easily since it has a long animation/advantage. | | Good poke if you're too close for standing B as well. Links into super easily since it has a long animation/advantage. | ||
|- | |- | ||
| Line 135: | Line 135: | ||
| | | | ||
|align="center"| HL | |align="center"| HL | ||
|colspan="2" | [[image: | |colspan="2" | [[image:Daimon98_crC.png|center]] | ||
| Fast, good range. Probably better options though. | | Fast, good range. Probably better options though. | ||
|- | |- | ||
| Line 143: | Line 143: | ||
|align="center"| | |align="center"| | ||
|align="center"| L | |align="center"| L | ||
|colspan="2" | [[image: | |colspan="2" | [[image:Daimon98_crD.png|center]] | ||
| A sweep! Can be meatied pretty easily. | | A sweep! Can be meatied pretty easily. | ||
|- | |- | ||
| Line 153: | Line 153: | ||
| | | | ||
|align="center"| H | |align="center"| H | ||
|colspan="2" | [[image: | |colspan="2" | [[image:Daimon98_jA.png|center]] | ||
| Pretty good air-to-air. | | Pretty good air-to-air. | ||
|- | |- | ||
| Line 161: | Line 161: | ||
| | | | ||
|align="center"| H | |align="center"| H | ||
|colspan="2" | [[image: | |colspan="2" | [[image:Daimon98_jB.png|center]] | ||
| Stays out for a long time, can be used as a crossup if it's very meaty, or your opponent is close to the corner, or in the corner and you are player 2. Good setup for his grab mixups. | | Stays out for a long time, can be used as a crossup if it's very meaty, or your opponent is close to the corner, or in the corner and you are player 2. Good setup for his grab mixups. | ||
|- | |- | ||
| Line 169: | Line 169: | ||
| | | | ||
|align="center"| H | |align="center"| H | ||
|colspan="2" | [[image: | |colspan="2" | [[image:Daimon98_jC.png|center]] | ||
| Crosses up, has a pretty hefty hitbox (what doesn't?). | | Crosses up, has a pretty hefty hitbox (what doesn't?). | ||
|- | |- | ||
| Line 177: | Line 177: | ||
| | | | ||
|align="center"| H | |align="center"| H | ||
|colspan="2" | [[image: | |colspan="2" | [[image:Daimon98_jD.png|center]] | ||
| Godly jump move. Good for jumping in, or air-to-air jumping back. Can be used as an instant overhead (short hop only). | | Godly jump move. Good for jumping in, or air-to-air jumping back. Can be used as an instant overhead (short hop only). | ||
|- | |- | ||
| Line 185: | Line 185: | ||
| | | | ||
|align="center"| HL | |align="center"| HL | ||
|colspan="2"| [[image: | |colspan="2"| [[image:Daimon98_jCD.png|center]] | ||
| CD in the air! | | CD in the air! | ||
|- | |- | ||
| Line 195: | Line 195: | ||
|align="center"| | |align="center"| | ||
|align="center"| HL | |align="center"| HL | ||
|valign="bottom" style="border-right:0px;"| [[image: | |valign="bottom" style="border-right:0px;"| [[image:Daimon98_fA1.png|center]] | ||
|valign="bottom" style="border-left:0px;"| [[image: | |valign="bottom" style="border-left:0px;"| [[image:Daimon98_fA2.png|center]] | ||
| Not overhead! Active frames and last two start-up frames cancel projectiles. | | Not overhead! Active frames and last two start-up frames cancel projectiles. | ||
|- | |- | ||
| Line 204: | Line 204: | ||
|align="center"| | |align="center"| | ||
|align="center"| HL | |align="center"| HL | ||
|valign="bottom" style="border- | |valign="bottom" style="border-right:0px;"| [[image:Daimon98_dfC1.png|center]] | ||
|valign="bottom" style="border- | |valign="bottom" style="border-left:0px;"| [[image:Daimon98_dfC2.png|center]] | ||
| Great anti-air. It doesn't beat as much stuff as standing D, but it will trade with most things, enabling you to perform a ground pound combo. Remember if it trades, you will have to re-buffer your qcb+B/qcf+B afterwards so the ground pound will hit OTG. | | Great anti-air. It doesn't beat as much stuff as standing D, but it will trade with most things, enabling you to perform a ground pound combo. Remember if it trades, you will have to re-buffer your qcb+B/qcf+B afterwards so the ground pound will hit OTG. | ||
|- | |- | ||
| Line 215: | Line 215: | ||
| | | | ||
|align="center"| HL | |align="center"| HL | ||
|colspan="2"| [[image:|center]] | |colspan="2"| [[image:Daimon98_hcfA.png|center]] | ||
| '''A Overhead Slam (hcf+A)'''<br> | | '''A Overhead Slam (hcf+A)'''<br> | ||
Beats pretty much everything above the top half of the screen, his arm is not hittable. It can be air blocked if the opponent is jumping up or back, though. Can be comboed from d/f+C on an opponent in the air. Ends in a back turned, un-rollable knockdown, and sets up for a meaty (unblockable) Ground Pound (dp+A). | Beats pretty much everything above the top half of the screen, his arm is not hittable. It can be air blocked if the opponent is jumping up or back, though. Can be comboed from d/f+C on an opponent in the air. Ends in a back turned, un-rollable knockdown, and sets up for a meaty (unblockable) Ground Pound (dp+A). | ||
| Line 224: | Line 224: | ||
| | | | ||
|align="center"| HL | |align="center"| HL | ||
|colspan="2"| [[image:|center]] | |colspan="2"| [[image:Daimon98_hcfC.png|center]] | ||
| '''C Overhead Slam (hcf+C)'''<br> | | '''C Overhead Slam (hcf+C)'''<br> | ||
Catches ground pokes, but is punishable by some fast long range things. Good to use as a combo ender if you aren't comfortable using hcb,f+P. Can hit OTG. Ends in a back turned, un-rollable knockdown, and sets up for a meaty (unblockable) Ground Pound (dp+A). | Catches ground pokes, but is punishable by some fast long range things. Good to use as a combo ender if you aren't comfortable using hcb,f+P. Can hit OTG. Ends in a back turned, un-rollable knockdown, and sets up for a meaty (unblockable) Ground Pound (dp+A). | ||
|- | |- | ||
! hcb,f+[[image:punch.gif]] | ! hcb,f+[[image:punch.gif]] | ||
|align="center"| 0 | |align="center"| 0/1/35 | ||
|align="center"| | |align="center"| | ||
| | | | ||
|align="center"| Grab | |align="center"| Grab | ||
|colspan="2"| [[image:|center]] | |colspan="2"| [[image:Daimon98_hcbfP.png|center]] | ||
| '''Ragdoll Toss (hcb,f+P)'''<br> | | '''Ragdoll Toss (hcb,f+P)'''<br> | ||
Instant, long range, comboable throw. Not rollable, and sets up for a meaty (unblockable) Ground Pound (dp+A). | Instant, long range, comboable throw. Not rollable, and sets up for a meaty (unblockable) Ground Pound (dp+A). | ||
|- | |- | ||
! dp+[[image:kick.gif]] | ! dp+[[image:kick.gif]] | ||
|align="center"| | |align="center"| 8/1/23 | ||
|align="center"| | |align="center"| | ||
| | | | ||
|align="center"| Grab | |align="center"| Grab | ||
|colspan="2"| [[image:|center]] | |colspan="2"| [[image:Daimon98_dpK.png|center]] | ||
| '''Trip Slam (dp+K)'''<br> | | '''Trip Slam (dp+K)'''<br> | ||
Slower grab with invincibility. You can even use it to go through fireballs. This is his main weapon in attack/throw mixups. Set it up by doing it on your opponents, wakeup, after a sloppy jump-in, or whatever. Not rollable, and sets up for a meaty (unblockable) Ground Pound (dp+A). | Slower grab with invincibility. You can even use it to go through fireballs. This is his main weapon in attack/throw mixups. Set it up by doing it on your opponents, wakeup, after a sloppy jump-in, or whatever. Not rollable, and sets up for a meaty (unblockable) Ground Pound (dp+A). | ||
| Line 251: | Line 251: | ||
| | | | ||
|align="center"| L | |align="center"| L | ||
|colspan="2"| [[image:|center]] | |colspan="2"| [[image:Daimon98_dpA.png|center]] | ||
|rowspan="2"| '''Ground Pound (dp+P)'''<br> | |rowspan="2"| '''Ground Pound (dp+P)'''<br> | ||
C version is a ground pound fake. It is 'blocked' by crouching, but there is no blockstun. You don't even need to hold d/b, just crouch. This can hit OTG (on the ground) after an anti-air d/f+C canceled into a non-blockable move (like a throw or utility move). It is also unblockable if done as a meaty attack, but the window is small and the setups vary from character to character. The knockdown can be rolled, but if they miss, you can combo a hcf+C in the corner. | C version is a ground pound fake. It is 'blocked' by crouching, but there is no blockstun. You don't even need to hold d/b, just crouch. This can hit OTG (on the ground) after an anti-air d/f+C canceled into a non-blockable move (like a throw or utility move). It is also unblockable if done as a meaty attack, but the window is small and the setups vary from character to character. The knockdown can be rolled, but if they miss, you can combo a hcf+C in the corner. | ||
| Line 260: | Line 260: | ||
| | | | ||
|align="center"| -- | |align="center"| -- | ||
|colspan="2"| [[image:|center]] | |colspan="2"| [[image:Daimon98_dpC.png|center]] | ||
|- | |- | ||
! qcb+[[image:snkb.gif]] | ! qcb+[[image:snkb.gif]] | ||
| Line 267: | Line 267: | ||
| | | | ||
|align="center"| -- | |align="center"| -- | ||
|rowspan="2" colspan="2"| [[image:|center]] | |rowspan="2" colspan="2"| [[image:Daimon98_qcbK.png|center]] | ||
|rowspan="2"| '''Ground roll (qcb+K)'''<br>Invincible during the roll, but completely vulnerable at the end of the roll. Usually used for the ground pound combo bug or to gain meter after a knockdown. Can be canceled into to roll through some auto-guard moves or CD counters. | |rowspan="2"| '''Ground roll (qcb+K)'''<br>Invincible during the roll, but completely vulnerable at the end of the roll. Usually used for the ground pound combo bug or to gain meter after a knockdown. Can be canceled into to roll through some auto-guard moves or CD counters. | ||
|- | |- | ||
| Line 281: | Line 281: | ||
| | | | ||
|align="center"| -- | |align="center"| -- | ||
|colspan="2"| [[image:|center]] | |colspan="2"| [[image:Daimon98_qcfK.png|center]] | ||
|'''Counter (qcf+K)'''<br>Will counter any mid/high hitting normal attack or CD counter. Usually used to cancel into to make moves safeer (like standing CD) and to bait CD counters at the same time. Ends in a back turned, un-rollable knockdown, and sets up for a meaty (unblockable) Ground Pound (dp+A). | |'''Counter (qcf+K)'''<br>Will counter any mid/high hitting normal attack or CD counter. Usually used to cancel into to make moves safeer (like standing CD) and to bait CD counters at the same time. Ends in a back turned, un-rollable knockdown, and sets up for a meaty (unblockable) Ground Pound (dp+A). | ||
|- | |- | ||
| Line 287: | Line 287: | ||
|- | |- | ||
! hcbx2+[[image:punch.gif]] | ! hcbx2+[[image:punch.gif]] | ||
|align="center"| 0 | |align="center"| 0/1/35 | ||
|align="center"| | |align="center"| | ||
| | | | ||
|align="center"| Grab | |align="center"| Grab | ||
|colspan="2"| [[image:|center]] | |colspan="2"| [[image:Daimon98_hcbx2P.png|center]] | ||
| '''Super Ragdoll Toss (hcbx2+P)'''<br> | | '''Super Ragdoll Toss (hcbx2+P)'''<br> | ||
Instant good range super throw. Does damage. MAX version does more damage. | Instant good range super throw. Does damage. MAX version does more damage. | ||
|- | |- | ||
! hcfx2+[[image:kick.gif]] | ! hcfx2+[[image:kick.gif]] | ||
|align="center"| | |align="center"| 14/1/11 | ||
|align="center"| | |align="center"| | ||
| | | | ||
|align="center"| Grab | |align="center"| Grab | ||
|valign="bottom" style="border-right:0px;"| [[image:|center]] | |valign="bottom" style="border-right:0px;"| [[image:Daimon98_hcfx2K1.png|center]] | ||
|valign="bottom" style="border-left:0px;"| [[image:|center]] | |valign="bottom" style="border-left:0px;"| [[image:Daimon98_hcfx2K2.png|center]] | ||
| '''Super Armor Throw (hcf,hcf+K~hcf+K~dp+K)'''<br> | | '''Super Armor Throw (hcf,hcf+K~hcf+K~dp+K)'''<br> | ||
A slower throw that has super armor on startup (ie you will still take full damage from any hits). The followups switch sides every time, and are timed as the previous part hits. MAX version does more damage. | A slower throw that has super armor on startup (ie you will still take full damage from any hits). The followups switch sides every time, and are timed as the previous part hits. MAX version does more damage. | ||
Revision as of 23:16, 2 October 2016
Introduction
Goro Daimon was previously known as just "Daimon" before the King of Fighters tournament. The name means "Die, man".
Just before the first KOF tournament, he defeated Goro, prince of Shokan in hand-to-hand mortal combat, taking his namesake as a trophy.
Anyone who could defeat Goro is extremely strong, so as expected, Goro Daimon is a top tier character.
Colors

|

|

|

|
Gameplay Overview
Daimon does a ton of damage, has very high priority normals, very effective throw mixups, and is top-tier. Even from an anti-air he can do 30% or so thanks to ground pound OTGs and juggles. He has very good defense (ie takes less damage than average) and is basically a wall of pain. His only disadvantage is that he has a very large sprite. He has combos/tactics that vary from requiring nearly no execution skill to requiring godly execution. He is a decent character for a beginner.
In-depth Analysis
Movelist
Normal Throws
b or f+C - Unbreakable (mashable), forward knockdown, face forward, un-rollable.
b or f+D - Breakable, reverse knockdown, back turned, rollable.
b or f+C (just outside of normal throw range) - Breakable, forward knockdown, back turned, un-rollable.
Combos
As I stated above, his combos range from easy to extremely difficult depending on what you're comboing into.
- cl.C/D, d/f+C (optional) xx C Overhead Slam (hcf+C)/Ragdoll Toss (hcb,f+P)/Super Ragdoll Toss (hcb,hcb+P)
- cr.B, Ragdoll Toss (hcb,f+P)/Super Ragdoll Toss (hcb,hcb+P)
- anti-air d/f+C xx qcb+B/qcf+B/dp+K/f,hcb,f+P, A Ground Pound (dp+A)
- anti-air d/f+C (counter-hit) xx qcb+B, d/f+C xx A Overhead Slam (hcf+A)
The cr.B link into super is a good way to combo into it without having godly execution. Just perform it like f,d/f,d,d/b+B,b,hcb+P.
It is possible to perform his Ground Pound (dp+A) on the opponent's wakeup with such timing that it cannot be blocked. Here is a list of unblockable Ground Pound setups after various moves for different characters: unblockable Ground Pound setups
