Yatagarasu: Attack on Cataclysm/Kotaro

From SuperCombo Wiki
Kotaro face.jpg

Introduction

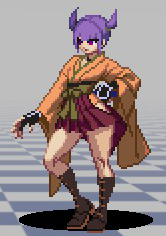
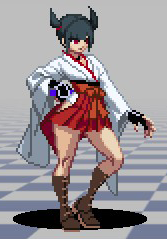
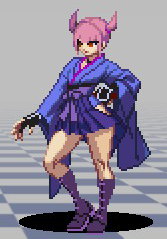
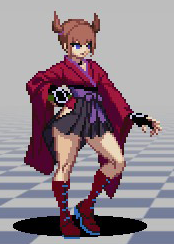
Colors

YataLP.png YataLK.png YataHP.png YataHK.png YataHBL.png YataLBL.png
Kotaro LP.png Kotaro LK.png Kotaro HP.png Kotaro HK.png Kotaro HParry.png Kotaro LParry.png

-- Gongfuren

Move List

Command Normals

Name
Command
Notes
Sweep
Df.png + Hk.png
Low.png
Double Hopkick
F.png + Hk.png
Ground Pound
(in air) D.png + Hp.png

Special Moves

Name
Command
Notes
Sawarabi Daiichimaku
Qcf.png + P.png
Jurokusen
(in air) Qcb.png + P.png
Oborozukiyo
(in air) Qcf.png + P.png
Kakushin Kenbu
Hcb.png + P.png
Tendaibu
Qcb.png + K.png

Super Special Moves

Name
Command
Notes
Tomoni Maiodorumaku
(in air) Qcf.png Qcf.png + P.png
Star's Gift
(in air) Qcb.png Qcb.png + P.png

Move Analysis

Normal Moves

Standing Lp.png

<Description here>

Crouching Lp.png

<Description here>

Jumping Lp.png

<Description here>

Standing Lk.png

<Description here>

Crouching Lk.png

<Description here>

Jumping Lk.png

<Description here>

Standing Hp.png

<Description here>

Crouching Hp.png

<Description here>

Jumping Hp.png

<Description here>

Standing Hk.png

<Description here>

Crouching Hk.png

<Description here>

Jumping Hk.png

<Description here>

Command Normals

Sweep (Df.png + Hk.png)

<Description here>

Double Hopkick (F.png + Hk.png)

<Description here>

Ground Pound (in air, D.png + Hp.png)

<Description here>

Special Moves

Sawarabi Daiichimaku (Qcf.png + P.png)

<Description here>

Jurokusen (in air, Qcb.png + P.png)

<Description here>

Oborozukiyo (in air, Qcf.png + P.png)

<Description here>

Kakushin Kenbu (Hcf.png + P.png)

<Description here>

Tendaibu (Qcb.png + K.png)

<Description here>

Super Special Moves

Tomoni Maiodorumaku (Qcf.png Qcf.png + P.png)

<Description here>

Star's Gift (Qcb.png Qcb.png + P.png)

<Description here>

Frame Data

Move Name Damage Hit Level Cancel Ability Startup Active Recovery Block Advantage Hit Advantage Total Frames
Stand Snka.gif 2000 Mid ? 5 3 7 +2 +3 14
Stand Snkb.gif 2300 Mid ? 7 4 13 -5 -4 23
Stand Snkc.gif 4400 Mid ? 9 2 22 -4 -1 32
Stand Snkd.gif 5100 Mid ? 11 3 19 -2 +1 32
Crouch Snka.gif 1900 Mid ? 5 1 9 +2 +3 14
Crouch Snkb.gif 1700 Low ? 6 4 10 -2 -1 19
Crouch Snkc.gif 4600 Mid ? 9 2 25 -7 -4 35
Crouch Snkd.gif 3700 Low ? 7 4 14 -1 +1 24
Jump Snka.gif 2200 High - 5 3 - - - -
Jump Snkb.gif 2000 High - 5 5 - - - -
Jump Snkc.gif 4000 High - 8 6 - - - -
Jump Snkd.gif 4000 High - 11 5 - - - -
Sweep

Df.gif + Snkd.gif

5100 Low - 11 3 19 -2 - 32
Throw

Snka.gif + Snkb.gif

6000 - - 4 2 23 - - 28
Overhead

Snka.gif + Snkc.gif

3000 High - 17 12 7 -2 -2 35
Guard Crush

Snkc.gif + Snkd.gif

6000 - - 20 2 18 +12 +3 39
F.gif + Snkd.gif 5200 (2000, 4000) Mid ? 7 6(11)3 22 -22 - 48
(in air) Down.gif + Snkc.gif 5000 High - 14 Until Landing 16 -4 - -
L Sawarabi

Qcf.gif + Snka.gif

4500 Mid ? 11 12 11 -32 - 33
H Sawarabi

Qcf.gif + Snkc.gif

4600 Mid ? 15 17 11 -32 - 42
EX Sawarabi

Qcf.gif + Snka.gifSnkc.gif

4700 Mid ? 7 12 11 -32 - 28
L Jurokusen

(in air) Qcb.gif + Snka.gif

2000 Mid ? - 10 6/8/18 - - -
H Jurokusen

(in air) Qcb.gif + Snkc.gif

2000 Mid ? - 10 6/8/18 - - -
EX Jurokusen

(in air) Qcb.gif + Snka.gifSnkc.gif

2000 Mid ? - 10 6/8/18 - - -
L Oborozukiyo

(in air) Qcf.gif + Snka.gif

4800 Mid ? 10 Until Landing 18 - - -
H Oborozukiyo

(in air) Qcf.gif + Snkc.gif

4800 Mid ? 10 Until Landing 18 - - -
EX Oborozukiyo

(in air) Qcf.gif + Snka.gifSnkc.gif

4800 Mid ? 10 Until Landing 18 - - -
L Kakushin Kenbu

Hcb.gif + Snka.gif

- - - 25 3 11 +4 - 38
H Kakushin Kenbu

Hcb.gif + Snkc.gif

- - - 27 3 11 +4 - 40
EX Kakushin Kenbu

Hcb.gif + Snka.gifSnkc.gif

- - - 25 3 11 +21 - 38
L Tendaibu

Qcb.gif + Snkb.gif

- - - 7 - 6 Upon Landing - - -
H Tendaibu

Qcb.gif + Snkd.gif

- - - 7 - 6 Upon Landing - - -
EX Tendaibu

Qcb.gif + Snkb.gifSnkd.gif

- - - 7 - 6 Upon Landing - - -
Tomoni Maiodorumaku

(in air) Qcf.gifQcf.gif + P.png

10000 Mid - 3 13 Until Landing + 18 - - -
Star's Gift

(in air) Qcb.gifQcb.gif + P.png

3000 Mid - 8 - Until Landing + 3 - - -

Combos

Meterless

  • 2C/2A*2 xx 236P

2-in-1 can be started with jump foward attack

  • jB/D xx j.236A/C

Aereal Rave combo

  • 2C>6D , 236C or j.D

Target combo,jumping attack follow its safer.

  • j.214C ,land 6D , j.D

Kunaki setup with command and follow

1/2 Meter

  • 63214AC , any combo of above

Ex command grab have better recovery

  • jD xx j.236AC

Ex Move multihits but don't float

  • jD xx j.214AC

Ex move lands faster.

  • j.236C ,land 2D xx 236AC

Strong Kunai can be useful for overhead traps and have better recovery

1 Meter

  • 2C (>6D) xx 236C xx 236236P

Your main Super Cancel Combo ,Target Combo is optional but less safe

  • j.B xx j.236A, j.236236C

You must input TK super 2369236 for it

  • j.D xx j.214C, j.236236P

The best option for big hitbox characters

  • 2C>6D , j.236236P

The most damaging option for a chain cancel

  • 2C xx 214B xx j.214214P

Way to land the Kunai super from a ground attack with 214D~214C Super Cancel

  • j.A xx j.214C, j.214214P

your Super Cancel Jump Combo.

1 1/2 Meter

  • j.A xx j.214AC, j.214214P or j.236236P
  • j.A xx j.236AC, j.214214P or j.236236P
  • 2C xx 236AC xx 236236P

Powered up version of a combo from above ,useful for more damage only

Strategy

Matchups

vs. Azure

(No strategies)

vs. Kotaro

(No strategies)

vs. Aja

(No strategies)

vs. Kou

(No strategies)

vs. Hanzo

(No strategies)

vs. Jyuzumaru

(No strategies)

vs. Dark Jyuzumaru

(No strategies)

vs. Hina

(No strategies)

vs. Shimo

(No strategies)

vs. Jet

(No strategies)

vs. Chadha

(No strategies)

vs. Crow

(No strategies)
Yatagarasu: Attack on Cataclysm
General
Characters

AjaAzureChadhaCrowHanzoHinaJetJyuzumaruKotaroKouShimo