Introduction
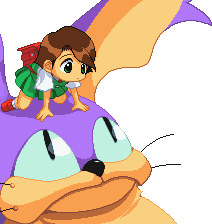
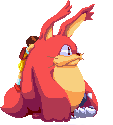
Mauru (Marurun) is a big animal living in the woods, who understands human words to some degree. Likes fruit and singing. Met Mugi, a little girl, when she was lost and crying alone in the woods.
Mauru is often refered as the worst character in the whole game while having excelent damage but extremely commital options, Mauru posesses a few decent normals to play footsies with and an amazing throw into super or Death frames set ups. Mauru oftens struggles to win neutral and get in, most character can shut down his pressure at almost any ranges, He requires to be at melee range to be effective but doesn't have the means to do so.
| Strengths | Weaknesses |
|---|---|
|
|
| Mauru | |
|---|---|
| Character Data | |
| Forward Run Duration | 105F to cross stage |
| Back Step Duration | 34 frames (1~34F: invincible) |
| Pre-jump Frames | 3 frames |
| Jump Duration | 46 frames |
| Landing Frames | 5 frames |
| Jump Height Apex | 123 |
| Forward Jump Distance | 119 |
| Backward Jump Distance | 118 |
| Back Step Distance | 96 |
| Knockdown Recovery | 25 frames |
| Chain Series | Solo Heavy Series |
Move List
Standing Normals
5A
| Damage | Guard | Dizzy | Cancel | ||
|---|---|---|---|---|---|
| 14 | Mid | 5 | y | ||
| Startup | Active | Recovery | Adv. Hit | Adv. Guard | |
| 5 | 4 | 5 | +8 | +1 | |
| |||||
5B
| Damage | Guard | Dizzy | Cancel | ||
|---|---|---|---|---|---|
| 37 | Mid | 25 | n | ||
| Startup | Active | Recovery | Adv. Hit | Adv. Guard | |
| 7 | 5 | 12 | +8 | -2 | |
| |||||
5C
| Damage | Guard | Dizzy | Cancel | ||
|---|---|---|---|---|---|
| 18 | Mid | 10 | y | ||
| Startup | Active | Recovery | Adv. Hit | Adv. Guard | |
| 4 | 2 | 6 | +9 | +1 | |
| |||||
5D
| Damage | Guard | Dizzy | Cancel | ||
|---|---|---|---|---|---|
| 44 | Mid | 25 | n | ||
| Startup | Active | Recovery | Adv. Hit | Adv. Guard | |
| 7 | 6 | 24 | KND | -15 | |
| |||||
Crouching Normals
2A
| Damage | Guard | Dizzy | Cancel | ||
|---|---|---|---|---|---|
| 13 | Low | 5 | y | ||
| Startup | Active | Recovery | Adv. Hit | Adv. Guard | |
| 5 | 2 | 6 | +9 | +1 | |
| |||||
2B
| Damage | Guard | Dizzy | Cancel | ||
|---|---|---|---|---|---|
| 33 | Low | 0 | n | ||
| Startup | Active | Recovery | Adv. Hit | Adv. Guard | |
| 15 | 4 | 20 | KND | -9 | |
| |||||
2C
| Damage | Guard | Dizzy | Cancel | ||
|---|---|---|---|---|---|
| 17 | Low | 5 | n | ||
| Startup | Active | Recovery | Adv. Hit | Adv. Guard | |
| 6 | 4 | 7 | KND | +1 | |
| |||||
2D
| Damage | Guard | Dizzy | Cancel | ||
|---|---|---|---|---|---|
| 40 | Low | 10 | n | ||
| Startup | Active | Recovery | Adv. Hit | Adv. Guard | |
| 9 | 16 | 17 | KND | -18 | |
| |||||
Air Normals
J.A
| Damage | Guard | Dizzy | Cancel | ||
|---|---|---|---|---|---|
| 14 | high | 5 | n | ||
| Startup | Active | Recovery | Adv. Hit | Adv. Guard | |
| 7 | Gnd | - | - | - | |
| |||||
J.B
| Damage | Guard | Dizzy | Cancel | ||
|---|---|---|---|---|---|
| 37 | high | 5 | n | ||
| Startup | Active | Recovery | Adv. Hit | Adv. Guard | |
| 9 | 12 | GND | - | - | |
| |||||
J.C
| Damage | Guard | Dizzy | Cancel | ||
|---|---|---|---|---|---|
| 8~9 | high | 5 | n | ||
| Startup | Active | Recovery | Adv. Hit | Adv. Guard | |
| 7 | - | GND | - | - | |
| |||||
J.D
| Damage | Guard | Dizzy | Cancel | ||
|---|---|---|---|---|---|
| 44 | high | 5 | n | ||
| Startup | Active | Recovery | Adv. Hit | Adv. Guard | |
| 11 | 4 | GND | - | - | |
| |||||
Command Normals
6.B
| Damage | Guard | Dizzy | Cancel | ||
|---|---|---|---|---|---|
| 18+37 | Mid | 45 | - | ||
| Startup | Active | Recovery | Adv. Hit | Adv. Guard | |
| 24 | 6 | 25 | - WSL | -15 | |
| |||||
8.B
| Damage | Guard | Dizzy | Cancel | ||
|---|---|---|---|---|---|
| 37 | Mid | 25 | n | ||
| Startup | Active | Recovery | Adv. Hit | Adv. Guard | |
| 11 | 6 | GND | - - | - - | |
| |||||
8.C
| Damage | Guard | Dizzy | Cancel | ||
|---|---|---|---|---|---|
| 18 | High | 5 | n | ||
| Startup | Active | Recovery | Adv. Hit | Adv. Guard | |
| 5 | GND | - - | - - | - - | |
| |||||
Universal Mechanics
Throw
| Damage | Guard | Dizzy | Cancel | ||
|---|---|---|---|---|---|
| 52 | Thw | 0 | - | ||
| Startup | Active | Recovery | Adv. Hit | Adv. Guard | |
| 1 | 1 | - | KND | - | |
|
Mauru throw is considered broken thanks to the existence of Dead frames (see System). The character being thrown will always be sent to the corner, when you soft a throw it will start a soft thrown animation that will have a frame of vulnerability where you're unable to block, this frame has a a different timing depending of the character animation.
| |||||
Air Throw
| Damage | Guard | Dizzy | Cancel | ||
|---|---|---|---|---|---|
| 52 | Thw | 0 | - | ||
| Startup | Active | Recovery | Adv. Hit | Adv. Guard | |
| 1 | 1 | - | KND | - | |
| |||||
Command Grab
| Damage | Guard | Dizzy | Cancel | ||
|---|---|---|---|---|---|
| 66 | Thw | 0 | - | ||
| Startup | Active | Recovery | Adv. Hit | Adv. Guard | |
| 1 | 1 | - | KND | - | |
| |||||
Universal Overhead
| Damage | Guard | Dizzy | Cancel | ||
|---|---|---|---|---|---|
| 37 | High | 5 | - | ||
| Startup | Active | Recovery | Adv. Hit | Adv. Guard | |
| 24 | 2 | 23 | 0 | -10 | |
| |||||
Pursuit
| Damage | Guard | Dizzy | Cancel | ||
|---|---|---|---|---|---|
| 44 | Mid | 0 | - | ||
| Startup | Active | Recovery | Adv. Hit | Adv. Guard | |
| 50 | 3 | 40 | KND | -38 | |
| |||||
Rissing attack
| Damage | Guard | Dizzy | Cancel | ||
|---|---|---|---|---|---|
| 37 | High | 20 | - | ||
| Startup | Active | Recovery | Adv. Hit | Adv. Guard | |
| 15 | 6 | 24 | KND | -15 | |
| |||||
Super mode
| Damage | Guard | Dizzy | Cancel | ||
|---|---|---|---|---|---|
| 37 | Mid | 50 | - | ||
| Startup | Active | Recovery | Adv. Hit | Adv. Guard | |
| 16 | 9 | 9 | KND | -9 | |
| |||||
Special Moves
623X
| 236A | Damage | Guard | Dizzy | Cancel | ||
|---|---|---|---|---|---|---|
| 59 | Mid | 30 | - | |||
| Startup | Active | Recovery | Adv. Hit | Adv. Guard | ||
| 19 | 2 (2) 10 | 28 | KND | -18 | ||
| ||||||
| 236B | Damage | Guard | Dizzy | Cancel | ||
| 66 | Mid | 45 | - | |||
| Startup | Active | Recovery | Adv. Hit | Adv. Guard | ||
| 21 | 14 | 32 | KND | -20 | ||
| ||||||
| 236AB ES: "Guruguru Punch" |
Damage | Guard | Dizzy | Cancel | ||
| 106 | Mid | 40 | - | |||
| Startup | Active | Recovery | Adv. Hit | Adv. Guard | ||
| 2 | 15 | 33 | WSL | -21 | ||
| ||||||
623X
| 623A | Damage | Guard | Dizzy | Cancel | ||
|---|---|---|---|---|---|---|
| 29+30 | Mid | 20 | - | |||
| Startup | Active | Recovery | Adv. Hit | Adv. Guard | ||
| 6 | 3 (3) 1 | 36 | KND | -24 | ||
| ||||||
| 623B | Damage | Guard | Dizzy | Cancel | ||
| 22 | Mid | 30 | - | |||
| Startup | Active | Recovery | Adv. Hit | Adv. Guard | ||
| 8 | 3(3)3(3)3 | 49 | KND | -49 | ||
| ||||||
| 623AB ES: "Bunbun Copter" |
Damage | Guard | Dizzy | Cancel | ||
| 100 | Mid | 45 | - | |||
| Startup | Active | Recovery | Adv. Hit | Adv. Guard | ||
| 6‼0 | - | 74 | KND | -76 | ||
|
Mauru's best AA and the best DP in the entire game, you want to react with this against jump ins, because of the invincibility since frame one that last for 23F you are able to punish most Jump ins for good damage
| ||||||
214X
| 214C | Damage | Guard | Dizzy | Cancel | ||
|---|---|---|---|---|---|---|
| 59 | High | 50 | - | |||
| Startup | Active | Recovery | Adv. Hit | Adv. Guard | ||
| 17 | 5 | 59 | KND | -49 | ||
| ||||||
| 214D | Damage | Guard | Dizzy | Cancel | ||
| 66 | High | 50 | - | |||
| Startup | Active | Recovery | Adv. Hit | Adv. Guard | ||
| 17 | 5 | 67 | KND | -57 | ||
This move is just the C version but being a bit more minus, you're going to be catch even using the C version so is better to just use this button instead | ||||||
| 214CD ES: "Body Press" |
Damage | Guard | Dizzy | Cancel | ||
| 104 | High | 35 | - | |||
| Startup | Active | Recovery | Adv. Hit | Adv. Guard | ||
| 5‼4 | 7 (12) 8 | 71 | KND | -58 | ||
|
this Move is a bit worse if blocked than the D version but hits double, mostly used in combos and you can chipp kill someone with it. An Actual useful move
| ||||||
Air Special Moves
623X
| J.623A | Damage | Guard | Dizzy | Cancel | ||
|---|---|---|---|---|---|---|
| 29+30 | Mid | 20 | - | |||
| Startup | Active | Recovery | Adv. Hit | Adv. Guard | ||
| 6 | 3 (3) 1 | 36 | GND | -24 | ||
| ||||||
| J.623B | Damage | Guard | Dizzy | Cancel | ||
| 22 | Mid | 30 | - | |||
| Startup | Active | Recovery | Adv. Hit | Adv. Guard | ||
| 8 | 3(3)3(3)3 | 49 | GND | -49 | ||
| ||||||
| J.623AB ES: "Kuchuun Bunbun Copter" |
Damage | Guard | Dizzy | Cancel | ||
| 100 | Mid | 45 | - | |||
| Startup | Active | Recovery | Adv. Hit | Adv. Guard | ||
| 6‼0 | - | 74 | KND | -76 | ||
| ||||||
DokiDoki
DokiDoki
| Damage | Guard | Dizzy | Cancel | ||
|---|---|---|---|---|---|
| 14~15 | Mid | 5 | - | ||
| Startup | Active | Recovery | Adv. Hit | Adv. Guard | |
| 8‼0 | - | 23 | KND | -23 | |
| |||||
HaraHara
HaraHara
| Damage | Guard | Dizzy | Cancel | ||
|---|---|---|---|---|---|
| 190 | - | 5 | - | ||
| Startup | Active | Recovery | Adv. Hit | Adv. Guard | |
| 103 | - | 64 | KND | - | |
| |||||
Palette options
Notable Players
| Name | Color | Location | Contact | Status | Notes | Example Play |
|---|---|---|---|---|---|---|
| Bee Chan | 
|
Venezuela | Retired | Mostly considered one of the strongest Mauru player. known for her work in making the wiki and the Bi weekly series with UltraYoshi. Currently Doesn't play anymore. | Link | |
| Hurumi | 
|
U.S | None | active | Really good Mauru player. She has been playing for a long time and has found moderated success in some of the tournament she has entered. | Link |


