Introduction
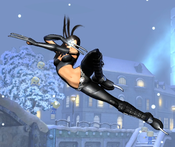
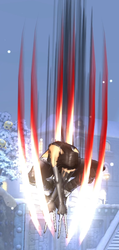
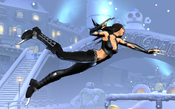
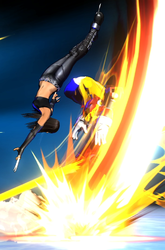
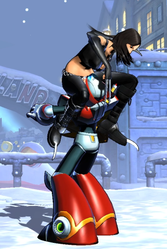
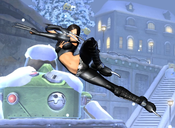
An imperfect clone of Wolverine, the 23rd attempt at recreating the Weapon X program and the only one to survive. She shares her "dad's" regenerative capabilities, adamantium skeleton, and heightened, feral senses. However, instead of having three claws on each hand, she has two per hand and an additional, hidden claw on each foot. Laura eventually escaped the program, but struggles with the emotional damage of being raised exclusively as a killing machine for her entire childhood.
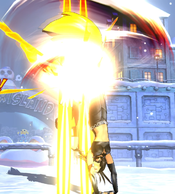
In UMvC3, X-23 draws superficial comparisons to Wolverine, as they are both rushdown-focused characters with limited ranged ability. Her attacks are usually slower, but in exchange she has several aerial specials that provide her some unique mobility options. The most important difference, however, is her unblockable level 3 "Dirt Nap" hyper. X-23 teams are typically constructed to maximize the effectiveness of this unblockable attack. These teams are typically called "300%" teams because - while they often struggle in neutral - one clean hit with them will lead to inescapable death to all three members of the opposing team.
| Strengths | Weaknesses |
|---|---|
|
|
Move List
Assists
| Damage | Startup | Active | Recovery |
|---|---|---|---|
| 80,000 | 42 | 7 | 119, 79 |
| On Hit | On Block | Guard | Properties |
| - | - | Mid | - |
|
THC Hyper: Rage Trigger. | |||
| Damage | Startup | Active | Recovery |
|---|---|---|---|
| 80,000 | 44 | 4 | 114, 84 |
| On Hit | On Block | Guard | Properties |
| - | - | Low | |
|
THC Hyper: Rage Trigger. X-23's Ankle Slice on point needs to be fully charged to hit OTG, but the assist performs the uncharged version, which hits OTG regardless. Has very poor coverage and lockdown, but its low-hitting and OTG properties give it some utility. As a Low-hitting assist, it can be used to set up High/Low Unblockables when combined with an overhead attack from the Point character. This requires being very close as the assist has poor range. You can also whiff this assist on purpose mid-combo if X-23 is in the second position, so that a TAC immediately after brings in your third character instead. This is a useful strategy for 300% teams, as your anchor character likely has an easier TAC Infinite than X-23. | |||
| Damage | Startup | Active | Recovery |
|---|---|---|---|
| 40,000 x3 | 29 | 9 | 154, 124 |
| On Hit | On Block | Guard | Properties |
| - | - | Mid | |
|
THC Hyper: Rage Trigger. This is X-23's fastest assist and the one that covers the most screen space. Like other DP-style assists, it lacks any kind of invincibility or defensive properties, has poor horizontal reach, and knocks opponents awkwardly high into the air on hit. This assist is mainly notable for its use as an Alpha Counter. When brought in as a guard cancel, this assist does have a respectable amount of invulnerability, allowing the previous point character to escape pressure fairly safely. Additionally, this attack can be canceled into Talon Strike (j.236X) to either remain safe on block or convert into a full combo on hit. | |||
Ground Normals
| Damage | Startup | Active | Recovery |
|---|---|---|---|
| 40,000 | 4 | 3 | 11 |
| On Hit | On Block | Guard | Properties |
| -1 | -1 | Mid | |
|
Hitbox does not extend as far as the visual claw swing effect indicates, but still has good reach for a light normal. Good bare button to steal momentum. Otherwise mainly used after Neck Slice or Talon Strike to confirm a hit or maintain pressure. | |||
| Damage | Startup | Active | Recovery |
|---|---|---|---|
| 30,000 x2 | 5 | 2(2)3 | 19 |
| On Hit | On Block | Guard | Properties |
| -4 | -5 | Mid | - |
|
Double-hitting poke normal. Has a solid hitbox and advances X-23 forwards slightly. | |||
| Damage | Startup | Active | Recovery |
|---|---|---|---|
| 68,000 | 9 | 4 | 21 |
| On Hit | On Block | Guard | Properties |
| +1 | -3 | Mid | |
|
Important combo tool due to its (relatively) high base damage, large amounts of hitstun, and Strike property enabling both simple and advanced jump loops. Its rather lengthy recovery can be largely negated - even on whiff - by canceling into Mirage Feint (214X). | |||
| Damage | Startup | Active | Recovery |
|---|---|---|---|
| 35,000 | 5 | 3 | 13 |
| On Hit | On Block | Guard | Properties |
| -3 | -3 | Low | |
|
Standard fast low attack. Like 5L, it is good for maintaining pressure after Talon Strike or Neck Slice. | |||
| Damage | Startup | Active | Recovery |
|---|---|---|---|
| 28,000 x2 | 6 | 7 | 16 |
| On Hit | On Block | Guard | Properties |
| -2 | -3 | Low | - |
|
Has slightly poorer range than 5M and advances X-23 only about half as far forward. Mainly useful as a low confirm. | |||
| Damage | Startup | Active | Recovery |
|---|---|---|---|
| 63,000 | 10 | 4 | 20 |
| On Hit | On Block | Guard | Properties |
| - | -2 | Low | |
|
Standard sweep attack. This attack does not juggle high enough into the air to start jump loops the way that 5H does, but it can still be followed up with a Mirage Feint Cancel, or with a regular 5S. | |||
| Damage | Startup | Active | Recovery |
|---|---|---|---|
| 80,000 | 8 | 4 | 27 |
| On Hit | On Block | Guard | Properties |
| Launch | -9 | Mid | |
|
Standard launcher. Unremarkable, except that it is fairly fast. | |||
Aerial Normals
| Damage | Startup | Active | Recovery |
|---|---|---|---|
| 40,000 | 4 | 3 | 16 |
| On Hit | On Block | Guard | Properties |
| +9 | +9 | OH | - |
|
- | |||
| Damage | Startup | Active | Recovery |
|---|---|---|---|
| 50,000 | 6 | 3 | 22 |
| On Hit | On Block | Guard | Properties |
| +16 | +15 | OH | - |
|
Works naturally as an instant overhead against big-body characters, and can also work as an instant overhead against standard-sized characters via a Fuzzy Guard setup. Thanks to j.2H, this can be converted easily and freely into a full combo if used as an instant overhead. Otherwise, it is fairly standard air combo filler and a respectable air-to-ground attack. | |||
| Damage | Startup | Active | Recovery |
|---|---|---|---|
| 70,000 | 11 | 3 | 22 |
| On Hit | On Block | Guard | Properties |
| +18 | +17 | OH | - |
|
- | |||
| Damage | Startup | Active | Recovery |
|---|---|---|---|
| 70,000 | 11 | 3 | 22 |
| On Hit | On Block | Guard | Properties |
| +18 | +14 | OH | |
|
Because X-23 also has j.236L as an Air Combo Finisher, this move is mainly used for its strength as a regular normal. It is a strong jump-in attack, deals good damage, and is helpful in jump loops or similar combos due to the large amount of hitstun dealt. | |||
Command Normals
| Damage | Startup | Active | Recovery |
|---|---|---|---|
| 68,000 | 8 | Until Grounded | 10 |
| On Hit | On Block | Guard | Properties |
| +7 | +6 | Mid | Special Cancelable |
|
Immediately halts all of X-23's aerial momentum and causes her to plunge straight downward. This attack hits on both sides directly below her, and thus can be used as a Crossup. However, it does not hit overhead. This move is useful combo filler, can help with certain conversions (such as after an instant overhead attempt), or be used for mobility purposes to evade underneath certain air attacks. | |||
Special Moves
| Damage | Startup | Active | Recovery |
|---|---|---|---|
| 85,000 | 18 | 9 | 14 |
| On Hit | On Block | Guard | Properties |
| 0 | -1 | Mid | - |
|
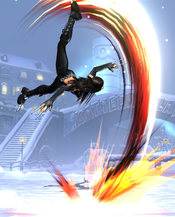
Largely unremarkable advancing attack. X-23 does a quick backflip and then advances forward while slicing. The backflip can be used to evade and then whiff punish some normals (so 2L xx 236L sometimes works as a frame trap, or to bait mashed pushblock attempts). However, uncharged Neck Slice isn't advantageous enough to combo after without additional resources. | |||
| Damage | Startup | Active | Recovery |
|---|---|---|---|
| 50,000 x3 | 37 | 12 | 11 |
| On Hit | On Block | Guard | Properties |
| +30 | 0 | Mid | Stagger on hit versus grounded, spinout into |
|
The charged version of Neck Slice deals more damage and has significantly better advantage on hit, while also being slightly better on block. It is impractical for most teams to combo into this move, but it easily starts combos of its own. Charged Neck Slice is a decent approach tool, especially when covered by an assist, and is extremely difficult to punish once active, even on whiff. Although typically neutral on block, very few characters can contest X-23's fast 5L, so she typically keeps momentum. | |||
| Damage | Startup | Active | Recovery |
|---|---|---|---|
| 85,000 | 20 | 4 | 22 |
| On Hit | On Block | Guard | Properties |
| -3 | -4 | Low | - |
|
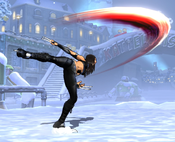
Works very similarly to Neck Slice, but with a low-hitting slash instead of the larger, mid-hitting attack of 236L. Like with Neck Slice, it is fairly unremarkable when uncharged. | |||
| Damage | Startup | Active | Recovery |
|---|---|---|---|
| 50,000 x3 | 39 | 7 | 19 |
| On Hit | On Block | Guard | Properties |
| +27 | -3 | Low | |
|
Charging Ankle Slice causes it to gain the OTG property, which makes it an important combo tool. Like with Neck Slice, charging this move also causes it to deal increased damage and hitstun, while also enhancing the move's horizontal range. Against most characters, this move launches the opponent slightly airborne when it hits OTG, allowing for a combo into Rage Trigger and basically nothing else outside of X-Factor. Against large-body characters (Hulk, Sentinel, Nemesis), this move launches slightly higher, allowing her to combo into Weapon X Prime (623XX) instead. | |||
| Damage | Startup | Active | Recovery |
|---|---|---|---|
| 120,000(3 hits) | 26-45 | 8 | 23 |
| On Hit | On Block | Guard | Properties |
| - | - | Throw | |
|
X-23's command grab. In most cases, it is too slow and predictable to use effectively, and opponents can simply hold up on reaction to the lengthy startup animation. Charging this special by holding the button increases the range of the attack (she leaps further horizontally) but otherwise has no benefit. On successful throw, the opponent is knocked airborne and eventually falls down next to X-23, allowing her to pick up with a well-timed normal just before they reach the ground. | |||
| L (in air) |
Damage | Startup | Active | Recovery |
|---|---|---|---|---|
| 90,000 | 15 | Until Grounded | 11 | |
| On Hit | On Block | Guard | Properties | |
| +10 | +9 | Mid | ||
| M (in air) |
Damage | Startup | Active | Recovery |
| 90,000 | 15 | 13 | 13 | |
| On Hit | On Block | Guard | Properties | |
| -3 | -4 | Mid | - | |
| H (in air) |
Damage | Startup | Active | Recovery |
| 90,000 | 15 | 13 | 13 | |
| On Hit | On Block | Guard | Properties | |
| -3 | -4 | Mid | - | |
|
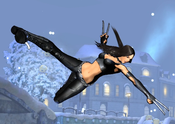
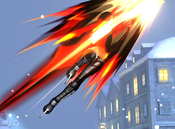
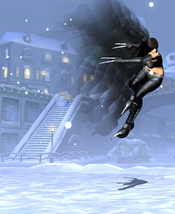
Divekick-esque special move. Direction is changed based on the button used. L travels diagonally down-forward, M travels straight horizontally forward, and H travels diagonally up-forward. L Talon Attack is an Air Combo Finisher and is preferred over j.5S due to dealing more damage and bringing X-23 down to the ground alongside the opponent, letting her follow-up more quickly. It is also a strong approach tool, as it is quite advantageous on both hit and block. M Talon Attack is also a solid approach tool, especially when done close to the ground as a Tiger Knee motion and/or covered by an assist. X-23 can freely cancel her other specials into Talon Attack so long as she is airborne. This is important for Crescent Scythe (623X) and Mirage Feint (214X) which have lengthy airborne periods during their duration. | ||||
| L |
Damage | Startup | Active | Recovery |
|---|---|---|---|---|
| 85,000 | 5 | 8 | 33* | |
| On Hit | On Block | Guard | Properties | |
| +1 | -19 | Mid | ||
| M |
Damage | Startup | Active | Recovery |
| 55,000 x2 | 5 | 11 | 40* | |
| On Hit | On Block | Guard | Properties | |
| -5 | -25 | Mid | ||
| H |
Damage | Startup | Active | Recovery |
| 44,000 x3 | 5 | 12 | 59* | |
| On Hit | On Block | Guard | Properties | |
| -23 | -46 | Mid | ||
|
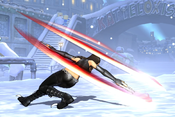
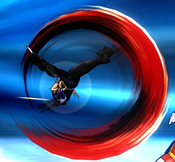
Dragon Punch-style upward hitting attack. However, it has no invulnerability and is a poor reversal. Crescent Scythe is mainly useful as combo filler, especially the H version which deals fairly significant damage. This move does not recover naturally until X-23 reaches the ground (recovery listed is for grounded version of the move). However, its lengthy recovery can be circumvented by canceling it into any version of Talon Attack at any time. | ||||
| L |
Damage | Startup | Active | Recovery |
|---|---|---|---|---|
| - | 3 | - | 14 | |
| On Hit | On Block | Guard | Properties | |
| - | - | - | - | |
| M |
Damage | Startup | Active | Recovery |
| - | 3 | - | 25 | |
| On Hit | On Block | Guard | Properties | |
| - | - | - | Passthrough | |
| H |
Damage | Startup | Active | Recovery |
| - | 6 | - | 7 | |
| On Hit | On Block | Guard | Properties | |
| - | - | - | - | |
|
X-23 drops into a stance which can be maintained by holding the button. Releasing the button causes X-23 to leap forward, with the trajectory determined by the button used:
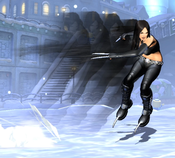
214M is useful as a cross-up tool, by canceling it into L Talon Attack once it basses behind the opponent. 214H is a useful combo tool and can also be used to quickly access aerial normals as a sort of pseudo jump-cancel. While holding down the button to delay any version of Mirage Feint, pressing S will cause X-23 to cancel the stance and return to a neutral state. This is referred to as a "Mirage Feint Cancel" and is a useful tool to reduce the recovery of M and H normals. In particular, Mirage Feint Cancels allow X-23 to loop 5H into itself with some practice, leading to a high damage combo. | ||||
Hyper Combos
| Damage | Startup | Active | Recovery |
|---|---|---|---|
| 20,000 x10 + 50,000 x3(245,400 - 294,600) | 13+2 | 16(13)24(10)10 | 44 |
| On Hit | On Block | Guard | Properties |
| -12 | -29 | Mid | Invuln until frame 19, mashable |
|
Standard combo ending hyper, as well as a decent reversal due to being invulnerable from frame 1. Final hits raise the opponent quite high in the air, which makes DHCs awkward to perform unless the cancel is done early. | |||
| Damage | Startup | Active | Recovery |
|---|---|---|---|
| 10,000 x6 + 15,000 + 25,000 + 70,000 + 20,000 x2 + 60,000 + 70,000 + 110,000(280,900) | 24+1 | 33 | 38 |
| On Hit | On Block | Guard | Properties |
| - | -50 | Mid | Invuln frames 6-64, Spinout into |
|
Cinematic level 1 hyper. Although it is not frame 1 invuln like Rage Trigger, it has significantly more total invincibility. This makes it a decent counter-activation to certain other hypers, such as Doctor Doom's 214XX. This hyper is harder to combo into (and deals less damage) than Rage Trigger, but it is more friendly to DHCs in either direction. It is especially nice for comboing into install hypers such as Dante's Devil Trigger due to its lengthy spinout. | |||
| Damage | Startup | Active | Recovery |
|---|---|---|---|
| 400,000 | 20+9 | 290 | - |
| On Hit | On Block | Guard | Properties |
| - | - | Good Luck :) | Invuln frames 6-29, 290 frame invisibility install |
|
Upon activation, X-23 performs a backflip and turns completely invisible for roughly 5 seconds. This means that neither X-23 nor her opponent knows exactly where she is, although the dust clouds kicked up whenever she dashes can give clues to her current location. While invisible, X-23 can move and attack as normal, however, her S button is replaced with a special unblockable attack. This special S follow-up can be done at any time, including during special attacks. Pressing S while on the ground causes the Unblockable attack to have identical hitboxes and frame data to 5L. Pressing S while airborne gives the unblockable the properties of j.5L. Because Silent Kill's followup is an Unblockable and not a throw, it can be landed even on an opponent already in hitstun or blockstun, leading to truly inescapable setups. Upon connecting this attack, a short cinematic plays where X-23 deals a single, highly damaging attack to the opponent. This attack causes a Hard Knockdown, and she can follow up either by catching the opponent before they land, or with an OTG 236[M]. Despite being invisible, X-23 is not invincible once the startup has ended, therefore she can be hit/thrown when approaching to perform the followup. This can be negated by using a normal or assist first, then going into the Unblockable followup. | |||
Universal Mechanics
| Damage | Startup | Active | Recovery |
|---|---|---|---|
| 80,000 | 1 | 1 | - |
| On Hit | On Block | Guard | Properties |
| - | - | Throw | |
|
X-23 can follow up her forward ground throw with a well-timed dash up 236[M], although the damage potential here is limited. Picking up after a backthrow is effectively impossible. | |||
| Damage | Startup | Active | Recovery |
|---|---|---|---|
| 80,000 | 1 | 1 | - |
| On Hit | On Block | Guard | Properties |
| - | - | Airthrow | |
|
X-23 can follow up her forward air throw with a well-timed dash up 236[M], although the damage potential here is limited. Picking up after a backthrow is effectively impossible. | |||
| Damage | Startup | Active | Recovery |
|---|---|---|---|
| 50,000 | 2 | 4 | 21 |
| On Hit | On Block | Guard | Properties |
| - | -3 | Mid | Snapback |
|
Animation and hitbox based on 5H | |||
| Damage | Startup | Active | Recovery |
|---|---|---|---|
| 30,000 | - | 17 | 34 |
| On Hit | On Block | Guard | Properties |
| - | -13 | OH | |
|
- | |||
Team Position
Laura is typically placed in the Second or Anchor position on a team. Although her Unblockable hyper is very powerful, she typically needs another character to score the first hit and build meter in order to set her up. Unfortunately, her assists are not the most useful while she waits in the backline. Crescent Scythe is a decent defensive assist and can be used to set up Alpha Counter Cancels since it is freely cancelable into j.236X on hit or block. Ankle Slice hits Low and thus can be used to set up Unblockables when combined with an overhead from the point character. She also makes an excellent candidate for Level 2 or Level 3 X-Factor, as the speed boost opens up some additional solo combo routes for her, and the damage boost allows her to quickly build meter for more Dirt Naps.
Notable Synergies
Dante: Dante's Jam Session assist has huge vertical coverage and provides a significant amount of blockstun. When called against an oncoming character, it can force most opponents to block (or be hit) as soon as they appear, making X-23's unblockable hyper truly inescapable. It's also a generically useful assist that she can call in neutral in order to mount an offense. Like many other characters on this list, Dante has many tools for extended combos that build significant meter, which can be used to fuel Dirt Nap setups.
Players to Watch: Dapvip (Dante/X-23/Iron Man), Traumatisch (X-23/Dormammu/Dante), Mitsu (Dante/X23/Strange)
Iron Man/Doctor Doom: Both of these characters offer a beam assist. Besides being useful in neutral, X-23 can call these assists during her 5S launcher and then quickly bring a launched opponent back to the ground with j.236L. These beams lasts long enough for the opponent to land on them and for Laura to relaunch, making it one of the few ways that she can use assists to extend her main combo routes. Both of these characters also have relatively easy, any-position TAC Infinites, which are one of the easiest ways to build 5 bars for X-23 to use in unblockable setups.
Players to Watch Jayto (X-23/Doom/Vergil), Dapvip (Dante/X-23/Iron Man)
Dormammu/Vergil: Dark Hole (Dorm) and Rapid Slash (Vergil) are rare examples of assists that last long enough for Laura to call them before starting her 236[M} OTG, and still be active as she recovers from it. This allows her to perform a relaunch without X-Factor, which is a welcome boost to her damage potential. Additionally, Dormammu can activate both Stalking Flare (214XX) and Flame Carpet (3H) and then tag out, leaving these attacks on screen for the opponent to block while Laura mounts an offense.
Players to Watch: Jayto (X-23/Doom/Vergil), Traumatisch (X-23/Dormammu/Dante)
Magento: With his high mobility, Magneto makes an excellent point character for 300% teams, as he can hold his own and score a hit even with limited assist availability. Magneto can score an early hit and set up a TAC for another character to finish, or be the character brought in to perform the TAC himself. In either case, the result is the same: one dead character and 5 meter to spend on Dirt Nap unblockables for the remaining two opponents.
Players to Watch: ASH (Magneto/X-23/Dante)
Other Players to Watch:
Alternate Colors
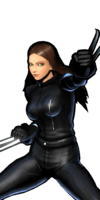
| Color 1 | Color 2 | Color 3 | Color 4 | Color 5 | Color 6 | Alt Color |
|---|---|---|---|---|---|---|

|

|

|

|

|

|
|


