Introduction
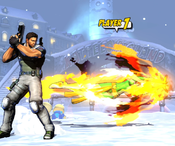
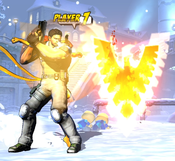
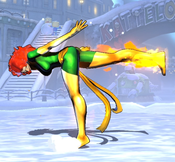
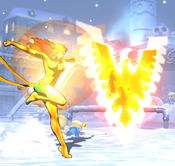
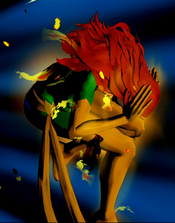
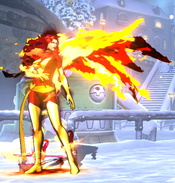
Also known as Jean Grey (her real name) or Marvel Girl (her previous codename), Phoenix is a psychic mutant and member of the X-Men. Her telepathic capabilities have led to her being possessed by a cosmic entity known as the Phoenix Force, and used as its avatar.
In UMvC3, Phoenix is a highly mobile projectile-focused character. She zones opponents out using her 236X "TK Shot" projectiles and 214X "TK Trap" specials to control space while maneuvering around the stage with Flight and a fast 8-way airdash. When on the offensive, she can set up dangerous mixups by using her 421X Teleportation to suddenly attack the opponent from any direction. However, she is most well known for her unique "Dark Phoenix Rising" level 5 Hyper, which allows her to resurrect as a much more powerful version of herself on death.
In the UMvC3 community, it is common to refer to Phoenix as "Jean", or even "The bird", in order to better distinguish her from Phoenix Wright, another character with a similar name. On this site, "Phoenix" always refers to Jean, except on Phoenix Wright's character page. On any other page, this site will specify "Phoenix Wright" by his full name when referring specifically to him.
| Strengths | Weaknesses |
|---|---|
|
|
Unique Mechanics
Phoenix automatically activates her Level 5 Hyper (Dark Phoenix Rising) if she dies with 5 bars of meter currently stocked. It is not possible to activate this hyper any other way. The specific properties of Dark Phoenix are detailed in her movelist, but in brief:
- Dark Phoenix's normal attacks and command normals produce "feathers", additional projectiles that move in a set pattern dependent on the attack used.
- Dark Phoenix gains a global 20% damage boost, stacking with the damage boost from X-Factor. She also gains a 20% boost to meter gain(this compounds with the damage boost, resulting in 44% more meter built per attack).
- Dark Phoenix's health is restored to full, but then starts to drain, at a rate of roughly 15000 life per second. All health drained this way is left as Red Health
- Dark Phoenix's specials are improved. They are typically larger in size, and have additional properties such as wall bounces
- Dark Phoenix's X-Factor bonuses - both damage and speed - are improved, and the Minimum Damage Scaling of her normals, specials and hypers is increased.
Move List
Assists
| Damage | Startup | Active | Recovery |
|---|---|---|---|
| 23,000 + 35,000 x3 / 26,400(?) x8(Including Dark Phoenix's damage boost) | 44 | - | 127, 97 |
| On Hit | On Block | Guard | Properties |
| - | - | Mid | Priority: Low, Durability: 5 (shot), 3 (explosion) |
|
THC Hyper: Phoenix Rage. Phoenix fires a single, standard fireball projectile, which quickly travels horizontally across the screen. If the fireball touches an opponent, it explodes, dealing additional damage. The explosion lasts for 15 frames. Neither the fireball nor its explosion have any special or notable properties. When in Dark Phoenix mode, this assist fires two projectiles, stacked vertically on top of each other. | |||
| Damage | Startup | Active | Recovery |
|---|---|---|---|
| 30,000 x4 / 36,000 x4 | 32 | 14 | 111, 81 |
| On Hit | On Block | Guard | Properties |
| - | - | Mid | |
|
THC Hyper: Phoenix Rage. Recommended assist. Phoenix charges forward across the screen, traveling just over halfscreen distance. Causes a decent amount of hitstun and pops opponents into the air on hit, so it can be used for combo extensions. Overdrive assist destroys Low and Medium Priority projectiles on contact. However, the risk of mistiming or mis-spacing the call, which will likely result in Phoenix taking heavy damage or outright dying, means it should rarely be used this way. In general, avoid calling outside of combos. TK Overdrive gains no extra properties from Dark Phoenix mode, except for the generic damage boost. | |||
| Damage | Startup | Active | Recovery |
|---|---|---|---|
| 90,000 / 60,000 x3(Including Dark Phoenix's damage boost) | 44 | 30 | 112, 82 |
| On Hit | On Block | Guard | Properties |
| - | - | Mid | Priority: Low, Durability: 5, |
|
THC Hyper: Phoenix Rage. Phoenix places a flaming emblem floating just above the ground in front of herself. The emblem has projectile durability and can absorb another projectile, but has no active hitbox and will not damage an opponent who touches it. After 30 frames, the trap activates, causing it to turn into an active projectile, which flies up-forward. In Dark Phoenix Mode, the emblem and subsequent projectile are significantly larger. The projectile now hits three times for higher total damage, and causes a Wall Bounce on hit. | |||
Ground Normals
| Damage | Startup | Active | Recovery |
|---|---|---|---|
| 30,000 | 5/4 | 3/4 | 11 |
| On Hit | On Block | Guard | Properties |
| 0/+4 | -1/+1 | Mid | |
|
Standard fast jab. Although it chains into itself, 5L > 5L does not consistently combo against airborne opponents, so it is not a particularly good anti-air the way many other Rapid Fire 5Ls are. In Dark Phoenix Mode, fires one Feather, directly forward, from the same height as her actual jab. | |||
| Damage | Startup | Active | Recovery |
|---|---|---|---|
| 46,000 | 8 | 3 | 16 |
| On Hit | On Block | Guard | Properties |
| 0/-1 | -1/-3 | Mid | - |
|
Phoenix performs a donkey kick. In Dark Phoenix Mode, fires three Feathers, which fan out. One up-forward, one directly forward, and one down-forward. | |||
| Damage | Startup | Active | Recovery |
|---|---|---|---|
| 67,000 | 11/10 | 10 | 10 |
| On Hit | On Block | Guard | Properties |
| +4/+8 | +3/+5 | Mid | - |
|
Phoenix creates a burst of flame from her hands. The attack does not reach quite as far as the flame graphic would suggest, but it still has good range for a normal and is heavily disjointed. In Dark Phoenix Mode, fires five feathers, which fan out. Up, Up-Forward, Forward, Down-Forward, and Down. | |||
| Damage | Startup | Active | Recovery |
|---|---|---|---|
| 33,000 | 4/3 | 3 | 11 |
| On Hit | On Block | Guard | Properties |
| 0/+4 | -1/+1 | Low | |
|
Very fast, spammable, crouching Low. In Dark Phoenix Mode, fires one feather, which travels horizontally forward along the ground, originating from her foot. The Feather appears 1 frame before the kick becomes active, giving it a 3f startup, the fastest of any normal in the game (tied with Ammy 5L). | |||
| Damage | Startup | Active | Recovery |
|---|---|---|---|
| 50,000 | 9 | 8 | 19 |
| On Hit | On Block | Guard | Properties |
| -8/-9 | -9/-11 | Low | - |
|
Phoenix slides along the ground, advancing forward while attacking. 2M significantly lowers Phoenix's crouching profile, allowing her to slide underneath many projectiles or other higher-aimed attacks. In Dark Phoenix Mode, fires three feathers, which fan out. Up, Up-Forward, and Forward. | |||
| Damage | Startup | Active | Recovery |
|---|---|---|---|
| 60,000 | 12 | 4 | 23 |
| On Hit | On Block | Guard | Properties |
| - | -4/-11 | Low | |
|
Phoenix sweeps the ground. Lowers her crouching profile in the same way that 2M does, but it is outclassed as a low-profile tool by 2M due to 2H's lack of active frames. In Dark Phoenix Mode, fires five feathers, which fan out, spreading evenly from directly Up to directly Forward. | |||
| Damage | Startup | Active | Recovery |
|---|---|---|---|
| 80,000 | 10 | 5 | 21 |
| On Hit | On Block | Guard | Properties |
| Launch | -3/0 | Mid | |
|
Phoenix kicks upward, launching opponents on hit. This is the only one of Phoenix's normals that does not gain Feathers from Dark Phoenix Mode, and behaves exactly the same except for the global damage boost. | |||
Aerial Normals
| Damage | Startup | Active | Recovery |
|---|---|---|---|
| 33,000 | 5 | 3 | 18 |
| On Hit | On Block | Guard | Properties |
| +16 | +11/+14 | OH | - |
|
Works as an instant overhead naturally against Big Body characters, or on normal-sized characters when set up via Fuzzy Guard. In Dark Phoenix Mode, fires one feather, directly forward. | |||
| Damage | Startup | Active | Recovery |
|---|---|---|---|
| 47,000 | 9/8 | 3 | 20 |
| On Hit | On Block | Guard | Properties |
| +17/+21 | +16/+18 | OH | - |
|
Phoenix kicks forward. Mainly used as combo filler. In Dark Phoenix Mode, fires three feathers, which fan out, Up-Forward, Forward, and Down-Forward. | |||
| Damage | Startup | Active | Recovery |
|---|---|---|---|
| 70,000 | 8 | 11 | 17 |
| On Hit | On Block | Guard | Properties |
| +16/+14 | +15/+12 | OH | - |
|
Phoenix performs a spinning kick, initially attacking in front of herself, then sweeping the hitbox above and behind her. Covers a very large total area, is very fast, and can easily hit cross-up. In Dark Phoenix Mode, fires five feathers, which fan out, Back, Up-Back, Up, Up-Forward, Forward. | |||
| Damage | Startup | Active | Recovery |
|---|---|---|---|
| 70,000 | 10 | 12 | 24 |
| On Hit | On Block | Guard | Properties |
| +16 | +15 | OH | |
|
Phoenix breathes fire, aimed forward with a very slight downward angle. j.5S has a very large hitbox that is entirely disjointed. It is an excellent jump-in as well as a general pressure and neutral tool. In Dark Phoenix Mode, fires five feathers, which fan out, spreading evenly from Down to Forward. | |||
Command Normals
| Damage | Startup | Active | Recovery |
|---|---|---|---|
| 24,000 per feather | - | 45 | - |
| On Hit | On Block | Guard | Properties |
| - | - | Mid | Priority: Low, Durability: 5 |
|
While in Dark Phoenix Mode, all of Phoenix's normals (except for grounded 5S), and command normals fire feather projectiles, in addition to the normal properties of the regular attack. The number of angle of the feathers is dependent on the specific move, but every individual feather behaves the same way. They slowly advance forward on their specified angle of travel, remaining active for 45 frames before disappearing. | |||
| Damage | Startup | Active | Recovery |
|---|---|---|---|
| 50,000 | 22 | 3 | 21 |
| On Hit | On Block | Guard | Properties |
| 0/-6 | -1/-8 | OH | - |
|
Phoenix raises her leg and then kicks downwards, acting as a standing overhead. Can be chained into from and of Phoenix's L or M normals, although this will not combo on hit. Can itself chain into 5H, 2H or 5S, so it is very easy to combo off of. In Dark Phoenix Mode, fires three feathers, which fan out, with one going directly Forward, one Down-Forward at a shallow angle, and one Down-Forward at a deeper angle. | |||
| Damage | Startup | Active | Recovery |
|---|---|---|---|
| 73,000 | 15/14 | 5 | 24 |
| On Hit | On Block | Guard | Properties |
| -5/-1 | -6/-1 | Mid | |
|
Phoenix charges forward while attacking with a flaming armbar. Causes a very large amount of hitstun, making it useful for combos. In Dark Phoenix Mode, fires five feathers, which fan out, Up, Up-Forward, Forward, Down-Forward, and Down. | |||
| Damage | Startup | Active | Recovery |
|---|---|---|---|
| 73,000 | 15/14 | 5 | 9 |
| On Hit | On Block | Guard | Properties |
| +10 | +9 | Mid | |
|
Air version of Flare Sword. Works basically the same way, and shares the high hitstun value. It recovers much faster, allowing Phoenix to link air normals afterwards. In Dark Phoenix Mode, fires five feathers, with the same spread as the grounded version. | |||
| Damage | Startup | Active | Recovery |
|---|---|---|---|
| 70,000 | 15 | Until grounded | 7 |
| On Hit | On Block | Guard | Properties |
| +10 | +9 | Mid | |
|
Phoenix halts any aerial momentum she had and plummets straight downward, attacking below herself. Can hit crossup, but the spacing is fairly narrow. Has a minimum activation height, similar to the minimum height required for airdashing. If j.2H hits an airborne opponent, it causes a Ground Bounce. j.2H if easy to combo in to from Phoenix's standard air chains, so it gives her access to an easy solo relaunch at any screen position. In Dark Phoenix Mode, fires five feathers, which fan out below her. These feathers will actually knock an opponent out of the regular j.2H hit, preventing it from Ground Bouncing properly. | |||
Special Moves
| L |
Damage | Startup | Active | Recovery |
|---|---|---|---|---|
| 20,000 + 67,000 / 21,600 + 55,200 + 21,600 + 55,200(Including Dark Phoenix's damage boost) | 10 | - | 35 (in air: Until Grounded+1) | |
| On Hit | On Block | Guard | Properties | |
| -11/-7 | -13/-9 | Mid | ||
| M |
Damage | Startup | Active | Recovery |
| 23,000 + 35,000 x3 / 26,400(?) x8(Including Dark Phoenix's damage boost) | 20 | - | 35 (in air: Until Grounded+1) | |
| On Hit | On Block | Guard | Properties | |
| -7/-3 | -8/-4 | Mid | ||
| H |
Damage | Startup | Active | Recovery |
| 20,000 + 28,000 x6 / 25,200(?) x12(Including Dark Phoenix's damage boost) | 30 | - | 35 (in air: Until Grounded+1) | |
| On Hit | On Block | Guard | Properties | |
| -3/+1 | -4/0 | Mid | ||
|
Phoenix's fireball special. Fires a standard projectile that travels directly forward. On contact with an opponent, the projectile explodes, dealing additional damage. L version has a slower travel speed, while M version moves more quickly. H version has the slowest travel speed of the three, but has homing properties, tracking the opponent's point character across the screen. If Phoenix is hit by any attack, TK Shot will disappear. When done in the air, Phoenix floats in place while charging up, then fires the projectile at a down-forward angle instead of directly forward. The "recoil" of the shot pushes Phoenix up-back slightly, and then she falls down, being vulnerable until she reaches the ground. Air TK Shot also gains the OTG property, and is Phoenix's only OTG-capable attack. Phoenix can perform a Tiger Knee TK Shot (2369X) to get an OTG fireball just off the ground, which is important for combos. Additionally, if Air TK Shot is performed in Flight Mode, Phoenix recovers with her normal recovery instead of needing to fall to the ground, and can even fire multiple TK Shots in succession. In Dark Phoenix Mode, TK Shot fires two projectiles instead of one. The individual projectiles are very slightly weaker, but they do more total damage and cover a larger portion of the screen. | ||||
| L |
Damage | Startup | Active | Recovery |
|---|---|---|---|---|
| 30,000 x4 | 8 | 14 | 19 | |
| On Hit | On Block | Guard | Properties | |
| - | -1/+2 | Mid | ||
| M |
Damage | Startup | Active | Recovery |
| 30,000 x4 | 8 | 14 | 14 | |
| On Hit | On Block | Guard | Properties | |
| +17 | +4/+7 | Mid | ||
| H |
Damage | Startup | Active | Recovery |
| 33,000 x5 | 12 | 20 | 34 | |
| On Hit | On Block | Guard | Properties | |
| - | -21/-18 | Mid | ||
|
Phoenix sets herself on fire and charges, attacking as a physical hitbox. The active frames of this attack destroy Low and Medium Priority projectiles on hit, allowing Phoenix to blow through them and hit an opponent on the other side. L and H versions travel horizontally forward, with L covering about halfscreen and H reaching fullscreen. The M version is aimed up-forward, into the air. If M Overdrive is used to go airborne from the grounded, Phoenix gets two airdashes, instead of her regular one per jump. TK Overdrive gains no special benefits from Dark Phoenix Mode, except for the global damage boost. | ||||
| Damage | Startup | Active | Recovery |
|---|---|---|---|
| 90,000 / 60,000 x3(Including Dark Phoenix's damage boost) | 20 | - | 20 |
| On Hit | On Block | Guard | Properties |
| - | - | Mid | Priority: Low, Durability: 5, |
|
Phoenix places a burning emblem on the stage, with its location and behavior dependent on button strength. The emblems themselves do not have active hitboxes and can not damage opponents. L version creates a burning trap on the ground in front of Phoenix, with a "detection" hitbox that extends vertically above it upwards indefinitely into the air. If an opponent enters that detection zone, a projectile is fired straight up. L TK Trap can be useful in combos, since she can link normals after the hit. The trap will disappear without activating after 300 frames (5 seconds), if Phoenix is hit, or if another L Trap is created. M version creates a burning trap in the air above and in front of Phoenix. The trap has a "detection" hitbox that extends horizontally outward from the emblem in both directions. The detection is rigged so that it will never trigger against a grounded opponent, even Big Body characters who look like they should be in range. If an opponent enters the detection zone, a projectile is fired directly forward. Note that the trap can be triggered from the opposite side, but it will still fire in the "forward" direction, missing the opponent. M TK Trap is a powerful mixup tool, especially on incoming. The trap will disappear without activating after 300 frames (5 seconds), if Phoenix is hit, or if another M Trap is created. H version creates a burning trap directly in front of Phoenix. Unlike the other versions, H TK Trap has no detection trigger. It automatically activates 30 frames after being created, firing a projectile at an up-forward angle. The trap will disappear without activating if Phoenix is hit, or if another H Trap is created. Phoenix can not have multiple of the same trap active on screen at once, but she can have all three different types of trap active simultaneously. In Dark Phoenix Mode, the emblems, their detection hitboxes, and the resulting projectiles are all significantly larger. Additionally, the projectiles have enhanced durability, being upgraded to Beam Durability with 5 points per frame for 3 frames. If an M or H Dark Phoenix Trap hits an opponent, it causes a Wall Bounce, making follow-up combos very easy. Dark Phoenix's version of all 3 traps hit three times, with slightly less damage per hit, but higher overall damage. TK Traps in Dark Phoenix Mode are extremely powerful as mixup tools and allow her to quickly snowball to destroy an entire enemy team. During the oncoming time after killing a previous character, Dark Phoenix can quickly set up all three traps, so they activate just as the next character enters, then perform any of her Teleport specials. This can make any from 0 to 3 of the triggered projectiles hit as a cross-up, creating a multi-layered mixup which is almost impossible to block correctly, and leads into another easy kill combo thanks to the enhanced Wall Bounce. | |||
| Damage | Startup | Active | Recovery |
|---|---|---|---|
| - | 10 | - | 20 |
| On Hit | On Block | Guard | Properties |
| - | - | - | |
|
Phoenix teleports, disappearing from her current location and reappearing at a position based on the opponent's location and button strength.
Because all versions of Teleport place Phoenix fairly close to the opponent, it is not particularly useful for her keepaway game. However, the L and M versions can be useful for escaping to the ground if Phoenix is airborne and an opponent pursues her up there. Conversely, Teleport greatly enhances Phoenix's offensive mixup game, since she can Teleport after throwing out a TK Shot or TK Trap to ambiguously cross-up as it connects. | |||
| Damage | Startup | Active | Recovery |
|---|---|---|---|
| - | 19 | 102 | 0 |
| On Hit | On Block | Guard | Properties |
| - | - | - | |
|
Phoenix enters a standard Flight Mode. While flying, Phoenix floats in place, and can steer herself in any direction by holding the stick. Phoenix gains unlimited use of her airdash while flying, and can chain airdashes of different directions into each other. Additionally, Phoenix can Plink Dash in the air to repeatedly airdash in the same direction, if desired. Phoenix can also perform air specials an unlimited number of times while flying, although her only air-OK specials are TK Shot and Teleport. Performing TK Shot while in Flight is particularly notable because it causes Air TK Shot to have normal recovery, instead of Until Grounded recovery, making it much less risky to perform high up. Phoenix's flight startup is fast enough that she can combo into it by Flight-canceling j.5H or j.6H. However, Phoenix's air normals are not airdash-cancelable, and so she does not gain much benefit from doing this, unlike other characters who have extended Flight combos like Magneto. While in Flight, Phoenix can cancel at any point by inputting 214S again, which is called "Unfly". Phoenix's Unfly is 0 frames, allowing her to cancel Flight normals instantly. | |||
Hyper Combos
| Damage | Startup | Active | Recovery |
|---|---|---|---|
| - | 4+3 | 600 | 18 |
| On Hit | On Block | Guard | Properties |
| - | - | - | - |
|
Phoenix surrounds herself with an orange, circular field. If any opponent is within that field, Phoenix will very quickly regenerate red health. The regeneration is extremely quick and occurs even if Phoenix is in hitstun or blockstun, unlike the regen granted by X-Factor (they also stack if both are active at once). Healing Field deals no damage and has no hitbox or attack element of any kind, its only purpose is healing, and it can only heal Red Life, not permanent damage. Its primary purpose is to negate the continual passive red health damage incurred by Dark Phoenix, if she does not have X-Factor available to perform the same function. | |||
| Damage | Startup | Active | Recovery |
|---|---|---|---|
| 0 | 30+0 | 4 | 0 |
| On Hit | On Block | Guard | Properties |
| - | +21 | Mid | |
|
Oh no. If regular Phoenix is killed while having a full five bars of meter stocked, this hyper will automatically activate, consuming all of them. Note that if the attack that would kill Phoenix also gives her enough meter to bring her to 5 bars, the hyper will still activate. Phoenix can not activate this hyper if she dies while not the Point character, like when being sniped as an assist call, even if five bars of meter are available. The hyper places Phoenix in an airborne state if she was not already, and makes her fully invincible for the entire duration. There are 30 frames of pre-flash startup to prepare any anti-Dark Phoenix tech the opponent may have planned. After the super flash, Phoenix enters Dark Phoenix Mode, granting several benefits. When the super flash ends, this hyper also sends out a shockwave, originating from Phoenix and growing outwards to protect the area around herself. This shockwave has zero frames of post-flash startup, and so it is not possible to buffer an input during the flash which will respond to it. For example, if the opponent is not already inputting block when the super freeze begins, they will not be able to block the shockwave. Similarly, invincible hypers can not be buffered during the freeze; they need to be input before the freeze-frame happens in order to come out in time. Afterwards, Phoenix returns with full health as Dark Phoenix, who is different from her regular form in the following ways:
Dark Phoenix is the most powerful character in the game and, especially in higher levels of X-Factor, is more than capable of wiping out an entire team of three characters by herself. The shockwave which originates from Dark Phoenix Rising to protect her transformation is not infallible. It is possible to pass through it with invincible or long-range moves and attack Phoenix. The transformation has zero frames of recovery, and so Dark Phoenix will always be able to block attacks as her transformation completes, but she may not be able to escape a well-timed airthrow. Many teams have strong anti-Dark Phoenix setups, which either force her to recover into an anti-air command grab (which she cannot escape from), or force her to recover blocking a meaty projectile, so that the attacker can perform a mixup. | |||
Universal Mechanics
| Damage | Startup | Active | Recovery |
|---|---|---|---|
| 80,000 | 1 | 1 | - |
| On Hit | On Block | Guard | Properties |
| - | - | Throw | |
|
Phoenix telepathically lifts the opponent up and tosses them away. The distance thrown makes picking up with an OTG Air TK Shot very difficult. | |||
| Damage | Startup | Active | Recovery |
|---|---|---|---|
| 80,000 | 1 | 1 | - |
| On Hit | On Block | Guard | Properties |
| - | - | Airthrow | |
|
Same as Phoenix's ground throw, but airborne. Tosses the opponent even further away. | |||
| Damage | Startup | Active | Recovery |
|---|---|---|---|
| 50,000 | 2 | 8 | 12 |
| On Hit | On Block | Guard | Properties |
| - | +6 | Mid | Snapback |
|
Animation and hitbox based on 5H. Note that Dark Phoenix will not produce any Feathers from her snapback, unlike the actual 5H. | |||
| Damage | Startup | Active | Recovery |
|---|---|---|---|
| 30,000 | - | 20 | 34 |
| On Hit | On Block | Guard | Properties |
| - | -17 | OH | |
|
- | |||
Team Position
Phoenix is exclusively used as an Anchor character. Although she has many of the strong neutral options available to typical point characters, such as flight mode, an 8-way airdash, and several strong projectiles, Phoenix is extremely fragile. Dark Phoenix is pretty universally considered to be the strongest anchor character in the game, so placing her in the 3rd position maximizes her chance to have five bars before she appears (and is killed).
Notable Synergies
Teams using Phoenix are typically built to support her Dark Phoenix transformation. They want to build up 5 bars of meter as quickly as possible, often by not using any at all, and then stay there, only activating other hypers if they are very confident that it can be built back in time. All characters would like to use meter, but some characters are better about working around this restriction.
Magneto: Out of all the standard point characters, Magneto is the most popular choice to support Phoenix. His extremely high mobility and strong projectile game allow him to be successful in neutral even with limited assist calls or meter usage. When he scores a hit, Magneto has several tools to set up dangerous resets, which can turn a 2-bar touch-of-death combo into a two-touch kill for zero bar. In general, he is a very meter-efficient character.
Players to Watch: GoldenBoyNeo (Magneto/Doom/Phoenix), Prodigy (Magneto/Doom/Phoenix)
Doctor Doom/Dormammu: While not a direct Phoenix synergy, Phoenix teams often have to deal with the problem that she is occupying their third slot, but players will want to call her assist as rarely as possible, to avoid the risk of her being sniped by an aware opponent. Doom and Dorm both have excellent, spammable assists, which can pick up the slack of only having one assist character available in neutral. Additionally, both of these characters have consistent TAC Infinites, and so a point character can secure a kill by TACing to either of these characters in the 2nd position, which will cost 0 meter and most likely build 5 meter as well.
Players to Watch: FChamp (Dorm/Doom/Phoenix), GoldenBoyNeo (Magneto/Doom/Phoenix), Prodigy (Magneto/Doom/Phoenix), Viscant (Zero/Doom/Phoenix), PZPoy (Zero/Doom/Phoenix), Noel Brown (Wolverine/Doom/Phoenix, Dorm/Doom/Phoenix)
Morrigan: This may seem like an anti-synergy, as Morrigan is most well-known for repeated use of her Level 1 Astral Vision hyper to enhance her projectile game, which is a serious drain on the team's meter. However, Morrigan can instead be used as a meter-building engine by making use of her Dark Harmonizer assist. Putting Morrigan behind a sufficiently mobile character can allow you to build a huge amount of nearly risk-free meter by running away and constantly calling Morrigan assist.
Players to Watch: RyanLV (Chun/Morrigan/Phoenix), Acentric (Chun/Morrigan/Phoenix), Rusty Shackleford (Morrigan/Ammy/Phoenix), snaketitz ( Joe/ morrigan / Phoniex), Prodigy (Magneto/Morrigan/Phoenix)
Other Players to Watch: RoachKing (Wesker/Haggar/Phoenix)
Alternate Colors
| Color 1 | Color 2 | Color 3 | Color 4 | Color 5 | Color 6 | Alt Color |
|---|---|---|---|---|---|---|

|

|

|

|

|

|

|

