Introduction
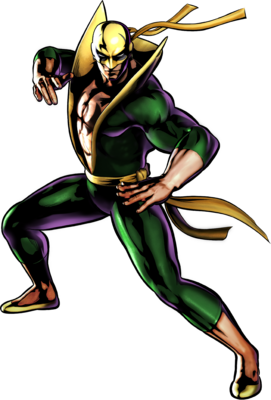
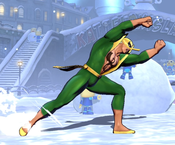
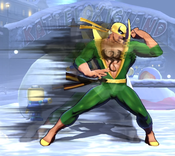
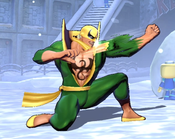
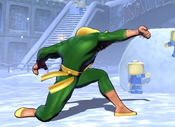
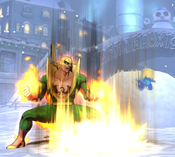
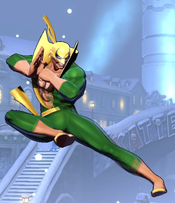
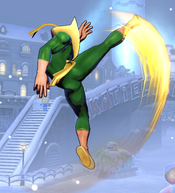
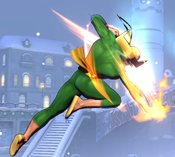
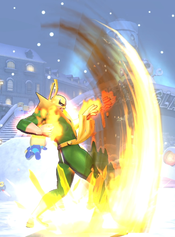
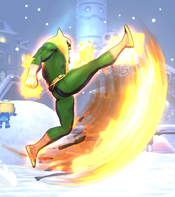
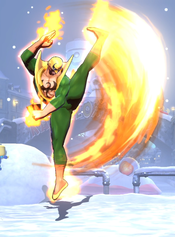
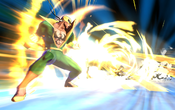
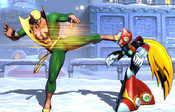
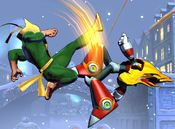
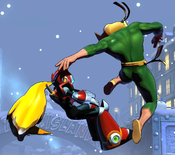
Danny Rand thought himself to be a normal man, but discovered he was part of a long legacy of Iron Fists after training in martial arts and earning the power himself. As Iron Fist, his body is hardened beyond normal human durability, and he has a mastery of chi - a mystical energy that augments his martial arts abilities.
In UMvC3, Iron Fist is a hyper-specialized character with extremely impressive dash speed and many tools for extended, high damage ground combos. However, he has virtually no ranged abilities, almost no aerial mobility or aerial attack capabilities, and limited defensive tools. Iron Fist can be quite strong if he is allowed to run his core gameplan, but struggles against characters that don't play by his rules.
| Strengths | Weaknesses |
|---|---|
|
|
Unique Mechanics
Iron Fist utilizes a special "rekka" mechanic that is unique to him. It allows him to freely cancel his special moves into each other, creating a chain of up to three specials. Any of Iron Fist's specials can be canceled into any of his other specials, with the following restrictions:
- You can not cancel a special directly into itself (but you can use the same special twice in a chain, provided a second move is in-between them).
- His "Chi" power-up specials can not be canceled (but you can cancel into them).
He also has two additional special moves which can only be performed as the third move in a rekka chain: Rising Fang (214S) and Wall of K'un-Lun (236S). These moves are powerful, but difficult to use outside of combos due to this requirement.
Move List
Assists
| Damage | Startup | Active | Recovery |
|---|---|---|---|
| 100,000 | 34 | 2 | 125, 95 |
| On Hit | On Block | Guard | Properties |
| - | - | Mid | |
|
THC Hyper: Iron Rage. Very short range single strike. Unremarkable except if you can find a way to set up the crumple with your point character. | |||
| Damage | Startup | Active | Recovery |
|---|---|---|---|
| 85,000 | 45 | 5 | 119, 89 |
| On Hit | On Block | Guard | Properties |
| - | - | OH | |
|
THC Hyper: Iron Rage. OTG assist similar to Wesker's gunshot or Sentinel's rocket punch. However, its horizontal range is poor, making it more difficult to use than those assists. As an overhead, it can be used to set up unblockables or other dangerous mixups when paired with low attacks from the point character. Again, the effectiveness of this is limited by its short range. | |||
| Damage | Startup | Active | Recovery |
|---|---|---|---|
| 130,000 | 34 | 10 | 122, 92 |
| On Hit | On Block | Guard | Properties |
| - | - | Mid | |
|
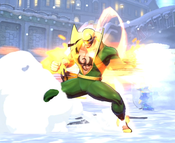
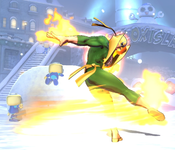
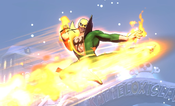
THC Hyper: Iron Rage. Recommended assist - a flying kick that covers approximately half the screen. At the outer edge of its range, it can be ducked, but otherwise has very good coverage. Causes a wallbounce into a soft knockdown on hit. Rising Fang has medium priority projectile nullification. It will completely destroy and low-priority projectiles it comes into contact with. On contact with a medium projectile, both the projectile and the assist will be mutually negated. Useful for calling in response to enemy zoning patterns to blow through them. | |||
Ground Normals
| Damage | Startup | Active | Recovery |
|---|---|---|---|
| 45,000 | 5 | 2 | 11 |
| On Hit | On Block | Guard | Properties |
| +3 | +1 | Mid | - |
|
- | |||
| Damage | Startup | Active | Recovery |
|---|---|---|---|
| 73,000 | 7 | 4 | 16 |
| On Hit | On Block | Guard | Properties |
| +1 | -1 | Mid | - |
|
Solid anti-air. When used this way, chain into 6H to attempt a confirm into jump loops. | |||
| Damage | Startup | Active | Recovery |
|---|---|---|---|
| 83,000 | 11 | 5 | 19 |
| On Hit | On Block | Guard | Properties |
| +2 | 0 | Mid | - |
|
Advances Iron Fist forward, and also has a deceptively huge hitbox. Altogether, it can hit an opponent from as far as three character lengths away, and dash-up 5H can catch opponents off-guard by closing the distance so quickly. Extremely low-risk to throw out due to being neutral on block, having decent recovery, and multiple excellent cancel options. | |||
| Damage | Startup | Active | Recovery |
|---|---|---|---|
| 43,000 | 5 | 2 | 12 |
| On Hit | On Block | Guard | Properties |
| +2 | 0 | Mid | - |
|
Note: Does not hit low. Almost identical frame data to 5L, but with a lower profile and slightly worse range. | |||
| Damage | Startup | Active | Recovery |
|---|---|---|---|
| 70,000 | 8 | 4 | 17 |
| On Hit | On Block | Guard | Properties |
| 0 | -2 | Mid | - |
|
Note: Does not hit low. | |||
| Damage | Startup | Active | Recovery |
|---|---|---|---|
| 75,000 | 10 | 4 | 25 |
| On Hit | On Block | Guard | Properties |
| - | -5 | Low | |
|
Standard sweep attack. Can get grounded opponents airborne if you specifically need to adjust their height for a 6H loop. However, its usually better to use 236M's crumple for this purpose instead. | |||
| Damage | Startup | Active | Recovery |
|---|---|---|---|
| 90,000 | 12 | 2 | 27 |
| On Hit | On Block | Guard | Properties |
| Launch | -5 | Low (!!) | |
|
One of the worst launchers in the game, as it cannot hit airborne opponents, no matter how low to the ground they are. Also his mediocre horizontal range. Considering that Iron Fist's air combo options are very basic, this move is rarely used. Notable for being a 5S that hits Low, which might catch opponents who are expecting overhead pressure after blocking 6H. | |||
Aerial Normals
| Damage | Startup | Active | Recovery |
|---|---|---|---|
| 50,000 | 6 | 8 | 12 |
| On Hit | On Block | Guard | Properties |
| +14 | +12 | OH | - |
|
Works as an instant overhead naturally against normal sized characters, although Iron Fist can not convert this to anything without assists or X-Factor. | |||
| Damage | Startup | Active | Recovery |
|---|---|---|---|
| 65,000 | 8 | 3 | 20 |
| On Hit | On Block | Guard | Properties |
| +19 | +17 | OH | - |
|
Works as an instant overhead against large bodies only, although it is largely outclassed by j.5H. | |||
| Damage | Startup | Active | Recovery |
|---|---|---|---|
| 80,000 | 9 | 3 | 29 |
| On Hit | On Block | Guard | Properties |
| +19 | +17 | OH | - |
|
Very good cross-up hitbox. Works as an instant overhead naturally against large bodies, and also against normal-sized characters when set up via fuzzy guard. If used this way, a delayed chain to j.5S allows Iron Fist enough time to land and solo convert into a full combo. | |||
| Damage | Startup | Active | Recovery |
|---|---|---|---|
| 83,000 | 10 | 4 | 27 |
| On Hit | On Block | Guard | Properties |
| +18 | +16 | OH | |
|
- | |||
Command Normals
| Damage | Startup | Active | Recovery |
|---|---|---|---|
| 70,000 | 9 | 4 | 21 |
| On Hit | On Block | Guard | Properties |
| +4 | +2 | Mid | |
|
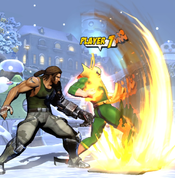
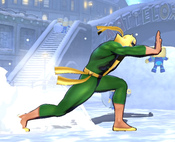
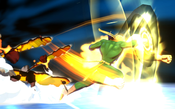
Advancing palm attack. Moves forward slightly (not as far as 5H) and has a respectable hitbox. Notable for nullifying low and medium priority projectiles on contact. The projectile nullification only occurs during the 4-frame active window, which can make it challenging to time. Iron Fist can throw this out against enemy zoning patterns and then whiff cancel into any of his rekka attacks to advance forward, whiff cancel into chi to power up while taking advantage of the armor frames, or whiff cancel into his Iron Rage hyper (236XX) to try and punish the projectile. On hitting an airborne opponent, causes a very low juggle, especially when compared to 6H. It can be difficult to follow-up with many of his rekka specials in this case, as the opponent will reach the ground too quickly. | |||
| Damage | Startup | Active | Recovery |
|---|---|---|---|
| 80,000 | 12 | 7 | 25 |
| On Hit | On Block | Guard | Properties |
| -6 | -8 | Low | |
|
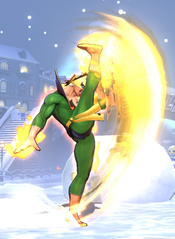
Upwards kick and important combo/pressure tool. Can be jump-canceled on hit or block. Also just useful as generic hit confirm filler, especially against grounded opponents. On hitting an airborne opponent, it juggles opponents quite high up. Be careful when using this, as it can cause many of his follow-up rekka specials to whiff. Quick Kick has a unique interaction with Iron Fist's rekka specials. Normally, Iron Fist can only a special into another after the first special has become active. However, if Iron Fist performs Quick Kick and then cancels it into a special, that special can then be kara-canceled (as in, it's startup can be canceled into another special before it becomes active). This gives Iron Fist some extra mixup tricks where he can fake a hit to bait pushblocks, or fake a low/overhead hit and quickly cancel into the other. | |||
Special Moves
| Damage | Startup | Active | Recovery |
|---|---|---|---|
| 80,000 | 15 | 3 | 21 |
| On Hit | On Block | Guard | Properties |
| +2 | 0 | Mid | scales by 0.85 |
|
The most basic and low-risk of Iron Fist's rekka specials. Safe on block, and leaves the opponent in place with no special properties. Useful as free extra damage in rekka chains before going into a knockdown or crumple attack. | |||
| Damage | Startup | Active | Recovery |
|---|---|---|---|
| 100,000 | 10 | 2 | 39 |
| On Hit | On Block | Guard | Properties |
| - | -17 | Mid | |
|
Standard way to end rekka chains against grounded opponents, as it causes a lengthy crumple. The crumple gives Iron Fist time to activate one of his chi buffs, or even hard tag to another character, before picking up with another combo string on the crumpled opponent. Note that you do not need to chain Lotus Whip into a chi move, you have enough time to fully recover, activate chi, and start a new string before the opponent recovers. Causes a hard knockdown on hitting an airborne opponent. This is usually rendered obsolete by Surging Fist (236H), which does the same thing with faster recovery. | |||
| Damage | Startup | Active | Recovery |
|---|---|---|---|
| 115,000 | 20 | 3 | 28 |
| On Hit | On Block | Guard | Properties |
| - | - | Mid | |
|
Good tool for ending rekka chains against airborne opponents. Causes a hard knockdown, and recovers quick enough that Iron Fist can usually follow up with a 214M OTG to extend the combo afterwards. | |||
| Damage | Startup | Active | Recovery |
|---|---|---|---|
| - | 4 | 300 | 26 |
| On Hit | On Block | Guard | Properties |
| - | - | - | Super Armor frames 5-20 |
|
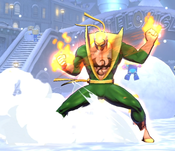
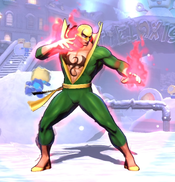
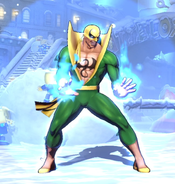
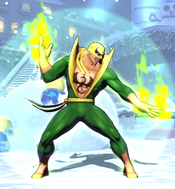
Iron Fists focuses in place, enhancing his body with one of three different types of Chi depending on the button pressed:
All chi enhancements last for 300 frames (5 seconds) from activation and - like most other power-ups - will be maintained indefinitely if Iron Fist tags out and is not currently the point character. Iron Fist can only have one chi buff active at a time, and using any Chi move will overwrite his existing chi. All versions of Chi have a 15-frame super armor window which can be used to tank attacks, especially when combined with 4H's projectile nullification or 236XX's invuln. This carries some risk, as the install also has a punishable recovery. | |||
| Damage | Startup | Active | Recovery |
|---|---|---|---|
| 70,000 | 13 | 3 | 25 |
| On Hit | On Block | Guard | Properties |
| -2 | -4 | Low | scales by 0.85 |
|
Low-hitting rekka attack. Enables a basic high/low mixup when paired with the overhead-hitting 214M, although pushblock can defeat most of these setups consistently. Otherwise works as combo filler in a similar way to 236L. | |||
| Damage | Startup | Active | Recovery |
|---|---|---|---|
| 85,000 | 21 | 5 | 33 |
| On Hit | On Block | Guard | Properties |
| - | -14 | OH | |
|
Overhead-hitting rekka attack. Enables basic high/low mixups when paired with the low-hitting 214L. This is Iron Fist's only OTG attack, and uses a ground bounce (which is necessary to get any follow-ups). As long as Iron Fist still has his ground bounce available, he can follow up with a rekka chain into basically any other special. | |||
| Damage | Startup | Active | Recovery |
|---|---|---|---|
| 50,000 + 60,000 | 15 | 3(3)4 | 36 |
| On Hit | On Block | Guard | Properties |
| - | -16 | Mid | |
|
Iron Fist performs two hopkicks in quick succession, juggling the opponent into the air. This move knocks opponents so high that many of his rekka follow-ups will whiff. Twin Snakes can be chained into 214M, but this will waste ground bounce, limiting the moves usefulness. Despite appearances, Iron Fist is considered to be grounded for the entire duration of this move. However, his hurtbox leaves the ground during the animation, and so many low-hitting attacks will whiff against this move. | |||
| Damage | Startup | Active | Recovery |
|---|---|---|---|
| 130,000 | 15 | 5 | 41 |
| On Hit | On Block | Guard | Properties |
| - | -22 | Mid | |
|
Rekka series ender. In most combos, you will get more value out of saving your wallbounce for Iron Rage. Armored, but awkward to use in neutral due to the requirement to chain into it from two other specials. Can be used as a frame trap by delaying another rekka into this move, although this is very risky due to Wall's long recovery. | |||
| Damage | Startup | Active | Recovery |
|---|---|---|---|
| 130,000 | 20 | 10 | 33 |
| On Hit | On Block | Guard | Properties |
| - | -19 | Mid | |
|
Like with 236S, this is a rekka series ender that causes a wallbounce on hit, and is awkward to use in neutral due to its requirement to follow two other rekka specials. Destroys low-priority projectiles on contact, and mutually negates with medium-priority projectiles. | |||
Hyper Combos
| Damage | Startup | Active | Recovery |
|---|---|---|---|
| 22,000 x9 - x19 + 130,000 | 3+3 | 46 | 34 |
| On Hit | On Block | Guard | Properties |
| - | -14 | Mid | Frames 1-11 Invuln, |
|
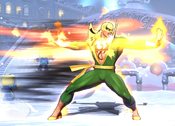
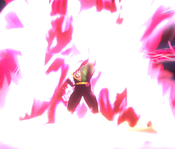
Reversal hyper and combo ender. Very fast with solid damage and a good enough amount of invincibility. Iron Fist rushes forward while punching rapidly. Causes a wallbounce on the final hit, provided that Iron Fist has not already used his wallbounce during that combo. This wallbounce allows Iron Fist to solo follow-up his own hyper for additional damage. The most basic follow-up is to simply link another Iron Rage or Volcanic Roar (623XX) hyper for additional damage. | |||
| Damage | Startup | Active | Recovery |
|---|---|---|---|
| 18,000 x25 - x50 | 9+1 | 90 | 38 |
| On Hit | On Block | Guard | Properties |
| -17 | -35 | Mid | Mashable, Priority: High, Beam Durability: 1 per frame for 25 frames |
|
More damaging than Iron Rage, although it lacks the wallbounce follow-up of his other hyper. Deals great damage for 1 bar when fully mashed. Has large vertical range much makes it easy to DHC into from a variety of hypers. | |||
| Damage | Startup | Active | Recovery |
|---|---|---|---|
| 400,000 | 10+10 | 21 | 38 |
| On Hit | On Block | Guard | Properties |
| - | -35 | Mid | Invuln until frame 30, |
|
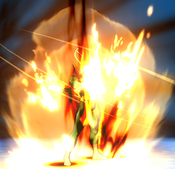
Standard cinematic level 3 hyper. Has large amounts of invincibility, and on contact enters a cinematic which deals heavy unscaled damage. The actual hitbox is an aura around Iron Fist which can also hit above or behind him. Due to the very long animation before this Hyper does damage, Chi effects will usually expire before the hit. However, it is still possible to get the damage boost from Chi L if you activate just before going into super. | |||
Universal Mechanics
| Damage | Startup | Active | Recovery |
|---|---|---|---|
| 80,000 | 1 | 1 | - |
| On Hit | On Block | Guard | Properties |
| - | - | Throw | |
|
Standard ground throw. Both forward and back throws knock the opponent a sizeable distance away from Iron Fist, requiring a tightly timed dash up to combo with 214M. | |||
| Damage | Startup | Active | Recovery |
|---|---|---|---|
| 80,000 | 1 | 1 | - |
| On Hit | On Block | Guard | Properties |
| - | - | Airthrow | |
|
Standard airthrow that results in a hard knockdown. Forward airthrow sends the opponent straight down, but backthrow pushes them some distance away, which can make follow-ups much harder. Glitch: Airthrowing an opponent with Iron Fist very low to the ground, and then mashing air normals afterwards, can lead to Iron Fist getting "stuck" in a floating state just off the ground without landing. Video Example. This glitch has no practical purpose and actually can be an inconvenience if you happen to cause it by accident, since it significantly delays Iron Fist's return to the ground. | |||
| Damage | Startup | Active | Recovery |
|---|---|---|---|
| 50,000 | 2 | 7 | 16 |
| On Hit | On Block | Guard | Properties |
| - | +1 | Mid | Snapback |
|
Animation and hitbox based on 6H | |||
| Damage | Startup | Active | Recovery |
|---|---|---|---|
| 30,000 | - | 19 | 35 |
| On Hit | On Block | Guard | Properties |
| - | -14 | OH | |
|
- | |||
Team Position
Iron Fist is most commonly played in the Point position. In most matchups, he will need access to two assists in order to cover for the severe holes in his gameplan. At the very least, he wants a teammate who can back him up at superjump height, where he has almost no tools on his own. Occasionally, he is instead placed second, to utilize his very strong Rising Fang assist, which causes a wallbounce on hit. Iron Fist makes a poor anchor, as even with X-Factor Level 3 boosts, many characters with better aerial mobility can simply stall him out.
Notable Synergies
Spencer: Iron Fist's combo potential is much higher versus a grounded opponent, and Spencer's Slant Shot assist is one of very few methods in the game to restand an opponent, bringing an airborne character back to the ground without ending the combo. Iron Fist can call Spencer assist to bring a jumping character back down to the ground for heavy punishment, or to bring back a character after his own attacks knock them airborne, further extending his combo potential.
Players to Watch: Heroic (Chris/Iron Fist/Spencer), ChrisG (Iron Fist/Spencer/Strange, rarely), Justin Wong (Iron Fist/Spencer/Strange, rarely)
Doctor Strange: Iron Fist's 236M special is very fast and causes a crumple state versus grounded opponents, letting him activate such a state easily. This gives Iron Fist a consistent way to set up Hard Tag combos, and few characters are better suited to a Hard Tag combo than Strange, with his high-damage palm loop combos. Besides this, Strange's Bolts of Balthakk assist is a very long duration beam assist, which can give Iron Fist an important edge in neutral.
Players to Watch: ChrisG (Iron Fist/Spencer/Strange, rarely), Justin Wong (Iron Fist/Spencer/Strange, rarely)
Akuma: While not a projectile itself, Akuma's Tatsumaki assist destroys projectiles. It also has relatively long duration and can keep opponents in blockstun for a significant amount of time. These factors make Akuma with tatsu assist a solid choice for any rushdown-focused character, and Iron Fist is no exception. Akuma's assist can also be called while attempting an Instant Overhead, and juggles long enough for Iron Fist to confirm if it connects, while also keeping him safe if it is blocked.
Players to Watch: Justin Wong (Iron Fist/Storm/Akuma, rarely, or Wolverine/Iron Fist/Akuma, rarely)
Strider: Vajra assist provides much needed coverage at superjump height, where most characters will retreat to avoid Iron Fist's genuinely threatening ground game. For most characters, the downside of Vajra assist is that it causes a hard knockdown on aerial hit, limiting follow-up potential. Iron Fist's unique rekka properties make it easy for him to pick up after such a knockdown with Crescent Heel 214M canceled into any special. Additionally, 623H drastically increases Iron Fists meter building potential, making it easier to secure meter for anchor Strider to spend on Ouroboros.
Players to Watch: Takari (Iron Fist/Zero/Strider)
Other Players to Watch: Punisher (Iron Fist/Hawkeye/Raccoon, rarely), Spartan Throne (Wolverine/Dormammu/Iron Fist), Yahiko (Iron Fist/Chris/Dante)
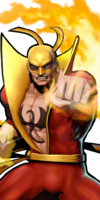
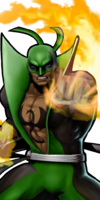
Alternate Colors
| Color 1 | Color 2 | Color 3 | Color 4 | Color 5 | Color 6 | Alt Color |
|---|---|---|---|---|---|---|

|

|
|

|

|
|

|

