Introduction
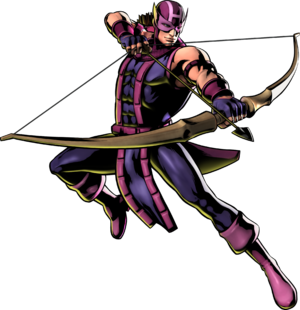
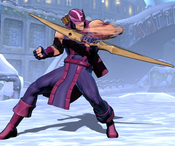
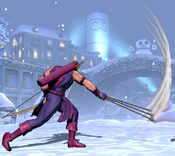
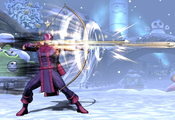
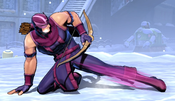
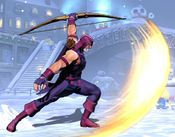
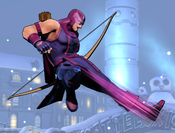
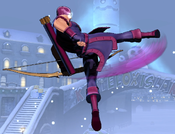
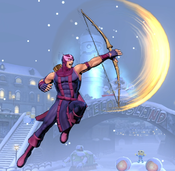
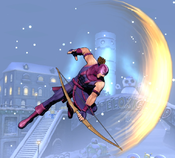
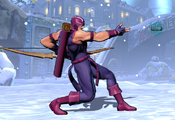
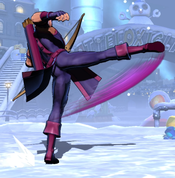
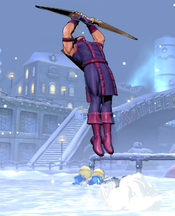
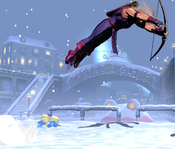
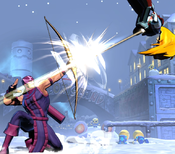
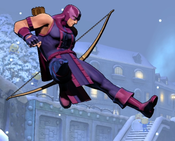
Orphaned at a young age, Clint Barton joined the circus, where he honed his skill as a performance archer to an incredible level of mastery. Although he has no actual superpowers, Hawkeye's marksmanship borders on the supernatural, and he has fought alongside other superheroes using his array of trick arrows.
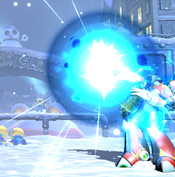
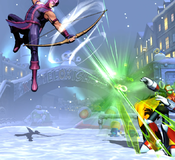
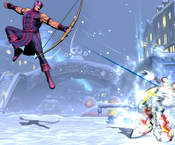
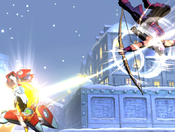
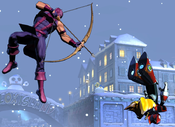
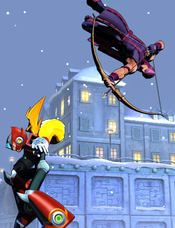
In UMvC3, Hawkeye is a projectile-heavy keepaway character who threatens his opponent with heavy and repeated chip damage. Although he lacks many of the standard movement tools like airdashes or double jumps, Hawkeye can evade opponents or extend combos using his Trick Maneuver (214X) special, push opponents back to fullscreen with his Kiss of Fire 623XX hyper, and punish almost any offense from the opponent with his fast, fullscreen Gimlet 236XX hyper.
| Strengths | Weaknesses |
|---|---|
|
|
Move List
Assists
| Damage | Startup | Active | Recovery |
|---|---|---|---|
| 50,000 x3 | 34 | 9 | 118, 88 |
| On Hit | On Block | Guard | Properties |
| - | - | Mid | Priority: Low, Durability: 3 per arrow |
|
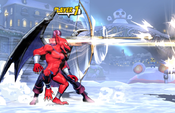
THC Hyper: Gimlet. Recommended assist. Hawkeye fires three normal arrows directly forward. Triple Arrow has good total durability and can trade with or cleanly beat many other common projectile assists. It is a fast and strong generic long-range assist that most characters can benefit from using. | |||
| Damage | Startup | Active | Recovery |
|---|---|---|---|
| 50,000 (Arrow) 90,000 over time (Poison) | 49 | - | 136, 106 |
| On Hit | On Block | Guard | Properties |
| - | - | Mid | |
|
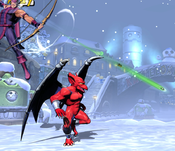
THC Hyper: Gimlet. Hawkeye hops into the air and fires a poison arrow at a downwards angle. The arrow's maximum range before hitting the ground reaches just under half of fullscreen distance. The arrow can also hit OTG, but adding the additional travel time for the arrow to reach the ground to its already lengthy startup means it is difficult for most characters to use Poison Tip this way. If Poison Tip hits an opponent, they will be poisoned. Poison status is indicated by green mist and bubbles appearing around the poisoned character, and has the following properties:
Violet Fizz is (technically) one of the most damaging assists in the game. It hits only a single time to minimize damage scaling, and most of its own damage is from the poison effect, which is itself unaffected by damage scaling. | |||
| Damage | Startup | Active | Recovery |
|---|---|---|---|
| 25,000 x10 | 39 | - | 126, 96 |
| On Hit | On Block | Guard | Properties |
| - | - | Mid | |
|
THC Hyper: Gimlet. Hawkeye fires an arrow directly upwards. When it reaches superjump height, the arrow bursts into a shrapnel storm of smaller arrows, which rain back down. This assist has no tracking at all, it always lands in the area from halfscreen to fullscreen distance, covering a good chunk of the airspace on the way down. In fact, if the point character is too close to the corner, the assist will land harmlessly off-screen. | |||
Ground Normals
| Damage | Startup | Active | Recovery |
|---|---|---|---|
| 45,000 | 5 | 2 | 11 |
| On Hit | On Block | Guard | Properties |
| 0 | -1 | Mid | - |
|
- | |||
| Damage | Startup | Active | Recovery |
|---|---|---|---|
| 60,000 | 7 | 3 | 17 |
| On Hit | On Block | Guard | Properties |
| -2 | -3 | Mid | - |
|
Hawkeye swings his bow as a physical attack. Has very good range considering its quick speed. Note that Hawkeye can not chain his Medium attacks into his Heavy normals. However, he can chain into his 6H and 3H Command Normals. When throwing this move out, be prepared to cancel into a Command Normal in order to confirm the combo, or into 214L to retreat to safety. | |||
| Damage | Startup | Active | Recovery |
|---|---|---|---|
| 50,000 per arrow (1~3) | 10/29/39 | 1/4/7 | 30/20/12 |
| On Hit | On Block | Guard | Properties |
| -5/+5/+13 | -6/+4/+12 | Mid | |
|
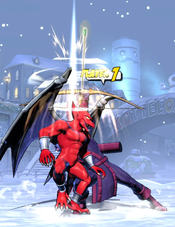
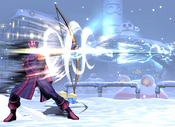
Extremely unique "normal" attack. Hawkeye draws his bow and prepares to fire. If H is simply pressed normally, Hawkeye fires a single arrow, which acts as a standard projectile and travels horizontally across the stage. If 5H is held, Hawkeye can charge the attack, holding his bow drawn. While charging, releasing the H button will cause Hawkeye to fire on the next frame. Charging causes additional arrows to be added to the attack, with a second arrow being added after 28 frames. Once held for 38 frames, Hawkeye will automatically fire a total of three arrows. While Hawkeye is charging 5H, he can aim the shot by moving the stick up or down. Hawkeye can aim anywhere from a 45-degree upward angle to a ~30 degree downward angle. Hawkeye can also continue to alter his aim while firing, causing the arrows to spread out and cover a wider area. Hawkeye can press S while charging in order to cancel the attack and return to neutral. Additionally, there is a very short window while the arrows are already being fired where Hawkeye can still press S to utilize this free-cancel and skip the attack's recovery. You can see an example here. S-Canceling Hawkeye's 5H arrows lets him put out projectiles noticeably faster, and is very helpful when in projectile battles with other zoning-focused characters. 5H is a powerful tool for Hawkeye's keepaway game, because it puts projectiles on the screen and can then be canceled into any of Hawkeye's projectile or mobility specials. | |||
| Damage | Startup | Active | Recovery |
|---|---|---|---|
| 43,000 | 5 | 2 | 15 |
| On Hit | On Block | Guard | Properties |
| -4 | -5 | Low | - |
|
- | |||
| Damage | Startup | Active | Recovery |
|---|---|---|---|
| 55,000 | 9 | 4 | 19 |
| On Hit | On Block | Guard | Properties |
| -5 | -6 | Low | - |
|
- | |||
| Damage | Startup | Active | Recovery |
|---|---|---|---|
| 70,000 | 12 | 3 | 26 |
| On Hit | On Block | Guard | Properties |
| - | -7 | Low | |
|
Standard sweep attack. | |||
| Damage | Startup | Active | Recovery |
|---|---|---|---|
| 80,000 | 9 | 3 | 29 |
| On Hit | On Block | Guard | Properties |
| Launch | -10 | Mid | |
|
- | |||
Aerial Normals
| Damage | Startup | Active | Recovery |
|---|---|---|---|
| 45,000 | 5 | 3 | 19 |
| On Hit | On Block | Guard | Properties |
| +11 | +10 | OH | - |
|
- | |||
| Damage | Startup | Active | Recovery |
|---|---|---|---|
| 55,000 | 8 | 4 | 24 |
| On Hit | On Block | Guard | Properties |
| +16 | +15 | OH | - |
|
- | |||
| Damage | Startup | Active | Recovery |
|---|---|---|---|
| 40,000 x2 | 9 | 11 | 25 |
| On Hit | On Block | Guard | Properties |
| +18 | +17 | OH | - |
|
Hawkeye spins his bow in front of himself, hitting twice. j.5H is a very good tool for controlling the airspace around Hawkeye. | |||
| Damage | Startup | Active | Recovery |
|---|---|---|---|
| 75,000 | 11 | 4 | 26 |
| On Hit | On Block | Guard | Properties |
| +15 | +14 | OH | |
|
- | |||
Command Normals
| Damage | Startup | Active | Recovery |
|---|---|---|---|
| 25,000 x3 | 13 | - | 27 |
| On Hit | On Block | Guard | Properties |
| - | -1 | Mid | |
|
Hawkeye chucks a small bomb. The bomb explodes after traveling half of fullscreen distance, but will also explode early if it comes within proximity of an opponent. The explosion is a small burst of electricity which hits OTG. Although Hawkeye can not cancel this attack into anything, he recovers fast enough to follow up this hit with a 3H Slide ot 5S Launcher. This is Hawkeye's primary OTG, as it is quite fast and allows him to solo relaunch. It is also the only of Hawkeye's OTGs that can hit multiple characters in a Happy Birthday situation. The bomb's proximity detonation does not trigger on an opponent who is knocked down, which requires spacing it manually, such as by backdashing in the corner before throwing it. | |||
| Damage | Startup | Active | Recovery |
|---|---|---|---|
| 35,000 + 40,000 | 9 | 3(13)4 | 27 |
| On Hit | On Block | Guard | Properties |
| - | -9 | Mid | |
|
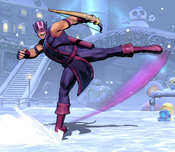
Hawkeye advances forward while kicking twice in front of himself. Has good range and can be used to confirm from any grounded normal. | |||
| Damage | Startup | Active | Recovery |
|---|---|---|---|
| 70,000 | 11 | 11 | 24 |
| On Hit | On Block | Guard | Properties |
| - | -13 | Low | |
|
Hawkeye slides along the ground, covering about half of fullscreen distance. Useful hitconfirm tool and also a decent long-range poke. | |||
Special Moves
| Damage | Startup | Active | Recovery |
|---|---|---|---|
| 50,000 x3 | 10 | 9 | 35 (air: until grounded) |
| On Hit | On Block | Guard | Properties |
| -13 | -14 | Mid | |
|
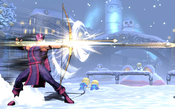
Hawkeye quickly fires three arrows which travel directly forward from Hawkeye's current position. This is Hawkeye's most basic keepaway tool and also his primary method for dealing chip damage. If Hawkeye performs this attack while in the air, he will continue to travel on his current jump arc while firing the arrows, resulting in each arrow appearing in a different place. This is particularly effective while falling - Hawkeye can space out the arrows to cover both the ground and jump height, then land-cancel almost all of his recovery and go right into firing more projectiles. | |||
| Damage | Startup | Active | Recovery |
|---|---|---|---|
| 50,000 | 20 | - | 30 (air: until grounded) |
| On Hit | On Block | Guard | Properties |
| +12 | -9 | Mid | |
|
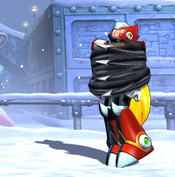
Hawkeye fires a special arrow that deploys a net on hit. Net Arrow causes two distinct capture states depending on whether it hits a grounded or airborne opponent. If a grounded opponent is hit by Net Arrow, they are placed in a standing capture state, giving Hawkeye ample time to convert into a combo even from fullscreen. In X-Factor, Hawkeye has a simple loop: If an airborne opponent is hit by Net Arrow, they will be placed into a falling Capture state, where they drop down towards the ground. If the opponent reaches the ground before the Capture state ends, they are placed into a special Hard Knockdown state. In this special Hard Knockdown state, the opponent can be OTG'd by any attack, not just attacks that are specifically tagged as OTG-capable. This resembles a Ground Bounce, but it is not one, and does not interact with the normal Ground Bounce limit in combos. An opponent whose Capture state wears off before they reach the ground (such as if they are hit at superjump height) will tech out and recover normally. Hawkeye can perform the same loop listed above - comboing back and forth between 5H and the air hit of Net Arrow. | |||
| Damage | Startup | Active | Recovery |
|---|---|---|---|
| 55,000 x3 | 20 | - | 40 (air: until grounded) |
| On Hit | On Block | Guard | Properties |
| -11 | -13 | Mid | |
|
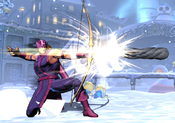
Hawkeye fires a lightning arrow. Piercing Bolt will blow through any other low-priority projectile in the game, and can even plow through multiple different projectiles. It still loses on Priority to Medium Priority projectiles (fairly rare) and High Priority ones (hypers). Piercing Bolt pierces through characters as well, functioning like a beam. It can hit for a full three hits on an opponent, and also continue on to hit the assist character behind them for an additional three hits. Piercing Bolt is one of the highest chip damage tools in Hawkeye's movelist. However, Triple Arrow is usually preferred due to being faster (in both startup and recovery) and being harder to evade due to firing three arrows instead of a single arrow. | |||
| Damage | Startup | Active | Recovery |
|---|---|---|---|
| 30,000 (Arrow) + 80,000 (Explosion) | 13 | - | 37 |
| On Hit | On Block | Guard | Properties |
| - | - | Mid | |
|
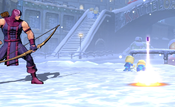
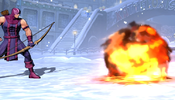
Hawkeye launches a bomb arrow directly up into the air, which eventually arcs lands back on the ground, planting into the stage at about halfscreen distance in front of Hawkeye. The arrow reaches the ground on frame 37, at which point it loses its active hitbox. If the arrow hits an opponent out of the air before reaching the ground, it explodes. Once the arrow is in the ground, it becomes a delayed explosive, which automatically detonates after 121 frames (2 seconds). The explosion knocks opponents airborne and can hit OTG. Hawkeye can use the setup time when an opponent is incoming to plant Exploding Arrow(s), for some extra chip damage and to discourage them from trying to press buttons. There is no limit to the number of Exploding Arrows Hawkeye can have deployed, except for the practical limit of how quickly he can fire them before they start to explode naturally. | |||
| Damage | Startup | Active | Recovery |
|---|---|---|---|
| 25,000 x10 | 15 | - | 45 |
| On Hit | On Block | Guard | Properties |
| - | - | Mid | |
|
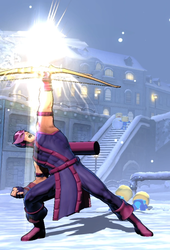
Hawkeye launches an arrow directly upwards. After 35 frames, the arrow reaches superjump height and explodes into ten shrapnel arrows. The shrapnel falls at a down-forward angle, traveling across the stage before eventually hitting the ground at around fullscreen distance. When falling, the arrows can hit OTG. Scatter Shot is Hawkeye's primary anti-air, as it covers a very large amount of airspace. An opponent who attempts to escape to superjump height but blocks Scatter Shot on the way up will have their upwards momentum halted, and begin to fall back down to the ground. A simple pressure sequence is the throw out Scatter Shot from a distance and begin charging 5[H]. Your opponent will block the shrapnel and be forced to fall back down, where you can manually time the release of your 5[H] so they land on it. Then cancel into either 236L for more chip damage, or into 623M to repeat the sequence. If Scatter Shot is canceled into Gimlet (236XX), the shrapnel will hit after the hyper, giving Hawkeye superior frame advantage and sometimes allowing him to continue the combo afterwards. | |||
| Damage | Startup | Active | Recovery |
|---|---|---|---|
| 30,000 x3 per arrow (9 hits total) | 21 | 10 | 35 |
| On Hit | On Block | Guard | Properties |
| - | - | Mid | Priority: Low, Durability: 5 per projectile |
|
Hawkeye launches three arrows directly upwards, which reach superjump height and then arc downwards. The arrows spread out as the fall, with the closest one landing at roughly midscreen and the farthest reaching to fullscreen distance. This is an anti-air attack similar to Scatter Shot, but deals less chip damage in exchange for wider coverage. | |||
| L |
Damage | Startup | Active | Recovery |
|---|---|---|---|---|
| - | Varies | 27 | 14 | |
| On Hit | On Block | Guard | Properties | |
| - | - | - | - | |
| M |
Damage | Startup | Active | Recovery |
| - | 11 | 19 | 6 | |
| On Hit | On Block | Guard | Properties | |
| - | - | - | - | |
| H |
Damage | Startup | Active | Recovery |
| - | 16 | 19 | 12 | |
| On Hit | On Block | Guard | Properties | |
| - | - | - | - | |
|
Hawkeye performs an agile movement, depending on the button pressed, which he can cancel into from his normals and command normals (excpet 6M). The L and H versions are command jumps, which become airborne on frame 6. L version is a backjump which is useful for retreating or repositioning for its follow-up special shots. H version jumps forward, and can be used to cross-up the opponent. The M version is not a jump but instead causes Hawkeye to quickly roll forwards across the ground. Besides their use as mobility tools, Hawkeye's Trick Maneuvers give him access to three special Trick Shot projectiles (detailed below), which he can not otherwise perform. The Trick Shots are performed by pressing L, M, or H during the active frames of any Trick Maneuver, and Hawkeye can not use normal attacks while maneuvering. Trick Shots performed from L or H Trick Maneuver can hit OTG, but Trick Shots performed from the M version do not hit OTG. For Trick Maneuver L specifically, the "startup" before Hawkeye can perform any of the Trick Shot followups is different:
| ||||
| Damage | Startup | Active | Recovery |
|---|---|---|---|
| 50,000 (arrow) + 90,000 (poison) | 5 | - | 30 / Until Grounded |
| On Hit | On Block | Guard | Properties |
| +5/-8/-3 | +5/-6/-3 | Mid | |
|
Hawkeye fires a poison arrow. If Poison Tip hits an opponent, they will be poisoned. Poison status is indicated by green mist and bubbles appearing around the poisoned character, and has the following properties:
OTG Violet Fizz canceled into Gimlet (236XX) is a solid way to end combos because it will deal an additional unscaled 90,000 damage after the combo provided that Hawkeye does not get hit too quickly afterwards. | |||
| Damage | Startup | Active | Recovery |
|---|---|---|---|
| 80,000 | 5 | - | 30 / Until Grounded |
| On Hit | On Block | Guard | Properties |
| +11/+6/+11 | -3/-9/-4 | Mid | |
|
Hawkeye fires an ice arrow. If Freeze Shot hits an airborne opponent, or hits as an OTG, it causes a Ground Bounce. Hawkeye can easily pick up after this ground bounce using his 3H slide, so it is a good relaunch tool. If Freeze Shot hits a grounded opponent, it places them in a short-duration Capture state where they are frozen in ice. | |||
| Damage | Startup | Active | Recovery |
|---|---|---|---|
| 40,000 x3 | 5 | - | 30 / Until Grounded |
| On Hit | On Block | Guard | Properties |
| 0 | +1/+3/+1 | Mid | |
|
Hawkeye fires a standard arrow, which hits three times for solid chip damage but has no other special properties. Notable for having better advantage on block than Hawkeye's other Trick Shots. | |||
Hyper Combos
| Damage | Startup | Active | Recovery |
|---|---|---|---|
| 250,000 | 8+1 | - | 50 |
| On Hit | On Block | Guard | Properties |
| -8 | -29 | Mid | |
|
Hawkeye readies, then fires a very fast, almost beam-like arrow. This arrow has extremely good tracking, and will fire in the opponent's direction no matter where they are on screen. It is basically impossible to dodge even with extremely fast movement, but it is possible to buffer a frame1 invincible move during the super flash to escape. In any other situation, it will connect. Gimlet (or at least the threat of Gimlet) is a central point of Hawkeye's keepaway gameplan. Because Gimlet is extremely fast and Air OK, Hawkeye can react to almost any attack in the game from any screen position to tag the opponent for a quick 250,000 damage. Gimlet also pierces, like a beam, so Hawkeye can hit both the point character and their assist if the angle is correct. However, Gimlet is very unsafe on block, so if Hawkeye is baited into a bad Gimlet, he is very vulnerable to punishment. It is also negative on hit, so using it at very close range (even as a combo ender) carries some danger as well. Because Gimlet has an extremely short total duration, it is very powerful for setting up THC synergies with Hawkeye as the point character. Pairing Hawkeye with a longer-lasting THC Hyper, such as Dante's Million Dollars, gives Hawkeye several uninterrupted seconds where he can attack the opponent, while they helplessly block the remainder of the team hyper. This is a solid way to pile on heavy chip damage and carries relatively little risk. If you mash X-Factor activation during the super flash of this hyper, you can activate it before the projectile reaches the opponent, improving the damage output. Level 3 X-Factor raw Gimlet deals 400,000 damage, and you can use the X-Factor cancel to combo into a few more projectiles into another Gimlet, killing most characters almost instantly. | |||
| Damage | Startup | Active | Recovery |
|---|---|---|---|
| 50,000 x7 | 9+1 | - | 58 |
| On Hit | On Block | Guard | Properties |
| - | - | Mid | |
|
Hawkeye fires a set of seven arrows into the air, which rain down progressively farther away from him. This hyper is primarily used as a safe cancel option to reset Hawkeye's pressure. If an opponent manages to slip past Hawkeye's zoning and get too close, Hawkeye can cancel into this hyper, which will push the opponent all the way back to fullscreen distance, while being almost impossible to punish. | |||
| Damage | Startup | Active | Recovery |
|---|---|---|---|
| 430,000 | 10+1 | 37 | 37 |
| On Hit | On Block | Guard | Properties |
| - | -45 | Mid | Invuln until frame 19, |
|
Cinematic level 3 hyper. Hawkeye fires an arrow at the ground, which explodes into a smoke cloud that can hit OTG. If the opponent is hit, they are pulled into a cutscene where Hawkeye sends in his friend Ant Man to beat them up, dealing unscaled damage. This hyper is very easy to tack on as a combo ender, although it has a heavy meter cost that could be spent on his other hypers. Additionally, the cinematic is very long, and will eat up most of Hawkeye's X-Factor duration if he currently has it active. | |||
Universal Mechanics
| Damage | Startup | Active | Recovery |
|---|---|---|---|
| 80,000 | 1 | 1 | - |
| On Hit | On Block | Guard | Properties |
| - | - | Throw | |
|
Hawkeye leaps up and shoots the opponent with an arrow which knocks them a long distance away. Forward throw can be converted consistently with a dash up 6M. Back throw knocks the opponent even further away, so conversions are extremely limited unless throwing into the corner. | |||
| Damage | Startup | Active | Recovery |
|---|---|---|---|
| 80,000 | 1 | 1 | - |
| On Hit | On Block | Guard | Properties |
| - | - | Airthrow | |
|
Hawkeye knocks the opponent away with an arrow, similar to his grounded throw. Can be converted into a combo with (dashup) 214H > M to cause a Ground Bounce. | |||
| Damage | Startup | Active | Recovery |
|---|---|---|---|
| 50,000 | 2 | 3 | 29 |
| On Hit | On Block | Guard | Properties |
| - | -10 | Mid | Snapback |
|
Animation and hitbox based on 6H. | |||
| Damage | Startup | Active | Recovery |
|---|---|---|---|
| 30,000 | - | 20 | 33 |
| On Hit | On Block | Guard | Properties |
| - | -9 | OH | |
|
- | |||
Team Position
Hawkeye is typically chosen as an Anchor character. His assists, especially Quick Shot, are quite useful. While Hawkeye has an awkward time extending his own combos with assists, he scales very well with the buffs from X-Factor. The damage boost greatly enhances his ability to deal chip damage, with fast projectiles that are difficult for the opponent to avoid. The speed boost from X-Factor also gives him access to several easy infinites, which he can confirm even from long-range projectile hits.
Notable Synergies
Zero: Hawkeye's Quick Shot assist does not provide as much hitstun as traditional beam assists, Zero is flexible enough that he can still use it to relaunch. Zero can thus make use of Hawkeye's relatively fast assist without much downside. Additionally, Zero is a very meter-efficient point character, so an anchor like Hawkeye can count on coming in with several bars of meter to use.
Players to Watch: Flocker (Zero/Vergil/Hawkeye)
Dante: As a keepaway character, Hawkeye appreciates having a vertical-coverage assist like Jam Session to prevent opponents from superjumping over his zoning game. Dante and Hawkeye also have a very strong THC synergy. Since Dante's THC Hyper (Million Dollars) lasts a very long time, while Hawkeye's (Gimlet) is almost instant, a point Hawkeye can activate this THC to get several free seconds of lockdown. Although Hawkeye doesn't have the most devastating mixup options during this time, he can deal a very heavy amount of chip damage.
Players to Watch: Dual Kevin (Deadpool/Dante/Hawkeye), lilmonix3 (Spidey/Dante/Hawkeye)
Rocket Raccoon: Hawkeye appreciates having an assist like Log Trap to cover his keepaway game. Meanwhile, Rocket can pretty effectively use Quick Shot assist to cover him while he sets up traps. Some characters struggle to use Log Trap effectively because it wastes wall bounce, but since Hawkeye has no moves which cause a wall bounce, he can utilize Log Trap with no loss in efficiency.
Players to Watch: Punisher (MODOK/Raccoon/Hawkeye)
Other Players to Watch: ChrisG (Wesker/Ryu/Hawkete, rarely) Yipes (Spencer/Vergil/Hawkeye, rarely)
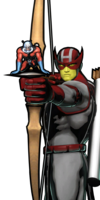
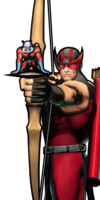
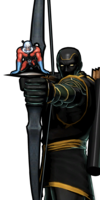
Alternate Colors
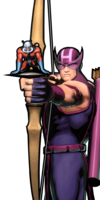
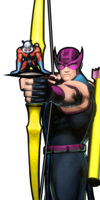
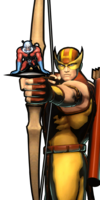
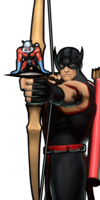
| Color 1 | Color 2 | Color 3 | Color 4 | Color 5 | Color 6 | Alt Color |
|---|---|---|---|---|---|---|
|
|
|
|
|
|
|

