Introduction
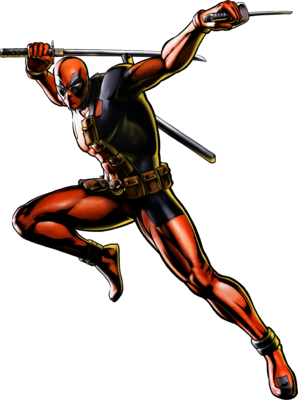
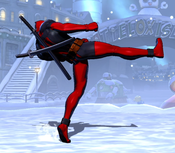
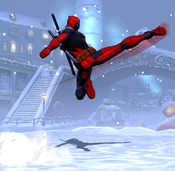
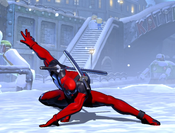
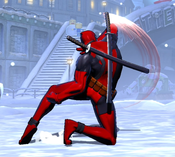
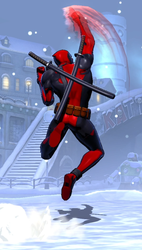
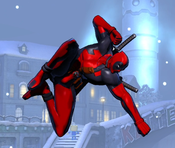
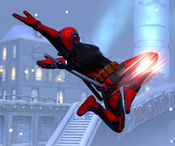
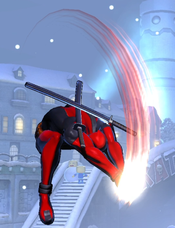
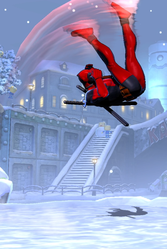
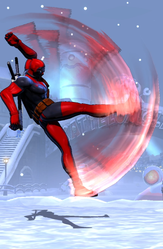
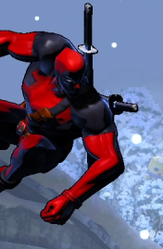
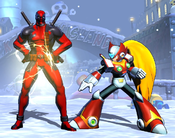
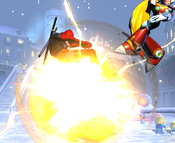
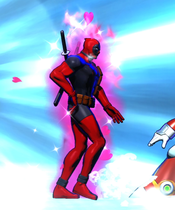
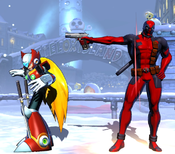
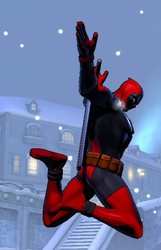
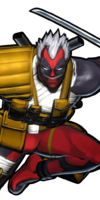
After being experimented on by the Weapon X Program (the same program that is responsible for Wolverine and X-23), Wade Wilson gained a powerful healing factor that allows him to regenerate from most wounds and makes him nearly unkillable. He took the name Deadpool, and has attempted to join or associate with various superhero organizations. Unfortunately, his abrasive, somewhat psychotic, personality makes it difficult for him to get along with others. Deadpool is an expert combatant honed by years of mercenary work, who fights using a variety of weapons and gadgets.
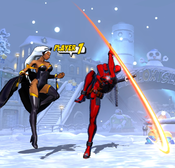
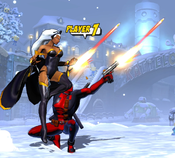
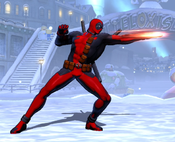
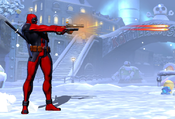
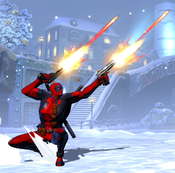
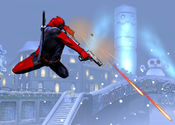
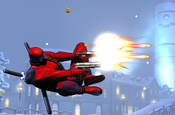
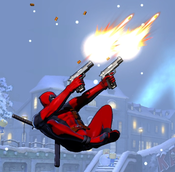
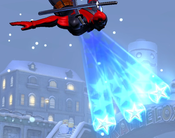
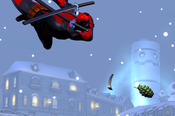
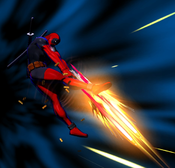
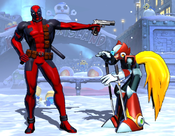
In UMvC3, Deadpool is an obnoxious keepaway character who tries to keep his distance in neutral while harassing with his very fast Trigger Happy (236X) gunshot special. Trigger Happy also includes special Ninja Gift follow-up attacks, providing additional zoning options like shuriken and grenades. Deadpool's bola special (236X > H) allows him to consistently convert stray aerial hits, something that other characters can struggle to do. His array of combo-extending specials also give him plenty of ways to deal damage.
| Strengths | Weaknesses |
|---|---|
|
|
Move List
Assists
| Damage | Startup | Active | Recovery |
|---|---|---|---|
| 90,000 | 37 | 4 | 126, 96 |
| On Hit | On Block | Guard | Properties |
| - | - | Low | |
|
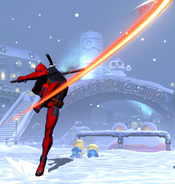
THC Hyper: Happy-Happy Trigger. Recommended assist. Deadpool dashes across the stage, covering a little over half of fullscreen distance, then delivers a quick slash. He will also slash sooner if he comes into contact with an opponent before traveling his full distance. As one of very few Low-hitting assists in the game, this assist can be used to set up High/Low mixups or even Unblockables when paired with an Overhead attack from the point character. The Soft Knockdown from this attack ignored Hitstun Deterioration, preventing the opponent from air teching even late into the combo. | |||
| Damage | Startup | Active | Recovery |
|---|---|---|---|
| 70,000 | 37 | 3 | 122, 92 |
| On Hit | On Block | Guard | Properties |
| - | - | Mid | |
|
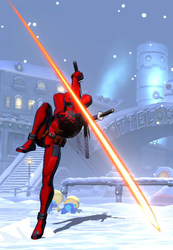
THC Hyper: Happy-Happy Trigger. Deadpool slashes the ground in front of himself. The slash hits OTG and causes a Ground Bounce on hit. The Ground Bounce is forced, and so it will still knock the opponent up properly even if a Ground Bounce has already been used earlier in the same combo. However, this will also waste Ground Bounce if it has not already been consumed, preventing the point character from making use of their own Ground Bounces. | |||
| Damage | Startup | Active | Recovery |
|---|---|---|---|
| 15,000 x10 | 39 | 21 | 112, 82 |
| On Hit | On Block | Guard | Properties |
| - | - | Mid | Priority: Low, Durability: 1 per bullet |
|
THC Hyper: Happy-Happy Trigger. Deadpool pulls out his pistols and fires into the air. By projectile assist standards, this is very fast. Unfortunately, Deadpool shoots at a very high angle which makes it almost impossible for this to connect on grounded opponents, and awkward to utilize in standard combos. Can be called as an opponent enters the stage on incoming to hit them meaty with relatively little risk. If the opponent pushblocks these bullets, they are vulnerable to being airthrown. | |||
Ground Normals
| Damage | Startup | Active | Recovery |
|---|---|---|---|
| 43,000 | 4 | 3 | 11 |
| On Hit | On Block | Guard | Properties |
| -1 | -2 | Mid | |
|
Fast, mashable jab. Can be used as a hitconfirm tool or as an anti-air thanks to its great speed. If using 5L as an anti-air, chain directly into 5S, or go 5L > 2M > 5S to confirm into a Launcher combo. | |||
| Damage | Startup | Active | Recovery |
|---|---|---|---|
| 35,000 x2 | 8 | 6 | 17 |
| On Hit | On Block | Guard | Properties |
| -3 | -4 | Mid | - |
|
Hits twice. Deadpool performs a thrust kick, with the first hit extending out to his knee, then the second hit occurring as he stretches out his leg to its full length. 5M has very good range and is a decent to throw out when fighting up close. It can be easily chained into 2H from any range. | |||
| Damage | Startup | Active | Recovery |
|---|---|---|---|
| 80,000 | 11 | 4 | 19 |
| On Hit | On Block | Guard | Properties |
| +3 | -1 | Mid | |
|
Deadpool performs a hopping sobat kick. Despite the animation, Deadpool is not considered airborne during this attack. 5H causes a very large amount of knockback. On hit, it sends opponents flying away almost full screen. This prevents Deadpool from chaining directly into 5S (chains into 2H can work situationally). However, it does juggle long enough for Deadpool to cancel into H Quick Work (214H) and start a combo that way. | |||
| Damage | Startup | Active | Recovery |
|---|---|---|---|
| 37,000 | 5 | 2 | 14 |
| On Hit | On Block | Guard | Properties |
| -3 | -3 | Low | |
|
Standard fast low attack. Can be used to mash out of pressure, but it is slower than 5L. | |||
| Damage | Startup | Active | Recovery |
|---|---|---|---|
| 60,000 | 7 | 3 | 19 |
| On Hit | On Block | Guard | Properties |
| -5 | -5 | Low | |
|
Deadpool thrusts his elbow upward, knocking opponents a very short distance into the air. 2M has longer range than its animation would suggest, but it is still the second-stubbiest of Deadpool's normals behind 2L. Notably, a 5M connecting from the outer part of its range will whiff when chained into 2M, so consider omitting it from ground chains for consistency. | |||
| Damage | Startup | Active | Recovery |
|---|---|---|---|
| 70,000 | 12 | 13 | 19 |
| On Hit | On Block | Guard | Properties |
| - | -10 | Low | |
|
Deadpool slides across the ground, traveling just under half of fullscreen distance. Has very good range and speed, making it a good choice to throw out and clip opponents who stop guarding, or to frame-trap with a delayed chain from 2L. Because it advances Deadpool so far forward, it helps stabilize the otherwise weird range of his normals. Just about any attack can chain into 2H to confirm and get close enough for a 5S launcher. 2H also significantly lowers Deadpool's crouching profile for the duration, allowing him to slide underneath certain attacks and projectiles while advancing forward. Although 2H is technically unsafe on block at point-blank range, it can actually be made to be plus on block when spaced from far enough away. Furthermore, Deadpool can chain 2H into 236X~M (or any other Ninja Gift, but the grenade is very powerful) in order to escape to safety while also throwing out more projectile pressure. | |||
| Damage | Startup | Active | Recovery |
|---|---|---|---|
| 80,000 | 5 | 6 | 34 |
| On Hit | On Block | Guard | Properties |
| Launch | -18 | Mid | |
|
Deadpool performs an uppercut, acting as his launcher. Despite the name and appearance, Deadpool's 5S is not a reversal, and it has no invincibility. However, 5S is extremely fast. At 5f startup, it is faster than many character's light normals, and comparable in speed to Deadpool's own L attacks. 5S does share the Shoryuken property of having awful recovery, and it very easy to punish on block. It should be avoided except when hitconfirmed into, which Deadpool can do easily thanks his long ground chains. | |||
Aerial Normals
| Damage | Startup | Active | Recovery |
|---|---|---|---|
| 44,000 | 5 | 3 | 15 |
| On Hit | On Block | Guard | Properties |
| +6 | +5 | OH | - |
|
Works as an instant overhead naturally against normal-sized characters. When used this way, Deadpool can not convert into any meaningful combo except by using assists or X-Factor activation. | |||
| Damage | Startup | Active | Recovery |
|---|---|---|---|
| 60,000 | 8 | 3 | 22 |
| On Hit | On Block | Guard | Properties |
| +12 | +11 | OH | - |
|
Deadpool performs a dragon kick. Can hit fairly easily as a cross-up, and has a solid hitbox below Deadpool that is very difficult to low-profile. | |||
| Damage | Startup | Active | Recovery |
|---|---|---|---|
| 75,000 | 12 | 8 | 11 |
| On Hit | On Block | Guard | Properties |
| +14 | +13 | OH | - |
|
Aerial knee thrust. Has fairly poor range and is quite slow. Unfortunately, it is Deadpool's only airthrow OS. When throwing out this attack in neutral, buffer an 236X~X input. This can confirm into an H Ninja Gift on hit to confirm into a combo, or an L/M Ninja Gift on whiff/block to escape to safety. | |||
| Damage | Startup | Active | Recovery |
|---|---|---|---|
| 80,000 | 13 | 3 | 20 |
| On Hit | On Block | Guard | Properties |
| +18 | +16 | OH | |
|
Double-fisted overhead slam. Can hit cross-up. | |||
Command Normals
| Damage | Startup | Active | Recovery |
|---|---|---|---|
| 35,000 x2 | 25 | 7 | 14 |
| On Hit | On Block | Guard | Properties |
| - | +3 | OH | |
|
Deadpool performs a lengthy cartwheel kick, which hits twice. The second hit causes a Hard Knockdown, which Deadpool can then convert into a combo using 623H OTG. It is a generic standing overhead that Deadpool can chain into from his L and M grounded normals. 6M is very slow, and so players familiar with the matchup will regularly be able to stand block it on reaction. However, Mad Wheel also has a very large, very active hitbox. It has a often stuffs an opponent's attacks, and can be useful as an anti-air. Even against fairly powerful attacks like Doom's Foot Dive, it has a tendency to trade hits. Since both hits of 6M cause lengthy Hard Knockdowns, trades with this attack are almost always in Deadpool's favor. | |||
| Damage | Startup | Active | Recovery |
|---|---|---|---|
| 10,000 | 10 | 5 | 92 |
| On Hit | On Block | Guard | Properties |
| -74 | -75 | Mid | - |
|
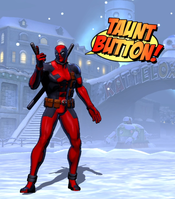
Although every character in the game has a Taunt, Deadpool's taunt is unique in that it is (somewhat) functional as an attack. Deadpool can chain any of his grounded normals into Taunt, which creates a speech bubble in front of him that has an active hitbox. Taunt can be special canceled at any point, and if Taunt connects with an opponent - hit or block - it can be chained into 5S as well. Although Taunt does have some mechanical effects, its primary purpose is still to show off and be funny. | |||
| Damage | Startup | Active | Recovery |
|---|---|---|---|
| - | 8 | - | - |
| On Hit | On Block | Guard | Properties |
| - | - | - | - |
|
Deadpool can Wall Jump by jumping into the edge of the screen, and then holding up-forward off of it. This gives Deadpool additional ability to stay airborne, combined with his regular Double Jump. | |||
Special Moves
| Damage | Startup | Active | Recovery |
|---|---|---|---|
| 15,000 x10 | 15 | 21 | 30 |
| On Hit | On Block | Guard | Properties |
| -8 | -14 | Mid | Priority: Low, Durability: 0.8(?!?) per bullet |
|
Deadpool pulls out his twin pistols and fires a salvo of bullets. Different button strengths have identical frame data and properties, differing only in how the bullets are aimed:
Grounded Trigger Happy deals solid chip damage, especially in X-Factor, and is thus a useful part of Deadpool's zoning game. Because it holds Deadpool in place for the duration, it leaves Deadpool vulnerable if an opponent guesses your bullet pattern correctly. Like all of Deadpool's grounded specials, it can be canceled into Teleport (421X) at any point. Trigger Happy also has a "follow-up" attack, Ninja Gift, which can be accessed by inputting a second attack button immediately after performing the Trigger Happy input: 236X~X. | |||
| Damage | Startup | Active | Recovery |
|---|---|---|---|
| 15,000 x10 | 15 | 21 | 20 / Until Grounded+8 |
| On Hit | On Block | Guard | Properties |
| +12 | +6 | Mid | |
|
Air version of Trigger Happy. Deadpool pulls out his pistols and fires 10 shots, with button strength determining the angle:
While performing Air Trigger Happy, Deadpool continues to sail through the air based on his previous jump arc, and the bullets will continue to appear from his current position as he moves. Deadpool does "float" slightly during Air Trigger Happy, causing him to fall more slowly and his jumps to travel further horizontally. Not only does Air Trigger Happy allow Deadpool to remain mobile while zoning, this property lets him spread out his shots to cover a wider area. A simple keepaway strategy is to perform a regular jump, then input j.236M as Deadpool reaches the peak of his jump. Timed properly, Deadpool will fire a wall of bullets that cover jump height all the way down to the ground, then land-cancel his own recovery. This pattern is very difficult to advance on, except by Superjumping. Like with the grounded version, Air Trigger Happy leads into Ninja Gift when input as j.236X~X before the bullets are fired. Additionally, Deadpool can cancel the landing recovery of Air Trigger Happy into Teleport, if he chooses. | |||
| "Present for ya!" (Shuriken) (During frames 3-15 of Trigger Happy) ~ |
Damage | Startup | Active | Recovery |
|---|---|---|---|---|
| 40,000 x3 | 10 | - | 35 | |
| On Hit | On Block | Guard | Properties | |
| -13 | -14 | Mid | ||
| "Pineapple Surprise!" (Grenade) (During frames 3-15 of Trigger Happy) ~ |
Damage | Startup | Active | Recovery |
| 80,000 | 10 | - | 35 | |
| On Hit | On Block | Guard | Properties | |
| +25 | +3 | Mid | ||
| "Get along li'l Doggy!" (Bolo) (During frames 3-15 of Trigger Happy) ~ |
Damage | Startup | Active | Recovery |
| 10,000 | 10 | - | 35 | |
| On Hit | On Block | Guard | Properties | |
| - | -23 | Mid | ||
|
Pressing a second attack button during the startup of (Air) Trigger Happy will cause Deadpool to perform a backflip and throw out one of three gadgets. The second button's strength determines the object thrown, and the initial 236X input has no effect on the resulting special. L Ninja Gift fires three shuriken in a spread pattern. It has decent coverage but no special properties and works as a generic keepaway tool. M Ninja Gift tosses a grenade, which falls to the ground and bounces forward before coming to a stop. The grenade will explode after 100 frames, but will also automatically detonate if it comes into contact with an opponent. The grenade is an important space-control tool for Deadpool, as the threat of triggering the explosion discourages opponents from simply plink dashing up to from the ground. H Ninja Gift tosses a set of bolos. The bolos place the opponent into a specific Capture state depending on whether they were hit while grounded or airborne. Grounded Capture holds the opponent in place in the location they were hit. Air Capture causes the opponent to fall directly down towards the ground. If an Air Captured opponent reaches the ground, they are placed into a Special Hard Knockdown state, where they can be hit OTG by any attack, instead of only attacks that are specifically OTG-capable. In either case, the Capture state lasts for 72 frames. Bolos are the only Ninja Gift of the set that is meaningfully useful in regular combos, and it is an important combo tool as it allows Deadpool to consistently bring air combos back down to the ground through its special Hard Knockdown state. j.5H xx 236X~H is a generic air-to-air confirm that works at almost any level of hitstun and will give Deadpool time to land and follow up with an "OTG" Quick Work or other attack. Glitch: Bolos are subject to a glitch that allows Deadpool teams to reset Damage Scaling mid-combo. If an opponent is placed in the air Capture state of bolos, and is then hit by an assist attack just before they would recover from the Capture state and tech out, the combo will be treated as if it reset for the purposes of Damage Scaling, even though the combo does not actually drop or give the opponent any chance to escape. The timing for this is extremely strict, but it has been very well-documented and can even be practically landed in a real match with proper team composition. Explanation and Proof Video | ||||
| L |
Damage | Startup | Active | Recovery |
|---|---|---|---|---|
| 90,000 | 13 | 4 | 34 | |
| On Hit | On Block | Guard | Properties | |
| - | -16 | Low | ||
| M |
Damage | Startup | Active | Recovery |
| 110,000 | 18 | 4 | 34 | |
| On Hit | On Block | Guard | Properties | |
| - | -16 | Low | ||
| L |
Damage | Startup | Active | Recovery |
| 130,000 | 23 | 4 | 34 | |
| On Hit | On Block | Guard | Properties | |
| - | -16 | Low | ||
|
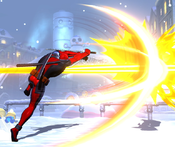
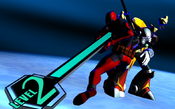
Deadpool dashes forward, and then performs a Low slash with his katanas. Also lowers Deadpool's profile, allowing him to dash underneath certain projectiles and punish them. Heavier button strengths travel farther and knock the opponent higher into the air. Primarily a tool for combo extensions. If the H version hits, Deadpool can perform a short dash up 5S to continue the combo. In X-Factor level 2 or 3, Deadpool can link Quick Work into itself as a simple infinite. All versions of Quick Work are not subject to hitstun deterioration. Quick Work has a special follow-up attack, Chimichangas! which can be performed by pressing H with specific timing after the Quick Work hit. This follow-up is shared with the one for Katana-Rama (see below). | ||||
| Damage | Startup | Active | Recovery |
|---|---|---|---|
| 70,000 | 13 | 3 | 30 |
| On Hit | On Block | Guard | Properties |
| - | -11 | Mid | |
|
Deadpool slashes his katana. Button strength determines the angle of the slash:
Katana-Rama is primarily notable for the H version, which is Deadpool's main OTG tool. Katana-Rama has a special follow-up, Chimichangas!, which can be chained from the OTG hit of 623H to cause a Wall Bounce and solo relaunch. | |||
| Damage | Startup | Active | Recovery |
|---|---|---|---|
| 70,000 | 13 | 3 | 30 |
| On Hit | On Block | Guard | Properties |
| - | -11 | Mid | |
|
Cancel Windows:
Deadpool performs a follow-up slash with his katana. Causes a Wall Bounce on hit, which is especially useful for picking up after an OTG 623H. If Wall Bounce has already been used earlier in the combo, causes a Soft Knockdown, but Deadpool can still cancel into a hyper and catch the opponent before they reach the ground. Chimichangas is not subject to hitstun deterioriation. | |||
| Damage | Startup | Active | Recovery |
|---|---|---|---|
| - | 25 | - | - |
| On Hit | On Block | Guard | Properties |
| - | - | - | - |
|
Deadpool's teleport. Upon activation, Deadpool warps to a specific location on screen depending on button strength:
These teleport locations are fixed and are not dependent on which side Deadpool is facing nor the opponent's position. Teleport can not cross up a cornered opponent, but it can cross up opponents in other screen positions. Besides being a generic mobility tool, Deadpool's teleport has two important properties: First, Deadpool can cancel his other grounded special moves into Teleport at any point. This is important for his keepaway game as it allows him to remain non-committal, and also gives him access to a basic offensive gameplan where he can teleport up to an opponent using his own projectiles as cover. Second, every third use of Teleport will cause a malfunction (see below), in which Deadpool does not teleport but instead explodes. | |||
| Damage | Startup | Active | Recovery |
|---|---|---|---|
| 100,000 (30,000 to Deadpool) | 18 | 2 | 98 |
| On Hit | On Block | Guard | Properties |
| - | -79 | Mid | |
|
Every third use of Teleport, regardless of button strength used, will cause Deadpool's belt to instead fizzle and then explode. The explosion covers the area around Deadpool and can hit opponents in addition to damaging Deadpool himself. The explosion also hits OTG, and it can even be used intentionally in some niche combos. Regardless of whether the explosion also hits an opponent, Deadpool is sent flying into the air, and then falls to the ground for a Hard Knockdown. Despite the appearance- and the fact that he takes damage - Deadpool is not actually in hitstun during this time. He can freely cancel being "hit" by the explosion into hypers or into X-Factor. However, if Deadpool lands on the ground without canceling into anything, he enters a real Hard Knockdown state where he actually is vulnerable to OTG attacks from the opponent. Teleport Malfunction is not subject to hitstun deterioration. | |||
Hyper Combos
| Damage | Startup | Active | Recovery |
|---|---|---|---|
| 10,000 x40 ~ x80 | 13+1 | 114 | 41 |
| On Hit | On Block | Guard | Properties |
| -11 | -20 | Mid | |
|
Hyper version of Trigger Happy. Deadpool rapidly fires his pistols, creating a stream of bullets. This is Deadpool's standard combo ender, as it deals solid damage, is easy to land, and is very friendly for DHCs. It is also fast enough to be used on reaction to assist calls in order to snipe them. | |||
| Damage | Startup | Active | Recovery |
|---|---|---|---|
| 10,000 x40 ~ x80 | 13+1 | 97 | 24 (or Until Grounded) |
| On Hit | On Block | Guard | Properties |
| -2 | -5 | Mid | |
|
Air version of Happy-Happy Trigger. Deadpool floats in the air, firing his pistols at a down-forward angle. It shares the grounded version's damage and speed, and so it can be useful to throw out raw against slow attacks or assist calls from the opponent. This hyper can hit OTG, and a Tiger Knee hyper hitting OTG just off the ground recovers fast enough that Deadpool can link 623H afterwards as well. | |||
| Damage | Startup | Active | Recovery |
|---|---|---|---|
| 50,000 x4 + 230,000 | 15+0 | 10 | 35 |
| On Hit | On Block | Guard | Properties |
| -6 | -21 | Mid | Invuln frames 11-19, |
|
Cinematic level 1 hyper. Deadpool dashes forward, similarly to his Quick Work special. If the opponent is hit, they are pulled into a cinematic where Deadpool repeatedly cuts them, ending in a large slash that knocks opponents into the air for a Soft Knockdown. Although it deals more up-front damage than Deadpool's gun hyper, it is more awkward to combo into, and less friendly for DHCs. Cuttin' Time has 0 frames of post-flash startup. This means that if an opponent at close range is not already blocking when the super flash begins, the attack can not be blocked. Similarly, opponents can not X-Factor cancel in time to protect themselves at close range. This is dubiously useful because Cuttin Time does not have frame 1 invincibility and does not function as a reversal, so if the opponent is in a situation where they are that close, Deadpool is likely going to get hit. | |||
| Damage | Startup | Active | Recovery |
|---|---|---|---|
| 400,000 | 5+1 | 80 | 24 |
| On Hit | On Block | Guard | Properties |
| - | - | Counter | Invuln until frame 6, |
|
Cinematic counter hyper. Deadpool walks forward for 80 frames. If he is struck by a physical attack from the opponent's point character, it triggers the counter, pulling the opponent into a cinematic where they are dealt heavy damage ending in a Hard Knockdown. Deadpool can follow up this knockdown with a dash-up 623H to OTG into a full combo. The counter does not work on projectiles, any attack originating from an assist character, or throws, leaving Deadpool vulnerable to these types of attacks. Since the counter still has 1 frame of post-flash startup, the opponent usually has at least one way in which they can cancel their attack to protect themselves on reaction to the super flash - such as by canceling their attack into Flight, into X-Factor activation, or into a projectile hyper. This greatly stacks the risk-reward of using the counter against Deadpool, and makes it very rarely used. | |||
Universal Mechanics
| Damage | Startup | Active | Recovery |
|---|---|---|---|
| 80,000 | 1 | 1 | - |
| On Hit | On Block | Guard | Properties |
| - | - | Throw | |
|
Deadpool shoots the opponent, causing them to fly away in the direction of the throw, ending in a Hard Knockdown. Deadpool can follow this up from any screen position with (dash up) 623H OTG. | |||
| Damage | Startup | Active | Recovery |
|---|---|---|---|
| 80,000 | 1 | 1 | - |
| On Hit | On Block | Guard | Properties |
| - | - | Airthrow | |
|
Deadpool slashes the opponent with his sword, resulting in a Hard Knockdown. Backthrow knocks the opponent very far away, which can make follow-ups difficult or even impossible. Air Forward Throw consistently sends the opponent straight down while causing Deadpool to switch sides, and so he can easily follow up with a 623H upon landing. | |||
| Damage | Startup | Active | Recovery |
|---|---|---|---|
| 50,000 | 2 | 4 | 19 |
| On Hit | On Block | Guard | Properties |
| - | -1 | Mid | Snapback |
|
Animation and hitbox based on 5H. | |||
| Damage | Startup | Active | Recovery |
|---|---|---|---|
| 30,000 | - | 22 | 32 |
| On Hit | On Block | Guard | Properties |
| - | -14 | OH | |
|
- | |||
Team Position
Deadpool is most commonly picked in the Point position. As a keepaway-focused character, he appreciates having assists to cover parts of the screen and restrict his opponent's movement. He also has some merit being picked in the Second position. Quick Work is a quick (haha) horizontal-covering assist that can support a point character's advance and - since it hits low - can be used to enable Unblockables. Although fairly unpopular, his Katana-Rama assist can provide an OTG option for characters whose OTGs are underwhelming. As a DHC support, Deadpool's hypers are not the most damaging, but are relatively easy to combo into.
Notable Synergies
Dante: Jam Session is an incredible assist for most characters, and keepaway characters like Deadpool particularly appreciate how it discourages superjumps. Its weakness as an assist is that players can struggle to convert off the awkward hitstun and knockback caused by Jam Session. Deadpool excels at these kinds of tricky conversions, a simple j.5X xx Bola will usually work, so this assist is particularly dangerous in Deadpool's hands. Deadpool can also use this assist as a mixup tool against airborne opponents, calling it right before using Quick Work or Teleport to cross under the opponent. Since Dante and Deadpool's level 1 hypers are similar, both being forward-aimed multihit projectiles hypers, it is very easy for either of them to DHC to the other for full damage. Dante can also use Deadpool's low-hitting Quick Work assist to set up either unblockables or dangerous high/low mixups, since he can jump-cancel his normals using Bold Move to quickly access overhead attacks.
Players to Watch: Dual Kevin (Deadpool/Dante/Hawkeye) Wedge (Deadpool/Dante/Strider), Sykilik101 (Deadpool/Dante, Vergil/Strider)
Strider: Not only is Strider a very capable anchor for rounding out Deadpool teams, Strider's Vajra assist is an excellent tool for amplifying Deadpool's zoning and off a hit from the air can provide a hard knockdown. From there you can convert from a Katana Rama and go into a full combo. Strider also synergizes really well with some of Deadpool's other good partners like Dante and Vergil. Vajra also provides a 50/50 incoming mixup and can extend combos.
Players to Watch: Javibaby (Vergil/Deadpool/Strider), Wedge (Deadpool/Dante/Strider), Sykilik101 (Deadpool/Dante, Vergil/Strider)
Akuma: Tatsu is a good assist.
Players to Watch: Zenpool (Deadpool/Ryu/Akuma, order varies)
Other Players to Watch: Rei-chan (Deadpool/Doom/Wesker), SexyBeast (Deadpool/Doom/Taskmaster)
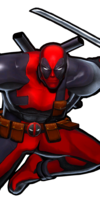
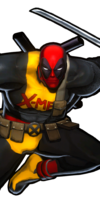
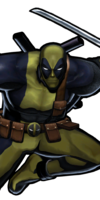
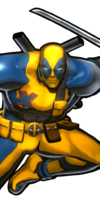
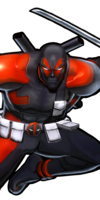
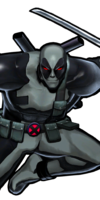
Alternate Colors
| Color 1 | Color 2 | Color 3 | Color 4 | Color 5 | Color 6 | Alt Color |
|---|---|---|---|---|---|---|
|
|
|
|
|
|
|

