Introduction
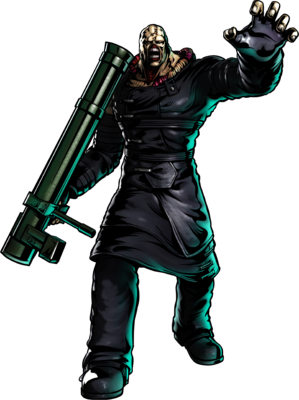
The Nemesis T-Type is the result of the Umbrella Corporation's attempts to engineer a bioweapon that was capable of understanding and following commands. It was given the order to wipe out the surviving members of STARS, who had discovered the horrible experiments conducted by Umbrella. Nemesis is the primary antagonist of Resident Evil 3, where he relentlessly pursues Jill Valentine.
In UMvC3, Nemesis is a Big Body grappler character who mixes opponents up between powerful armored attacks and dangerous command grabs. In a twist on this formula, Nemesis also has a variety of long-range tools to support his gameplan before he gets in. Nemesis can attack enemies from a distance with extended tentacle attacks and his rocket launcher, before approaching with a surprisingly fast ground dash.
| Strengths | Weaknesses |
|---|---|
|
|
Move List
Assists
| Damage | Startup | Active | Recovery |
|---|---|---|---|
| 80,000 + 150,000 | 46 | 5(28)1 | 111, 81 |
| On Hit | On Block | Guard | Properties |
| - | - | Mid, High | |
|
THC Hyper: Bioweapon Assault. Nemesis attacks in a pattern mirroring his 236M special; making a big melee swing with a large amount of coverage, and then following it up with a horizontal rocket launch. Although the first attack is easy to land and causes a Wall Bounce which makes it a strong combo option, the follow-up rocket can interfere with the combo. | |||
| Damage | Startup | Active | Recovery |
|---|---|---|---|
| 130,000 | 42 | 5 | 124, 94 |
| On Hit | On Block | Guard | Properties |
| - | - | Mid | |
|
THC Hyper: Bioweapon Assault. Causing a Ground Bounce gives this assist some combo utility for characters that can not reliably ground bounce on their own. However, it has limited range compared to his other assists. | |||
| Damage | Startup | Active | Recovery |
|---|---|---|---|
| 150,000 | 44 | - | 136, 106 |
| On Hit | On Block | Guard | Properties |
| - | - | High | Priority: Low, Durability: 1 (Rocket), 10 (Explosion) |
|
THC Hyper: Bioweapon Assault. Nemesis fires a rocket straight forward. Like with most of Nemesis' rocket-based attacks, this attack can easily be crouched underneath by the opponent, and smaller characters can even stand or dash underneath it. | |||
Ground Normals
| Damage | Startup | Active | Recovery |
|---|---|---|---|
| 70,000 | 8 | 3 | 13 |
| On Hit | On Block | Guard | Properties |
| +2 | 0 | Mid | - |
|
- | |||
| Damage | Startup | Active | Recovery |
|---|---|---|---|
| 90,000 | 12 | 3 | 21 |
| On Hit | On Block | Guard | Properties |
| -1 | -3 | Mid | - |
|
- | |||
| Damage | Startup | Active | Recovery |
|---|---|---|---|
| 110,000 | 17 | 4 | 28 |
| On Hit | On Block | Guard | Properties |
| - | -6 | Mid | |
|
5H knocks the opponent higher into the air than 2H. This is important when comboing into 623M, as the extra air time makes follow-up attacks after the Ground Bounce easier. Armor comes out too late to work as a proper reversal, but can still be used to deter opponents from mashing against Nemesis' pressure. | |||
| Damage | Startup | Active | Recovery |
|---|---|---|---|
| 65,000 | 9 | 3 | 12 |
| On Hit | On Block | Guard | Properties |
| +3 | +1 | Low | - |
|
Nemesis' only low attack. | |||
| Damage | Startup | Active | Recovery |
|---|---|---|---|
| 85,000 | 11 | 3 | 20 |
| On Hit | On Block | Guard | Properties |
| 0 | -1 | Mid | - |
|
- | |||
| Damage | Startup | Active | Recovery |
|---|---|---|---|
| 100,000 | 18 | 4 | 29 |
| On Hit | On Block | Guard | Properties |
| - | -7 | Mid | |
|
Nemesis drops down and advances forward (roughly 1/3 of a full screen length) while attacking with a shoulder charge. Can be kara-canceled quite leniently, taking advantage of its long startup, to extend the range of special attacks, especially his Tentacle Slam command grab. As a bonus, the armored frames of this attack will discourage opponents from mashing against 2H, making this tactic more effective. The advancing nature of this move also allows Nemesis to use it as a cross-under attack, especially on the opponent's incoming. | |||
| Damage | Startup | Active | Recovery |
|---|---|---|---|
| 100,000 | 10 | 5 | 34 |
| On Hit | On Block | Guard | Properties |
| Launch | -13 | Mid | |
|
Nemesis causes a large amount of disjointed tentacles to pop up from the ground in front of him. Nemesis' 5S has very good range, making it an effective neutral tool and much more difficult to punish on block than its frame data lets on. | |||
Aerial Normals
| Damage | Startup | Active | Recovery |
|---|---|---|---|
| 75,000 | 9 | 3 | 19 |
| On Hit | On Block | Guard | Properties |
| +16 | +14 | OH | - |
| Damage | Startup | Active | Recovery |
|---|---|---|---|
| 90,000 | 12 | 3 | 21 |
| On Hit | On Block | Guard | Properties |
| +21 | +19 | OH | - |
|
Works as an instant overhead against other big-body characters, although the spacing can be quite finicky. If used this way, a simple | |||
| Damage | Startup | Active | Recovery |
|---|---|---|---|
| 100,000 | 15 | 11 | 15 |
| On Hit | On Block | Guard | Properties |
| +22 | +20 | OH | - |
|
Nemesis is completely surrounded on all sides by a large hitbox. This attack is a solid cross-up, although the tentacles also extend Nemesis' hurtbox which makes this move fairly contestable by opponents with good anti-air options. | |||
| Damage | Startup | Active | Recovery |
|---|---|---|---|
| 110,000 | 17 | 4 | 25 |
| On Hit | On Block | Guard | Properties |
| - | +18 | OH | |
|
Ground Bounce property on j.5S makes Nemesis' air-to-air conversions a serious threat. | |||
Command Normals
| Damage | Startup | Active | Recovery |
|---|---|---|---|
| 40,000 x3 | 15 | 8 | 23 |
| On Hit | On Block | Guard | Properties |
| +16 | -1 | High* | - |
|
Disjointed tentacle attack. Less commonly used than the air variants because Nemesis can not move while using it, nor land-cancel its recovery. | |||
| Damage | Startup | Active | Recovery |
|---|---|---|---|
| 40,000 x3 | 15 | 8 | 23 |
| On Hit | On Block | Guard | Properties |
| +23 | +21 | OH | - |
|
Nemesis attacks in a similar manner to his grounded 6H while sailing through the air. In most cases, this is a worse throw OS than j.5H. Although this attack does technically hit Overhead, in practice it is difficult to hit a grounded opponent with this attack, as Nemesis will typically land and cancel the animation before the tentacle is low enough. | |||
| Damage | Startup | Active | Recovery |
|---|---|---|---|
| 40,000 x3 | 15 | 8 | 23 |
| On Hit | On Block | Guard | Properties |
| +23 | +21 | OH | - |
|
Key harassment tool. Works as an Instant Overhead when used on the way up, or can be converted into a combo when used on the way down. Can also be used in air combos as an alternative ender to j.5S, as the large amount of total hitstun can lead to a rejump loop. | |||
Special Moves
| L |
Damage | Startup | Active | Recovery |
|---|---|---|---|---|
| 120,000 | 18 | 5 | 23 | |
| On Hit | On Block | Guard | Properties | |
| - | -2 | Mid | ||
| M |
Damage | Startup | Active | Recovery |
| 80,000 + 150,000 | 22 | 5(28)1 | 20 | |
| On Hit | On Block | Guard | Properties | |
| - | +6 | Mid, High | ||
| H |
Damage | Startup | Active | Recovery |
| 80,000 + 150,000 | 22 | 5(28)1 | 20 | |
| On Hit | On Block | Guard | Properties | |
| - | +6 | Mid, High | ||
|
All three versions of this special cause Nemesis to perform a large haymaker punch that connects easily in combos and causes a Wall Bounce. The M and H versions cause Nemesis to automatically follow this attack up with a horizontal and diagonally upwards rocket launch, respectively. These follow-up attacks are rarely more useful than simply recovering faster and acting normally, so only 236L has any real practical use. 236L is throw-punishable on block, which is relatively easy to time but somewhat of a knowledge check. 236M and 236H are full-combo punishable on block provided that the opponent ducks the rocket. Every character in the game can crouch underneath the rocket follow-up except for Sentinel (who can instead mash a throw punish before the rocket comes out). Thus, using any version of Clothesline Rocket outside of combos is quite risky. | ||||
| Damage | Startup | Active | Recovery |
|---|---|---|---|
| 150,000 | 20 | - | 45 |
| On Hit | On Block | Guard | Properties |
| - | -19 | High | |
|
Nemesis fires a rocket straight ahead, similarly to how he follows up his Clothesline Rocket special. Due to Nemesis' height, the rocket fires quite high off the ground. Every character in the game (except Sentinel) can crouch to avoid the rocket and possibly even whiff punish. Additionally, many of the game's shorter characters can freely move underneath the rocket even while standing, making it significantly less threatening. | |||
| Damage | Startup | Active | Recovery |
|---|---|---|---|
| 150,000 | 20 | - | 45 |
| On Hit | On Block | Guard | Properties |
| - | 0 | Mid | |
|
Nemesis stops in the air and fires a rocket at a diagonally downward angle. The trajectory of j.236S makes it a much more practical zoning tool than the grounded version, as Nemesis can space the rocket such that it will hit an opponent even if they are crouching. Although it hits OTG, Nemesis has limited ability to convert this hit into any further combo. As Nemesis' only aerial special move, it is his only real cancel option from j.6H and j.2H, which is occasionally useful. | |||
| Damage | Startup | Active | Recovery |
|---|---|---|---|
| 150,000 | 20 | - | 45 |
| On Hit | On Block | Guard | Properties |
| - | -19 | High | |
|
Nemesis fires a rocket at a slightly upwards angle. The trajectory of the rocket and its small hitbox make this move extremely difficult to land, especially considering its low reward and high risk. | |||
| L |
Damage | Startup | Active | Recovery |
|---|---|---|---|---|
| 130,000 | 15 | 5 | 29 | |
| On Hit | On Block | Guard | Properties | |
| +2 | -8 | Mid | ||
| M |
Damage | Startup | Active | Recovery |
| 130,000 | 18 | 5 | 33 | |
| On Hit | On Block | Guard | Properties | |
| - | -12 | Mid | ||
| H |
Damage | Startup | Active | Recovery |
| 130,000 | 22 | 5 | 39 | |
| On Hit | On Block | Guard | Properties | |
| - | -18 | Mid | ||
|
Nemesis performs a lumbering swing of his rocket launcher. M version is the most useful as a combo tool due to causing a Ground Bounce. 623H's Wallbounce is comparatively less useful due to 236L being faster and easier to connect, and 623L offers little reward while being unsafe on block. | ||||
| L |
Damage | Startup | Active | Recovery |
|---|---|---|---|---|
| 150,000 | 7 | 1 | 48 | |
| On Hit | On Block | Guard | Properties | |
| - | - | Throw | ||
| M |
Damage | Startup | Active | Recovery |
| 150,000 | 20 | 1 | 45 | |
| On Hit | On Block | Guard | Properties | |
| - | - | Airthrow | ||
| H |
Damage | Startup | Active | Recovery |
| 150,000 | 20 | 1 | 45 | |
| On Hit | On Block | Guard | Properties | |
| - | - | Airthrow | ||
|
Command grab special. On a successful grab with any version, Nemesis smashes the opponent into the ground, causing them to bounce back up for a combo opportunity. L version is a relatively fast (but not instant) ground command grab. M version is an anti-air grab that scoops opponents diagonally above Nemesis, and H version grabs straight up above Nemesis. Kara-canceled H normals into Tentacle Slam are an effective offensive option, as opponents who try to guard the attack are vulnerable to being thrown, and opponents who try to mash out of pressure will lose to the armor of the attacks. 63214M Tentacle Slam is a good choice for air resets, grabbing opponents out of their air recovery if they are forced to tech low to the ground. Nemesis can perform a simple "throw loop" by performing 623M, 2M > 623M. Timed correctly, many characters have a hard time escaping this loop, and a variation of this can be used as a reset against most characters if the opponent is not prepared to evade it. | ||||
Hyper Combos
| Damage | Startup | Active | Recovery |
|---|---|---|---|
| 80,000 x4 | 18+3 | 1(23)1(24)1(93)7 | 82 |
| On Hit | On Block | Guard | Properties |
| - | -58 | Mid | |
|
Nemesis fires three rockets before leaping into the air and slamming down onto the opponent. Unlike Nemesis' regular rockets, these shots are aimed at the opponent's point character and have a slight amount of tracking. However, the tracking is not infallible and in certain circumstances the knockback of one rocket can cause the following rocket to miss. This can potentially cause the entire hyper to drop, although it is relatively rare and can be avoided with experience. In general, this is Nemesis' most useful hyper, as it deals large amounts of damage, is easy to combo into, and has lots of potential for THC or DHC setups. It is not well understood, but there is a glitch that allows this hyper to reset the Ground Bounce limit when canceled in certain circumstances. For example, if Nemesis performs a combo that uses a ground bounce, ends the combo with this hyper, and then DHCs to Chris' Sweep Combo hyper as the 4th hit connects, Chris's hyper will use its Ground Bounce on the second hit, even though this should not be possible. | |||
| Damage | Startup | Active | Recovery |
|---|---|---|---|
| 50,000 x4 + 80,000 x2 | 15+3 | 10(23)11(26)11(33)11(50)20 | 69 |
| On Hit | On Block | Guard | Properties |
| - | -54 | Mid | Armored (10 hits) frames 11-260, |
|
Nemesis slowly advances while swinging in front of him. Because the swings are so high in the air, it can be awkward to connect them all properly. This hyper is more damaging than 236XX, but the concessions needed to combo into it properly means that the extra damage is rarely worth it. | |||
| Damage | Startup | Active | Recovery |
|---|---|---|---|
| 450,000 | 15+0 | 2 | 58 |
| On Hit | On Block | Guard | Properties |
| - | - | Throw | |
|
Cinematic command grab hyper. Although it has no startup after the flash, this hyper has a pretty significant amount of startup before the flash with no invulnerability to speak of. This gives the opponent time to jump away or even hit Nemesis out of the startup. This hyper is slower than L Tentacle Slam and only has slightly more range as a tradeoff. It also replaces the groundbounce of Tentacle Slam with a regular Hard Knockdown, limiting Nemesis' solo follow-ups to only 236XX. | |||
Universal Mechanics
| Damage | Startup | Active | Recovery |
|---|---|---|---|
| 80,000 | 1 | 1 | - |
| On Hit | On Block | Guard | Properties |
| - | - | Throw | |
|
Can be followed up with 236XX or a tiger knee j.2369S. Backthrow (and only backthrow) into the corner allows Nemesis to catch the opponent with 5L before they land and start a full combo. | |||
| Damage | Startup | Active | Recovery |
|---|---|---|---|
| 80,000 | 1 | 1 | - |
| On Hit | On Block | Guard | Properties |
| - | - | Airthrow | |
|
Can be followed up with 236XX or a j.236S, although regular Air Rocket can whiff if Nemesis is too high or the opponent is thrown into the corner. An airthrow in the corner can be followed up with a falling j.5S (easy, wastes ground bounce) or falling j.2H (harder to time, preserves ground bounce) and start a full combo. | |||
| Damage | Startup | Active | Recovery |
|---|---|---|---|
| 50,000 | 2 | 4 | 28 |
| On Hit | On Block | Guard | Properties |
| - | -6 | Mid | Snapback |
|
Animation and hitbox based on 5H. | |||
| Damage | Startup | Active | Recovery |
|---|---|---|---|
| 30,000 | - | 19 | 32 |
| On Hit | On Block | Guard | Properties |
| - | -12 | OH | |
|
- | |||
Team Position
Nemesis is a flexible character, but he is typically run as either the Point or Second character. His assists, especially Clothesline Rocket, are quite strong and offer a lot of combo extension possibilities for certain characters. He also brings some powerful support abilities in the second position with his hypers. His THC Hyper (Bioweapon Assault) causes a forced ground bounce, allowing some point characters to continue the combo after calling it. As a point character, Nemesis brings incredible solo damage and some very deceptive oncoming mixups to maintain momentum after a kill.
Notable Synergies
Arthur: Arthur can take advantage of Bioweapon Assault's exceptional strength as a THC. Spaced correctly, Arthur will recover just as Nemesis lands for the forced ground bounce, allowing Arthur to continue to combo after the team hyper for additional damage. As a larger character that struggles against concentrated zoning efforts, Nemesis also benefits from Arthur's dagger toss assist, to help clear projectiles in front of him and cover his advance.
Players to Watch: Sacktap (Nemesis/Arthur/Haggar)
Wesker: Wesker is more likely to use THCs than other characters, as it allows him to cancel directly from OTG gunshot. Nemesis' "Bioweapon Assault" hyper is exceptionally strong for this purpose. Not only does it deal high damage, its duration lines up perfectly with Wesker's hyper, such that Nemesis will slam down from the sky just as Phantom Dance ends, causing a Forced Ground Bounce and potentially allowing Wesker to continue the combo (if it didn't kill outright). Nemesis also gets significant extra combo potential when he can replace his own (medicore) OTG attacks with an OTG assist like Wesker.
Players to Watch: Scamby (Wesker/Nemesis/Chris)
Chris: Chris' Nemesis synergy is similar to his synergies with Arthur. They have strong THC compatibility, as Chris will recover from his Grenade Launcher hyper just in time to pick up after the forced ground bounce of Bioweapon Assault, and Chris' Gun Fire assist can help protect Nemesis on his forward advance.
Players to Watch: Scamby (Wesker/Nemesis/Chris)
Other Players to Watch: JDog (Nemesis/Hulk/Sentinel), Airtola (Hulk/Nemesis/Taskmaster), Motion51 (Spencer/Nemesis/Nova)
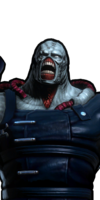
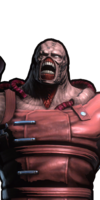
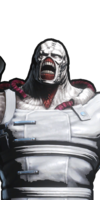
Alternate Colors
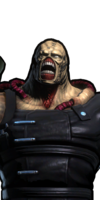
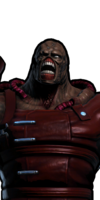
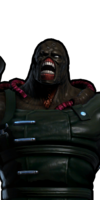
| Color 1 | Color 2 | Color 3 | Color 4 | Color 5 | Color 6 | Alt Color |
|---|---|---|---|---|---|---|
|
|
|
|
|
|

|

