Subsystems
- Block - Hold back. While blocking, you take no damage from normals and a single pixel-per-hit when blocking special/desperation moves. Unlike in KOF98, you cannot air-block in this game.
- Short Hop - Performed by quickly pressing up-back, up-forward, or simply just up and then inputting a neutral or any non-upward motion. Performing a short hop can be difficult at first but being able to select from any jump option at a moment's notice is absolutely vital to KOF. One trick is to quickly move from an upward direction to down in order to avoid holding up for too long and causing a jump. Short hops are fast and possibly the least vulnerable of all jump types (the hopping player moves forward under 1/3 of the screen's length) which make them difficult to react to when under pressure. Using air-to-ground attacks from short hops is a quick way to keep the opponent blocking while gaining frame advantage afterward. Once used to seeing short hops, they become easier to anti-air when an opening presents itself. Short hops are great for baiting and then punishing sweeps. This forms part of the basic RPS system of KOF where hops beat low attacks, standing attacks defeat hops, and low attacks win against standing attacks.
- Hyper Hop - performed by first pressing any downward direction, quickly pressing up-back or up-forward, and then releasing to a non-upward directional input. They can also be done by running and inputting a short hop. Note that hyper hops cannot be done neutrally upward. Hyper hops are even faster and travel further than normal "Short Hops."
- Jump - The option that should be the most familiar with most fighting game players. Jumps in KOF are performed the same way as in any game: just hold up-back, up, or up-forward. Jumps reach a high vertical height which suits them for maneuvering over large specials or challenging the other player in the air. Jumping carries a longer aerial hang time which gives the other player more substantial time to anti-air or air-to-air. Additionally, a normal jump covers the same horizontal distance as a hyper hop. Jumps end up getting punished more often than either hop, and so much like in any fighting game the player should have a set reason or strategy in mind before jumping heedlessly.
- Super Jump - Super jumps are done by pressing any downward direction and followed by up-back or up-forward. Players cannot super jump neutrally upward. A super jump travels a bit further than 1/2 of the screen length. Combined with the widescreen ratio this creates more safety from fullscreen against being jumped on. A super jump travels faster and further than a standard jump although tall vertical height of the jump arc makes this the easiest of all air options to anti-air.
- Back Dash or Back Step - Tap back twice quickly. During a back dash, you can perform air command normals and air special moves. Using a command normal will cause the trajectory and recovery period of the back dash to change.
- Guard Cancel Strike (CD counter) - Press C and D simultaneously while guarding a move. This uses one power stock.
- Taunt - Press Start. In KOF2000, you cannot cancel your taunt animations early, however to compensate, taunting now recovers one Striker Bomb (as long as you have one Super Bar filled).
Power Gauge
The Power Gauge is now located below your Life Gauge. It fills up in several ways: by taking damage, performing special moves, and hitting your enemy. Taking damage earns you the least energy, while performing a special which hits your enemy earns you the most. Command attacks, normal throws, (S)DMs, Striker attacks, and certain special moves will not add energy to your Power Gauge, though. Once the gauge is full, you gain one power stock, and the gauge empties. You can hold three power stocks total. Stocks can be used to perform the following moves:
- DMs cost one stock to use.
- SDMs now cost a full three stocks to use. There is no longer any benefits to being in "Red Health" mode in regards to supers.
- Guard Cancel Attacks and Guard Cancel Rolls cost one stock to perform.
- Activating Counter and Armor modes also costs the full three stocks to use.
- Striker Launchers require both one power stock, and one striker bomb to use.
- Lastly, Taunt Recovering requires one stock to use, as well as at least one spare striker bomb.
Armor Mode
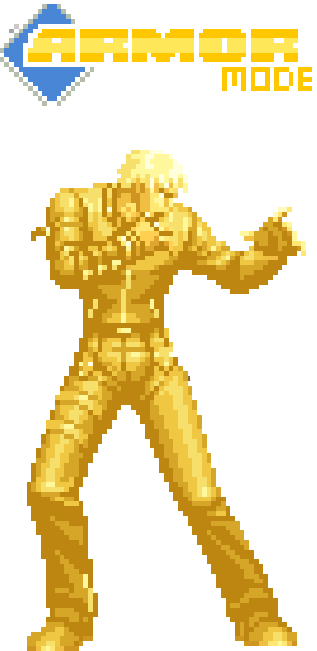
K' in armor mode

| Damage | Guard | Guard Damage | Cancel Properties | Startup | Active | Recovery | Total | Hit Advantage | Block Advantage | Invulnerability | |
|---|---|---|---|---|---|---|---|---|---|---|---|
| 0 | Unblockable | None | - | 1 | 7 | 16 | 23 | KND | - | 1-23f Strike Invul | |
| |||||||||||
Counter Mode
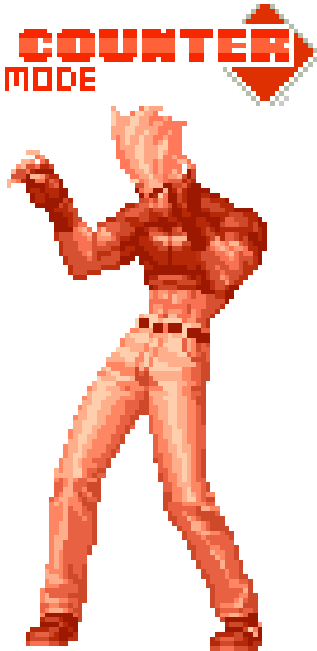
Benimaru in counter mode

| Damage | Guard | Guard Damage | Cancel Properties | Startup | Active | Recovery | Total | Hit Advantage | Block Advantage | Invulnerability | |
|---|---|---|---|---|---|---|---|---|---|---|---|
| 0 | Unblockable | None | - | 1 | 7 | 16 | 23 | KND | - | 1-23f Strike Invul | |
| |||||||||||
Note that using an SDM or activating Counter or Armor modes will remove your power gauge temporarily, meaning you cannot build or use meter during this time.
Strikers
- KOF 2000 builds upon the previous game mechanics of KOF 99, most notably the Striker system. For those unfamiliar with it, now you choose 4 characters, where 3 of them fight and one of them is the Striker, similarly to assists in Marvel vs. Capcom. At the bottom of the screen, your striker name is shown, with the stocks available. At the start of the match you have three striker stocks, and whenever you lose a round one stock will be added. Pressing B+C will call your striker, he will perform his specific action (note that it's not always an attack, Kensou restores a bit of your life for example), and will cost you one striker bomb.
- Note that unlike KOF99, you no longer have to be in neutral to call a striker; you can call a striker while jumping, backdashing or performing an attack in KOF2000 now. You can also call in a striker during Guard Cancel Attacks, but some communities may have that particular tactic banned.
- If you summon a Striker during a regular throw, the Striker will perform a special animation; which is them diving in and attack the opponent, launching them high in the air. This require one striker bomb, and one bar of super available to use. Note that in this situation, Strikers can miss the opponent entirely, wasting both meter and strikers respectively. Mash throws (such as Joe's knee bash or Chang's chokehold) will not cause a Striker Launcher to happen. Only a few characters with Mash Throws can actually summon strikers out during said Mash throw (those being Bao, Chin and Choi, respectively).
- Taunting will replenish one striker bomb at any point in time at the cost of 1 bar of super meter.
- Some Notable strikers: Seth, Another Iori, Joe, Vanessa, Cool Choi, Ryuhaku Todoh(Unknown)
Basic Strategy
- Use neutral hops(and jumps) attacks as means sometimes to defend yourself. In the Fatal Fury and KOF games it can look like your ground normals are terrible/not as strong. Using neutral hops and jumps this can make the difference for stopping air attacks where your ground attacks wouldn't do the job. As well as tag grounded attacks with hops. Finding the sweet spot and timing for certain air attacks will take practice.
Advanced Strategy
- Roll : Press A and B simultaneously. Holding back while pressing A+B rolls backwards and holding forward or just pressing A+B without input rolls forwards. Rolls are invulnerable from the very start and vulnerable at the end. You can be thrown out of rolls at any point. Since they are invincible at startup, you can use rolls as a wakeup 'reversal', but unlike in later KOF games you cannot mash the input.
- Recovery roll (tech roll) - Press A and B simultaneously as you are touching the ground from getting knocked down. Some moves/knockdowns are not rollable. You can mix this up with staying on the ground to mess with your opponents setups on wakeup.
- Throw break - Press back/forward with any button immediately after you are thrown. Some mashable throws are not breakable, and instead you can mash all the buttons and directions to lessen the damage and get out faster.
Armor Mode is generally more efficient and useful than Counter Mode in matches situations.
- Reversals - Reversals in KOF2000 work mostly the same as in other games. There isn't a reversal message, but the window is very large (about 5 frames). The main difference between this game and others is that most 'invincible' moves aren't completely invincible. A lot of the time they are only invincible up to the hit, in which case they will trade with meaties. You will have to refer to the character-specific sections concerning which moves do what. Universally speaking, rolls, instant command throws, and super instant command throws can be used as reversals.
- Alternate Guard - This is a technique to avoid being thrown while blocking. First, you must block an attack or be put in blockstun by an attack (ie by it being whiffed close to you). Then you must alternate between back and down-back very quickly. This will keep you in perpetual blockstun and unable to be thrown by any throws, including proximity unblockables. To beat alternate guard, you must be able to hit the opponent by using fast lows/overhead mixups etc. to break their defense. Tactics like repeated/delayed cr.Bs can be hard to alternate guard without thinking.
- Proximity Unblockables - This is a special type of throw that is exclusive to KOF. Some examples of proximity unblockables are King's hcf+P throw or Takuma's qcf,qcf+P super for example. Unlike command throws, they can only be performed when close to an opponent who is in a throw-able state (ie in hitstun or not in blockstun). Because of this, it is usually impossible to whiff a proximity unblockable, making them safer in some situations than command throws. You will simply get a normal move if the opponent is not in a throw-able state, or a different command normal/special if you tried to combo into one. On the other hand, they do have startup, and it is possible to trade hits instead of simply throwing. It is also possible to whiff a proximity unblockable if you combo into one in such a way that it pushes the opponent out of range after the proximity unblockable has started. As for rolls, in most cases they will be stopped by a proximity unblockable as if you were a wall.
- Counter-hits - Whenever you interrupt a jumping attack, special move, or super move, you score a counter-hit. This causes the screen to flash white and a "COUNTER!!" message to appear. The hit gets a 25% (usually) damage bonus, pushes back further (ala MAX mode hits), and allows you to juggle with another hit if the attack knocks down. For example, if you score a jump CD counter-hit, you can hit the opponent while they are in the air. Other examples are Chang's Ball Swing or A Belly Flop hitting twice on counter.
- Guard Cancel Roll:
The guard cancel roll, has some differences compared the normal roll:
- The characters has trailing shadows during Guard Cancel Roll (so you can visually differentiate between both rolls).
- The Guard Cancel Roll is faster and slide a longer distance (similar to the normal roll during a run).
- The Guard Cancel Roll is immune to throws (the normal roll is vulnerable to throws on all frames).
- Guard Cancel Roll has no vulnerable frames (the normal roll is vulnerable on the last frames).
- You can cancel the Guard Cancel Roll into another roll. The new roll may be a forward or back roll (no matter the direction of the previous roll) and the new roll will retain all properties of the Guard Cancel Roll, in special it may be cancelled in another roll and so on without limits. If you miss the time of the cancel, you may end up doing a normal roll after the Guard Cancel Roll had ended, so pay attention to the trailling shadows to be sure that you've cancelled. (the normal roll cannot be cancelled on any move.)
Button lag
If you press a button during a neutral state the game will wait four frames before beginning the attack.
This is because it's waiting for button+button/button+direction combinations. If it detects one it will execute it immediately without waiting further (e.g. if you press C and then press D two frames later, it will immediately begin the CD animation.)
One of the combinations it looks for is f/b+C/D so if you're trying to cancel a close C or D into a command normal, don't be too quick with the direction input or you could end up doing a throw instead.


