Normal Moves
Normal Moves refer to any single button hit, and are common across every character, The number of normals each character has is drastically reduced from previous Street Fighter games, removing close and neutral jumping attacks. Most have 18 total: standing LP, MP, HP, LK, MK, HK; jumping LP, MP, HP, LK, MK, HK; and crouching LP, MP, HP, LK, MK, HK. Certain characters such as Nash and Fang also have a different attack if done during a neutral jump instead of a forward jump.
Unique / Command Normals
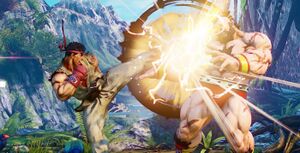
Ryu's overhead, performed by pressing forward and MP
Command normals are unique attacks for each character, performed by pressing a direction + a button. Examples of these are Ryu's Collarbone Breaker, Guile's Sobat Kick, and Chun-Li's Senenshu. These moves often have different properties than normals such as being overheads, moving the character far forward, and more. These moves can still combo into others, cause crush counters, or just be a good poke as with regular normal moves.
Target Combos
Ryu's target combo, performed by pressing MP, HP, HK one after another. Timing is very loose.
Target combos are pre-defined button sequences that execute unique attack strings. Examples of these are Ryu's Jodan Sanrengeki, Cammy's Lift Combination, and Cody's Final Combination. The largest difference is the timing on them is much less strict than a normal combo, they can be pressed one after another in a loose timing to get the moves to come out.
Special Moves
A special move is another class of moves in Street Fighter V. These moves usually have special properties compared to normal attacks; examples of them include Ryu's Hadoken, M. Bison Scissor Kicks, Birdie's Bullhorn, and Ed's Psycho Rising.
Special Moves are often a large part of what makes a character unique. When people think of Ryu they often don't think of what his sMP or f+HP look like, they think of the Shoryuken or Hadoken or Tatsumaki. When people think of Blanka they think of his electricity and rolling attacks, when they think of Chun-Li they think of her lightning kicks. In this way they have a variety of uses; some are used as combo enders, some are used for zoning, some are used as "Get off me!" moves, some for breaking the opponent's pressure, and more. Learning a character's specials is a good first step to learn what kind of character they are supposed to be.
Special Moves in addition to their utility alone are useful because many normals are special cancelable, meaning you can cancel moves that normally would not allow further combo into a special attack. The classic example is Ryu's crMK xx Hadoken where "xx" means cancel; on its own crMK is not advantageous enough to continue a combo but because it can be special canceled it allows further followups.
Special Moves also causes actual chip damage instead of only grey life.
There are several types of inputs for performing specials:
Motion
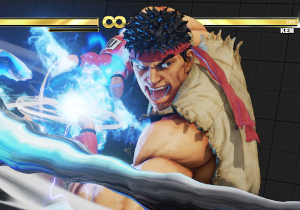
Hadoken, performed with down, down-forward, forward then a punch button.
These refer to moves that are done via entering a motion, such as a Hadoken which is Quarter Circle Forward (QCF) + Punch, or Zangief's Screw Pile Driver which is F, DF, D, DB, B, UB + P (commonly called a 360 even though you only need to input a 270).
Charge
Guile's Sonic Boom, performed by holding back for about 1 second then pressing forward and a punch button.
Charge refers to moves that you have to hold a direction for a certain period of time before being able to perform. These include Chun-Li's Kikoken, Guile's Sonic Boom, and Bison's Scissor Kicks. These are either hold back for several frames (usually around 50, or almost a second) then pressing forward + an attack button, or hold down then press up plus an attack button. These moves are designed to limit mobility to have access to them; for example while Guile is walking forward this means he is not charging and cannot Somersault Kick, making it safer to jump at him.
Hold
Balrog's TAP punch, performed by holding 2 buttons for about 1.5 seconds.
Hold specials are similar to charge, however they are performed by holding a button (or buttons) for a certain number of frames. Examples of these are Balrog's Turn Around Punch, Birdie's Bullhorn, and Falke's Psycho Kugel. The amount of time you need to hold the button varies depending on the character and the special.
Rapid Input
Blanka's Electricity, performed by pressing any 4 punch buttons in a short window.
Rapid input, or mash specials, are moves that requiring hitting a button several times in quick succession. Examples are Blanka's Electricity and Ed's Psycho Flicker which require 4 punch buttons presses, and Kolin's Parabellum which requires 5 punch buttons to be pressed. The last input determines the strength of the move if there are multiple; for example if Kolin presses LP, MP, HP, MP, LP then the LP version is performed; if Kolin does LP, MP, HP, MP, HP then the HP version is performed. If the last input is 2 or 3 punch buttons at the same time such as LP, MP, HP, MP, LP+MP, the EX version is performed.
There are two common ways to handle these types of inputs: Piano and Sliding. Sliding is performed by sliding a finger along the punch or kick buttons hitting them as you go along, and ending with the appropriate button. Pianoing is similar concept; see VesperArcade's YouTube tutorial for more information.
Easy-Input
Ed's Psycho Upper, performed by pressing any 2 punch buttons together.
New to Street Fighter V and currently unique to two characters, Ed and Falke, easy input moves refer to specials that are performed by simply pressing two buttons with no motion or charge attached to them. For example, Ed's Psycho Upper is performed by pressing two punch buttons at the same time and the EX version is performed by pressing 3 punch buttons. With this comes some benefits; being able to press just one button to have an invincible reversal come out versus having to do a motion means it is much easier and quicker to get them to come out in tight situations such as trying to anti-air or trying to beat a charging armored move on reaction.
Projectiles
Multi-Hit
TODO.
Clashes
TODO.
EX Specials
EX Specials are powered up versions of regular specials, and take 1 section of the EX Gauge to use. When an EX Move is performed, the character will glow yellow and 1 stock of EX gauge will disappear. They are performed by doing the motion of a special move that has an EX version, and inputting 2 or 3 buttons of the appropriate type (punches or kicks). These moves often have extra benefits or properties than the regular version. Using Ryu as an example:
- Ryu's regular Hadoken is a single hit that is -6 on block, does 60 damage, and leaves the opponent standing on hit. Comparatively his EX Hadoken is two hits, meaning it can break most armored moves, knocks the opponent down on hit, is does 100 damage total, and is +2 on block allowing Ryu to continue pressure safely if he wants to.
- Ryu's Tatsumaki normally does not hit crouching opponents while his EX version does, in addition to performing more hits, more damage, and knocking the opponent away. It is also stationary.
- Ryu's Jodan Sokutou Geri normally knocks the opponent backwards on hit, while the EX version causes the opponent to bounce off the wall allowing a Shoryuken to combo afterwards for more damage
- Ryu's HP Shoryuken is normally not invincible until frame 3 while his EX Shoryuken is invincible frame 1, does more damage, and can combo after moves that normally don't such as after an air-to-air jump MP.
Most special moves have EX versions, however not every move does. Ed's Psycho Flicker and Falke's Psycho Kugel are two examples. In general special moves granted as part of V-Trigger do not have EX versions either.
Almost all EX specials are also the same regardless of inputs; meaning there is no light, medium, and heavy versions of them. QCB+LK+MK and QCB+LK+HK do the same move with the same properties. However some specials such as Urien's Metallic Sphere performs different versions depending on the button combination. Inputting QCF+LP+MP will doing the slow version, QCF+LP+HP or QCF+LP+MP+HP will perform the medium version, and QCF+MP+HP will perform the heavy aerial version. Other examples are Kolin's QCB+PP counters which perform low, mid, and high versions depending on which two punch buttons are pressed; and Gill's projectiles which work similarly to Urien's.
One interesting thing about EX Moves is they do not consume meter until the 2nd frame, meaning if they are counter hit on their first frame no resources will be consumed.
Counter Hits
A counter hit occurs when you strike your opponent during their startup frames. When a counter hit occurs, it will display "Counter" on the side of the screen
Counter Hit Benefits
The biggest benefit counter hits give is +2 frame advantage on moves, allowing new links and more damaging combos. In addition, counter hits give a move a 20% damage and stun bonus. For multi-hitting moves the properties can vary per move, but usually the benefits only apply to the first hit of a move. For example with Ryu's b+HK Axe Kick it normally does 40*40 damage for a total of 80 and is +4 on hit, and on counter hit it does 50*40 damage for a total of 90 but is still only +4 on hit, as the counter hit bonus only applies to the first hit. Similarly, Ryu's f+MP Collarbone breaker does 30*30 for 60 damage and is +1 on hit; on counter hit f+MP does 36*30 for a total of 66 damage but is still only +1 on hit. However, if only the second hit of Ryu's b+HK counter hits it will do 50 damage and be +6 on hit allowing more damaging combos. Similarly, if only the second hit of f+MP connects, it will do 36 damage and be +3.
Crush Counters
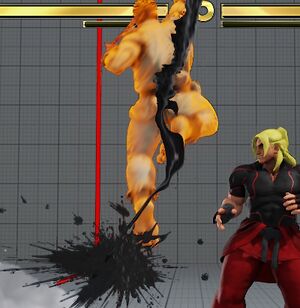
New to Street Fighter V are Crush Counters; these are similar to the Fatal Counter system in games like BlazBlue an Persona 4 Arena. Each character has a variety of moves that when they land as a counter hit, they will cause a special hit effect with a loud "glass breaking" noise, and cause special effects such as the opponent crumpling forward, spinning backwards, or flying into the air often allowing follow up combos. These moves are often on HP and HK; either standing, crouching, or as a command normal. One exception to this is Cammy, who can crush counter with her V-Skill 2. Universal to everyone (except Gill) is a character's sweep, which will cause a hard knockdown forcing the opponent to do a delay rise, giving plenty of time to either form a setup or activate resources such as Alex's V-Skill or Ibuki's Kunai Reload. This is usually performed with crHK, with the exceptions being Seth (who's is crHP).
In addition to the larger combo opportunities, Crush Counters generate V-Gauge; the amount generated depends on the move and character.
New in Season 3 is a universal adjustment to Crush Counters, which causes the combo to be scaled more heavily. Crush Combos start the combo at 2 hits instead of 1, meaning the next hit will cause 80% damage instead of the normal 90%, the third will cause 70% instead of 80%, and so on. Because of this other counter hit combos will often cause more damage but not give the V-Gauge gain.
Critical Arts
When a character's Critical Art gauge is full, they can perform their Critical Art. Critical Arts are often called supers; they are extremely powerful moves that are a great way to end a round. When activated all Critical Arts have a special animation associated with them where the screen freezes and zooms in on the character performing it, before going into the attack itself.
For many characters there is a follow up animation if the attack hits; some exceptions are Ryu, Cody, and G. Critical Arts are unique as they are the only way to chip out an opponent, and many can be canceled into from other special attacks such as Ryu HP Shoryuken xx CA, or Alex Flash Chop xx CA which is normally not possible. Critical Arts are also almost always very unsafe with a couple exceptions being Guile's when he is in V-Trigger 1 and Dhalsim's which is a large orb projectile, so make sure to punish with your most damaging combo if you block it.
Not all critical arts can be blocked however; Laura, Zangief, and Mika's are all command throws that need to be back dashed or jumped.
Throws
Throws are inputted by pressing LP+LK near an opponent, and causes you do throw the opponent dealing a decent amount of damage and slight advantage. Inputted b+LP+LK performs a back throw, which throws the opponent behind you often dealing slightly more damage than a normal throw. This can be a great move when you are in or near the corner to instead put your opponent there. Regular throws are only able to grab grounded opponents, meaning back dashes and jumping will beat them. You also cannot throw an opponent if they are in hit or block stun, meaning they cannot be used in combos.
Throws are universally 5f startup, 3f active, and 17f of recovery. The advantage and distance between the player and opponent after a throw varies by character and whether it is a back throw or a forward throw. After a successful throw the player is usually advantageous enough to apply some pressure, with some characters better at it than others.
Throw Techs
By pressing LP+LK within 7 frames of a throw connecting, you can tech a throw. Teching a throw causes you to push the opponent away, preventing any damage and returning both players to neutral. Only regular throws can be etched, command grabs and air throws cannot.
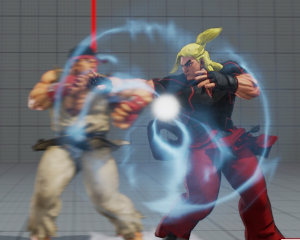
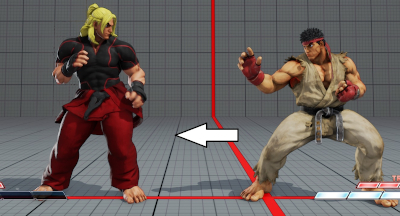
Ken entered the throw input just after Ryu
Upon successful throw tech, the player will stay in the same position however the opponent will be pushed back about 1 square on The Grid Stage
Ken teched Ryu's throw causing him to be pushed away
Command Throws
Command throws are unique special moves or Critical Arts tied to a character. Examples of them are Zangief's Spinning Pile Driver, Vega's Grand Izuna Drop when clawless, and Balrog's B3 when in V-Trigger 2. These are more damaging than regular throws and often give better advantage, however if the throw misses the recovery is much longer at a near universal 60f of recovery. Command throws cannot be throw teched and with few exceptions such as Zangief and Balrog's V-Trigger 2 command throws they cannot be combed into
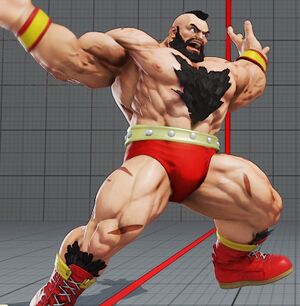
Zangief's Spinning Pile Driver
Air Throws
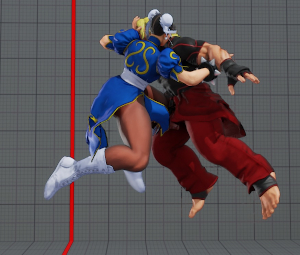
Air throws are generally performed by pressing LP+LK while in the air, however certain characters such as Kolin and Zeku have special move that act similarly. Not every character has an air throw; examples of those that do are Falke, Chun-Li, Guile, and Ibuki. Air throws cannot be teched. Different air throws have different animations which can lead to different advantages; for example Falke's knocks the opponent down while staying airborne herself meaning the height she threw them determines how advantaged they are, meanwhile Chun-Li follows them to the ground which always gives the same frame advantage. With a couple of exceptions such as Kolin and Zeku's special moves, air throws cannot be used in a combo
Throw Ranges
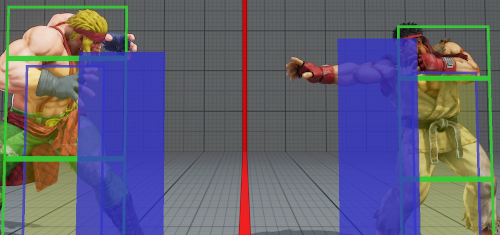
Not every character has the same throw range, and not all characters have the same throw hurtbox range. This means there are situations where the opponent may be able to grab the opponent when the opponent would not be able to.
Notice Alex's throw range and throw hurtbox is slightly longer than Ryu's
Frame Traps
Frame Traps are performing two moves that have a large enough window to not be a true blockstring allowing the opponent to do something besides block, but small enough where if the opponent does something besides blocking that is not invincible they will be hit.
A common example Ryu's LP, MP Frame Trap. When the opponent blocks Ryu's LP, Ryu is +2. Ryu's MP is 5 frame startup, meaning there is a 3 frame gap (5f startup - 2 frame advantage) where the opponent can perform an action. To beat this the opponent needs to perform an invincible move where the invincibility occurs on or before the 3rd frame such as most HP DP type moves or Kolin's MP Frost Touch parry, or a 3f or faster medium attack. Because of the priority system (mediums beat lights that hit on the same frame, heavies beat mediums on the same frame), it must be a medium. A 3f medium attack does not exist in the game, meaning if the opponent presses any button or tries to walk forward after blocking the LP they will be hit. In addition if the opponent pressed a button, it will be a counter hit allowing Ryu to perform a more damaging combo than normal. Ryu's LP being +2 is also noteworthy because throws are also 5 frames startup, and when throws connect on the same frame as any attack button the throw will win. This means if the opponent presses a button that is not throw invincible OR stays and blocks without trying to throw tech, Ryu will always throw the opponent.
Because all normal throws in SFV are 5f startup and the fastest light normals in the game are 3 frames startup, a +2 - +4 situation is the ideal frame advantage to setup a frame trap. +2 means the attacking player can press either a 5 frame medium / 4 frame light attack or throw and the defending player must guess between attack, throw, or perform an invincible move. These can be mitigated by delay tech, which itself can be beaten in a variety of ways as discussed in the Option Select section.
While 3 frame or 4 frame gaps are ideal (depending if a character's fastest light attack is 3 or 4 frames), frame traps can have larger windows. Ryu's MP HP is a 7 frame trap (MP is +1 on block, HP is 8f startup), crMP, crMK is a 5 frame gap, and so on. Larger frame traps are more useful at distances where light interrupts aren't a problem. A 7 frame gap up close against Karin will get beat by her crLP, however at max distance of MP if Karin presses crLP it will whiff and Ryu's HP will hit the recovery, which in V-Trigger 1 can then be special canceled for large damage. Similarly crMP crMK won't frame trap against stand LK, however it will beat her crMK which is a common button for Karin at a distance.
For a visual explanation, see Bafael's Frame Traps and Counter Hits guide. Note this is based on Season 1, meaning damage values and frame data is often different between then and now. The core concept remains the same however.
Meaties
"Meaty" has two common definitions in fighting games:
- Using a move against an opponents wake up that will beat any of their non-invincible options, similar to a frame trap.
- Hitting a move in its later active frames.
An example of 1, is after Ryu knocks an opponent down with crHK sweep and they perform a quick recovery, leaving Ryu at +20. If Ryu dashes forward (16 frames) and presses MP (5 frame startup), the MP will hit the opponent just as the opponent wakes up, meaning it will beat any non-invincible move or move that does not have armor on frame 1. When people say "what's the meaty after X move", they usually mean this. Ideally meaties hit either just as the opponent wakes up, or 2 frames after. This means the move will beat any light attack, heavy reversals which are invincible frame 3, or armored moves that are invincible on frame 3. To guarantee the move hits correctly, it's possible to use "frame kill" setups rather than manually timing it. Another example is after Ryu performs a crush counter crHK, which forces the opponent to perform a delayed wake up and leaves Ryu at +69. Rather than having to time the sequence manually, Ryu can perform the following sequence to guarantee MP will hit as soon as the opponent wakes up: forward dash (16f), MP (17f*), HP (30f*), MP (5f startup, 3f active), allowing MP to hit on frames 68 - 70 because it has 3 active frames. 68 < 69 < 70, so the opponent wakes up into it without Ryu having to manually time it.
- Note when calculating total frames in a move, most fighting game frame data including this wiki include the first active frame as the startup. Because of this, the total amount of frames is startup + active + recovery - 1.
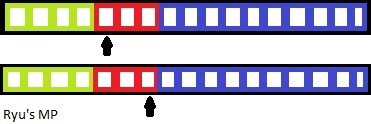
For number 2, as mentioned in the Game Data section each move is divided into 3 sections: startup, active frames, and recovery. When a move hits or is blocked, it has frame advantage or disadvantage. Ryu's MP is normally +7 on hit and +1 on block. However, this data assumes the move hits on its first active frame. If a move hits on a later active frame the opponent stays in the same amount hit of blockstun, however the player will recover faster giving them additional advantage.
In the above sequence after Ryu hits a crush counter crHK, Ryu's MP hits on the second active frame. This means rather than 10 frames of recovery + 2 additional frames (MP has 3 active frames, if it hits on the first Ryu the two additional active frames still play out), it takes 10 frames of recovery + 1 additional frame for Ryu to be able to act again. Because MP hit 1 frame late, Ryu becomes +8 on hit and +2 on block. On hit Ryu can then combo into stand HP which is usually only possible on counter hit, and on block he is at +2 letting him set up a basic strike/throw mixup. Similarly, if Ryu's MP hits on the third frame, it becomes +10 on hit and +3 on block; on counter hit this becomes +12 on hit which is enough time for Ryu to perform a micro walk for larger combos, such as MP, microwalk MP, crHP xx HP Shoryuken.
Above is a visual representation of Ryu's MP Frames. Green are the 4 startup frames, red are the three active frames (5f startup means becomes active on 5th frame), and blue are the 10 recovery frames.
A more practical example is with Laura's MP, which is usually +4 on hit with 5 active frames. Laura's EX Thunder Clap knocks the opponent into the air. Up close Laura can immediately press crMP xx f+VS1 to cause the opponent to flip out and Laura to dash forward, leaving her at +10. During a flip out the opponent cannot be hit. By pressing MP (5 active frames) immediately after the crMP xx f+VS1, the opponent will land and become vulnerable on the last active frame of Laura's MP. If the opponent is hit, her MP becomes +8 on hit instead of only +4 (+4 on hit if hits 1st active frame, 4 active frames late = +8). This allows her to combo into HP (8 frames startup), which would normally be impossible even on counter hit. This is once again because the move is hitting "meaty" on its 5th active frame, rather than on its first active frame.
While meaty moves can apply in many situations, wake up and as part of a reset are the two most common. Another example would be against a move that extends its hurtbox forward. If Laura pressed MP and Ryu pressed f+HP which causes him to move forward and extend his hurtbox forward, it's possible for Ryu to move into Laura's active hitbox, hitting on a later frame giving additional advantage. However these types of situations are much more difficult to judge how "meaty" the move was and react accordingly, compared to off a reset or knockdown where the exact outcomes and numbers are known.

