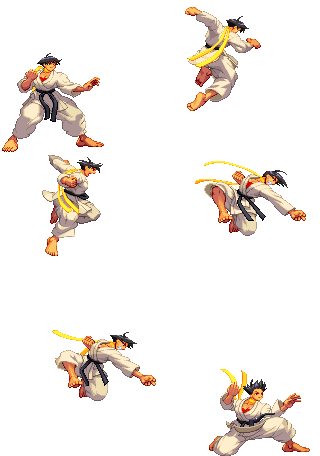
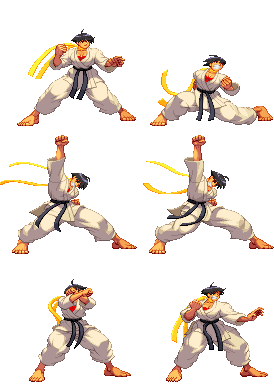
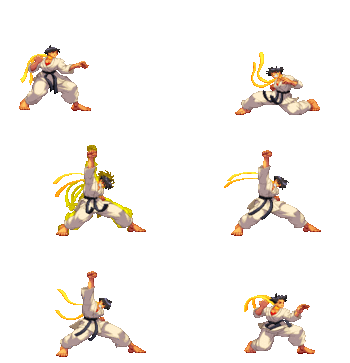
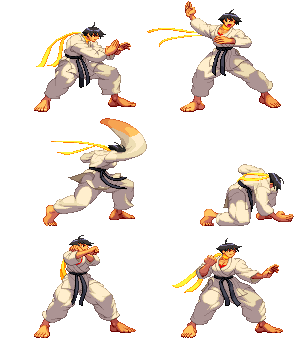
Street Fighter 3: 3rd Strike/Makoto/2021

From SuperCombo Wiki

Introduction

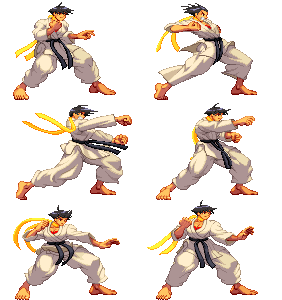
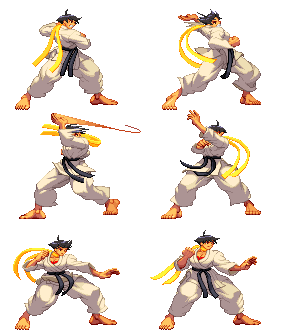
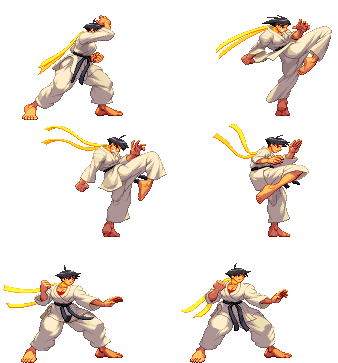
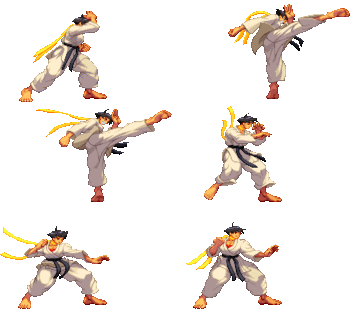
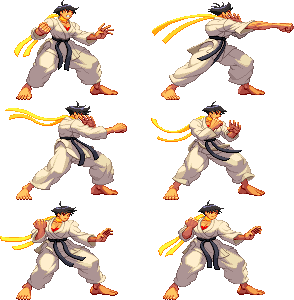
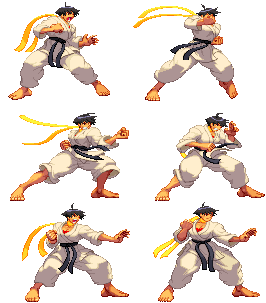
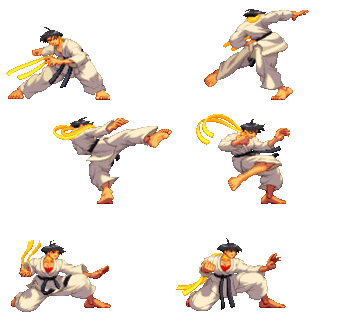
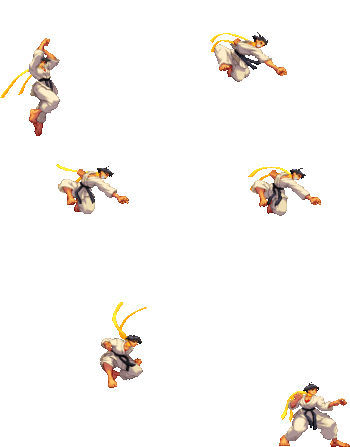
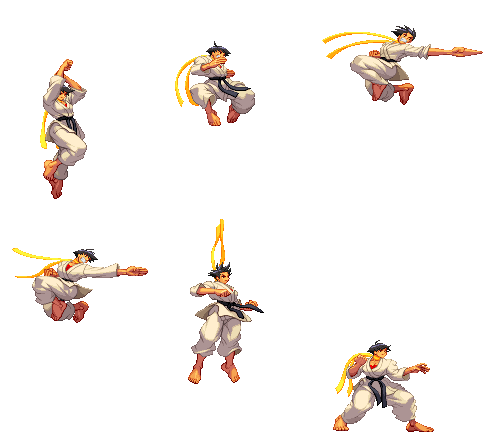
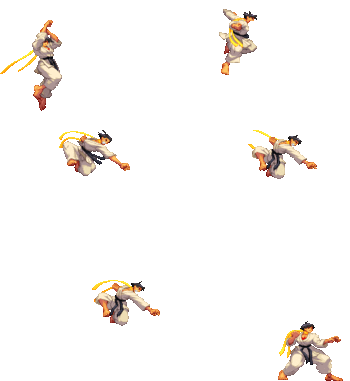
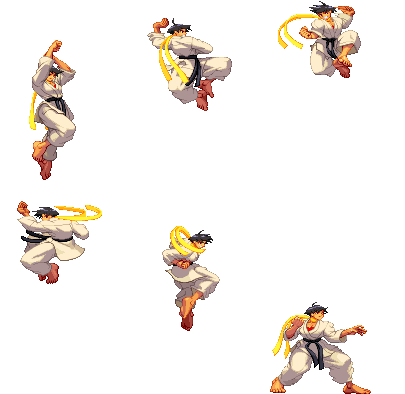
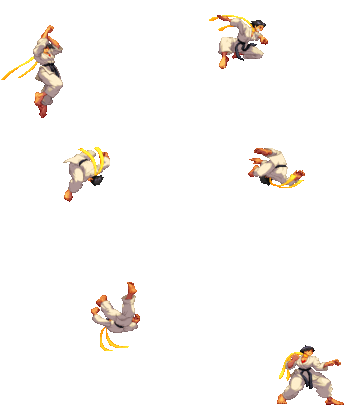
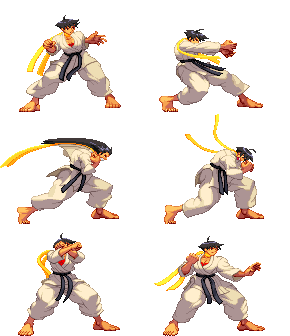
Makoto, a tomboyish Japanese teenager, seeks to restore her father's dojo to its former glory. She is one of the new characters introduced in SF III: 3rd Strike, based around a more traditional concept of Japanese Karate compared to Ryu/Ken's more supernaturally-flavored Ansatsuken.

Makoto is the first female Street Fighter to be tough and hard-hitting with just as much stamina as the average males (like Ryu and Ken), instead of being a "glass cannon" archetype. Although her normal walk speed is incredibly sluggish, she has the fastest dash in the game, as well as quick feints and overheads. Perhaps her best tool is the Karakusa, a unique command grab which can be comboed from, making way for devastating damage and stun. Put all of this together and you have a character who can survive long sets until her highly explosive fighting style can win with a single opening.

Super Arts

SA I (Seichuusen Godanzuki)

Highly recommended for beginners. Use this for the faster characters, including Yun, Yang, and Ibuki, who tend to be harder to grab with Karakusa. It does excellent damage and has numerous hit-confirms, in addition to the guaranteed Karakusa ones. It is especially good if you can confirm it after Hayate and Oroshi. Weaknesses include lack of range and bad anti-air, but the first shouldn't be an issue if you combo into it, and the second isn't a big deal, as she has plenty of good anti-air normals. It also confers no positional advantage after hit, as your opponent is sent across the screen and often recovers before you will (some characters can even get a free punish if you hit them with it in the corner). Some top players use this super exclusively against all characters as it allows for fast punishes and is universally easy to connect with.

SA II: (Abare Tosanami)

High execution, high reward Super. Typically used for slower characters including the shotos, Urien, Hugo, etc. A lot of its usefulness depends on your ability to land Karakusa (or the threat thereof), especially on your half of the screen, as it can be comboed into with HP after the Karakusa (or simply with HP to catch your opponent trying to jump away out of Karakusa reach. It is potentially the most powerful super in the game and can lead to 100% kill combos from full health using the Double Fukiage technique. For the most damage, you can use early MK Tsurugi, Fukiage, jump Fierce, but for the most reliable combo, use MK Tsurugi, Hayate, Hayate.

Makoto has 100% stun setups from Karakusa on almost everyone except the 5 characters with the longest stun bar (Alex, Q, Hugo, Oro, and Dudley) using the "Double Fukiage" (W-Fukiage in Japan) followup, but they involve an advanced kara-cancel technique on at least the first Fukiage (using neutral HK), and even more advanced methods against Oro, Ibuki, and Chun-Li (the Telesniper technique). Akuma and Remy, having the shortest stun bars, have the easiest 100% stun combo (the "Fukiage, HP" follow-up to the super), and can also be fully stunned with even a raw SAII using the Double Fukiage follow-up. Timing before the first Fukiage also varies greatly by character (Necro, Urien, Dudley, and Hugo very slowly, Shotos tend to fall moderately fast, and Yun, Yang, and Alex fall extremely quickly, for example). Also, it can 100% stun every character in the game if comboed into from jump HP, though this is highly situational.

The main downside (aside from its usefulness being mostly tied to your ability to land Karakusa on your side of the screen) is that it has huge startup time and no actual invulnerability on startup, unlike her other two supers. However, it can be used to counter fireballs from full screen, and counter meaty low attacks and throws even on wakeup (if you are actually unhinged enough to do this).

SA III: (Tanden Renki)

Obviously the last super of choice, this is more a "fun" super than a practical one. If you can get your opponent on the back foot and guessing wrong once or twice, you can get insane damage by the time the meter runs out. However, if you're on the back foot against an experienced player (while it's already active), you're pretty much screwed. It does confer temporary invulnerability upon startup with zero recovery time (and is the only super in the game to do so), so it's possible to use this as a one-time Get Out of Jail Free card, but it's likely to take you out of the frying pan and directly into the fire.

Strengths Weaknesses
  • Some of the best stun accumulation in the game, between Fukiage (40-70%), EX Hayate after Karakusa (50%), neutral throw (25%), and SA2 (100%)
  • Best forward dash in the game (12f), allowing her to maintain the threat of a command grab from half screen away, along with low profiling under high attacks
  • Almost all attacks have great hitboxes and active frames with advantage on hit or block, allowing for pressure into Karakusa or confirms into SA1
  • Great mixup/pressure game with her scary command grab (Karakusa), fast overheads in EX Orochi/Tsurugi, and feints with Hayate and f+HK
  • Slowest walk speed in the game, meaning she has to commit to her movement options and has linear/straightforward offense
  • Slow startup on many moves (and the slowest light attacks in the game) and no invulnerable reversals outside of SA1, requiring more work for defense
  • Unusually wide hitbox can make her easier to juggle or combo for many characters (such as Yun/Yang's command grab followups)
  • Lack of a projectile (and projectile invulnerable options) makes it hard for her to contest neutral pressure
  • Lacks a cancelable crouching MK, making it hard to threaten with low options at farther distances
Makoto
#3S_MA
3S Makoto Art.png
Vitals
Life Points 1200
Stun Points 64
Super Art Stock/Size
SA1 1/120
SA2 2/88
SA3 1/96
Ground Movement
Forward Dash duration/distance 11 (30)
(150px)
Back Dash duration/distance 14
Jumping
Back Jump duration 42(4+35+3)
Neutral Jump duration 41(4+34+3)
Forward Jump duration 41(4+34+3)
Back Super Jump duration 46(6+37+3)
Neutral Super Jump duration 45(6+36+3)
Forward Super Jump duration 45(6+36+3)
Wake up
Wake up duration 71
Quick rise duration 43
3S Frame Data Glossary
Active

How many frames a move remains active (can hurt opponents) for. Consecutive sets of active frames on a multi-hit move are separated by an asterisk (ex: 3*5). If there is a gap between sets of active frames, the gap is denoted by a number in parentheses (ex: 2(4)2)

Attack

Attack level is L for low attacks (must be blocked crouching), H is for High attacks (which can be blocked high or low) and M for overhead (must be blocked standing). T is for throw attacks (which cannot be blocked).

Cancel options

Available cancel options.

  • "ch": Chain cancel (into itself or another light attack), refer to description for options.
  • "self": Self-only chain cancel. Much more restrictive than a standard chain cancel.
  • "tc": Target combo, refer to description for options. Successive attacks in a target combo may warrant their own move entry.
  • "dash": Grounded dashes.
  • "sj": Super jump.
  • "sp": Special move.
  • "su": Super Art.
Damage

Attack damage on hit in life points. Notation may denote multi-hit or "sweet spot" damage values on certain frames.

Hit/Block

These are frame advantage values when the attack hits or is blocked. If the number is positive, then the move will end before the defender can act again. If the number is negative, the defender will be able to act before the attacker and maybe even punish. D refers to knockdown on hit.

"Cr. Hit" is an additional frame advantage value denoting if the advantage on hit changes when the defender is being hit while crouching.

Kara Range

Almost all normal attacks can be canceled into a special or a multi-button command within three frames of startup. During that time, some attacks will shift position forward or backward and affect the reach of the special or command accordingly. This is denoted in pixels of range. There are a handful of moves in the game that can be kara-canceled after this initial window and will be denoted as a late kara-cancel.

Link

A combo that is performed by inputting the second move after the first move has completely recovered (as opposed to cancelling the first move's animation). In 3S, the final frame of a move's hitstun allows a character to block a normal or special move, as well as some projectile supers. Therefore, an attack's frame advantage must be 2 frames greater than the followup move's startup in order to link. Ex: a +6 normal can link into a 4f normal/special, or a 5f super.

Parry

This field will show a value of A if the attack can be parried standing or crouching, H if it must be parried standing or L if it must be parried crouching.

Recovery

How many frames it takes for a move to finish after it's been active.

Startup

How many frames it takes before the move becomes 'active' or has a hitbox. 3S uses classic startup notation, which does not include the first active frame. A move with 3 startup becomes active on frame 4.

Stun

Amount of stun added to the opponent's stun bar on hit.

Throw range

Range in pixels from the center of the character to the center of the opponent which allows a grab to connect.

Frame Data

Standing Normals

5LP
Stand LP
Lp.png
(makotolp).gif
Startup Active Recovery Hit Cr. Hit
4 6 6 2 2
Damage Stun Guard Parry Block
5 3 - A 2
  • Cancel options: self sp su
  • Can chain into st.LK
  • +2 in all scenarios

This button is a good tool for mix, dash cancel, and tick throw karakusa, but is not the best button for these options.

FATonline.png
5MP
Stand MP
Mp.png
(makotomp).gif
Startup Active Recovery Hit Cr. Hit
8 11 4 7 8
Damage Stun Guard Parry Block
14 9 - H 6
  • Cancel options: sp su
  • Self meter gain: Whiff: 2, Hit: 11, Block: 6.
  • Opponent meter gain: Whiff: 0, Hit: 2, Block: 0.
  • Unusually fast recovery (4f) for a medium attack; can be parried and still be safe from 10f attacks
  • Huge advantage on hit and block, use as a meaty okizeme tool outside of throw range to confirm into SA1 safely, or at close range to lead into a frame trap or combo

Possibly the game's best mix-up normal, or one of. It is +6 on block, making it a good pressure tool and hard to counterattack against it, although the startup of the normal itself (8f) can be quite annoying at first. It can be combo'd into HP hayate and SA1 (even as a confirm). Can be linked into LK > LP hayate. Can be used for tick karakusa. Also a good AA, as if parried Makoto can cancel MP into a special, SA or a dash.

FATonline.png
5HP
Stand HP
Hp.png
(makotohp).gif
Startup Active Recovery Hit Cr. Hit
8 2 22 -3 -1
Damage Stun Guard Parry Block
21 15 - H -5
  • Cancel options: sp su
  • Self meter gain: Whiff: 3, Hit: 19, Block: 10.
  • Opponent meter gain: Whiff: 0, Hit: 4, Block: 0.
  • Can be canceled into Hayate (and canceled again) on hit to improve its frame advantage from -3 to +1

Yet another go-to cancelling move. It can be combo'd into all lvl1s, EX hayate, EX oroshi, and all SAs. However, it does Whiff on most of the cast except tall characters, yet against them it's ~+1 ob if hayate feint'd afterwards. It can be cancelled into a special or SA if parried. A high risk high reward option.

FATonline.png
5LK
Stand LK
Lk.png
(makotolk).gif
Startup Active Recovery Hit Cr. Hit
4 5 12 -2 -2
Damage Stun Guard Parry Block
7 3 - A -2
  • Cancel options: tc sp su
  • 7 kara range
  • Late kara-cancel possible from frames 8-11

A go-to cancel button, as it can be combo'd into LP Hayate, Hayate Feint, and SA1. It can cancel into all Oroshi versions, and can be kara canceled into the rest of her grounded specials, most notable of which being karakusa, all without initially connecting with the opponent.

FATonline.png
5MK
Stand MK
Mk.png
(makotomk).gif
Startup Active Recovery Hit Cr. Hit
7 5 13 -1 -
Damage Stun Guard Parry Block
16 7 - A -2
  • 7 kara range
  • Self meter gain: Whiff: 2, Hit: 11, Block: 6.
  • Opponent meter gain: Whiff: 0, Hit: 2, Block: 0.

Due to it frequently missing crouching characters, it is only used rarely. Its value comes from the LK>MK Target Combo, and as an anti-air, though it lacks the cancelling potential of MP, cr.MP, or HP. Also has some use as a niche poke against Hugo's normals.

FATonline.png
5HK
Stand HK
Hk.png
(makotohk).gif
Startup Active Recovery Hit Cr. Hit
11 9 13 2 4
Damage Stun Guard Parry Block
23 7 - H -
  • -24 kara range (useful for W Fukiage technique and for certain setups, as it moves her backwards.)
  • Self meter gain: Whiff: 3, Hit: 19, Block: 10.
  • Opponent meter gain: Whiff: 0, Hit: 4, Block: 0.
  • Can avoid both low attacks and throws with proper timing and distance (except in the corner)

It shares the same use as 6HP in the neutral. In comparison to 6HP, it's better at stuffing low pokes, though it's worse against dash-ins. It's also used in the SA2 TOD and kara Hayate against twin's divekicks.

FATonline.png


Command Normals

6LP
Kazami
F.png+Lp.png
(makotoflp).gif
Startup Active Recovery Hit Cr. Hit
4 4 8 - -
Damage Stun Guard Parry Block
4 3 - A -
  • Cancel options: ch sp su
  • More range than stand LP but can miss crouching characters

A worse LP in almost all scenarios, due to worse active frames, worse recovery, and is +0 in all scenarios. Avoid using it.

FATonline.png
6MP
Kaoruna
F.png+Mp.png
(makotofmp).gif
Startup Active Recovery Hit Cr. Hit
9 6 9 3 4
Damage Stun Guard Parry Block
15 5 - H 2
  • 4 kara range
  • Self meter gain: Whiff: 2, Hit: 11, Block: 6.
  • Opponent meter gain: Whiff: 0, Hit: 2, Block: 0.
  • Has significant pushback

Its primary use is gaining distance via its pushback, though it can link into SA1.

FATonline.png
6HP
Shimaki
F.png+Hp.png
(makotofhp).gif
Startup Active Recovery Hit Cr. Hit
16 12 16 -2 -
Damage Stun Guard Parry Block
26 13 - H -4
  • Cancel options: tc
  • Self meter gain: Whiff: 3, Hit: 17, Block: 7.
  • Opponent meter gain: Whiff: 0, Hit: 4, Block: 0.
  • Can cancel to Yamase without connecting with the opponent

Useful for getting the opponent to respect a desired distance and can stuff many moves, though slow start-up can cripple the latter.

FATonline.png
6LK
Shibuki
F.png+Lk.png
(makotoflk).gif
Startup Active Recovery Hit Cr. Hit
6 6 13 -5 -5
Damage Stun Guard Parry Block
6 5 - A -5
  • 4 kara range
  • Extremely good range for a light poke
  • Avoids most crouching sweeps and kicks

Can be used against every character to reset the opponent in the corner after an EX Hayate. Against certain characters, you can even dash under them.

FATonline.png
6MK
Naruto
F.png+Mk.png
(makotofmk).gif
Startup Active Recovery Hit Cr. Hit
17 5 18 -3 -1
Damage Stun Guard Parry Block
17 9 - H -5
  • Cancel options: tc
  • 2 kara range
  • Self meter gain: Whiff: 2, Hit: 11, Block: 6.
  • Opponent meter gain: Whiff: 0, Hit: 2, Block: 0.
  • May miss most crouching characters

Never used.

FATonline.png
6HK
Kuroshio
F.png+Hk.png
(makotofhk).gif
Startup Active Recovery Hit Cr. Hit
22 3 25 D D
Damage Stun Guard Parry Block
21 5 - L -11
  • Self meter gain: Whiff: 3, Hit: 19, Block: 10.
  • Opponent meter gain: Whiff: 0, Hit: 4, Block: 0.
  • Only standing attack in the game that hits low
  • From 3rd frame, Makoto steps backwards and can avoid some grabs
  • Moves her forward far more quickly than walk

This move is looked over in favor of its feint option, as it lacks any good utility otherwise.

FATonline.png
6HK (Hold)
Kuroshio (Fake)
F.png+Hk.png (Hold)
Startup Active Recovery Hit Cr. Hit
1 - 43 - -
Damage Stun Guard Parry Block
- - - - -
  • During Kuroshio, perform by holding HK for 18f
  • Like Kuroshio, from 3rd frame, Makoto steps backwards and can avoid some grabs
  • Recovers 6f faster than Kuroshio and is excellent against knocked-down opponents to set up a Karakusa

Used as another dash, and for a post-knockdown Karakusa setup.

FATonline.png


Crouching Normals

2LP
Crouch LP
D.png+Lp.png
(makotoclp).gif
Startup Active Recovery Hit Cr. Hit
5 4 5 3 3
Damage Stun Guard Parry Block
3 3 - A 3
  • Cancel options: self sp su

A better LP in most cases. Better recovery and +3 on all scenarios, however less active frames and 1f slower than LP on startup, so use it for applying mixups and dash cancelling.

FATonline.png
2MP
Crouch MP
D.png+Mp.png
(makotocmp).gif
Startup Active Recovery Hit Cr. Hit
7 7 11 - 1
Damage Stun Guard Parry Block
12 5 - A -1
  • Cancel options: sp su
  • 3 kara range
  • Self meter gain: Whiff: 2, Hit: 11, Block: 6.
  • Opponent meter gain: Whiff: 0, Hit: 2, Block: 0.
  • Long cancel window and significant active frames allow this to be used to cover a large area and hit confirm into hayate if it hits.

The aforementioned Long-ish range and cancel window makes it an ideal poking tool and niche AA. It can be cancelled into a special or SA if parried. You can also cancel it into HP Hayate or SA1 if it lands normally.

FATonline.png
2HP
Crouch HP
D.png+Hp.png
(makotochp).gif
Startup Active Recovery Hit Cr. Hit
10 2 21 D D
Damage Stun Guard Parry Block
17 3 - L -6
  • Self meter gain: Whiff: 3, Hit: 19, Block: 10.
  • Opponent meter gain: Whiff: 0, Hit: 4, Block: 0.
  • Sweep, hits low

Its excellent speed and range makes it good at stopping approaches, and largely unpunishable by other sweeps. However it can still suffer against certain SAs, so be sure not to abuse it.

FATonline.png
2LK
Crouch LK
D.png+Lk.png
(makotoclk).gif
Startup Active Recovery Hit Cr. Hit
4 6 10 -3 -3
Damage Stun Guard Parry Block
5 3 - L -3
  • Cancel options: sp su
  • Makoto's fastest low poke. Usually reserved for mixups
  • Combos into LP hayate, unless it hits at max range.
  • Almost immediately retracts Makoto's upper body, making downward-moving attacks strike later (if not miss entirely)

The most used button for punishing high-blockers, especially after Hayate loops (only for 2 loops though). Cancel it into LP Hayate. You can also cancel it into EX Oroshi to punish low blocking.

FATonline.png
2MK
Crouch MK
D.png+Mk.png
(makotocmk).gif
Startup Active Recovery Hit Cr. Hit
7 8 7 4 5
Damage Stun Guard Parry Block
16 5 - A 3
  • Self meter gain: Whiff: 2, Hit: 11, Block: 6.
  • Opponent meter gain: Whiff: 0, Hit: 2, Block: 0.
  • Superb hitbox coverage, making it a great poke.
  • Can be linked into SA1
  • Moves Makoto's hurtbox very low, so it can be a good niche anti air as well.
  • Extended leg is raised over most low attacks.
  • Does not hit low; can be parried high or low
  • A good normal to whiff for meter build.

A really good low poke. It's +3 on block so you can harass with it (with caution). It can beat other cr.MKs. It can also be linked into SA1 after Karakusa, though it does the same dmg of HP > lvl1 MP Hayate > SA1.

FATonline.png
2HK
Crouch HK
D.png+Hk.png
(makotochk).gif
Startup Active Recovery Hit Cr. Hit
10 4 12 4 6
Damage Stun Guard Parry Block
23 15 - H 2
  • 13 kara range
  • Self meter gain: Whiff: 3, Hit: 19, Block: 10.
  • Opponent meter gain: Whiff: 0, Hit: 4, Block: 0.
  • High-angle attack for anti-air, often recovers fast enough to be safe if parried

Used sparingly against some characters (mainly Elena and Dudley). It can also beat long medium/heavy normals if spaced right.

FATonline.png


Jumping Normals

8LP
Jump LP (Neutral)
U.png+Lp.png
(makotonjlp).gif
Startup Active Recovery Hit Cr. Hit
9 17 - - -
Damage Stun Guard Parry Block
8 7 - H -

Often used as an air reset in conjunction with j.LK, and after SA2, though j.LK has a better hitbox.

FATonline.png
j.LP
Jump LP
Uf.png+Lp.png
(makotojlp).gif
Startup Active Recovery Hit Cr. Hit
4 21 - - -
Damage Stun Guard Parry Block
8 7 - H -
  • Has extended active frames for the entire jump but hitbox is too high to hit grounded characters if done early
  • Excellent reset setup attack after Fukiage for mixups
FATonline.png
8MP
Jump MP (Neutral)
U.png+Mp.png
(makotojnmp).gif
Startup Active Recovery Hit Cr. Hit
11 10 - - -
Damage Stun Guard Parry Block
14 11 - H -
  • Self meter gain: Whiff: 2, Hit: 11, Block: 6.
  • Opponent meter gain: Whiff: 0, Hit: 2, Block: 0.

A slower j.LP, and thus is never used.

FATonline.png
j.MP
Jump MP
Uf.png+Mp.png
(makotojmp).gif
Startup Active Recovery Hit Cr. Hit
11 23 - - -
Damage Stun Guard Parry Block
12 11 - H -
  • Self meter gain: Whiff: 2, Hit: 11, Block: 6.
  • Opponent meter gain: Whiff: 0, Hit: 2, Block: 0.
  • Has extended active frames for the entire jump

A slower j.LP, and thus is never used.

FATonline.png
8HP
Jump HP (Neutral)
U.png+Hp.png
(makotonjhp).gif
Startup Active Recovery Hit Cr. Hit
13 2 - - -
Damage Stun Guard Parry Block
23 15 - H -
  • Self meter gain: Whiff: 3, Hit: 19, Block: 10.
  • Opponent meter gain: Whiff: 0, Hit: 4, Block: 0.
  • Extremely slow startup
  • High hitbox, cannot hit most crouching characters

Poor air-to-air option, use j.HK/MK instead.

FATonline.png
j.HP
Jump HP
Uf.png+Hp.png
(makotojhp).gif
Startup Active Recovery Hit Cr. Hit
10 2 - - -
Damage Stun Guard Parry Block
26 15 - H -
  • Self meter gain: Whiff: 3, Hit: 19, Block: 10.
  • Opponent meter gain: Whiff: 0, Hit: 4, Block: 0.
  • First frame does less damage than later frames
  • Can hit slightly behind Makoto vs larger characters

A safe jumping move (from +1 to +13 on block). Can be combo'd into st.HP (though timing can make it difficult at first) and can crossup some characters.

FATonline.png
j.LK
Jump LK
U.png/Uf.png+Lk.png
(makotojlk).gif
Startup Active Recovery Hit Cr. Hit
2 14 - - -
Damage Stun Guard Parry Block
10 7 - H -
  • Super-fast startup for winning air-air situations

Used in air resets and/or after SA2, often in conjunction with j.LP, though it is often favored due to a faster startup.

FATonline.png
j.MK
Jump MK
U.png/Uf.png+Mk.png
(makotojmk).gif
Startup Active Recovery Hit Cr. Hit
7 13 - - -
Damage Stun Guard Parry Block
16 9 - H -
  • Self meter gain: Whiff: 2, Hit: 11, Block: 6.
  • Opponent meter gain: Whiff: 0, Hit: 2, Block: 0.
  • Superb hitbox coverage and active frames

It's a nice jumping poke both aggressively or defensively, though it's very active, so be careful against AAs. Can be combo'd into SA1 or st.LK > LP Hayate. It can also crossup.

FATonline.png
j.HK
Jump HK
U.png/Uf.png+Hk.png
(makotojhk).gif
Startup Active Recovery Hit Cr. Hit
6 6 - - -
Damage Stun Guard Parry Block
23 11 - H -
  • Self meter gain: Whiff: 3, Hit: 19, Block: 10.
  • Opponent meter gain: Whiff: 0, Hit: 4, Block: 0.
  • Excellent all-round air attack, guaranteed hit if used after teching mid-air throws.
  • Extremely fast for a heavy button with very high priortity and very good range.
  • Can often dash in to extend pressure after an air to air hit.

Same deal as j.MK, however the hitbox is only horizontal and it's a better A2A move. If done low enough it can be combo'd into st.HP.

FATonline.png


Target Combos

5LK, MK
Stand LK > Tatsunami
5LK > MK
Startup Active Recovery Hit Cr. Hit
7 5 13 -1 -
Damage Stun Guard Parry Block
16 7 - A -2
  • Self meter gain: Whiff: 2, Hit: 11, Block: 6.
  • Opponent meter gain: Whiff: 0, Hit: 2, Block: 0.
  • Whiffs on most crouching characters
  • Combo & true blockstring only if the 5LK connects on a standing opponent
  • Can be delayed to become a frame trap
  • Target Combo be done even if the initial LK whiffs
FATonline.png
6MK,HK
Naruto > Dotou
6MK > HK
Startup Active Recovery Hit Cr. Hit
12 9 13 2 4
Damage Stun Guard Parry Block
23 7 - H -
  • Self meter gain: Whiff: 3, Hit: 19, Block: 10.
  • Opponent meter gain: Whiff: 0, Hit: 4, Block: 0.
  • Performed immediately after f+MK 'Naruto' but not a true combo
  • Possibly the most useless target combo in SF history
FATonline.png
6HP, HP, HP
Shimaki > Yamase
F.png+Hp.png,Hp.png,Hp.png
(makotofhp2).gif
Startup Active Recovery Hit Cr. Hit
16 23 13 -3 -2
Damage Stun Guard Parry Block
31 17 - H*H*H -4
  • Self meter gain: Whiff: 3, Hit: 29, Block: 11.
  • Opponent meter gain: Whiff: 0, Hit: 8, Block: 0.
  • Can be performed without any of the previous attacks connecting, including Shimaki
  • Can be performed by pressing any combination of punches three times after Makoto begins Shimaki
FATonline.png


Throws

LPLK
Tacchuu
Lp.png+Lk.png
(makotothr).gif
Startup Active Recovery Hit Cr. Hit
2 1 21 D D
Damage Stun Guard Parry Block
16 16 - - -
  • 20 throw range
  • This throw inflicts an unusually high amount of stun (25% on most characters)
  • If successfully connected, Makoto's recovery animation is fully invulnerable for 32 frames as long as no button or direction is touched
FATonline.png
4/6LPK
Araiso
B.png/F.png+Lp.png+Lk.png
(makotobftr).gif
Startup Active Recovery Hit Cr. Hit
2 1 21 D D
Damage Stun Guard Parry Block
21 10 - - -
  • 20 throw range
FATonline.png


Universal Overhead

MPMK
Chigusa
Mp.png+Mk.png
(makotooh).gif
Startup Active Recovery Hit Cr. Hit
15 10 5 - -
Damage Stun Guard Parry Block
7 3 - H -

An underrated mixup tool, as it can be kara-canceled from standing HK to move Makoto backwards for better spacing and hit advantage. Thus, it's used to apply pressure, beat cr.MKs and can be used as a sneaky AA. Used to also confirm SA1 or LK too if meaty'd enough.

FATonline.png


Taunts

HPHK
Kiai wo Reru (Lv 1)
Hp.png+Hk.png
(makotot).gif
Startup Active Recovery Hit Cr. Hit
79 3 - - -
Damage Stun Guard Parry Block
1 3 - A -
  • Cancel options: su
  • 13 kara range
  • Self meter gain: Whiff: 18, Hit: 20, Block: 19.
  • Opponent meter gain: Whiff: 0, Hit: 0, Block: 0.
  • Grants 30% additional damage to next hit upon completion of this phase
  • Hit can be canceled into super
FATonline.png
None
Kiai wo Reru (Lv 2)
(makotot).gif
Startup Active Recovery Hit Cr. Hit
- - - - -
Damage Stun Guard Parry Block
- - - - -
  • Grants 25% additional damage to next hit upon completion of this phase (stacks with continued taunt but is reset if Makoto performs another taunt)
  • Does not have a strike attack
FATonline.png
None
Kiai wo Reru (Lv 3)
(makotot).gif
Startup Active Recovery Hit Cr. Hit
- - - - -
Damage Stun Guard Parry Block
- - - - -
  • Improves stun recovery rate for the rest of the round by 10% (stacks 3x)
  • Does not have a strike attack
FATonline.png


Special Moves

236P
Hayate
Qcf.png+P.png (can be held)
(makotohayate).gif
Lp.png/Mp.png/Hp.png
(makotohdkex).gif
Ex.png
LP Startup Active Recovery Hit Cr. Hit
6 6 24 2 4
Damage Stun Guard Parry Block
17 9 - H -12
  • Self meter gain: Whiff: 3, Hit: 15, Block: 7.
  • Opponent meter gain: Whiff: 0, Hit: 3, Block: 0.
  • Can be instant kara-canceled with LK for followup juggle after EX Hayate vs some characters
  • Hold Punch to charge attack power, press Kick to cancel
FATonline.png
MP Startup Active Recovery Hit Cr. Hit
9 6 24 2 4
Damage Stun Guard Parry Block
17 9 - H -12
  • Self meter gain: Whiff: 3, Hit: 15, Block: 7.
  • Opponent meter gain: Whiff: 0, Hit: 3, Block: 0.
  • Hold Punch to charge attack power, press Kick to cancel
FATonline.png
HP Startup Active Recovery Hit Cr. Hit
11 6 24 2 4
Damage Stun Guard Parry Block
17 9 - H -12
  • Self meter gain: Whiff: 3, Hit: 15, Block: 7.
  • Opponent meter gain: Whiff: 0, Hit: 3, Block: 0.
  • Hold Punch to charge attack power, press Kick to cancel
FATonline.png
EX Startup Active Recovery Hit Cr. Hit
17 6 24 D D
Damage Stun Guard Parry Block
28 17 - H 2
  • Self meter gain: Whiff: -40, Hit: -40, Block: -40.
  • Opponent meter gain: Whiff: 0, Hit: 0, Block: 0.
  • Extremely difficult to juggle mid-air opponents with
  • If performed near the corner, allows for a followup juggle
  • All characters: f+LK
  • Ibuki, Necro: cr.MP
  • Ryu, Ken, Sean, Akuma, Dudley, Necro: st.MK, kara-Hayate
  • Chun, Makoto, Oro, Elena, Q, Twelve, Remy: LP Hayate
  • Urien: MP Hayate
  • Hugo, Alex: Standing HP
FATonline.png
236P (7F hold)
Hayate (Lv 1)
Qcf.png+P.png (7F hold)
(makotohayate).gif
Startup Active Recovery Hit Cr. Hit
8 6 24 2 4
Damage Stun Guard Parry Block
19 11 - H -9
  • Self meter gain: Whiff: 3, Hit: 15, Block: 7.
  • Opponent meter gain: Whiff: 0, Hit: 3, Block: 0.
  • Can be consistently performed from standing HP for 2 more damage (from 17 to 19) and 2 more stun (from 9 to 11)
FATonline.png
236P (27F hold)
Hayate (Lv 2)
Qcf.png+P.png (27F hold)
(makotohayate).gif
Startup Active Recovery Hit Cr. Hit
28 6 24 2 4
Damage Stun Guard Parry Block
21 13 - H -6
  • Self meter gain: Whiff: 3, Hit: 15, Block: 7.
  • Opponent meter gain: Whiff: 0, Hit: 3, Block: 0.
  • Strongest version that does not knock opponent down
FATonline.png
236P (47F hold)
Hayate (Lv 3)
Qcf.png+P.png (47F hold)
(makotohayate).gif
Startup Active Recovery Hit Cr. Hit
48 6 24 D D
Damage Stun Guard Parry Block
24 13 - H -2
  • Self meter gain: Whiff: 3, Hit: 15, Block: 7.
  • Opponent meter gain: Whiff: 0, Hit: 3, Block: 0.
  • Becomes safe on block at this stage except against 1f super arts
  • Knocks down on hit and can be followed up with a juggle near the corner
FATonline.png
236P (67F hold)
Hayate (Lv 4)
Qcf.png+P.png (67F hold)
(makotohayate).gif
Startup Active Recovery Hit Cr. Hit
68 6 24 D D
Damage Stun Guard Parry Block
24 17 - H 2
  • Self meter gain: Whiff: 3, Hit: 15, Block: 7.
  • Opponent meter gain: Whiff: 0, Hit: 3, Block: 0.
  • Can be held up to 126 frames before automatically releasing
  • Fully safe if blocked at this stage
  • Knocks down on hit and can be followed up with a juggle near the corner
FATonline.png
236P,K
Hayate Feint
Qcf.png+P.png,K.png
Startup Active Recovery Hit Cr. Hit
1 - 5 (16) - -
Damage Stun Guard Parry Block
- - - - -
  • Must be performed 5f or later after Hayate input
  • Punch MUST be held down while Kick is input
  • Has 5f recovery if Hayate was not canceled into
  • All light and medium attacks canceled into Hayate add 16f recovery to the cancel
  • Standing HP canceled into Hayate adds 14f recovery to the cancel
FATonline.png
236P, HPK
Hayate Taunt
Qcf.png+P.png, hold HP+HK
Startup Active Recovery Hit Cr. Hit
1 - 31 - -
Damage Stun Guard Parry Block
- - - - -
  • No additional effects
  • Adds 32 frames of recovery to Hayate
FATonline.png
623P
Fukiage
Dp.png+P.png
(makotofkage).gif
Lp.png/Mp.png/Hp.png
(makotosrkex2).gif
Ex.png
LP Startup Active Recovery Hit Cr. Hit
7 8 26 D D
Damage Stun Guard Parry Block
21 29 - A -16
  • Cancel options: su sj
  • Self meter gain: Whiff: 3, Hit: 21, Block: ---.
  • Opponent meter gain: Whiff: 0, Hit: 6, Block: ---.
  • Can be super-jump canceled on block, hit, or parry
  • Cannot hit most standing or crouching characters from the front but can hit extended limbs (or from behind)
  • Inflicts massive stun damage and launches opponent
  • Crouching profile during startup but does not incur crouching defense penalty
FATonline.png
MP Startup Active Recovery Hit Cr. Hit
10 8 26 D D
Damage Stun Guard Parry Block
24 31 - A -16
  • Cancel options: su sj
  • Self meter gain: Whiff: 3, Hit: 21, Block: ---.
  • Opponent meter gain: Whiff: 0, Hit: 6, Block: ---.
  • Can be super-jump canceled on block, hit, or parry
  • Cannot hit most standing or crouching characters from the front but can hit extended limbs (or from behind)
  • Inflicts massive stun damage and launches opponent
  • Crouching profile during startup but does not incur crouching defense penalty
FATonline.png
HP Startup Active Recovery Hit Cr. Hit
14 8 26 D D
Damage Stun Guard Parry Block
28 31 - A -14
  • Cancel options: su sj
  • Self meter gain: Whiff: 3, Hit: 21, Block: ---.
  • Opponent meter gain: Whiff: 0, Hit: 6, Block: ---.
  • Can be super-jump canceled on block, hit, or parry
  • Cannot hit most standing or crouching characters from the front but can hit extended limbs (or from behind)
  • Inflicts massive stun damage and launches opponent
  • Crouching profile during startup but does not incur crouching defense penalty
FATonline.png
EX Startup Active Recovery Hit Cr. Hit
12 7 26 D D
Damage Stun Guard Parry Block
24 21 - A -12
  • Cancel options: su sj
  • Self meter gain: Whiff: -40, Hit: -40, Block: ---.
  • Opponent meter gain: Whiff: 0, Hit: 0, Block: ---.
  • Travels forward during startup
  • Can be super-jump canceled on block, hit, or parry
  • Cannot hit most standing or crouching characters from the front but can hit extended limbs (or from behind)
  • Inflicts high stun damage (not as much as other versions) and launches opponent
  • Extremely low profile from from 1f-11f but does not incur crouching defense penalty
FATonline.png
214P
Oroshi
Qcb.png+P.png
(makotooroshi).gif
Lp.png/Mp.png/Hp.png
(makototskex2).gif
Ex.png
LP Startup Active Recovery Hit Cr. Hit
19 7 17 -2 -
Damage Stun Guard Parry Block
17 7 - H -4
  • Cancel options: su
  • Self meter gain: Whiff: 3, Hit: 18, Block: 12.
  • Opponent meter gain: Whiff: 0, Hit: 4, Block: 0.
  • Easily confirmed into Seichuusen Godanzuki as an overhead cancel route
FATonline.png
MP Startup Active Recovery Hit Cr. Hit
23 7 17 -2 -
Damage Stun Guard Parry Block
19 11 - H -4
  • Cancel options: su
  • Self meter gain: Whiff: 3, Hit: 18, Block: 12.
  • Opponent meter gain: Whiff: 0, Hit: 4, Block: 0.
  • Slower version of LP Oroshi that can fake out parry attempts
  • Can combo into SA2 if cancelled early on the correct area of the screen.
FATonline.png
HP Startup Active Recovery Hit Cr. Hit
28 7 17 D D
Damage Stun Guard Parry Block
24 13 - H -
  • Cancel options: su
  • Self meter gain: Whiff: 3, Hit: 18, Block: 12.
  • Opponent meter gain: Whiff: 0, Hit: 4, Block: 0.
  • Knocks down on hit
  • Safe on block but easy to interrupt or parry on reaction
  • Will still fully connect into Seichuusen Godanzuki on hit
FATonline.png
EX Startup Active Recovery Hit Cr. Hit
13 7 17 D D
Damage Stun Guard Parry Block
28 9 - H 4
  • Cancel options: su
  • Self meter gain: Whiff: -40, Hit: -40, Block: -40.
  • Opponent meter gain: Whiff: 0, Hit: 0, Block: 0.
  • Knocks down on hit (except in certain interactions involving limbs)
  • One of the fastest overheads in the game (14f) and can also be canceled into
  • Can combo into SA1 and 2 if cancelled early (Hugo only).
FATonline.png
214K (air)
Tsurugi
Qcb.png+K.png (air)
(makotoatsur).gif
Lk.png/Mk.png/Hk.png
(makotoatskex2).gif
Ex.png
LK Startup Active Recovery Hit Cr. Hit
14 4 - - -
Damage Stun Guard Parry Block
24 13 - H 1
  • Self meter gain: Whiff: 3, Hit: 19, Block: 12.
  • Opponent meter gain: Whiff: 0, Hit: 4, Block: 0.
  • Launches airborne opponents
  • Makoto does not hover in mid-air during startup, which affects parry timing and landing speed
  • Cannot be performed during a backwards jump
FATonline.png
MK Startup Active Recovery Hit Cr. Hit
15 4 - - -
Damage Stun Guard Parry Block
26 13 - H 1
  • Self meter gain: Whiff: 3, Hit: 19, Block: 12.
  • Opponent meter gain: Whiff: 0, Hit: 4, Block: 0.
  • Launches airborne opponents
  • Makoto hovers in mid-air during startup, which affects parry timing and landing speed
  • Cannot be performed during a backwards jump
FATonline.png
HK Startup Active Recovery Hit Cr. Hit
16 4 - D D
Damage Stun Guard Parry Block
28 13 - H 1
  • Self meter gain: Whiff: 3, Hit: 19, Block: 12.
  • Opponent meter gain: Whiff: 0, Hit: 4, Block: 0.
  • Knocks down both airborne and grounded opponents
  • Makoto hovers in mid-air during startup, which affects parry timing and landing speed
  • Cannot be performed during a backwards jump
FATonline.png
EX Startup Active Recovery Hit Cr. Hit
15 4 - D D
Damage Stun Guard Parry Block
17 9 - H 3
  • Self meter gain: Whiff: -40, Hit: -40, Block: -40.
  • Opponent meter gain: Whiff: 0, Hit: 0, Block: 0.
  • Incredibly fast overhead that can bypass neutral and low attacks if performed right off the ground
  • If only 1 hit connects against an airborne opponent (usually due to hitting a limb) launches opponent
  • Instantly halts upward and forward momentum to cause Makoto to drop straight down to the ground
  • +3 on block if done at its lowest possible height
  • Cannot be performed during a backwards jump
FATonline.png
63214K
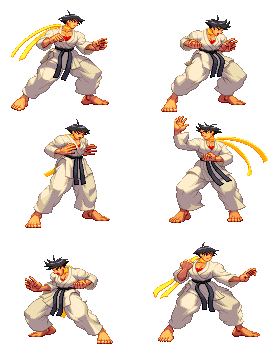
Karakusa
Hcb.png+K.png
(makotokarakusa).gif
Lk.png/Mk.png/Hk.png
(makotokusawhiff).gif
whiff
LK Startup Active Recovery Hit Cr. Hit
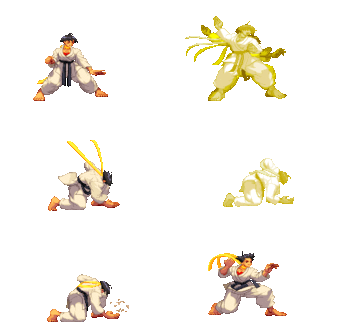
7 3 28 14 14
Damage Stun Guard Parry Block
5 8 - - -
  • 53 throw range
  • Long active duration
  • If overlapping with opponent's normal throw, has a 50% chance of being teched or winning outright
  • Can choose not to input anything after releasing opponent to be invulnerable for 29f
FATonline.png
MK Startup Active Recovery Hit Cr. Hit
8 4 29 14 14
Damage Stun Guard Parry Block
5 8 - - -
  • 57 throw range
  • Long active duration
  • If overlapping with opponent's normal throw, has a 50% chance of being teched or winning outright
  • Can choose not to input anything after releasing opponent to be invulnerable for 29f
FATonline.png
HK Startup Active Recovery Hit Cr. Hit
9 4 30 14 14
Damage Stun Guard Parry Block
5 8 - - -
  • 61 throw range
  • Long active duration
  • If overlapping with opponent's normal throw, has a 50% chance of being teched or winning outright
  • Can choose not to input anything after releasing opponent to be invulnerable for 29f
FATonline.png


Super Arts

236236P (SA1)
Seichuusen Godanzuki
Qcf.pngQcf.png+P.png (SA1)
(makotosa1).gif
Startup Active Recovery Hit Cr. Hit
1 3 65 - -
Damage Stun Guard Parry Block
83 20 - A -17
  • Makoto's only true reversal.
  • First hit forces standing.
  • Can be linked into from any Hayate on hit, but the super must be inputted on its last recovery frame.
  • This move has additional recovery AFTER the opponent lands from a successful hit. If connected in the corner, the following characters have advantage: Dudley (10F), Yang (8F), Necro (6F), Twelve (6F), Yun (5F), Q (3F) , Elena (1F, cannot punish)
  • Hits 2-4 have significant vacuum effect but may not be enough if the first hit connected on an opponent's limb
  • Cannot juggle air-reset opponents
FATonline.png
236236K (SA2)
Abare Tosanami Kudaki
Qcf.pngQcf.png+K.png (SA2)
(makotosa2).gif
Startup Active Recovery Hit Cr. Hit
14(-18)+1 5 25 - -
Damage Stun Guard Parry Block
59 22 - H -20
  • Cancel options: dash sj
  • Makoto flips backwards to the corner of the screen, braces against the wall, and then dives forward with a kick, angle and distance varying on the button pressed
  • Makoto only has invulnerability during the wall-brace itself and not upon startup or the divekick
  • Meter is not spent if interrupted before the wall brace
  • Instantly dodges low attacks and throws on frame 1, but may not allow her to enter airborne state until frame 2, especially with overlapping projectiles such as Aegis Reflector
  • Is fast enough to punish a throw attempt from full screen performed at the same time
  • Results in a free juggle state launch from a reverse Fukiage uppercut that can be canceled into any movement or attack on successful hit, with a generous input buffer
  • Can juggle air-reset opponents
FATonline.png
236236P (SA3)
Tanden Renki: Seme No Kata
Qcf.pngQcf.png+P.png (SA3)
(makotosa3).gif
Startup Active Recovery Hit Cr. Hit
- - - - -
Damage Stun Guard Parry Block
- - - - -
  • Makoto turns red and charges up while yelling, this phrase can be changed by pressing any of the punch buttons or all three at once
  • Attack power increases by 75% but loses the ability to block (parry is still possible)
  • Damage bonus stacks multiplicatively with Personal Action attack bonus (max bonus 284%)
  • The darkened startup animation lasts for 80f, much longer than normal and allows for extra time for the player to analyze the opponent's current state
  • Makoto is COMPLETELY invulnerable for 6f after startup and can extend invulnerability for an additional 15f by not pressing any button or direction
  • Opponent cannot quick-recover when knocked down by an enhanced attack, except throws
  • Lasts for 600f (10 seconds)
FATonline.png

3S Navigation

General
Controls
Notation
HUD
Glossary
System
FAQ
Characters
Akuma
Alex
Chun-Li
Dudley
Elena
Hugo
Ibuki
Ken
Makoto
Q
Necro
Oro
Remy
Ryu
Sean
Twelve
Urien
Yang
Yun
Gill