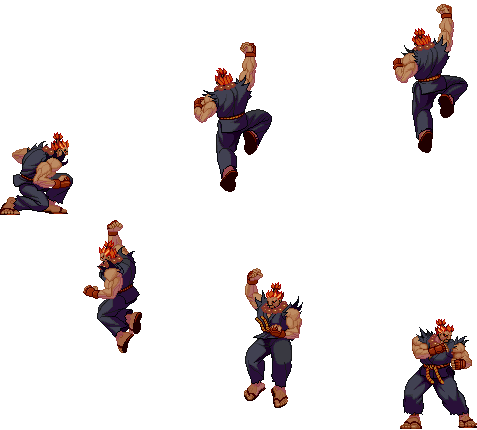
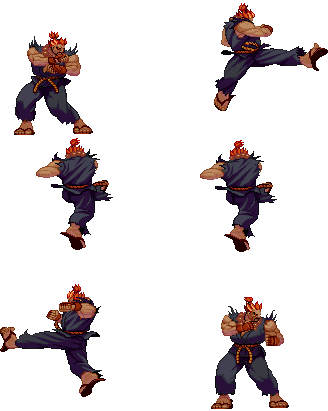
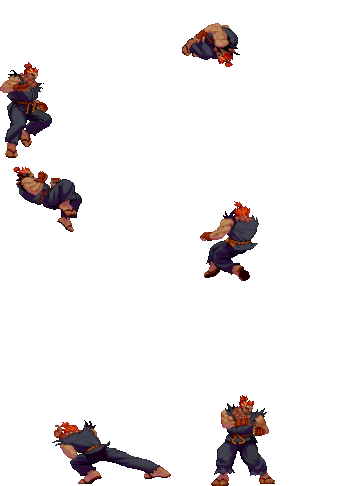
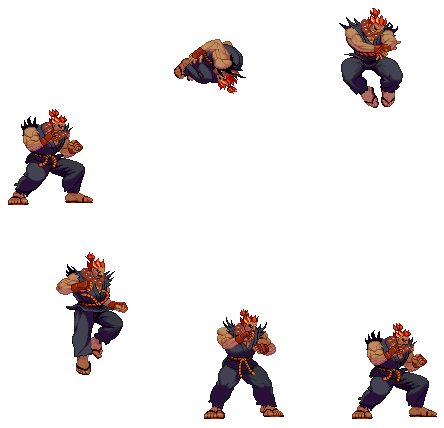
Street Fighter 3: 3rd Strike/Akuma/2021

From SuperCombo Wiki

Introduction

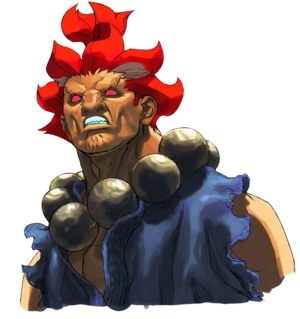
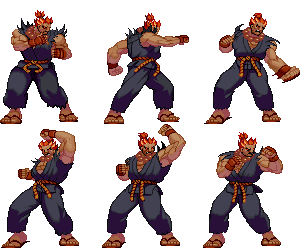
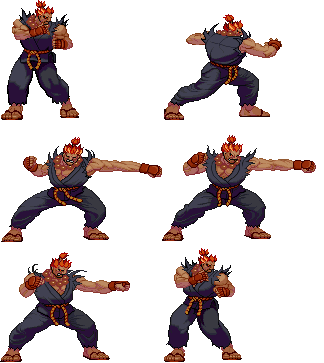
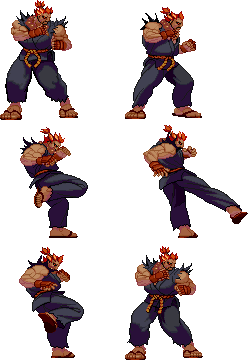
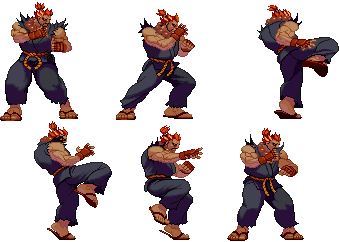
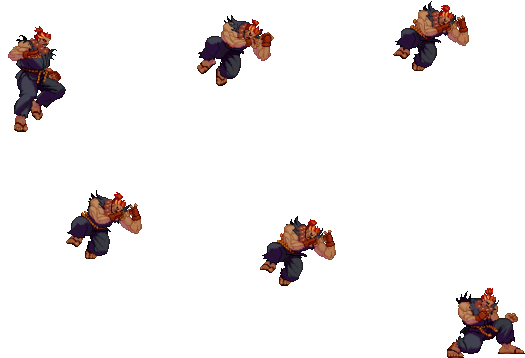
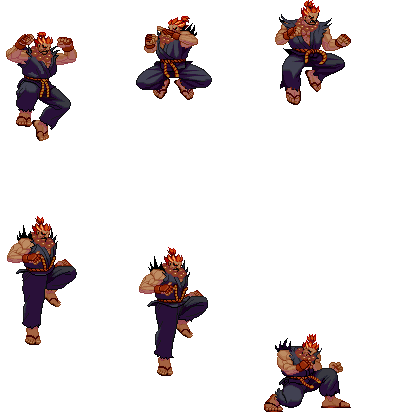
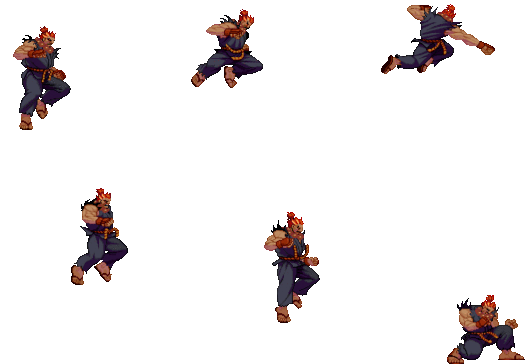
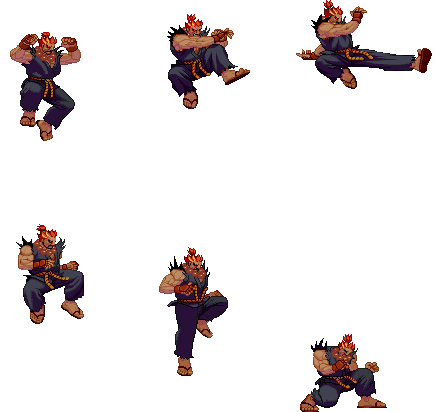
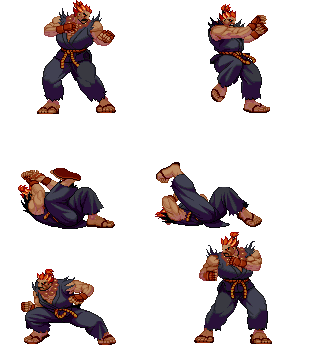
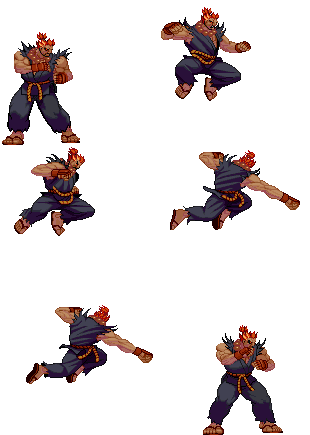
Akuma (known as Gouki in Japan) is an extremely powerful warrior obsessed with mastery of the Satsui no Hado, a dark energy-based force, the antithesis of the Kyosui no Hado (Power of Nothingness) that Ryu employs. He believes only another practitioner of the Satsui no Hado will ever be able to contest his power. His first appearance was in Super Street Fighter II Turbo as a secret boss.

When playing Akuma, the basic goal is either to use his zoning ability to control your opponent’s options, minimizing the risk of getting hit yourself, or to simply go on total offense and decimate the opponent as quickly as possible, as they can take him out just about as quickly. It is very important to note that Akuma has the absolute worst defense rating of all the characters in the game, and is tied with Remy for having the smallest stun bar. One should also note that Akuma's supers are all the same length, and that he has no EX moves. All this was done to counter balance his incredible offense and mixups.

Super Arts

SA1: Messatsu Gouhadou

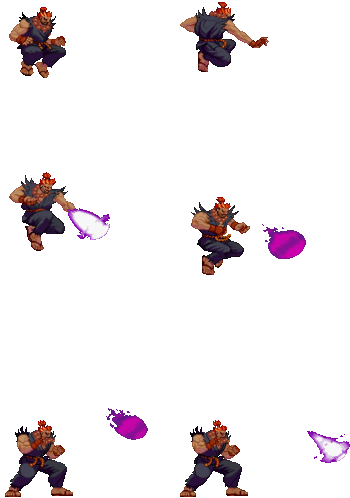
Akuma's fireball super, and by far the most practical choice. SA1 offers Akuma the most opportunities to land a super. It's the safest of the three, and is hard to punish unless it's blocked at close range. Because it's a projectile, Akuma can move freely if the opponent chooses to parry it, giving him time to mix up the opponent with high/low sequences or Demon Flip. Its long parry time also makes it an excellent anti-air. SA1 can be confirmed from a variety of moves, including cr.LK x 2, cr.MK, or any of his uppercuts. It also does good chip damage, especially when preceded by a fireball or red fireball. The main downside is its fairly low damage, but it's still respectable, especially against the lower health characters.

SA2: Messatsu Goushoryu

Akuma's uppercut super, similar to Ken's SA1. Does better damage than SA1, and has many of the same confirms and cancels. On the other hand, this super is much more unsafe if missed, and basically gives the opponent a free combo. Also has less chip potential, since the last 3 hits are easily parried. Not a bad super, but SA1 is preferable.

SA3: Messatsu Gourasen

Akuma's Hurricane Kick super, goes straight up. Does the most damage out of all of his supers, but has the worst recovery and chip damage by far. Also lacks range and confirm routes, making it hard to easily integrate into his ground pressure/offense. Almost certainly his worst super.

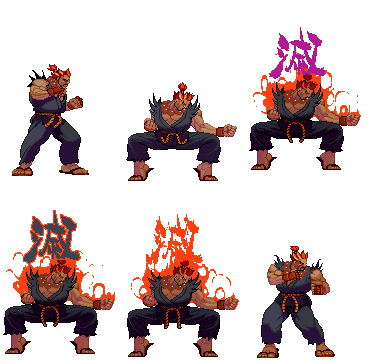
Shun Goku Satsu/Raging Demon (any SA)

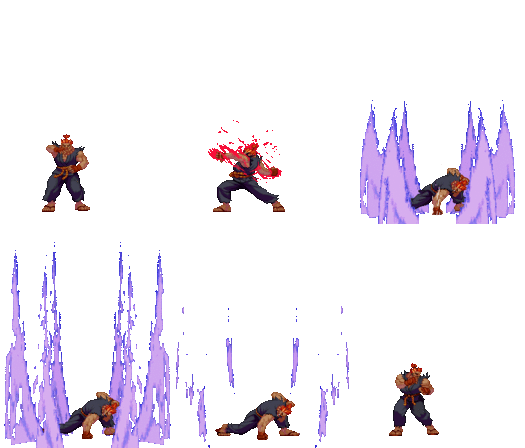
Akuma's signature special art, requires 2 full meters regardless of which super is selected. An unblockable throw super that does tons of damage. It is ordinarily hard to connect since the range is very short if not done from a kara, allowing the opponent to jump away after the super flash. Techniques such as f.MP kara-Demon or hiding the jabs with a forward dash make it a much more useful. It can also combo from far HK (which causes a back turned state). While the high damage is tempting, the difficulty of successfully landing it means that it is often better to land any of his other supers twice instead.

Kongou Kokuretsu Zan (Any SA)

Akuma channels his energy into a shockwave, requiring 2 full meters. Even more damaging than the Raging Demon (and is the most damaging Super Art in the game, provided all of the hits connect). Good for countering early jump-ins and cross-ups, but is somewhat slow to come out and does severely reduced damage if the first hit misses. His most common combo with this super involves a jab reset into KKZ after a LK Tatsumaki Zankuukyaku. This is also the ultimate chip out super - if you get a knockdown with 2 full meters and your opponent has only a few pixels of life, this super guarantees the win with proper timing. This is because the first hit is unparryable and does great chip damage. If, by some ridiculous chance, your opponent survives the first hit and starts red parrying the rest, you have many opportunities to continue a high/low mixup during the parries (similar his SA1).

Strengths Weaknesses
  • Versatile tools, allowing Akuma to play either a very offensive rushdown game or a low risk, zoning game
  • High damage output and corner carry, even without access to EX moves
  • Solid and versatile mobility with great dashes, good walk speed, air tatsu, fireballs and demon flip followups
  • Solid mixup game with his different air approaches, good tick throws, reset routes, and overhead
  • No EX moves and same size bars for all supers means Akuma utilizes his meter least efficiently out of all characters in the game
  • Lowest health in the game means he can't afford to make many mistakes compared to other characters
Akuma
#3S_AK
3S Akuma Art.png
Vitals
Life Points 985
Stun Points 56
Super Art Stock/Size
SA1 2/112
SA2 2/112
SA3 2/112
Ground Movement
Forward Dash duration/distance 13 (95px)
Back Dash duration/distance 15 (47px)
Jumping
Back Jump duration 43(4+36+3)
Neutral Jump duration 41(4+34+3)
Forward Jump duration 42(4+35+3)
Back Super Jump duration 48(6+39+3)
Neutral Super Jump duration 47(6+38+3)
Forward Super Jump duration 47(6+38+3)
Wake up
Wake up duration 77
Quick rise duration 50
3S Frame Data Glossary
Active

How many frames a move remains active (can hurt opponents) for. Consecutive sets of active frames on a multi-hit move are separated by an asterisk (ex: 3*5). If there is a gap between sets of active frames, the gap is denoted by a number in parentheses (ex: 2(4)2)

Attack

Attack level is L for low attacks (must be blocked crouching), H is for High attacks (which can be blocked high or low) and M for overhead (must be blocked standing). T is for throw attacks (which cannot be blocked).

Cancel options

Available cancel options.

  • "ch": Chain cancel (into itself or another light attack), refer to description for options.
  • "self": Self-only chain cancel. Much more restrictive than a standard chain cancel.
  • "tc": Target combo, refer to description for options. Successive attacks in a target combo may warrant their own move entry.
  • "dash": Grounded dashes.
  • "sj": Super jump.
  • "sp": Special move.
  • "su": Super Art.
Damage

Attack damage on hit in life points. Notation may denote multi-hit or "sweet spot" damage values on certain frames.

Hit/Block

These are frame advantage values when the attack hits or is blocked. If the number is positive, then the move will end before the defender can act again. If the number is negative, the defender will be able to act before the attacker and maybe even punish. D refers to knockdown on hit.

"Cr. Hit" is an additional frame advantage value denoting if the advantage on hit changes when the defender is being hit while crouching.

Kara Range

Almost all normal attacks can be canceled into a special or a multi-button command within three frames of startup. During that time, some attacks will shift position forward or backward and affect the reach of the special or command accordingly. This is denoted in pixels of range. There are a handful of moves in the game that can be kara-canceled after this initial window and will be denoted as a late kara-cancel.

Link

A combo that is performed by inputting the second move after the first move has completely recovered (as opposed to cancelling the first move's animation). In 3S, the final frame of a move's hitstun allows a character to block a normal or special move, as well as some projectile supers. Therefore, an attack's frame advantage must be 2 frames greater than the followup move's startup in order to link. Ex: a +6 normal can link into a 4f normal/special, or a 5f super.

Parry

This field will show a value of A if the attack can be parried standing or crouching, H if it must be parried standing or L if it must be parried crouching.

Recovery

How many frames it takes for a move to finish after it's been active.

Startup

How many frames it takes before the move becomes 'active' or has a hitbox. 3S uses classic startup notation, which does not include the first active frame. A move with 3 startup becomes active on frame 4.

Stun

Amount of stun added to the opponent's stun bar on hit.

Throw range

Range in pixels from the center of the character to the center of the opponent which allows a grab to connect.

Frame Data

Standing Normals

5LP (cl)
Close LP
Lp.png (cl)
(akumacloselp).gif
Startup Active Recovery Hit Cr. Hit
3 3 5 3 3
Damage Stun Guard Parry Block
5 3 - HL 3
  • Cancel options: ch sp su
  • Activates within x pixels of opponent
FATonline.png
5LP (far)
Far LP
Lp.png (far)
(akumalp).gif
Startup Active Recovery Hit Cr. Hit
4 3 4 4 4
Damage Stun Guard Parry Block
3 3 - HL 4
  • Cancel options: ch sp su
FATonline.png
5MP (cl)
Close MP
Mp.png (cl)
(akumaclosemp).gif
Startup Active Recovery Hit Cr. Hit
5 4 10 2 3
Damage Stun Guard Parry Block
20 7 - H 1
  • Cancel options: tc sp su
  • Self meter gain: Whiff: 2, Hit: 11, Block: 6.
  • Opponent meter gain: Whiff: 0, Hit: 2, Block: 0.
  • Activates within
FATonline.png
5MP (far)
Far MP
Mp.png (far)
(akumamp).gif
Startup Active Recovery Hit Cr. Hit
5 4 9 5 5
Damage Stun Guard Parry Block
18 11 - H 4
  • Cancel options: sp su
  • Self meter gain: Whiff: 2, Hit: 11, Block: 6.
  • Opponent meter gain: Whiff: 0, Hit: 2, Block: 0.
  • Forces standing
FATonline.png
5HP (cl)
Close HP
Hp.png (cl)
(akumaclosehp).gif
Startup Active Recovery Hit Cr. Hit
4 4 17 -2 -
Damage Stun Guard Parry Block
24 15 - H -4
  • Cancel options: sp su
  • Self meter gain: Whiff: 3, Hit: 19, Block: 10.
  • Opponent meter gain: Whiff: 0, Hit: 4, Block: 0.
  • Activates within
FATonline.png
5HP (far)
Far HP
Hp.png (far)
(akumahp).gif
Startup Active Recovery Hit Cr. Hit
8 5 22 -4 -2
Damage Stun Guard Parry Block
24 13 - H -6
  • Self meter gain: Whiff: 3, Hit: 19, Block: 10.
  • Opponent meter gain: Whiff: 0, Hit: 4, Block: 0.
FATonline.png
5LK
Stand LK
Lk.png
(akumalk).gif
Startup Active Recovery Hit Cr. Hit
4 4 7 2 2
Damage Stun Guard Parry Block
7 3 - A 2
FATonline.png
5MK (cl)
Close MK
Mk.png (cl)
(akumaclosemk).gif
Startup Active Recovery Hit Cr. Hit
4 5 11 4 6
Damage Stun Guard Parry Block
20 9 - H 2
  • Cancel options: sp su
  • Self meter gain: Whiff: 2, Hit: 11, Block: 6.
  • Opponent meter gain: Whiff: 0, Hit: 2, Block: 0.
  • Activates within
FATonline.png
5MK (far)
Far MK
Mk.png (far)
(akumamk).gif
Startup Active Recovery Hit Cr. Hit
5 5 17 -6 -5
Damage Stun Guard Parry Block
16 7 - H -7
  • Self meter gain: Whiff: 2, Hit: 11, Block: 6.
  • Opponent meter gain: Whiff: 0, Hit: 2, Block: 0.
FATonline.png
5HK (cl)
Close HK
Hk.png (cl)
(akumaclosehk).gif
Startup Active Recovery Hit Cr. Hit
5 8 25 -4 -
Damage Stun Guard Parry Block
33 23 - H*H -6
  • Maximum advantage is 2F (6F-8F)
  • Self meter gain: Whiff: 4, Hit: 21, Block: 12.
  • Opponent meter gain: Whiff: 0, Hit: 4, Block: 0.
  • Activates within 35 pixels of opponent
  • First hit misses small crouching characters but is crouch-blockable for large characters
  • This move is negative on hit unless it hits a crouching character
  • Both hits will connect on airborne opponents and slams down on 2nd hit
FATonline.png
5HK (far)
Far HK
Hk.png (far)
(akumahk).gif
Startup Active Recovery Hit Cr. Hit
9 5 20 -5 -3
Damage Stun Guard Parry Block
25 11 - H -7
  • Self meter gain: Whiff: 3, Hit: 19, Block: 10.
  • Opponent meter gain: Whiff: 0, Hit: 4, Block: 0.
  • Puts opponent in turnaround state (vulnerable to grabs, especially Shun Goku Satsu)
FATonline.png


Command Normals

6MP
Zugai Hasatsu
Overhead Chop
F.png+Mp.png
(akumafmp).gif
Startup Active Recovery Hit Cr. Hit
14 2 22 1 3
Damage Stun Guard Parry Block
14 15 - H -1
  • 20 kara range
  • Self meter gain: Whiff: 2, Hit: 11, Block: 5.
  • Opponent meter gain: Whiff: 0, Hit: 2, Block: 0.
  • Invincible to throws from frames 4-29 (ends right after last active frame)
  • Primary kara-cancel attack
FATonline.png


Crouching Normals

2LP
Crouch LP
D.png+Lp.png
(akumaclp).gif
Startup Active Recovery Hit Cr. Hit
4 3 5 3 3
Damage Stun Guard Parry Block
3 3 - A 3
  • Cancel options: ch sp su
FATonline.png
2MP
Crouch MP
D.png+Mp.png
(akumacmp).gif
Startup Active Recovery Hit Cr. Hit
5 4 7 4 5
Damage Stun Guard Parry Block
16 7 - A 3
  • Cancel options: sp su
  • Self meter gain: Whiff: 2, Hit: 11, Block: 6.
  • Opponent meter gain: Whiff: 0, Hit: 2, Block: 0.
FATonline.png
2HP
Crouch HP
D.png+Hp.png
(akumachp).gif
Startup Active Recovery Hit Cr. Hit
5 5 19 -6 -4
Damage Stun Guard Parry Block
24 11 - A -8
  • Cancel options: sp su
  • Self meter gain: Whiff: 3, Hit: 19, Block: 10.
  • Opponent meter gain: Whiff: 0, Hit: 4, Block: 0.
FATonline.png
2LK
Crouch LK
D.png+Lk.png
(akumaclk).gif
Startup Active Recovery Hit Cr. Hit
5 3 7 1 1
Damage Stun Guard Parry Block
3 3 - L 1
  • Cancel options: ch sp su
FATonline.png
2MK
Crouch MK
D.png+Mk.png
(akumacmk).gif
Startup Active Recovery Hit Cr. Hit
6 5 16 -2 -1
Damage Stun Guard Parry Block
16 3 - L -3
  • Cancel options: sp su
  • 13 kara range
  • Self meter gain: Whiff: 2, Hit: 11, Block: 6.
  • Opponent meter gain: Whiff: 0, Hit: 2, Block: 0.
FATonline.png
2HK
Crouch HK
D.png+Hk.png
(akumachk).gif
Startup Active Recovery Hit Cr. Hit
7 5 25 28 28
Damage Stun Guard Parry Block
24 3 - L -15
  • 13 kara range
  • Self meter gain: Whiff: 3, Hit: 19, Block: 10.
  • Opponent meter gain: Whiff: 0, Hit: 4, Block: 0.
FATonline.png


Jumping Normals

j.LP
Jump LP
U.png/Uf.png+Lp.png
(akumajlp).gif
Startup Active Recovery Hit Cr. Hit
4 - - - -
Damage Stun Guard Parry Block
7 5 - H -
FATonline.png
j.MP
Jump MP
U.png/Uf.png+Mp.png
(akumajmp).gif
Startup Active Recovery Hit Cr. Hit
5 5 - - -
Damage Stun Guard Parry Block
16 9 - H -
  • Self meter gain: Whiff: 2, Hit: 11, Block: 6.
  • Opponent meter gain: Whiff: 0, Hit: 2, Block: 0.
FATonline.png
8HP
Jump HP (Neutral)
U.png+Hp.png
(akumanjhp).gif
Startup Active Recovery Hit Cr. Hit
6 3 - - -
Damage Stun Guard Parry Block
23 13 - H -
  • Self meter gain: Whiff: 3, Hit: 19, Block: 10.
  • Opponent meter gain: Whiff: 0, Hit: 4, Block: 0.
FATonline.png
j.HP
Jump HP
Uf.png+Lp.png
(akumajhp).gif
Startup Active Recovery Hit Cr. Hit
6 4 - - -
Damage Stun Guard Parry Block
23 13 - H -
  • Self meter gain: Whiff: 3, Hit: 19, Block: 10.
  • Opponent meter gain: Whiff: 0, Hit: 4, Block: 0.
FATonline.png
j.LK
Jump LK
U.png/Uf.png+Lk.png
(akumajlk).gif
Startup Active Recovery Hit Cr. Hit
4 10 - - -
Damage Stun Guard Parry Block
7 5 - H -
FATonline.png
8MK
Jump MK (Neutral)
U.png+Mk.png
(akumanjmk).gif
Startup Active Recovery Hit Cr. Hit
5 6 - - -
Damage Stun Guard Parry Block
14 7 - H -
  • Self meter gain: Whiff: 2, Hit: 11, Block: 6.
  • Opponent meter gain: Whiff: 0, Hit: 2, Block: 0.
FATonline.png
j.MK
Jump MK
Uf.png+Mk.png
(akumajmk).gif
Startup Active Recovery Hit Cr. Hit
5 6 - - -
Damage Stun Guard Parry Block
14 7 - H -
  • Self meter gain: Whiff: 2, Hit: 11, Block: 6.
  • Opponent meter gain: Whiff: 0, Hit: 2, Block: 0.
FATonline.png
8HK
Jump HK (Neutral)
U.png+Hk.png
(akumanjhk).gif
Startup Active Recovery Hit Cr. Hit
6 5 - - -
Damage Stun Guard Parry Block
21 11 - H -
  • Self meter gain: Whiff: 3, Hit: 19, Block: 10.
  • Opponent meter gain: Whiff: 0, Hit: 4, Block: 0.
FATonline.png
j.HK
Jump HK
Uf.png+Hk.png
(akumajhk).gif
Startup Active Recovery Hit Cr. Hit
6 4 - - -
Damage Stun Guard Parry Block
21 11 - H -
  • Self meter gain: Whiff: 3, Hit: 19, Block: 10.
  • Opponent meter gain: Whiff: 0, Hit: 4, Block: 0.
FATonline.png
2MK (air)
Tenma Kujin Kyaku
Dive Kick
D.png+Mk.png (air)
(akumajdmk).gif
Startup Active Recovery Hit Cr. Hit
8 10 7 -1 ~ 12 4~12
Damage Stun Guard Parry Block
16 11 - H -1 ~ 12
  • Self meter gain: Whiff: 2, Hit: 11, Block: 6.
  • Opponent meter gain: Whiff: 0, Hit: 2, Block: 0.
FATonline.png

Target Combos

5MP > 5HP
Close Standing MP-HP (TC)
5MP > 5HP
Startup Active Recovery Hit Cr. Hit
8 2 28 -10 -8
Damage Stun Guard Parry Block
11 3 - H -12
  • Creates distance but is extremely unsafe on hit. Not very useful
FATonline.png


Throws

5LPLK
Seoi Nage
Throw
Lp.png+Lk.png
(akumasn).gif
Startup Active Recovery Hit Cr. Hit
2 1 21 D D
Damage Stun Guard Parry Block
19 8 - N -
  • 24 throw range
FATonline.png
4LPLK
Tomoe Nage
Back Throw
B.png+Lp.png+Lk.png
(akumatn).gif
Startup Active Recovery Hit Cr. Hit
2 1 21 D D
Damage Stun Guard Parry Block
19 14 - N -
  • 24 throw range
FATonline.png


Universal Overheads

5MPHK
Straight Hit
Universal Overhead
Mp.png+Mk.png
(akumaoh).gif
Startup Active Recovery Hit Cr. Hit
15 8 7 0 ~ 7 1 ~ 8
Damage Stun Guard Parry Block
7 3 - H -5 ~ 0
FATonline.png


Taunt

5HPHK
Kiai
Taunt
Hp.png+Hk.png
(akumat).gif
Startup Active Recovery Hit Cr. Hit
66 - - - -
Damage Stun Guard Parry Block
- - - - -
  • Increases damage for the next hit/combo by 43.8%
  • Increases stun damage for the next hit/combo by 28.1%
  • One taunt is the maximum
  • Bonus is lost if Akuma is successfully hit (chip damage does not count), after he lands a successful hit/combo, or if he throws the opponent
FATonline.png


Special Moves

236P
Gou Hadouken
Fireball
Qcf.png+P.png
(akumahdk).gif
Startup Active Recovery Hit Cr. Hit
8 - 38 -10 -10
Damage Stun Guard Parry Block
17 3 - H -11
  • Cancel options: su
  • Button strength only affects projectile speed
FATonline.png
236P (air)
Zankuu Hadouken
Air Fireball
Qcf.png+P.png (air)
(akumazhdk).gif
Startup Active Recovery Hit Cr. Hit
11 varies 7 land -17 ~ 13 -16 ~ 14
Damage Stun Guard Parry Block
10 3 - H -18 ~ 12
  • Cancel options: su
  • Can make Akuma temporarily pause in mid-air, especially before landing
  • Can be performed from any angled or neutral jump
  • Fireball speed is determined by button strength; LP = slowest, HP = fastest
    • Button strength does not affect the fireball angle
  • Holding down on the frame Akuma lands causes him to crouch during landing recovery
FATonline.png
63214P
Shakunetsu Hadouken
Red Fireball
Hcb.png+P.png
(akumashdk).gif
Lp.png/Mp.png/Hp.png
LP Startup Active Recovery Hit Cr. Hit
14 44 42 D D
Damage Stun Guard Parry Block
8 3 - H -23
  • Cancel options: su
  • Launches opponent on hit
FATonline.png
MP Startup Active Recovery Hit Cr. Hit
18 45 43 - -
Damage Stun Guard Parry Block
16 5 - H*H -18
  • Cancel options: su
  • Counts as 2 projectile points
  • Last hit launches opponent
FATonline.png
HP Startup Active Recovery Hit Cr. Hit
22 46 44 - -
Damage Stun Guard Parry Block
24 7 - H*H*H -15
  • Cancel options: su
  • Counts as 2 projectile points despite hitting three times
  • Last hit launches opponent
FATonline.png
623P
Gou Shoryuken
DP/Shoryu/Uppercut
Dp.png+P.png
(akumasrk).gif
Lp.png/Mp.png/Hp.png
LP Startup Active Recovery Hit Cr. Hit
3 14 26 D D
Damage Stun Guard Parry Block
23 11 - A -24
  • Cancel options: su
  • 1-3f fully invulnerable, 4-5f upper body invulnerable
    • Can trade with overlapping attacks on its first active frame, depending on priority and hitbox height
  • 1-5f throw invulnerable, 6f airborne
  • Self meter gain: Whiff: 3, Hit: 21, Block: 15.
  • Opponent meter gain: Whiff: 0, Hit: 6, Block: 0.
FATonline.png
MP Startup Active Recovery Hit Cr. Hit
2 7 41 D D
Damage Stun Guard Parry Block
25 13 - A*A -30
  • Cancel options: su (first hit only)
  • 1-2f fully invulnerable, 3-4f upper body invulnerable
    • Can trade with overlapping attacks on its first active frame, depending on priority and hitbox height
  • 1-4f throw invulnerable, 5f airborne
  • 2nd hit knocks down, but misses most crouching characters except at point blank, leaving Akuma vulnerable on recovery
    • This makes it unreliable as a wakeup reversal, since properly spaced crouching attacks can force the move to whiff
  • Self meter gain: Whiff: 3, Hit: 22, Block: 16.
  • Opponent meter gain: Whiff: 0, Hit: 6, Block: 0.
FATonline.png
HP Startup Active Recovery Hit Cr. Hit
1 23 35 D D
Damage Stun Guard Parry Block
29 15 - A*A*A -34
  • Cancel options: su (first 2 hits only)
  • 1-3f fully invulnerable, 4-5f upper body invulnerable
  • 1-5f throw invuln, 6f airborne
  • 3rd hit knocks down, but misses most crouching characters except at point blank, leaving Akuma vulnerable on recovery
    • This makes it unreliable as a wakeup reversal, since properly spaced crouching attacks can force the move to whiff
  • Does NOT force standing
  • Self meter gain: Whiff: 3, Hit: 23, Block: 17.
  • Opponent meter gain: Whiff: 0, Hit: 6, Block: 0.
FATonline.png
214K
Tatsumaki Zankuu Kyaku
Tatsu/Hurricane
Qcb.png+K.png
(akumatzk).gif
Lk.png/Mk.png/Hk.png
LK Startup Active Recovery Hit Cr. Hit
11 4 17 D D
Damage Stun Guard Parry Block
17 7 - H -12
  • Cancel options: su
  • Self meter gain: Whiff: 6, Hit: 21, Block: 15.
  • Opponent meter gain: Whiff: 0, Hit: 4, Block: 0.
  • Against crouching, only hits Dudley, Hugo, Q, Urien; sometimes Akuma or Remy depending on idle animation
    • Also connects vs. crouch blocking Akuma (at farther ranges, Twelve
FATonline.png
MK Startup Active Recovery Hit Cr. Hit
2 10 16 D D
Damage Stun Guard Parry Block
21 9 - H*H*H -8
  • Cancel options: su
  • Self meter gain: Whiff: 3, Hit: 19, Block: 14.
  • Opponent meter gain: Whiff: 0, Hit: 4, Block: 0.
  • 1st hit can hit crouchers and forces standing
  • 2nd hit causes launch but misses most crouching characters that missed or defended the 1st hit
  • If it hits, this move has a maximum of two hits, otherwise it has three hits total
FATonline.png
HK Startup Active Recovery Hit Cr. Hit
2 18 10 D D
Damage Stun Guard Parry Block
25 11 - H*H*H*H*H -5
  • Cancel options: su
  • Self meter gain: Whiff: 3, Hit: 20, Block: 16.
  • Opponent meter gain: Whiff: 0, Hit: 4, Block: 0.
  • 1st hit can hit crouchers and forces standing
  • Subsequent hits cause launch but can miss most crouching characters and cause a crossup situation
  • Last hit can hit crouchers (even as a crossup) and launches
  • If it hits, this move has a maximum of three hits, otherwise it has five hits total
FATonline.png
214K
Air Tatsumaki Zankuu Kyaku
Air Tatsu/Air Hurricane
Qcb.png+K.png
(akumaatzk).gif
Lk.png/Mk.png/Hk.png
LK Startup Active Recovery Hit Cr. Hit
5 3 40 D D
Damage Stun Guard Parry Block
14 3 - H -8
  • Cancel options: su
  • Self meter gain: Whiff: 1, Hit: 9, Block: 2.
  • Opponent meter gain: Whiff: 0, Hit: 2, Block: 0.
FATonline.png
MK Startup Active Recovery Hit Cr. Hit
5 6 31 D D
Damage Stun Guard Parry Block
27 5 - H*H -7
  • Cancel options: su
  • Self meter gain: Whiff: 2, Hit: 17, Block: 2.
  • Opponent meter gain: Whiff: 0, Hit: 4, Block: 0.
FATonline.png
HK Startup Active Recovery Hit Cr. Hit
5 12 16 D D
Damage Stun Guard Parry Block
40 7 - H*H*H -8
  • Cancel options: su
  • Self meter gain: Whiff: 4, Hit: 26, Block: 3.
  • Opponent meter gain: Whiff: 0, Hit: 6, Block: 0.
FATonline.png
623K
Hyakki Shuu
Demon Flip > Slide
Dp.png+K.png
(akumahgouzan).gif
Startup Active Recovery Hit Cr. Hit
40 15 13 D D
Damage Stun Guard Parry Block
17 3 - L -11
  • Button strength determines the distance traveled
  • Followup inputs can be input starting on the 17th frame
  • Maximum advantage is +13f (Special)
  • Self meter gain: Whiff: 3, Hit: 19, Block: 10.
  • Opponent meter gain: Whiff: 0, Hit: 4, Block: 0.
  • After 1st active frame, becomes massively safer on block, up to +2
FATonline.png
623K-P
Hyakki Goushou
Demon Flip > Palm
Dp.png+K.png,  P.png
(akumahgoushou).gif
Startup Active Recovery Hit Cr. Hit
10 3 20 D D
Damage Stun Guard Parry Block
23 13 - H -12 ~ -2
  • Can be input starting from the 17th frame of Demon Flip
  • Self meter gain: Whiff: 3, Hit: 19, Block: 10.
  • Opponent meter gain: Whiff: 0, Hit: 4, Block: 0.
FATonline.png
623K-K
Hyakki Goujin
Demon Flip > Divekick
Dp.png+K.png,  K.png
(akumahgoujin).gif
Startup Active Recovery Hit Cr. Hit
9 10 7 -1 ~ 12 -1 ~ 12
Damage Stun Guard Parry Block
17 11 - H -1 ~ 12
  • Can be input starting from the 17th frame of Demon Flip
  • Self meter gain: Whiff: 3, Hit: 19, Block: 10.
  • Opponent meter gain: Whiff: 0, Hit: 4, Block: 0.
  • Has least amount of landing recovery out of all options
    • If done close to the ground (so that the hitbox doesn't come out), only 2f landing recovery
FATonline.png
623K-LP+K
Hyakki Gousai
Demon Flip > Throw
Dp.png+K.png,    Lp.png+Lk.png
(akumahgousai).gif
Startup Active Recovery Hit Cr. Hit
3 2 34 D D
Damage Stun Guard Parry Block
19 14 - N -
  • Can be input starting from the 17th frame of Demon Flip
  • Can grab crouching characters with strict timing
FATonline.png
623PP
Ashura Senkuu (Long)
Teleport (Long)
Dp.png+P.pngP.png
(akumaasf).gif
Startup Active Recovery Hit Cr. Hit
- 65 9 - -
Damage Stun Guard Parry Block
- - - - -
  • Completely invulnerable upon startup but can be interrupted from certain Super Art activations after 15f startup and has 13f recovery
  • Punch version travels full screen with longer invulnerability
FATonline.png
623KK
Ashura Senkuu (Short)
Teleport (Short)
Dp.png+K.pngK.png
(akumaasf).gif
Startup Active Recovery Hit Cr. Hit
- 49 9 - -
Damage Stun Guard Parry Block
- - - - -
  • Completely invulnerable upon startup but can be interrupted from certain Super Art activations after 15f startup and has 13f recovery
  • Kick version travels half-screen distance
FATonline.png


Super Arts

236236P (SA1)
Messatsu Gou Hadou
SA1
Qcf.pngQcf.png+P.png
(akumamgh).gif
Startup Active Recovery Hit Cr. Hit
2 42 - D D
Damage Stun Guard Parry Block
47 0 - H x6 -13
  • Stock: x2
FATonline.png
236236P (SA1 air)
Tenma Gou Zankuu
Air SA1
Qcf.pngQcf.png+P.png
(akumatgz).gif
Startup Active Recovery Hit Cr. Hit
7 32 13 land D D
Damage Stun Guard Parry Block
53 0 - H x6 -24 ~ -14
  • Stock: x2
  • If Akuma holds down when landing, he will be in a crouching recovery state
FATonline.png
236236P (SA2)
Messatsu Gou Shoryuu
SA2
Qcf.pngQcf.pngP.png
(akumamgs).gif
Startup Active Recovery Hit Cr. Hit
1 24 37 D D
Damage Stun Guard Parry Block
66 16 - A x7 -25
  • Stock: x2
  • Can OTG Dudley after a neutral/forward throw if he doesn't quick rise
  • Active frame distribution: 2*4(13), 2*4(15), 2*2*8
    • 52 total frames from first to final active frame
FATonline.png
236236K (SA3)
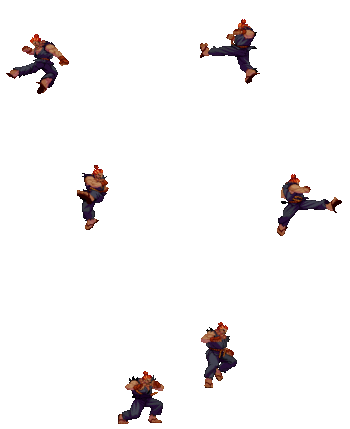
Messatsu Gou Rasen (Ground)
SA3
Qcf.pngQcf.png+K.png
(akumamgr).gif
Startup Active Recovery Hit Cr. Hit
4 22 42 + 9 land D D
Damage Stun Guard Parry Block
65 0 - A -76
  • Stock: x2
  • Number of parries depends on stand/crouch and character height
  • If Akuma holds down when landing, he will be in a crouching recovery state
  • Active frame distribution: 2(2), 1(1) x17, 1(2)1(2)1
    • 45 total frames from first to final active frame; hitbox switches sides between each set of active frames
FATonline.png
236236K (SA3 air)
Messatsu Gou Rasen (Air)
Air SA3
Qcf.pngQcf.png+K.png
Startup Active Recovery Hit Cr. Hit
2 27 42 + 9 land D D
Damage Stun Guard Parry Block
67 0 - A -56
  • Stock: x2
  • Does less damage the higher it connects, as opponents will fall out of the juggle near max stage height
  • If Akuma holds down when landing, he will be in a crouching recovery state
  • Active frame distribution: 7*1(1), 1(1) x14, 1(2)1(2)3
    • 47 total frames from first to final active frame; hitbox switches sides between each set of active frames
    • First 7 active frames hit behind Akuma, making it much slower for practical purposes
FATonline.png
LP LP 6 LK HP
Shun Goku Satsu
Raging Demon
Lp.png,Lp.png, F.png, Lk.png, Hp.png
(akumasgs).gif
Startup Active Recovery Hit Cr. Hit
1 39 2 D D
Damage Stun Guard Parry Block
87 0 - N -
  • 8 throw range
  • Requires 2 stock, usable with any SA
  • Travels forward for
  • Invincible from frames 1-4
  • Can cancel from any non-command standing or crouching attack on hit or whiff, universal overhead on grounded frames, from recovery frames of dive kick, from grounded hits of Goushoryu, or instantly from any fireball
  • Cannot cancel from Ashura Senkuu (Teleport)
FATonline.png
222PPP
Kongou Kokuretsu Zan
KKZ/Geyser/Ground Pound
D.pngD.pngD.png+P.pngP.png
(akumakkz).gif
Startup Active Recovery Hit Cr. Hit
16 24 64 D D
Damage Stun Guard Parry Block
65*42 15*13 - N * A x9 -28
  • Requires 2 stocks, can be used with any SA
  • Lightning Strike cannot be parried and inflicts massive chip damage
  • Can hit air-reset opponents as a guaranteed juggle
  • Cannot be cancelled into
  • Invincible from startup until the 4th active frame
    • If used from around sweep range, there is a short window where Akuma can be hit after the lightning strike but before the shockwaves
FATonline.png

3S Navigation

General
Controls
Notation
HUD
Glossary
System
FAQ
Characters
Akuma
Alex
Chun-Li
Dudley
Elena
Hugo
Ibuki
Ken
Makoto
Q
Necro
Oro
Remy
Ryu
Sean
Twelve
Urien
Yang
Yun
Gill