


Introduction
The game that started it all. Street Fighter 2 is arguably the first true fighting game. Introducing most of the mechanics present in the genre to this day, Street Fighter 2 brought a revolution to arcades back in the 90s and set a new level to the world of competitive gaming.
Street Fighter 2 is a fighting game, which means it features matches between two characters in a one-on-one combat fashion. The player chooses a fighter in an eight-character roster and must face all of them under a given time limit per round. Each fighter has a life bar, and the player must deplete the opponent's one (using normal/special attacks, grabs and throws) to win. After defeating the 8 selectable chars from SF2, the player still must overcome the four Grand Masters in order to beat the game.
During the game, there are bonus stages where the player must destroy a car, falling barrels and a pile of oil cans, earning points according to his success at doing that.
Street Fighter 2 runs on Capcom Play System 1 (CPS-1) arcade hardware, the same as other popular Capcom games such as Final Fight and Captain Commando.
Characters
| Ryu | E.Honda | Blanka | Guile | ||
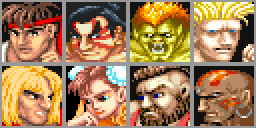 | |||||
| Ken | Chun-Li | Zangief | Dhalsim | ||
Terminology
(borrowed from the supercool ST wiki)
Joystick Notation
- F - Forward - Tilt stick forward/towards the opponent. (X-axis)
- B - Backward/Back - Tilt stick backward/away from the opponent. (X-axis)
- U - Up - Tilt stick upwards. (Y-axis)
- D - Down - Tilt stick downwards. (Y-axis)
- QCF - Quarter circle forward/Hadouken/Fireball - Tilt stick downwards, then to downwards and forward, then forward.
- QCB - Quarter circle backward - Tilt stick downwards, then to downwards and backward, then backward.
- HCF - Half circle forward - Tilt stick backwards, then to downwards and backward, then to downward, then to downwards and forward, then forward.
- HCB - Half circle backward - Tilt stick forwards, then to downwards and forward, then to downward, then to downwards and backward, then backward.
- DP - Dragon punch/Shoryuken - Tilt stick forwards, then to downward, then to downward and forward.
- 360/FC - Full circle - Complete a full rotation of the stick.
- Charge - Hold a tilt - Hold the stick in either B or D (Depending) then move to F or U respectively.
X-axis functions can be used interchangeably with Y-axis functions and vice versa. X-axis functions cannot be used in conjunction with another X-axis function and vice versa.
Six Button Notation
- Jab - weak punch (also called LP)
- Strong - medium punch (also called MP)
- Fierce - fierce punch (also called HP)
- P - any punch
- PPP or 3P - all three punches simultaneously
- Short - weak kick (also called LK)
- Forward - medium kick (also called MK)
- Roundhouse (RH) - fierce kick (also called HK)
- K - any kick
- KKK or 3K - all three kicks simultaneously
Connectors
- ~ = Immediately after, e.g "Strong~Fierce" means press Fierce IMMEDIATELY after Strong
State Modifiers
- st. - The following move should be performed in the standing position (neutral in the Y-axis). i.e. st.Fierce, perform a Fierce whilst standing.
- cr. - The following move should be performed in the crouched position (held down in the Y-axis). i.e. cr.Fierce, perform a Fierce whilst crouching.
- j. - The following move should be performed in the "in the air" position (After having held up in the Y-axis). i.e. j.Fierce, perform a Fierce whilst in the air.
- cl. -The following move should be performed 'close' to the opponent in the standing position so that the close animation of the move activates.
Miscellaneous Notation
- SF2 or SF II = Street Fighter II (all versions)
- WW = Street Fighter II The World Warrior
- SF2CE (or just CE) = Street Fighter II' Champion Edition
- HF = Street Fighter II' Hyper Fighting (USA)
- SF2T = HF japanese version. Basically the same game
- SSF2 = Super Street Fighter 2
- ST = Super Street Fighter 2 Turbo
- TAP = Boxer's Turn Around Punch (hold 3P or 3K, then release)
- Shoto = a practitioner of shotokan karate (now called "Ansatsuken"). EG: Ryu and Ken
- Boxer = American Balrog = Japanese Bison
- Claw = American Vega = Japanese Balrog
- Dictator (Dic) = American Bison = Japanese Vega
NOTE 1: Not everyone plays on the American version, and some character names are different in the Japanese version, so to avoid confusion, we should not use the names Vega, Bison, or Balrog (further explained in the "Regional Differences" section below).
NOTE 2: Additional info about fighting game specific jargon and conventions used here can be found in the Fighting Game Glossary and SRK Strategy Guide.
Game Elements
Blocking
Holding away from your opponent on the controller while they are attacking results in your character defending their attack (blocking), and will take little to no damage. However, there are two blocking states, one standing, and one crouching.
Standing block (high block) will block your opponent's high attacks (including jumping attacks), while crouching block (low block) will block your opponent's low attacks (including sweeps, and some other crouching kicks). All attacks which are not specifically 'high' or 'low' attacks can be blocked either standing or crouching.
While blocking you cannot move or perform attacks, you must wait until the block has completed.
Normal Attacks
Pressing a button on the control panel results in a normal move. Punches are the top 3 buttons, kicks the bottom 3. Weaker normals are to the left, stronger to the right.
Normal attacks are your most basic offensive tools, and you should familiarise yourself with your character's normals as thoroughly as possible.
Some normal attacks only are available when holding particular directions on the stick, these are known as 'unique moves' or 'command normals'. An example is E.Honda's 'Hiza Geri' which is performed by holding left or right on the controller and pressing the Medium Kick button.
Special Attacks
Every character has 'special' attacks, which involve a series of controller movements and/or button presses. These will take some practice to get used to, but are very important tools. Generally, performing special moves using the weaker punch or kick buttons will do less damage or travel shorter distances, but be less punishable by your opponent.
Special moves inflict a small amount of damage to your opponent even when blocked.
Throws
If your opponent is blocking your attacks, Throws allow you to grab your opponent anyway and deal damage. Depending on your character, while near your opponent, holding left or right on the stick while pressing particular punch or kick buttons (usually hard punch) will perform a throw. Holding left results in the opponent being throw towards the left, and holding right will throw them to the right.
Some characters have holds rather than throws, they fill the same role but result in multiple smaller hits rather than one big throw.
Familiarise yourself with the ranges your throws/holds will work at, and how far away your opponent ends up afterwards.
System Info
Damage
Damage comes from 2 sources: Hits, and Throws. Each are handled separately for randomness, scaling, and special other factors.
- Hit damage
The basic formula for any hit's damage is
(base + rnd) * char_scaling * life-scaling
Any hit has a predefined "base" damage level. This is the raw amount of damage that would be dealt, were there no other random factors or scaling. A random value (which may be positive or negative) is added to this base level, which varies by both the hit and how much life the opponent has left. After this, each character has a 'defense rating' which decreases damage dealt to that character by an amount specific to that character (shown in the table below). Finally, the amount of life an opponent has determines a final scaling factor.
| Damage Scaling | Characters |
| 27/32 | Ryu, Guile, Ken, Chun Li, Dhalsim |
| 25/32 | E.Honda, Blanka |
| 22/32 | Zangief |
Every character takes less than full damage, but Zangief takes the least damage.
- Throw damage
Throws are unaffected by a character's 'defense' scaling. This means a throw will do the same damage to Zangief as it will to Chun Li. They are however affected by Lifebar scaling, and also are given a boost if the thrower is behind in rounds won.
Damage randomness tables are documented at HF Random Damage
Dizzy (a.k.a. Stun)
- About dizzy
Once a character has accumulated 32 points of dizzy, they become dizzied. To reach this value, they must be hit or thrown several times in quick succession.
Along with a counter tracking how many dizzy points a character has accumulated, there is a separate 'dizzy timeout' counter, which tracks how long until their dizzy point tracker is reset to 0. Dizzy timeout is decremented with every game tick, regardless of whether the character is blocking an attack, in hitstun, being thrown, or knocked down.
Note that generally a throw which does not dizzy is a net loss of dizzy timeout.
- Dizzy properties of attacks
Any hit or throw has a predefined base dizzy amount. To this is added a random value (which may be negative), consistent across all attacks.
The lookup table for dizzy randomness is as follows:
| Modifier | -3 | -2 | -1 | 0 | 1 | 2 | 3 |
| Likelihood | 3.125% | 12.5% | 15.625% | 37.5% | 15.625% | 12.5% | 3.125% |
For example, Vega's crouching Strong has a base dizzy value of 8, to which a random value between -3 and +3 is added, resulting in a 5~11 possible dizzy range, with 8 being the most likely value and 5 or 11 being very unlikely. His throw has a base dizzy value of 10, resulting in a 7~13 possible dizzy range.
As well as raw dizzy value, each move has a predefined dizzy timeout value, which is added to the character's dizzy timeout counter. This means that successive hits increase the length of time until a character's dizzy is reset.
A move hitting an airbourne opponent tends to result in less stun and stun timeout when compared to the same move hitting a grounded opponent. For example, Blanka's horizontal rolling ball special attack does 16 points of stun damage and adds 120 to the stun timer if connected on a grounded opponent, but only 14 stun points and adds only 80 to the stun timer if the opponent is airbourne.
- Escaping dizzy
Upon becoming dizzy, a randomly selected value is chosen determining the difficulty of escaping dizzy. These values are represented by a dizzy icon which circle above the dizzied character's head, either Stars (easier) or Ducks (harder). Each game tick, the value chosen is decremented by 1 until it reaches 0, whereupon the character leaves the dizzy state.
| Icon | Values |
| Stars | 60, 90, 120 |
| Ducks | 150, 180, 210 |
Entering commands (joystick directions, button presses) decreases the counter faster, so it's in your best interest to mash.
- Being hit while dizzy
A character being hit out of dizzy is afforded 60 game ticks as a "grace period" before more dizzy will be accumulated.
Impact Freeze
Impact freeze is a period of time where the game freezes momentarily when an attack hits or is blocked. It is why a move on hit seems to show on the screen for much longer than the same move when it whiffs. Impact freeze allows special move cancels such as Ryu's cr.mk XX fireball to be much easier than the number of active frames would suggest. See [1] and [2] for much more information.
In SF2WW, normal game ticks still occur during impact freeze, so timers such as the Dizzy Timer still decrease.
In SF2WW, Impact freeze lasts for 14 frames, regardless of attack strength.
Negative Edge
Negative Edge refers to events which occur upon the release of a button (or buttons) as opposed to the press of a button. An example is Balrog (Boxer)'s Turn Around Punch, which is performed by holding all 3 punch or kick buttons for a few seconds, then releasing.
More specifically, the ability for all special moves to be performed by button releases rather than presses can be called Negative Edge. For example, it is possible to perform a Ryu Fireball by holding a punch button, performing the QCF joystick motion, and then releasing the punch button.
Hit Stun and Block stun
After any attack has hit or has been blocked, and after impact freeze, the attackee enters a state of hit stun or block stun. Depending on the attack, hitstun or block stun may end before or after the attack has finished, putting the attackee in advantage or disadvantage (known as "Frame advantage").
During hitstun, the character is unable to perform any action, and is also unthrowable. They may however buffer special moves during hitstun.
During blockstun the character is additionally allowed to switch block states (e.g. from high blocking to low blocking).
For normal moves, the strength of the move determines the amount of hitstun. Special moves usually have the same hitstun regardless of strength used.
In general, block stun is one frame longer than hit stun. That is, if your opponent blocks an attack, they recover one frame LATER than they would if they had been hit by the attack. Any frame data given in terms of "Frame advantage on block" can be converted to "Frame advantage on hit" by subtracting one.
Additionally, hitstun is reduced by a frame after the first hit in a combo. This explains why Ryu can combo cr.LK xx Fireball, but j.HK, cr.LK xx Fireball can be blocked.
See [3] for more info.
| Strength | Jab/Short | Strong/Forward | Fierce/Roundhouse |
| Hitstun (in frames) | 14 | 19 | 23 |
Special moves may have their own specific hitstun values, but often are 23f (like a fierce/roundhouse).
Combos
A Combo results when any attack is followed by a subsequent attack without the opponent being able to block inbetween. This is an interaction between the Hitstun on an opponent from the attack, the attack's recovery, and the next attack's startup. As long as the hitstun is greater than the attack's recovery time plus the startup of the next attack, the next attack will successfully combo and the opponent will be unable to stop it. Other gameplay mechanics allow combos in different ways, such as Special Cancelling, Chain Cancelling, and Kara Cancelling (explained below).
Block strings
Essentially a Block string is a combo which is blocked. Due to block stun and hitstun generally being the same in HF, attack strings which would normally combo will form a block string when blocked. This means the opponent will be similarly unable to perform any actions except those allowed during blocking, i.e. switching from crouch block to stand block, for the duration of the combo. They will however not be taking damage (except from moves which cause block damage). For example, Ryu's cr.Strong, cr.Forward XX Fireball attack string can combo, and will also form a block string if blocked, but the opponent will only take block damage from the Fireball.
Kara Cancelling
Kara (meaning 'empty') cancelling is an allowance the SF2 engine makes for easier input of special moves. When a normal attack is performed, a 5 frame timer ticks down, during which the input of a special move will result in the normal move being interrupted and the special move will be performed. This means if you press the attack button slightly before the special move motion is completed, the normal move which has started animating can be kara cancelled into the special move when the button is released.
One use for this technique is to use a crouching normal move (usually a kick) cancelled into a special such as a Dragon Punch. This can result in a lower hurtbox for your character, which may allow for avoiding certain jumpins.
Special Cancelling
A possible error in the handling of the kara cancel code in the SF2 series means that the kara cancel timer is NOT decremented during impact freeze. The result is that any normal attack which hits or is blocked by the opponent before the timer runs out retains the ability to kara cancel into a special move for the 14 extra frames of impact freeze. This is typically known as special cancelling. When impact freeze ends, the normal move is cancelled and the special move is performed. This allows combos such as Ryu's cr.Forward XX Fireball and Guile's cr.Strong XX Flash Kick. Note that this does NOT necessarily mean the special move will combo after the normal attack, although many will.
Chain Cancelling
Some characters have at least one Jab or Short attack which may be cancelled by another of the same strength. This allows repeated presses of the same button to easily combo even up to 4 or 5 times. An example is Ryu's crouching LK, which may be continued with further crouching LKs. Note that any attacks in a chain past the initial attack lose any special cancelling ability they may have had, due to the kara-cancel timer expiring between the first and second hits.
Randomness
Frame skipping
Damage
Dizzy dealt
Time spent in dizzy (difficulty of mashing out)
Throw invincibility upon wakeup
Winner of a same-frame throw vs throw exchange
When Vega's claw will fall off
See SF2 randomness for more details.
Advanced Strategy
Chain Cancelling into special moves
Chain cancelled normal attack strings cannot normally be comboed into special moves. For example, Boxer's cr.Jab XX Straight Rush will normally special cancel, but cr.Jab, cr.Jab will not. However, alternating between standing and crouching can reset the "chain state" and re-allow special cancelling. Continuing the previous example, Boxer's crouching Jab can be chained into standing Jab, thus allowing cr.Jab, cr.Jab, s.Jab XX Straight Rush to connect.
Strangely, even though Boxer's s.Short is not chain cancellable, it is possible to perform cr.Short, cr.Short, s.Short XX Straight Rush too (as a chain, not a link combo).
CPS1 Chains
Utilizing the CPS1 gaming engine to your advantage:
The first three editions of Street Fighter II (WW,CE,HF aka Turbo) were programmed with the CPS1 engine. There was an old glitch that was fixed in Super and Super Turbo that allowed for a number of rapid fire kicks to be linked into a punch and then further cancelled into your favorite special.
EX. Ken: 3x c.lk-> s.hp xx Hadoken (qcf+p)
How this works is beyond me, but I do know how to utilize the CPS1 chains, and here's how:
After hitting with the first three rapid fire kicks, let the pad, stick, whatever go back to neutral (so you are standing) and input lk+whichever punch you want with the same timing as the initial lk's. In the example above you would input c.lk..c.lk..c.lk.(neutral).s.lk+hp then just cancel into hadoken.
This is the just one of the ways to use CPS1 chains. You can use these to get high punches in when all you had time for was a low kick.
One more note, you can go from standing lk's to crouching punches; or from crouching lk's to standing punches. But curiously enough not vice versa, punches don't go to kicks, and standing kicks do not go to standing punches.
--Danthrasher
Here's a video description of CPS1 chains (CE used in the vid, but the process is identical for WW)
http://www.youtube.com/watch?v=0WzU3IXDOT0
Throw loops
Since ww was the first "real" competitive fighting game, a lot of things that are commonplace in fighters, were not yet added. This includes reversal specials, special moves cannot be done on a reversal frame, the only thing that can be done at this time is a normal/throw. This means safejumps are incredibly easy and effective, as are a lot of meaty attacks in general. If you have someone with a long range throw like honda, gief or sim, you can usually tick throw people to death.
Tier List
| Top Tier | Mid Tier | Low Tier |
|---|---|---|
|
Guile Dhalsim Chun Li |
Blanka Zangief |
E. Honda Ken Ryu |
Online Play
Street Fighter 2: The World Warrior is supported by FightCade and RedGGPO; multiplayer services for classic arcade games. FightCade requires Windows XP or later to run, but can be used on other operating systems through Windows compatibility layers such as Wine
Game Versions
CPS1 (arcade)
This the original release of World Warrior.
Super Nintendo
The initial home release. Derezzed sprites/simpler graphics (very little parallax scrolling) and much weaker sound effects than the arcade release. Also some nitpicky game engine changes - CPS1 combos don't work, and the game certainly 'feels' different - probably some frame data and timing changes. Check out E.Honda's LP headbutt for instance.
Also, no intro movie! OMG!
PlayStation
Direct-to-Arcade alike,but not perfect
Sega Saturn
PlayStation 2
Xbox
PlayStation 4, Xbox One, Nintendo Switch, and Microsoft Windows (Street Fighter 30th Anniversary Collection)
This is a compilation that includes an emulated version of World Warrior. The emulation appears to be 100% accurate.
Regional Differences
Please note that the Japanese versions are not the same as the American versions:
| Boxer character = Balrog | Boxer character = M.Bison |
| Claw character = Vega | Claw character = Balrog |
| Dictator character = M.Bison | Dictator character = Vega |
All known revisions of the US region arcade ROMs have a "Winners don't use drugs" screen during the attract mode, which is not shown for other regions.
Arcade glitches/revisions
In all arcade revisions (currently known), the following glitches and tricks are known to exist:
- Konami code during attract
- While watching the CPU vs CPU gameplay during the attract sequence, input UUDDLRLR Strong Jab on the 2p side.
- The top row of numbers displayed correspond to coins inserted into the game: <unknown> <player one coin total> <unknown> <player two coin total>
- The bottom row of numbers indicate the number of times each character has been selected: <Ryu> <E. Honda> <Blanka> <Guile> <Ken> <Chun-Li> <Zangief> <Dhalsim>
- (taken from ilitirit's description
- Car bonus stage glitch
- By breaking one side of the car during the car bonus stage, several characters can get stuck by backwards-jumping and hitting the top corner of the car. This includes Ryu, Ken, and E.Honda.
- If the character is not hit out of this glitch and the stage times-out, the game is hard locked and needs to be reset.
- See Error1's Car Bonus Glitch video for a demonstration.
- Guile free sonic boom
- After throwing an opponent with MP, Guile can continue holding the same direction (towards the opponent), and fire a Sonic Boom by pressing any Punch button soon after recovery. Waiting too long will squander this 'free sonic boom'.
- Dhalsim game reset
- By performing a Yoga Fire with Roundhouse, and pressing Fierce immediately afterwards, Dhalsim can reset the machine.
- 512 Glitch
- With every button press (?), there is a 1-in-512 chance for a special move to come out instead. This was used by the developers as a method to show players moves that are possible, but it's actually frustrating when they come out when you don't want them.
| Revision | Guile Free Flash Kick | Guile Scroller | Dhalsim invisible |
|---|---|---|---|
| 910129 | Resets | Works | Resets |
| 910204 | Resets | Resets | Resets |
| 910206 | Resets | Resets | Resets |
| 910214 | Resets | Resets | Works |
| 910228 | Resets | Resets | Works |
| 910306 | Works | Resets | Works |
| 910318 | Works | Resets | Works |
| 910411 | Works | Resets | Works |
| 910522 | Works | Resets | Works |
| 911101 | No | No | Works |
| 911210 | No | No | Works |
| 920312 | No | No | Works |
Notes:
- None of Guile's "main" glitches work from 911101 revision onwards - this includes Handcuffs, Magic Throws, etc. Only the "Free Sonic Boom" still works.
- The 911101 revision has an additional quirk - all of Guile's Sonic Booms are LP (slow) versions, and all Guile's Flash Kicks are LK (lowest) versions.
- No revision exhibits the behaviour of E.Honda's jumping neutral Roundhouse kick as documented at Derek Daniel's SF2 Glitch FAQ
References
Technical Details
SF2 Dizzies
Dizzy durations and limits and update
SF2 Hitboxes
SF2 Throwboxes
SF2 Random damage
Cheat codes & findings


